
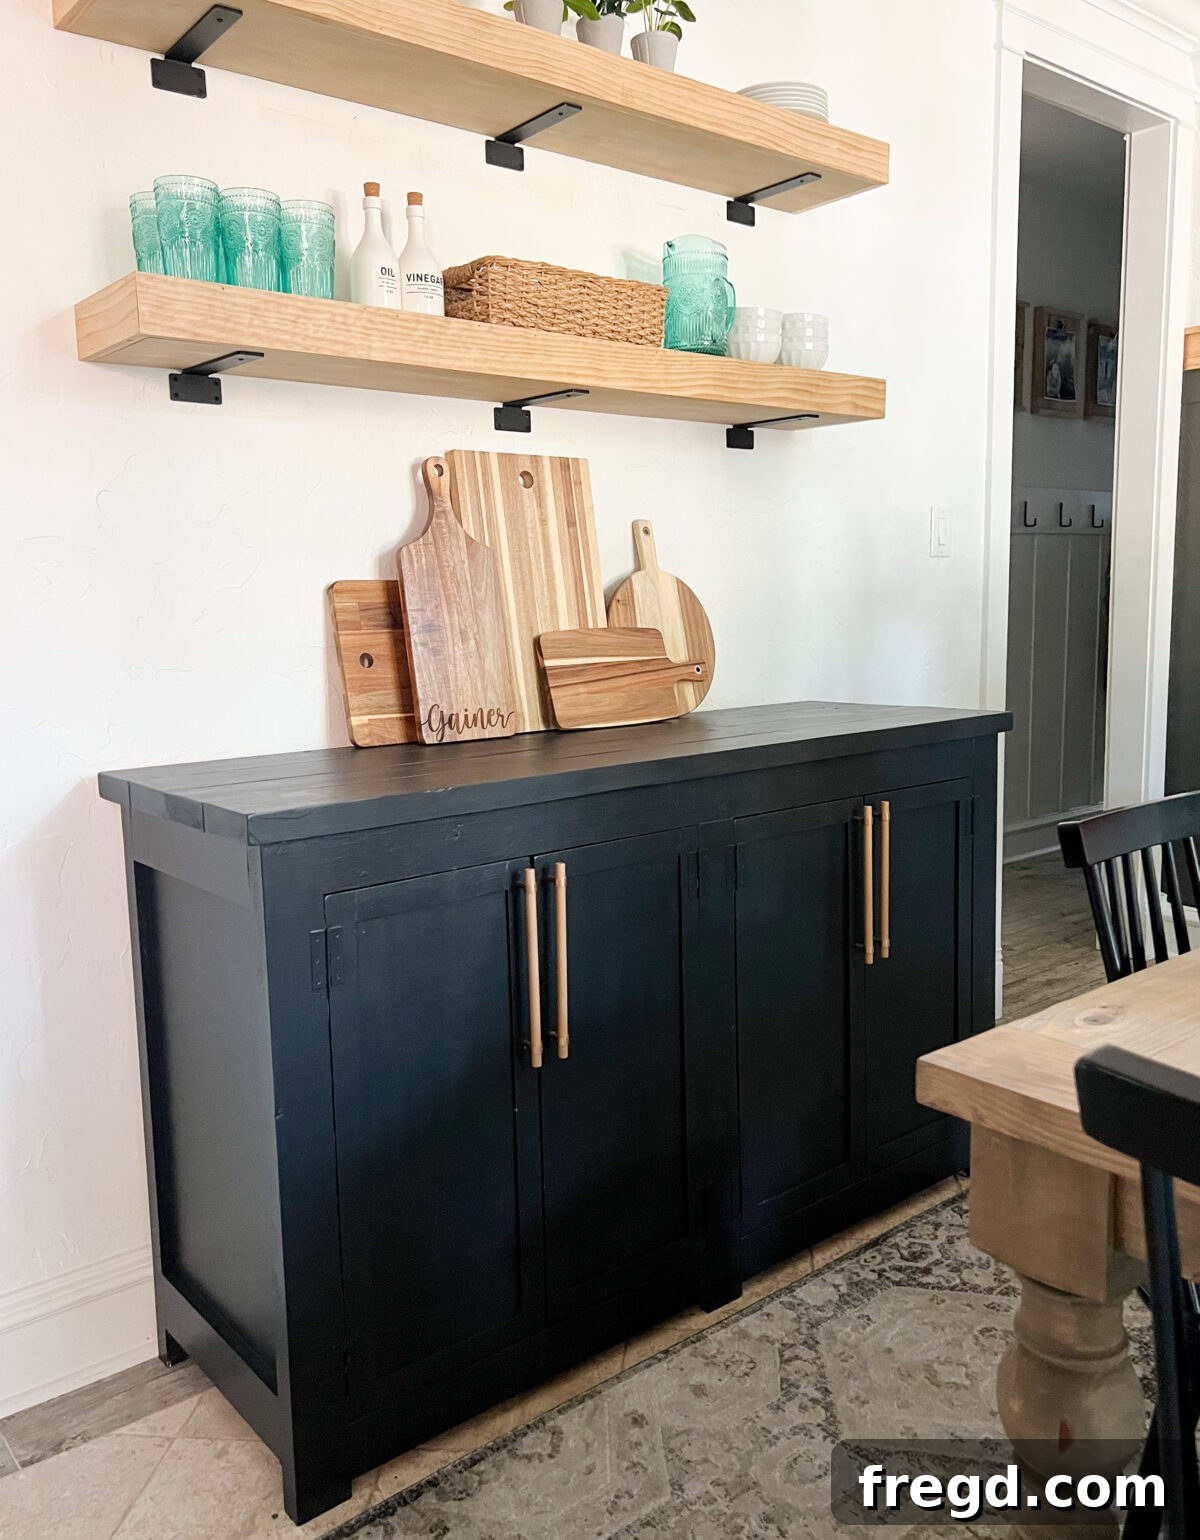
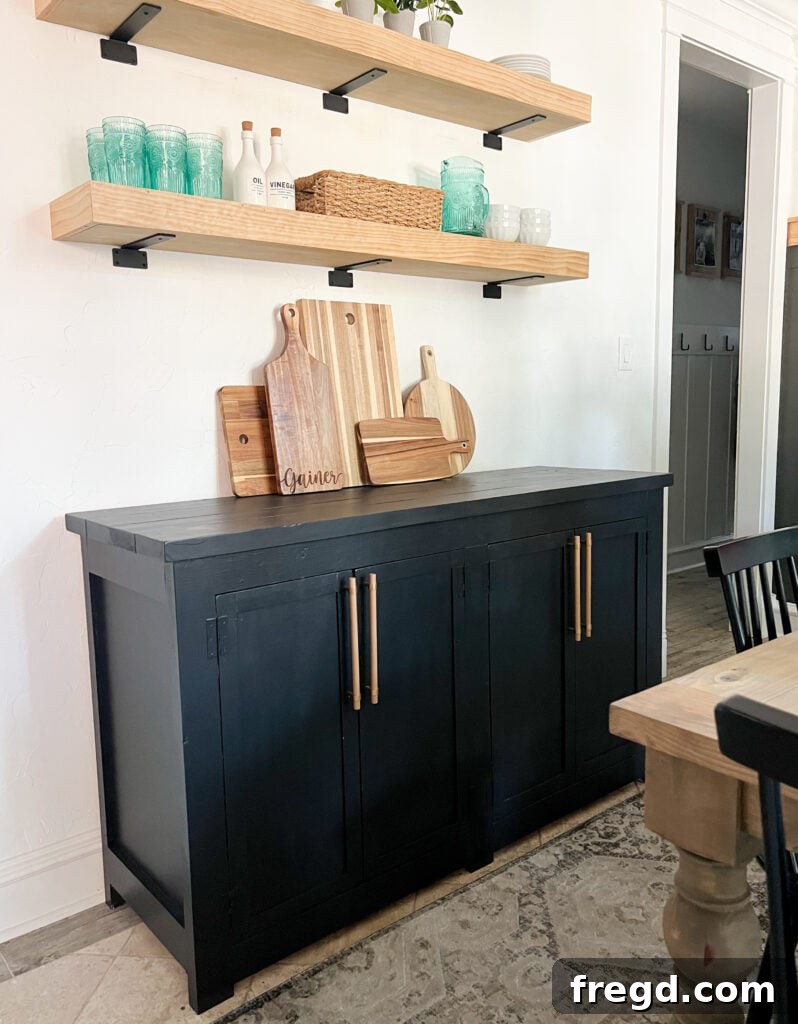
As the holiday season draws near, bringing with it the joyful anticipation of Thanksgiving feasts and festive Christmas gatherings, the desire to create a warm and inviting home atmosphere becomes paramount. For many, this includes enhancing the dining space with functional yet beautiful furniture. That’s precisely why I embarked on a new woodworking adventure: constructing a magnificent DIY Modern Farmhouse Sideboard for my dining room. This project not only delivers ample storage, perfect for stowing away seasonal dinnerware, linens, and other essentials, but also acts as a stunning focal point that beautifully complements the room’s aesthetic. The rustic charm blended with clean, modern lines truly elevates the space, making it ready for any celebration. If you’re looking to add a touch of handcrafted elegance and practical storage to your home, you’re in the right place! You can grab the comprehensive, free plans for this elegant buffet cabinet at the bottom of this detailed guide.
Unlocking Your Woodworking Potential: The Kreg Jig
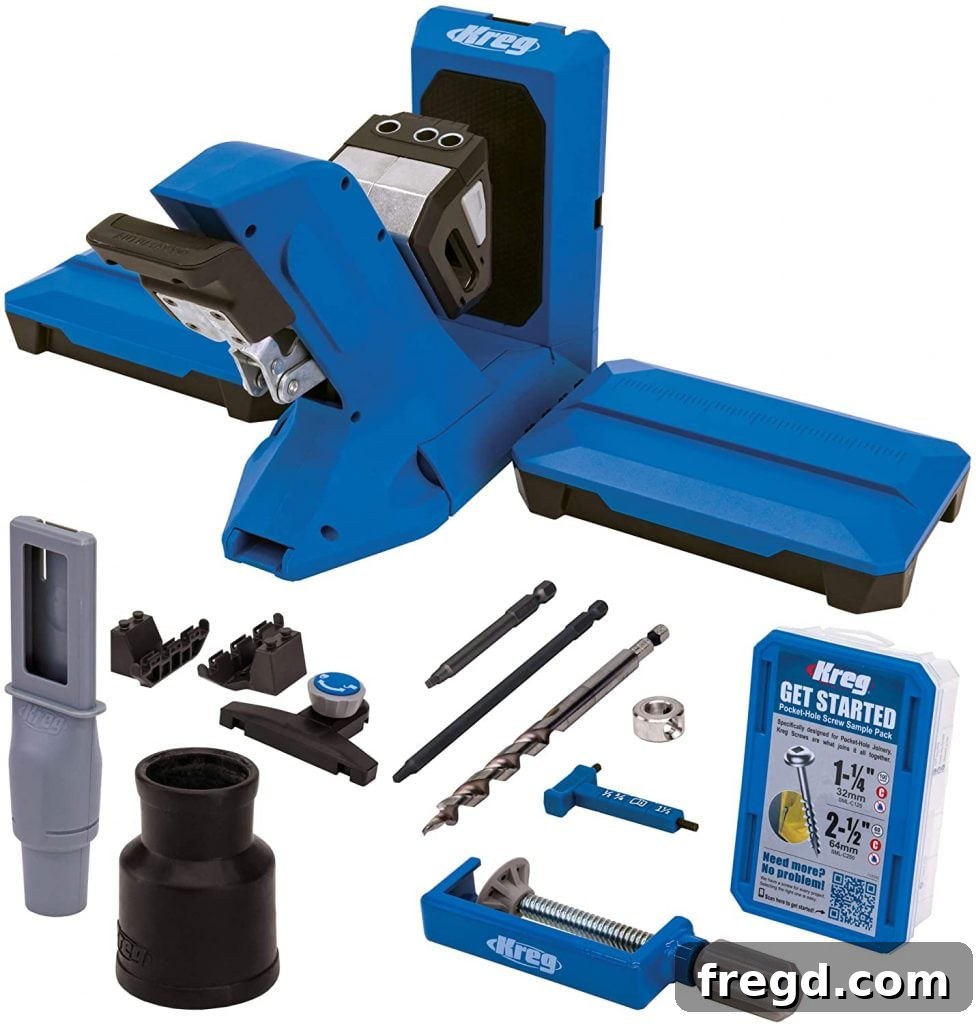
One of the most frequent inquiries we receive from aspiring furniture builders revolves around the essential tools needed to embark on their woodworking journey. For beginners, in particular, selecting the right tools can feel overwhelming. However, our consistent recommendation for anyone starting out includes three fundamental pieces of equipment: a reliable miter saw for precise cuts, a versatile drill for fasteners, and, perhaps most importantly, a Kreg Pocket Hole Jig. But what exactly is a Kreg Jig, and why is it such a cornerstone for DIY furniture? Simply put, a Kreg Jig is an innovative tool designed to create incredibly strong and clean pocket-hole joints. It revolutionizes the way two pieces of wood are joined, offering a method that is significantly faster, more robust, and aesthetically superior to traditional methods like countersinking a standard wood screw.
Our own experience with the Kreg Jig was nothing short of transformative. We discovered this remarkable tool early in our furniture-building endeavors, and it quickly proved to be a monumental game-changer. The ease of use, combined with the unparalleled strength it imparted to our creations, left us thoroughly impressed. For this particular DIY Modern Farmhouse Sideboard project, I utilized my Kreg Jig 720 PRO, and I absolutely adore it! This model offers enhanced features and increased efficiency, making the building process even more enjoyable. For those who already own a different Kreg Jig model, the 720 PRO is definitely a worthwhile upgrade, offering superior clamping mechanisms and dust collection. You can explore the Kreg Jig 720 PRO further and purchase it HERE on Amazon. Additionally, for a visual guide and more in-depth instruction on how to maximize its potential, be sure to check out our detailed video on using the Kreg Jig 720 PRO HERE! Mastering this tool will open up a world of possibilities for your woodworking projects, enabling you to build durable and beautiful pieces with confidence.
Building The Sturdy Foundation: Face Frames
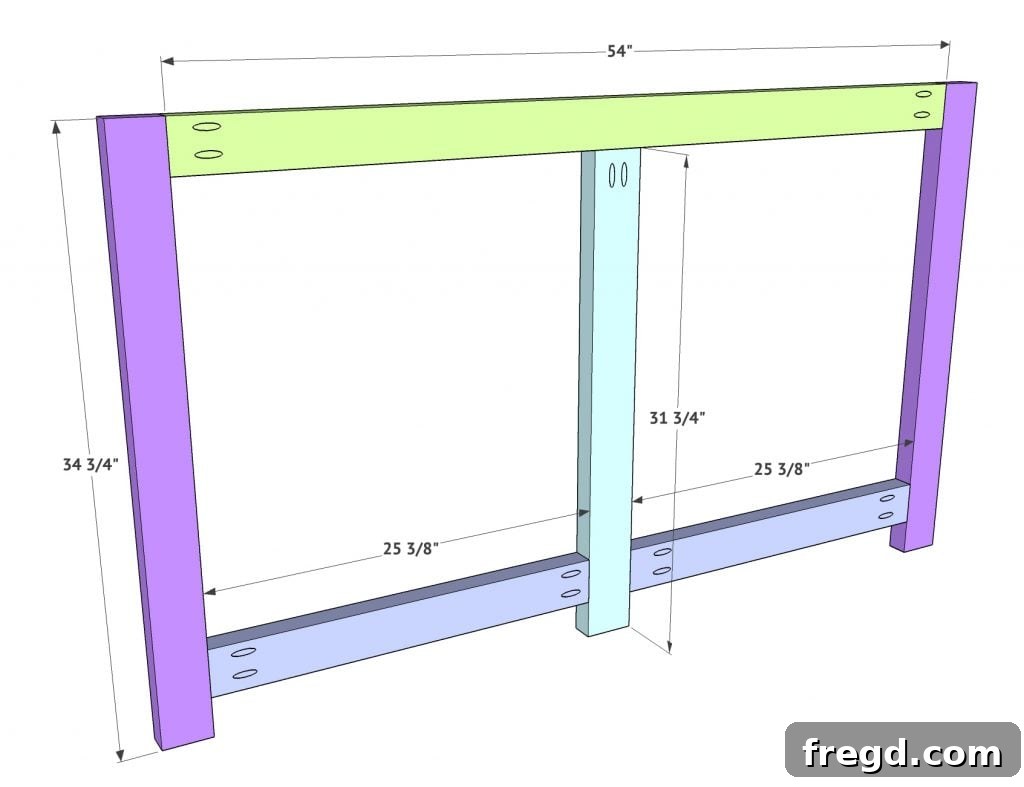
The journey of constructing your Modern Farmhouse Sideboard begins with the creation of the face frames. These frames are not merely decorative; they form the essential structural backbone of your cabinet, providing rigidity and defining the overall shape and openings for your doors. You will need to construct two identical face frames, one for the front and one for the back of the sideboard.
These critical components are expertly crafted from 2×4 boards. To achieve the refined aesthetic characteristic of farmhouse design, I precisely ripped these boards down to a consistent width of 3 inches each. This step, while requiring an extra tool like a table saw or circular saw with a guide, ensures a cleaner, more custom look than standard 2×4 dimensions. Once your boards are prepped, it’s time to utilize the Kreg Jig. Add 1.5-inch pocket holes at the indicated positions within your plans – typically where the horizontal and vertical pieces connect. Apply a generous amount of high-quality wood glue to all mating surfaces before securing the joints with 2.5-inch pocket hole screws. Pay close attention to the alignment of the bottom horizontal boards; they should be positioned exactly 2.5 inches from the base of the leg pieces. This precise placement is crucial for maintaining the correct proportions and ensuring proper clearance for the cabinet base and eventual doors. Take your time during this stage, as the accuracy of these face frames will dictate the overall squareness and quality of your finished sideboard.
Crafting The Elegant Side Panels
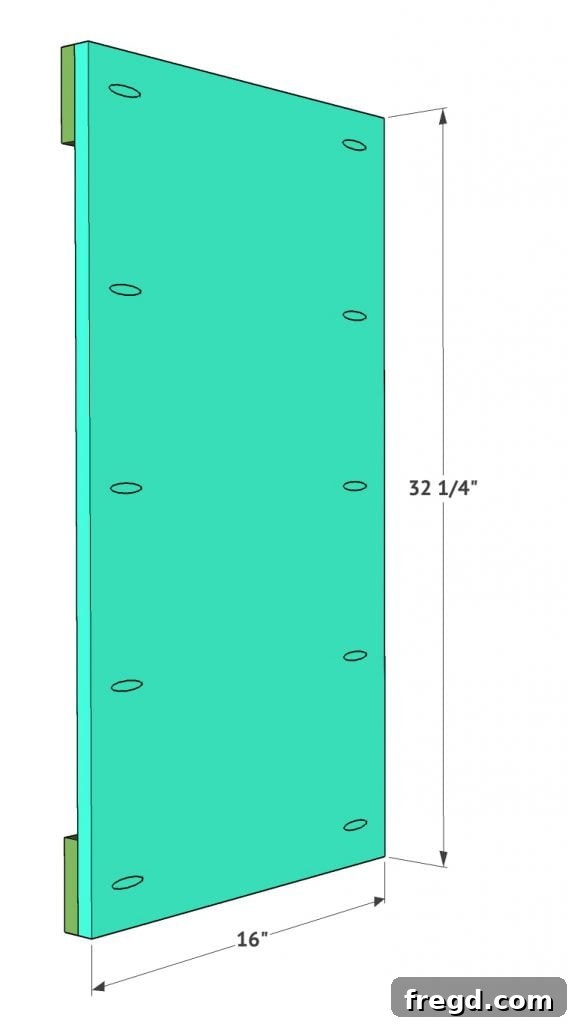
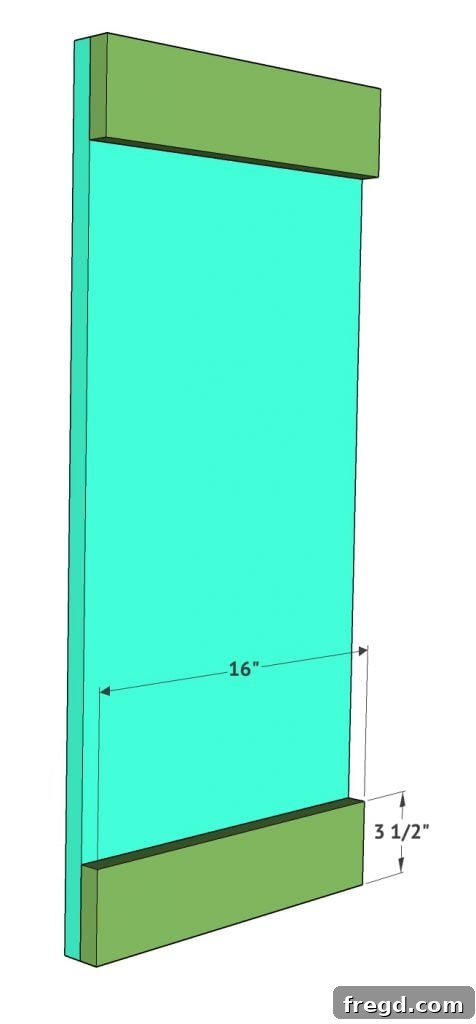
With the face frames providing the initial structure, the next crucial step in building your Modern Farmhouse Sideboard is to construct the side panels. These panels contribute significantly to the aesthetic appeal and overall stability of the cabinet. Each side panel is a composite of two primary materials: a substantial 3/4-inch hardwood plywood sheet for the main body and 1×4 boards for the decorative trim.
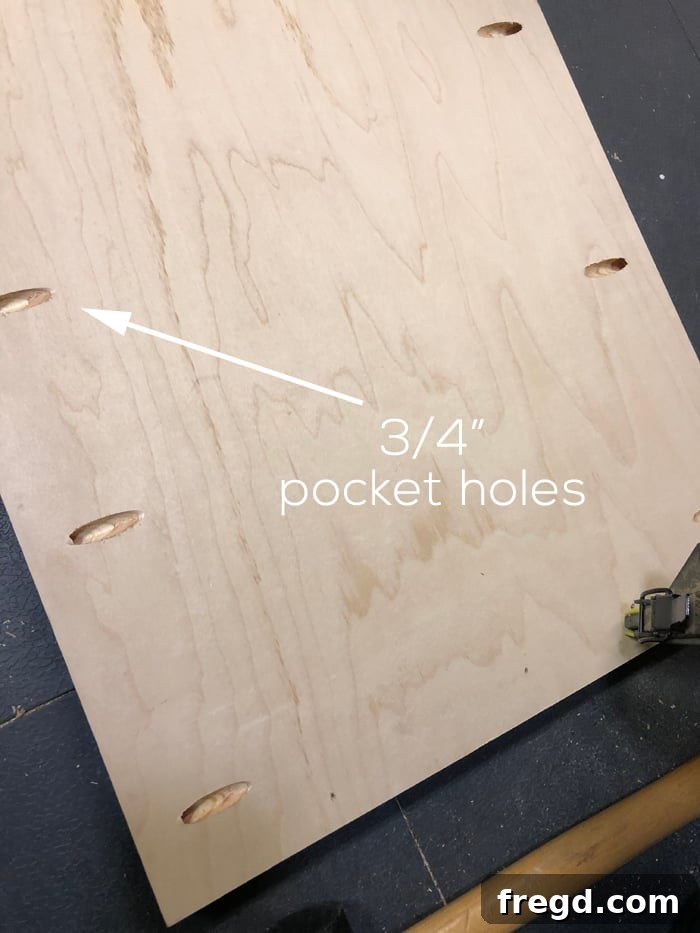
Begin by cutting your hardwood plywood to the precise dimensions specified in the plans. Hardwood plywood is an excellent choice for furniture construction due to its stability, strength, and smooth surface, which takes paint or stain beautifully. Once your main panel is cut, prepare it for assembly by adding 3/4-inch pocket holes along each long side, specifically on the *back* surface of the panel. These pocket holes will later be used to securely attach the side panels to the main cabinet structure, ensuring a strong, invisible joint from the front.
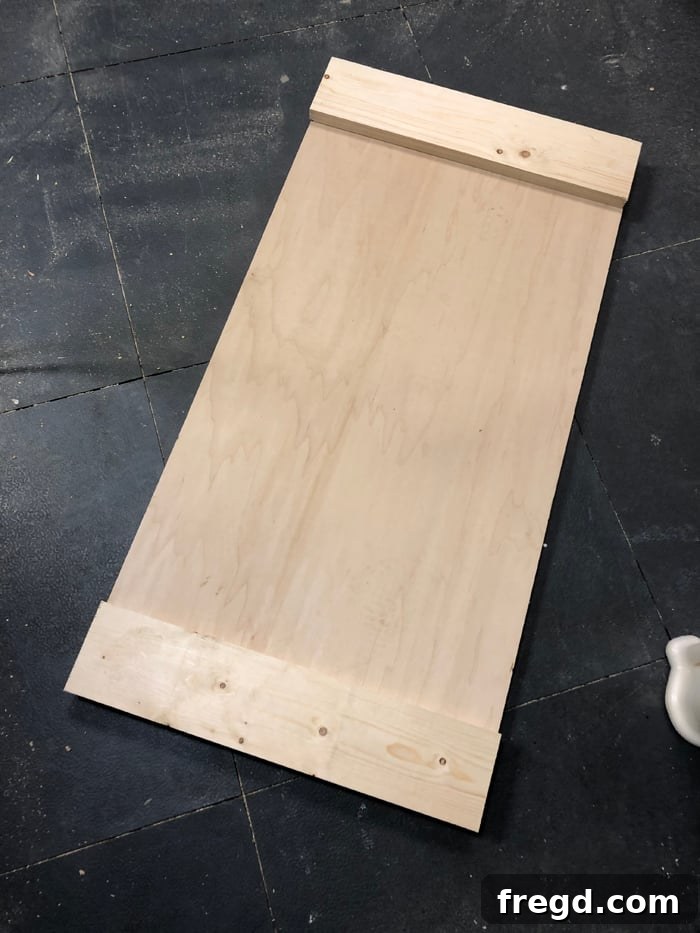
Next, focus on the 1×4 trim pieces. These pieces will frame the front face of your plywood panels, adding depth and that distinctive farmhouse character. Measure and cut these 1×4 boards to perfectly fit the perimeter of your plywood panel. Once cut, attach the 1×4 trim to the front of the panel. For this, apply wood glue generously to the mating surfaces, then secure the trim in place using 1.25-inch brad nails and a reliable nail gun. Brad nails provide strong, virtually invisible fastening, especially when combined with wood glue. Ensure the trim is flush with the edges of the plywood. You will need to build two identical side panels following these steps, paying close attention to consistency in measurements and assembly for a symmetrical and professional finish.
Connecting The Structure: Side Panels To Back Face Frame
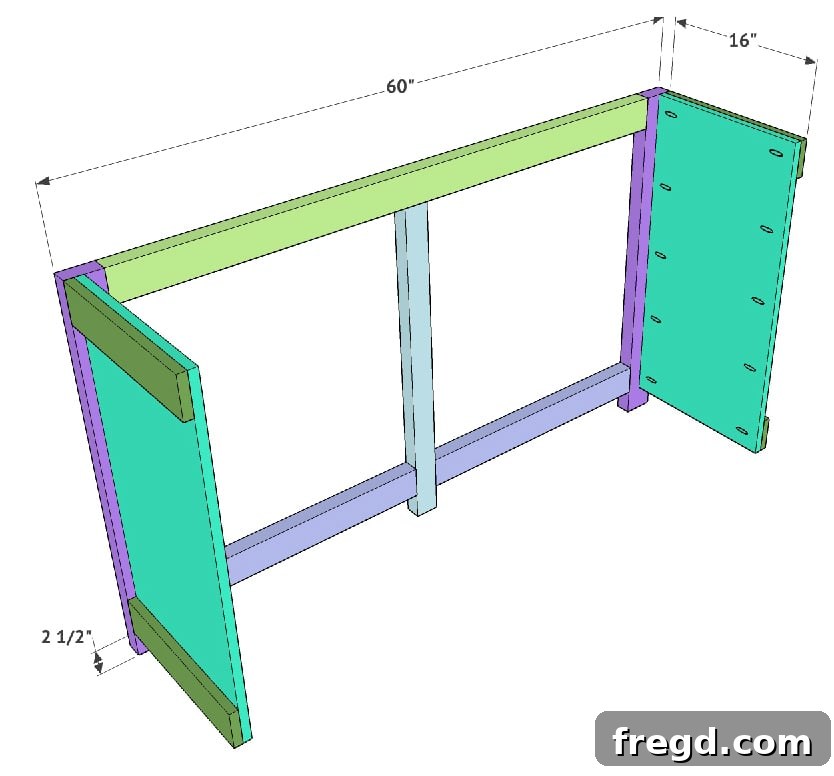
With your face frames and side panels now meticulously crafted, it’s time to bring these components together to form the initial skeleton of your DIY Modern Farmhouse Sideboard. This step is crucial for establishing the overall dimensions and squareness of the cabinet, so precision is key.
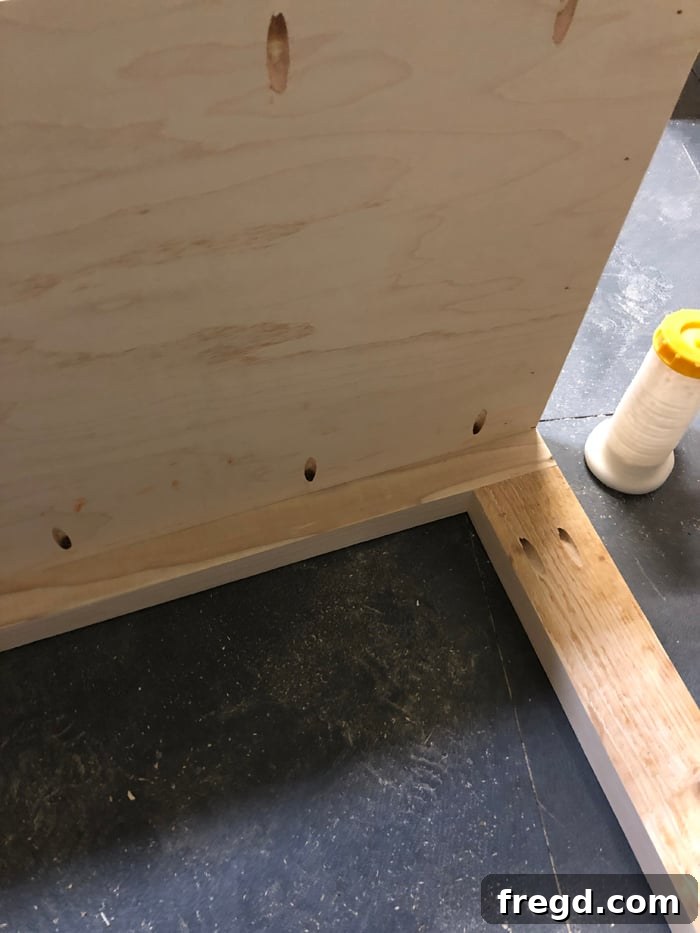
Take one of your completed side panels and align it with the back face frame. The goal here is to create a seamless and robust connection. Apply a liberal amount of wood glue to the mating surfaces where the side panel will meet the face frame. Then, using 1.5-inch Kreg pocket hole screws, secure the side panel to the back face frame through the pocket holes you previously drilled on the side panel’s back edge. As you attach them, ensure that the top edge of the side frames aligns perfectly flush with the top edge of the back face frame. This alignment is vital for a level surface and for the subsequent attachment of the cabinet top. This specific positioning will naturally leave a 2.5-inch space below the bottom edge of the side frames, which is part of the overall design and leg structure.
Equally important is ensuring that the outside face of the 1×4 trim boards on the side panels is perfectly flush with the outside edge of the face frame. This attention to detail guarantees a smooth, continuous surface, making for a professional and polished appearance once the entire sideboard is assembled and finished. Repeat this process for the second side panel, ensuring both are securely and accurately attached to the back face frame. Double-check all measurements and alignments before the glue dries, making any necessary adjustments to maintain a square and true structure.
Establishing The Core: Attaching The Cabinet Base
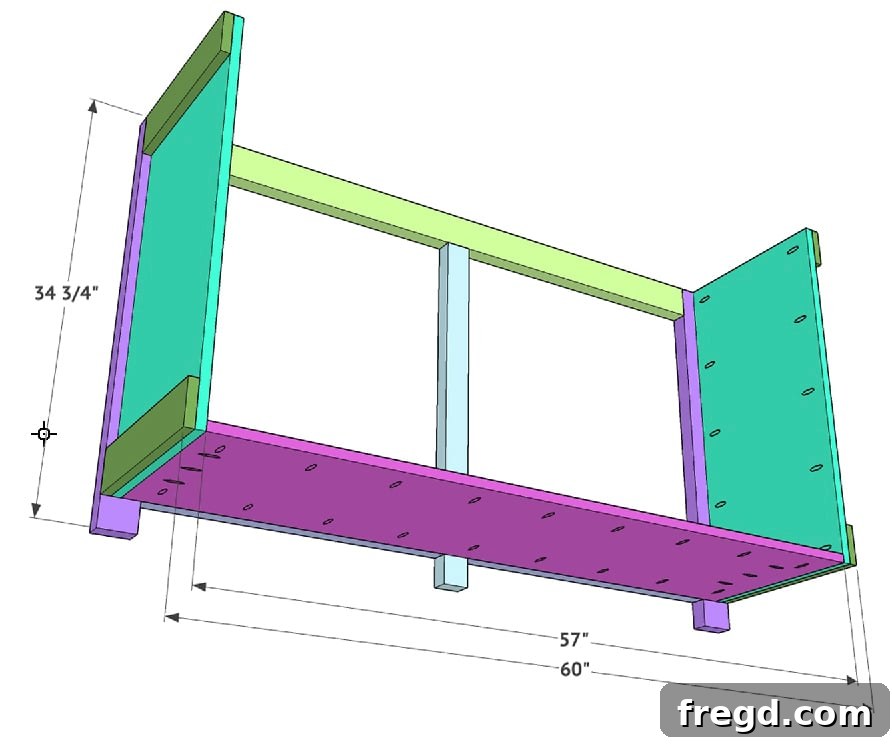
With the initial framework of the back face frame and side panels in place, your DIY Modern Farmhouse Sideboard is beginning to take shape. The next critical component to integrate is the cabinet base. This piece serves as the structural floor of your sideboard, providing support for everything stored inside and adding significant rigidity to the entire assembly.
The base of this elegant cabinet is constructed from 3/4-inch hardwood plywood, chosen for its strength and stability, which are essential for supporting the contents of the sideboard over time. Begin by precisely cutting your plywood sheet to the dimensions specified in your plans. Once cut, use your Kreg Jig to add 3/4-inch pocket holes along all four sides of this plywood piece. The strategic placement of these pocket holes will allow for strong, hidden connections to the surrounding framework.
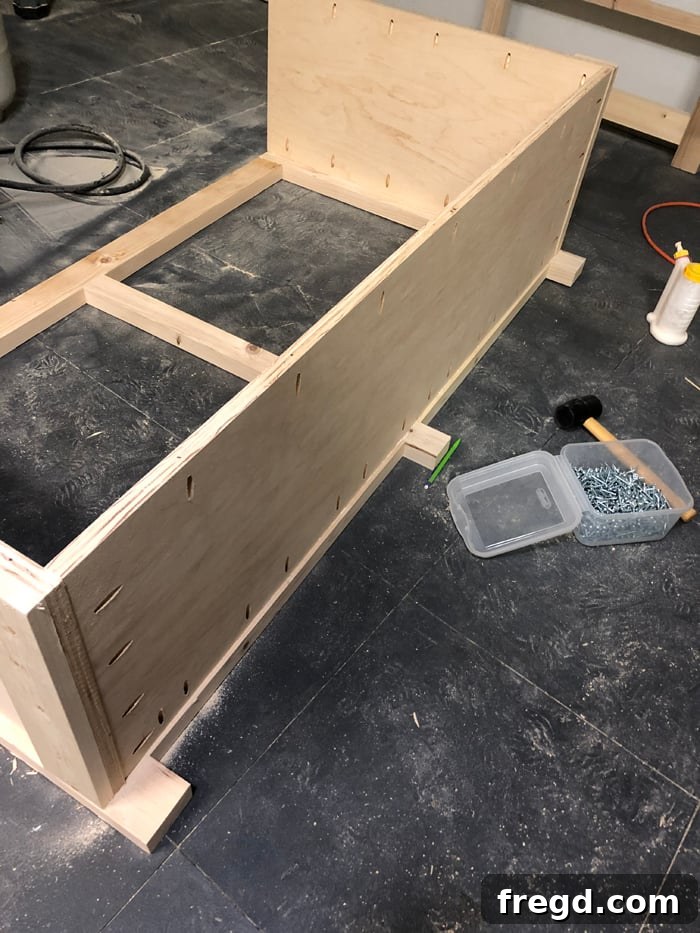
Before fastening, apply a generous and even layer of wood glue to the mating surfaces where the base will connect with the back face frame and the two side frames. Wood glue provides an incredibly strong bond that, when combined with mechanical fasteners like pocket hole screws, creates a joint that is far more durable than screws alone. Carefully position the plywood base within the assembled framework. Ensure it sits flush with the intended ledges or supports on the face frame and side panels. Then, using 1.5-inch pocket hole screws, firmly attach the base to the back face frame and both side frames. Work systematically around all four sides, driving screws through the pre-drilled pocket holes. This step not only completes the main body of the cabinet but also significantly contributes to its overall strength and stability, preparing it for the internal dividers and front face frame.
Installing The Middle Divider For Organized Storage
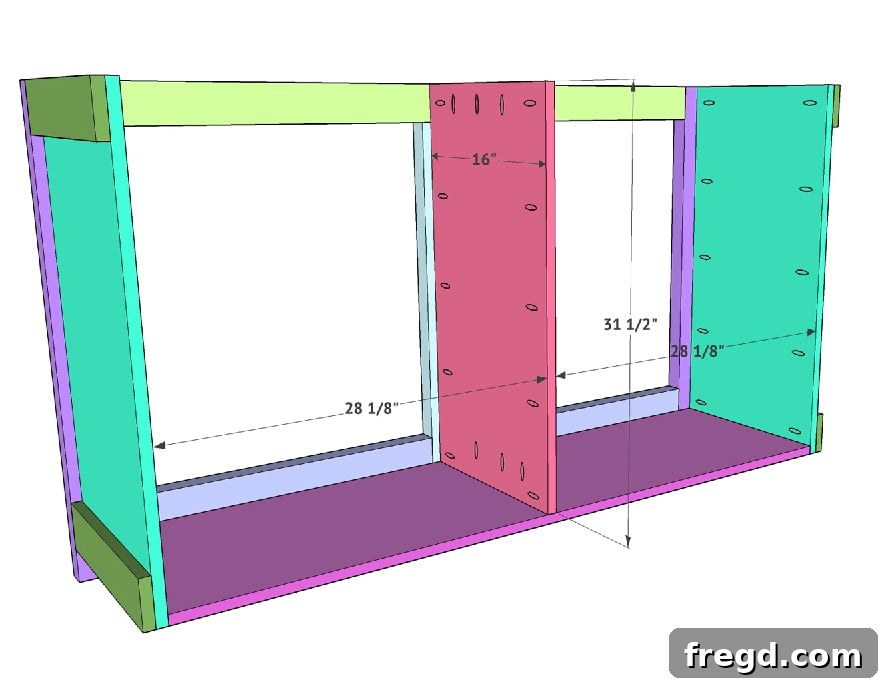
Once the cabinet base is securely in place, the structure of your DIY Modern Farmhouse Sideboard is really starting to come together. The next step is to introduce the middle divider, a crucial element that not only enhances the structural integrity of the sideboard but also plays a key role in organizing the internal storage space. This divider separates the cabinet into distinct compartments, making it ideal for storing different types of items, from dinnerware to serving platters or holiday decorations.
This middle divider is also fashioned from 3/4-inch hardwood plywood, ensuring consistency in material strength and finish. It’s important to note that this piece is typically cut slightly shorter than the side frames, allowing for proper alignment with the various components of the face frames. Before installation, prepare the divider by drilling pocket holes. Add 3/4-inch pocket holes along both long sides of the board, as well as along the bottom edge of one side. The specific placement and orientation of these pocket holes are critical for creating strong, concealed joints once installed.
Now, carefully position the middle divider within the cabinet. Apply wood glue to the edges where it will meet the cabinet base and the middle leg of the front face frame (even though the front face frame isn’t attached yet, you’re building towards that connection). Using 1.25-inch pocket hole screws, attach the bottom of the divider to the cabinet base, securing it firmly. Then, using 1.5-inch pocket hole screws, fasten the longer sides of the divider to the corresponding support points. Remember, the combination of wood glue and pocket hole screws creates a durable and reliable joint. Take your time to ensure the divider is perfectly plumb and square within the cabinet, as this will affect the functionality and appearance of your cabinet doors later on. This step is a testament to the thoughtful design of the sideboard, maximizing both its strength and its practical storage capabilities.
Securing The Front Face Frame: Completing The Cabinet Front
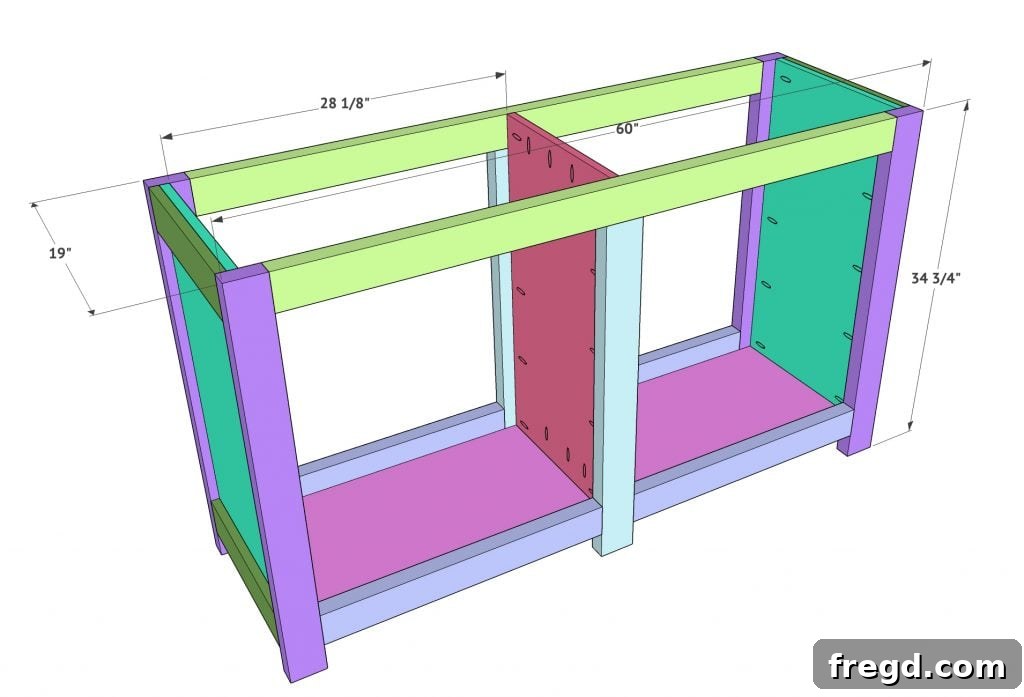
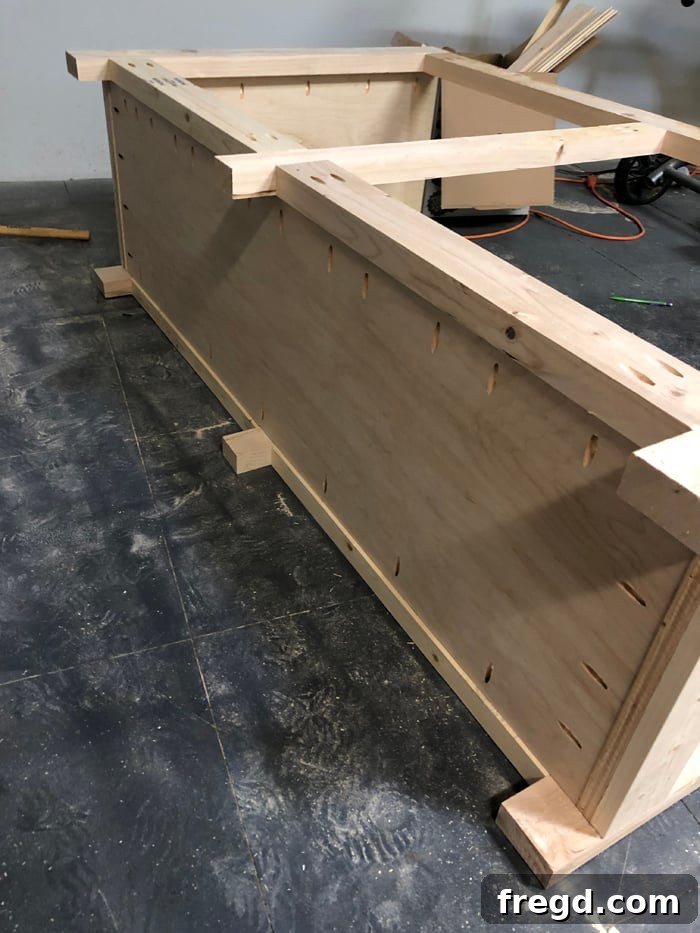
With the back, sides, base, and middle divider now firmly assembled, the main body of your DIY Modern Farmhouse Sideboard is structurally robust. The next pivotal step is to attach the front face frame, which completes the enclosure of the cabinet and defines the openings for your doors. This is where the aesthetic vision truly starts to solidify, so careful alignment is essential.
Take the second face frame you constructed at the very beginning of this project. Before attaching, ensure all mating surfaces are clean and free of debris. Apply a generous bead of wood glue along the edges where the front face frame will meet the side frames and the front edge of the middle divider. This wood glue will create a long-lasting, unbreakable bond when combined with the pocket hole screws.
Carefully position the front face frame onto the cabinet structure. You will then use 1.5-inch Kreg pocket hole screws to fasten it. Drive these screws through the pocket holes previously drilled into the edges of the side frames and the front edge of the center divider, securing them firmly into the front face frame. As you attach the frame, it is absolutely critical to ensure that the outsides and the top edges of the front face frame are perfectly flush with the corresponding outside edges of the side frames. Achieving this flush alignment is not just about aesthetics; it ensures that your cabinet doors will fit correctly and hang evenly, contributing to the professional look of your finished piece. Double-check all alignments before tightening the screws completely, making any necessary adjustments to ensure a perfectly square and level front. This step essentially “closes” the main box of your sideboard, providing a complete and sturdy structure ready for doors, top, and back panel.
Constructing The Cabinet Doors: Precision And Style
At this stage, with the main cabinet carcass robustly assembled, it’s often best to pause and focus on building the cabinet doors before adding the final top and back panels. This approach allows for precise fitting and adjustments of the doors against the completed openings of the DIY Modern Farmhouse Sideboard, ensuring a professional and seamless finish.
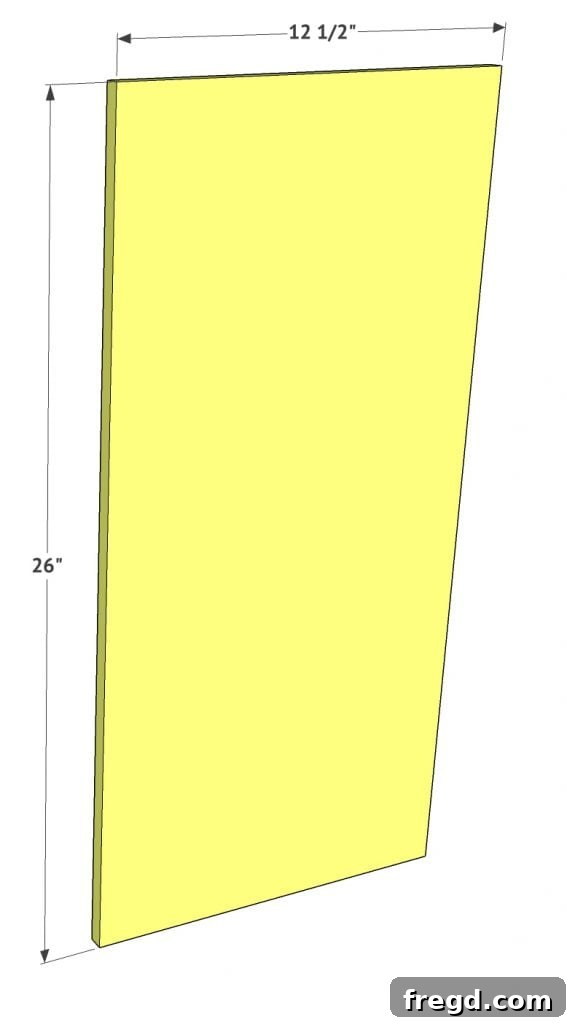
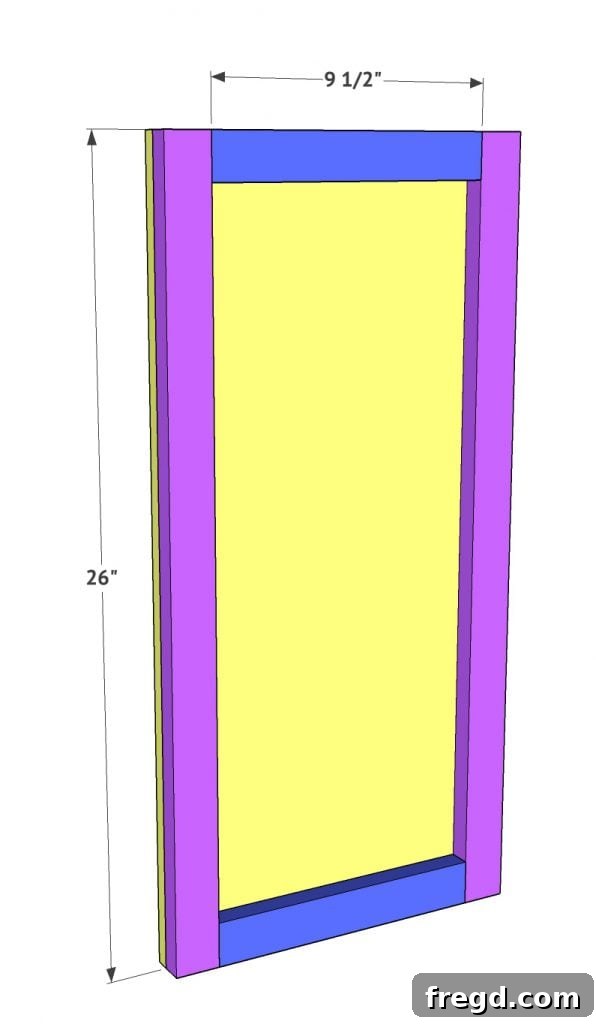
These elegant doors are constructed from 1/2-inch hardwood plywood. Hardwood plywood is an excellent choice for doors due to its stability, resistance to warping, and smooth surface, which is ideal for painting or staining. The key to perfectly fitting doors lies in meticulous measurement. Begin by accurately measuring each individual opening within your newly constructed face frame. It’s important to treat each opening independently, even if they appear identical, as minor variations can occur during the framing process. I strongly recommend leaving a consistent 1/8-inch gap all around each door panel. This small gap is essential for allowing the doors to open and close freely without binding, and it also accommodates any slight expansion or contraction of the wood due to changes in humidity. Cutting each panel to size based on these exact measurements for its specific opening will prevent uneven gaps and ensure a beautifully symmetrical final appearance. Precision here will save you a lot of frustration later, so measure twice, cut once!
Adding Refined Detail: Attaching Trim To Doors
Once your 1/2-inch hardwood plywood door panels are cut to their precise dimensions, the next step in bringing the farmhouse aesthetic to your DIY Modern Farmhouse Sideboard is to attach the decorative trim. This trim elevates a simple plywood panel into a sophisticated, paneled door, adding depth, character, and visual interest.
The door trim is crafted from 1×4 boards. The process for cutting and attaching these pieces requires a methodical approach to ensure crisp, clean corners and a perfectly framed panel. Start by carefully measuring and cutting your longer vertical trim pieces first. These will run along the height of your door panel. Once the vertical pieces are cut and dry-fitted to ensure a perfect match, proceed to measure and cut the shorter horizontal pieces. Measuring the horizontal pieces *after* the vertical ones are placed accounts for the thickness of the vertical trim, ensuring a snug and accurate fit.
With all trim pieces cut, it’s time to attach them to the plywood door panels. Apply a generous amount of wood glue to the back surfaces of the trim pieces where they will meet the plywood. Wood glue is paramount for a strong, lasting bond. Then, using a nail gun, secure the trim pieces with 1-inch brad nails. Brad nails are ideal here because they leave very small holes that are easy to conceal. Drive nails strategically to hold the trim firmly in place while the glue dries, ensuring the trim is flush and square with the edges of the plywood. Before moving on to painting or finishing, it is absolutely essential to fill all nail holes with wood putty. This step creates a smooth, seamless surface, making the holes virtually disappear once sanded and painted. Allow the putty to dry completely, then sand it flush for a professional, unblemished finish that truly embodies the refined farmhouse style.
Building The Robust Cabinet Top
With the main cabinet structure complete and the doors meticulously crafted, the next significant element to construct for your DIY Modern Farmhouse Sideboard is its substantial top. The top of a sideboard is not just a covering; it’s a prominent surface that sees a lot of use, holding decor, serving dishes, and often bearing the brunt of daily activities. Therefore, building a robust and visually appealing top is paramount to both the functionality and the aesthetic of the entire piece.
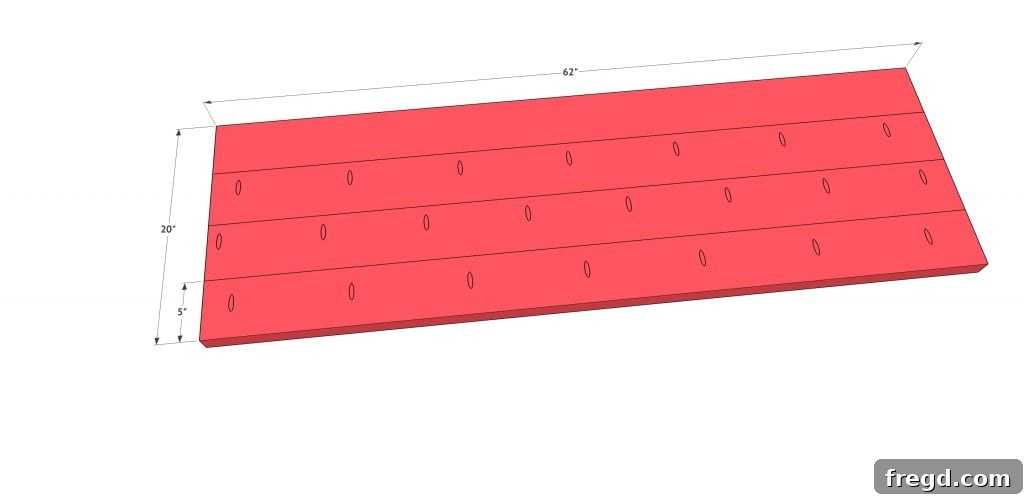
For this sideboard, the top is fashioned from 2×6 boards, chosen for their inherent thickness and strength, which contribute to the rustic yet durable farmhouse appeal. To achieve a more refined profile and a custom look that integrates seamlessly with the rest of the design, I precisely ripped these 2×6 boards down to a consistent width of 5 inches each. This step minimizes bulk while retaining the impressive solidity of the original lumber.
To create a single, wide, and flat cabinet top from multiple boards, joinery is key. On three of these prepared boards, you will add 1.5-inch pocket holes along one long side. The Kreg Jig makes this process efficient and accurate, preparing the boards for strong, concealed connections. Once the pocket holes are drilled, carefully line up all the boards side-by-side, ensuring their ends and faces are perfectly flush. Apply a generous amount of wood glue along all mating edges between the boards before joining them. Then, using 2.5-inch pocket hole screws, fasten the boards together, driving the screws through the pocket holes. The combination of wood glue and pocket hole screws creates an incredibly strong panel, minimizing any chance of warping or separation over time. Allow the glue to cure completely before handling, ensuring the top is a single, solid, and flat piece ready for attachment and finishing.
Affixing The Cabinet Top: A Seamless Connection
After meticulously constructing the sturdy top for your DIY Modern Farmhouse Sideboard, the next critical step is to securely attach it to the main cabinet assembly. This finalizes the primary structure and prepares the piece for its doors, back panel, and the all-important finishing touches. A properly secured top ensures the cabinet’s longevity and stability, preventing any wobbling or shifting over time.
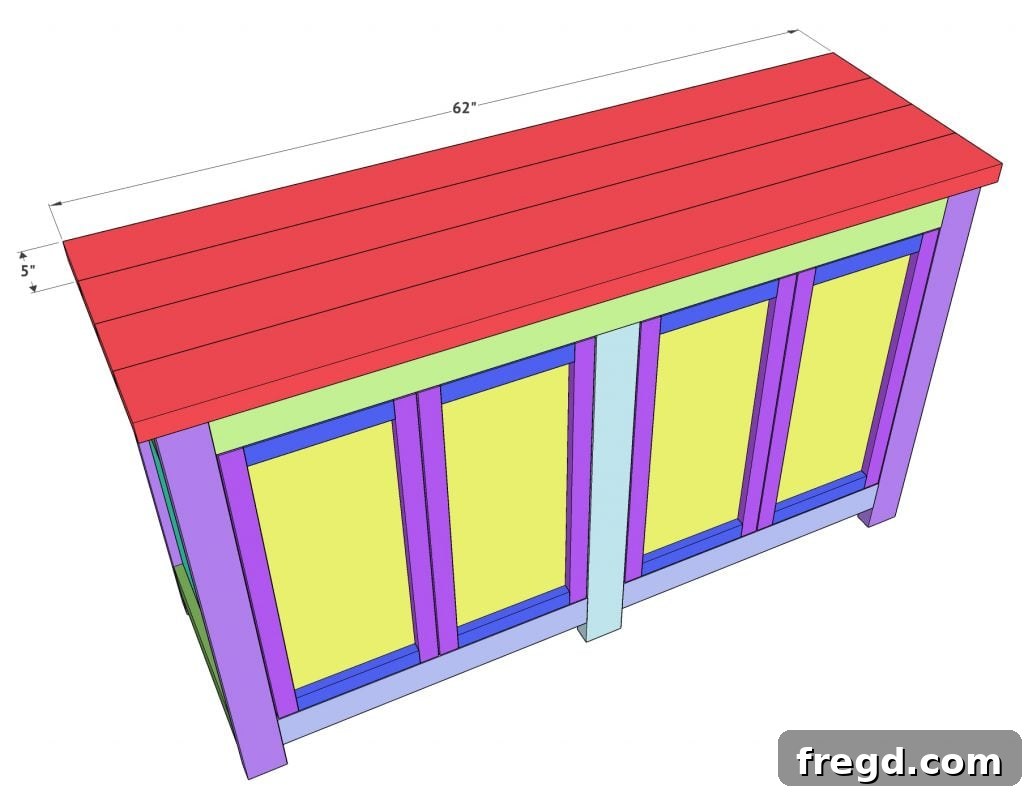
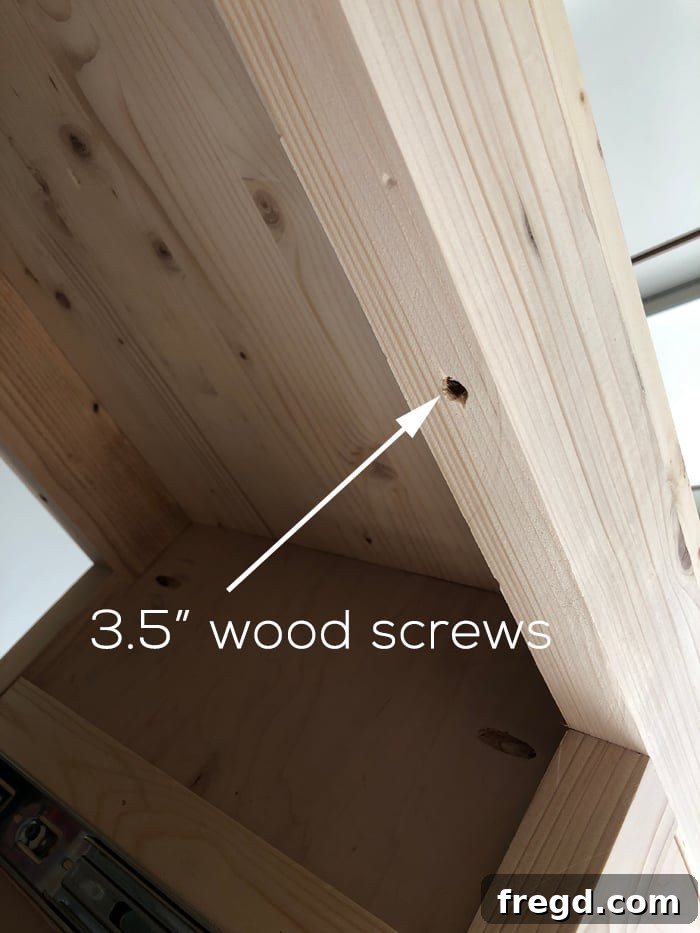
The cabinet top, expertly crafted from the 2×6 boards ripped to 5 inches each, is designed to sit directly on top of the assembled face frames and side panels. Before fastening, carefully position the top onto the cabinet, ensuring it is centered and that all overhangs are even on all sides. This symmetrical placement is crucial for the aesthetic balance of the sideboard. Once satisfied with the alignment, you will attach the top using 3.5-inch wood screws. These robust screws are driven strategically from the underside, through the top rails of the face frame, and directly into the cabinet top. This method creates a very strong and secure connection while keeping the fasteners hidden from view on the top surface. Pre-drilling pilot holes through the face frame rails into the underside of the cabinet top is highly recommended. This prevents the wood from splitting, especially when working with hardwoods, and ensures the screws drive in straight and tight. Work your way around the perimeter, using several screws to distribute the load evenly. With the top firmly in place, your sideboard truly begins to look like a finished piece of furniture, ready for the next stages of assembly and beautification.
Finishing Touch: Adding The Cabinet Back
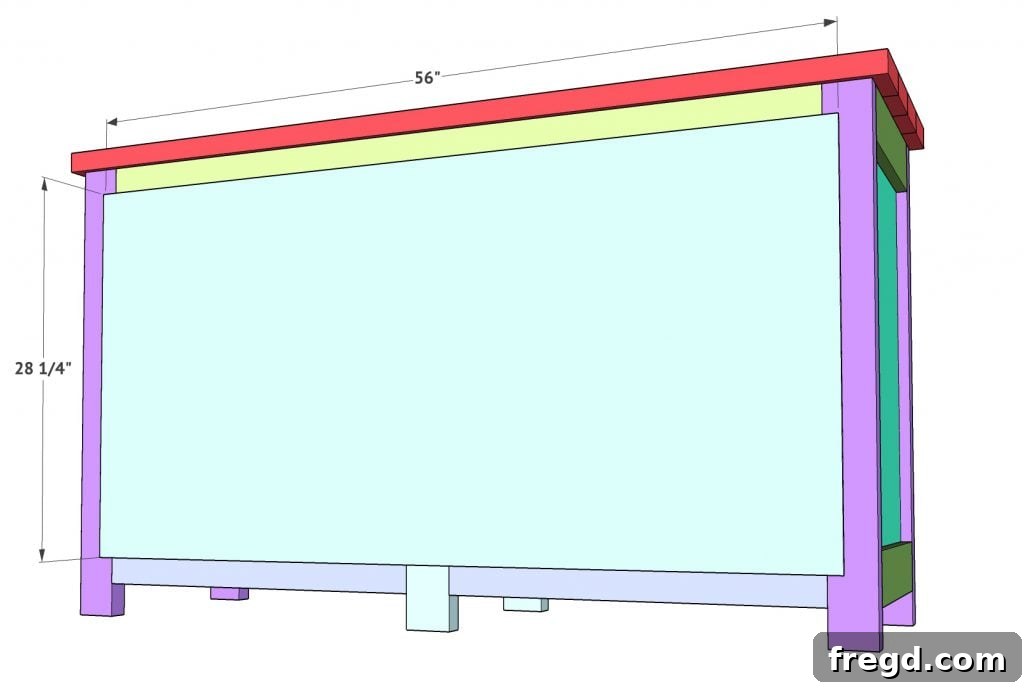
With the main structure of your DIY Modern Farmhouse Sideboard fully assembled, including the base, sides, face frames, middle divider, and robust top, there’s just one final structural component to add: the back panel. While often overlooked, the back panel is more than just a cover; it adds significant rigidity to the entire cabinet, preventing racking (the tendency for a cabinet to lean or twist out of square). It also seals the interior, protecting contents from dust and providing a clean, finished look.
For the back of this cabinet, a 1/4-inch sheet of plywood is the ideal material. This thickness is sufficient for structural support while remaining lightweight and easy to work with. Begin by accurately measuring the opening at the back of your assembled sideboard. Remember, even with careful construction, slight variations can occur, so measuring your actual piece is always better than relying solely on plans for this final panel. Once measured, cut your 1/4-inch plywood to size, ensuring a snug fit that covers the entire back opening.
To attach the back panel, apply a continuous bead of wood glue along all the edges of the cabinet where the back panel will meet – the back face frame, the side panels, and the underside of the top. Then, carefully position the plywood panel into place, ensuring it is flush with the outer edges of the cabinet. Secure it firmly using 1-inch staples or brad nails. A staple gun or nail gun makes this process quick and efficient, creating a strong bond with numerous fasteners. Drive staples or nails every few inches around the perimeter and optionally along the middle divider if it extends to the back. This final step not only completes the structural assembly but also provides a clean canvas for painting or staining, bringing your Modern Farmhouse Sideboard one step closer to its beautiful finished state.
The Art Of Color: Painting Your Sideboard
With the construction of your DIY Modern Farmhouse Sideboard now complete, it’s time to infuse it with personality through the perfect finish. Painting is often the most rewarding part of a woodworking project, transforming raw wood into a polished piece that perfectly matches your home’s decor. The choice of paint and its application can dramatically impact the final look and feel of your custom furniture.
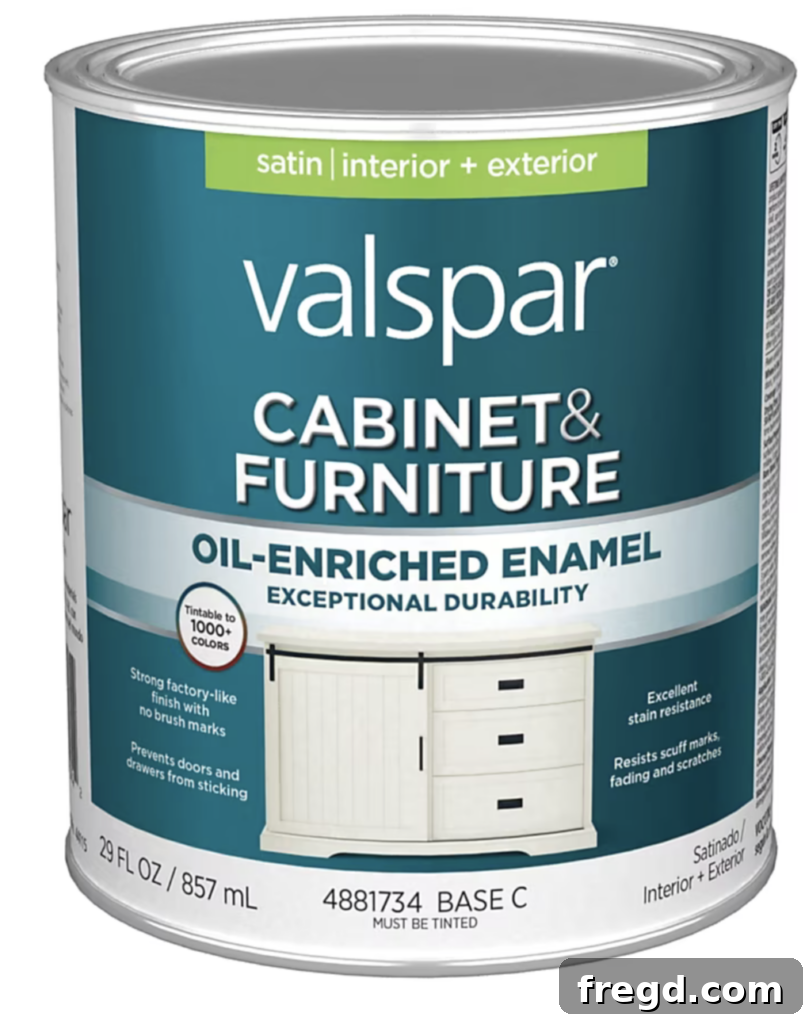
For this particular project, I opted for a paint that I’ve grown to truly love for its durability and beautiful finish. This is the same type of paint I successfully used for my bathroom cabinets, demonstrating its versatility and high quality. You can find this paint HERE at Lowe’s. I was fortunate to find cans already pre-tinted to a striking “Kettle Black” in a satin finish, which perfectly captured the modern farmhouse aesthetic I was aiming for. The satin finish offers a subtle sheen that is easy to clean and provides a sophisticated look without being overly glossy.
Application is key to achieving a professional finish. I applied all the paint using THIS high-quality paintbrush. A good brush allows for smooth, even coats and precise application, especially in corners and on detailed trim work. Before painting, always ensure your surface is clean, dry, and lightly sanded to provide a good “tooth” for the paint to adhere to. Depending on the wood and paint type, a primer might also be beneficial for better adhesion and a more uniform color. While I chose Kettle Black for its timeless appeal, the beauty of DIY is customization. You are absolutely encouraged to select any paint color that complements your existing decor and personal style. Experiment with different shades, from classic whites and greys to bold blues or greens, to create a truly unique Modern Farmhouse Sideboard that reflects your individual taste.
Selecting The Perfect Hardware For Your DIY Sideboard
After investing your time and effort into constructing and painting your DIY Modern Farmhouse Sideboard, the final step in bringing your vision to life is the selection and installation of hardware. Hinges and door pulls are not just functional elements; they are essential design details that can significantly enhance the overall aesthetic of your piece, adding character and completing the modern farmhouse look. Choosing the right hardware can truly transform a good build into a great one.
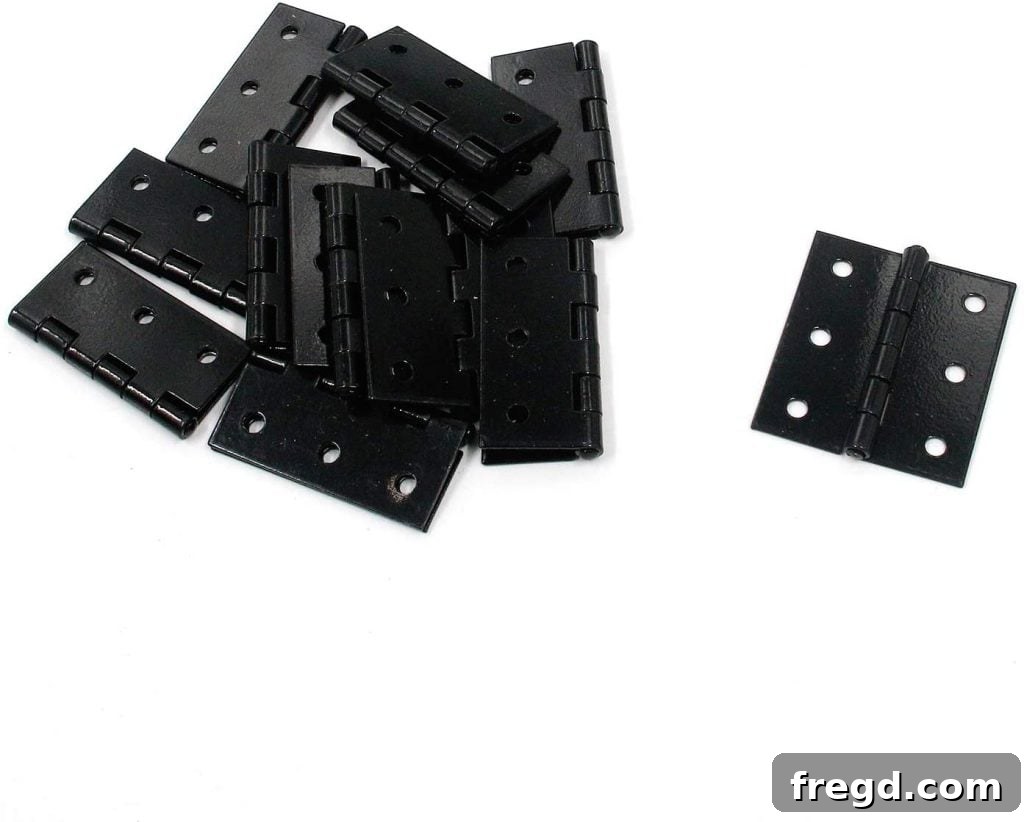
For the hinges, functionality, durability, and a subtle aesthetic are paramount. I discovered a fantastic set of hinges on Amazon that perfectly met these requirements. They provide smooth operation and blend seamlessly with the farmhouse style, offering both quality and value. You can find these highly recommended hinges HERE! Their excellent price point makes them an even more attractive choice for any DIY project.
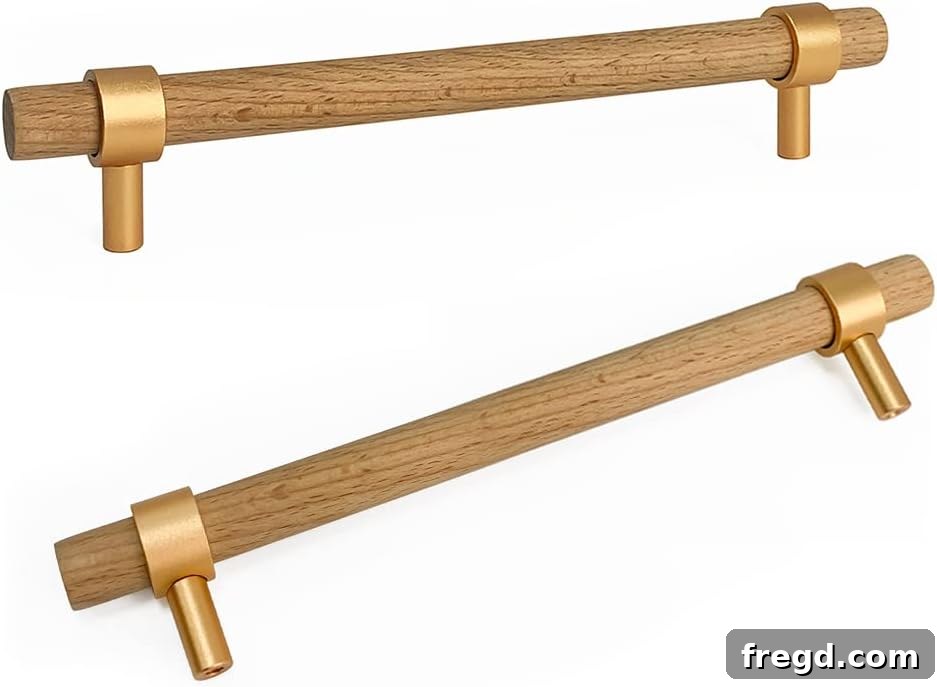
When it came to the door pulls, I sought something that would not only be functional but also add a distinctive touch of charm and elegance to the sideboard. I found what quickly became my absolute favorite door pulls, and I believe they added immense character to the piece, truly making it shine. These pulls were also incredibly affordable and conveniently available on Amazon. You can discover these stunning door pulls HERE! Their versatile design means they wouldn’t just be perfect for cabinet doors; they would also make the cutest drawer pulls, should you decide to incorporate drawers into future projects or even a modified version of this sideboard. When installing hardware, always measure carefully to ensure pulls and hinges are level and evenly spaced. Small details like these make a big difference in the perceived quality and finish of your handcrafted furniture.
The Grand Reveal: Admiring Your Finished Sideboard
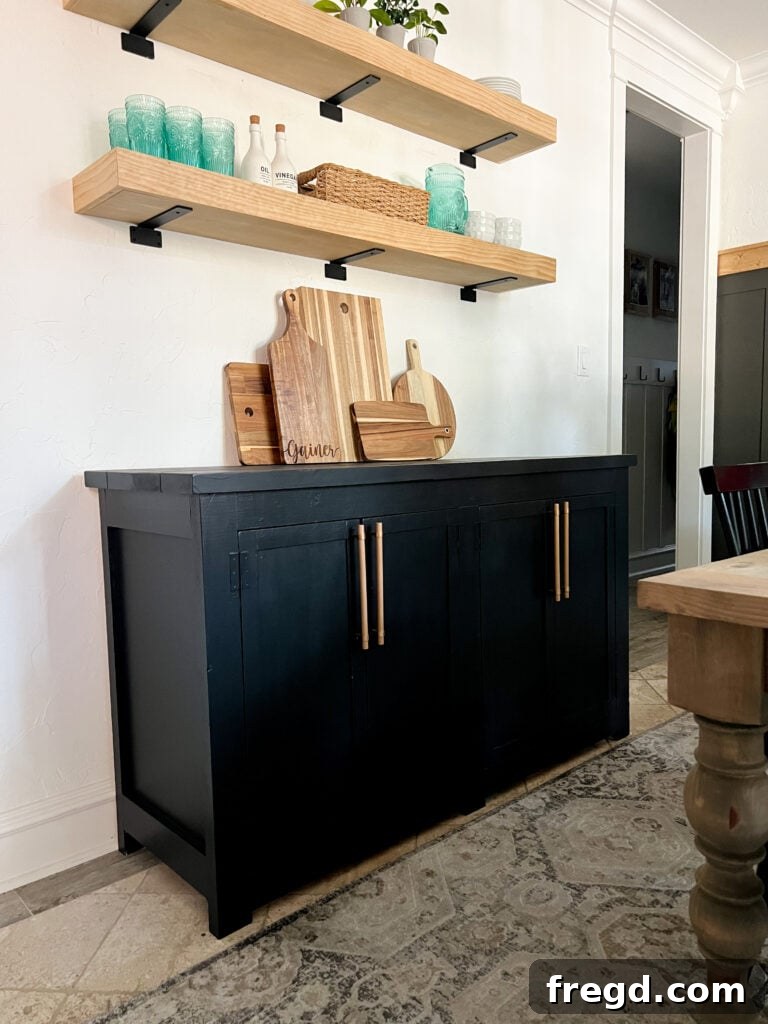
There’s an incomparable sense of pride and accomplishment that comes with stepping back and admiring a piece of furniture you’ve crafted with your own hands. This DIY Modern Farmhouse Sideboard project is no exception; the final result has truly exceeded my expectations! I am absolutely thrilled with how it turned out, and it has undeniably transformed my dining room.
One of the primary motivations for undertaking this build was the dire need for additional storage, and this sideboard delivers beautifully. The spacious interior, thoughtfully designed with a central divider, provides abundant room for neatly organizing dishes, serving platters, extra linens, and various other dining essentials that often clutter kitchen cabinets or lesser-used spaces. It’s a functional powerhouse disguised as a charming piece of decor.
Beyond its practicality, the aesthetic impact of this sideboard is profound. The blend of robust construction, elegant trim work, and the rich “Kettle Black” finish creates a captivating modern farmhouse look that is both timeless and on-trend. It anchors the dining room, providing a substantial yet inviting presence. I particularly love the function it adds to my dining room, serving not only as storage but also as an expansive surface for displaying seasonal decor or serving food during gatherings. With Thanksgiving and Christmas just around the corner, I couldn’t be more excited to decorate its top with festive arrangements and utilize its ample surface for holiday spreads. This Modern Farmhouse Sideboard is more than just a piece of furniture; it’s a testament to the joy of DIY and a centerpiece ready to enhance countless family memories.
Download Your Free Plans: Start Building Today!
Inspired to create your very own stunning and functional DIY Modern Farmhouse Sideboard? There’s no better time to start! We’ve made it incredibly easy for you to embark on this rewarding woodworking project. You can access and download the comprehensive, step-by-step FREE PLANS and the detailed cut list for this DIY Sideboard Cabinet right HERE! These plans are designed to guide you through every stage of the build, from initial cuts to final assembly, ensuring a successful and enjoyable experience. Gather your tools, prepare your materials, and get ready to transform your dining room with a custom-built piece that perfectly blends storage, style, and the undeniable charm of modern farmhouse design. Happy building!