
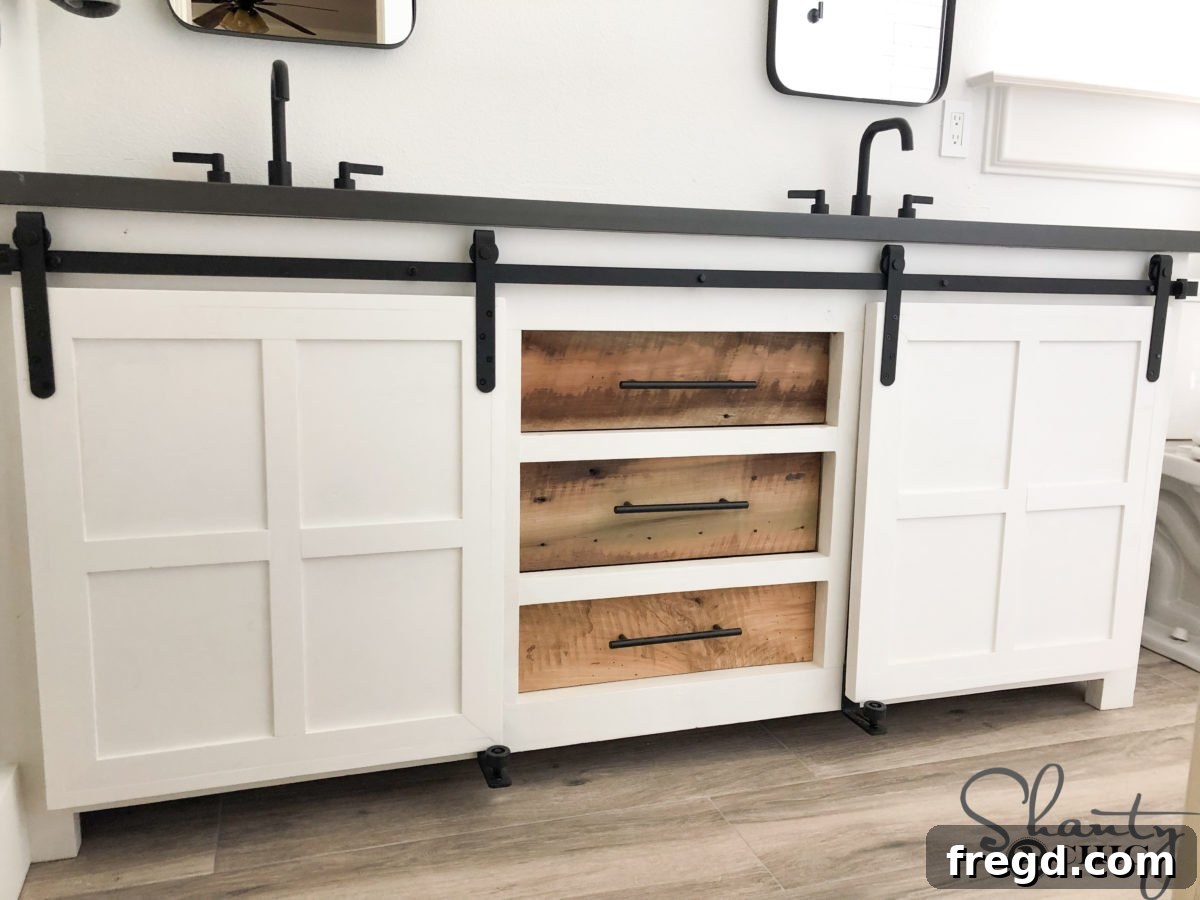
Transform your bathroom into a modern farmhouse oasis with a custom-built DIY double-sink vanity. This comprehensive guide provides everything you need, from free step-by-step plans to a detailed tutorial, empowering you to create a unique and functional centerpiece for your space while saving a significant amount of money. Imagine sleek barn doors concealing ample storage, perfectly complemented by convenient drawers and two stylish sinks – a design often found at premium prices, now achievable through your own craftsmanship. Embark on this rewarding home improvement journey and bring your dream bathroom vanity to life.
The Inspiration Behind Our Custom Bathroom Vanity Project
The journey to constructing this custom double bathroom vanity for my boys’ bathroom began unexpectedly about a year ago. The catalyst was a persistent leak from their toilet tank, which unfortunately warped the side of their existing, dated vanity. This incident sparked the idea for a complete overhaul. The original vanity sat directly on the bathroom floor, a design flaw that contributed to the water damage. To prevent this issue from recurring, I decided to design a new vanity with stylish legs, elevating it from the floor and ensuring better ventilation and protection against potential future leaks. With the initial design concept solidifying, I went ahead and purchased a beautiful countertop, eager to kickstart the cabinet construction.
Uncovering Hidden Damage: A Renovation Expands
As I delved into the initial stages of building the new vanity, a crucial thought crossed my mind: what lay beneath the old cabinet? There was a nagging suspicion that the bathroom floor tile might not extend completely under the existing structure. Acting on this hunch, I carefully pulled the warped cabinet away from the wall and floor. My suspicion was confirmed: the bathroom floor tiles abruptly stopped precisely where the old vanity began. This discovery instantly presented a new challenge – a gaping, untiled section of flooring that the new vanity, with its elevated design, would expose. To complicate matters further, I had no leftover tiles from the original installation. This meant that before I could even consider installing the meticulously crafted new vanity, the entire bathroom floor would need to be retiled, pushing the scope of the project beyond simple vanity replacement.
From Vanity Build to Full Bathroom Renovation: The “Mouse and Cookie” Effect
We’ve all experienced how one small project can snowball into something much larger, a phenomenon perfectly encapsulated by the saying, “if you give a mouse a cookie.” This adage became the unofficial motto for my bathroom vanity project. The need for new floor tile quickly led to a dilemma. I envisioned a more modern aesthetic for the new vanity and flooring, but the contemporary tile selections I admired clashed dramatically with the existing beige shower surround. Adding to this aesthetic disconnect, the toilet and bathtub were an outdated biscuit color, not the crisp white I desired for a modern look. I was left with two primary options: either find a floor tile that begrudgingly matched the existing beige tones and biscuit fixtures, or embrace the inevitable and undertake a full bathroom renovation, gutting everything to start fresh. Having already invested significantly in a gorgeous new countertop that screamed “modern farmhouse,” compromising on the overall aesthetic felt wrong. The desire for a cohesive, stylish, and truly updated space for my boys was paramount. Thus, I made the decision to completely gut the bathroom and embark on a full-scale renovation.
This major shift meant putting the vanity build on hold. I wasn’t prepared to tackle an entire bathroom remodel at that moment, and other projects and how-to videos quickly sidetracked me. For months, the unfinished vanity, along with its pristine countertop, sat neglected at the back of my workshop, gathering sawdust and spider webs. This year, however, I made a firm commitment to complete this bathroom renovation and vanity build as my first major project. I am incredibly thrilled to report that it’s not only finished but the entire process, from demolition to final touches, took a remarkably efficient two weeks! The result is a stunning double vanity that perfectly complements their new modern farmhouse bathroom. I am so enamored with the outcome that I’m already planning a similar transformation for my master bathroom. This vanity, despite its custom features, proved to be a surprisingly straightforward build, especially with the ready-to-install quartz countertop that even included the sinks. Now, let’s dive into the detailed steps so you can build your own!
CLICK HERE TO JUMP TO THE FREE PRINTABLE DIY BATHROOM VANITY PLANS
Table of Contents
Essential Supplies for Your DIY Bathroom Vanity Build
Gathering the right materials is the first crucial step for a successful DIY project. For this custom double-sink vanity with barn doors, you’ll need the following high-quality lumber and hardware to ensure durability and a professional finish:
- 2 – 3/4″x48″x96″ Birch Plywood (for sturdy cabinet construction)
- 1 – 1/4″x48″x96″ Hardwood Birch Plywood (optional, for back panels or drawer bottoms for added finish)
- 1 – 2x6x8 (for robust structural elements)
- 3 – 2x4x8 (standard framing lumber for supports)
- 1 – 2x2x8 (for smaller frame pieces or supports)
- 1 – 1x8x8 (for specific trim or paneling)
- 4 – 1x6x8 (for door panels or larger trim)
- 4 – 1x4x8 (versatile for face frames and trim)
- 1 – 1x3x8 (for delicate trim work)
- 4 – 1x2x8 (for smaller trim and decorative elements)
- 1/4″x2x48″ Craft Boards (ideal for decorative barn door trim)
- 2 1/2″ Pocket Hole Screws (for strong, concealed joinery)
- 1 1/4″ Pocket Hole Screws (for general assembly)
- 1 1/4″ Brad Nails (for attaching trim and drawer faces)
- 3/4″ Pin Nails (for precise, minimal-hole trim attachment)
- Sliding Barn Door Hardware (the mechanism for your stylish doors)
- Extra Set of Barn Door Hangers (essential for two doors)
- 3 – Pulls (for drawers, adding a touch of elegance)
- Countertop (pre-fabricated quartz saves time and effort)
- 2 – Faucets (to complete your double sink setup)
- Wood Glue (for reinforced joints and lasting strength)
- Barn Door Guides (optional, to keep doors stable and prevent swinging)
- Adhesive (for securing the countertop to the vanity base)
- Silicone (for waterproofing and sealing sink edges)
Essential Tools for Building Your DIY Bathroom Vanity
Equipping yourself with the right tools is key to achieving precision and efficiency in your build. While many DIY projects can be accomplished with a basic toolkit, these specialized tools will make the process smoother and the results more professional:
- Miter Saw (for precise crosscuts and angled cuts on lumber)
- Drill (indispensable for drilling pilot holes and driving screws)
- Kreg Jig (for creating strong, concealed pocket hole joints – a DIY favorite)
- 18 gauge Nailer (for quickly and neatly attaching trim and panels)
- Table Saw (optional, but highly recommended for ripping boards to exact widths and creating clean edges)
- Pin Nailer (optional, for very small trim pieces where minimal nail holes are desired)
- Kreg Drawer Slide Jig (optional, but incredibly helpful for perfectly aligning drawer slides)
Step-by-Step DIY Bathroom Vanity Build (Free PDF Plans Available)
Before you begin, remember that precision is paramount in woodworking. Take your time with measurements and cuts. Note: I chose to rip the rounded edges off some of the 2x boards for a cleaner, more contemporary look. The specified widths in the cut list reflect these adjusted dimensions. This step is entirely optional; if you prefer to leave the rounded edges, simply adjust the plans and your measurements accordingly to ensure proper fit.
Step 1 – Constructing the Bathroom Vanity Cabinet Base
Assembling the Vanity Side Panels
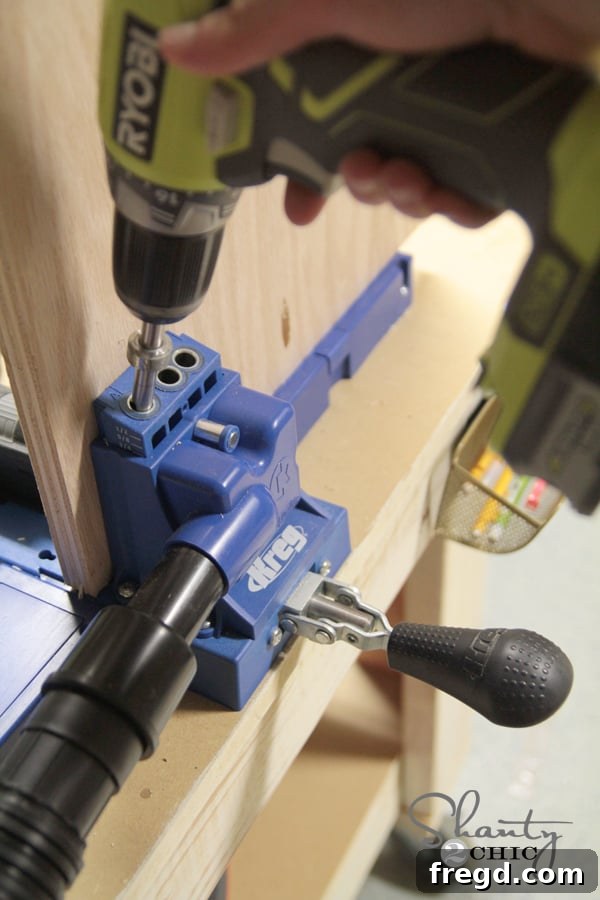
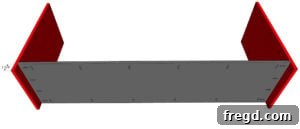
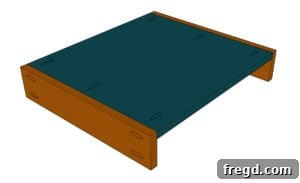
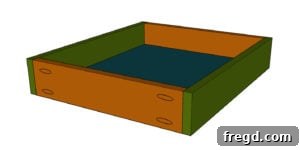
Start by carefully cutting the cabinet’s side panels and bottom piece to the precise dimensions outlined in the plans. For strong, concealed joints, I used my Kreg Jig to drill 3/4″ pocket holes along all four sides of the bottom piece and along both vertical edges of the side panels. This method ensures robust construction and a clean appearance.
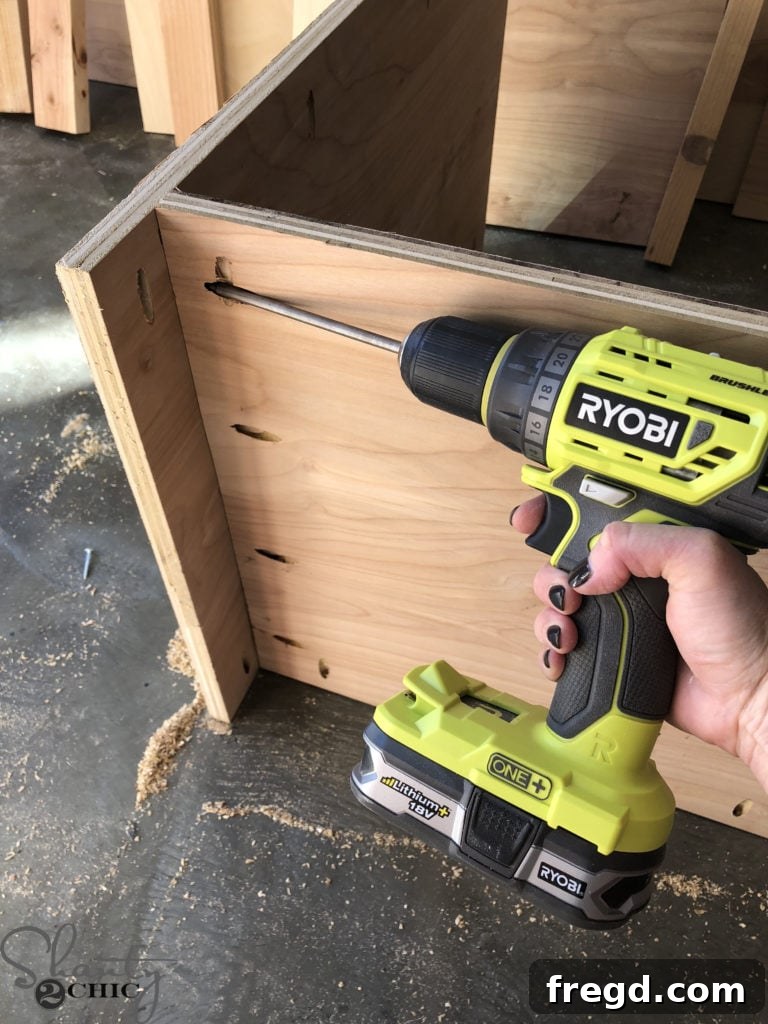
Next, apply a generous amount of wood glue to the edges and align the bottom piece with the side panels. Secure them firmly using 1 1/4″ pocket hole screws. It’s crucial that the side panels extend 2 1/4″ beyond the bottom edge of the base piece. This overhang creates the foundation for the vanity’s legs and overall height. Always double-check your alignment and ensure the joints are tight before moving on. An electric drill will make driving these screws quick and efficient.
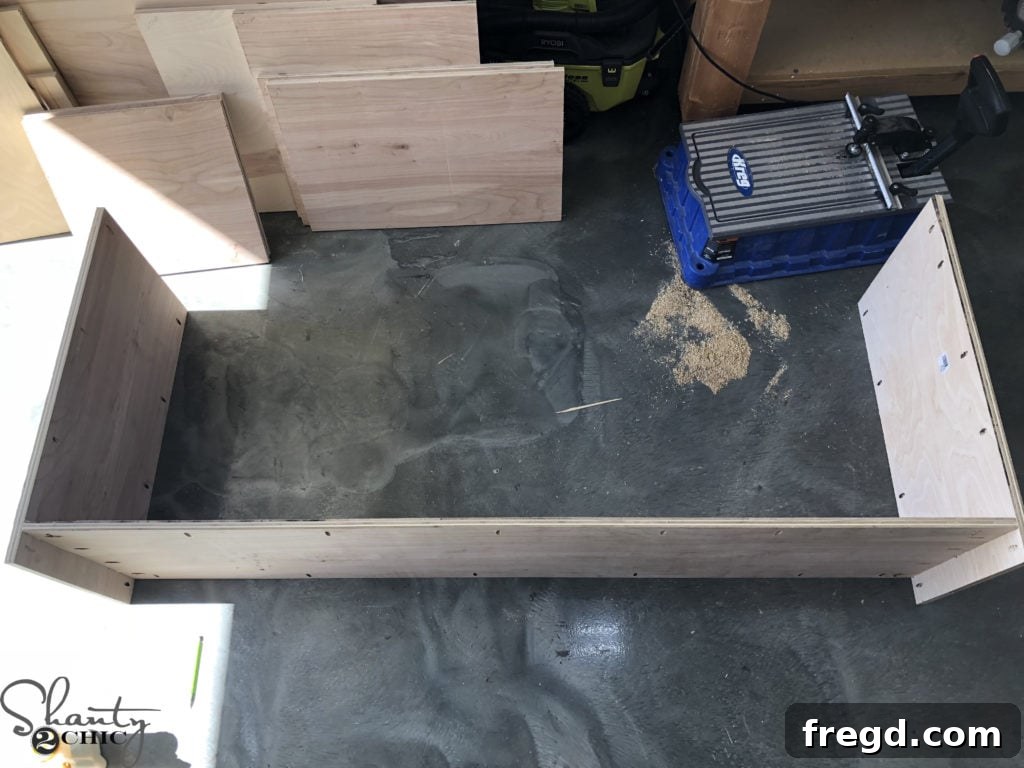
At this stage, your cabinet base should visibly take shape, with the side panels and bottom piece securely joined, forming a stable foundation for the rest of the vanity.
Incorporating the Middle Panels for Structure and Storage
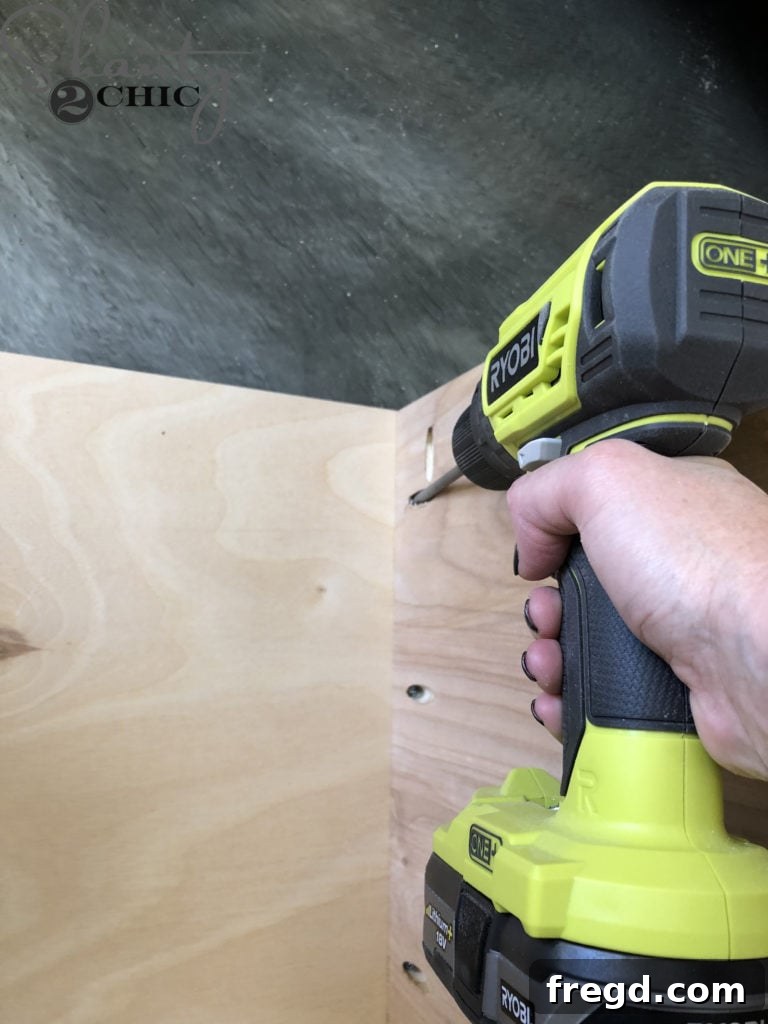
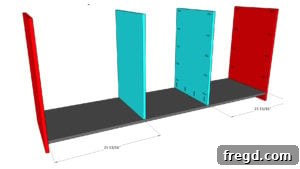
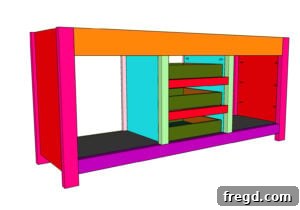
With the main cabinet perimeter established, it’s time to add the internal structure. Cut the middle cabinet divider pieces to their specified sizes. Similar to the initial steps, drill 3/4″ pocket holes along their front and bottom edges. These dividers are essential for creating separate compartments within the vanity, which will later house the drawers and open storage sections. Attach these middle pieces to the bottom of the cabinet using 1 1/4″ pocket hole screws and a strong bond of wood glue. Precise placement here is crucial for the functionality and aesthetics of the finished vanity.
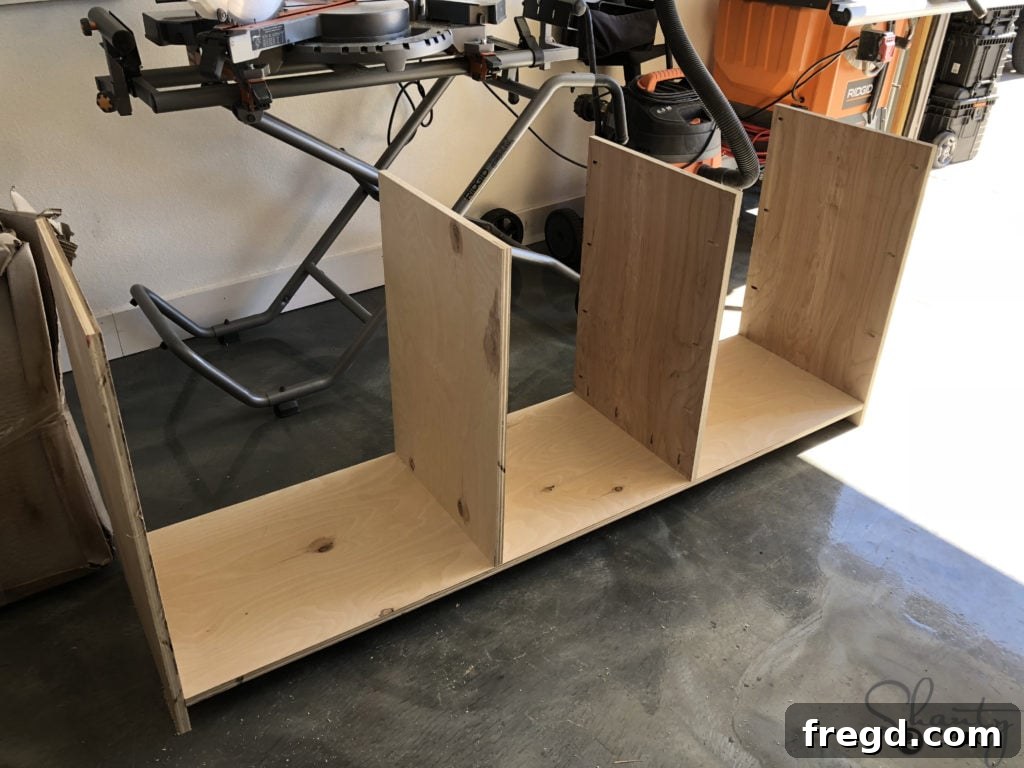
At this point, your cabinet base should now feature a series of distinct compartments created by the securely attached middle dividers, providing the framework for drawers and barn doors. This robust internal structure is vital for the vanity’s overall stability and storage capabilities.
Step 2 – Building the Aesthetic and Structural Face Frame
Securing Legs to Aprons for the Face Frame
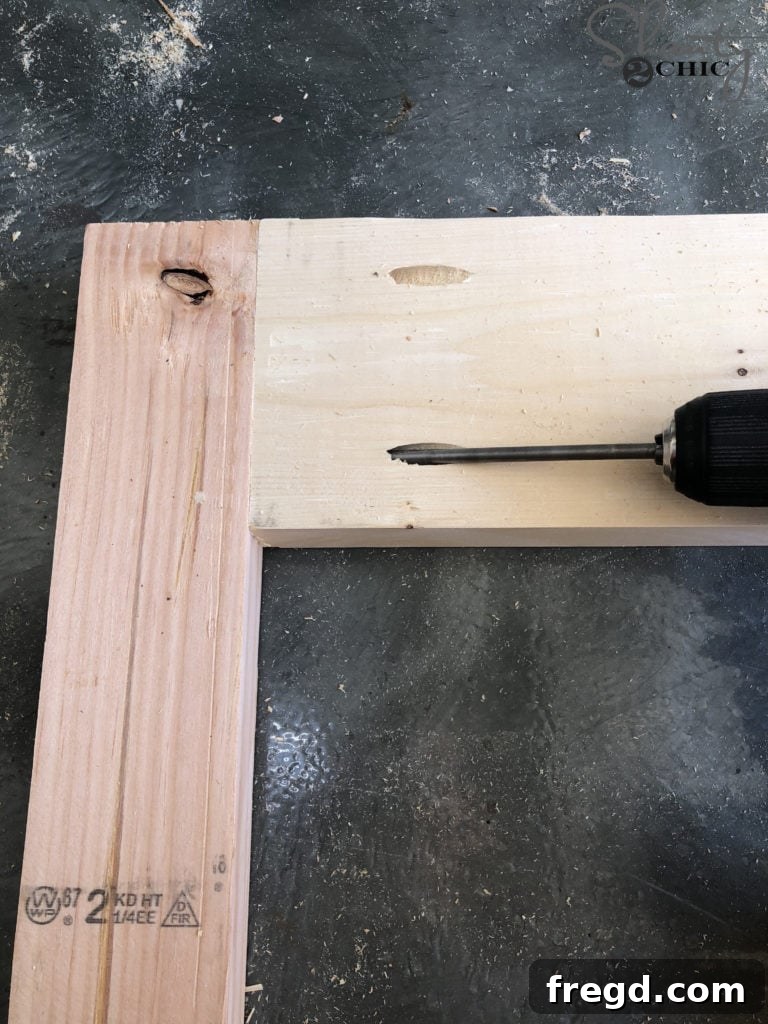
The face frame is a critical component that defines the vanity’s aesthetic and provides structural support for the drawers and doors. Begin by cutting the four legs and the front, top, and bottom apron pieces to their exact specified dimensions. For strong, lasting joints, drill 1 1/2″ pocket holes into both ends of each apron piece. Then, using 2 1/2″ pocket hole screws and a generous application of wood glue, attach the apron pieces to the legs. Ensure the top apron is perfectly flush with the top of the legs, and the bottom apron is securely attached 2 1/2″ from the very bottom of the legs. This precise placement is essential for the vanity’s final appearance and stability.
Integrating the Middle Face Frame Pieces
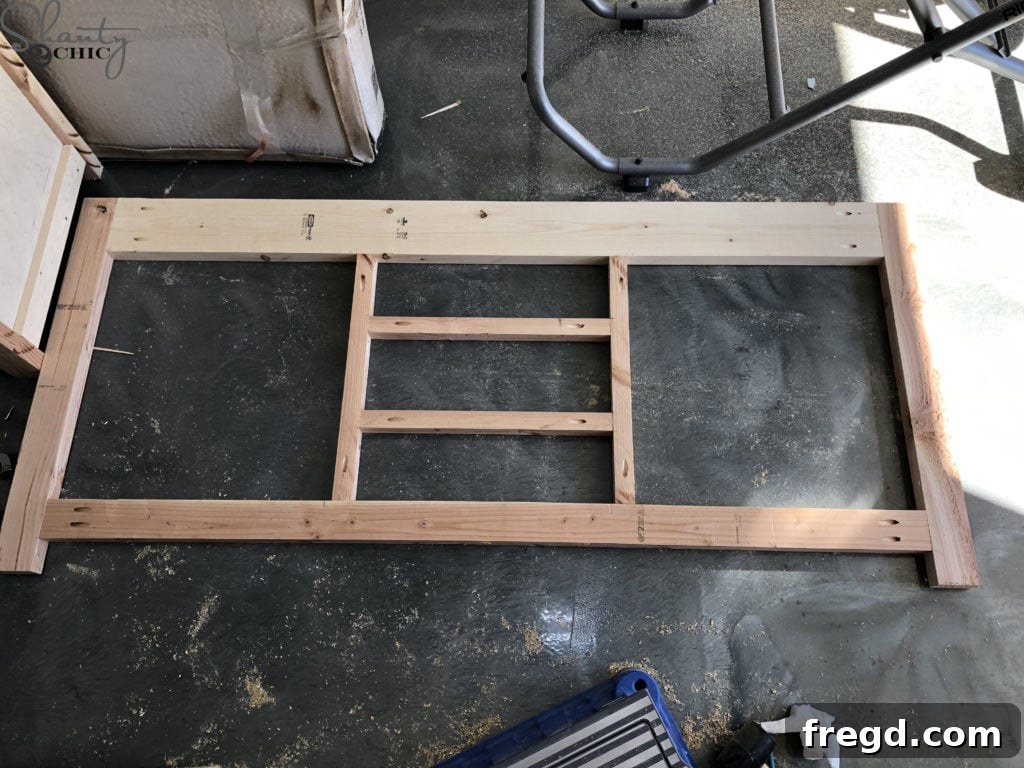
With the outer frame established, proceed to cut the middle face frame pieces to size. Drill 1 1/2″ pocket holes at both ends of these pieces. These internal dividers within the face frame will delineate the drawer openings. Carefully attach the vertical pieces to both the top and bottom aprons. Subsequently, attach the horizontal pieces to the vertical elements using 2 1/2″ pocket hole screws and wood glue. This meticulous assembly ensures a rigid and aesthetically pleasing face frame.
Attaching the Face Frame to the Cabinet
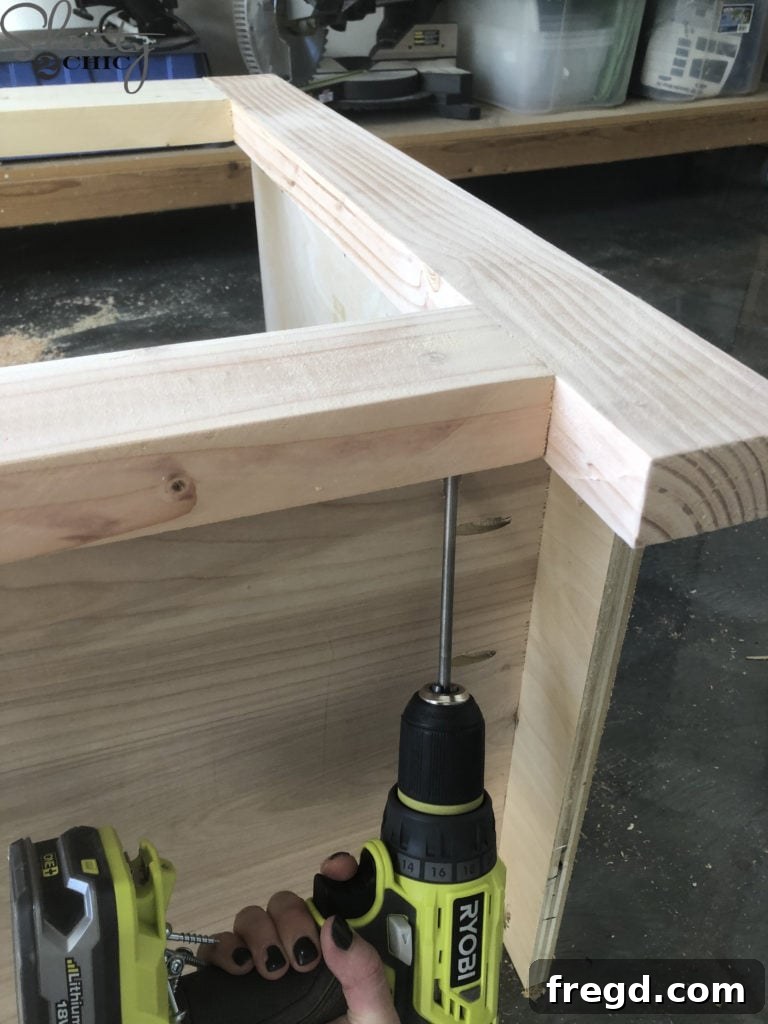
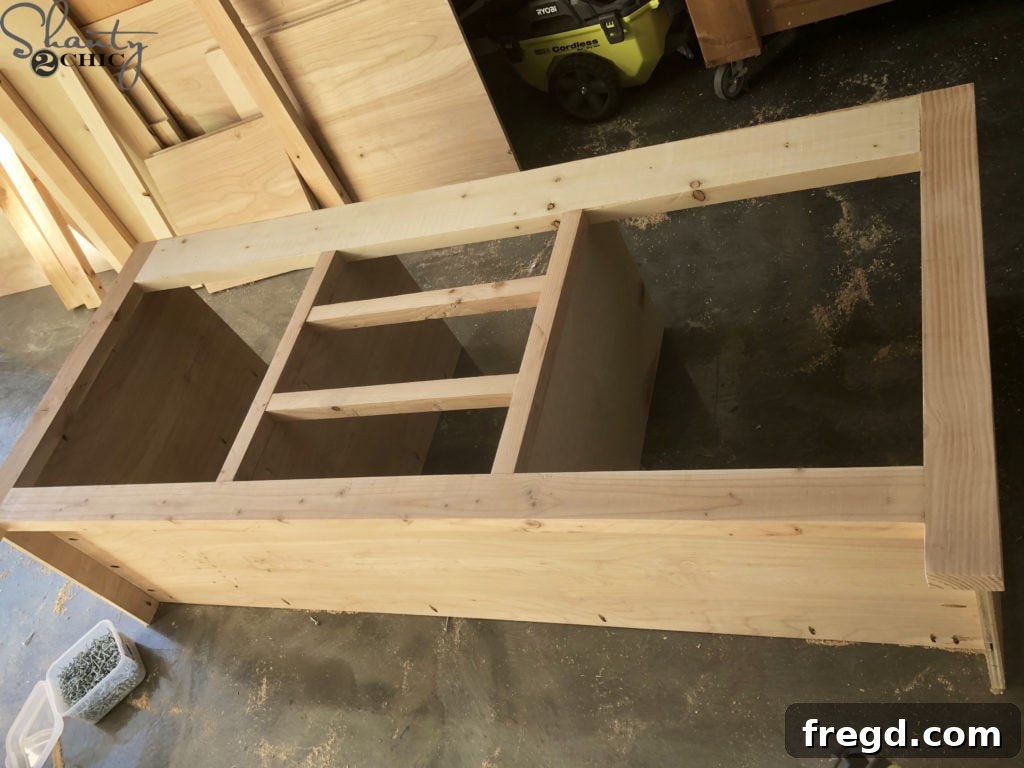
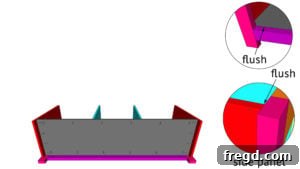
Once the entire face frame is completely assembled and sturdy, it’s time to integrate it with the cabinet body. This is a crucial step for the vanity’s overall structure and finished appearance. Align the face frame precisely with the front of the cabinet. Use 1 1/4″ pocket hole screws and wood glue to attach it securely from the inside of the cabinet – driving screws through the cabinet’s bottom, side, and middle panels directly into the back of the face frame. Pay close attention to the alignment: the cabinet bottom should be flush with the bottom apron of the face frame, and the side panels should be flush with the top of the legs while being inset by 3/4″. This careful alignment ensures a seamless transition and a professional, finished look for your DIY double-sink bathroom vanity.
Step 3 – Constructing the Back Frame for Enhanced Stability
Attaching Legs to Aprons for the Back Frame
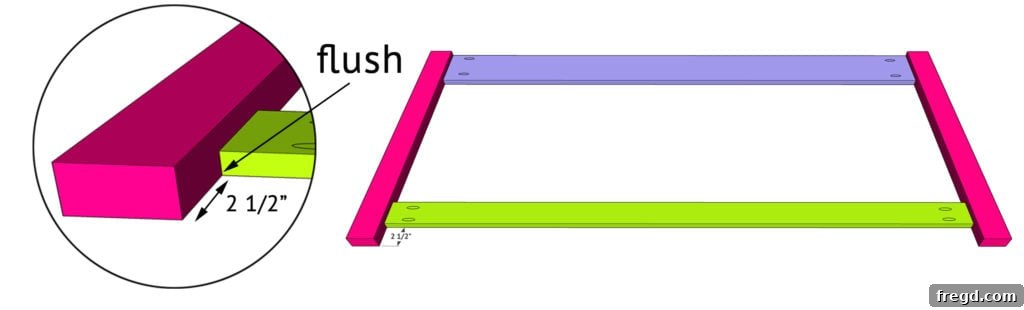
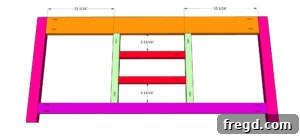
The back frame plays a vital role in reinforcing the vanity’s structure and providing a secure attachment point to the wall. Begin by cutting the back apron pieces to the specified size. Drill 3/4″ pocket holes into both ends of each apron piece. Attach these aprons to the two remaining legs using 1 1/4″ pocket hole screws and wood glue. Critical for alignment: the top apron should be flush with both the top and the front edges of the legs. Similarly, the bottom apron should be flush with the front of the legs and positioned 2 1/2″ from the bottom of the legs. This mirrored approach ensures structural integrity and visual consistency.
Adding Middle Frame Pieces to the Back Frame
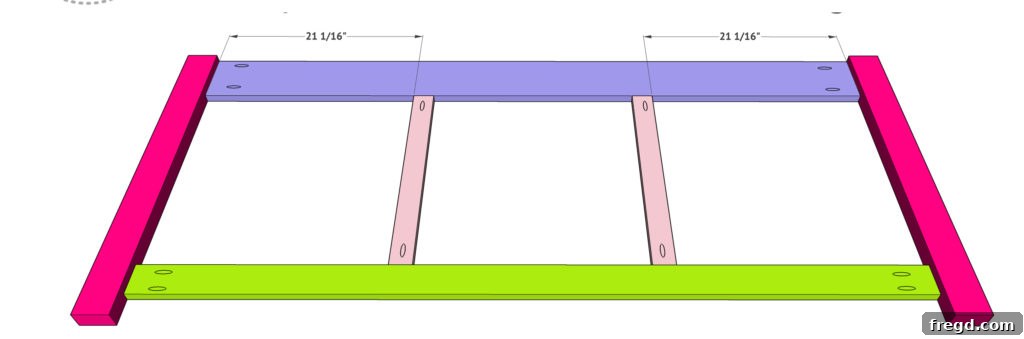
After the main back frame is assembled, cut the middle frame pieces to size. Drill 3/4″ pocket holes at both ends of these pieces. These central supports further enhance the back frame’s stability. Securely attach them to the top and bottom apron pieces using 1 1/4″ pocket hole screws and wood glue. This completed back frame is now ready to be integrated with the main cabinet body.
Attaching the Back Frame to the Vanity Cabinet
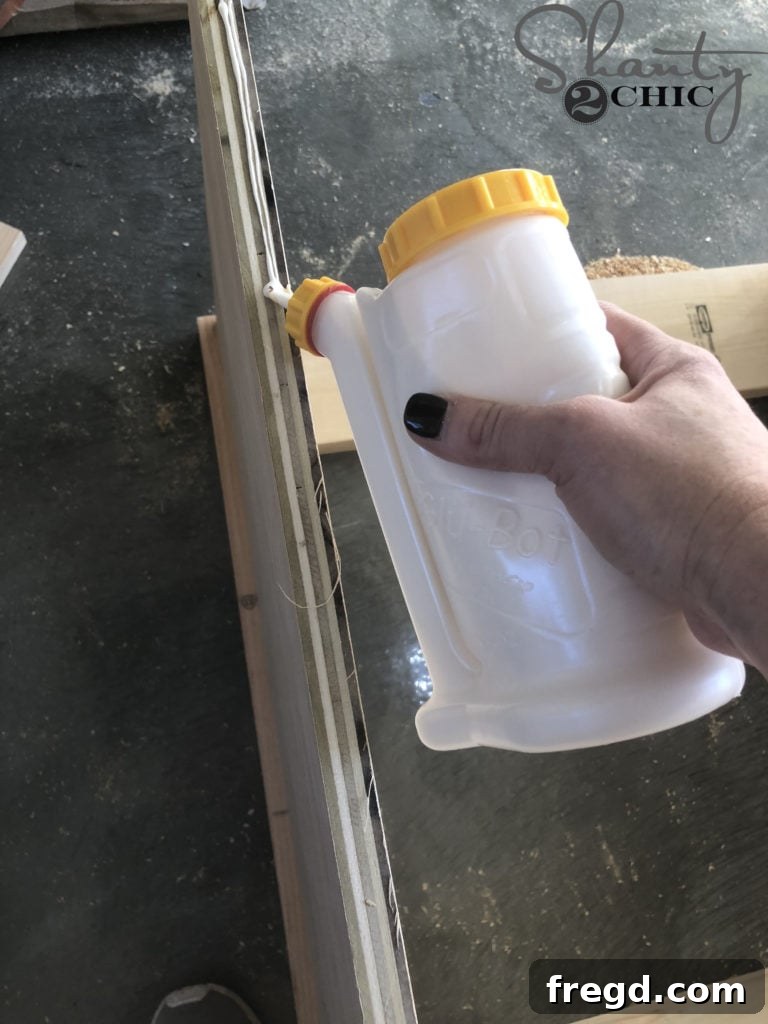
With the back frame fully constructed, it’s time to marry it with the main cabinet structure. Before attaching, apply a generous and even layer of wood glue to all contact points. This adhesive is crucial for creating a bond that is stronger than wood itself. Then, carefully align the back frame with the rear of the cabinet. Secure it using 1 1/4″ pocket hole screws, driven from the cabinet’s bottom, side, and middle panels into the back frame. This method creates a concealed and incredibly strong connection.
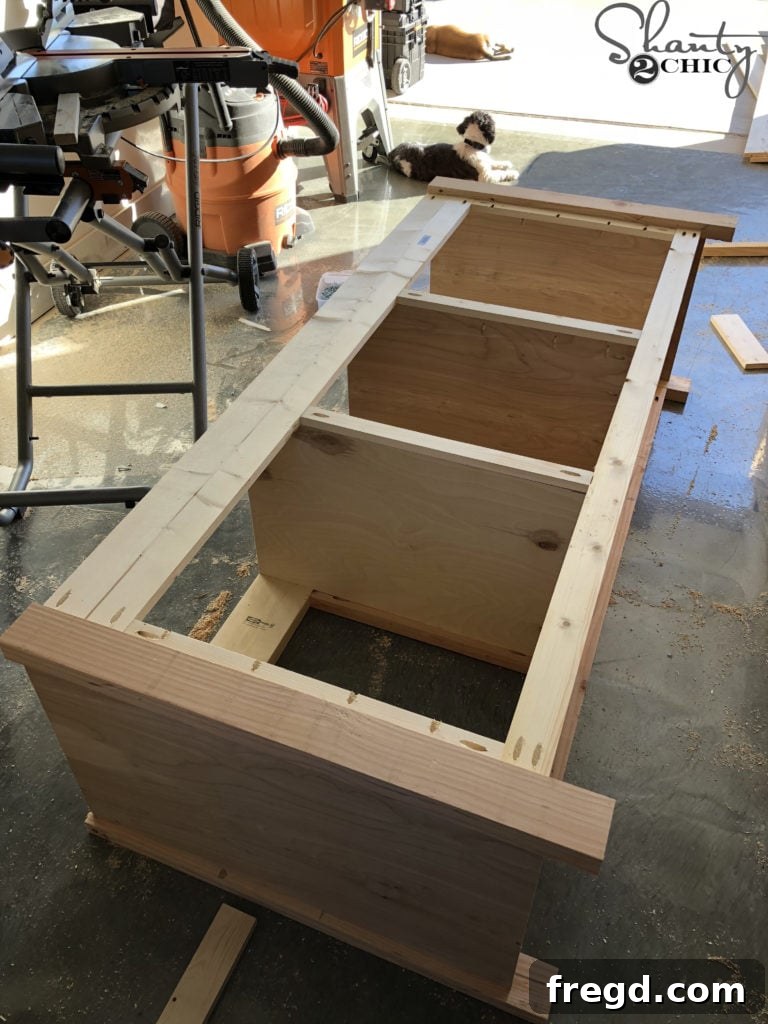
Ensure that the bottom apron of the back frame is flush with both the front of the legs and the cabinet bottom, while the top apron aligns perfectly with the top and front of the legs. This precise alignment ensures a square, stable, and ready-to-finish vanity structure.
Step 4 – Constructing and Assembling the Functional Vanity Drawers
Attaching the Drawer Sides to the Drawer Bottoms
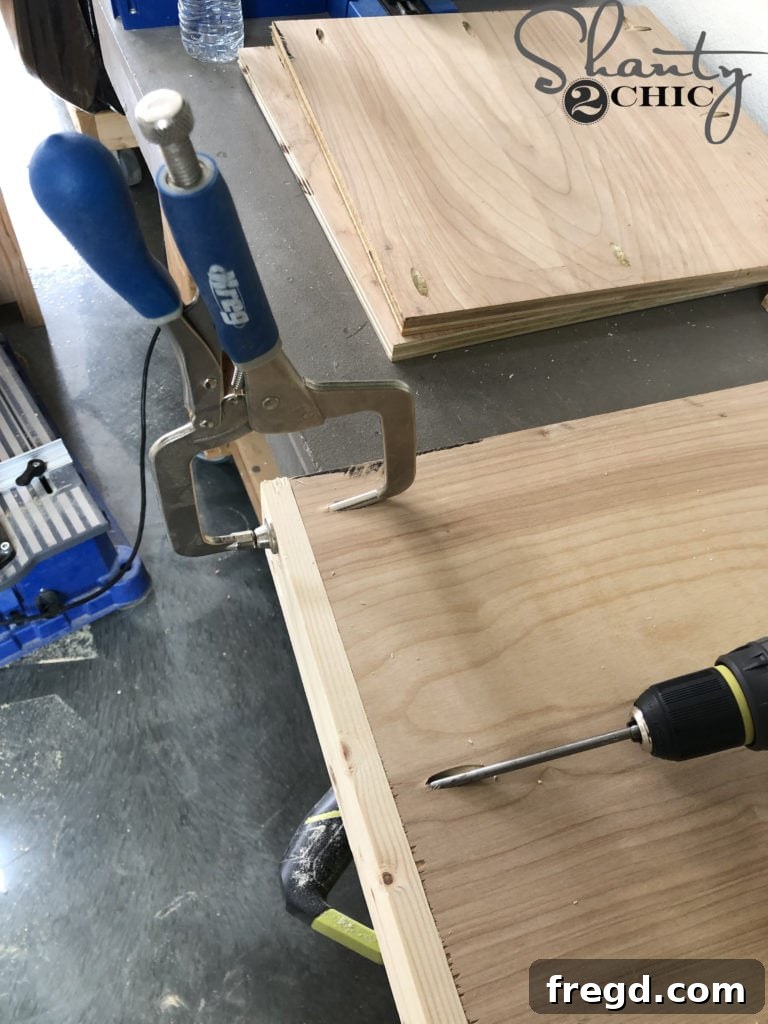
Drawers are essential for maximizing storage in your DIY bathroom vanity. Start by cutting the drawer bottoms and side pieces to their precise measurements. Drill 3/4″ pocket holes around the perimeter edges of the bottom pieces and 3/4″ holes at both ends of the side pieces. Apply wood glue to the edges and attach the side pieces to the drawer bottom using 1 1/4″ pocket hole screws. To ensure perfectly square and tight joints during assembly, I highly recommend using a Kreg Right Angle Clamp – it’s an invaluable tool for this step.
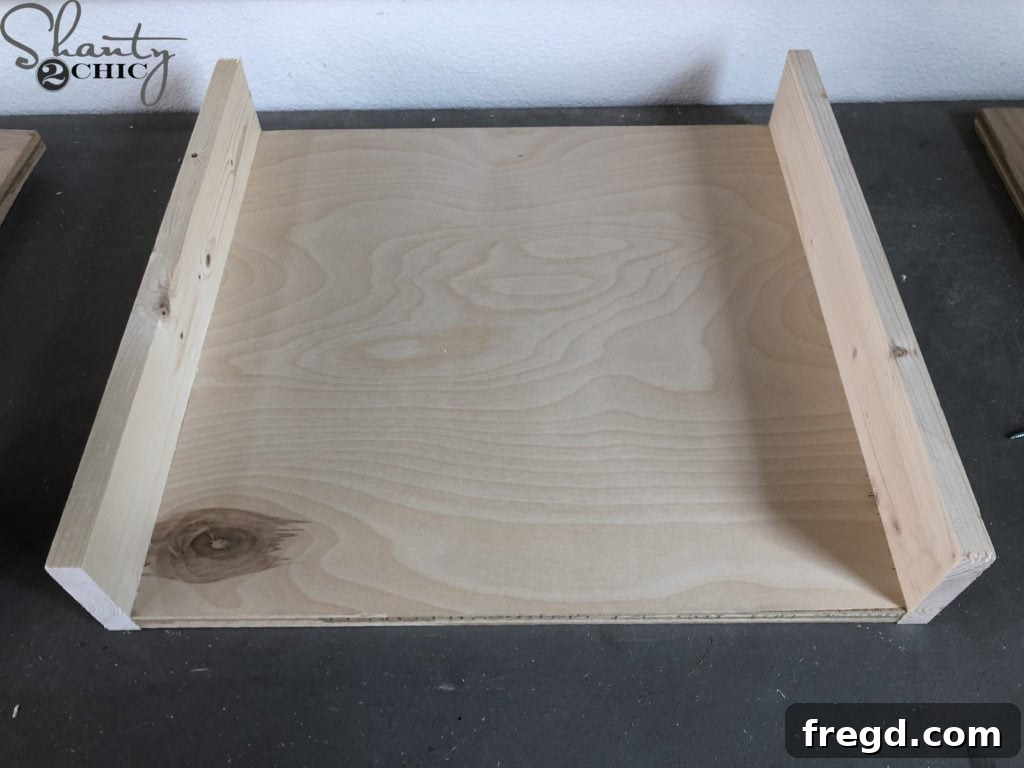
At this stage, your drawer assembly should clearly resemble an open-top box, with the sides securely fastened to the bottom piece, creating a sturdy foundation for the full drawer unit.
Attaching the Front and Back to the Drawer Box
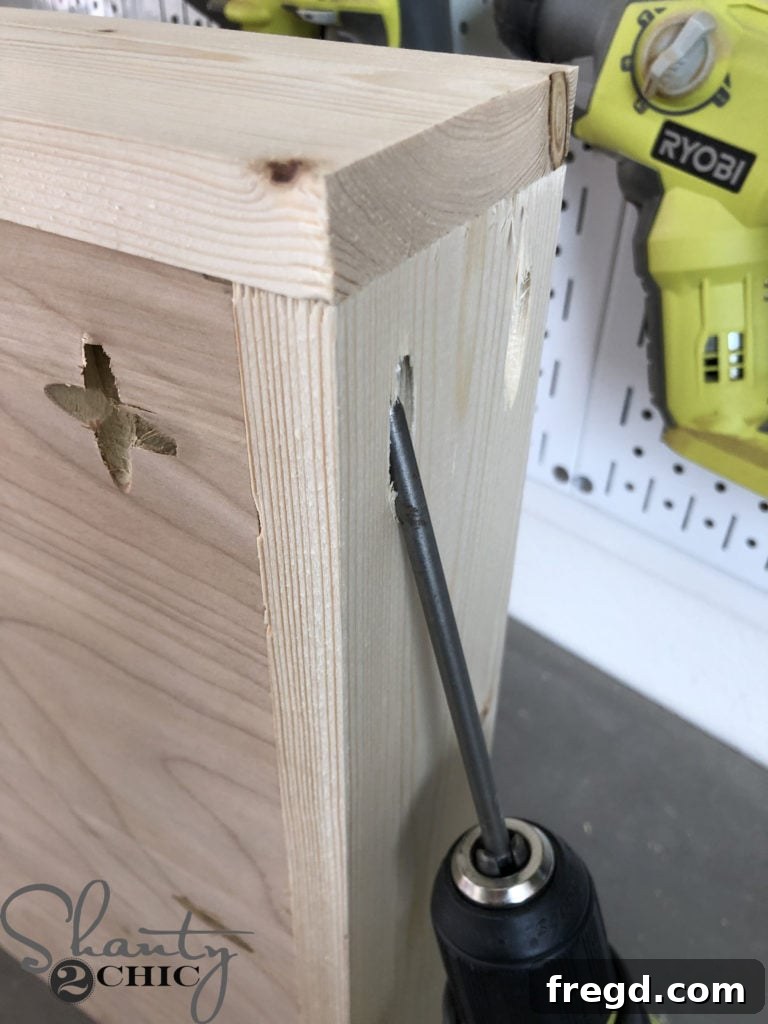
To finalize the drawer box, cut the front and back pieces to their exact dimensions. Apply wood glue to the joining edges and attach these pieces to the previously assembled bottom and side pieces using 1 1/4″ pocket hole screws. This completes the essential drawer box structure.
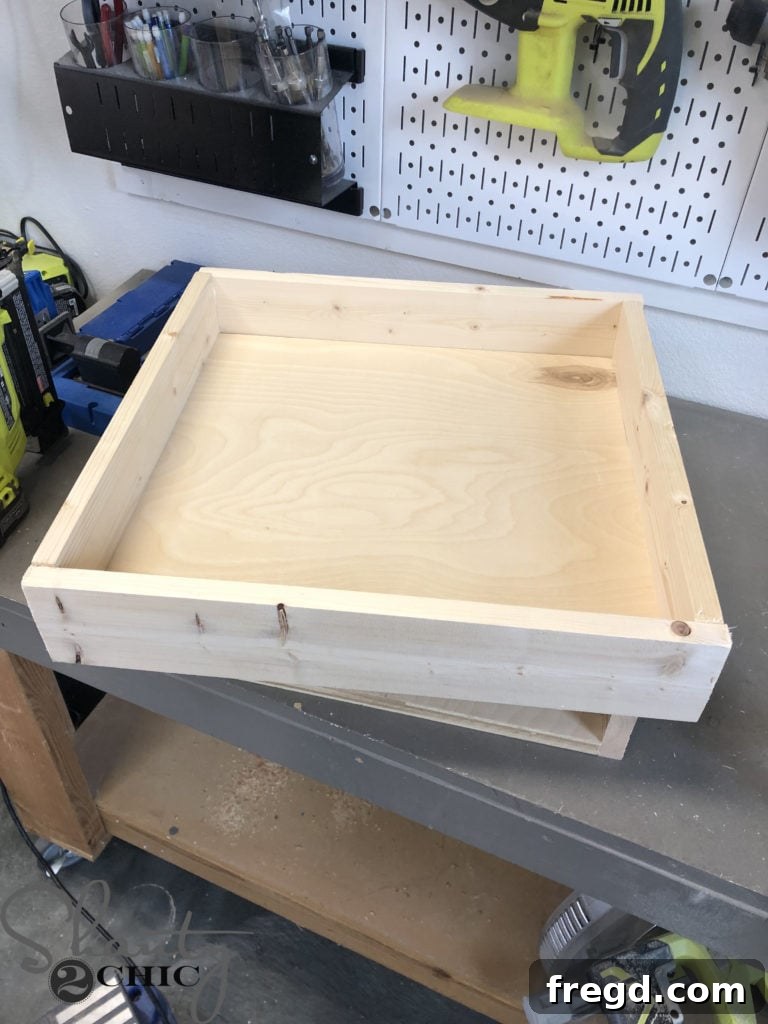
With all four sides and the bottom securely connected, your drawer is now fully assembled. Repeat this process to build all three drawers required for the vanity, ensuring each one is square and sturdy.
Installing the Drawers with Precision Drawer Slides
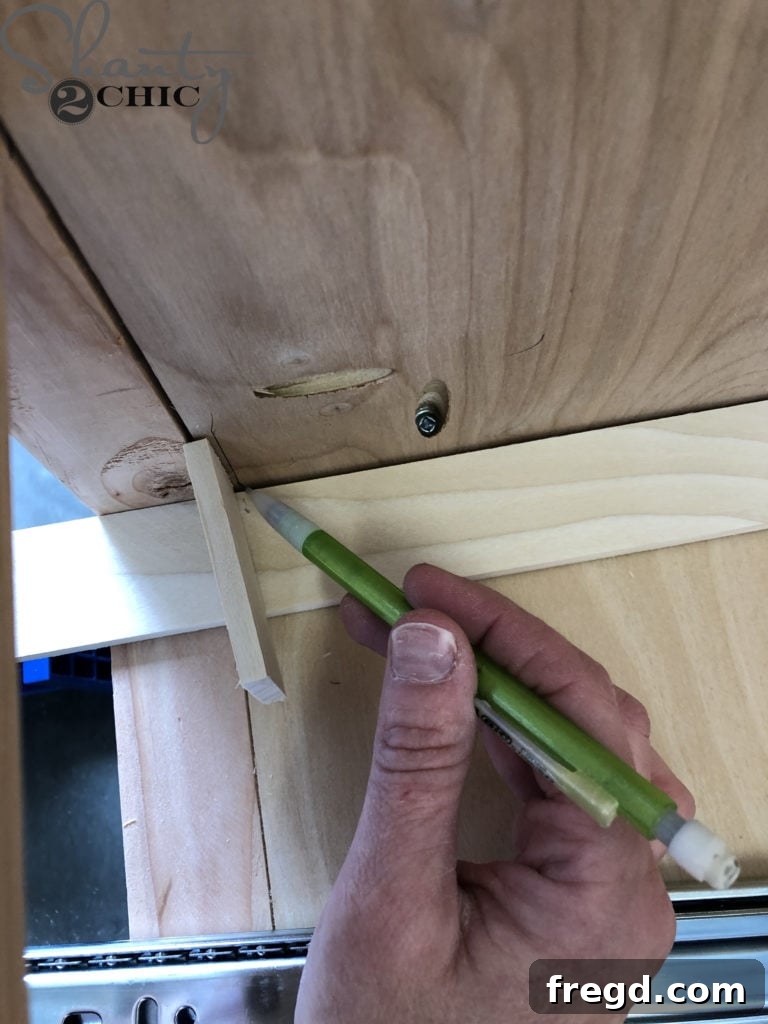
Proper drawer installation is key to functionality. First, use a spacer to accurately mark the desired position for the front of your drawers on the inside of the cabinet. (Note: I initially did this before purchasing my drawer pulls. If your pulls have a specific projection, ensure your spacer thickness accounts for the drawer face and the pull’s extension for optimal fit.)
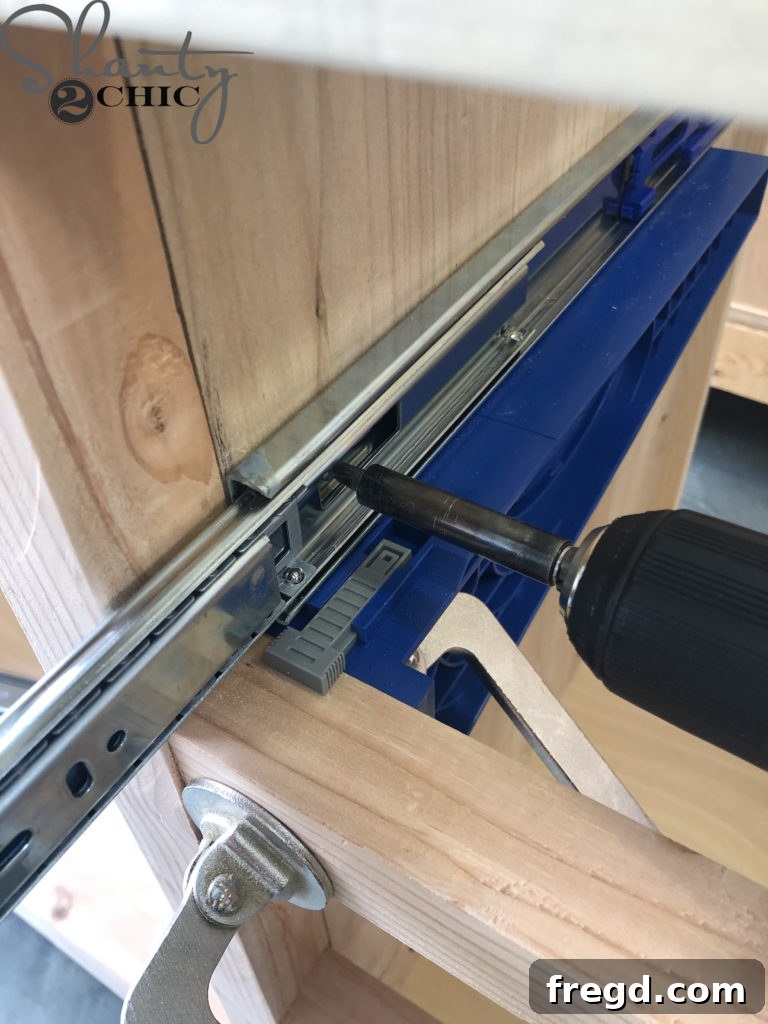
For flawless drawer slide installation, the Kreg Drawer Slide Jig is an absolute game-changer, making the process incredibly easy and foolproof. Once you’ve marked your drawer front position, use a Kreg Face Clamp to hold the drawer slide jig firmly in place. Attach the drawer slide to the cabinet interior with one screw at the front. Use a level to confirm perfect horizontal alignment, then add a second screw at the back for stability. This method ensures smooth operation for your DIY double-sink vanity drawers.
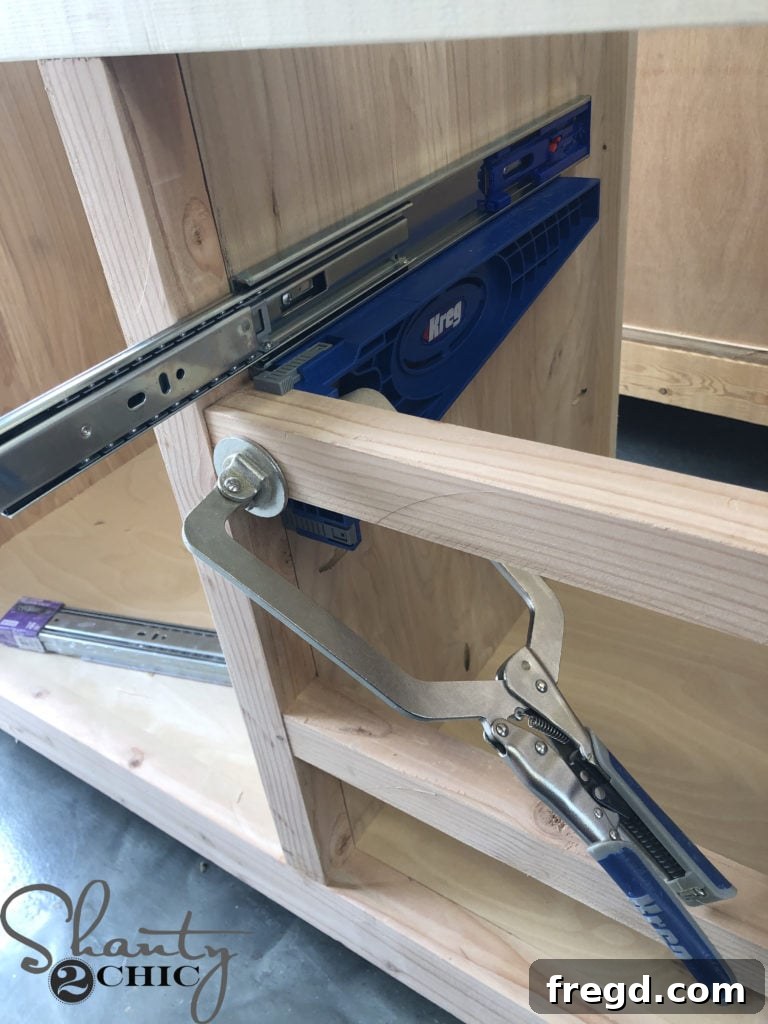
After successfully attaching the drawer slide on one side, repeat the identical steps for the corresponding slide on the opposite side of the cabinet, ensuring symmetry and proper function.
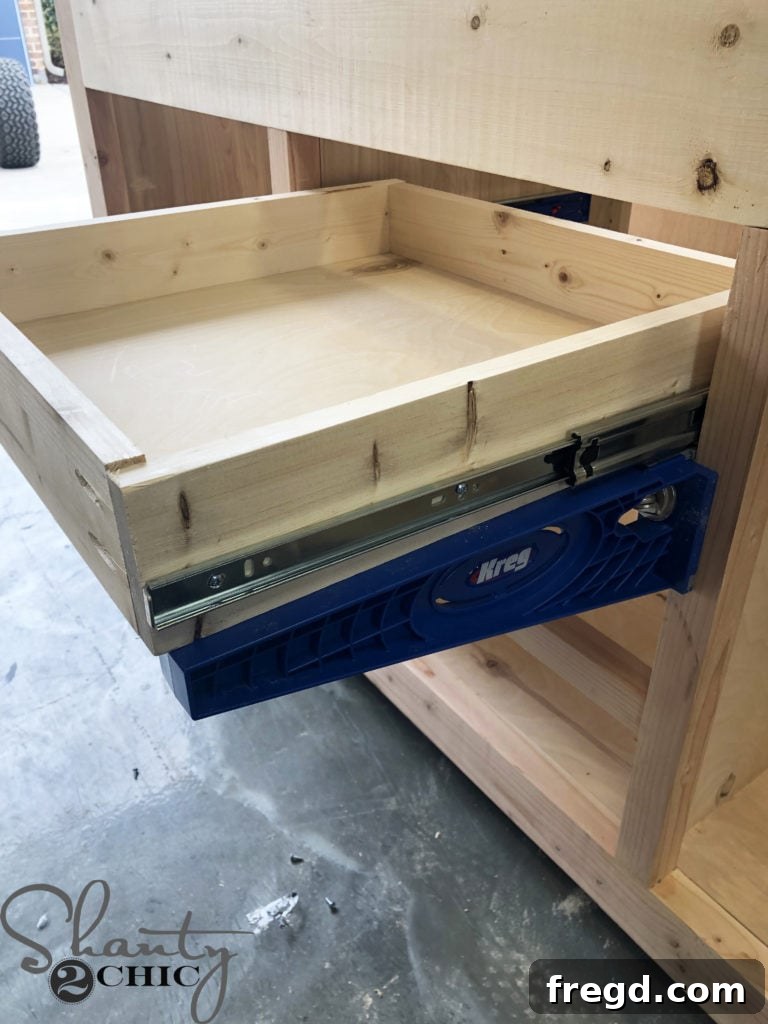
Once both slides are securely mounted inside the cabinet, flip the Kreg Drawer Slide Jig and attach it to the face frame using the Kreg Face Clamp. Rest the assembled drawer on top of the jig, extend the slides, and screw them firmly into the sides of the drawer. Repeat this process for the remaining two drawers, ensuring each is perfectly aligned and slides effortlessly.
Attaching the Decorative Drawer Faces
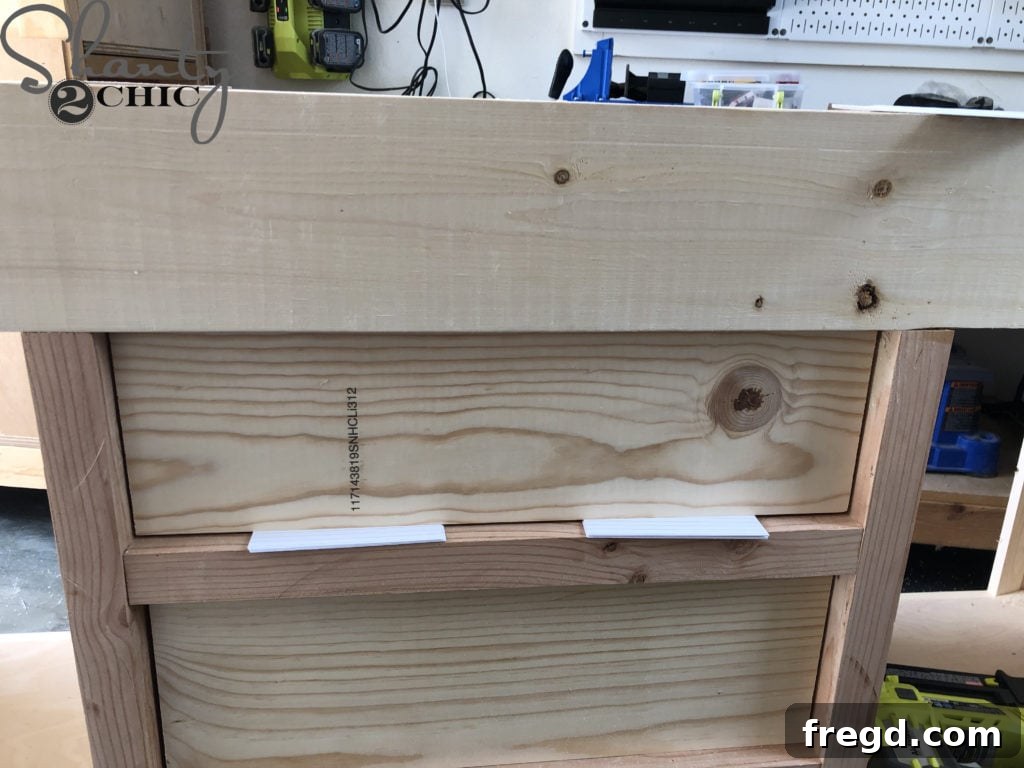
The drawer faces are key to the vanity’s finished look. Cut the drawer faces to their specified dimensions. To achieve perfectly consistent and aesthetically pleasing gaps around the perimeter of each drawer face, use index cards as spacers. This simple trick ensures uniform spacing, a hallmark of high-quality cabinetry.
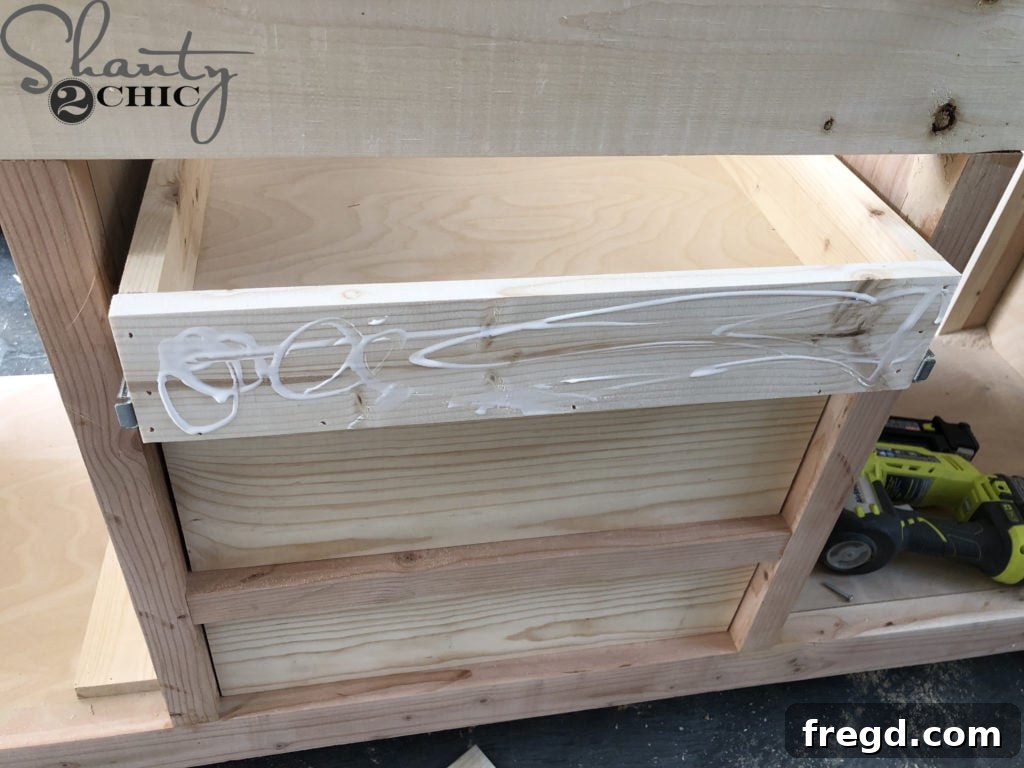
Apply wood glue to the front of the drawer box, then carefully position the drawer face, ensuring the index card spacers maintain the desired gaps. Secure the drawer faces to the front of the drawers using 1 1/4″ brad nails. For a pristine, hole-free exterior, aim the brad nails from the inside of the drawer, shooting them through the drawer box and into the back of the drawer face. This technique conceals all fasteners.
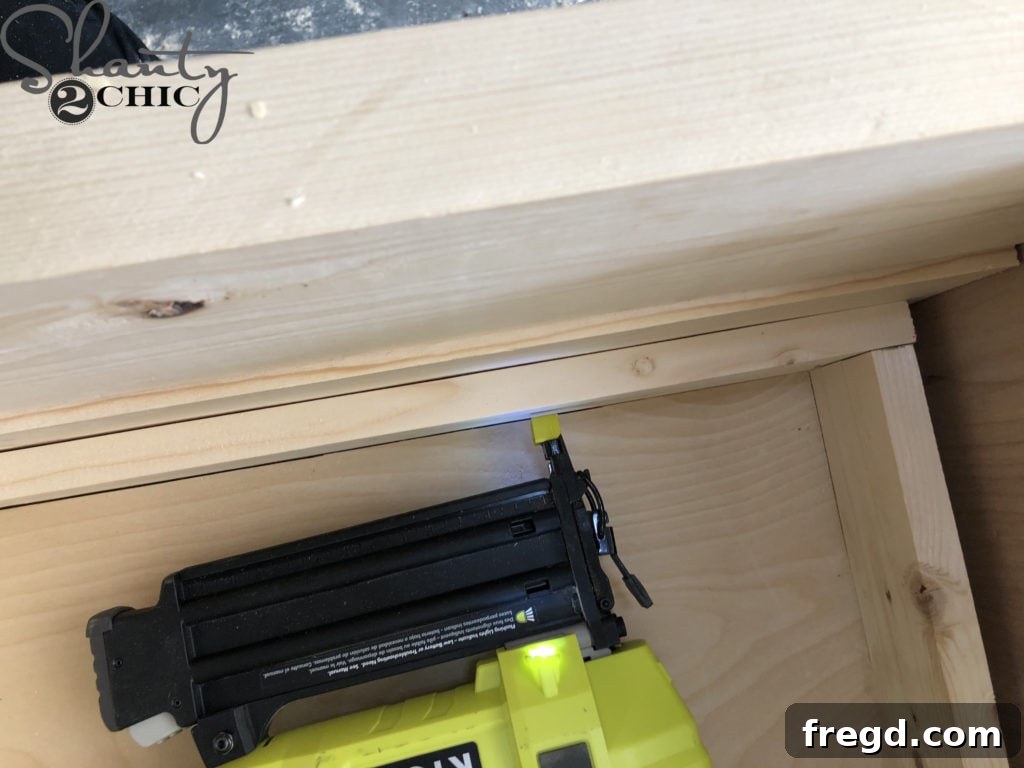
To ensure a flawless exterior free from visible nail holes, a clever technique is to shoot the 1 1/4″ brad nails from the inside of the drawer, driving them through the drawer box and into the back of the drawer face. This method secures the face firmly while keeping the front surface perfectly smooth. You can find our favorite Brad Nailer here for precise and efficient fastening.
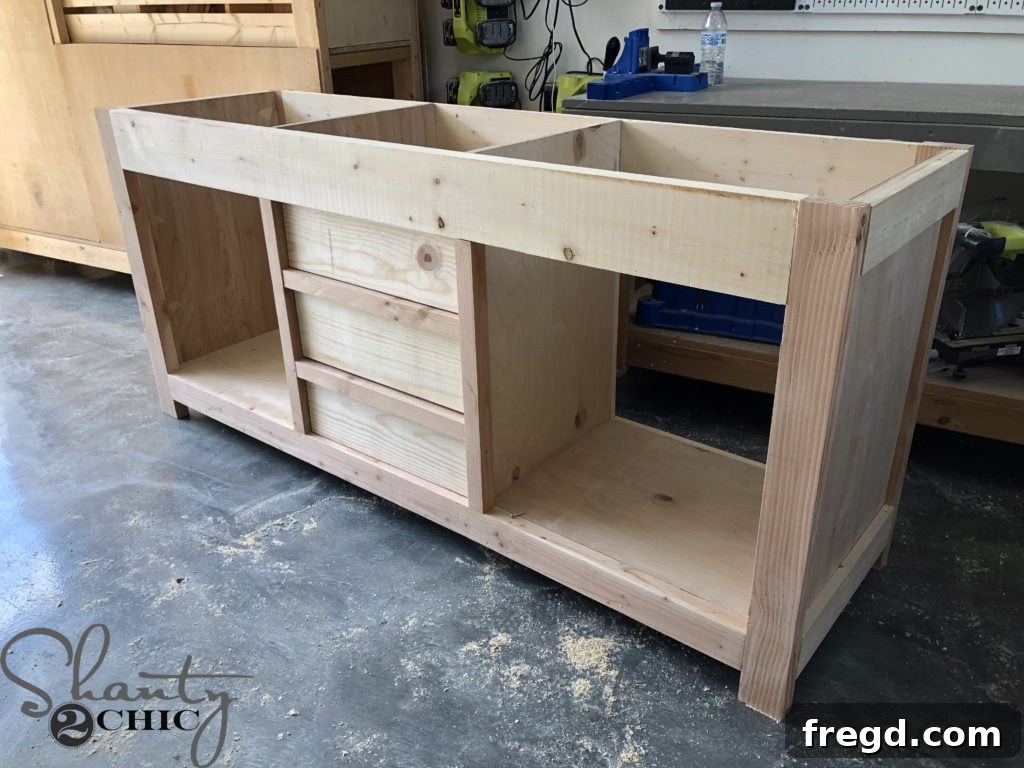
With the drawer faces meticulously attached, your DIY bathroom vanity is now truly taking on its custom, refined appearance. The consistent gaps and clean surfaces are a testament to careful craftsmanship.
Step 5 – Adding Decorative Side Panel Trim to the Vanity
Attaching the Trim to the Side Panels
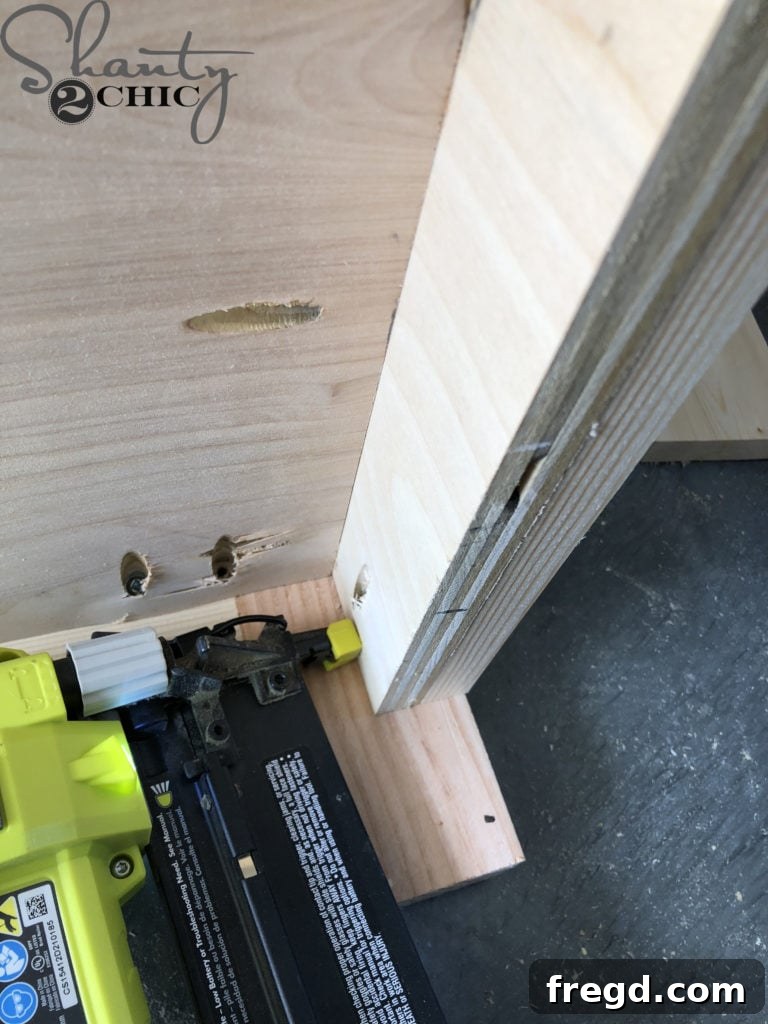
Adding side panel trim is a small detail that makes a big impact, elevating the vanity from a simple box to a piece of custom furniture. Cut the side trim pieces to their precise lengths. Apply wood glue to the back of the trim pieces for a permanent bond. Then, attach them to the sides of the vanity using 1 1/4″ brad nails. For a clean finish, drive the nails from the inside of the cabinet, through the cabinet side, and into the back of the side panel trim. Ensure that the top and bottom edges of the side trim pieces are perfectly flush with the top and bottom of the vanity, creating a seamless and polished appearance.
Step 6 – Constructing the Charming Barn Doors for the Vanity
Attaching the Front Trim for a Distinctive Look
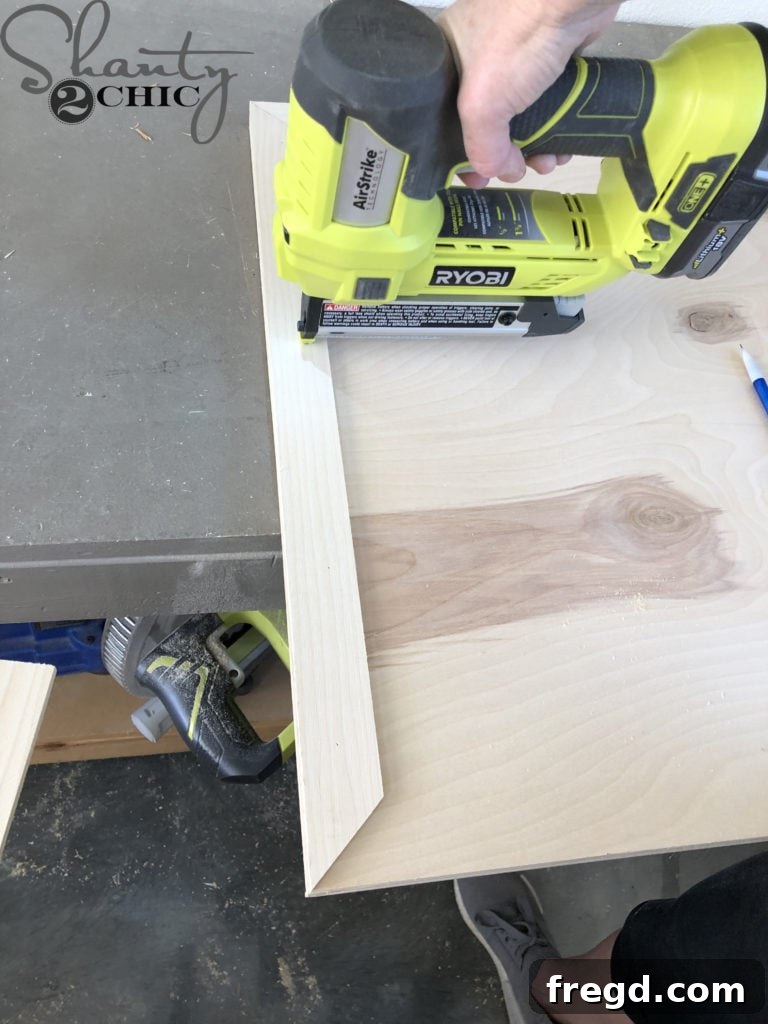
The sliding barn doors are a defining feature of this DIY bathroom vanity, lending it a unique modern farmhouse character. Start by cutting the main door panels to size. Next, measure and cut the front trim pieces. For professional-looking mitered corners, cut a 45° angle off the end of your first trim piece, then mark and cut the opposite end at a matching 45° angle. Use this completed piece as a template for the opposite side piece, ensuring they are identical in measurement. Secure these two trim pieces to the door panel using 3/4″ pin nails and wood glue. The pin nailer is ideal here for its minimal impact on the wood surface.
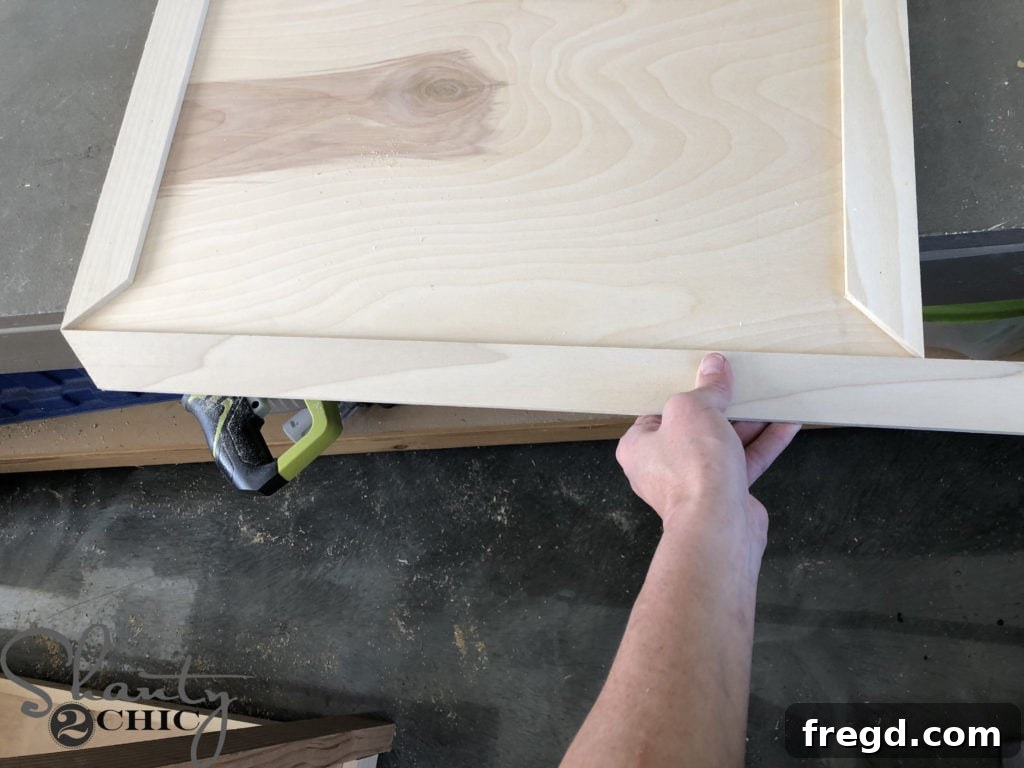
For the remaining two trim pieces that complete the rectangular frame, cut a 45° angle off one end. Position the piece upside down against the door panel, aligning it perfectly with the previously installed trim, and mark for the second 45° cut. Cut the last trim piece in the same manner. Attach both with 3/4″ pin nails and wood glue, ensuring all mitered corners meet seamlessly.
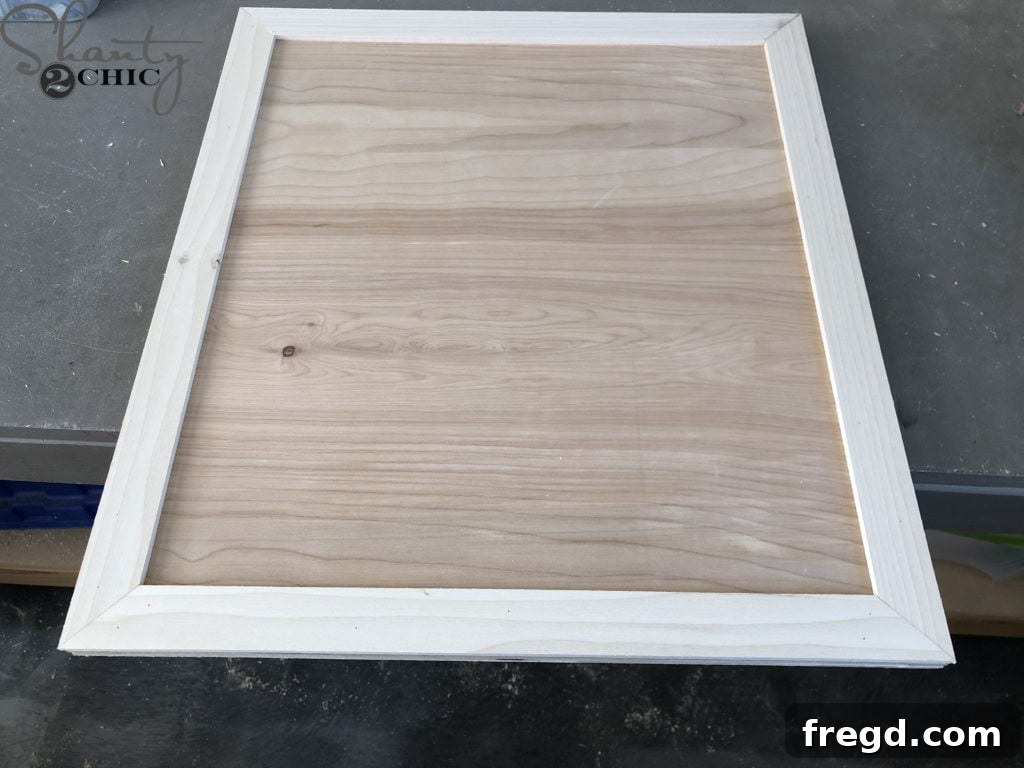
With the front trim meticulously attached, the door begins to resemble a classic barn door, showcasing the careful craftsmanship that defines its unique character.
Attaching the Decorative Trim for Rustic Charm
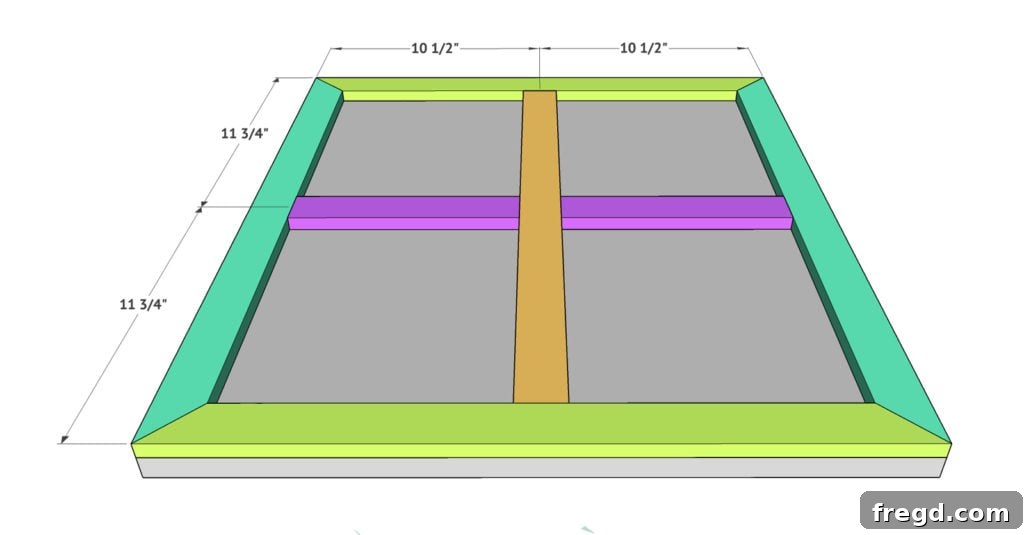
To truly capture the modern farmhouse aesthetic, add the decorative trim elements (often forming an X-brace or similar pattern) to the barn doors. Cut these decorative door trim pieces to their specific sizes. Begin by centering the vertical piece on the door panel and attaching it securely with 3/4″ pin nails and wood glue. Subsequently, center and attach the two horizontal pieces in the same manner, creating a symmetrical and visually appealing design. This step truly brings the barn door aesthetic to life.
Attaching the Side Door Trim for a Finished Edge
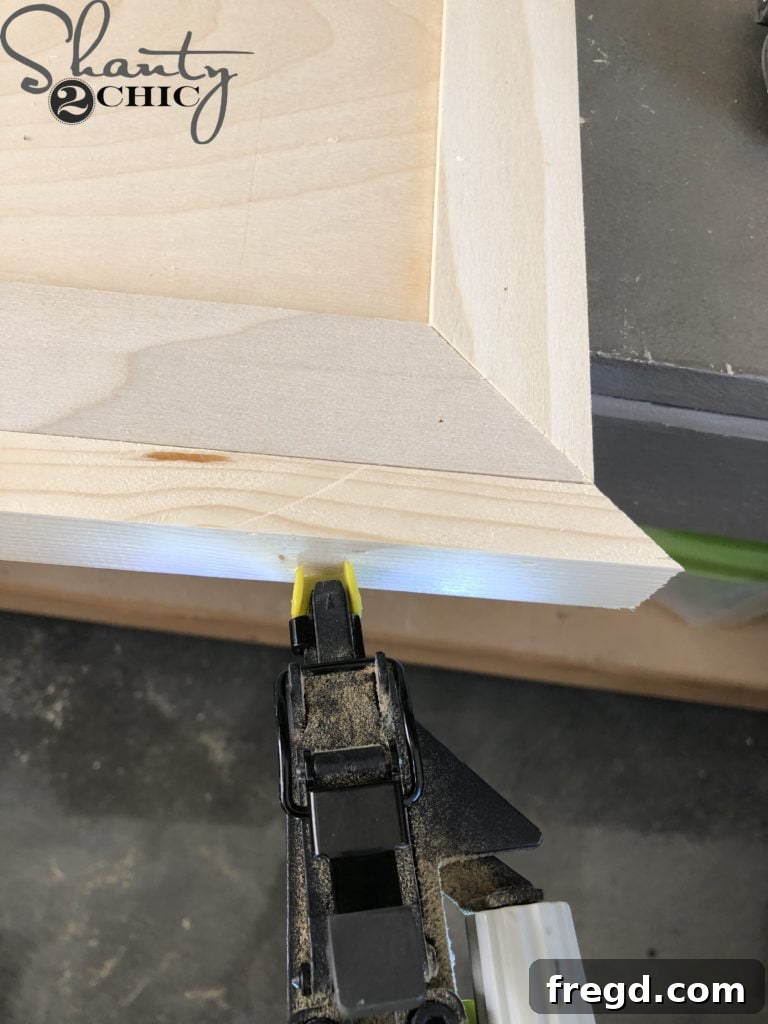
To provide a clean, finished edge to the barn doors, it’s time to add the side door trim. Cut one end of the trim piece at a 45° bevel. Hold it up against the door panel, aligning it perfectly, and mark for the corresponding 45° cut on the other end. Attach this trim piece to the side of the door using 1 1/4″ brad nails and wood glue. This ensures a tight fit and a polished look.
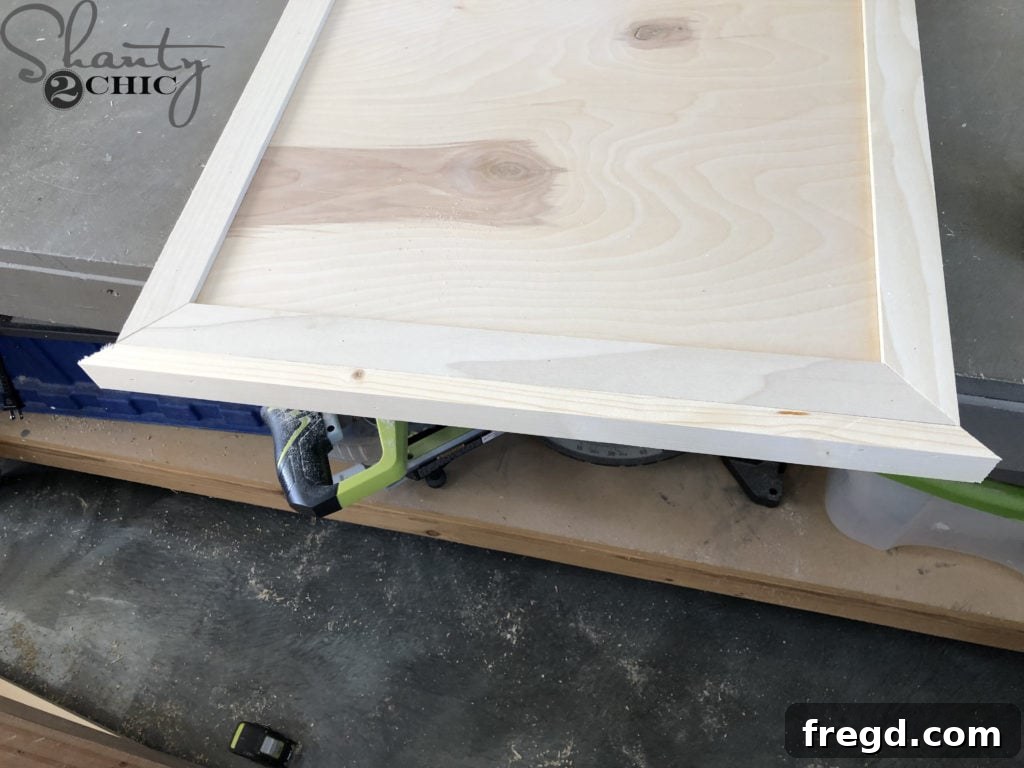
Repeat the same steps for the remaining three sides of the door, ensuring all corners meet cleanly. Once complete, you will have one fully assembled barn door. Now, repeat the entire process to construct the second door, as this DIY double-sink vanity requires two matching sliding barn doors.
Step 7 – Applying a Flawless Finish to Your Bathroom Vanity
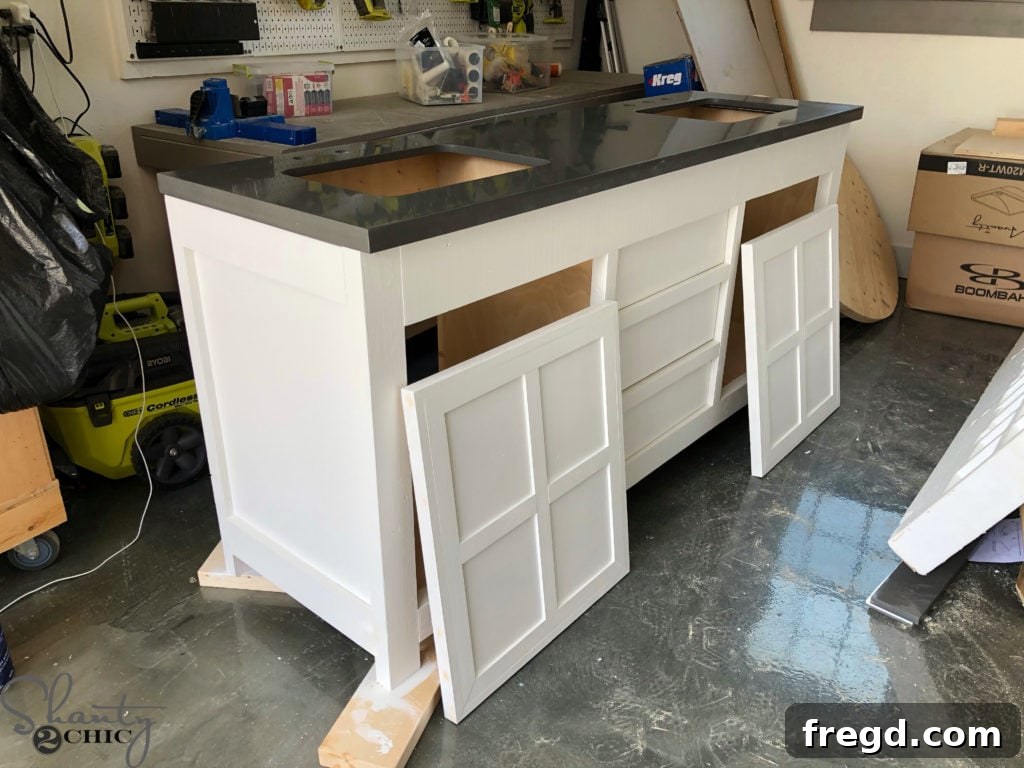
With the construction complete, it’s time for the crucial finishing stage that transforms raw wood into a beautiful, durable piece of furniture. Thoroughly sand the entire vanity, ensuring all surfaces are smooth and free of imperfections. Pay extra attention to any rough spots or glue residue. Once sanded, fill all visible nail holes and any minor gaps with a high-quality wood filler. Allow the filler to dry completely, then sand it flush for an invisible repair. This meticulous preparation is vital for a professional-looking paint or stain application.
At this point, I couldn’t resist test-fitting the countertop! It’s always exciting to see the vanity begin to take its final form. If your design includes a back panel for the vanity, this is the ideal time to attach it. However, I opted to leave the back open, which significantly simplifies plumbing installation and future access to the sink pipes. Once your chosen finish – be it paint or stain – is applied and fully cured, your vanity will be ready for the countertop, sinks, faucets, and hardware installation.
Step 8 – Seamlessly Installing the Sinks onto Your Bathroom Vanity
Prepping the Vanity Sinks and Countertop
While you could certainly create a custom planked wood countertop with a robust protective finish, or even a concrete pour, for this project, I opted for a DIY-friendly quartz countertop. It proved to be not only stunningly beautiful but also incredibly easy to install, significantly less expensive, and far less hassle than hiring a professional countertop company.
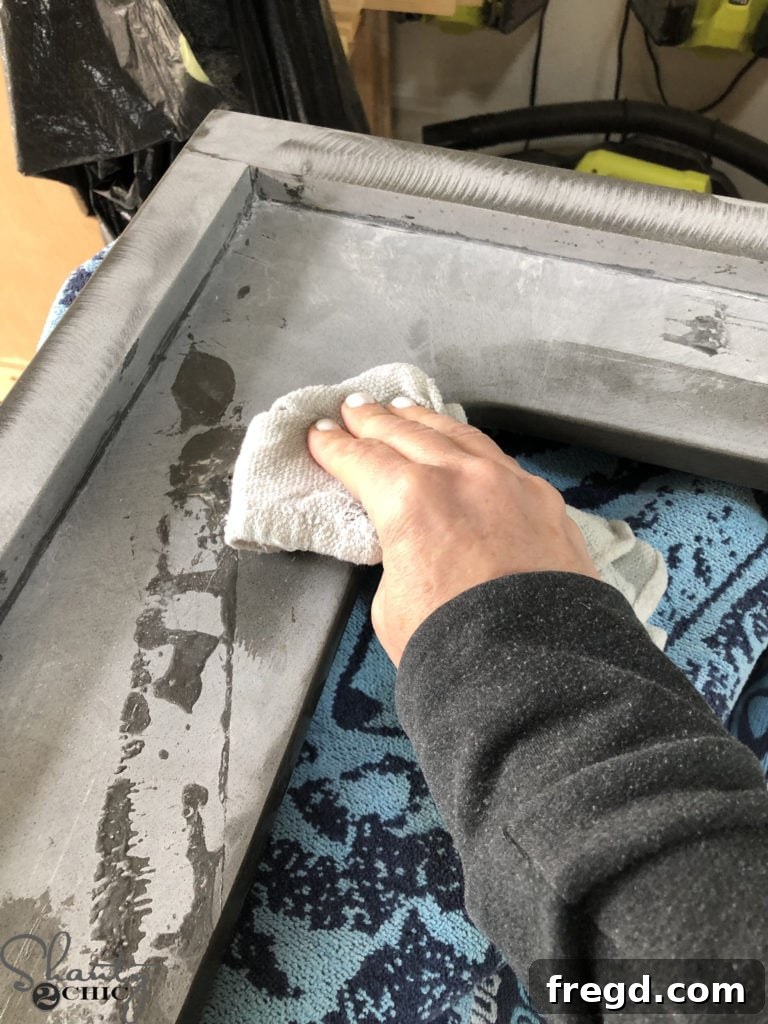
The first step in installing your sinks is to prepare the countertop. Carefully flip the countertop upside down (I assembled it directly on top of the vanity, using several beach towels underneath to protect the quartz surface). Wipe down the areas where the sinks will be attached with a damp cloth to ensure they are free of dust and debris, which could compromise the seal. The quartz countertop I chose for this DIY double-sink vanity is available here.
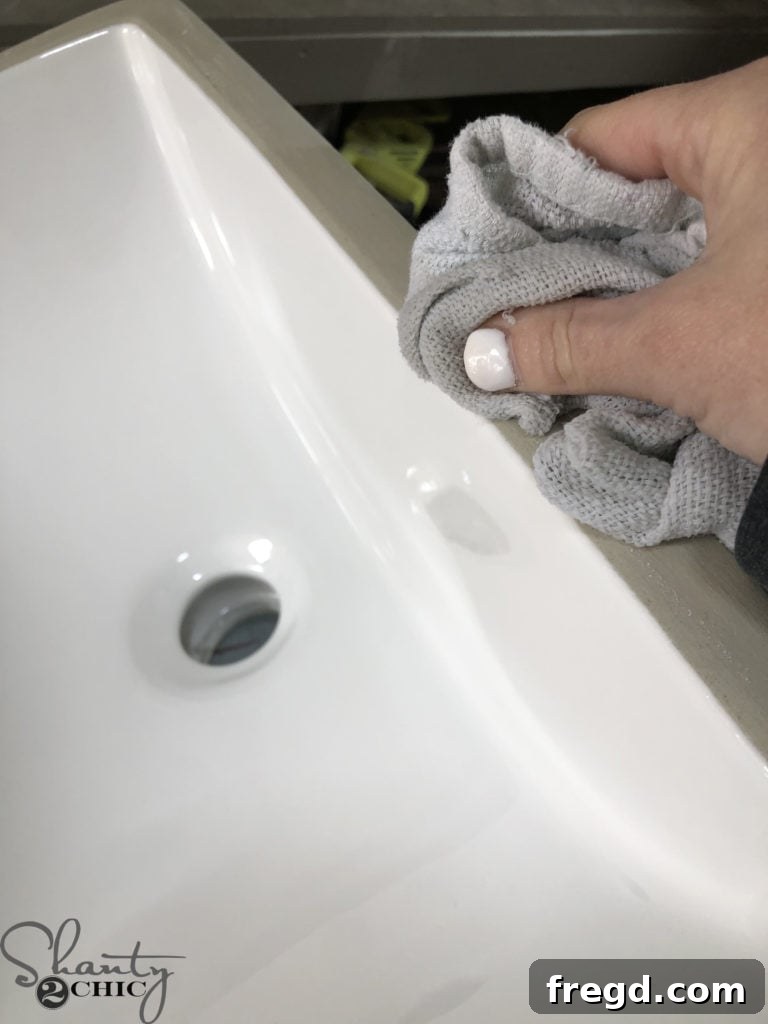
Perform the same cleaning process for the outer rim of the sink basin that will make contact with the countertop. A clean surface on both the sink and the countertop is essential for creating a strong, watertight seal.
Gluing the Vanity Countertop in Place
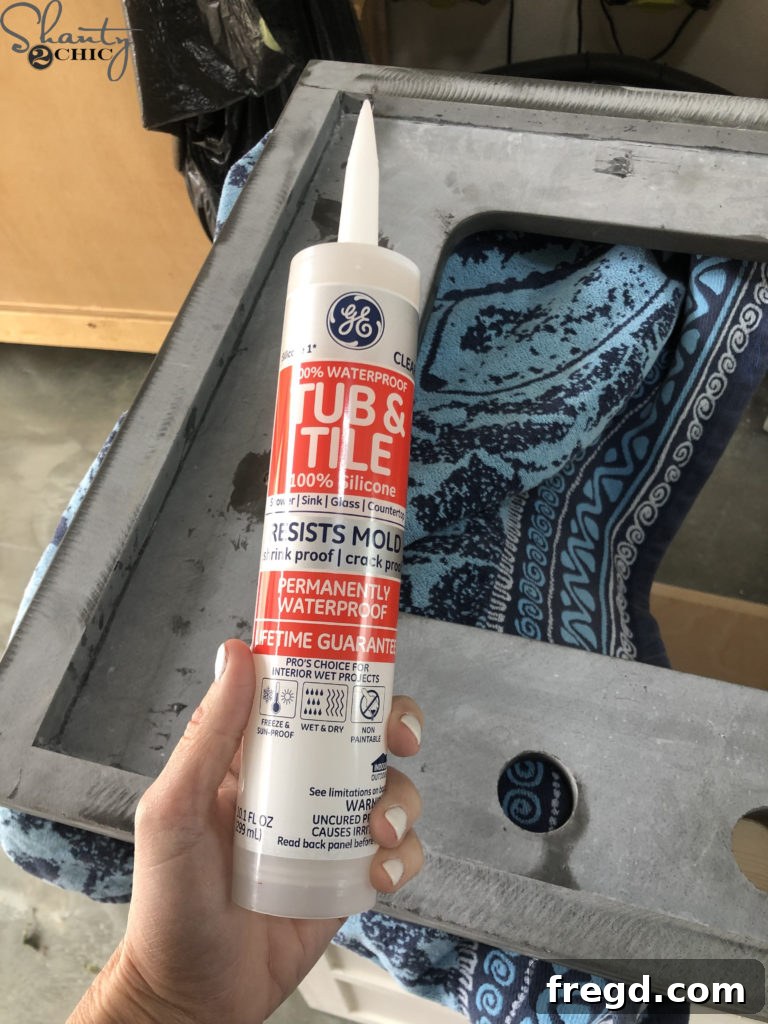
To permanently adhere the sink to the countertop, apply a continuous bead of clear, waterproof silicone sealant along the bottom perimeter of the countertop opening where the sink will be attached. This sealant will create a robust, watertight barrier, crucial for any bathroom fixture. The silicone I used is highly effective for this application.
Installing the Sinks with Secure Hardware
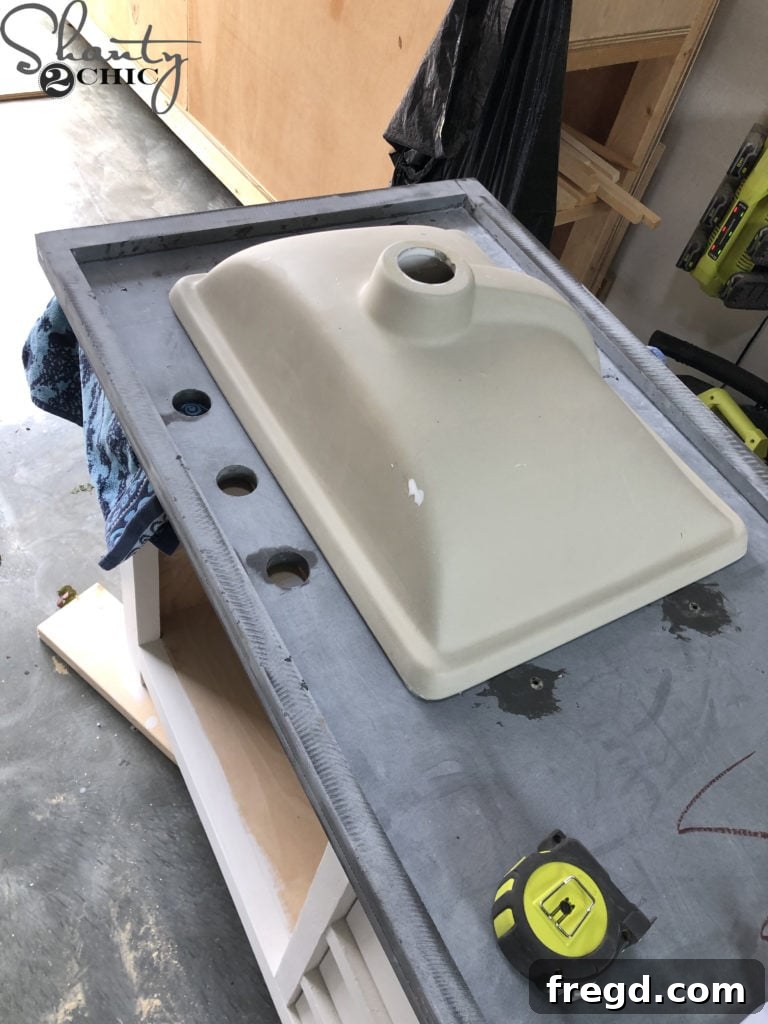
Carefully lay the sink upside down, aligning it precisely over the designated sink opening on the underside of the countertop. Precision at this step is vital for the sink’s functionality and aesthetics.
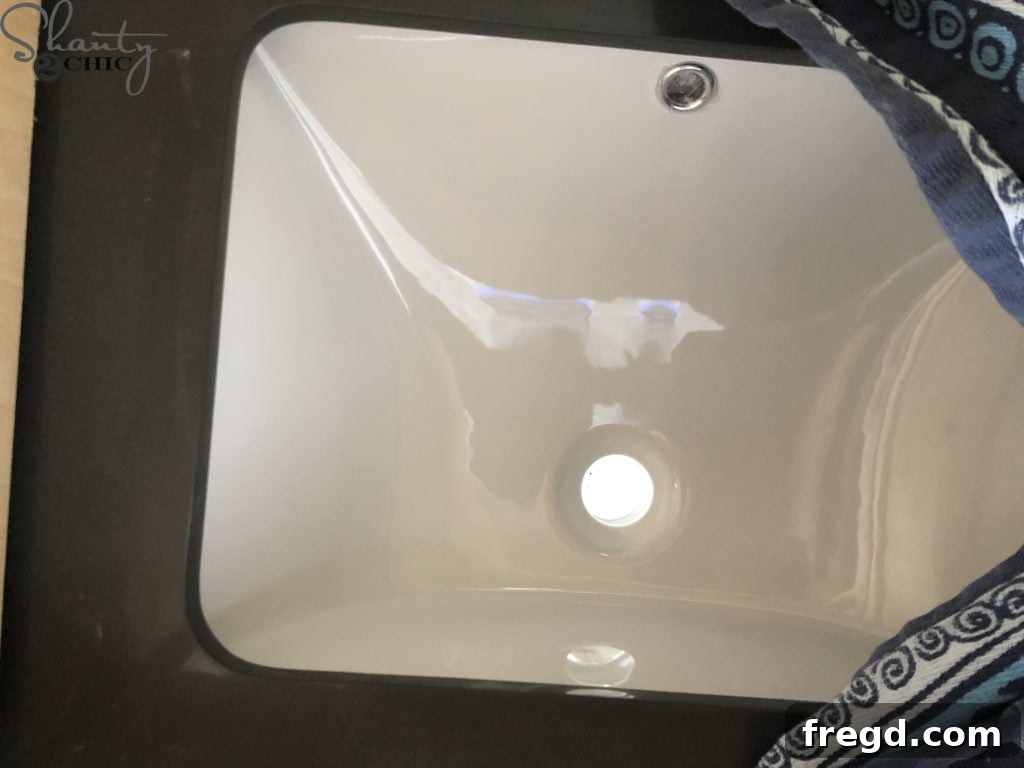
From underneath the countertop, double-check that the drain hole of the sink is perfectly centered within the countertop’s opening. This ensures proper plumbing alignment and an aesthetically pleasing installation.
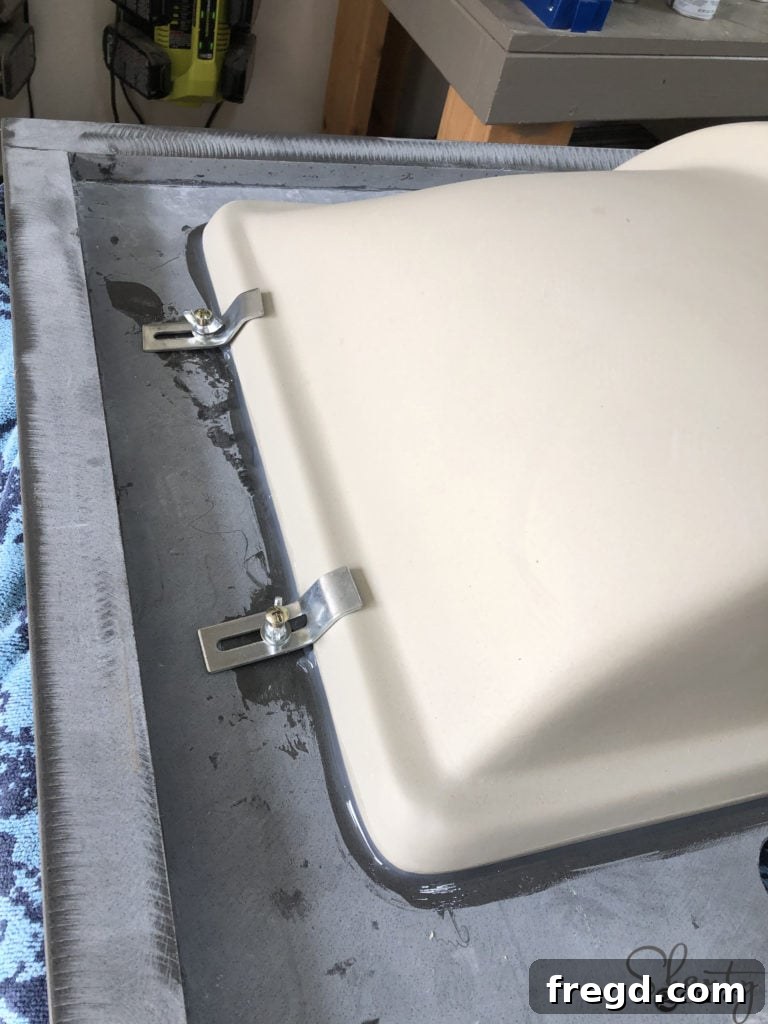
Once the sink is perfectly aligned, use the mounting hardware provided with your sink to secure it firmly in place. Tighten all fasteners evenly to ensure a snug and stable attachment to the countertop.
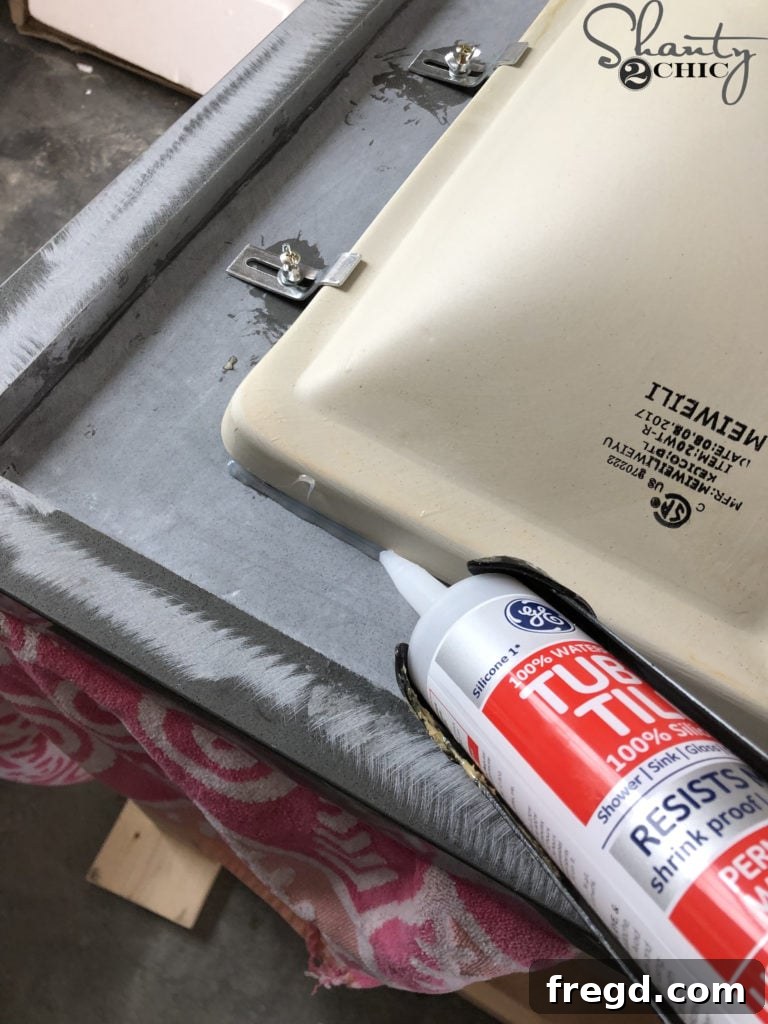
After the mounting hardware is fully attached, run another continuous bead of silicone sealant around the entire perimeter where the sink meets the countertop on the underside. This secondary seal provides an extra layer of waterproofing and durability.
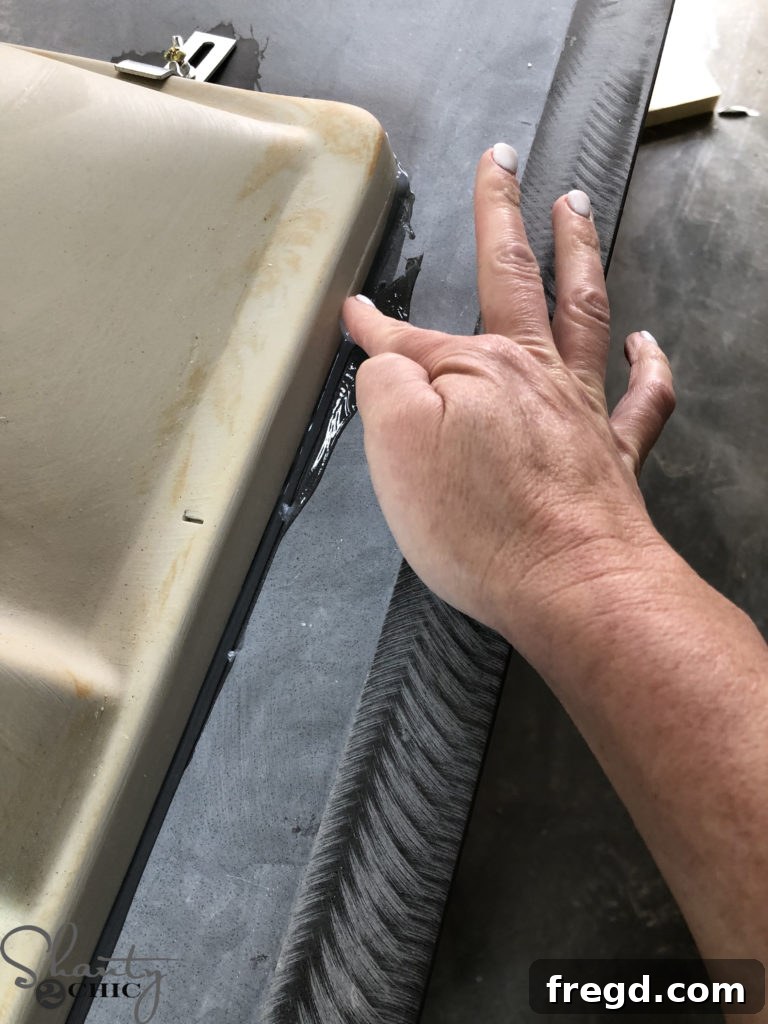
Immediately after applying the silicone, use your finger (or a silicone tool) to smooth out the bead. This action ensures the silicone fills any tiny gaps between the sink and countertop and removes any excess material, resulting in a perfectly clean, waterproof, and professional finish. This step is crucial for preventing water damage over time.
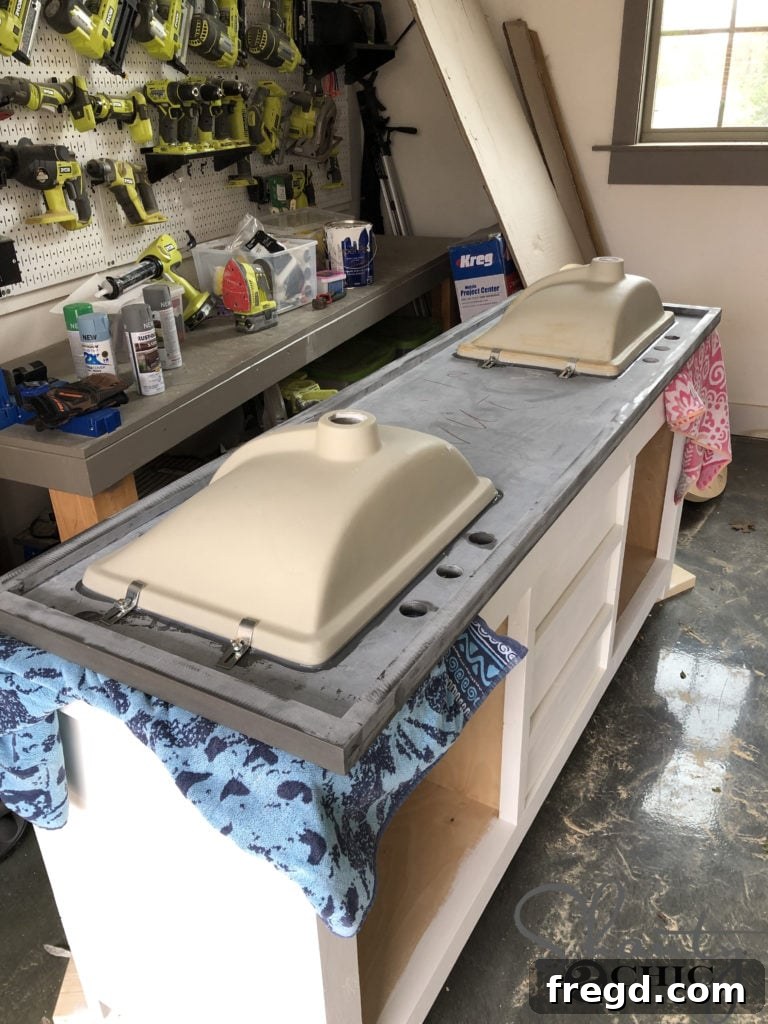
With both sinks successfully installed, it is imperative to allow the silicone sealant to cure completely. This typically requires at least 24 hours. During this period, avoid disturbing the sinks or exposing them to water to ensure the strongest possible bond and a lasting waterproof seal.
Step 9 – Securing the Vanity to the Bathroom Wall for Stability
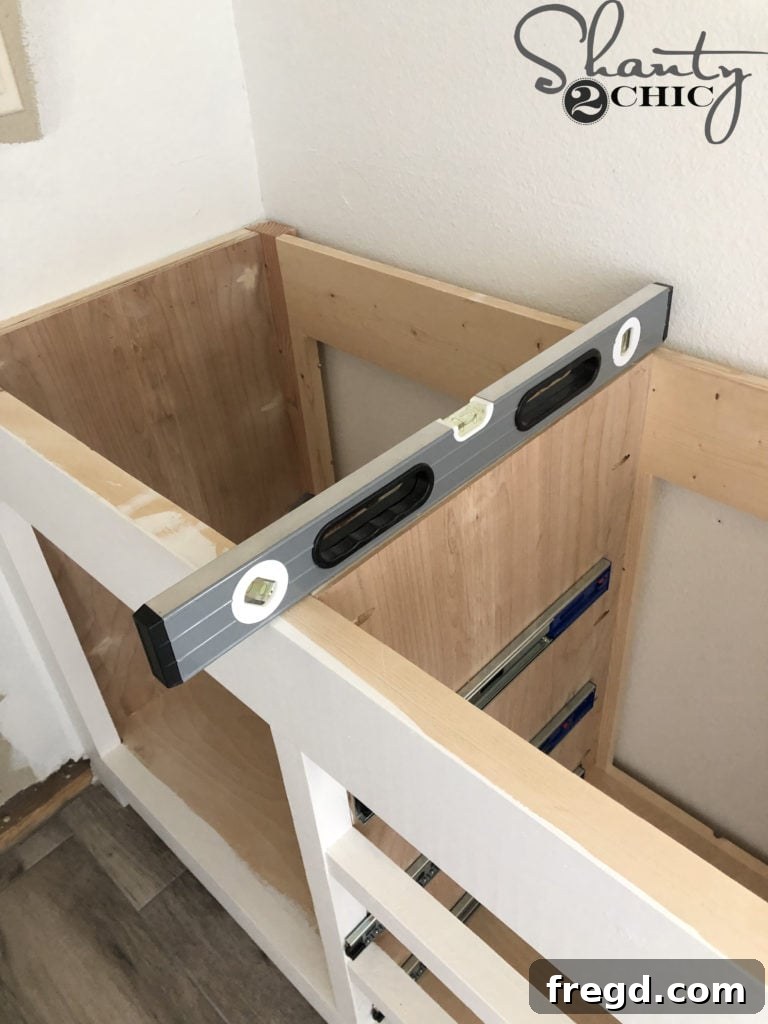
While the silicone for the sinks cures, bring the finished vanity into the bathroom. Use a reliable level to ensure the vanity is sitting perfectly flat and level on the floor. My vanity was thankfully level from the start, but if yours isn’t, simply place shims strategically under the legs until it achieves perfect horizontal alignment. Leveling is critical for the countertop to sit correctly and for proper drainage.
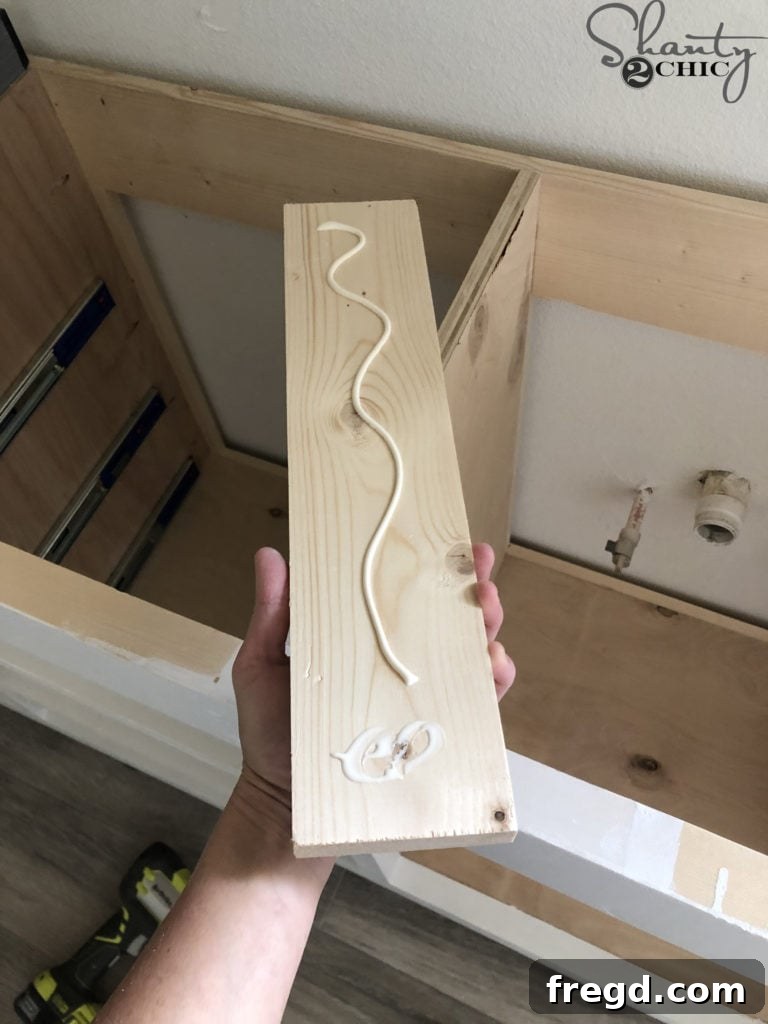
For maximum security and stability, I highly recommend attaching the vanity directly to the wall studs. This step, while optional, significantly enhances the vanity’s durability and safety. Since the back apron has a 3/4″ inset, I used three 3/4″ shims to bridge this gap and provide a solid surface for attachment. First, use a stud finder to accurately locate the wall studs behind the vanity. Mark these locations precisely, as this is where your shims and screws will go. Apply wood glue to each shim to help secure them in place against the wall.
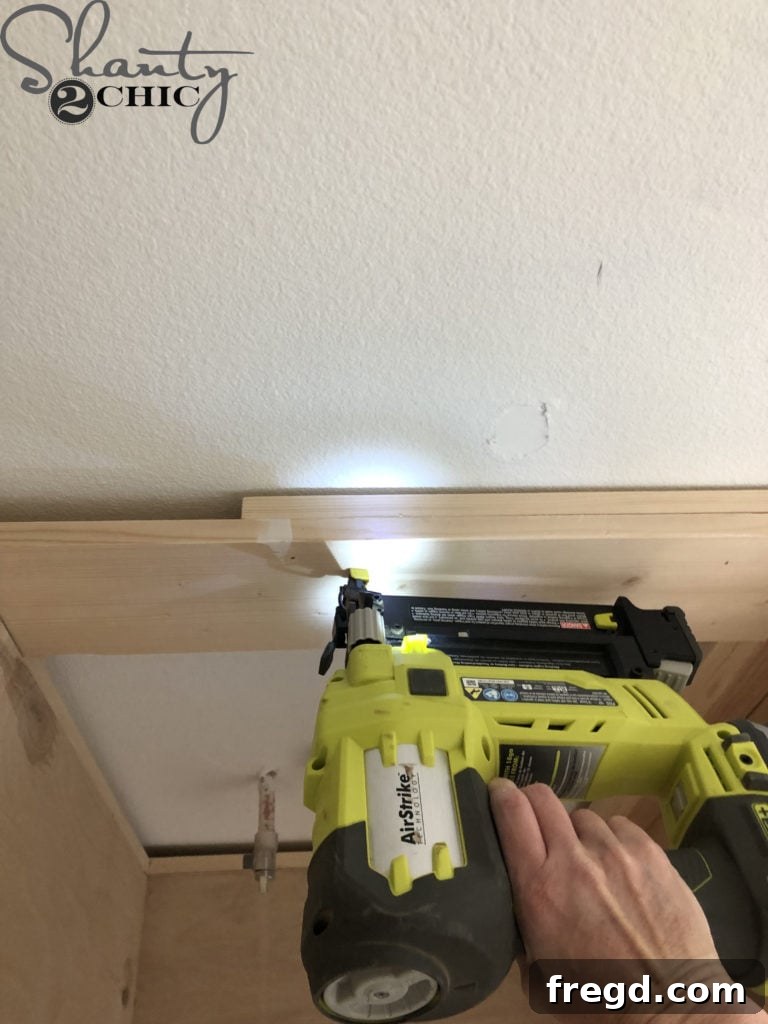
Carefully slide a shim behind the back apron at each marked stud location. Attach the shim to the apron with 1 1/4″ brad nails, driving them from the apron into the shim. I strategically placed one shim in the middle of the vanity and one at each end, ensuring evenly distributed support across the back of the vanity.
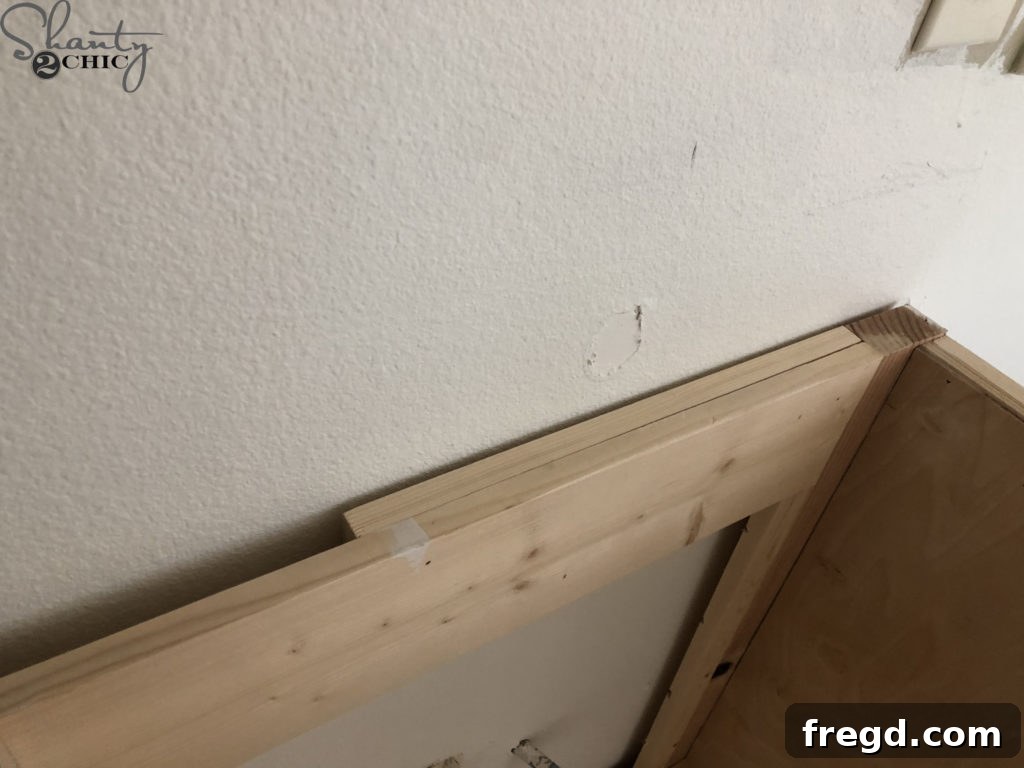
Once all the shims are securely in place, use long 3″ wood screws to attach the vanity firmly to the wall. Drive these screws directly through the back apron (and shims) and into the wall studs. This robust connection ensures that your DIY double-sink bathroom vanity is completely stable and safe for years of use.
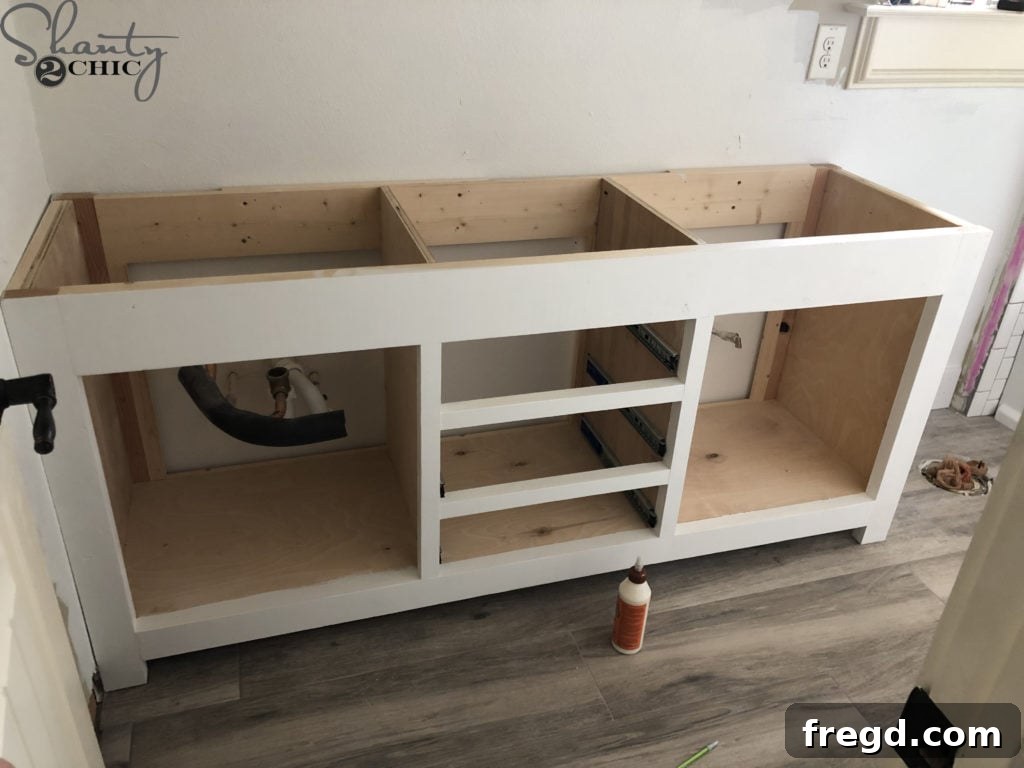
With the vanity now securely installed against the bathroom wall, it’s a moment of great satisfaction! The structure is complete and ready for the final, weighty addition: the countertop.
Step 10 – Installing the Vanity Countertop for a Polished Look
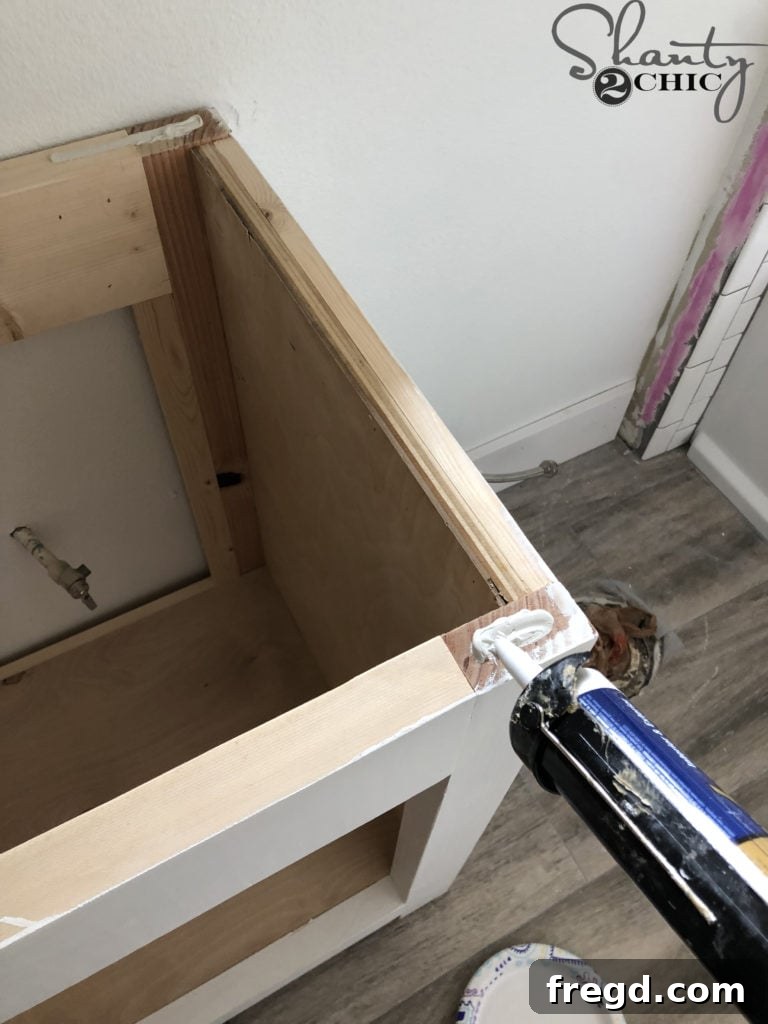
With the sinks cured and the vanity firmly in place, it’s time to install the countertop. Apply a generous “glob” of strong adhesive on top of each vanity leg. Ensure there’s enough adhesive to create a solid bond without excessive squeeze-out. The adhesive I used is specifically designed for such heavy-duty applications, providing a reliable and lasting bond.
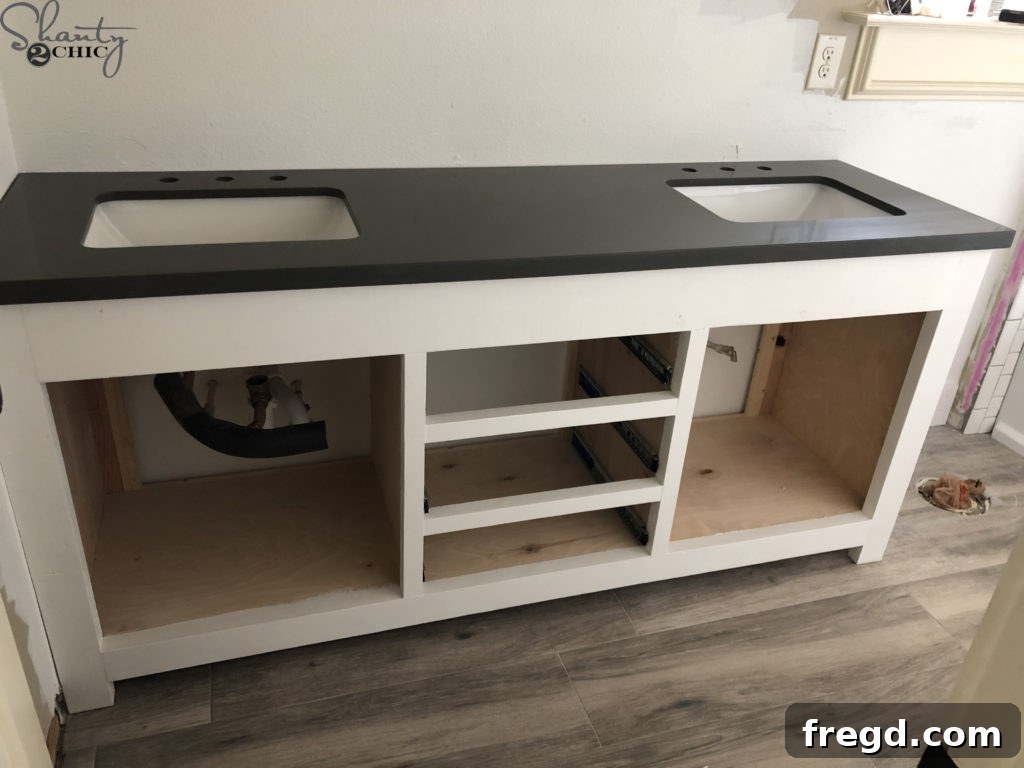
Carefully lower the countertop onto the vanity, aligning it precisely with the edges of the cabinet. Gently press down to ensure good contact with the adhesive. Once positioned, allow the adhesive to dry and cure completely for at least 24 hours before placing any heavy items or beginning to use the sinks. This patience ensures a permanent and stable countertop installation for your DIY double-sink barn door vanity.
Step 11 – Installing the Vanity Hardware for Function and Style
Installing the Drawer Pulls for Easy Access
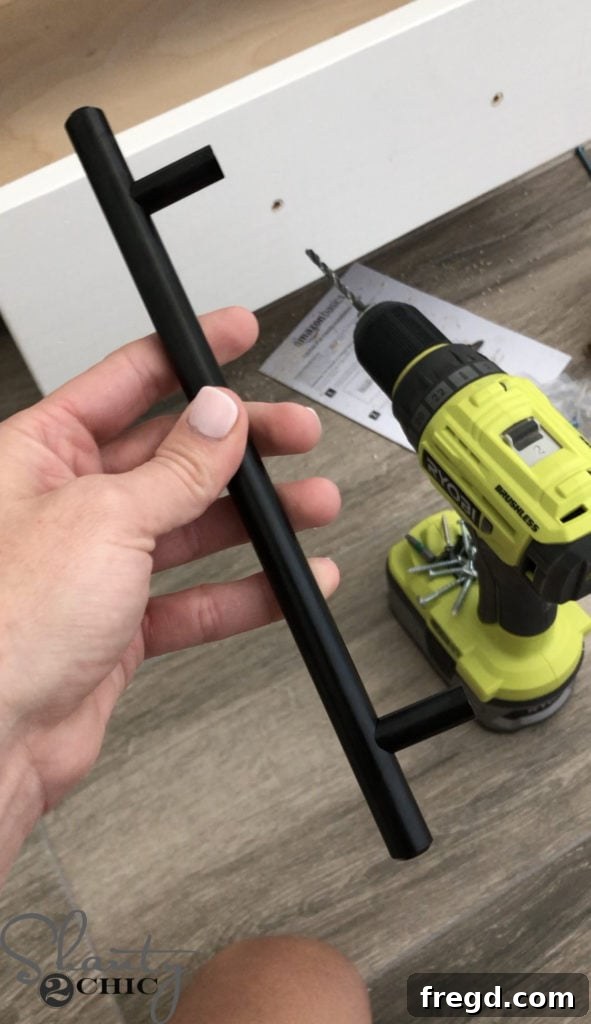
The drawer pulls are the jewelry of your vanity, adding both beauty and practicality. The drawer pulls I selected came with 1 1/2″ screws, which were a bit too short for my thicker drawer faces. Instead of making an extra trip to the hardware store for longer screws, there’s a simple trick I use every time. (Video Tutorial: How to Install Drawer Pulls)
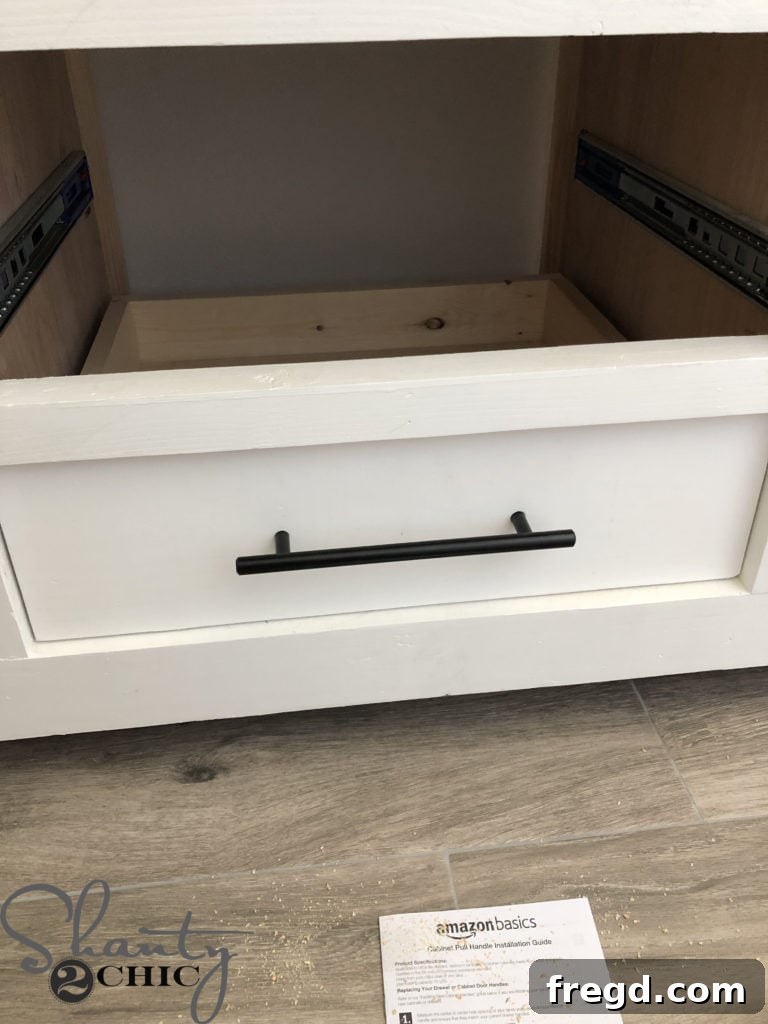
Success! The pulls are securely fastened and look fantastic.
While installing the drawer pulls, I encountered a minor setback that ultimately led to an even better design choice. (Video Tutorial: My Drawer Pull Installation Mistake & Solution)
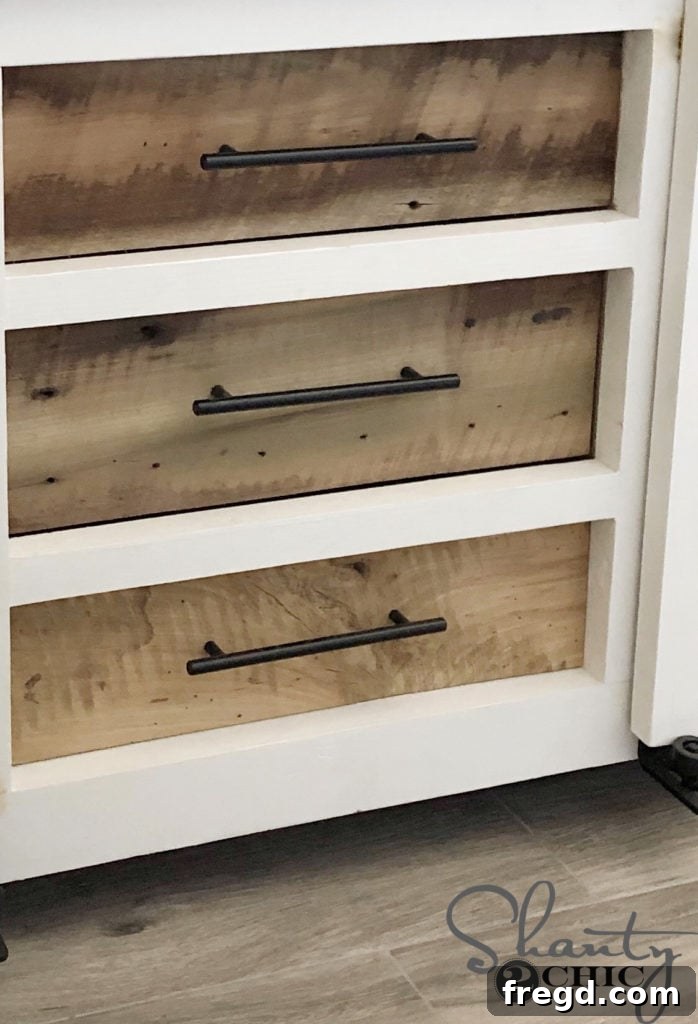
Absolute success! I am truly delighted with the striking contrast created by the matte black pulls against the crisp white paint of the vanity, perfectly complemented by the rustic charm of the barn wood elements.
Attaching the Sliding Barn Door Hardware
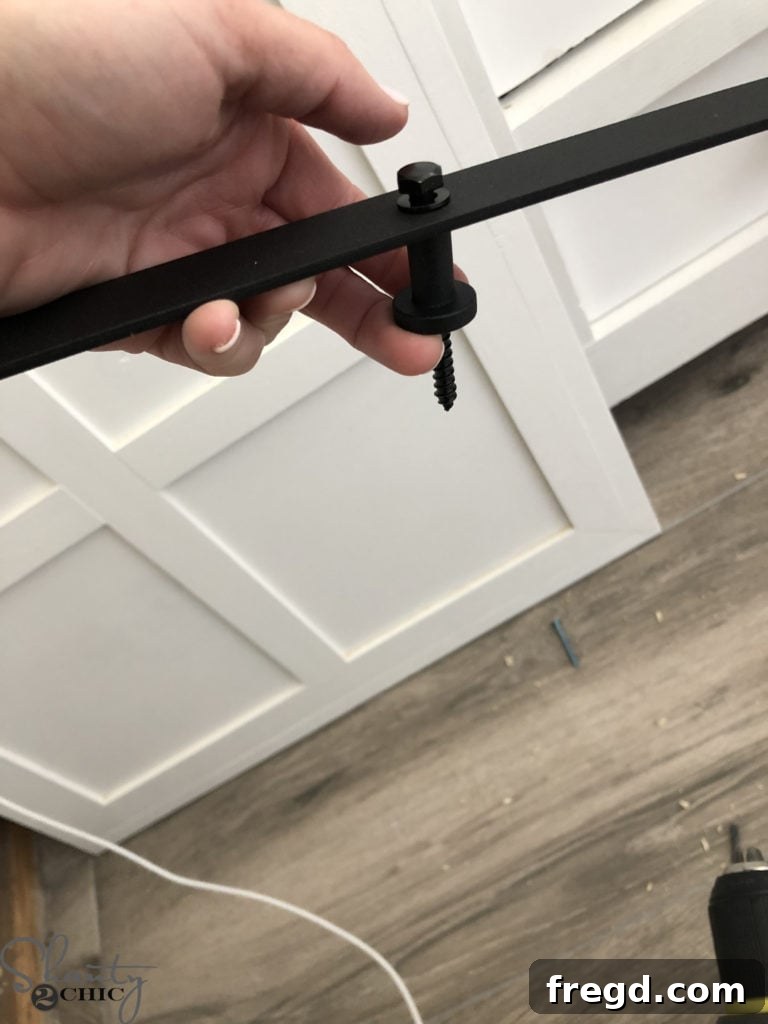
The barn door hardware not only provides functionality but also significantly contributes to the modern farmhouse aesthetic of this vanity. The barn door hardware kit I used is both affordable and incredibly simple to install. While the included instructions are good, I’ve created a quick video tutorial to guide you through my installation process. (Video Tutorial: How to Install a Barn Door Track)
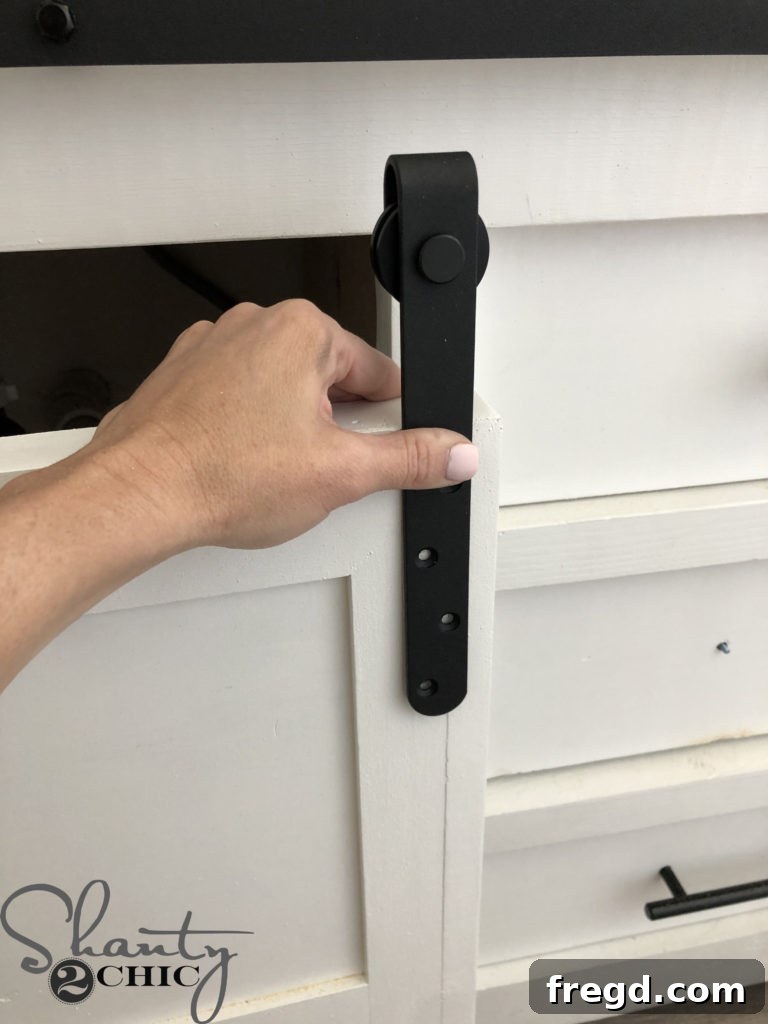
Once the track is installed, the next step is to attach the hangers to your beautifully crafted barn doors. (Video Tutorial: How to Install Barn Door Hangers)
The main barn door kit provided the essential components. Since this custom vanity features two sliding barn doors, you’ll need to purchase an additional set of barn door hangers to complete the setup.
Step 12 – Connecting the Bathroom Vanity Plumbing
While I enjoy many aspects of DIY, certain tasks are best left to professionals to ensure safety and compliance. For the final plumbing connections, I opted to hire a certified plumber. They expertly installed the necessary pipes to the sinks and attached the faucets, ensuring everything was up to code and fully functional. This step completed the operational aspect of the vanity.
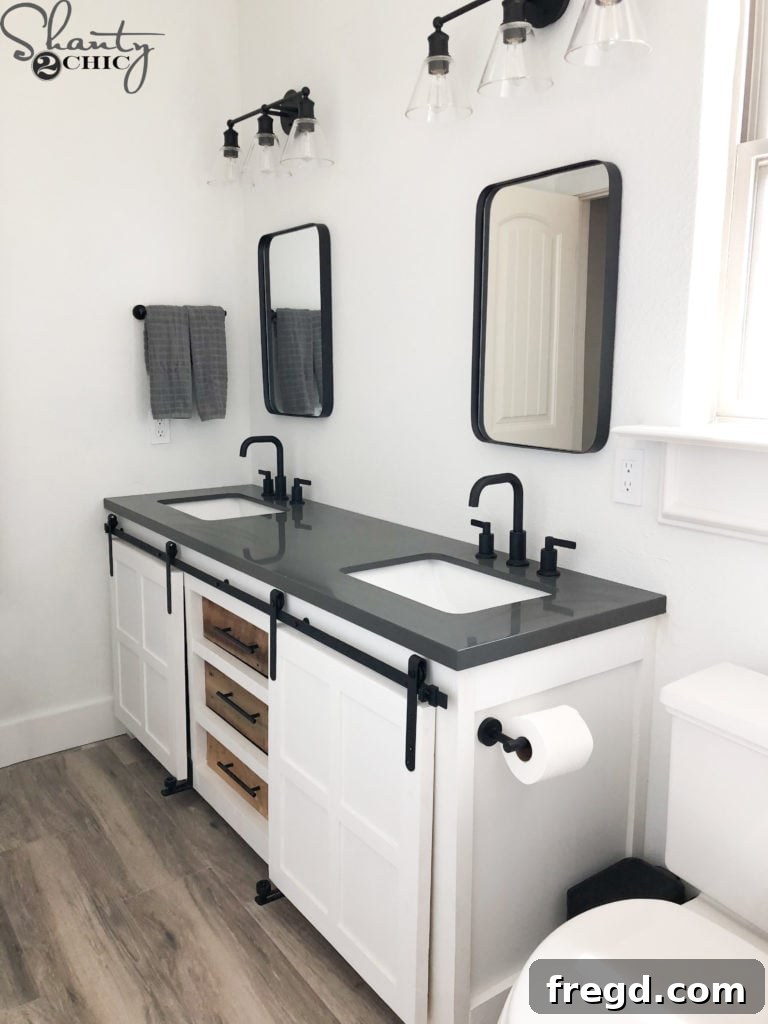
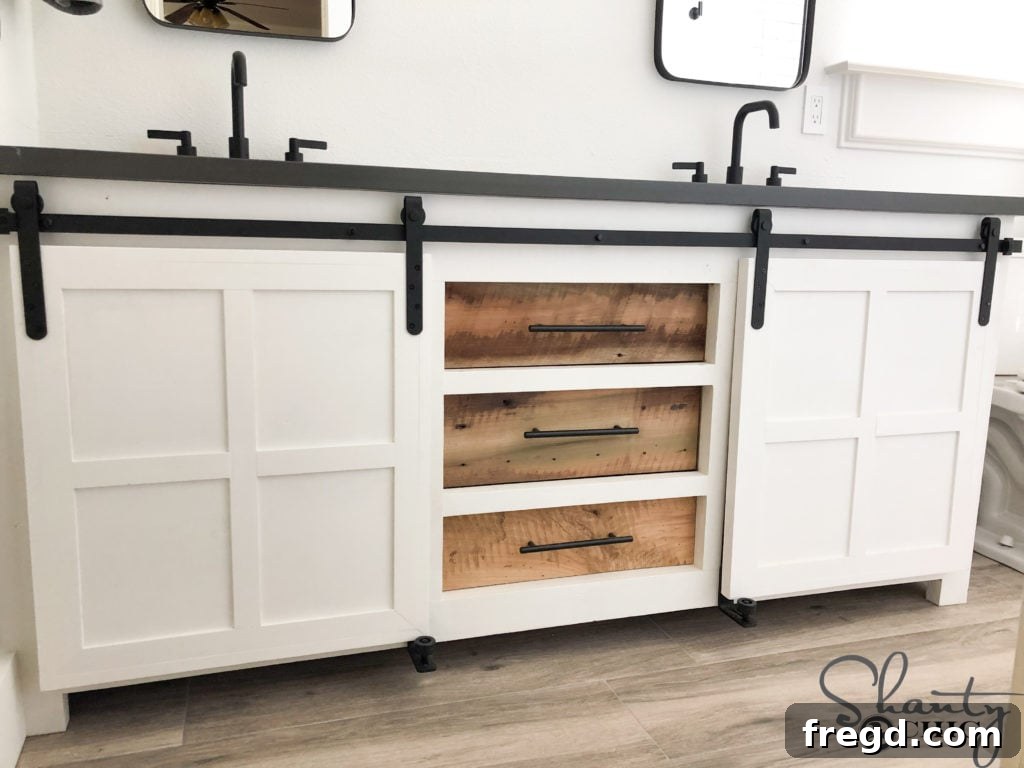
I am absolutely smitten with my boys’ new DIY Double Bathroom Vanity! It offers an incredible amount of storage, making their bathroom highly organized, and its unique sliding barn doors add unparalleled character and charm. It truly feels like a bespoke piece of furniture, designed specifically for their space.
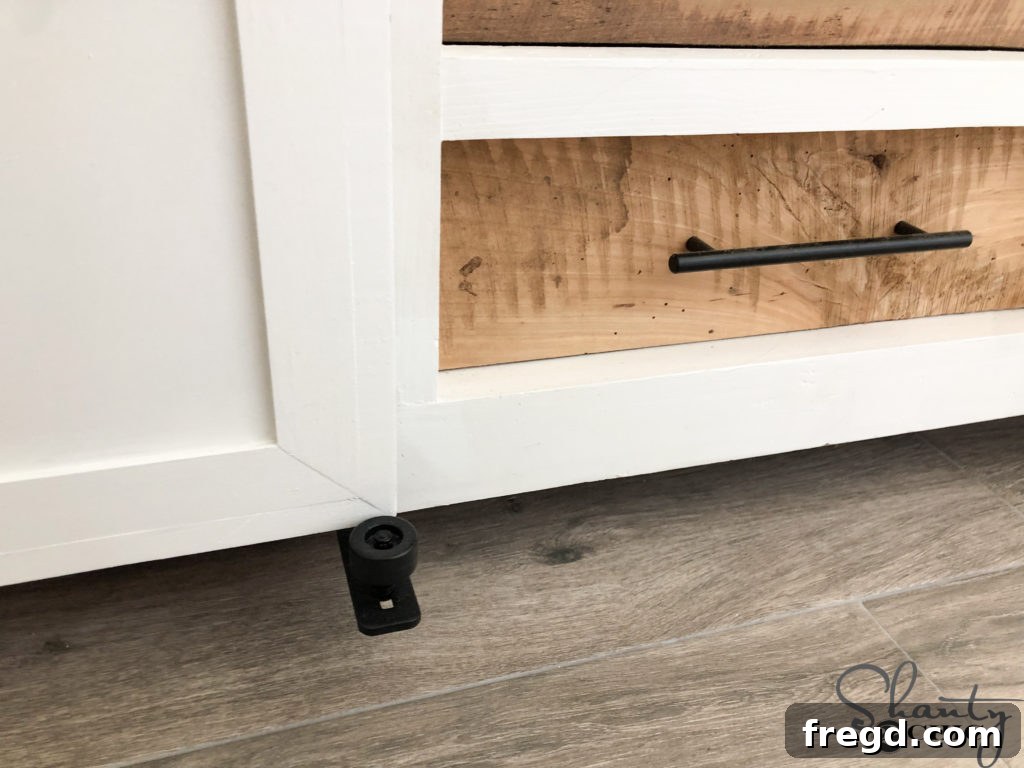
To prevent the barn doors from swinging freely, which can be an annoyance, I installed separate Barn Door Guides. While most barn door kits include guides, they are often floor-mounted, which might not be ideal for a vanity. These specific guides attach discretely to the vanity itself, offering excellent stability without interfering with the floor.
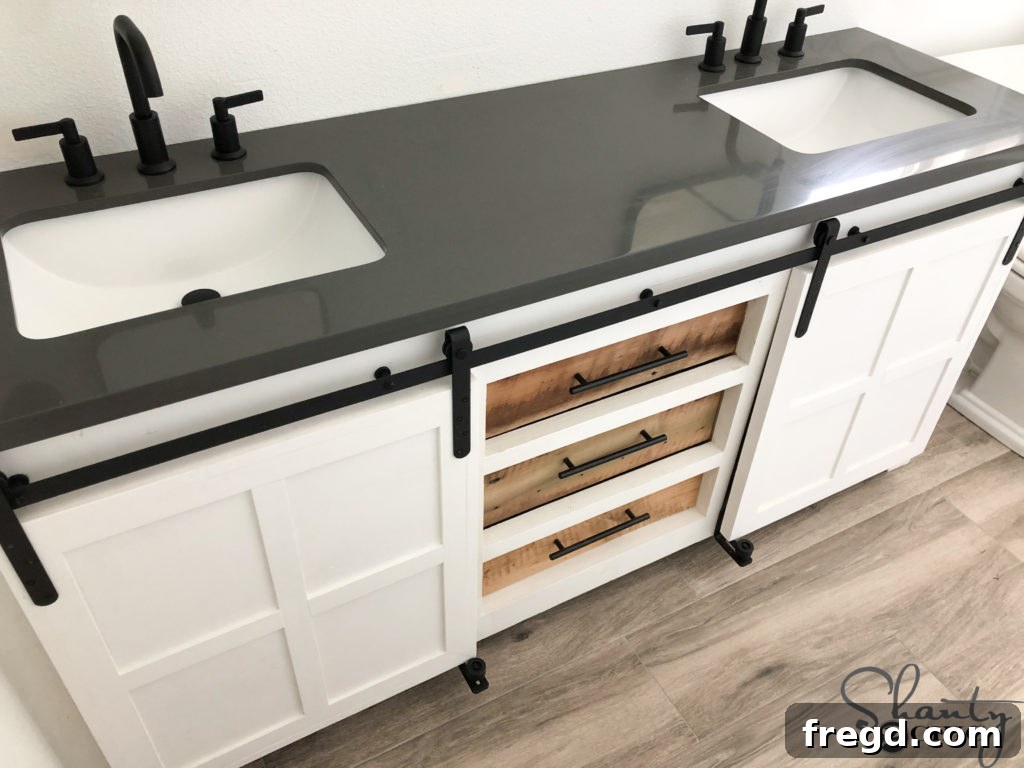
The sleek gray quartz countertop is a true highlight, providing a luxurious and durable surface that perfectly complements the modern farmhouse aesthetic. Its understated elegance is a fantastic choice for any bathroom.
The matte black faucets were an intentional design choice, perfectly matching the aesthetic of the barn door hardware and drawer pulls. This cohesion in hardware finishes ties the entire vanity together beautifully, creating a sophisticated and intentional look.
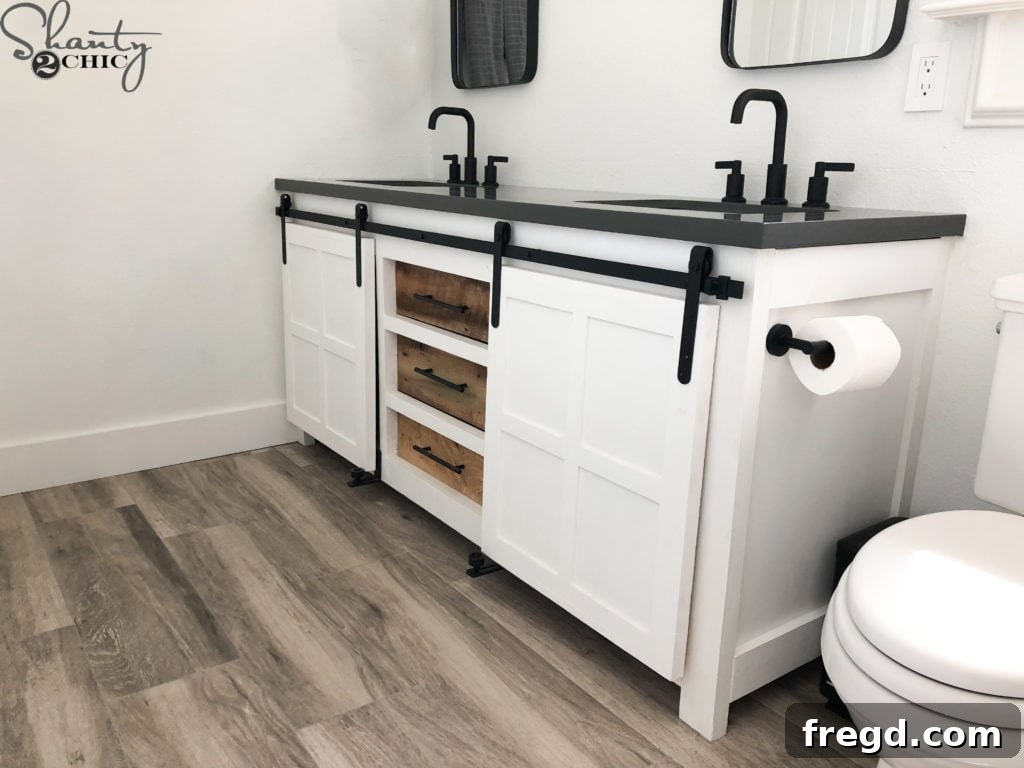
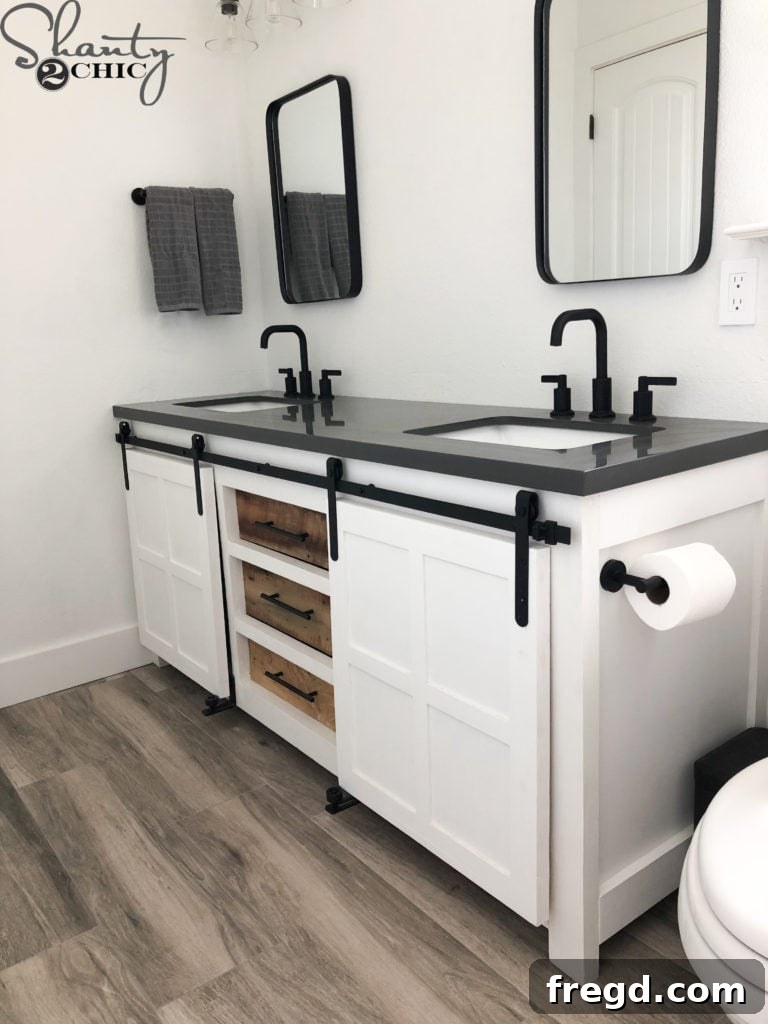
I am absolutely overjoyed with how my boys’ bathroom turned out! The DIY Bathroom Vanity truly takes the space to the next level, lending it the polished, high-end appearance of a custom-designed piece of furniture. I had extensively searched online for vanities, but none captured the precise vision I had in my head for a unique, functional, and stylish centerpiece. This project, while seeming complex, was a surprisingly easy build, and the satisfaction of crafting something exactly to my specifications is immense. I’m so inspired by the success of this project that I can’t wait to tackle the other bathrooms in my home, starting with my master bathroom. The possibilities for custom, cost-effective design are endless when you embrace DIY!
Sources for Items Used in This Bathroom Vanity Project
Love something else you’ve spotted in this beautifully renovated bathroom space? You can find the sources for other key items that complete this modern farmhouse look right here:
- Flooring (for that clean, contemporary base)
- Grout (the perfect complement to the chosen tiles)
- Mirrors (adding light and reflection to the space)
- Vanity Lights (providing functional and ambient illumination)
- Toilet Paper Holder and Towel Holder (matching fixtures for a cohesive look)
Stay tuned! I’ll be sharing the complete details of their full bathroom renovation very soon, offering more insights and inspiration for your own home projects!
Thanks so much for stopping by and taking the time to explore this DIY journey!
Happy Building!
Download Your Free DIY Bathroom Vanity Plans Here!

DIY Bathroom Vanity
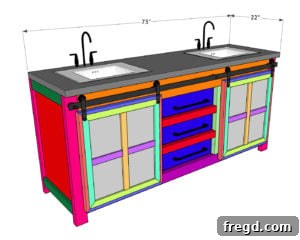
Learn how to build this DIY Bathroom Vanity with free plans by Shanty2Chic. This vanity has two sliding barn doors and three drawers making it functional and a beautiful piece for any bathroom in your home!
CLICK HERE TO DOWNLOAD AND PRINT THE FULL SET OF PLANS INCLUDING THE SUPPLY LIST
Tools
- Miter Saw
- Kreg Jig
- Drill
- Nailer
- Pin Nailer (optional)
- Table Saw (optional)
- Kreg Drawer Slide Jig (optional)
Supply List
- 2 – 3/4″x48″x96″ Hardwood Plywood (Birch)
- 1 – 1/4″x48″x96″ Hardwood Plywood (Birch)
- 1 – 2x6x8 Framing Lumber
- 3 – 2x4x8 Framing Lumber
- 1 – 2x2x8 Pine or Ripped from a 2×4
- 1 – 1x8x8 Whitewood or Common Boards
- 4 – 1x6x8 Whitewood or Common Boards
- 4 – 1x4x8 Whitewood or Common Boards
- 1 – 1x3x8 Whitewood or Common Boards
- 4 – 1x2x8 Whitewood or Common Boards
- 4 – 1/4″x2″x48″ Craft Boards
- 2 1/2″ Pocket Hole Screws
- 1 1/4″ Pocket Hole Screws
- 1 1/4″ Brad Nails
- 3/4″ Pin Nails
- Sliding Barn Door Hardware
- 3 – Pulls
- 1 – Countertop
- 2 – Faucets
- Wood Glue
Instructions
Cut Lists – Note: I ripped the round edges off of some of the 2x boards. The width of the boards is noted in the cut list. This is not a necessary step but if you choose not to rip your boards, adjust the plans accordingly.
-
Cut List 1

-
Cut List 2
-
Cut List 3



Cabinet
-
Cut the cabinet sides and bottom to size and drill 3/4″ pocket holes on all sides of the bottom and piece and both edges of the side panels. Attach the bottom piece to the side panels with 1 1/4″ pocket hole screws and wood glue. The panels should extend 2 1/4″ from the bottom of the bottom piece.
-
Cut the middle cabinet pieces to size and drill 3/4″ pocket holes on the front and bottom edges. Attach them to the bottom of the cabinet with 1 1/4″ pocket hole screws and wood glue.
Face Frame
-
Cut the legs and front, top and bottom aprons to size. Drill 1 1/2″ pocket holes into both endds of the apron pieces. Attach the apron pieces to the egs with 2 1/2″ pocket hole screws and wood glue. The top apron should be flush with the top of the legs. The bottom apron should be attached 2 1/2″ from the botto of the legs.
-
Cut the middle face frame pieces to size and drill 1 1/2″ pocket holes at the ends. Attach the vertical pieces to the top, bottom and the horizontal pieces to the vertial pieces with 2 1/2″ pocket hole screws and wood glue.
-
Attach the front face frame to the cabinet with 1 1/4″ pocket hole screws and wood glue, from the cabinet bottom, side and middle panels and into the face frame. The cabinet bottom should be flush with the bottom apron. The side panels should be flush with the top of the legs and inset 3/4″.

Back Frame
-
Cut the back apron pieces to size. Drill 3/4″ pocket holes into the ends of both apron pieces. Attch them to the 2 remaining legs with 1 1/4″ pocket hole screws and wood glue. The top apron should be flush with the top and front of the legs. The bottom apron should be flush with the front of the legs and 2 1/2″ from the bottom of the legs.
-
Cut the middle pieces to size and drill 3/4″ pocket holes at both ends. Attach them to the top and bottom apron pieces with 1 1/4″ pocket hole screws and wood glue.


Drawers
-
Cut the drawer bottoms and side pieces to size. Drill 3/4″ pocket holes around the edges of the bottom pieces and 3/4″ holes at both ends of the side pieces. Attach the side pieces to the drawer bottom with 1 1/4″ pocket hole screws and wood glue.
-
Cut the front and back pieces to size and attach them to the bottom and side pieces with 1 1/4″ pocket hole screws and wood glue.
-
Install the drawers inside the cabinet with drawer slides. You can refer to the detailed tutorial in this post for more comprehensive instructions on how we installed our drawers.
-
Cut the drawer faces to size and attach them to the drawers with wood glue and 1 1/4″ brad nails from the inside of the drawer and into the back of the drawer faces.
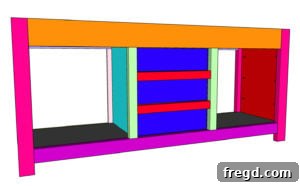
Side Panel Trim
-
Cut the side trim pieces to size and attach them to the sides of the vanity with 1 1/4″ brad nails and wood glue. The top and bottoms of the side trim pieces should be flush with the top and bottom of the vanity.
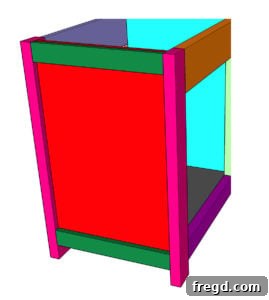
Doors
-
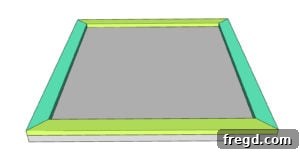
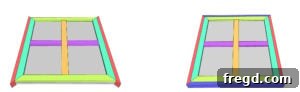
Cut the door panels to size. The, measure and cut the front trim to size. Attach the front trim to the door panels with 3/4″ pin nails and wood glue.
-
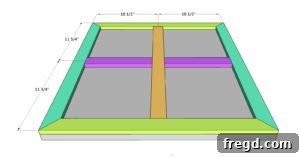
Cut the decorative door trim to size. Center the vertical piece and attach it to the door panel with 3/4″ pin nails and wood glue. Center the two horizontal pieces and attach them the same way.
-
Cut the door trim pieces to size and attach them to the sides of the doors with 1 1/4″ brad nails and wood glue. Measure and cut the top and bottom door trim pieces to size and attach them the same way.
The Finish
-
Now, you can add a finish! Once the finish dries, you can attach the countertop, sinks, faucets and hardware! We share more detail on how we attached all of these pieces in the post! If you plan to have a back on the vanity, now is the time to attach it!
DIY Bathroom Vanity FAQs
Building your own bathroom vanity is almost always more budget-friendly than purchasing a pre-made unit from a store. The total cost can vary significantly depending on your choice of lumber, hardware, sinks, and countertop. Typically, our DIY vanity projects range between $100 and $300. This particular double vanity was at the higher end of that spectrum due to the luxurious quartz countertop. However, you can significantly reduce costs by opting for a DIY countertop solution, such as a concrete pour or a planked wood top treated with a durable protective finish.
Absolutely! All of our DIY vanity designs, including this stylish barn door model, are specifically created to be accessible for home builders with basic power tools. You won’t need a professional workshop to achieve fantastic results. Essential tools like a drill, a Kreg Jig for strong pocket hole joints, and a miter saw for precise cuts are generally all you need to get started and complete the project successfully. Even optional tools like a drawer slide jig make the process easier, not more complex.
For optimal functionality and comfort, most double-sink bathroom vanities typically measure between 60 to 72 inches wide. This generous sizing provides ample space for two sinks, ensuring both users have enough elbow room, and also allows for adequate countertop space and storage. The immense advantage of building your own vanity is the freedom to customize its dimensions precisely to fit your unique bathroom layout and personal needs, maximizing every inch of your space.
Absolutely, customization is one of the greatest benefits of embarking on a DIY vanity project! Our free plans provide an excellent starting point, but they are designed to be fully adaptable. You have the creative freedom to adjust the height, width, drawer configurations, and even the type of finish (paint or stain) to perfectly match your bathroom’s specific dimensions and aesthetic style. Further personalization can be achieved through your selection of unique hardware and faucets, allowing you to create a truly one-of-a-kind piece that reflects your personal taste.
Yes, barn doors are a fantastic and highly practical choice for a bathroom vanity! I personally adore the unique style and exceptional functionality they bring. Unlike traditional swinging doors that require clear floor space to open, sliding barn doors are perfect for maximizing space, especially in smaller bathrooms or those with tight layouts. They instantly add a chic modern farmhouse touch and, as our detailed tutorial demonstrates, they are surprisingly simple to build and install, making them an excellent and stylish storage solution for your vanity.
More DIY Bathroom Projects You’ll Love to Tackle
Inspired by this custom vanity build? If you’re looking to continue your home improvement journey and transform more areas of your bathroom, explore these other fantastic DIY projects designed to add charm and functionality:
- Small DIY Bathroom Vanity (perfect for powder rooms or guest baths)
- 49″ Bathroom Vanity (a great mid-size option for various bathrooms)
- Single Sink Bathroom Vanity (classic design for a minimalist or compact space)