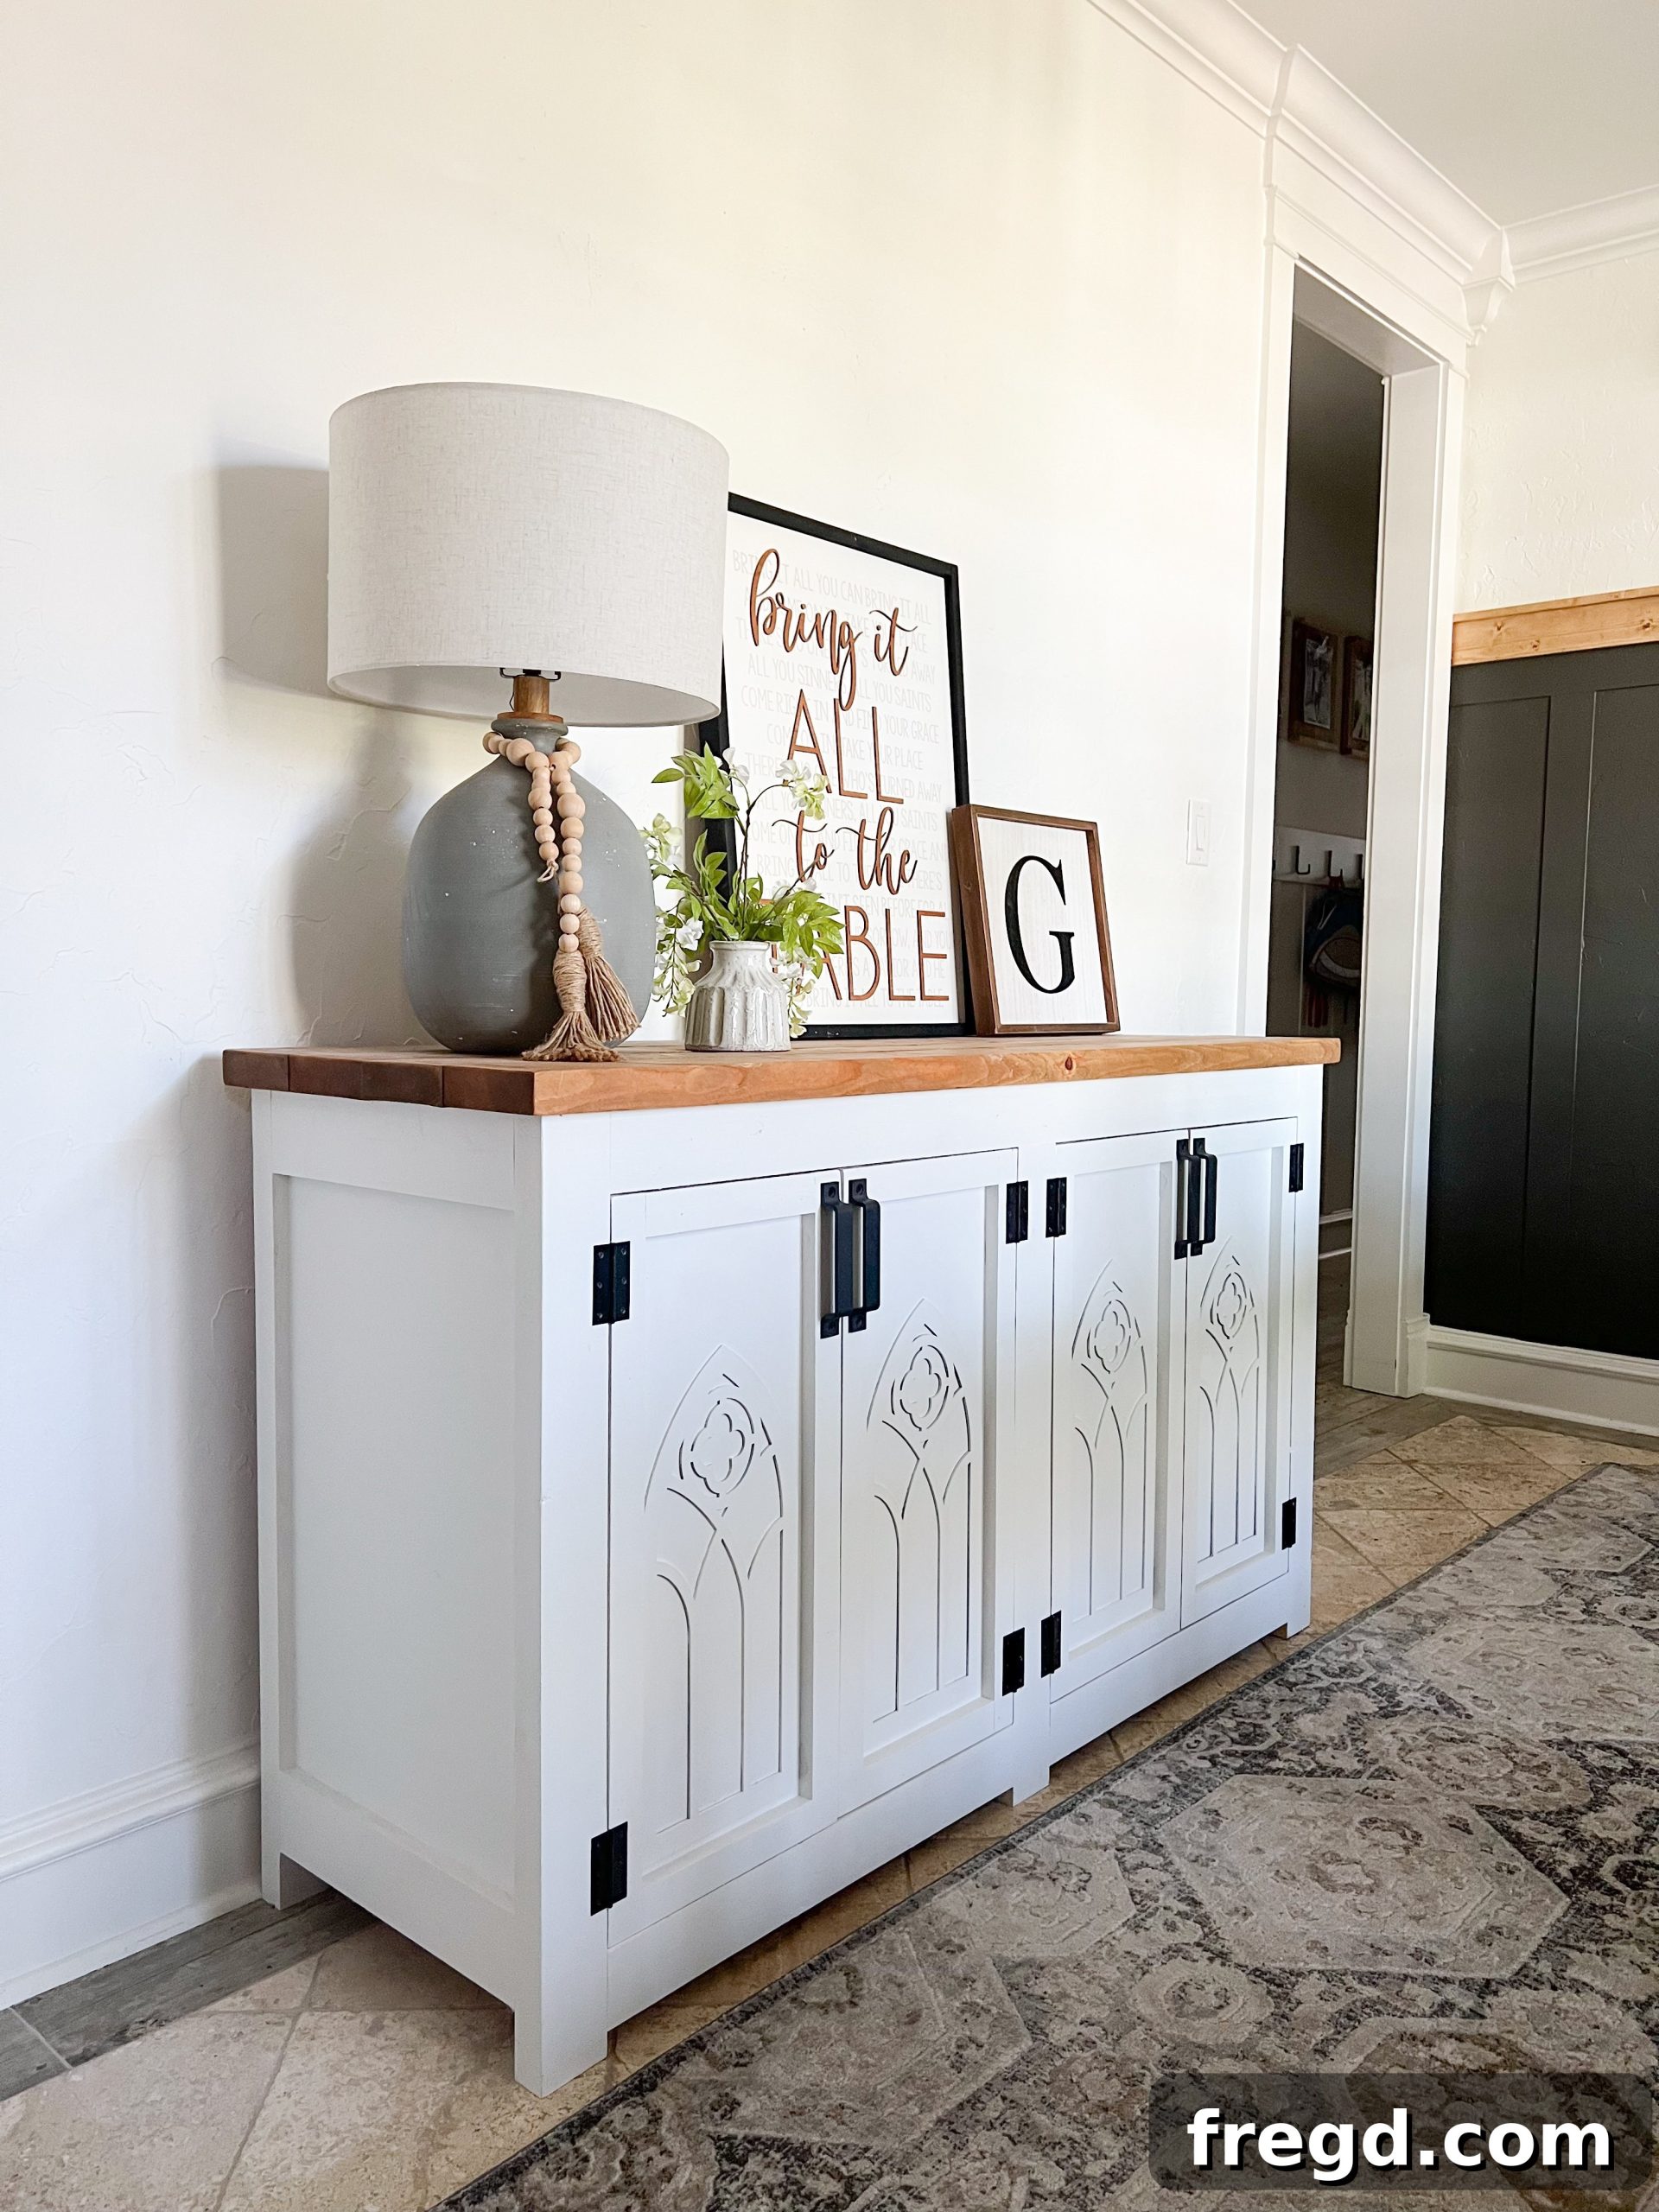
Transform your dining room or living space with a custom-built piece that perfectly blends storage, style, and functionality. Building your own **DIY buffet table** or **buffet cabinet** is not only incredibly rewarding but also a fantastic way to save a substantial amount of money compared to purchasing a pre-made unit. This comprehensive guide will walk you through creating a stunning **modern farmhouse buffet table** – a project that requires just a few hours and basic woodworking tools. Get ready to enhance your home with a beautiful, handcrafted storage solution!
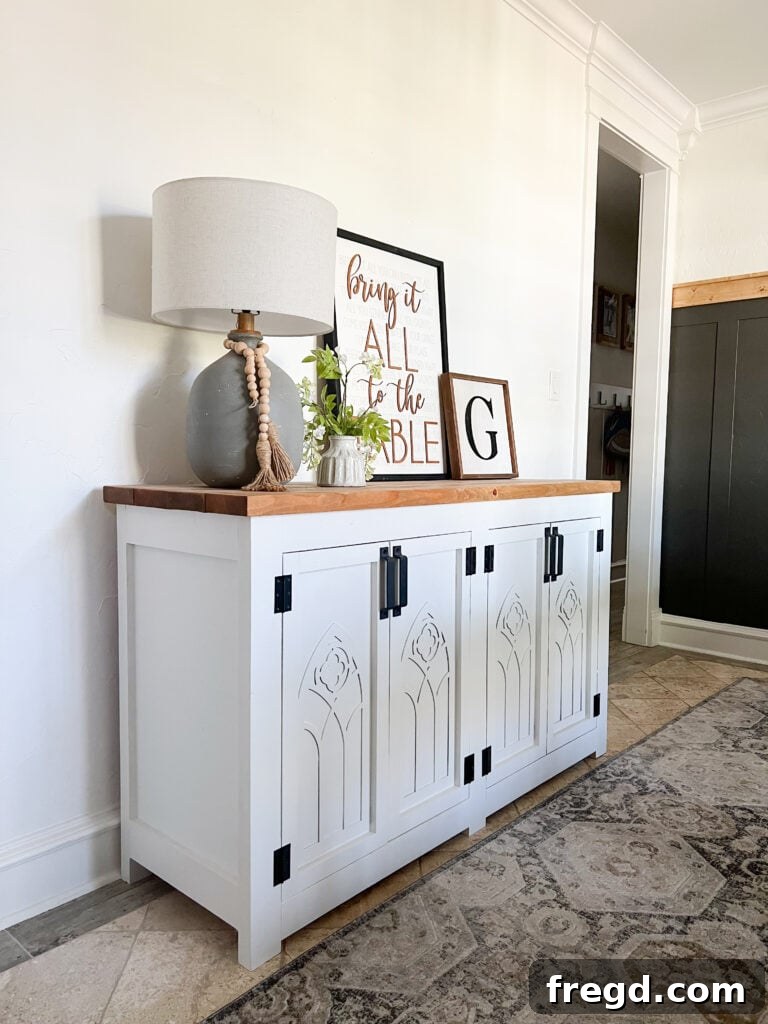
Inspired by my recently completed new dining table, I realized the space called for a complementary **buffet cabinet** to provide essential storage and a serving surface. The result? This absolutely charming and incredibly functional piece! I am beyond thrilled with how it turned out, particularly loving the intricate detailing of the doors which add a touch of sophistication while concealing practical storage. This **DIY storage cabinet** not only serves as an eye-catching focal point but also offers valuable space for linens, dinnerware, or decorative items. You can find the detailed, free printable plans and a comprehensive cut list at the bottom of this post to begin your own woodworking adventure!
Introduction to Your DIY Buffet
The allure of **DIY furniture building** lies in its unique blend of cost savings, customization, and the immense satisfaction of creating something beautiful with your own hands. A **buffet table** or **sideboard cabinet** is an incredibly versatile piece of furniture, offering invaluable storage, an elegant display surface, and a convenient serving station for gatherings. This **modern farmhouse buffet** project is designed to be accessible for intermediate DIYers, demonstrating how thoughtful design and efficient techniques can yield professional-looking results without breaking the bank. By following these detailed instructions, you’ll not only learn essential woodworking skills but also gain a stunning and functional addition to your home decor, perfectly tailored to your style. Say goodbye to generic store-bought pieces and hello to your very own custom-built **farmhouse storage cabinet**!
Essential Tools and Materials for Your Buffet Build
Before diving into construction, gather all the necessary tools and materials. Having everything on hand will ensure a smooth and efficient building process for your **DIY buffet table**.
Key Tools You’ll Need:
- Miter Saw: For precise cross-cuts on your lumber.
- Table Saw: Essential for ripping down larger boards to specific widths, like the 2x4s for the face frames and the 2x6s for the top.
- Kreg Jig 720 PRO: This pocket hole jig is a game-changer for strong, concealed joinery. Its ease of use and reliability make it an excellent investment for any serious DIYer. You can see it HERE on Amazon!
- Cordless Drill: For driving screws and pre-drilling holes.
- Brad Nailer: For attaching trim pieces with neat, nearly invisible fasteners.
- Wood Clamps: To hold pieces securely while glue dries and screws are driven.
- Tape Measure, Pencil, & Speed Square: For accurate measurements and markings.
- Safety Glasses & Hearing Protection: Always prioritize safety in your workshop!
Materials List:
- 2×4 Boards: For the robust face frames.
- 1×4 Boards: For cabinet side trim and door trim.
- 3/4″ Hardwood Plywood: For cabinet sides, bottom, and middle divider.
- 1/2″ Hardwood Plywood: For the door panels.
- 1/4″ Plywood Sheet: For the cabinet back.
- Wood Glue: Crucial for strong, lasting joints.
- Pocket Hole Screws: 1.25″, 1.5″, and 2.5″ lengths to match different material thicknesses.
- Brad Nails: 1″ length for trim.
- Wood Screws or Spax Screws: 3.5″ for attaching the top.
- Cabinet Hinges: High-quality hinges for smooth door operation.
- Door Pulls/Knobs: To complete the aesthetic and functionality of your doors.
- Paint & Stain: Your chosen finishes for the cabinet body and top.
- Optional: Decorative material (e.g., eucalyptus board for laser cutting) and strong adhesive (like Gorilla Clear Grip) for custom door accents.
Step-by-Step Guide to Building Your Modern Farmhouse Buffet Cabinet
Let’s begin the exciting journey of building your very own **modern farmhouse buffet cabinet**. Each step is crucial for the overall stability and appearance of your finished piece.
1. Build the Sturdy Face Frames
The first foundational step involves constructing the two face frames that will form the front and back of your buffet. These frames provide structural integrity and a finished look to the cabinet openings.
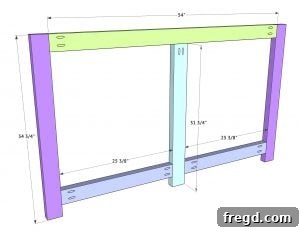
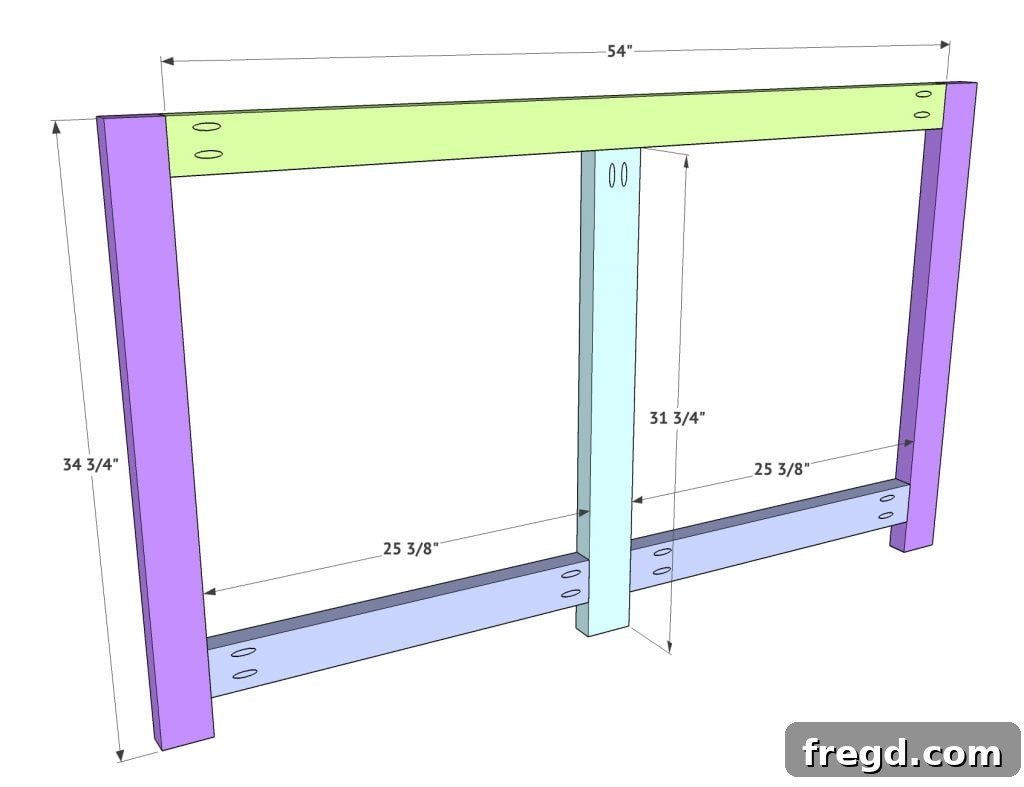
Begin by taking your 2×4 boards and using your table saw to rip them down to a consistent 3” width. This slightly narrower profile offers a more refined, custom furniture aesthetic than standard 2x4s. Next, utilize your miter saw to make all the necessary cross cuts according to your plans. With your pieces cut, it’s time to create pocket holes. Position your Kreg Jig 720 PRO to drill 1.5” pocket holes in the locations indicated in the provided diagrams. These holes are essential for strong, hidden joinery. Apply a generous amount of wood glue to the mating surfaces, then firmly attach the boards using your drill and 2.5” pocket hole screws. A key detail: ensure the bottom horizontal boards of the face frames align 2.5” from the base of the leg pieces. This precise alignment establishes the correct height and proportion for your buffet, ensuring a cohesive and professional appearance.
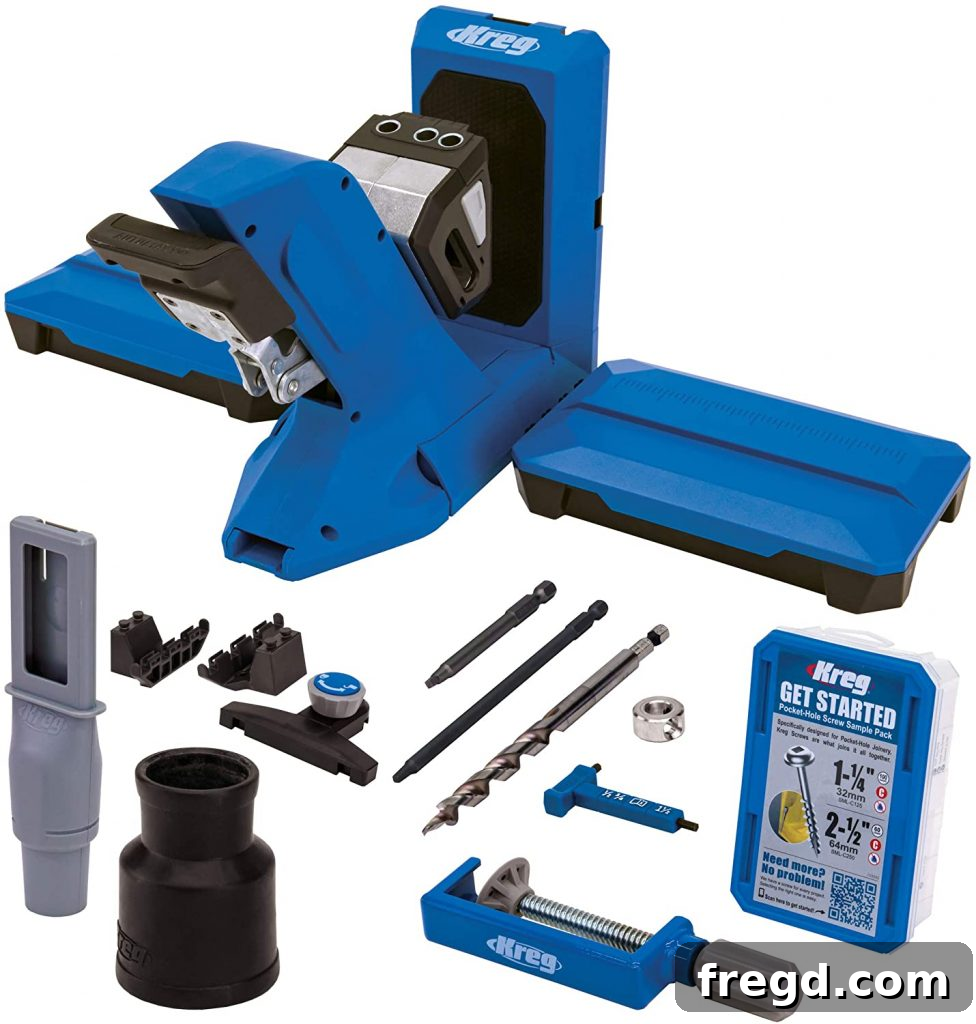
The Kreg Jig simplifies this process significantly, allowing you to create incredibly strong joints without visible fasteners from the front. Always double-check your measurements before making cuts and ensure your drill is set to the correct depth for the pocket hole screws to prevent over-driving or stripping.
2. Construct the Cabinet Sides
With the face frames ready, your next step is to build the two side panels of the cabinet. These components define the depth and overall shape of your buffet.
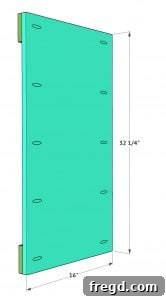
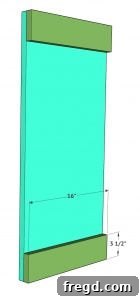
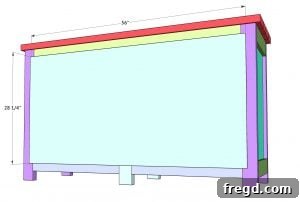
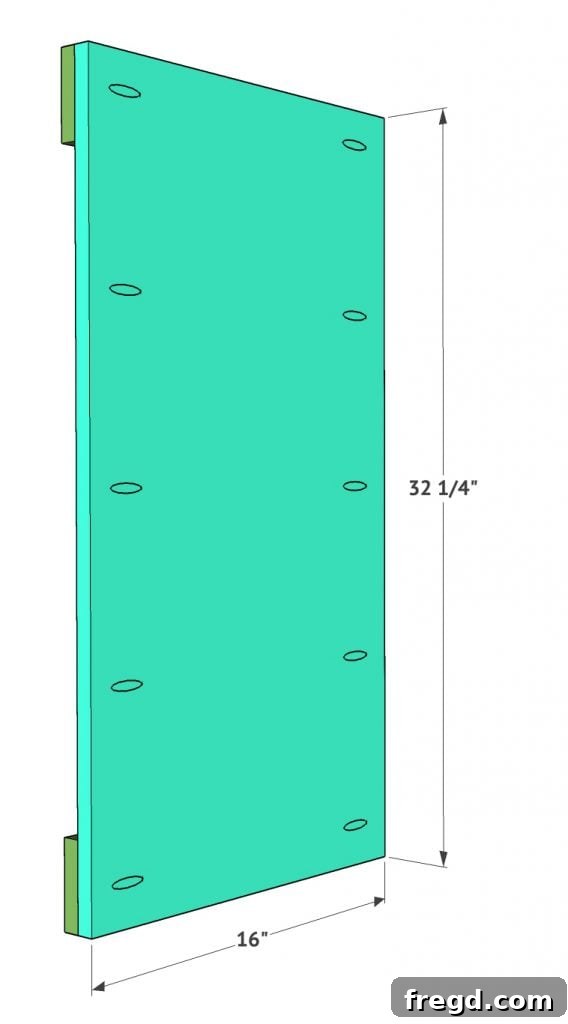
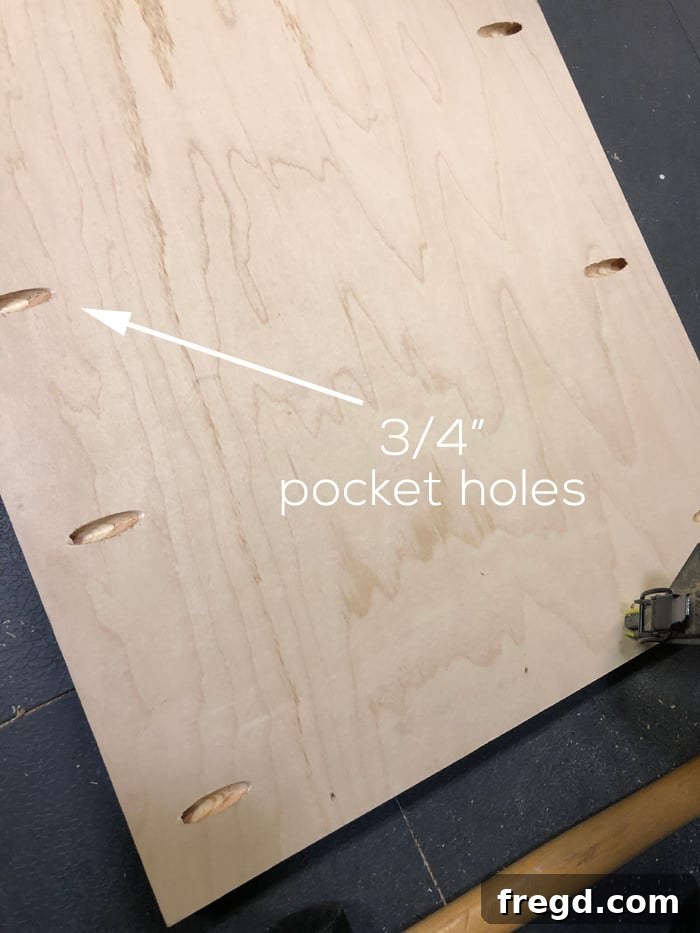
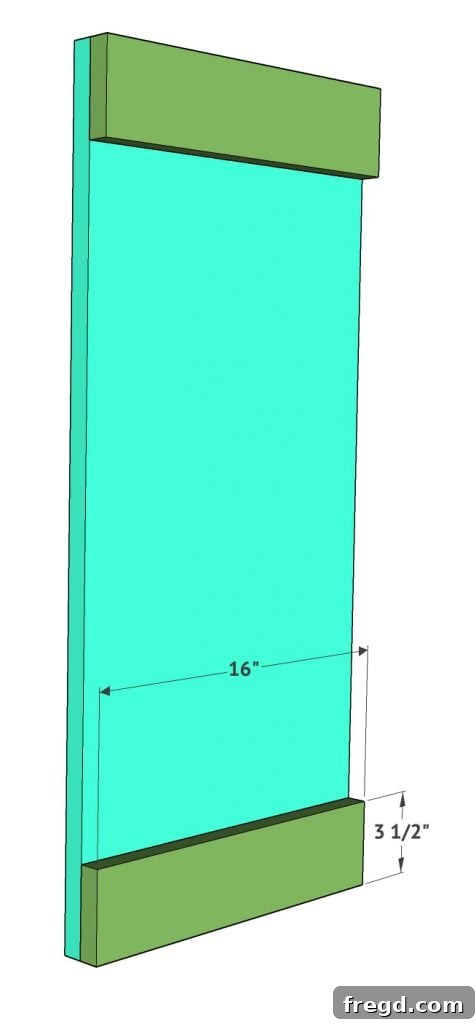
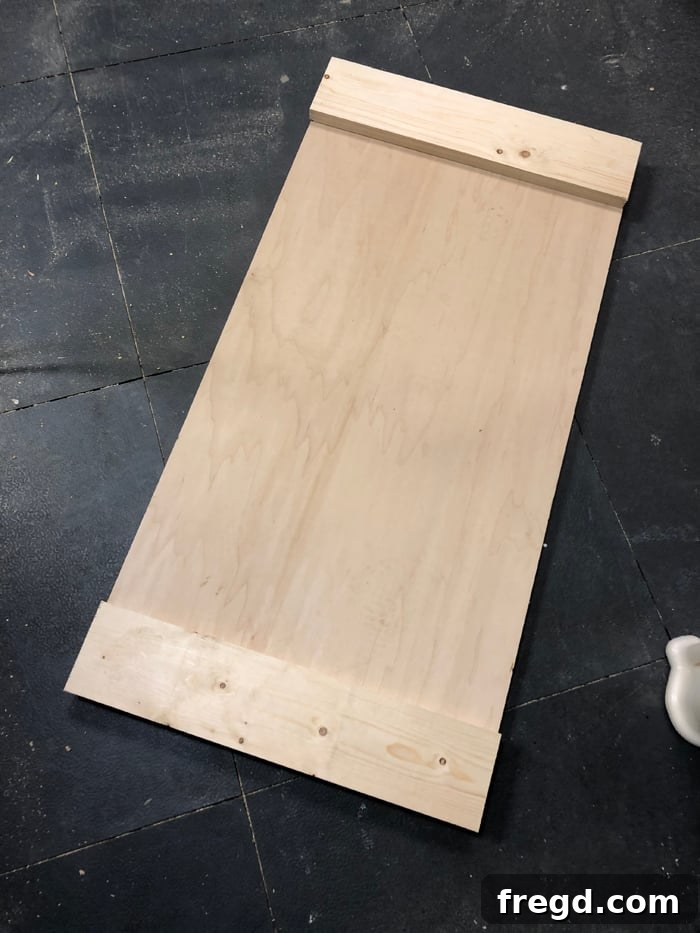
For the cabinet sides, you’ll be working with 3/4” hardwood plywood and 1×4 boards. Begin by cutting your plywood panels to the specified dimensions. On the back side of each plywood panel, drill 3/4” pocket holes down each long edge. These pocket holes will be used later to securely attach the side panels to the face frames, creating a robust and stable cabinet box. Next, take your 1×4 boards, cut them to size, and apply wood glue to one face. Attach these 1×4 trim pieces to the front edge of the plywood panels using 1.25” brad nails. Ensure the trim pieces are perfectly flush with the edges of the plywood for a clean, professional finish. It is critical that you construct two identical side panels for your buffet, so take your time and measure carefully for each component.
3. Attach the Sides to the Back Face Frame
Now it’s time to bring the first major components of your **buffet cabinet** together, forming the initial structure.
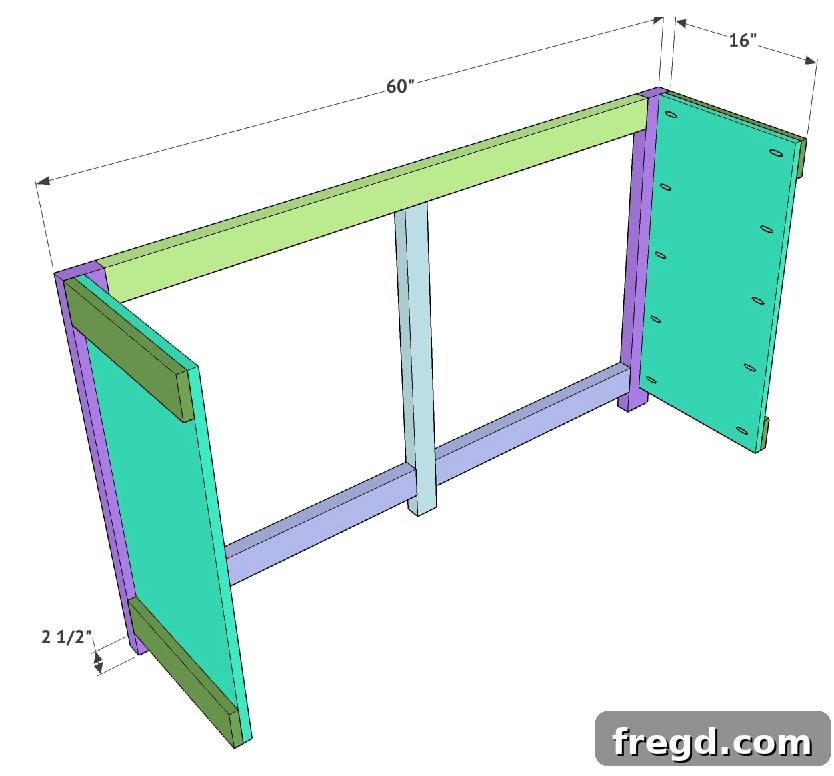
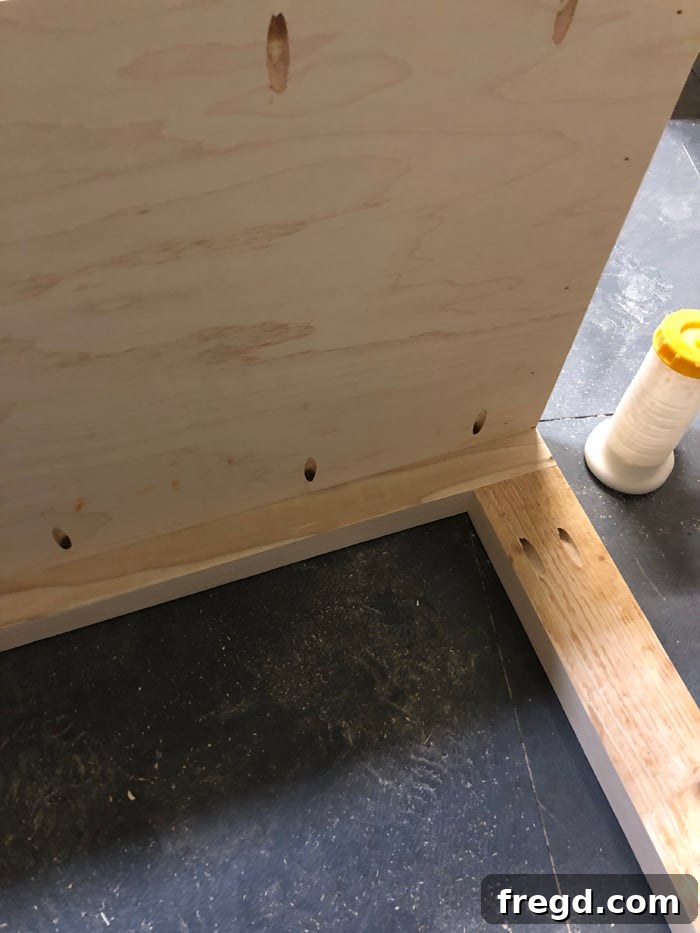
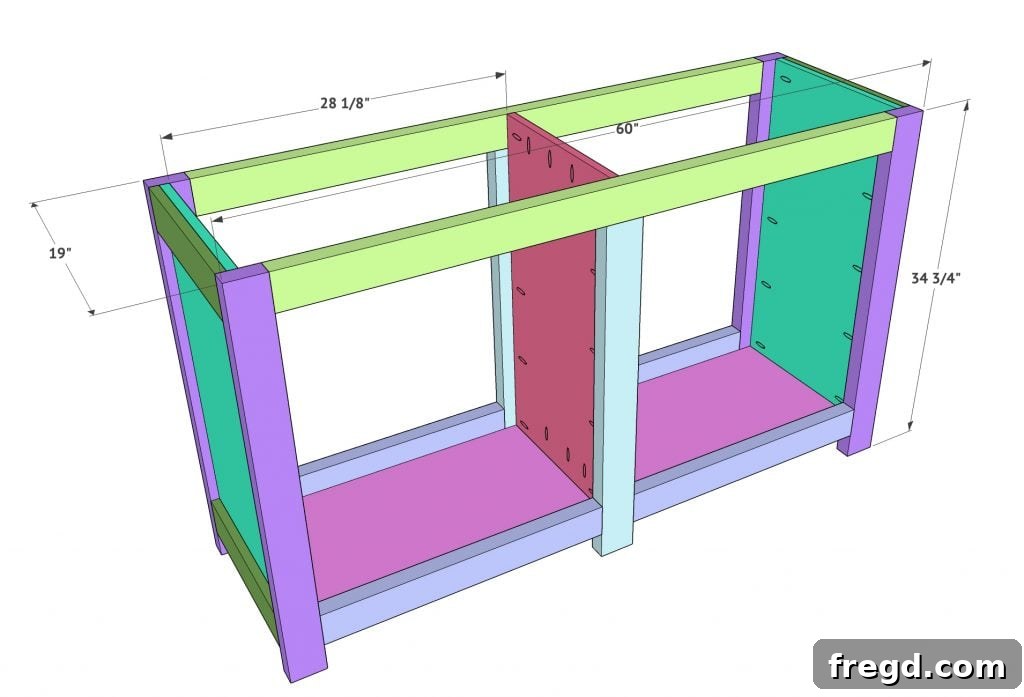
Carefully align and attach the two assembled side frames to the back face frame. Apply wood glue along the edges where the pieces will meet, then secure them using 1.5” Kreg pocket hole screws driven into the pre-drilled pocket holes on the side panels. Pay close attention to alignment: you want the top edge of the side frames to be perfectly flush with the top edge of the back face frame. This precise alignment will naturally create a 2.5” space below the bottom of the side frames, which is intended for the cabinet’s base. Additionally, ensure that the outside edge of the 1×4 trim boards on the side panels are flush with the outside edge of the back face frame. This step is crucial for maintaining squareness and ensuring the entire cabinet comes together correctly.
4. Add the Bottom of the Cabinet
With the sides and back in place, it’s time to install the bottom panel, which adds significant rigidity and defines the lower storage area of your **buffet table**.
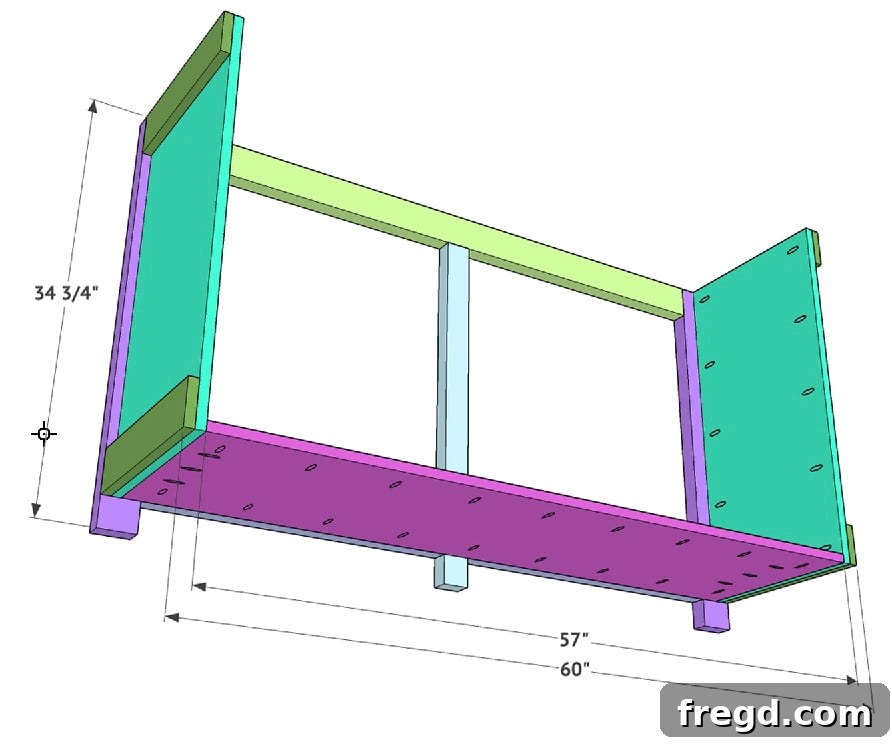
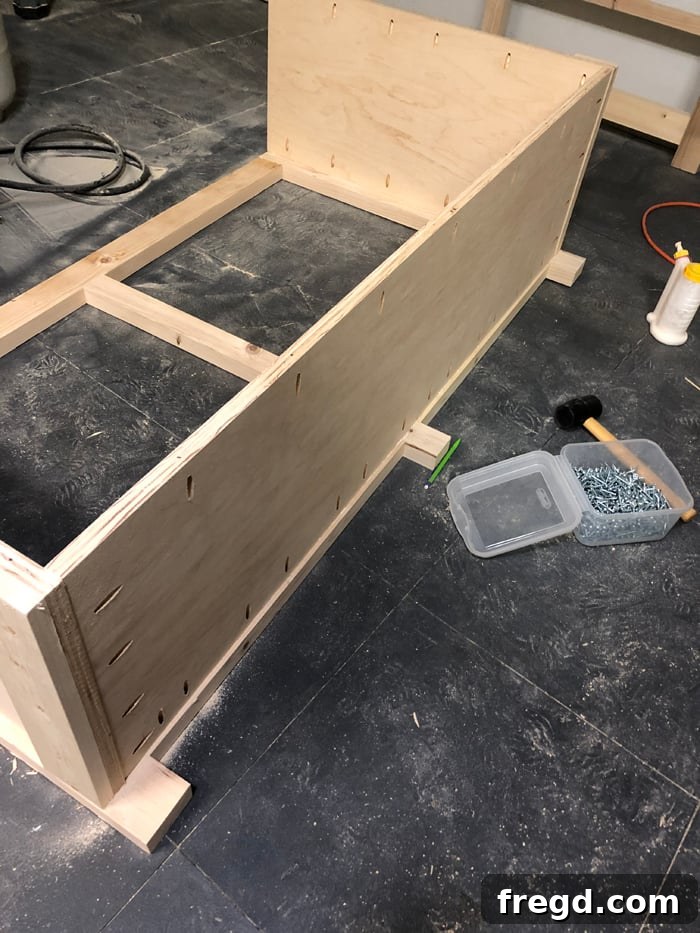
The base of this cabinet is constructed from 3/4” hardwood plywood. Start by cutting this piece to the exact dimensions specified in your plans. Using your Kreg Jig, add 3/4” pocket holes along all four sides of this plywood piece. These pocket holes will facilitate strong, concealed attachments from multiple angles. Apply wood glue to the mating edges of the back face frame and side frames where the bottom panel will rest. Then, carefully position the plywood base and attach it securely using 1.5” pocket hole screws. This step not only closes off the bottom of the cabinet but also significantly enhances the overall structural integrity, ensuring your **DIY storage cabinet** is robust and stable.
5. Secure the Middle Divider
Adding the middle divider is a key step for both structural support and creating organized compartments within your **buffet cabinet**.
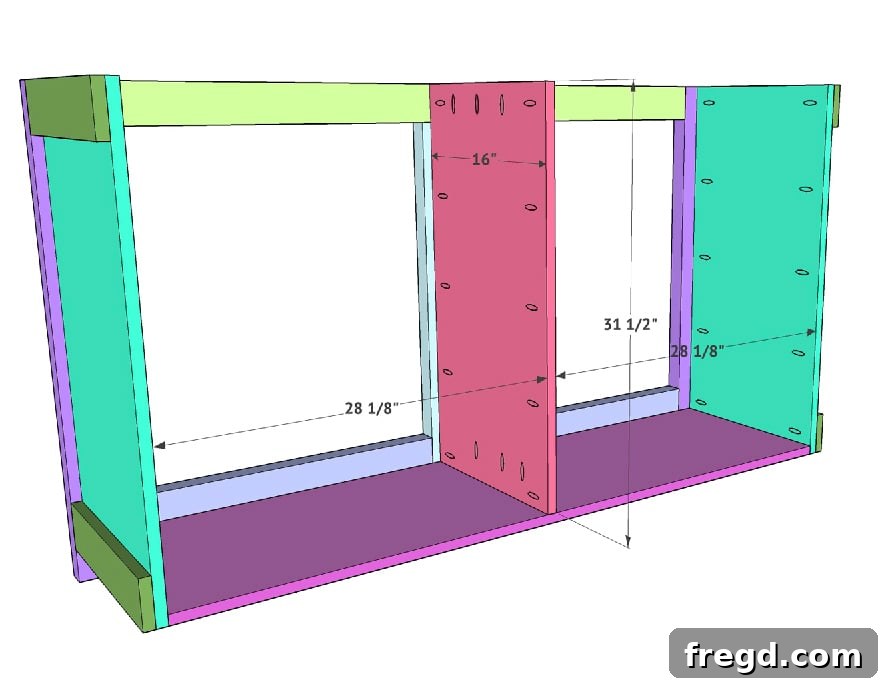
Next, install the middle divider. This piece is also crafted from 3/4” hardwood plywood and should be cut slightly shorter than the side frames to allow for the front face frame. Drill pocket holes down both long sides of the divider and along the bottom edge of one side. Apply wood glue to the contact points. Then, carefully position the divider in the center of the cabinet opening and attach it. Use 1.25” pocket hole screws to secure the bottom of the divider to the cabinet base, and 1.5” pocket hole screws for attaching its sides to the middle leg of the back face frame. Remember to apply wood glue on all mating surfaces for maximum strength and durability. This divider not only provides additional stability but also creates two distinct storage sections, making your **farmhouse buffet** even more functional.
6. Attach the Front Face Frame
The attachment of the front face frame is a pivotal moment, completing the main box of your **DIY buffet table** and defining its aesthetic openings.
Now, it’s time to attach the front face frame! This piece mirrors the back face frame in construction and is critical for the overall appearance and stability of your **modern farmhouse cabinet**. Apply wood glue to all mating surfaces. Then, using 1.5” Kreg pocket hole screws, drive them through the side frames and the center divider directly into the front face frame. It is absolutely crucial that the outsides and the top of this front face frame are perfectly flush with the outside edges of the side frames and the top of the cabinet structure. This precision ensures a clean, seamless look and proper alignment for your future doors. Take your time during this step to ensure everything is square and flush, as it significantly impacts the final quality of your **DIY furniture build**.
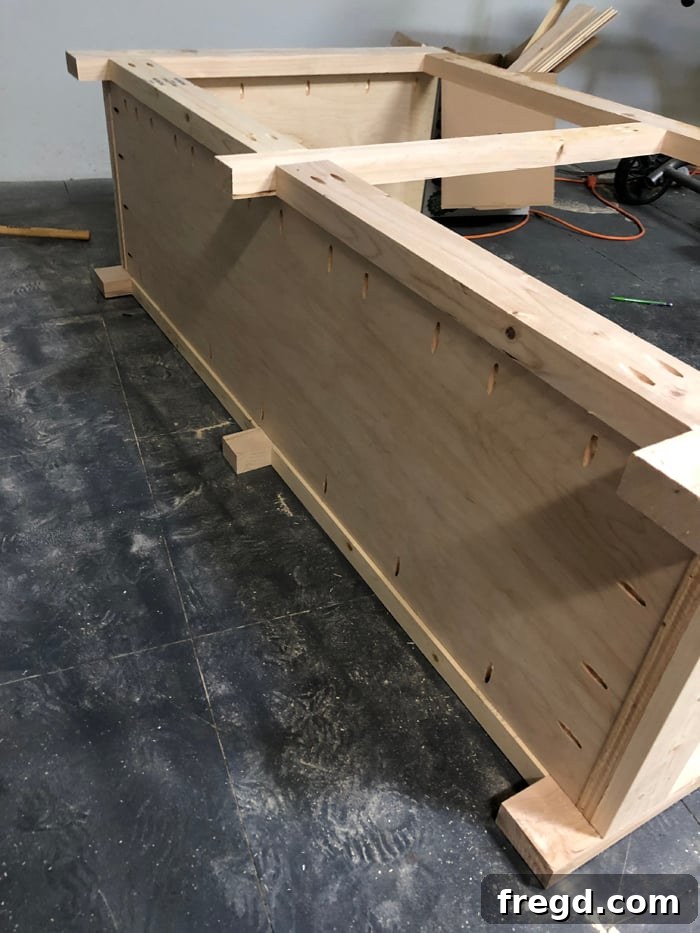
At this stage, before proceeding with the top and back panels, I highly recommend pausing to build the doors. Constructing the doors now allows for easier access and more precise fitting within the completed cabinet frame.
7. Crafting the Stylish Doors
The doors are a focal point of your **modern farmhouse buffet**, offering both aesthetic appeal and practical storage.
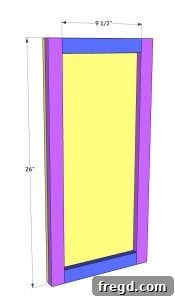
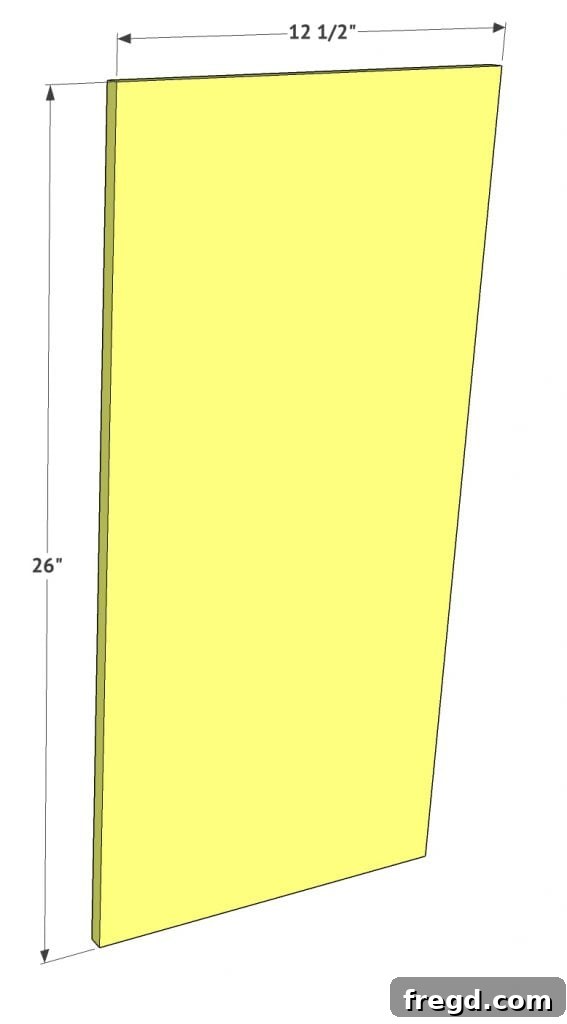
These elegant doors are constructed from 1/2” hardwood plywood. Begin by cutting each door panel to its exact size. When determining your measurements, it’s a good practice to leave a consistent 1/8” gap all around each door within its respective opening. This small clearance ensures that the doors can open and close smoothly without binding, and it accommodates any minor fluctuations in wood movement. It’s always best to measure your specific cabinet openings and cut these panels precisely, rather than relying solely on generic measurements, as slight variations can occur, potentially leading to uneven gaps. Once your plywood panels are cut, move on to attaching the decorative door trim.
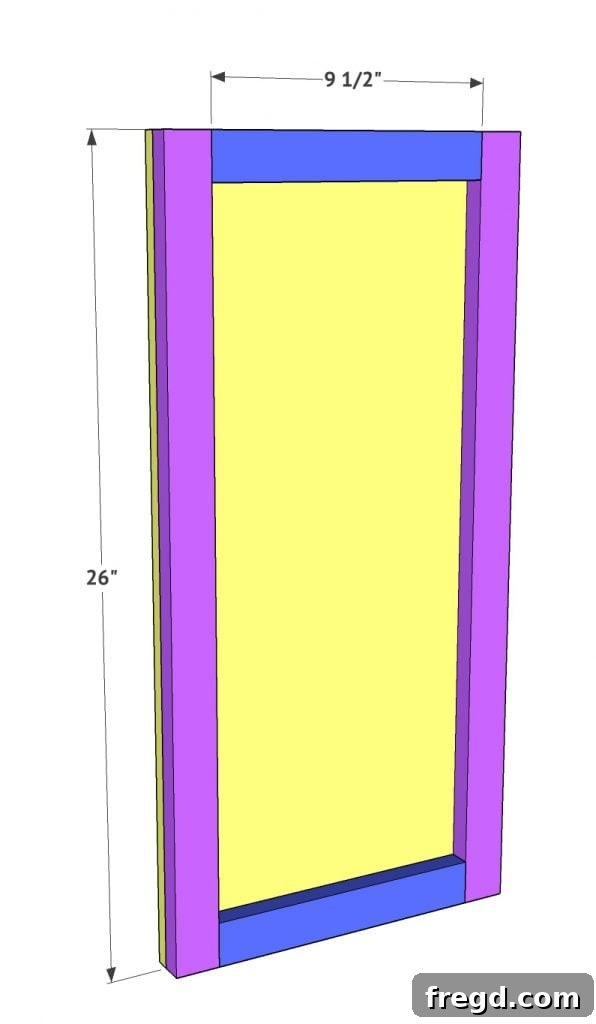
The door trim is made from 1×4 boards cut to size. For the best fit and appearance, first measure and cut your longer vertical trim pieces. Then, measure and cut the shorter horizontal pieces to fit perfectly between the vertical ones, creating a seamless frame around the plywood panel. Apply wood glue to the back of the trim pieces and securely attach them to the plywood panels using 1” brad nails. Ensure the trim is flush with the outer edges of the plywood. This step is where the doors truly begin to take on their distinctive character, ready for further customization.
8. Decorative Arches for a Custom Look
To infuse a truly unique and personalized touch into this **DIY buffet table**, I opted for a distinctive decorative element on the doors.
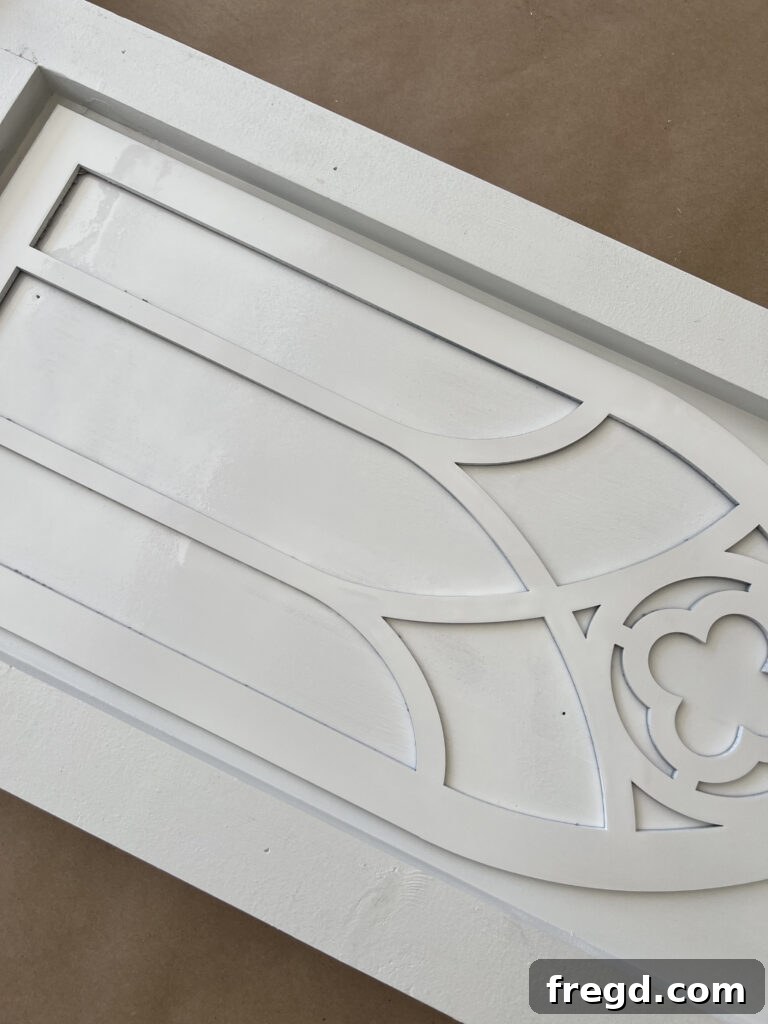
Instead of leaving the door panels plain, I decided to incorporate elegant decorative arches. For this, I utilized my Glowforge laser printer to precisely cut these intricate designs. I found a fantastic SVG file on Etsy, which made the design process incredibly simple. For the material, I used this eucalyptus board from Home Depot, cutting one panel for each door. I used medium draftboard settings on the Glowforge, and surprisingly, no masking was needed as the cuts cleaned up beautifully with just a fiber cloth!
While these decorative arches add a special flair, please know that the doors are equally striking left blank, just as the standard plans suggest. However, if you’re looking to elevate your **buffet cabinet** and match your unique interior design, there are countless ways to customize them. Consider routed edges, adding a different style of applied molding, or even stenciling a pattern. This flexibility ensures that your **DIY modern farmhouse cabinet** truly reflects your personal style and creativity.
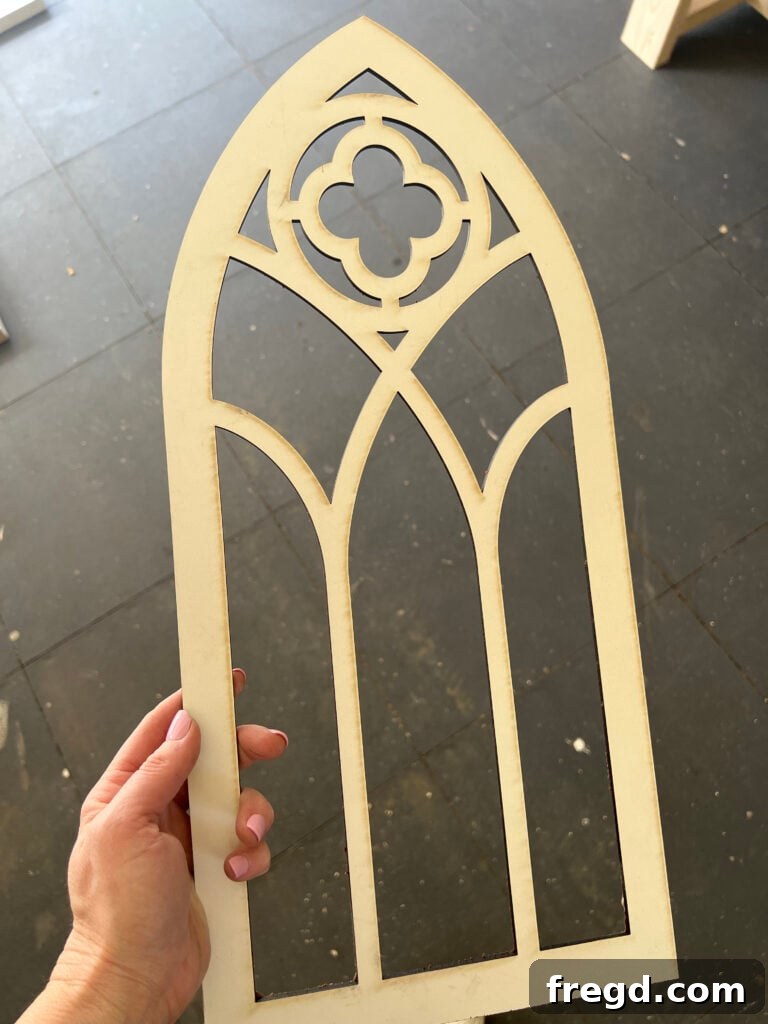
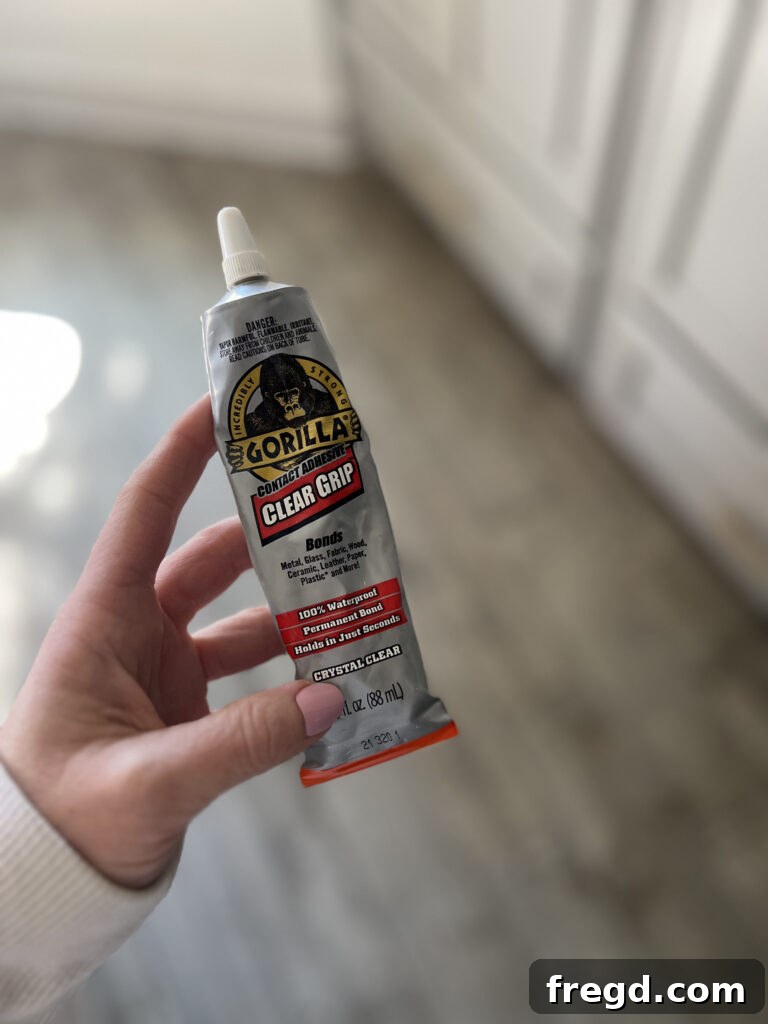
Once the decorative panels were cut, I attached each arch securely to the center of the door panels. For this, I used Gorilla Clear Grip adhesive, which is fantastic for a strong, clear bond. I allowed them ample time to dry thoroughly, ensuring a lasting attachment. This detail, though optional, truly transforms the doors and adds an extra layer of craftsmanship to the **farmhouse buffet**.
9. Build the Beautiful Planked Top
The top of your **DIY buffet table** is not just functional; it’s a prominent design element, and a planked top offers a classic farmhouse charm.
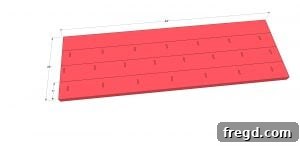
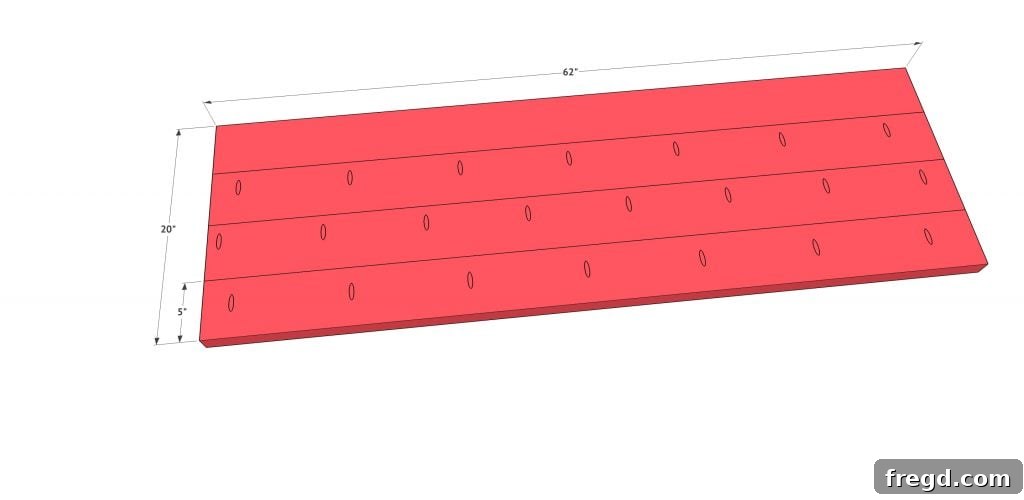
To create the beautiful, rustic planked top for your **buffet cabinet**, you’ll start with 2×6 boards. Using your table saw, rip these boards down to a consistent 5” wide each. This slight adjustment from standard 2x6s creates a more refined “planked” appearance. Next, you’ll need to add pocket holes. Drill 1.5” pocket holes along one long side of three of these boards. Once the pocket holes are drilled, line up the boards side-by-side, ensuring they are perfectly flush along their top and bottom surfaces. Apply wood glue generously along the mating edges before securing them together with 2.5” pocket hole screws. This creates a wide, seamless, and incredibly strong top that will be both durable and visually appealing for your **modern farmhouse buffet**.
10. Attach the Top to the Base
With the main cabinet structure complete and the beautiful planked top ready, it’s time to bring these two primary components together.
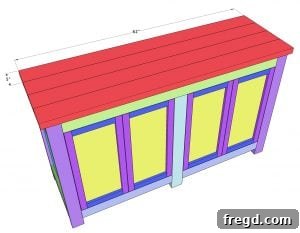
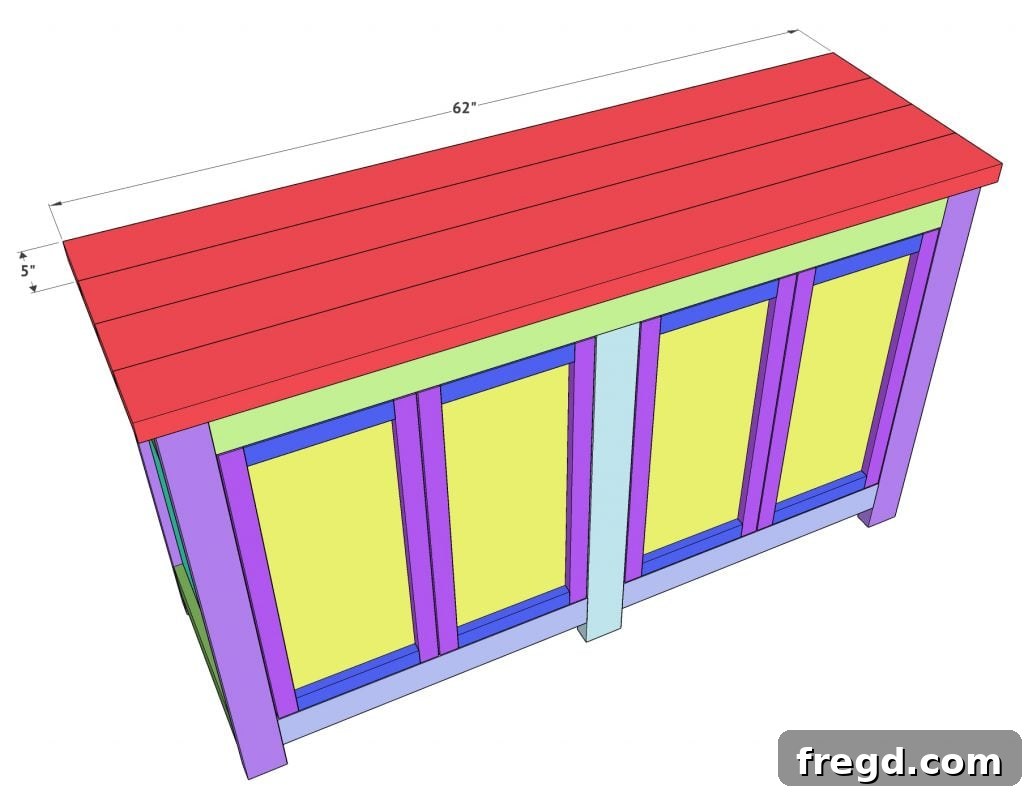
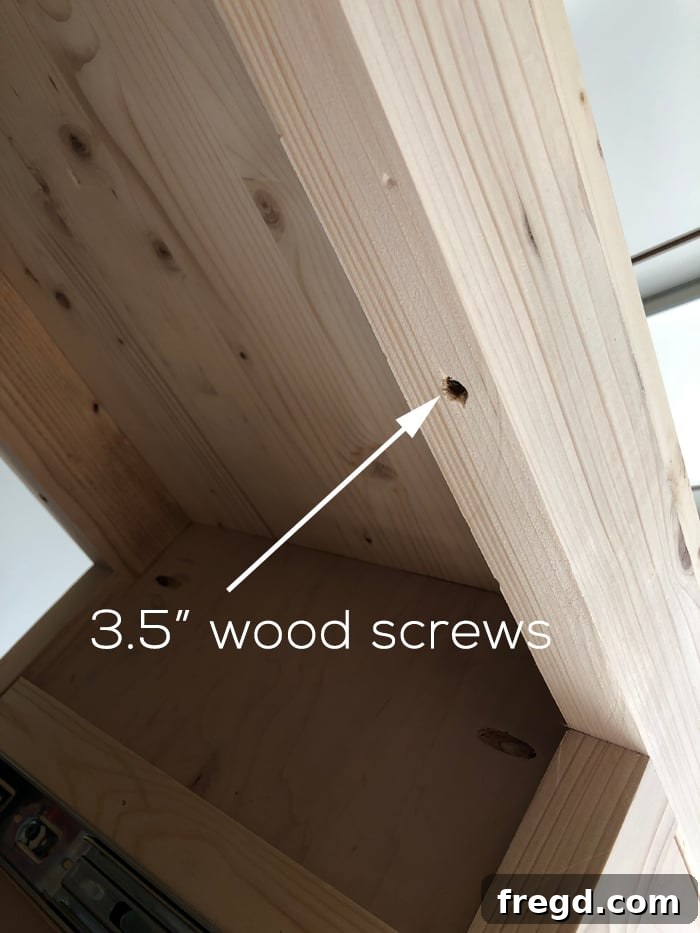
Carefully position the assembled planked top onto the cabinet base, ensuring it is perfectly centered and aligned with the front and side edges. Once satisfied with the placement, you will secure the top using 3.5” wood screws or Spax screws. Drive these screws up through the top rails of the face frames and into the underside of the planked top. Make sure these screws are long enough to penetrate well into the top without going all the way through. This robust attachment guarantees that the top is firmly fixed to the base, providing immense stability and completing the primary structure of your **DIY buffet table**. This step transforms your separate components into a single, formidable piece of **custom furniture**.
11. Install the Plywood Back Panel
The final structural step for your **buffet cabinet** is adding the back panel, which encloses the unit and adds crucial rigidity.
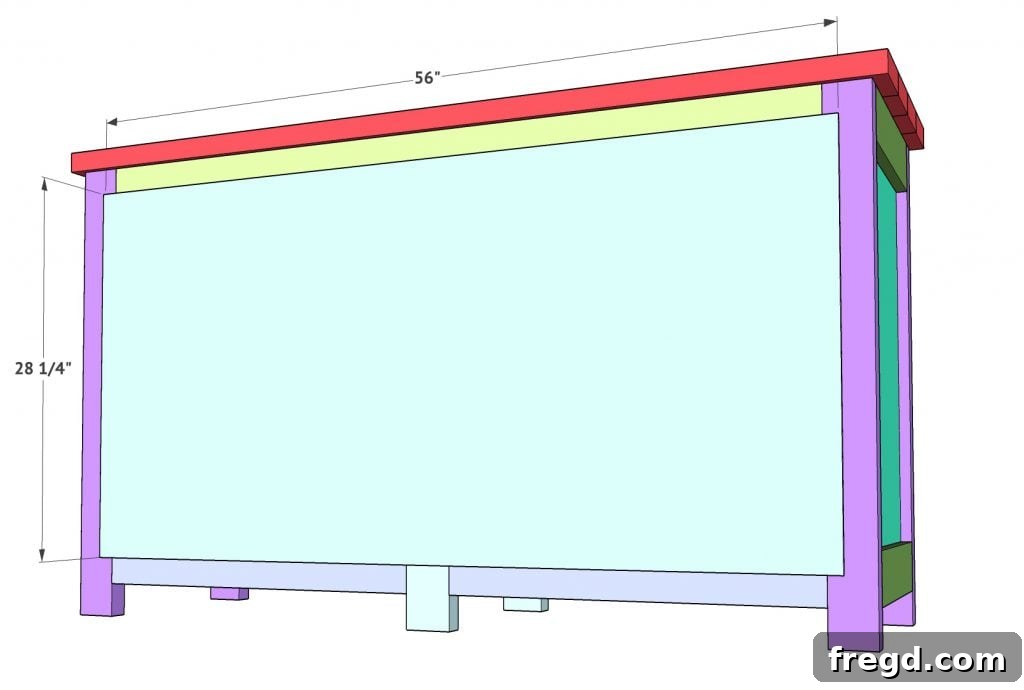
This panel is cut from a 1/4” sheet of plywood. Measure and cut it precisely to fit the entire back opening of your assembled buffet. Once cut, apply wood glue generously around the perimeter of the back frame where the plywood will sit. Then, carefully position the 1/4” plywood back panel and attach it securely using 1” staples or brad nails. Drive fasteners every few inches around the entire perimeter for a strong hold. This final panel not only provides a finished look but also significantly enhances the overall squareness and stability of your **DIY storage cabinet**, preventing any racking or wobbling. With the back in place, your **modern farmhouse buffet** is structurally complete and ready for finishing touches!
Finishing Your DIY Buffet Table with Paint and Hardware
With the construction complete, it’s time to bring your **DIY buffet table** to life with beautiful finishes and functional hardware, transforming it into a true statement piece for your home.
Painting and Staining for That Perfect Farmhouse Look
The choice of paint and stain plays a huge role in achieving the desired aesthetic for your **modern farmhouse buffet**. For this project, I went with a classic and popular combination that perfectly embodies the farmhouse style.
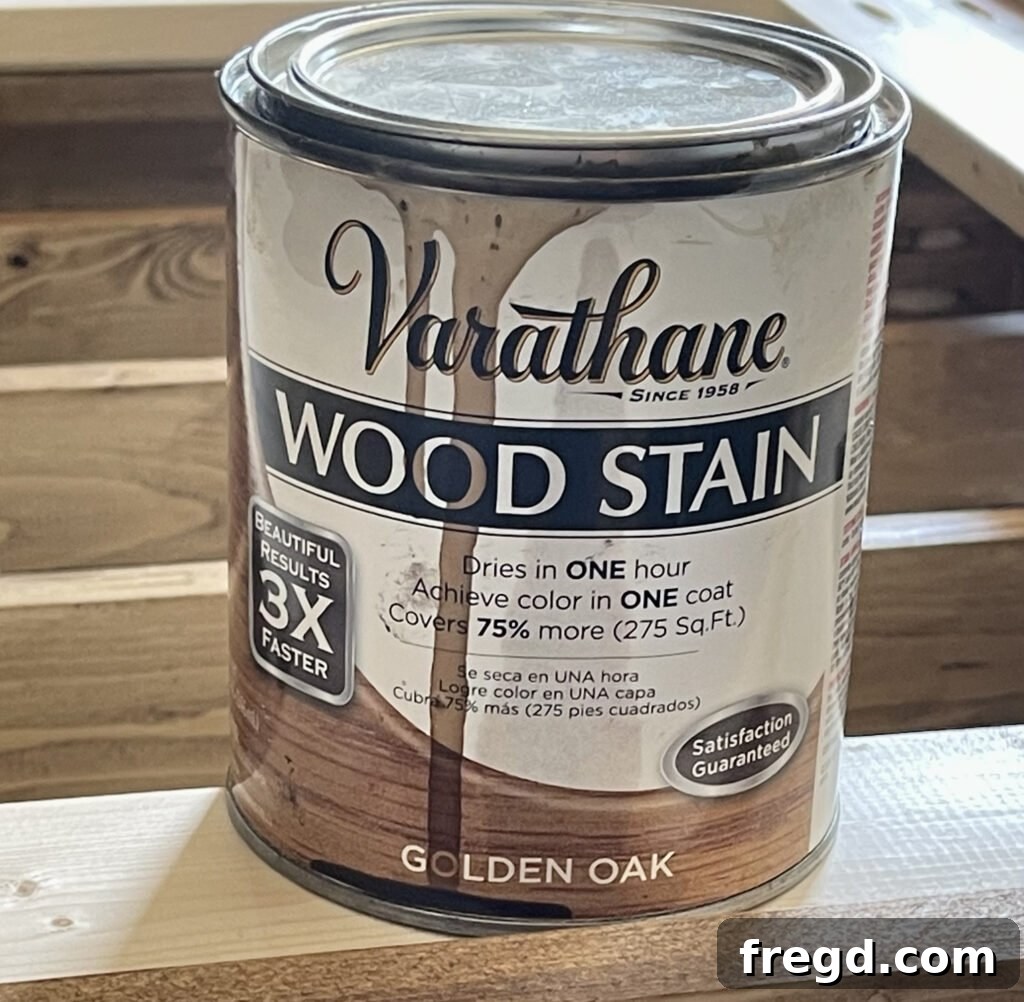
I meticulously painted the doors and the entire cabinet base with Sherwin-Williams Pure White in a satin finish. This crisp, clean white provides a bright and airy feel, making the piece versatile for various decor styles while retaining its farmhouse charm. Before painting, ensure all surfaces are smoothly sanded and primed for optimal paint adhesion and a flawless finish. For the planked top, I chose to highlight the natural wood grain with a rich stain. I applied Varathane stain in Golden Oak, which imparts a warm, inviting hue that beautifully contrasts with the white cabinet. This combination of a painted base and a stained top is a hallmark of **farmhouse furniture**, creating visual interest and adding depth to the piece. This finishing step truly defines the character of your **DIY buffet table**, making it a personalized masterpiece.
Attaching the Functional and Decorative Hardware
The final touches – the hardware – are essential for both the functionality and the overall aesthetic of your **DIY storage cabinet**. Choosing the right hinges and door pulls can dramatically enhance the finished look.
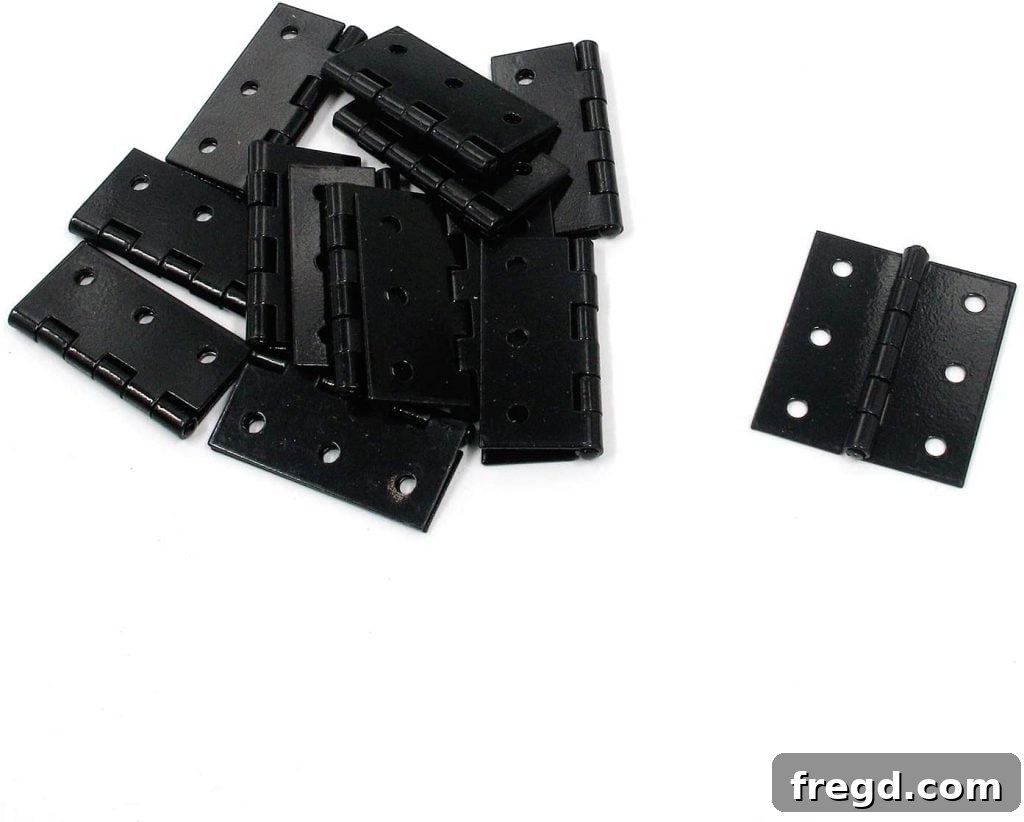
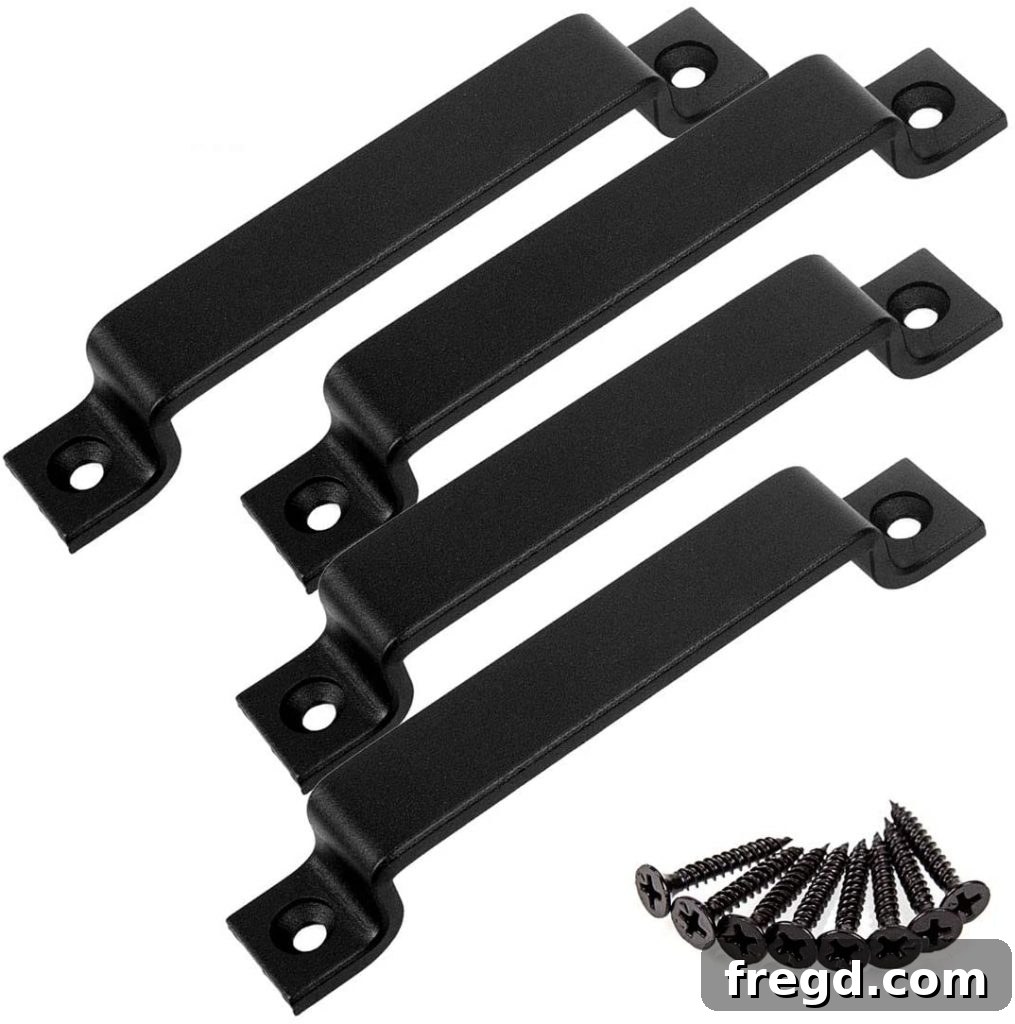
For the doors, I discovered these fantastic hinges on Amazon that perfectly complement the farmhouse style and offer excellent value. You can find them HERE! They were not only affordable but also of great quality, ensuring smooth and reliable door operation. Take your time to carefully install each hinge, making sure the doors hang level and swing freely. Proper hinge placement is crucial for the longevity and appearance of your **buffet cabinet**. Next came the door pulls. I absolutely adore these particular pulls and have used them on several of my **DIY furniture builds**. Their design perfectly matches the modern farmhouse aesthetic, and they are incredibly fast to ship, making them a convenient choice. You can find these stylish pulls HERE on Amazon! Installing the hardware is the moment when your **DIY buffet table** truly becomes a finished, usable piece of furniture, ready to be admired and utilized in your home.
Your Finished DIY Modern Farmhouse Masterpiece
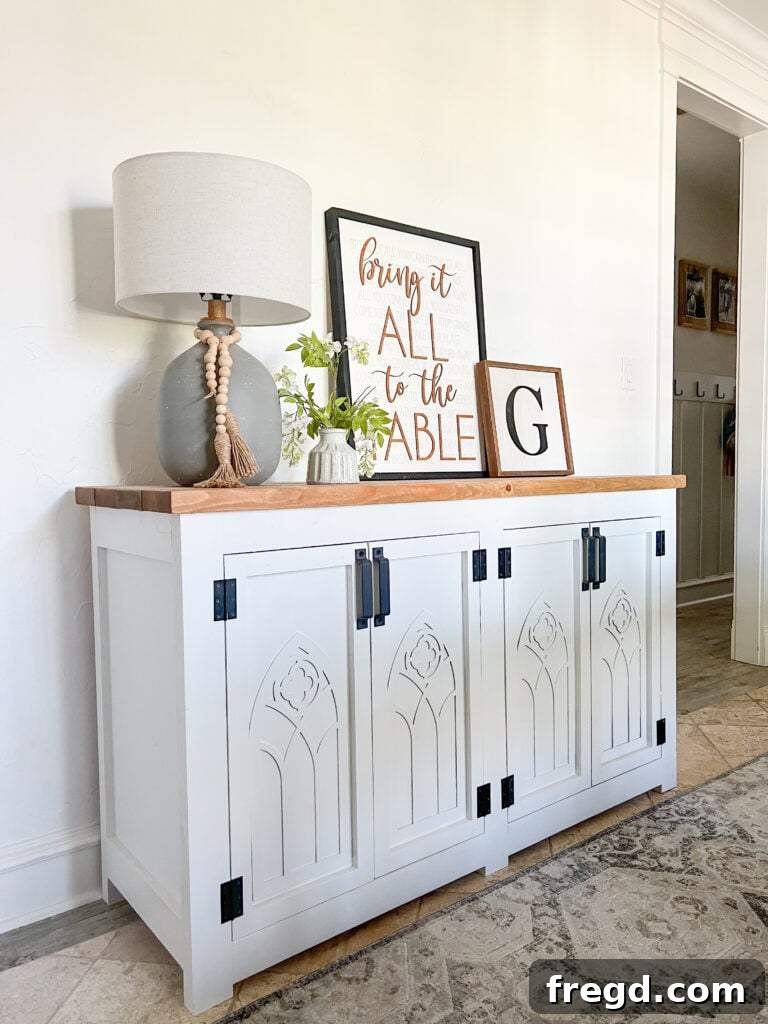
And there you have it – your very own **DIY Modern Farmhouse Buffet Table**, built with skill and care! I am absolutely delighted with how this project turned out. The seamless blend of style, ample storage, and functional design has added an incredible amount of charm and utility to my dining room. Beyond the aesthetic appeal, the pride of creating a significant piece of furniture with my own hands is truly unmatched.
This **buffet cabinet** now serves as a central hub in the dining area, perfect for displaying decor, organizing essentials, or serving guests during special occasions. It’s a testament to the fact that with a few tools, some patience, and a clear guide, anyone can tackle a significant woodworking project and achieve stunning results. Whether you’re looking to save money, customize your home, or simply enjoy the craft of building, this **DIY storage cabinet** is a deeply satisfying endeavor. I couldn’t be happier with the added function and the beautiful space it has created. Now it’s your turn to experience this joy!
Free Printable Plans for Your DIY Modern Farmhouse Cabinet
DIY Modern Farmhouse Fancy Door Cabinet
CLICK HEREto print the FREE plans!
Instructions
-
The first step is to build your 2 face frames. These are made from 2×4 boards that you will rip to 3” wide each using a table saw. Create 1.5” pocket holes where indicated in the plans. Attach these pieces using wood glue and 2.5” pocket hole screws. Ensure the bottom horizontal boards align 2.5” from the base of the leg pieces for proper cabinet height.

-
Next, construct the cabinet sides. Each side uses 3/4” hardwood plywood and 1×4 boards. Drill 3/4” pocket holes along each long side on the back of the plywood panel. This will be used for later attachment to the main cabinet structure.
-
Then, attach the 1×4 trim to the front of the plywood panel using wood glue and 1.25” brad nails. Make sure these trim pieces are flush with the edges of the plywood. You will need to build two identical side panels.
-
Now, connect the two assembled side frames to the back face frame. Use wood glue and 1.5” Kreg pocket hole screws for a strong connection. It’s important that the top of the side frames are flush with the top of the back face frame. This will naturally leave a 2.5” space beneath the bottom of the side frames. Also, ensure the outside edge of the trim boards on the sides are flush with the outside edge of the back face frame.
-
The base of this cabinet is made from 3/4” hardwood plywood. Using your Kreg Jig, add 3/4” pocket holes along all four sides of this piece. Then, attach it securely to both the back face frame and the side frames using wood glue and 1.5” pocket hole screws. This creates a solid foundation for your buffet.
-
Next, attach the middle divider. This piece is also 3/4” hardwood plywood, cut slightly shorter than the side frames. Drill pocket holes down both long sides and along the bottom of one side. Attach it to the base of the cabinet using 1.25” pocket hole screws (for the bottom) and to the middle leg of the back face frame using 1.5” pocket hole screws. Don’t forget to apply wood glue for maximum strength.
-
Once the middle divider is secure, attach the front face frame. Utilize wood glue and 1.5” Kreg pocket hole screws, driving them through the side frames and the center divider into the face frame. Just like the back face frame, ensure the outsides and top of the front face frame are flush with the outside edges of the rest of the cabinet structure, creating a clean, seamless appearance.
-
Before adding the top and back panels, it’s best to construct the doors. These doors are made from 1/2” hardwood plywood. Cut each door panel precisely to size. A good practice is to leave a small 1/8” gap around each door for proper operation and to account for any slight imperfections in your cabinet opening. Accurate measurement is crucial here.
-
Next, attach the door trim. This trim is made from 1×4 boards cut to size. Start by measuring and cutting your longer vertical pieces, then measure and cut the shorter horizontal pieces to fit perfectly between them. Attach these trim pieces to the door panels using wood glue and 1” brad nails for a clean, decorative finish.
-
Now, construct the cabinet top. This beautiful planked top is made from 2×6 boards that you will rip down to 5” wide each. Add 1.5” pocket holes along one side of three of these boards. Align them flush with each other and attach them using 2.5” pocket hole screws to create a wide, solid planked surface.
-
Attach the newly built top to the cabinet base. Use 3.5” wood screws or Spax screws, driving them up through the face frames and securely into the underside of the top. This strong connection ensures the top is firmly in place and adds significant stability to the entire buffet.
-
The final structural step is to add the back panel. Cut this from a 1/4” sheet of hardwood plywood to fit the back of your cabinet perfectly. Attach it to the back using wood glue and 1” staples or nails. This completes the enclosure, adds rigidity, and provides a finished look.