
Reinventing the Dining Room: A Modern Gray Transformation Journey
Hello home decor enthusiasts!
This week has been an exhilarating whirlwind of creativity and sawdust as I plunged headfirst into a much-needed dining room makeover. You know how it is – sometimes a certain space in your home just starts whispering for a change, and once that inspiration hits, there’s no turning back! I decided it was time to heed that call and transform a formerly overlooked area into a vibrant, modern heart of our home. This wasn’t just a simple refresh; it was a full-blown mission to inject new life and sophistication into a room that deserved far more attention than it had previously received.
For years, our dining room had been a bit of an “afterthought,” a collection of pieces I’d acquired over time without a cohesive vision. It lacked a distinct personality and often felt somewhat disconnected from the rest of our home’s aesthetic. I still have a photo from a couple of years ago that perfectly captures its previous state. The lighting in the original photo is a little dim, but it gives you a clear sense of the space before its grand transformation. It’s hard to believe how far it’s come!
The “Before” Story: A Room in Need of Revival
Every home has those spaces that, despite their potential, somehow become catch-alls or simply fade into the background. For us, that was undoubtedly the dining room. It wasn’t an intentional neglect, more a gradual accumulation of pieces rather than a thoughtfully curated design. Items were “thrown in there as I would find them,” creating an eclectic mix that, while functional, lacked the intentional style and modern flair I craved. This space, designed for gathering, entertaining, and making memories, felt more like a forgotten corner. The decor was dated, the colors felt heavy, and it desperately needed a stylistic intervention to bring it into the contemporary era. Finally, the time arrived to give it the attention it deserved and infuse it with a sense of purpose and beauty. The goal was clear: to modernize it and make it a vibrant, inviting space for family and friends.
Embracing Gray: The Quest for the Perfect Hue
When the decision was made to modernize the dining room, one color immediately sprang to mind: gray. And let me tell you, choosing gray for my walls was one of the best decisions ever – at least, I certainly think so! Gray has emerged as a powerhouse in interior design, celebrated for its versatility, sophistication, and ability to create a serene yet stylish backdrop for almost any decor. It’s a truly timeless neutral that offers incredible flexibility, seamlessly blending with various color palettes and design aesthetics from minimalist to industrial, or even traditional with a modern twist. The beauty of gray lies in its nuanced character; it can be warm or cool, light or dark, providing an endless spectrum of possibilities.
However, this very versatility is also what makes gray one of the hardest colors to pick. It’s not just “gray”; it’s an intricate world of undertones and saturation levels. A single shade can shift dramatically under different lighting conditions, appearing blue, green, purple, or even beige depending on the light source and surrounding colors. It can lean towards a cool, crisp feel or offer a warm, inviting embrace. This complexity means that what looks perfect on a tiny paint chip in the store might look entirely different once applied to an entire wall in your home. I’d venture to say that gray can present about “1400 different tones,” making the selection process a daunting task. For this project, the most challenging part wasn’t the physical act of painting, but rather the meticulous process of selecting the precise shade of gray that would perfectly complement my home’s existing elements and truly transform the dining room. Once I made the choice, there was no looking back – complete commitment was key!
Introducing Dutch Boy Route 66: My Chosen Shade
After careful consideration, countless swatches, and a fair bit of deliberation, I finally settled on a stunning shade from Dutch Boy called “Route 66.” This particular gray struck the perfect balance I was seeking. It’s a sophisticated, mid-tone gray that manages to be both contemporary and classic. It has a depth that prevents it from feeling stark or cold, yet it’s undeniably modern. What I appreciate most about Route 66 is its chameleon-like quality; it adapts beautifully to the changing light throughout the day, always maintaining its elegant character without becoming overwhelming. While Dutch Boy’s website might represent it in a certain way, in person and on my walls, it’s actually a bit more richly gray than I anticipated, which was a pleasant surprise and exactly what I hoped for.
A crucial factor in my paint choice was its ability to seamlessly mesh with my existing trim. Repainting all the trim in the dining room, and potentially the surrounding areas, was simply not on my agenda – I had “NO intentions of painting all of it”! This meant finding a gray that had the right undertones to harmonize with the trim’s color without clashing or making the trim look yellowed or dull. Route 66 proved to be the ideal companion, creating a cohesive and polished look without requiring an exhaustive amount of additional work. The beauty of a well-chosen gray is its ability to enhance rather than compete with architectural details, and this shade did just that, allowing the existing trim to shine while providing a fresh, new backdrop.
Seamless Transitions: Ceiling and Trim Selection
Speaking of seamless transitions, the ceiling was another element that required careful consideration. To maintain a crisp, clean aesthetic and ensure visual continuity, I matched my ceiling color to my trim. This decision creates an illusion of greater height and an expansive feel, as the eye isn’t interrupted by contrasting lines at the wall-ceiling junction. Painting a ceiling, as many DIYers know, is a unique challenge. Yes, I had to paint the ceiling (even while pregnant!), but honestly, it wasn’t nearly as horrible as it sounds. With the right tools and a bit of patience, it was entirely manageable. Just like the walls, I opted for a Dutch Boy color for the ceiling as well, ensuring a consistent quality and finish throughout the room. This commitment to matching the ceiling to the trim significantly contributed to the overall bright and airy atmosphere I was aiming for in the newly revamped dining space.
Mastering the Art of Painting: Essential Tools and Techniques
Now, let’s talk about the practical side of this transformation: the painting process itself. I want to share a few details on how I tackled the painting, because having the right tools makes an incredible difference. Good quality rollers and brushes can genuinely elevate your painting experience from a tedious chore to an efficient, almost enjoyable task. They significantly reduce frustration, improve the finish, and ultimately save you time and effort. Beyond selecting the perfect paint color, investing in superior equipment is paramount for achieving a professional-looking result, especially when undertaking a significant room makeover like this one.
The Unsung Hero: Whizz 4″ Roller for Precision
For all the intricate areas, the “cutting in,” and those smaller, hard-to-reach spaces, I swear by the Whizz 4″ roller from Lowe’s. This little powerhouse is a game-changer. “Cutting in” – the technique of applying paint precisely along edges where two surfaces meet, like walls and trim or ceiling – is often the most time-consuming and challenging part of painting. A steady hand and a good brush are usually recommended, but this compact roller offers an unexpected level of control and speed. It allows you to get surprisingly close to edges, reducing the need for painstaking brushwork. Its smaller size and maneuverability make it ideal for working around windows, door frames, and in tight corners where a larger roller simply can’t reach. This tool truly simplifies what can often be the most daunting aspect of a painting project.
What sets these Whizz rollers apart and makes them so effective is their unique construction: the inside core is also made of fiber. This innovative design means that you can use the roller on corners and get a clean, smooth line with remarkable ease. Unlike traditional rollers that have a hard plastic core, the fibrous interior allows the roller to flex and conform slightly to irregular surfaces, ensuring even paint application right into the crease of a corner. This eliminates the frustrating streaks and uneven coverage that often plague corners when using standard rollers or brushes. It creates a crisp, professional edge, making the cutting-in process feel significantly less daunting and more efficient. Seriously, once you try one, you’ll wonder how you ever painted without it.
Efficient Coverage: The Whizz 9″ Roller for Walls
After meticulously taping off my trim – a crucial first step for any painting project to ensure clean lines – and completing all my cutting-in with the smaller Whizz roller, I moved onto the broader wall surfaces. For this, I employed a larger Whizz 9″ roller. These larger rollers, much like their smaller counterparts, are superior to standard rollers in several key ways. They are designed to hold more paint and distribute it more evenly, which translates to fewer dips into the paint tray and quicker coverage of large areas. This efficiency is a massive time-saver, especially when tackling an entire room.
One of the most annoying frustrations with painting is dealing with streaks and drips. Standard rollers often leave behind unsightly lines, especially if the paint isn’t applied perfectly or if the roller isn’t sufficiently loaded. The Whizz rollers, however, are engineered to minimize these common issues. They deliver a smoother, more consistent finish, leaving virtually no annoying streaks on the wall. Furthermore, they don’t seem to drip nearly as much as other rollers, which means less mess, less wasted paint, and significantly less time spent on clean-up. This superior performance is truly a joy to work with. If you haven’t tried these rollers yet, you absolutely must! I promise, you’ll fall in love with them just as I have. They truly make painting a ton easier and more enjoyable. That was pretty much the secret to my painting success – two coats of paint on both the ceiling and walls, and I was done!
The Painting Process: Step-by-Step Guide
Beyond the tools, a streamlined process ensures the best results. Here’s a quick overview of how I approached the painting, which you can easily adapt for your own projects:
- **Preparation is Key:** Before any paint hit the walls, I ensured the room was thoroughly prepped. This involved moving furniture to the center and covering it with drop cloths, meticulously cleaning the walls to remove any dust or grime, and then carefully taping off all the trim, baseboards, and ceiling edges with high-quality painter’s tape. Good prep work is non-negotiable for a professional finish.
- **Cutting In First:** Using my trusty Whizz 4″ roller (or a high-quality angled brush for very tight spots), I first “cut in” along the ceiling line, around windows, doors, and baseboards. This involves painting a strip a few inches wide along all edges. This foundational step ensures clean lines where the wall meets other surfaces.
- **Rolling the Main Surfaces:** Once the cutting in was complete and slightly dry to the touch, I used the Whizz 9″ roller for the main wall areas. I started at one corner and worked my way across, painting in “W” or “M” patterns and then filling them in, ensuring even coverage from top to bottom. It’s important to keep a wet edge, meaning you should always work back into paint that is still wet to avoid lap marks.
- **Two Coats for Perfection:** For both the ceiling and walls, I applied two coats of paint. The first coat provides initial coverage, but the second coat is crucial for achieving true color depth, uniformity, and durability. I allowed ample drying time between coats, typically following the manufacturer’s recommendations on the paint can. Rushing this step can lead to an uneven finish and compromised adhesion.
- **Removing Tape Promptly:** Once the final coat was applied and still slightly damp (not completely dry), I carefully removed the painter’s tape. This helps to achieve clean, sharp lines and prevents the paint from peeling along with the tape once it’s fully cured.
Following these steps, even a relatively large area like a dining room can be transformed efficiently and effectively, yielding results you’ll be proud of.
The Stunning “After”: A Gray Dining Room Reborn
The transformation is truly remarkable. It’s genuinely amazing how much gray paint can brighten up a room and completely change its ambiance! What was once an overlooked, somewhat cluttered space now feels expansive, sophisticated, and incredibly welcoming. The Dutch Boy Route 66 gray acts as a serene, contemporary backdrop that allows other elements in the room to truly pop. It reflects light beautifully, making the room feel larger and more airy than before. The subtle undertones of the gray add depth and interest without being overwhelming, creating a sophisticated canvas for future decor additions. The coordinated ceiling and trim further enhance this sense of spaciousness, providing a seamless visual flow that elevates the entire aesthetic.
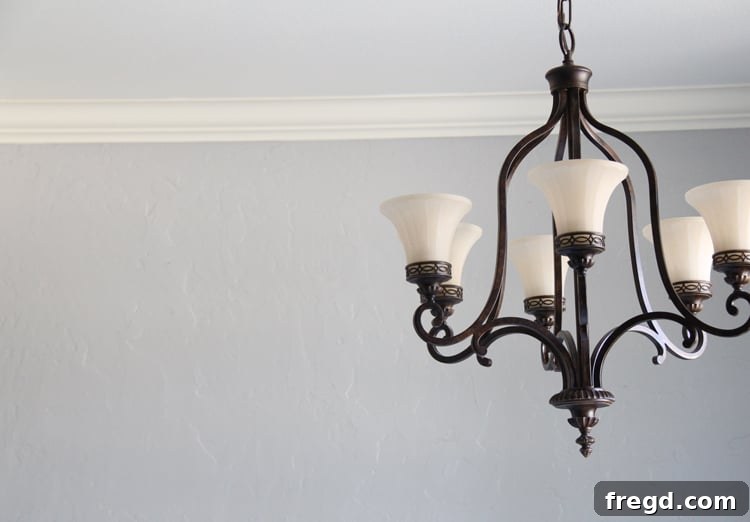
While the furniture is currently tucked away to fully appreciate the fresh paint – you’ll have to settle for these wall-focused images for now – you can already see the profound impact. The room has shed its outdated skin and emerged as a chic, modern space ready for new memories. These initial “after” shots truly capture the essence of the revitalized room:
Beyond the Walls: Future Decor Plans
The walls are just the beginning of this exciting dining room saga! Now that the foundation is set with this beautiful gray, my mind is already buzzing with the next steps. I’m currently putting the finishing touches on some custom window panels that I made, designed to perfectly complement the new wall color and add another layer of texture and style to the space. I can’t wait to share those with you tomorrow, so make sure to stop back by for the reveal! In the meantime, I’m off to finish painting the dining chairs, giving them a fresh, updated look that will tie the entire room together. There’s still so much more to come in this dining room transformation, and I’m thrilled to take you along for the journey.
Conclusion: Your Next Home Transformation Awaits
Embarking on a home renovation project, even one as seemingly straightforward as painting a room, can bring a surprising amount of joy and satisfaction. It’s a testament to the power of color and the impact a thoughtful refresh can have on your living environment. Our dining room’s journey from an “afterthought” to a beautifully modernized gray sanctuary proves that with a clear vision, the right tools, and a little elbow grease, any space can be transformed into something truly special. The versatility and timeless elegance of gray have breathed new life into this room, creating a foundation that is both stylish and incredibly adaptable for future decor choices.
I hope this deep dive into my gray dining room makeover has inspired you to tackle those overlooked spaces in your own home. Remember, every great transformation starts with a single step – or in this case, a single paint chip! Don’t forget to check back soon for updates on the window panels and the completed chair project. Your next home transformation might just be a can of paint away!
Thanks so much for stopping by and sharing in my DIY adventures!
~Whitney