
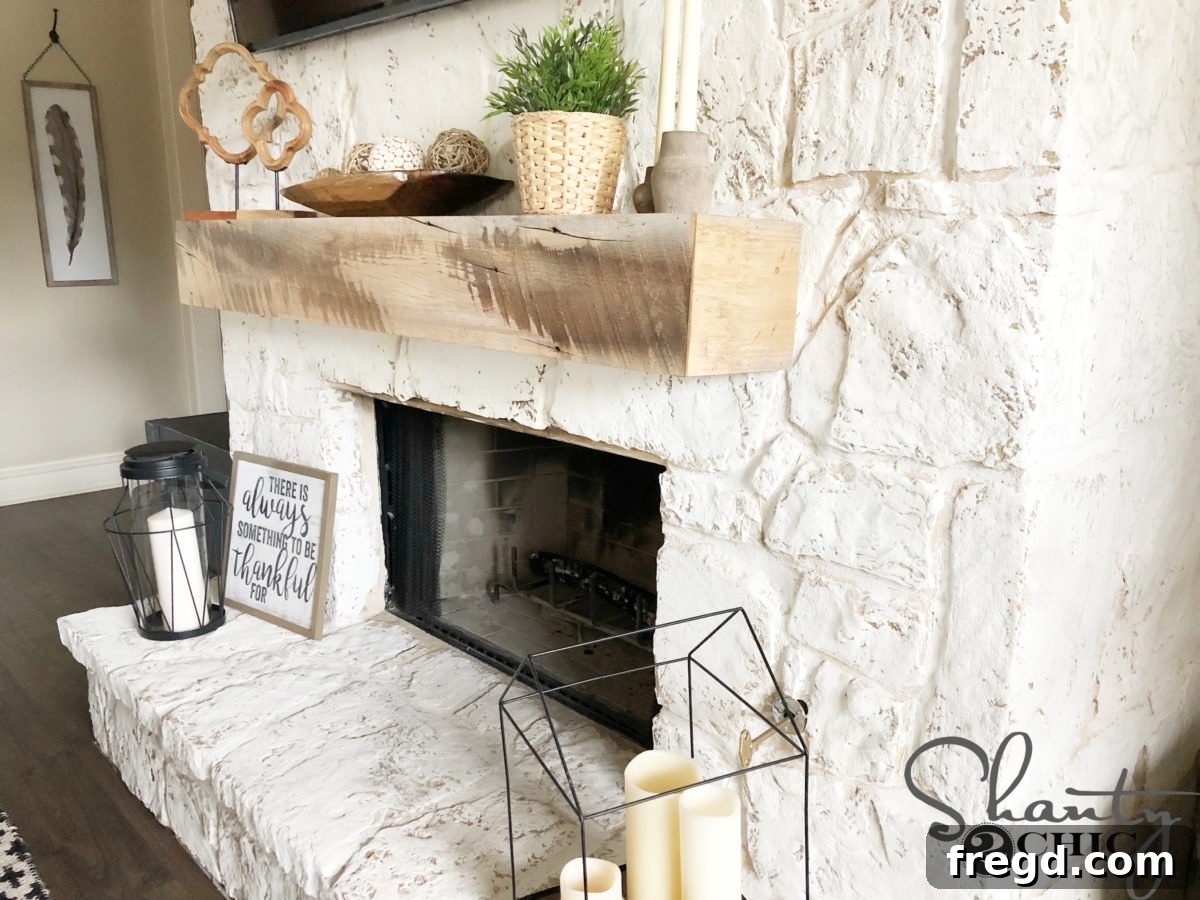
Discover the transformative power of the German Schmear technique to revitalize your fireplace. This incredibly easy-to-follow method, popularized by DIY experts like Shanty2Chic, can be applied to any brick or stone surface in your home, offering a fresh, modern update without extensive renovation.
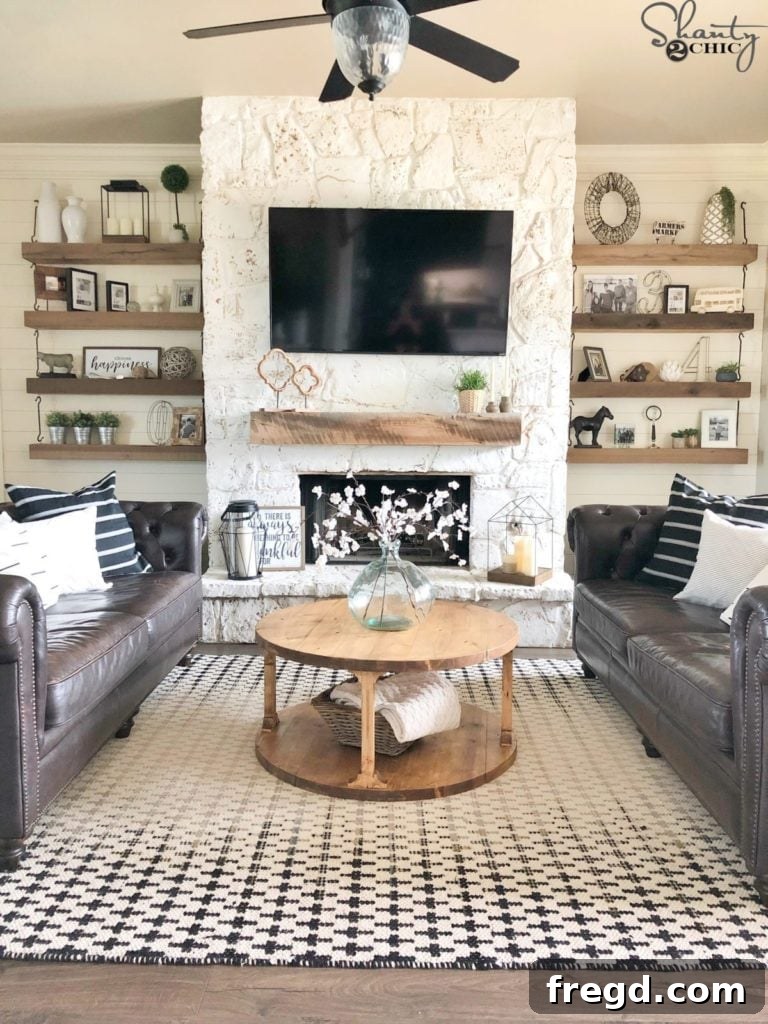
Transform Your Fireplace with German Schmear: A Comprehensive DIY Guide to Modern Elegance
Have you been envisioning a complete style overhaul for your outdated fireplace? The German Schmear technique offers a stunning, cost-effective solution to achieve a beautifully modern aesthetic. This highly popular DIY method breathes new life into tired brick or stone, creating a distinctively weathered, historic, yet undeniably contemporary finish. Unlike the often stark appearance of traditional whitewashing, German Schmear provides a nuanced, textured look that celebrates the natural character of your masonry while significantly brightening your living space. Dive into our comprehensive guide to learn how this simple weekend project can dramatically enhance your home, providing clear, step-by-step instructions for professional-quality results.
For two years, my rustic stone fireplace presented a significant design challenge in my living room. While I appreciated the natural stone, its inherently dark and rugged aesthetic severely limited my decor choices and increasingly clashed with my vision for a brighter, more contemporary home. The moment I saw the incredible transformation achieved by Whitney using the German Schmear technique on her own stone fireplace, I knew I had found the perfect solution for mine. The most exciting revelation? This remarkable upgrade cost me only about $65 in materials, yet it delivered a completely new, sophisticated, and modern look! To empower you to replicate this success, we’ve compiled an in-depth guide, complete with practical tips and essential insights. Prepare to unleash the potential of your fireplace and transform your entire living area!
What Exactly is German Schmear? Understanding the Technique
Often mistaken for simple whitewashing, German Schmear (sometimes spelled “Schmier,” derived from the German word “schmieren,” meaning “to smear” or “to spread”) is a distinct masonry finishing technique that imbues surfaces with a timeless, Old World charm. Rather than applying a thin, uniform coat of paint like traditional brick painting or whitewashing, German Schmear involves spreading a thinned layer of mortar directly over brick or stone. This mortar is then strategically removed or feathered, allowing varying amounts of the original masonry to show through. The result is a beautifully imperfect, textural finish that softens harsh lines, adds incredible depth, and gives your fireplace a unique, artisanal appearance that feels both rugged and refined. It’s the ideal choice for homeowners who wish to preserve the authentic texture and character of their brick or stone while simultaneously achieving a lighter, more contemporary, and airy aesthetic.
Why Choose German Schmear for Your Fireplace Makeover?
Opting for German Schmear provides a compelling array of advantages, making it an exceptionally appealing and rewarding DIY project:
- Remarkably Budget-Friendly: As my personal experience demonstrates, a truly dramatic fireplace transformation doesn’t require breaking the bank. The primary material, masonry mortar, is surprisingly inexpensive, making this a highly accessible and cost-effective project for nearly any budget. You get a high-impact renovation for a minimal investment.
- Instantly Modern & Bright: German Schmear has an immediate and profound effect on a space, instantly lightening and modernizing it. By subtly muting the often dark, heavy tones of natural brick or stone, it creates an open, airy ambiance. This makes your entire room feel brighter, more spacious, and undeniably more inviting. My daughter frequently comments on how much brighter and more cheerful our home feels now!
- Preserves Natural Texture and Character: Crucially, German Schmear differs from painting in that it does not completely obscure the inherent texture of your masonry. It allows the unique contours, variations, and rugged charm of each individual brick or stone to remain subtly visible, adding an authentic character and depth that a flat coat of paint simply cannot replicate.
- Surprisingly DIY-Friendly and Forgiving: This technique is remarkably forgiving, even for novice DIY enthusiasts. There’s no single “perfect” way to apply it; its beauty lies in its inherent imperfection and organic finish. With a few fundamental tools and a dash of patience, you can achieve results that look professionally done.
- Versatile Design Compatibility: Regardless of your home’s interior design style – be it farmhouse chic, industrial loft, transitional elegance, or minimalist modern – German Schmear seamlessly complements a vast spectrum of aesthetics. It provides a sophisticated, subtle backdrop that allows other decor elements and furniture to truly shine.
- Potentially Enhances Home Value: An updated and aesthetically pleasing fireplace can significantly boost your home’s overall curb appeal and potentially its market value. This project offers a high return on a relatively small investment, making your home more attractive to potential buyers.
Watch the German Schmear Process in Action!
To fully appreciate the simplicity and effectiveness of this technique, we’ve included a comprehensive video tutorial. Watching the process unfold firsthand can build your confidence and provide invaluable visual guidance before you embark on your own project. Simply click the play button below to see how to German Schmear your fireplace, achieving a far superior, more textured finish compared to basic whitewashing.
(Note: If the video does not play directly in your browser, it may initiate a download or require you to open it in a media player. This embed uses a direct link to the video file.)
Essential Supplies for Your German Schmear Project
One of the most appealing aspects of this DIY project is its minimal material requirement. You won’t need an extensive array of specialized tools or costly equipment. With just a few key items, you’ll be perfectly equipped to tackle your fireplace transformation with confidence. Here’s everything you’ll need to gather:
- Mortar: Specifically, a Type N masonry mortar is highly recommended for German Schmear. It’s known for its fine texture and good workability, which are ideal for achieving the desired spread and wipe-away effect. A 50lb bag is often sufficient for an average-sized fireplace.
- Paint Brushes: A sturdy, wide masonry brush (sometimes called a brick brush or stucco brush) is essential. Its robust bristles are perfect for effectively applying mortar and pushing it into grout lines and textured surfaces. Keep a smaller brush handy for precise detail work around edges or intricate areas.
- Mixing Attachment for Drill: A paddle mixer attachment is crucial for thoroughly blending your mortar and water. This ensures a consistent, lump-free mixture, which is vital for smooth application and achieving an even finish.
- Builder’s Paper: This heavy-duty paper is indispensable for protecting your floors, furniture, and surrounding areas from any drips, splatters, or accidental spills of mortar. Opt for a thicker construction or rosin paper for best protection.
- Painter’s Tape: Essential for securing the builder’s paper in place and for meticulously taping off the perimeter of your fireplace, adjacent walls, mantelpiece, and any other surfaces you wish to keep pristine. A high-quality tape ensures clean, crisp lines.
- 2-Gallon Bucket (or larger): You’ll need at least one sturdy bucket for mixing your mortar. Having a second bucket filled with clean water is highly recommended for rinsing your sponge and brush, keeping them clean throughout the process.
- Sponge: A large, durable masonry sponge is perfect for gently wiping and blending the applied mortar. This allows you to control the degree of coverage and expose as much or as little of the original brick or stone as desired.
- Drill: Necessary to power the mixing attachment. Ensure it’s a sturdy drill capable of handling the viscosity of mortar.
- Trowel or Small Scoop: Useful for transferring dry mortar from its bag into your mixing bucket.
- Safety Gear: Always prioritize safety. Wear gloves to protect your hands from the alkaline mortar, eye protection to shield against splashes, and a dust mask when handling dry mortar to avoid inhaling fine particles.
Step-by-Step Guide: How to German Schmear Your Fireplace
With your supplies meticulously gathered, it’s time to embark on the exciting journey of transforming your fireplace. Remember, the inherent beauty of German Schmear lies in its artistic, imperfect nature, so embrace the creative freedom this technique offers!
Phase 1: The Essential Preparation Work
Thorough preparation is the bedrock of any successful DIY project, and German Schmear is no exception. Investing adequate time in this initial phase will significantly reduce cleanup efforts and ensure a smooth application process.
Step 1: Lay Down Builder’s Paper for Protection
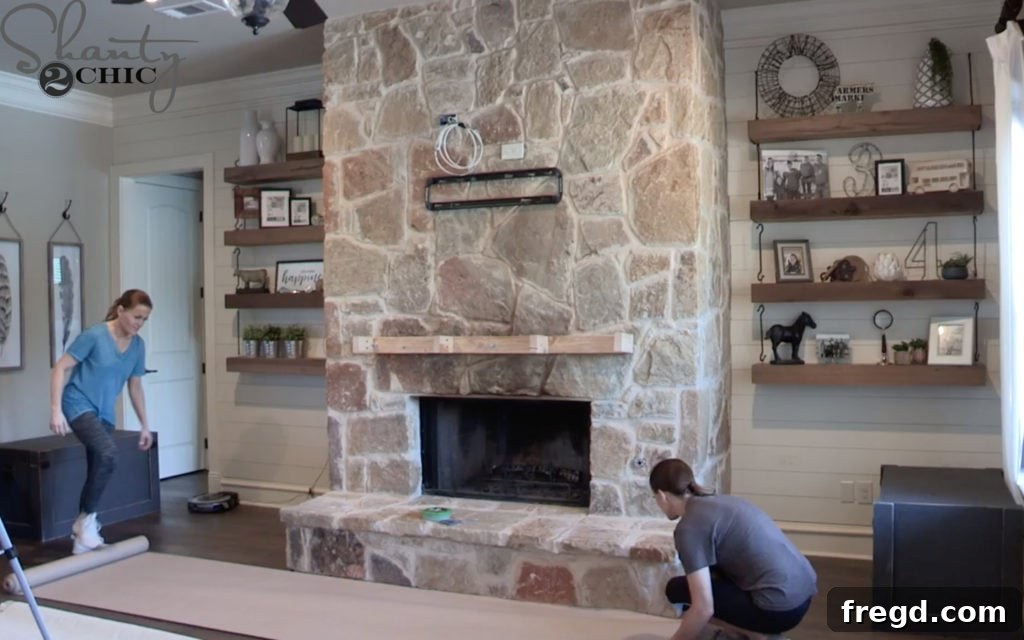
Start by comprehensively covering the entire floor area surrounding your fireplace with builder’s paper. It is always prudent to extend the coverage far wider than you anticipate needing. Mortar has a tendency to splatter or drip, particularly during the mixing phase or when applying it vigorously. Extending the paper several feet out from all sides of the fireplace acts as an effective safeguard. Double-check to ensure there are no uncovered gaps where errant drips could potentially mar your flooring.
Step 2: Meticulously Tape Off All Edges
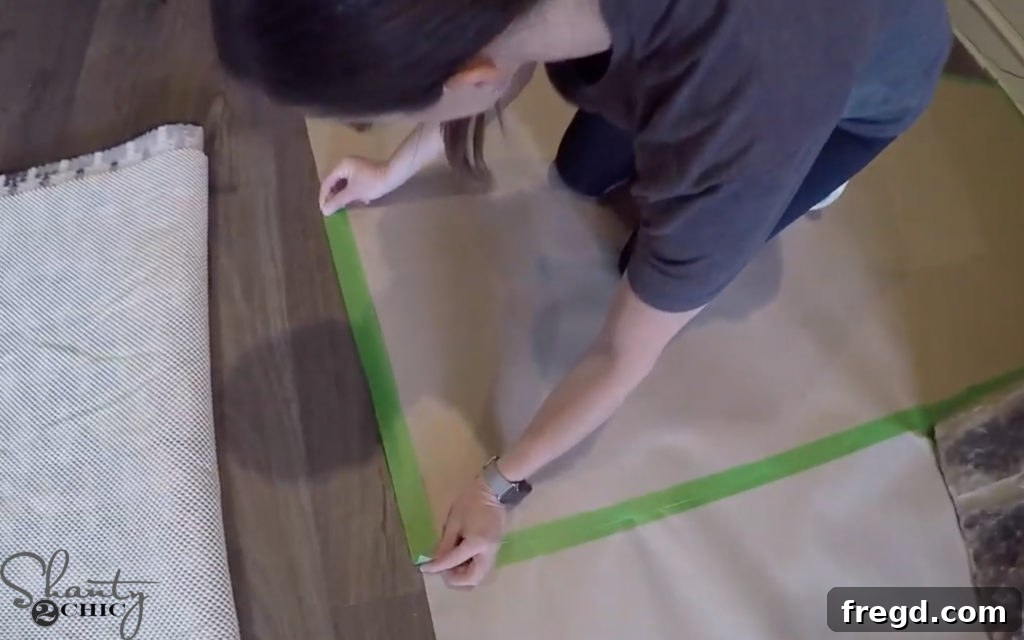
Once your builder’s paper is strategically laid out, use high-quality painter’s tape to firmly secure it to the floor. This crucial step prevents the paper from shifting, buckling, or curling up while you’re actively working. Subsequently, meticulously tape off the entire perimeter of the fireplace itself. This includes any adjacent walls, decorative trim, the mantelpiece, and the firebox opening. Creating a crisp, straight tape line here is paramount for achieving a clean, professional edge for your German Schmear application.
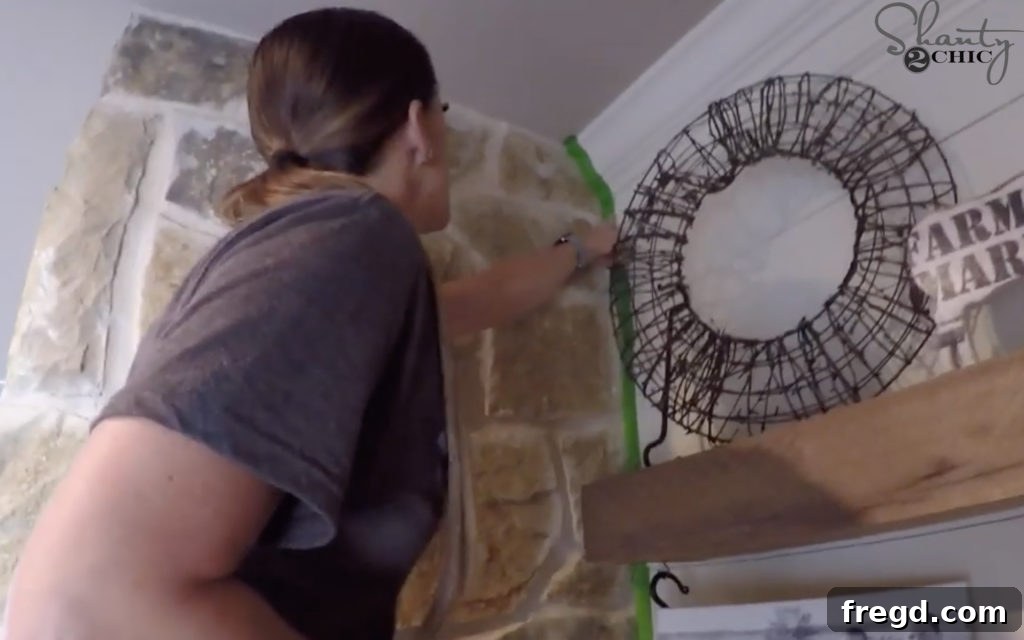
Furthermore, remember to extend your painter’s tape a few inches up the surrounding walls. This establishes an invaluable protective barrier against any accidental splashes or drips, allowing you to work with confidence and precision around the delicate edges of your fireplace. Investing careful attention and time during this preparation stage will undoubtedly save you substantial time and effort during the cleanup phase, leading to a much more satisfying overall experience.
Phase 2: Mixing Your Mortar for the Ideal Consistency
The secret to a beautifully executed German Schmear lies in achieving the perfect mortar consistency. This critical factor will directly influence how smoothly the mortar applies, how easily it can be manipulated, and ultimately, how much of the underlying masonry is revealed in your final design.
Step 1: Scoop Dry Mortar into Your Mixing Bucket
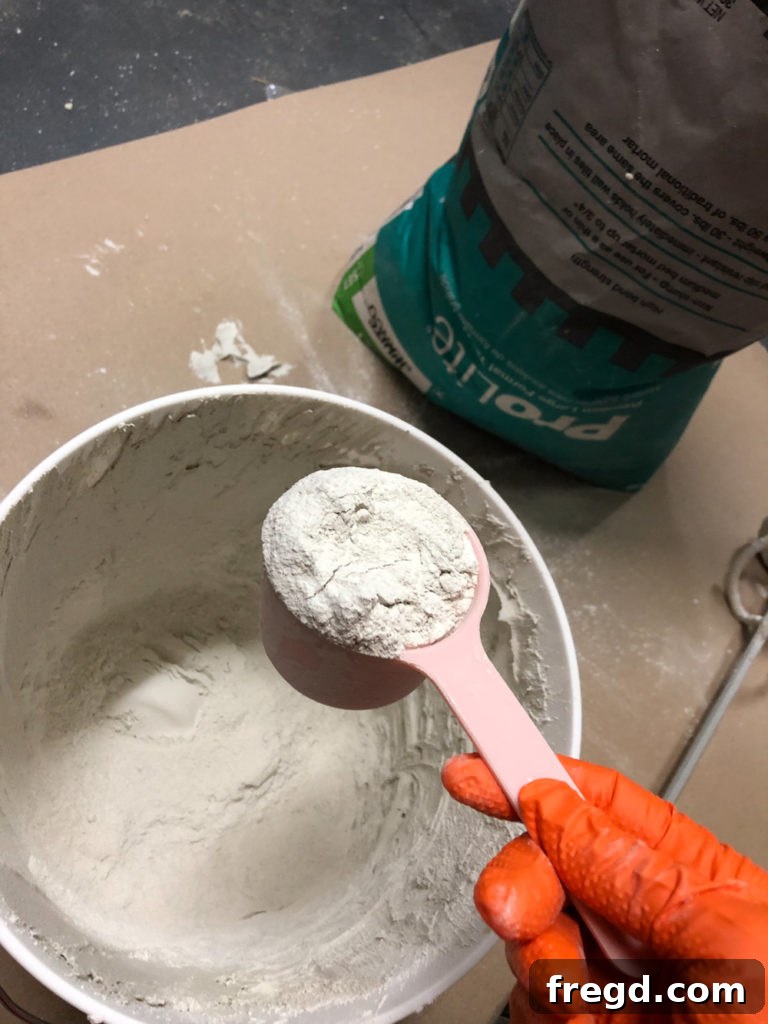
Carefully scoop the dry mortar into your designated 2-gallon bucket. It’s often advisable to work with smaller batches of mortar, especially if you’re new to the technique, to prevent the mixture from drying out prematurely before you have a chance to apply and manipulate it. For our fireplace project, we initiated the mixing process with an approximate 50/50 ratio of mortar to water. However, consider this merely a starting point. The optimal consistency can fluctuate based on several variables, including the specific type of mortar you’re using, ambient humidity levels, and your personal preference for the final look. The ultimate objective is a texture that is substantial enough to adhere securely to the brick or stone, yet sufficiently pliable to spread effortlessly with a brush.
Step 2: Mix Thoroughly to Achieve Desired Consistency
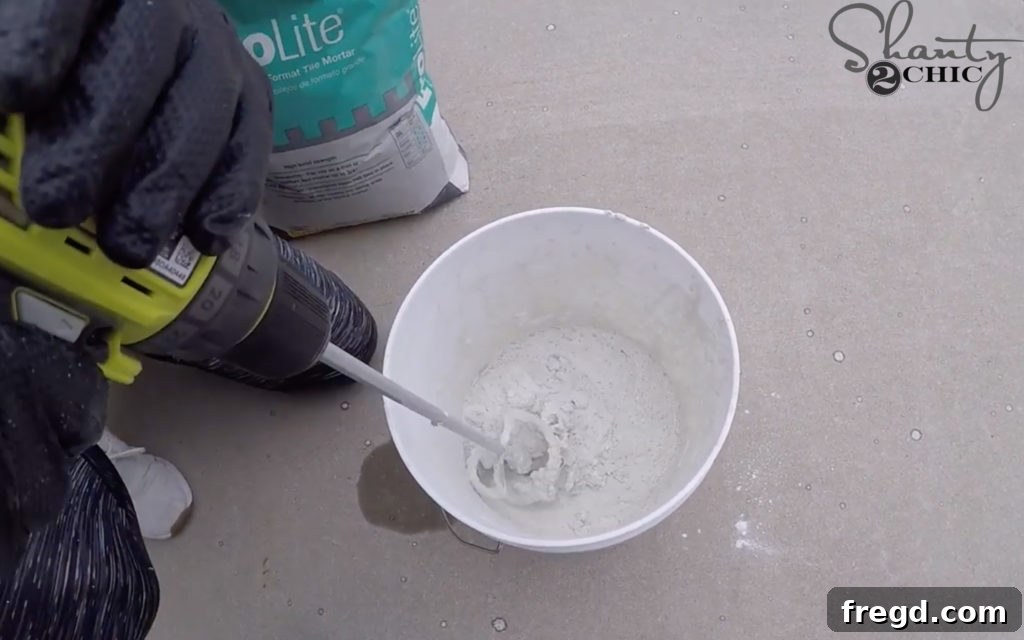
Secure the mixing attachment to your drill and commence mixing the mortar and water at a slow speed. Starting gently helps prevent the creation of a dusty cloud or unwanted splashing of the mixture. Gradually increase the drill’s speed as the dry mortar begins to hydrate and the mixture becomes more fluid and uniform. For my fireplace, our aim was a consistency reminiscent of thick toothpaste – easily spreadable but absolutely not runny. If the mixture appears too thick and difficult to work with, add small amounts of water, stirring well after each addition. Conversely, if it seems too thin, incorporate a bit more dry mortar to achieve the desired density. Mix thoroughly until you eliminate any dry pockets or stubborn lumps. Once adequately mixed, allow the mortar to “slake” (rest) for a few minutes; this permits the water to fully penetrate the particles. After resting, give it one final brief remix before you begin application to ensure optimal workability.
Phase 3: The Art of German Schmear Application
This is the moment your fireplace truly begins its captivating transformation! The application process is remarkably intuitive and inherently encourages creative expression, allowing you to customize the finish to your exact liking.
Step 1: Apply the Mortar Generously with a Brush
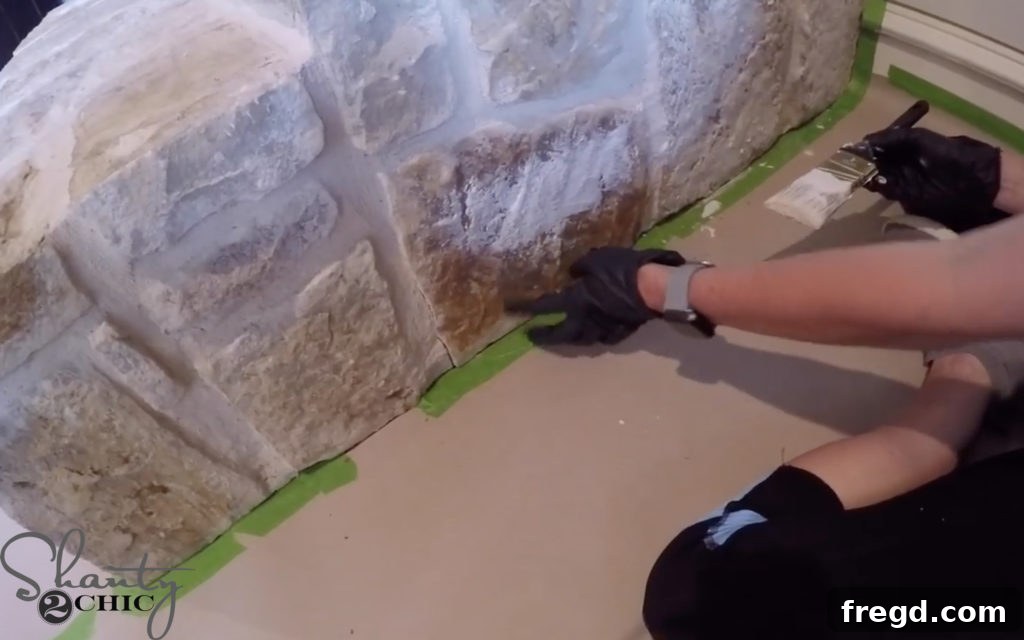
Dip your sturdy paint brush into the freshly mixed mortar, ensuring you pick up a substantial amount without overloading the bristles excessively. Begin applying the mortar directly onto the brick or stone surface of your fireplace. It is highly advisable to work in small, manageable sections, perhaps a 2×2 or 3×3 foot area at a time. This strategy grants you sufficient time to skillfully manipulate the mortar before it begins its setting process. For my specific project, we made a conscious decision not to completely obscure the original stones. Instead, we applied the mortar somewhat thinly and unevenly, deliberately allowing some of the beautiful, natural stone color and inherent texture to gracefully peek through. This approach cultivates that highly sought-after weathered, “aged” look, distinctly different from a solid, opaque painted surface. Feel free to experiment with various brush strokes – dragging, dabbing, swirling, or even feathering – to create diverse and rich textures that add character.
Step 2: Wipe and Blend with a Sponge for Your Desired Effect
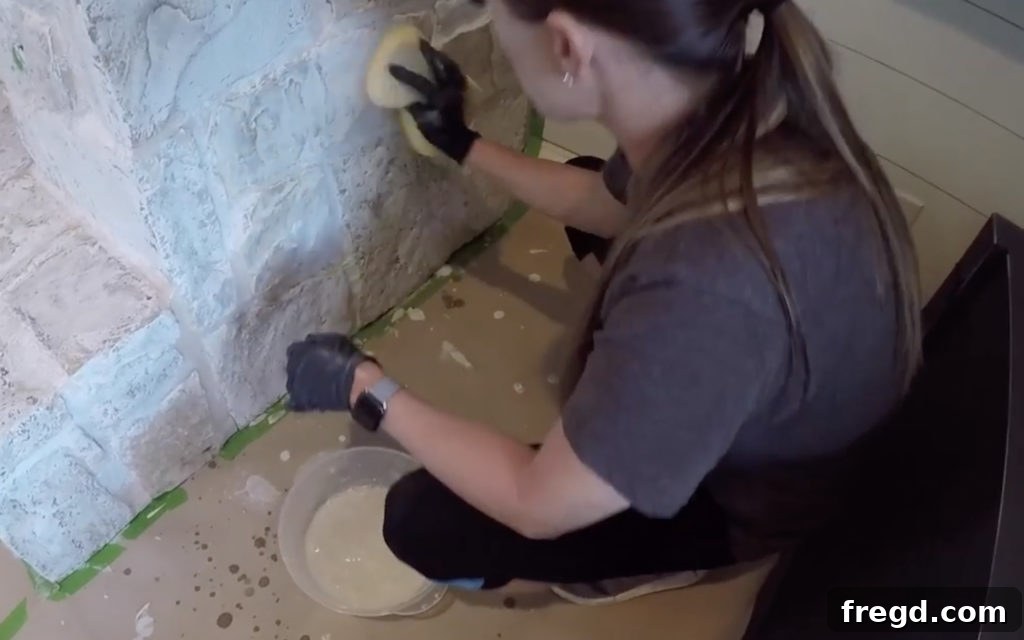
This particular step is absolutely pivotal for customizing your German Schmear appearance. Before the mortar has an opportunity to fully set (which can occur quite rapidly, especially in warm or dry environments), dip a clean sponge into a separate bucket filled with clean water. Gently wipe down the recently applied mortar, paying close attention to areas where you might have applied it too thickly, or if your intention is to expose more of the original masonry. Wiping while the mortar is still pliable enables you to seamlessly blend the edges, soften the overall appearance, and effectively achieve a more pronounced “whitewashed” effect. The more vigorously and frequently you wipe, the greater the amount of underlying brick or stone that will be revealed, offering incredible control over the final aesthetic. For my own fireplace, I chose not to heavily wipe the stones, as I personally favored a more opaque yet richly textured finish. However, if your vision leans towards a look that significantly reveals more of the natural stone, ensure you are wiping your sections every 15-20 minutes as you progressively apply mortar. This ensures you are consistently working with workable mortar, allowing you to achieve a cohesive, yet beautifully varied, finish across the entirety of your fireplace.
And that’s truly all there is to it! Incredibly straightforward, isn’t it? The entire process is surprisingly simple, and the resulting transformation is nothing short of spectacular. My living room has been completely revitalized and uplifted by the exquisite new German Schmear fireplace. It has imbued the room with an incredible amount of light, making the space feel significantly more open, expansive, and undeniably modern and chic.
The Stunning Before & After Transformation: A Visual Feast
Sometimes, words alone cannot capture the full impact of a change; seeing truly is believing! The striking contrast between the original rustic stone and the finished German Schmear fireplace is simply remarkable. It serves as a powerful testament to how a single, thoughtfully executed DIY project can profoundly redefine the entire ambiance and character of a room, elevating it from dated to dazzling.
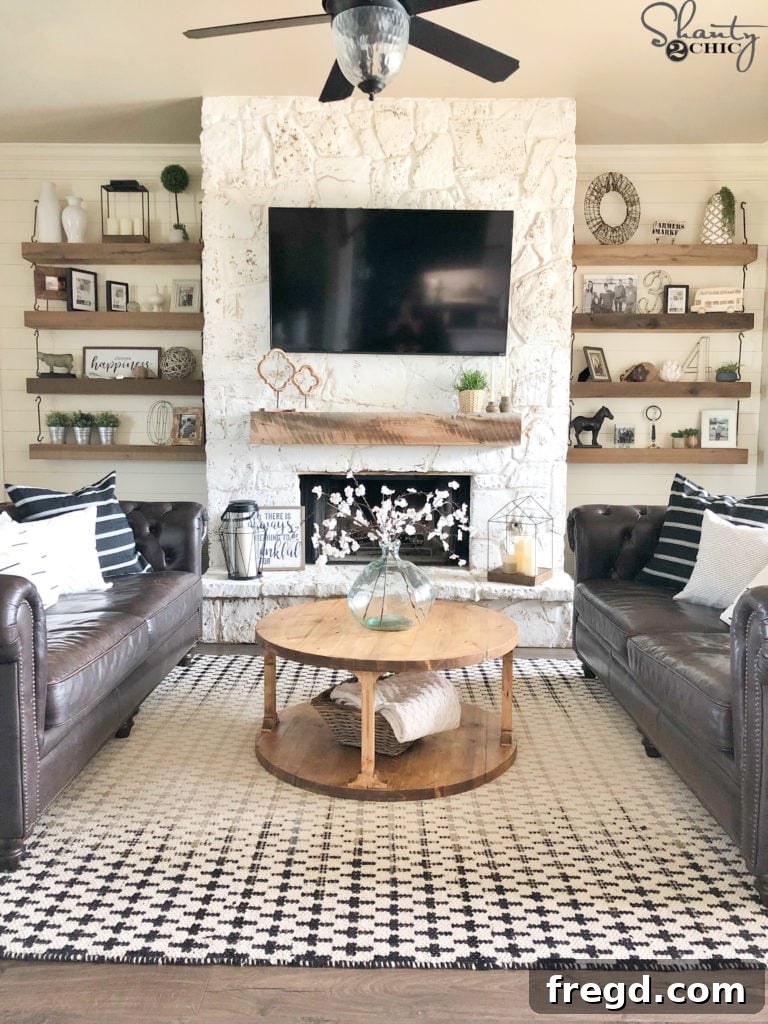
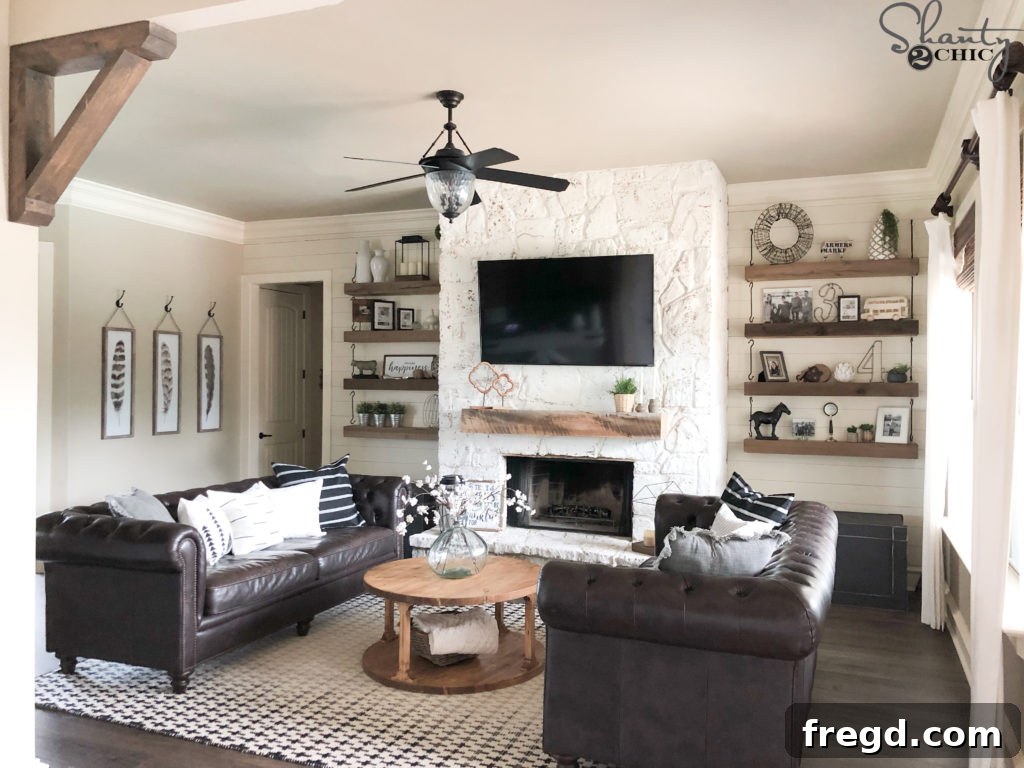
Take a moment to observe how the elegant, subtle white tones of the German Schmear seamlessly enhance the overall brightness of the room, creating a clean, sophisticated backdrop that allows your chosen decor to truly pop.

Here’s a candid look at the “before” – a perfectly functional but undeniably dark, somewhat imposing stone fireplace that was yearning for a refreshing update. The visual difference, as you can clearly see, is absolutely striking!
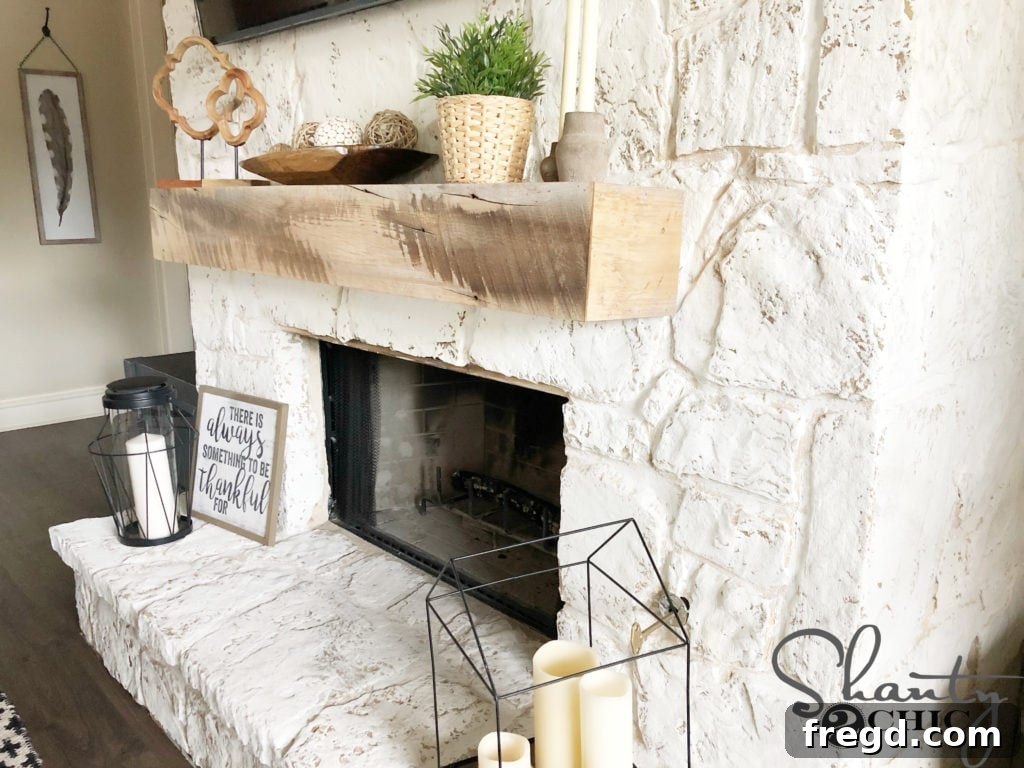

Beyond simply brightening the entire space, I’ve fallen in love with how the warm, natural wood tones in my carefully curated decor now beautifully contrast and vividly stand out against the fresh, lighter backdrop of the German Schmear finish. It truly allows these cherished elements to command attention and create a captivating focal point!
With a modest investment of approximately $65 in materials and a mere two hours of focused work, this project unequivocally delivers an incredible “bang for your buck!” It stands as a high-impact, low-cost renovation that yields not only professional-looking but also enduring results. Do you have a particular area in your home – perhaps an interior brick wall, an exterior foundation, or another fireplace – that you’re eager to try this remarkable, transformative technique on? We warmly invite you to share your thoughts, ideas, and aspirations in the comments section below; we genuinely love hearing from our readers!
Expert Tips for a Flawless German Schmear Finish
While the German Schmear technique is inherently forgiving and embraces artistic imperfection, a few expert tips can significantly enhance your project, ensuring a smoother process and helping you achieve the best possible aesthetic outcome:
- Always Test a Small, Inconspicuous Area: Before committing to your entire fireplace, it’s highly recommended to mix a small batch of mortar and test it on an unseen spot, such as the back, side, or even a spare brick. This crucial step allows you to experiment with the mortar’s consistency and practice your wiping technique, helping you determine your ideal level of coverage and transparency.
- Work in Manageable Sections: Mortar begins to set relatively quickly, especially in warmer or drier conditions. Avoid the temptation to apply mortar to an excessively large area at once. Instead, work in smaller, more controlled sections (e.g., 2×2 or 3×3 feet). This ensures you have ample time to apply the mortar, manipulate its texture, and wipe it away before it hardens too much.
- Maintain Consistent Mortar Mix: While the final finish is designed to be imperfect, your mortar mixture itself should be consistently smooth and lump-free. Lumps in the mortar will make application difficult, lead to uneven coverage, and can create an undesirable texture. If your mix becomes too stiff or lumpy, add a tiny bit more water and remix thoroughly.
- Keep Your Sponge and Water Clean: Frequently rinse your sponge in a separate bucket of clean water. A sponge laden with dried or excess mortar will smear rather than effectively wipe, preventing you from achieving a clean blend or revealing the underlying masonry. Similarly, change your rinse water periodically when it becomes too cloudy.
- Understand Curing Time: Mortar requires time to properly cure and harden, typically several days to a full week, depending on environmental factors like humidity and temperature. Avoid heavy scrubbing, cleaning with harsh chemicals, or applying any sealants until the mortar has fully cured to prevent damage.
- Embrace Imperfection: The true beauty of German Schmear lies in its organic, rustic, and imperfect nature. Do not strive for absolute uniformity or a perfectly smooth finish. Embrace the subtle variations, brush strokes, and unique character that this technique inherently brings. These “imperfections” are what give it charm!
- Prioritize Safety: Mortar is an alkaline substance and can be irritating or drying to the skin. Always wear protective gloves when mixing and applying. Additionally, wear eye protection to shield against splashes and a dust mask when handling dry mortar to avoid inhaling fine particles.
Maintaining Your Beautiful German Schmear Fireplace
Once your German Schmear project is complete and the mortar has fully cured, maintaining its beautiful appearance is remarkably straightforward. For routine cleaning, a soft brush or a lightly damp cloth can effectively remove dust, cobwebs, and minor smudges. Should you encounter more stubborn marks, a mild, pH-neutral, non-abrasive cleaner diluted with water can be used; however, always test it first in an inconspicuous area to ensure it doesn’t affect the finish. It is crucial to avoid harsh chemical cleaners, abrasive scrubbing pads, or vigorous brushing, as these can potentially damage or prematurely wear away the delicate mortar finish. With minimal effort and proper care, your German Schmear fireplace will remain a stunning and cherished focal point in your home for many years to come.
Styling Your Newly Transformed Living Room: Curated Decor Picks
A refreshed and modernized fireplace often serves as the perfect catalyst for updating and elevating the surrounding decor. Here, I’m delighted to share some of my absolute favorite items that perfectly complement the bright, contemporary, and inviting aesthetic of my newly German Schmear-finished living room.
Cozy & Chic Pillow Covers
Before you go, I simply must reveal my clever secret to achieving stylish and affordable pillow arrangements: decorative pillow covers! Not all of my older decorative pillows came with removable inserts. For those “whole” pillows, I ingeniously slipped these new, chic covers right over them. This approach is an incredibly budget-friendly way to instantly refresh your sofa or accent chairs, breathing new life into tired, dingy decorative pillows without the expense of purchasing entirely new inserts!

Pillows Featured (Linked Left to Right)
- Black Stripe Pillow: Offers a sophisticated graphic element, providing a subtle yet impactful contrast to lighter tones.
- White Stripe Pillow: Seamlessly integrates with the bright, airy aesthetic of the new fireplace, enhancing the sense of freshness.
- Dash Pillow: Introduces a modern, minimalist geometric pattern, adding subtle visual interest and contemporary flair.
- Arrow Pillow: A playful yet chic geometric touch that breaks up solid colors and adds a dynamic element to the pillow arrangement.
- Gray Pillow: Provides a soft, versatile neutral anchor, effortlessly complementing a wide range of color palettes and textures.

- Gray Pillow: A foundational piece that offers flexibility and a calming presence within the decor scheme.
- Aztec Pillow: Infuses the space with a touch of bohemian or globally-inspired pattern, adding cultural richness.
- Dash Pillow: Continues the theme of understated geometric design, providing continuity and modern appeal.
- Arrow Pillow: Showcases another perspective of this charming geometric pattern, contributing to a layered look.
- Black Striped Pillow: A classic and versatile choice that brings a strong, foundational graphic element to the overall arrangement.
Other Curated Living Room Essentials
Beyond the delightful pillow covers, here are convenient links to other cherished items that contribute to the inviting, stylish, and cohesive atmosphere of my living room:
- DIY Round Coffee Table: A beautiful, custom-built piece that anchors the seating area, providing both warmth and essential functionality.
- Mantel: The perfect elegant perch for displaying seasonal decor, cherished family photos, and beloved keepsakes, complementing the fireplace.
- DIY Hanging Shelves: Offer sophisticated display space for books or decorative objects without adding visual bulk, maintaining an open feel.
- Couches: The comfortable and stylish foundational pieces for relaxation and gathering, setting the tone for the entire living space.
- Rug: Artfully ties the entire room together, adding crucial texture, warmth, and helping to clearly define the main living area.
- Vase: An elegant and versatile accent piece, ideal for showcasing fresh flowers, dried botanicals, or simply standing as a sculptural element.
- Stems: Bring a refreshing touch of nature, organic beauty, and a hint of color indoors, softening the room’s hard lines.
- Flooring: A durable, attractive, and low-maintenance base that serves as the cohesive foundation for the entire living area.
- Black Striped Pillow Covers: For adding bold, contemporary graphic interest and a touch of sophisticated contrast.
- Dash Pillow Cover: A subtle yet stylish modern pattern that contributes to a layered and visually interesting pillow arrangement.
- Arrow, Aztec and White Striped Pillow Covers: A curated collection of varied textures and engaging patterns, perfect for creating dynamic and personalized styling on your seating.
- Gray Pillows: Offer exceptional versatility and a calming, neutral presence that beautifully complements almost any color scheme.
Thank you so much for taking the time to stop by and explore the exciting possibilities of transforming your home with German Schmear. We sincerely hope this comprehensive guide inspires you to confidently take on your next rewarding DIY challenge!
Happy Building!