
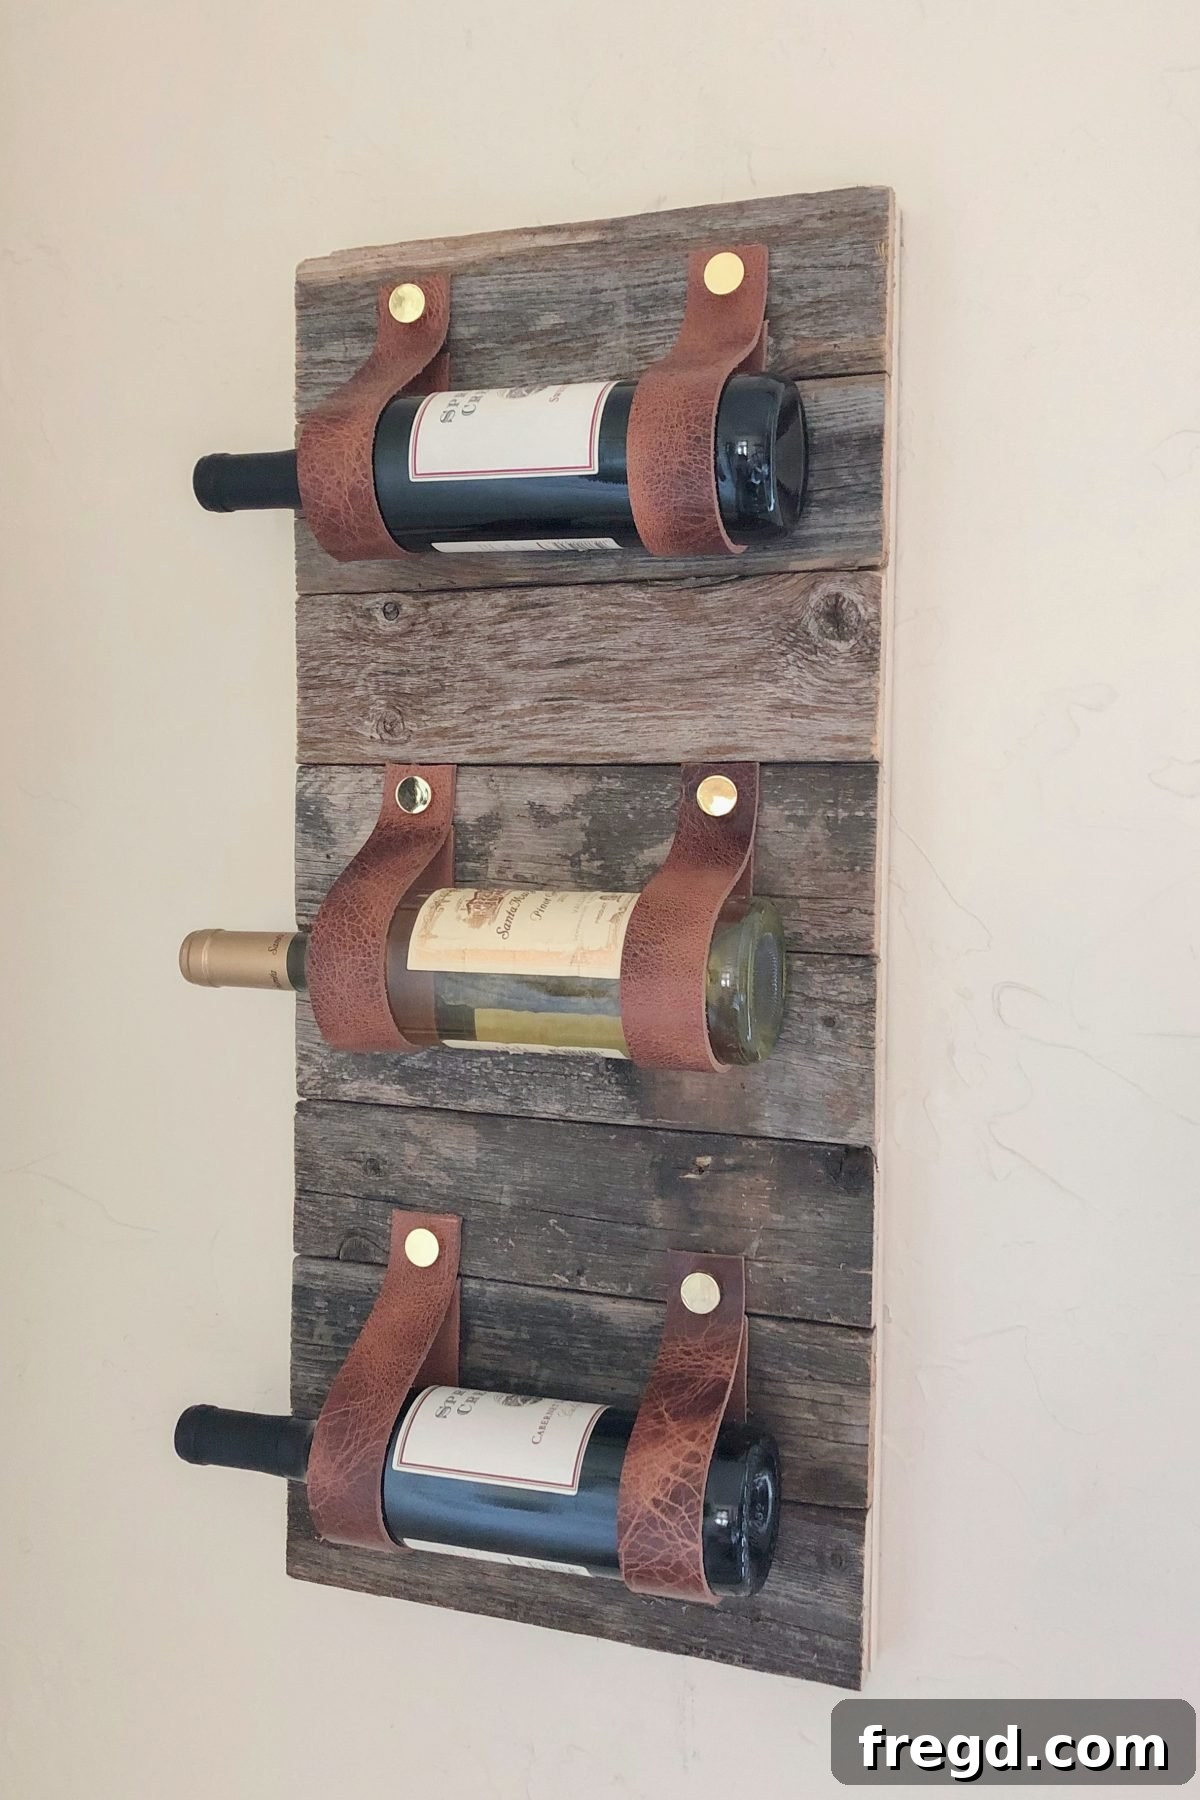
Craft Your Own Elegant DIY Wood and Leather Wine Rack
Are you ready to embark on a truly rewarding DIY project that combines rustic charm with sophisticated style? Today, we’re diving into the exciting world of woodworking and leathercraft to create a stunning DIY Wood and Leather Wine Rack. This isn’t just any wine rack; it’s a statement piece, a conversation starter, and a testament to your crafting prowess. We absolutely adore mixing different textures like warm wood and supple leather, and this project perfectly encapsulates that aesthetic. Get ready to transform ordinary materials into an extraordinary home for your favorite bottles!
Whether you’re a seasoned DIY enthusiast or just starting your crafting journey, this project is designed to be accessible and enjoyable. With just a few essential tools and a dash of creativity, you’ll be able to construct a beautiful and functional wine rack that reflects your personal taste. Imagine proudly displaying your wine collection in a piece you made with your own hands – it’s incredibly satisfying!
Watch the Full Video Tutorial and Get Your Free Plans!
To help you every step of the way, we’ve put together a comprehensive video tutorial. It’s packed with visual instructions and helpful tips that will guide you through the entire building process, from cutting your first piece of wood to attaching the final leather strap. Don’t miss out on seeing this project come to life!
You can also watch the YouTube Video HERE or simply click on the embedded player above. For detailed measurements and step-by-step written instructions, make sure to grab your FREE Printable Plans and How-To HERE!
Why Build Your Own Wood and Leather Wine Rack?
In a world full of mass-produced items, there’s something truly special about a handmade creation. A DIY wood and leather wine rack offers numerous advantages over store-bought alternatives:
- Unique Aesthetic: Combining the warmth of wood with the tactile elegance of leather creates a unique, high-end look that complements various interior design styles, from modern farmhouse to industrial chic.
- Personalization: You have complete control over the choice of wood, leather color, and finishes. This allows you to tailor the rack to perfectly match your home decor and personal preferences.
- Cost-Effective: Building it yourself can often be more budget-friendly than purchasing a similar high-quality, designer wine rack. You pay for materials, not labor and brand markups.
- Sense of Accomplishment: There’s immense satisfaction in looking at a beautiful and functional piece of furniture and knowing you crafted it with your own hands.
- Perfect Gift Idea: A handmade wine rack makes an incredibly thoughtful and personal gift for wine lovers, housewarmings, or weddings.
- Sustainable Choice: By carefully selecting your materials and creating a durable item, you’re contributing to less waste and a more sustainable lifestyle.
Essential Materials You’ll Need
Before you start, gathering all your materials is crucial for a smooth building process. Here’s a breakdown of what you’ll need for your DIY Wood and Leather Wine Rack:
Wood Components:
- Wood Species: Consider common choices like pine (affordable, easy to work with), oak (durable, beautiful grain), maple (smooth, light-colored), or even reclaimed wood for a more rustic feel. The exact dimensions will be detailed in the free plans, but generally, you’ll need boards for the main frame and cross supports.
- Wood Glue: A strong woodworking adhesive is essential for securely joining your wood pieces.
- Wood Screws/Dowels: Depending on the joinery method you choose, you’ll need appropriate screws or dowels for added strength.
- Wood Finish: Stain, paint, clear coat, or wax to protect and beautify your wood.
Leather Components:
- Leather Straps/Pieces: You’ll need sturdy leather for the bottle-holding slings. Vegetable-tanned leather (4-6 oz thickness is ideal) is a great choice as it’s durable and takes dyes well. Faux leather can also be used for a vegan-friendly option. The width and length will be specified in the plans.
- Leather Rivets/Fasteners: To attach the leather straps securely to the wood frame. Decorative rivets can also add a nice touch.
- Leather Punch: For creating clean holes in the leather for your rivets.
- Leather Dye (Optional): If you want to customize the color of your leather.
Hardware and Other Supplies:
- Sandpaper: Various grits (e.g., 120, 180, 220) for smoothing the wood.
- Clamps: Essential for holding wood pieces together while glue dries.
- Measuring Tape and Pencil: For accurate measurements and markings.
- Safety Glasses and Gloves: Always prioritize safety!
Tools for the Job
While this project is designed to be accessible, having the right tools will make the process much smoother and more enjoyable. Here’s a list of tools you might use:
Cutting Tools:
- Miter Saw or Circular Saw: For making precise, straight cuts in your wood pieces. A miter saw is ideal for accurate angle cuts.
- Jigsaw (Optional): If your design incorporates any curved elements or requires intricate cuts.
Drilling and Fastening Tools:
- Power Drill/Driver: Essential for drilling pilot holes and driving screws.
- Drill Bits: Various sizes for pilot holes and counter-sinking screws.
- Rivet Setting Tool: If using rivets for your leather straps.
Finishing and Assembly Tools:
- Orbital Sander: For quickly and efficiently smoothing wood surfaces.
- Wood Chisels (Optional): For fine-tuning joints or removing small amounts of wood.
- Clamps: Critical for holding pieces together during glue-up.
- Paint Brushes/Rags: For applying wood finishes.
Step-by-Step Guide to Building Your Wood and Leather Wine Rack
With your materials and tools ready, let’s get down to building! Remember to consult the free plans for exact dimensions and detailed instructions.
Step 1: Planning and Cutting the Wood Components
- Measure and Mark: Carefully measure and mark all your wood pieces according to the provided plans. Accuracy here is key to a well-fitting rack.
- Cut Wood Pieces: Using your miter saw or circular saw, make precise cuts for the uprights, horizontal supports, and any other wooden elements of your wine rack. Always double-check your measurements before cutting.
- Sand All Surfaces: Once cut, thoroughly sand all wood pieces. Start with a coarser grit (e.g., 120) to remove any rough edges or imperfections, then move to finer grits (180, 220) for a smooth, touchable finish. This is also the time to ease any sharp edges.
Step 2: Preparing the Leather Straps
- Measure and Cut Leather: Based on the plans, measure and cut your leather into the appropriate strap lengths for the wine bottle slings.
- Punch Holes: Using a leather punch, create holes at the ends of each leather strap where they will be attached to the wood frame. Ensure these holes are evenly spaced and positioned correctly for secure fastening.
- Optional: Dye Leather: If you wish to color your leather, apply leather dye evenly according to the manufacturer’s instructions. Allow it to dry completely.
Step 3: Assembling the Wood Frame
- Dry Fit Components: Before applying any glue, assemble the wooden frame components without fasteners to ensure everything fits together correctly. Make any necessary adjustments.
- Apply Glue and Clamp: Apply a generous amount of wood glue to all mating surfaces. Assemble the frame, ensuring all joints are square and tight. Use clamps to hold the pieces firmly in place while the glue dries completely (refer to glue manufacturer’s instructions for drying times).
- Add Reinforcement (Optional): Once the glue has dried, you can add wood screws (pre-drilling pilot holes to prevent splitting) or dowels for extra strength and stability, especially in stress points.
Step 4: Attaching the Leather Straps
- Position Straps: Carefully position the leather straps onto the wooden frame according to the plans. Ensure they are evenly spaced and aligned for proper bottle support.
- Secure with Rivets: Using your rivet setting tool, attach the leather straps to the wood frame. Make sure the rivets are securely fastened and hold the leather firmly in place without tearing or stretching. If using screws, pre-drill small pilot holes through the leather and into the wood, then secure with small decorative screws.
Step 5: Finishing Touches
- Final Sanding (Optional): Do a light final sanding with a very fine grit sandpaper (e.g., 220 or higher) to prepare the wood for finishing.
- Apply Finish: Apply your chosen wood finish (stain, paint, clear coat, or wax) according to the product’s instructions. This step not only enhances the beauty of the wood but also protects it. Allow ample drying time between coats and before placing bottles in the rack.
- Inspect and Enjoy: Once everything is dry and secure, give your wine rack a final inspection. Then, fill it with your favorite bottles and admire your beautiful, handcrafted creation!
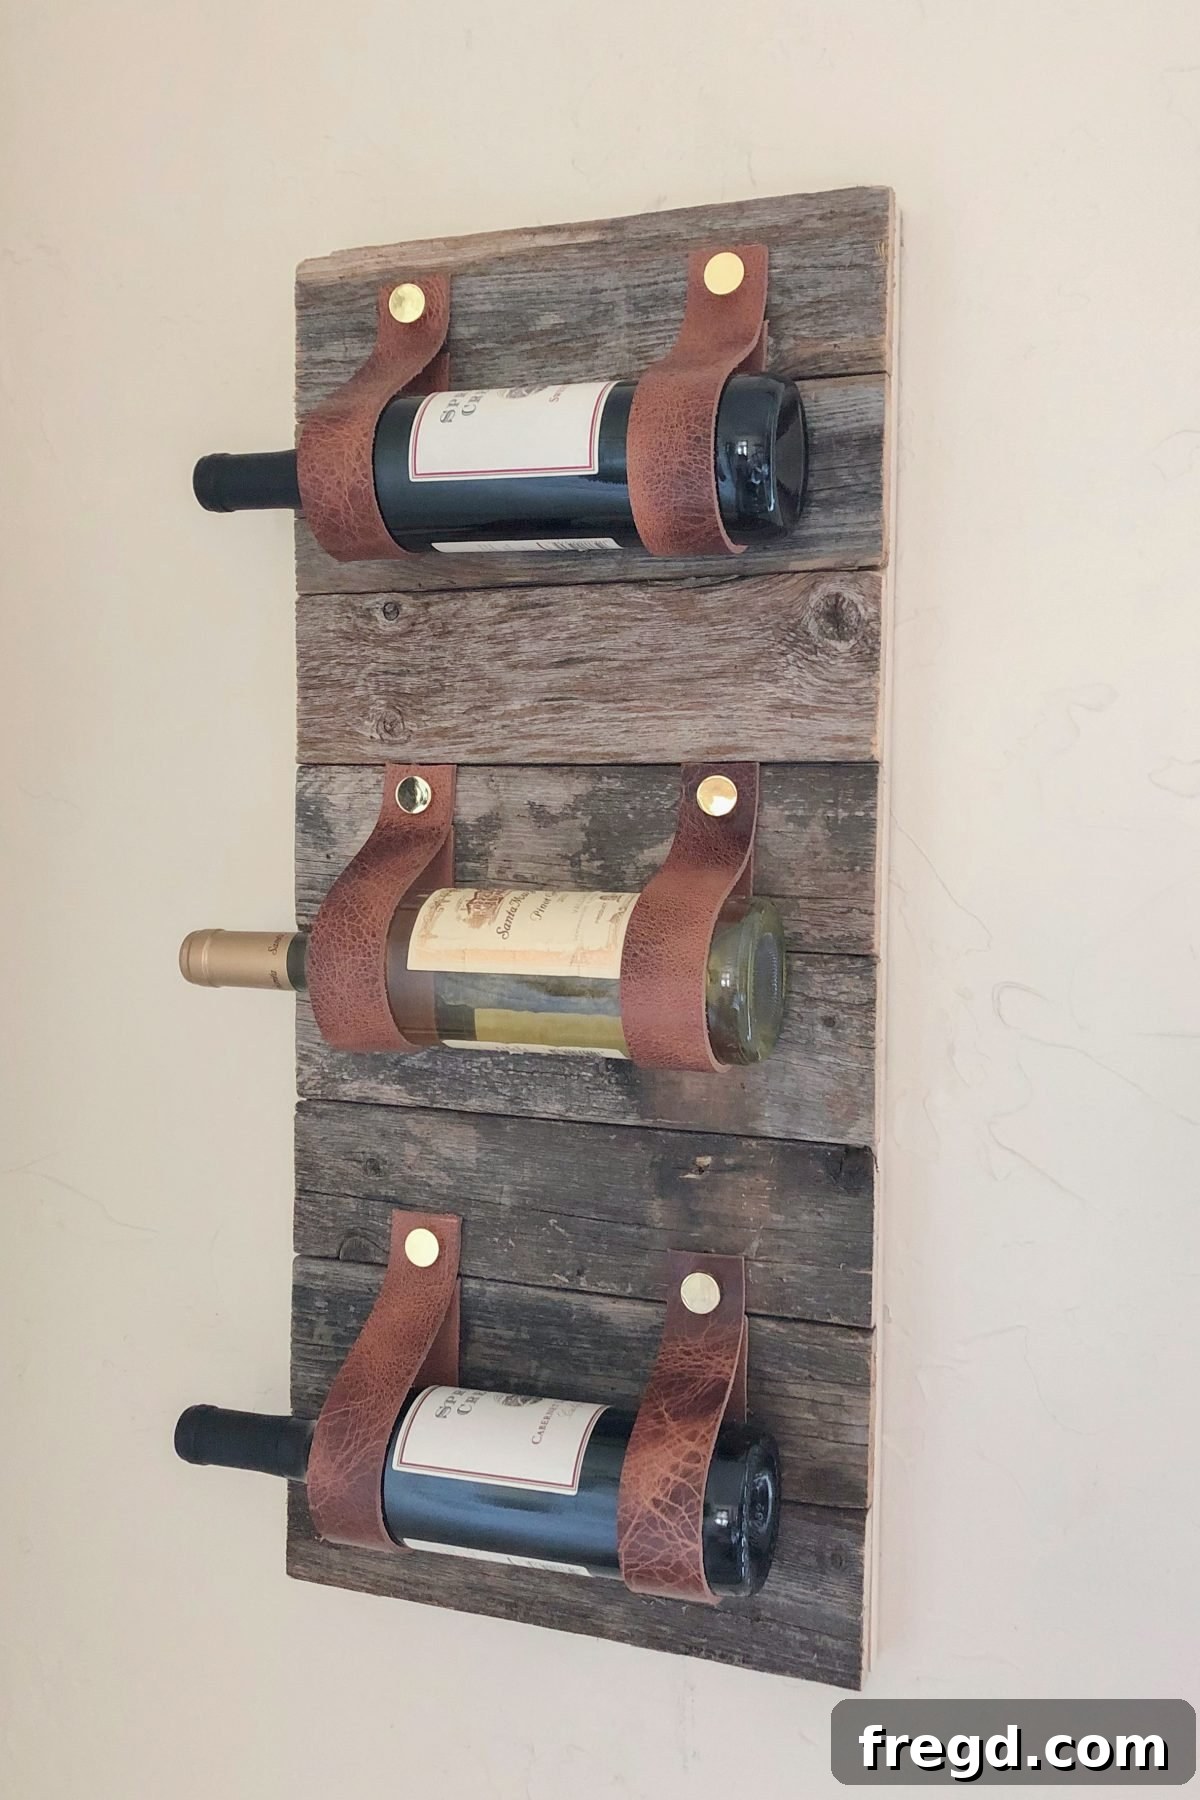
Customization Ideas for Your Wine Rack
One of the best parts of DIY is the ability to make it truly your own! Here are some ideas to customize your wood and leather wine rack:
- Wood Stain/Paint: Experiment with different wood stains to match existing furniture, or go bold with a pop of paint.
- Leather Color: Dye your leather straps to a vibrant color, or stick with classic natural tones.
- Hardware: Use decorative brass, copper, or black rivets for a different look.
- Engraving: Personalize the wood with an engraved message or motif.
- Size and Capacity: Adjust the dimensions in the plans to create a smaller tabletop version or a larger, wall-mounted rack.
- Addition of Shelves: Integrate a small shelf on top for displaying wine glasses or decorative items.
Care and Maintenance for Your Handcrafted Wine Rack
To ensure your beautiful wood and leather wine rack stands the test of time, proper care is essential:
- Wood Care: Dust regularly with a soft cloth. For spills, wipe immediately. Periodically reapply wood wax or polish to maintain its luster and protect the finish. Avoid placing the rack in direct sunlight or near heat sources, which can cause wood to warp or fade.
- Leather Care: Wipe leather straps with a damp cloth to clean. For deeper cleaning, use a mild leather cleaner. Condition the leather every few months with a good leather conditioner to keep it supple and prevent cracking. Avoid harsh chemicals or excessive moisture.
- Placement: Always place the wine rack on a stable, level surface. Ensure bottles are balanced to prevent tipping.
Embrace the Joy of DIY
Building your own DIY Wood and Leather Wine Rack is more than just a project; it’s an experience. It’s an opportunity to learn new skills, express your creativity, and add a truly unique and functional piece to your home. We encourage you to dive in, have fun, and enjoy the process of creating something beautiful with your own hands. The satisfaction of seeing your vision come to life is unparalleled.
Don’t forget to share your finished project with us! We love seeing how you customize and make these plans your own. Happy crafting, and may your wine rack be filled with delightful vintages!