
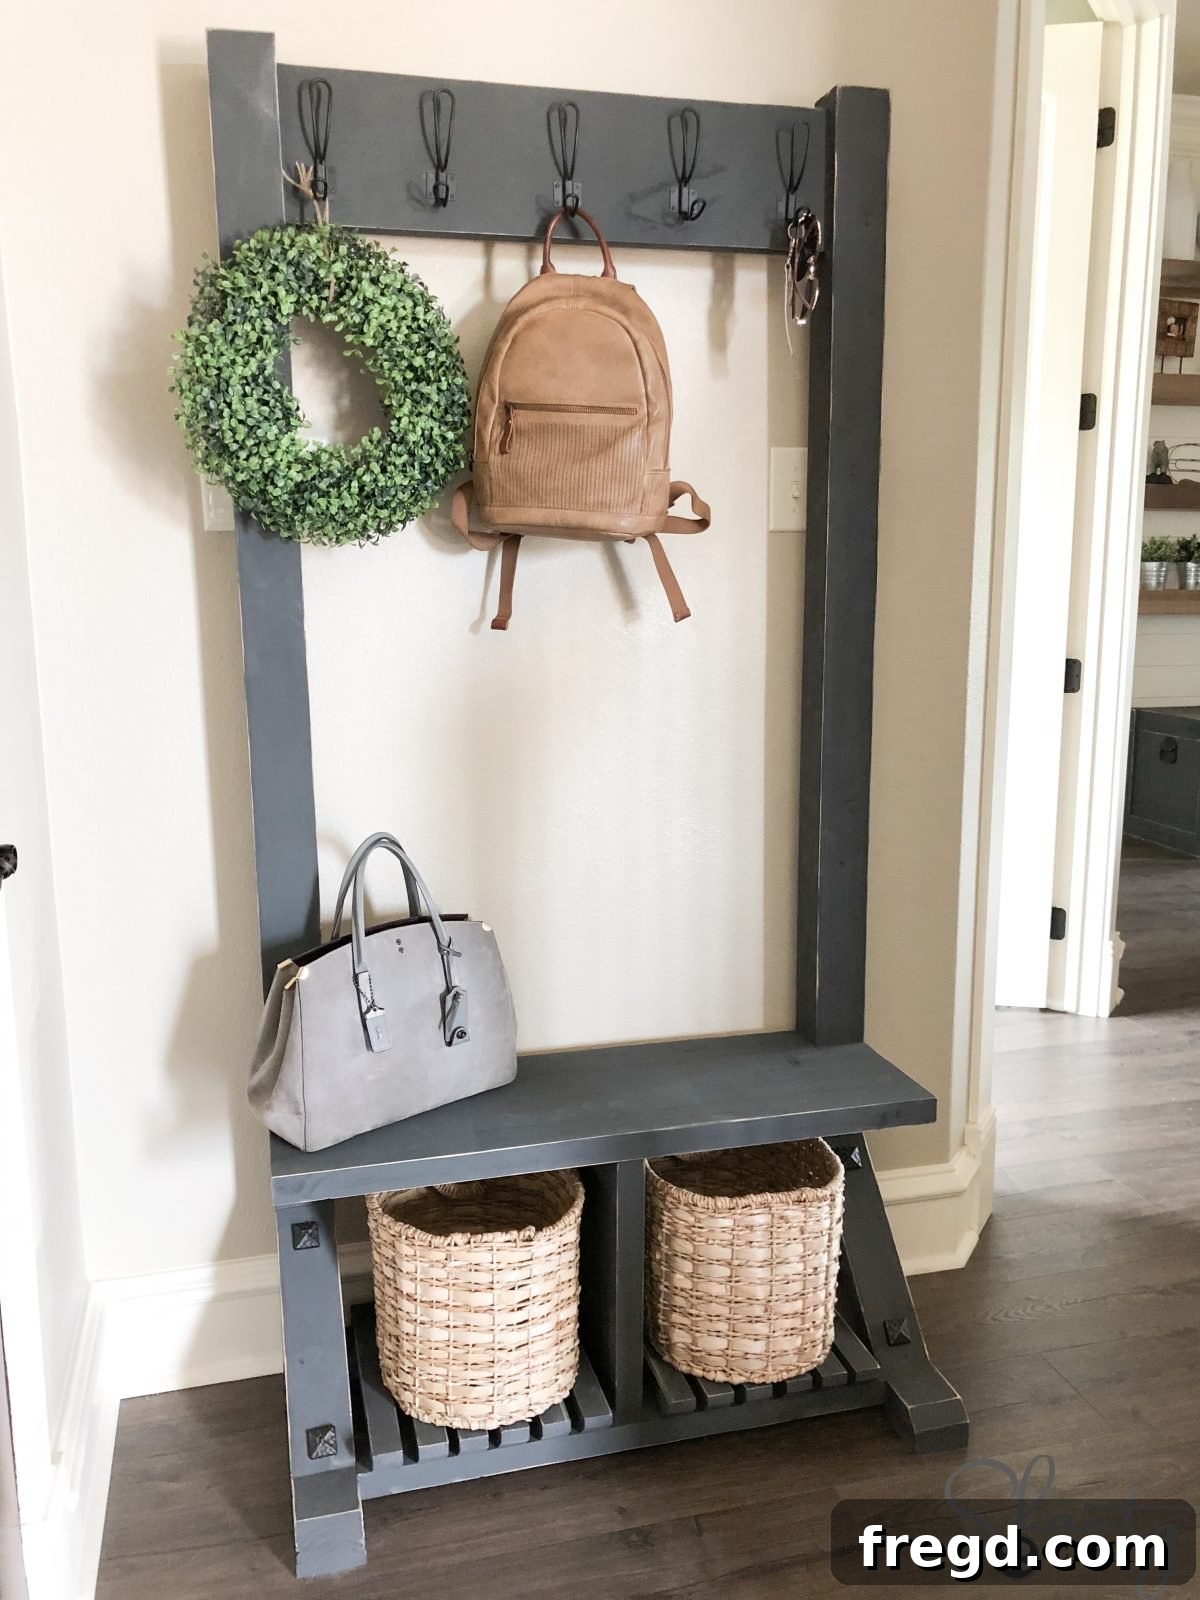
Unlock the potential of your entryway or mudroom with a stunning piece of custom furniture you can build yourself! Shanty2Chic is thrilled to share the comprehensive free plans and an invaluable how-to video for crafting this gorgeous DIY Modern Farmhouse Hall Tree. Designed not just for looks, but for unparalleled functionality, this project promises to transform cluttered spaces into organized, welcoming areas.
In every home, the quest for extra storage is eternal. But why settle for generic, mass-produced items when you can create something both incredibly useful and aesthetically pleasing? This DIY Modern Farmhouse Hall Tree perfectly embodies that philosophy. It’s engineered to provide ample storage, a convenient seating area, and a stylish focal point – all while embracing the beloved modern farmhouse aesthetic. Best of all, this impressive build won’t break the bank; we managed to construct ours for approximately $50, proving that beautiful, custom furniture is within everyone’s reach!
To ensure your building experience is as smooth and enjoyable as possible, we’ve put together a detailed step-by-step video guide. Watch us in action, demonstrating each technique and offering helpful tips along the way. Simply click HERE or on the video box below to get started and visualize your own hall tree coming to life!
Build Your Own Modern Farmhouse Hall Tree: Free Plans & Step-by-Step Guide
Embark on your next woodworking adventure with confidence! This section provides you with all the details needed to construct your very own Modern Farmhouse Hall Tree. Before diving into the practical steps, make sure to grab your FREE Printable Plans HERE! These plans are your essential companion, offering precise measurements and diagrams that complement our step-by-step instructions. We encourage you to follow along closely with the written guide below and refer to the plans for critical dimensions, ensuring a successful and rewarding DIY project.
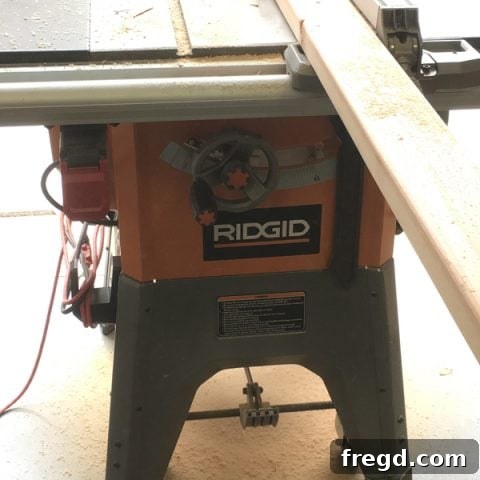
Prepping Your Lumber for a Refined Finish and Modern Aesthetic
The foundation of any great woodworking project lies in meticulous preparation. For this Modern Farmhouse Hall Tree, achieving a sleek, contemporary look involves a crucial initial step: ripping the rounded edges off all our lumber. Using a table saw, we carefully removed approximately 1/8 inch from each side of the boards, particularly the 2x4s designated for the laminated posts. This seemingly small detail makes a significant difference, creating flat, crisp edges that allow for a seamless, tight joint when pieces are laminated together. This process not only elevates the overall aesthetic, giving the piece a cleaner, more modern appeal, but also ensures a professional-grade finish. Furthermore, to maximize efficiency and cost savings, we strategically cut larger pieces of lumber into smaller, required dimensions – for instance, ripping a 2×8 from a 2×10 and creating 2x2s from 2x4s. This approach is excellent for optimizing material use and staying within a budget. If you prefer not to rip your round edges, simply adjust the measurements in the provided plans accordingly to accommodate the original dimensions of your lumber, though the final look will vary slightly.
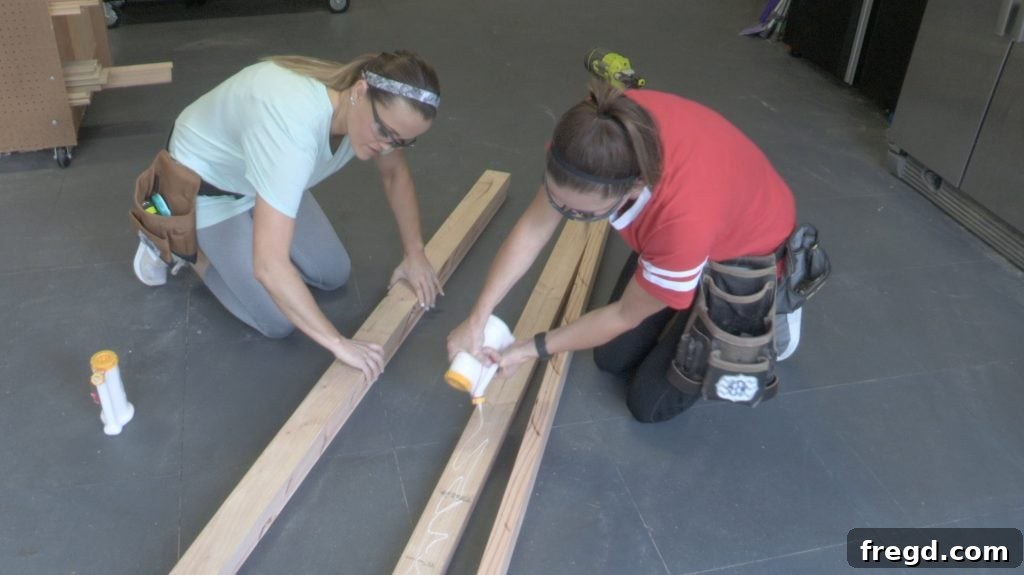
Creating Sturdy Laminated Posts for a Chunky Look
One of the defining characteristics of this Modern Farmhouse Hall Tree is its robust, chunky posts, which add significant visual weight and structural integrity. The first primary assembly step involves laminating two 2×4 boards together for each post. This simple yet effective technique doubles the thickness of your posts, achieving that desired substantial aesthetic. To begin, apply a generous, even layer of high-quality wood glue across the entire mating surface of one 2×4. Carefully align the second 2×4 on top, pressing firmly to ensure good contact. Immediately clamp the two pieces together, applying consistent pressure along the full length of the joint. It’s crucial to allow the glue to dry thoroughly, ideally overnight, to form an incredibly strong and durable bond. For precision and ease of application, our favorite glue bottle, found HERE, offers excellent control and minimizes mess.
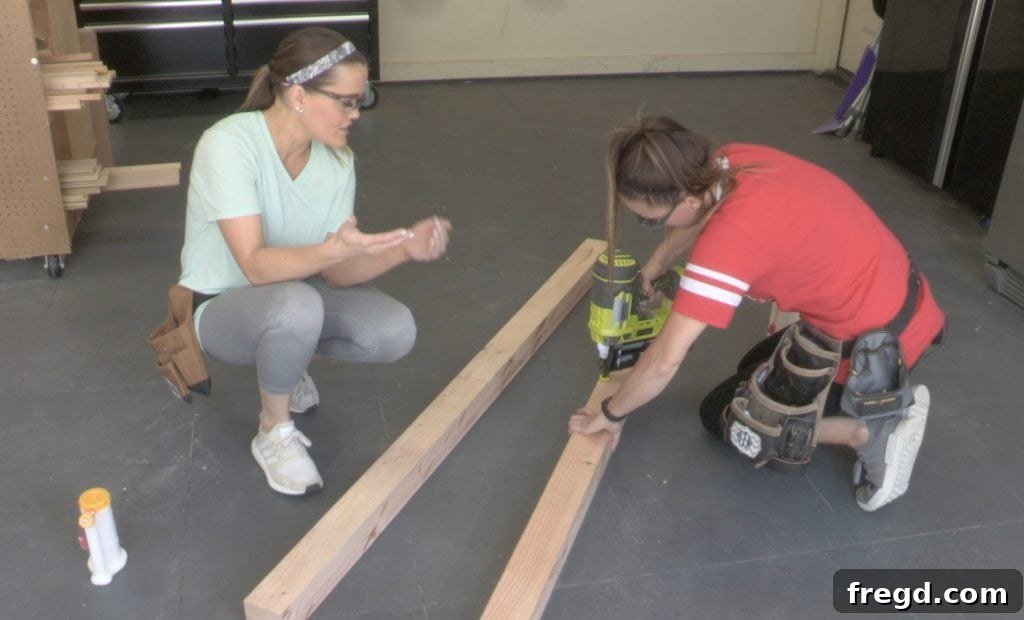
Efficient Assembly with a Finish Nailer for a Clean Appearance
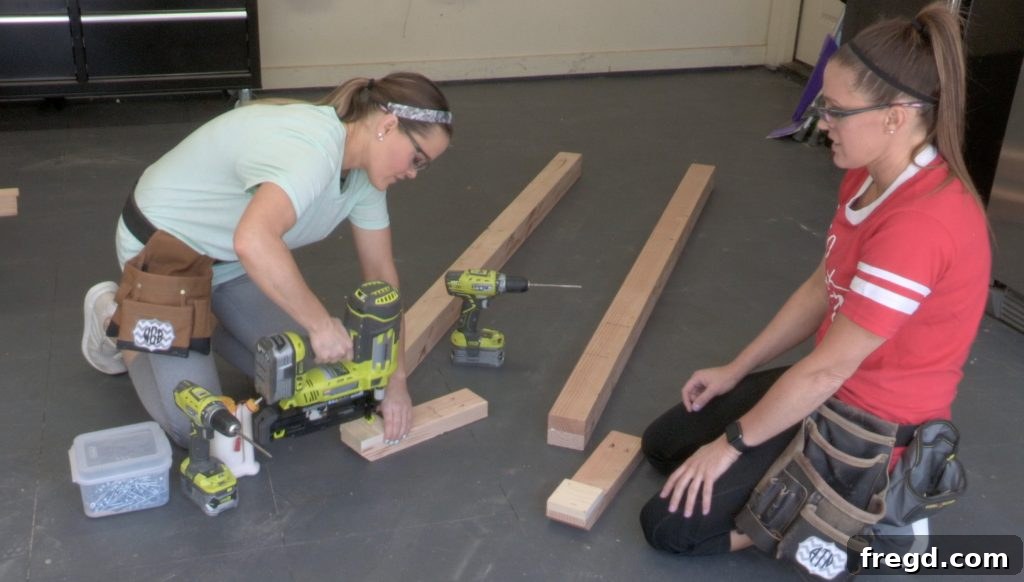
While wood glue provides the ultimate strength for laminated joints, a finish nailer can significantly speed up the assembly process and hold components in place while the glue dries. To efficiently attach boards and sub-assemblies throughout this project, we relied on our 16-gauge finish nailer, paired with 2-inch finish nails. This tool is excellent for making quick, secure connections without the need for excessive clamping during initial assembly. A key technique for maintaining the clean, modern aesthetic of this DIY Modern Farmhouse Hall Tree is to attach boards from the back or less visible sides wherever possible. This strategic placement helps to conceal nail holes, minimizing the need for extensive wood filler and sanding, ultimately contributing to a smoother, more professional final finish.
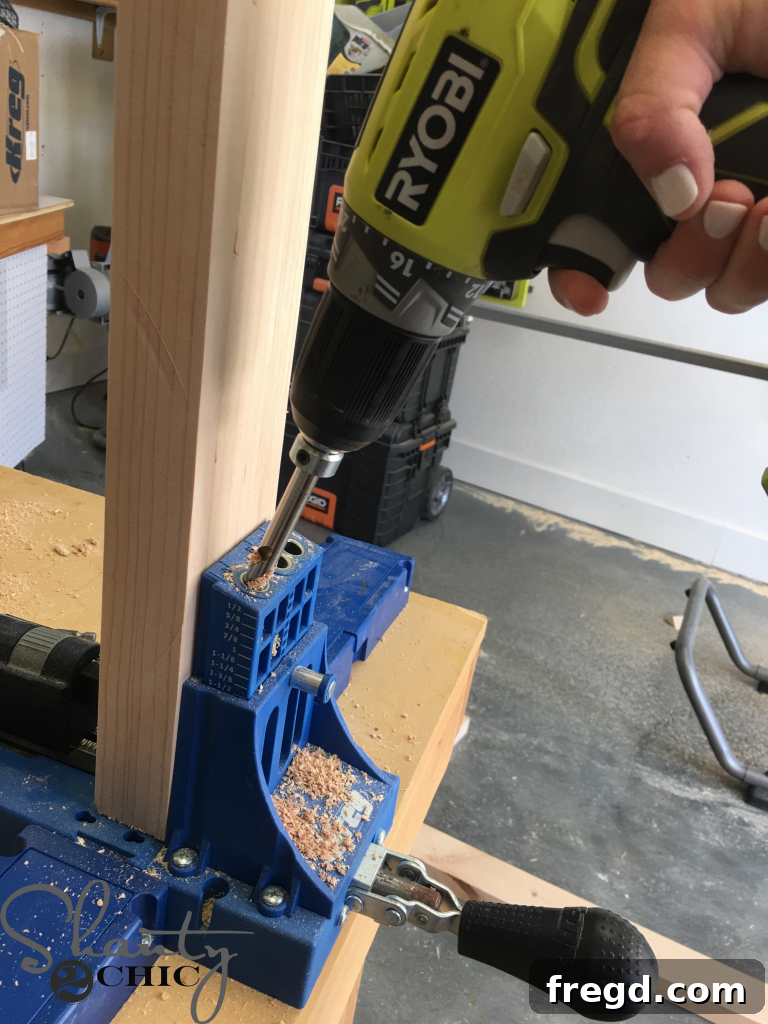
Mastering Joinery with Your Kreg Jig for Strong, Hidden Connections
The Kreg Jig is an indispensable tool for achieving strong, hidden joints in woodworking projects, and it’s particularly vital for the construction of this Modern Farmhouse Hall Tree. Pocket hole joinery allows you to create incredibly sturdy connections without visible fasteners, contributing to the clean lines and professional finish of the piece. If you’re new to using a Kreg Jig, don’t worry – it’s incredibly user-friendly and unlocks a world of possibilities for your DIY furniture projects. You can find our favorite model of Kreg Jig HERE, which is highly recommended for its reliability and ease of use.
Crafting the Elegant Hall Tree Legs and Footpads
With your main posts laminated and cured, the next step involves shaping the legs of your hall tree. Begin by cutting the legs to their specified length according to the free plans. Once cut, utilize your Kreg Jig to drill 1 1/2-inch pocket holes into one end of each leg. These pocket holes will be essential for attaching the legs to other components later in the assembly process, ensuring strong, concealed joints. Precision here is key for a well-aligned structure. Subsequently, to add a touch of design flair and to protect both the hall tree and your floors, a 45-degree angle is cut off the opposite end of each leg. This subtle angle provides a more refined, finished look. To further enhance durability and stability, a protective foot pad is attached to the bottom of each leg. Apply wood glue to the footpad and secure it firmly with 2-inch finish nails, making sure the angle matches that of the leg for a cohesive appearance.
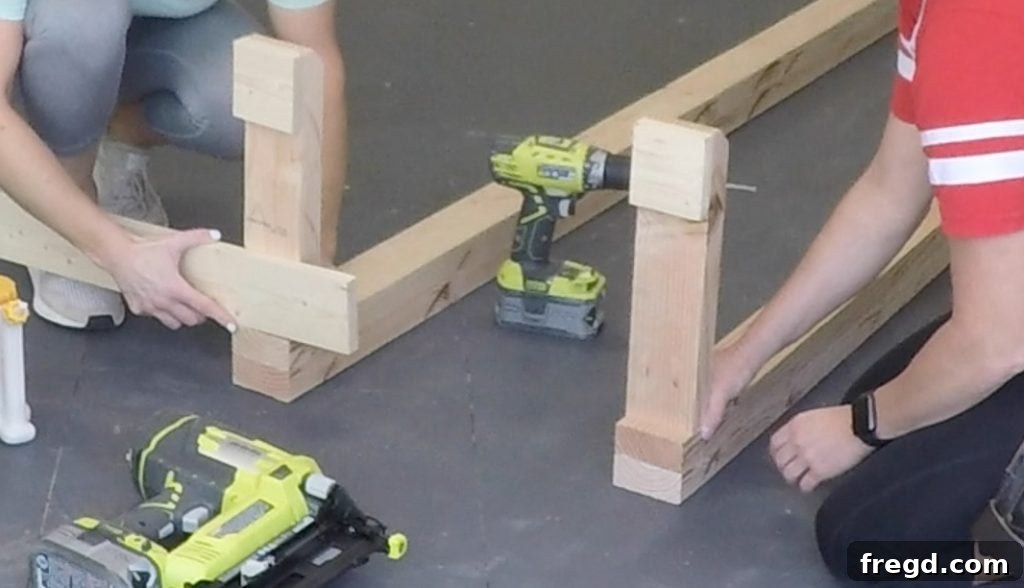
Assembling the Robust Foot Assembly for Stability
The foot assembly plays a crucial role in providing a stable base for your Modern Farmhouse Hall Tree. This component is carefully attached to each leg assembly, positioned precisely 3/4 inch from the bottom of the leg. This specific placement ensures the overall structural integrity and visual balance of the piece. To secure the foot assembly, apply a generous amount of wood glue to the mating surfaces before fastening them together. Then, using 2 1/2-inch pocket hole screws, drive them through the pre-drilled pocket holes from the foot assembly into the legs. The combination of wood glue and pocket hole screws creates an incredibly strong, long-lasting joint that can withstand daily use in a busy entryway or mudroom.
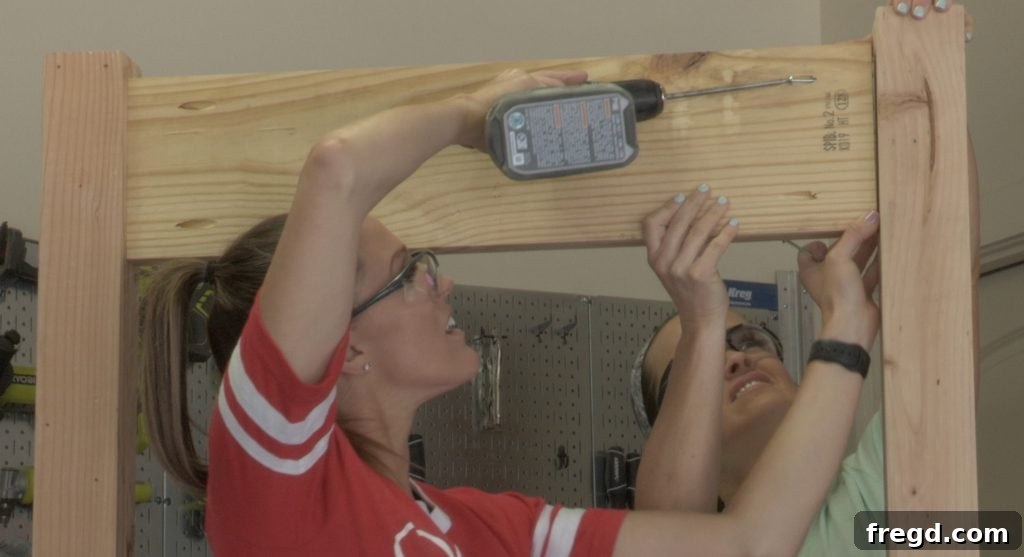
Installing the Functional Hook Board for Coats and Bags
No hall tree is complete without hooks for hanging coats, scarves, and bags. The next step focuses on preparing and attaching the hook board. Begin by cutting the hook board to its precise dimensions as indicated in the plans. Next, drill 1 1/2-inch pocket holes into the back surface of this board. These hidden fasteners will ensure a clean, seamless look once installed. Carefully center the hook board horizontally between the two leg assemblies. Vertically, position it 1 inch down from the very top of the legs. Apply wood glue to the edges that will make contact with the legs, then secure it firmly using 2 1/2-inch pocket hole screws. It is critically important to ensure that the pocket holes are facing backward, away from the front of the piece, so they remain hidden and do not compromise the aesthetic of your finished DIY Modern Farmhouse Hall Tree.
Building the Foundation: Attaching the Base Pieces
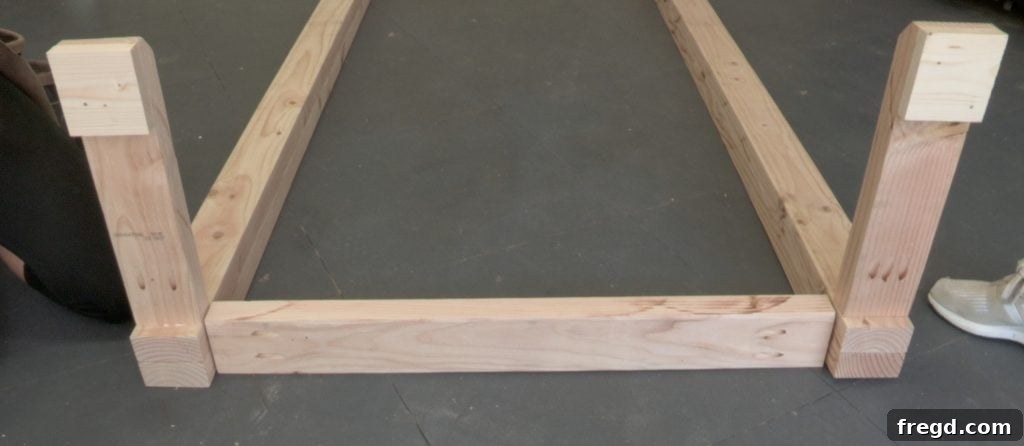
With the vertical structure taking shape, it’s time to solidify the base of your Modern Farmhouse Hall Tree. Cut the base pieces to the exact sizes specified in your plans. Into the ends of both the front and back base pieces, drill 1 1/2-inch pocket holes. These will be used to connect them securely to the legs. Begin by attaching the back base piece. Apply wood glue to the ends and align it flush with the back of the legs, ensuring it is level with the previously installed feet. Fasten it firmly with pocket hole screws. Next, position the front base piece. This piece should be attached 3 1/2 inches from the front of the feet, creating a subtle recess that adds depth and character to the design. Again, use wood glue and pocket hole screws to create a robust connection. These base pieces not only add structural stability but also define the space for the upcoming seat and lower storage elements.
Constructing the Comfortable Seat Support Structure
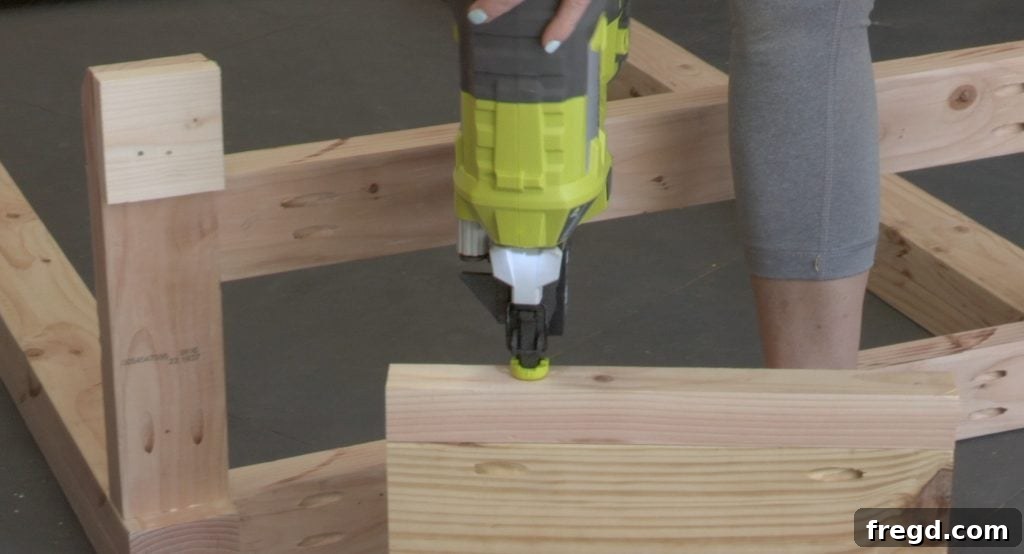
The seat is a central functional element of any hall tree, providing a convenient spot to sit while putting on or taking off shoes. To create a strong and comfortable seat, a robust support structure is essential. Start by cutting the seat support pieces to their required dimensions. For the 2×2 pieces, drill 1 1/2-inch pocket holes into each end. These will be used for later attachment to the main structure. Now, join the 2x2s to the larger 2×10 piece. Apply wood glue along the mating surfaces of the 2×10 where the 2x2s will sit. Carefully position the 2x2s and secure them with 2-inch finish nails. The combination of glue and nails creates a durable frame that will comfortably bear weight and ensure the longevity of your DIY Modern Farmhouse Hall Tree.
Securely Attaching the Seat Support to the Base Runners
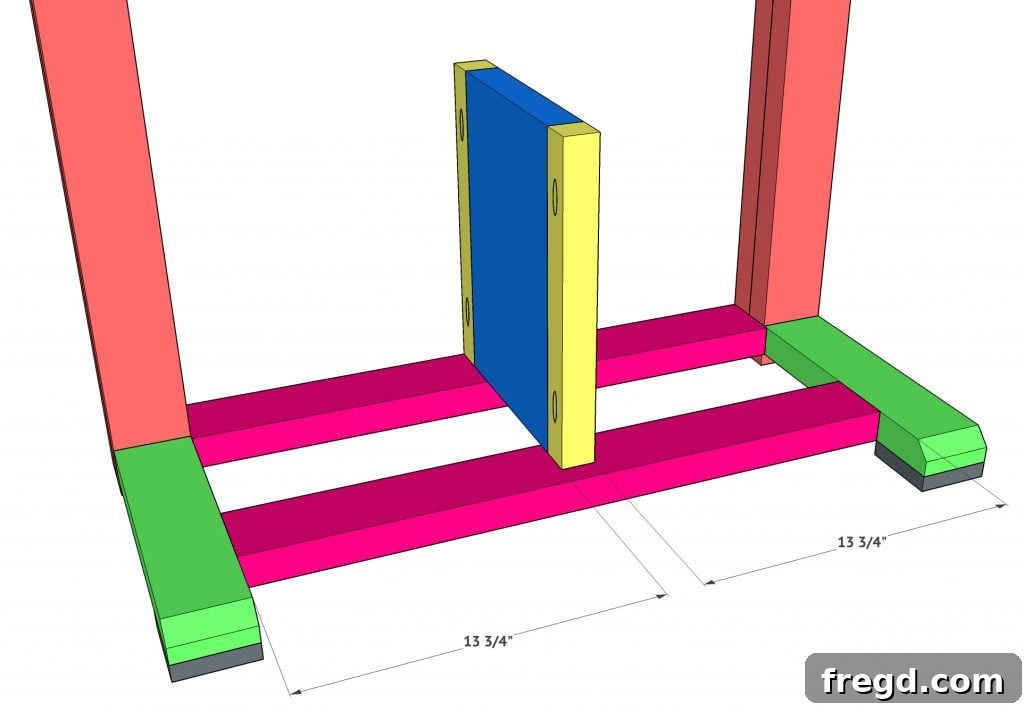
With the seat support frame assembled, it’s time to integrate it into the main structure of the hall tree. Carefully center the entire seat support assembly on the base runners that you previously installed. This precise alignment is crucial for both aesthetic balance and structural integrity. Once properly centered, apply wood glue to the contact points between the seat support and the base runners. Then, using 2 1/2-inch pocket hole screws, drive them through the pre-drilled pocket holes in the seat support into the base runners. This robust connection, combining the strength of wood glue and pocket hole screws, ensures that the seat support is firmly anchored, providing a solid foundation for the seat itself and making your Modern Farmhouse Hall Tree exceptionally durable.
Crafting and Joining the Hall Tree Seat Pieces for Comfort and Style
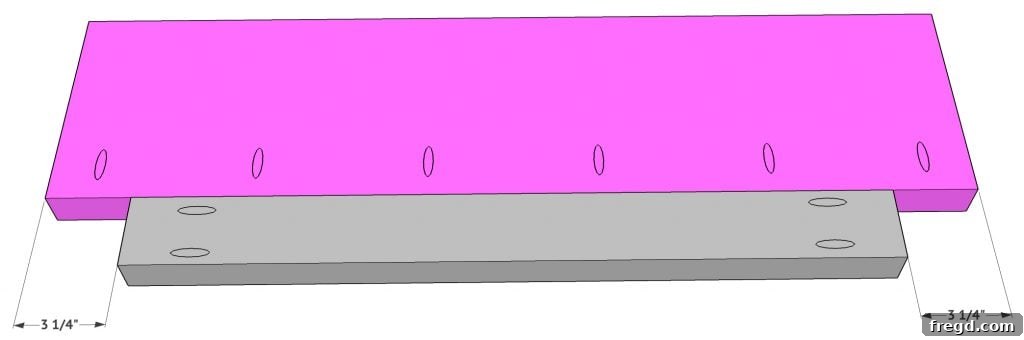
The seat itself is composed of two main pieces, designed to create a comfortable and visually appealing surface. Begin by cutting both the short and long seat pieces to their exact dimensions as specified in the detailed plans. Pay close attention to any special cuts or angles. Next, drill 1 1/2-inch pocket holes into the appropriate locations on these pieces, as indicated in the plans. These pocket holes will facilitate the strong, hidden connections. Carefully center the shorter seat piece on top of the longer seat piece. Apply wood glue to the mating surfaces, ensuring an even coat for maximum adhesion. Then, using 2 1/2-inch pocket hole screws, secure the short piece to the long piece, driving the screws through the pre-drilled holes. This dual-piece construction adds depth and visual interest to the seat, while the pocket hole joinery ensures it’s robust enough for daily use on your DIY Modern Farmhouse Hall Tree.
Finalizing the Seat and Leg Connections for Integrated Structure
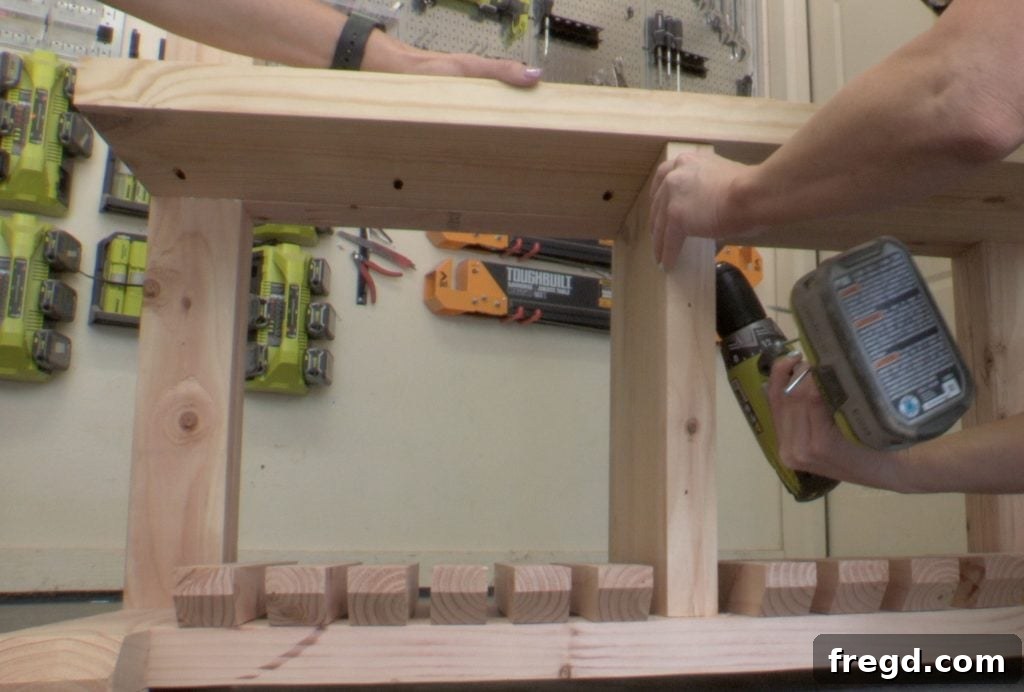
With the seat pieces joined, the next crucial step is to securely attach the entire seat assembly to the hall tree’s main structure. This involves connecting it to both the previously installed seat support and directly to the legs. Begin by carefully positioning the assembled seat onto the seat support and between the legs, ensuring it is perfectly aligned and level. Apply a generous amount of wood glue to all contact points – where the seat meets the support, and where it touches the inside of the legs. Then, using 2 1/2-inch pocket hole screws, drive them through the pre-drilled pocket holes in the seat, into both the seat support and the legs. This multi-point attachment creates an incredibly strong and stable seating surface, seamlessly integrating it into the overall design of your Modern Farmhouse Hall Tree. Double-check all connections to ensure they are tight and secure.
Adding Decorative and Functional Slats to the Lower Section
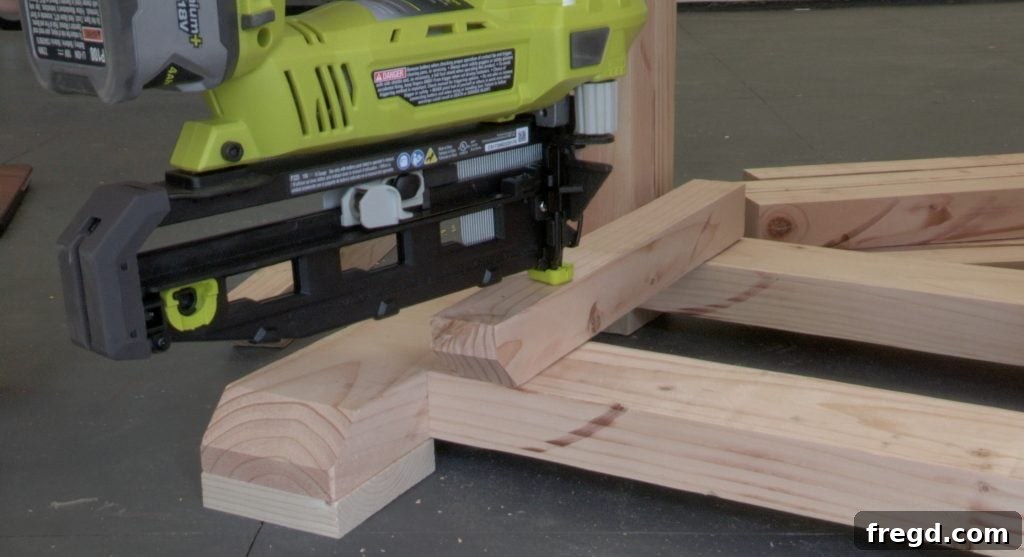
The lower section of the hall tree, beneath the seat, is designed not just for aesthetics but also to provide an ideal spot for storage baskets or shoes. This area is finished with a series of slatted pieces, which contribute to the open, airy feel characteristic of modern farmhouse design. Begin by cutting the slat pieces to their precise dimensions, paying careful attention to any specific angles or lengths detailed in your plans. Once cut, apply wood glue to the edges of the slats that will make contact with the bottom runners. Position each slat carefully, ensuring that the bottom of its angle is flush with the front of the bottom runner. This alignment is key for a consistent and professional look. Secure each slat firmly in place using 2-inch finish nails. Refer to your free plans for the exact spacing and placement of each slat, ensuring a symmetrical and visually pleasing arrangement that enhances both the function and style of your DIY Modern Farmhouse Hall Tree.
The Finishing Structural Touch: Installing the Truss Pieces
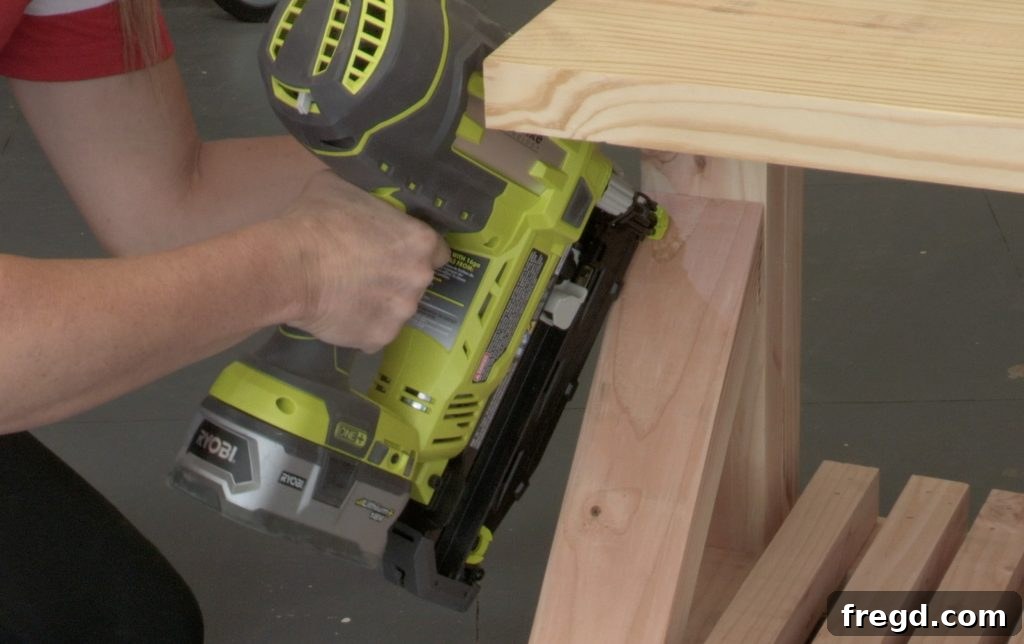
The final step in the structural assembly of your Modern Farmhouse Hall Tree involves adding the decorative and reinforcing truss pieces. These elements are not only aesthetically pleasing, mimicking classic architectural details, but also add an extra layer of stability to the legs and feet. Begin by accurately measuring and cutting the truss pieces to size according to your plans. Precision in these cuts is important for a tight, professional fit. Once cut, apply wood glue to the contact surfaces of each truss piece. Carefully position them onto the legs and feet, ensuring they are properly aligned and seated snugly. Secure each truss piece firmly in place using 2-inch finish nails. This step completes the robust framework of your hall tree, leaving it ready for the exciting stage of finishing and personalization. Take a moment to admire the solid structure you’ve created!
Personalizing Your Modern Farmhouse Hall Tree: Hooks, Paint & More
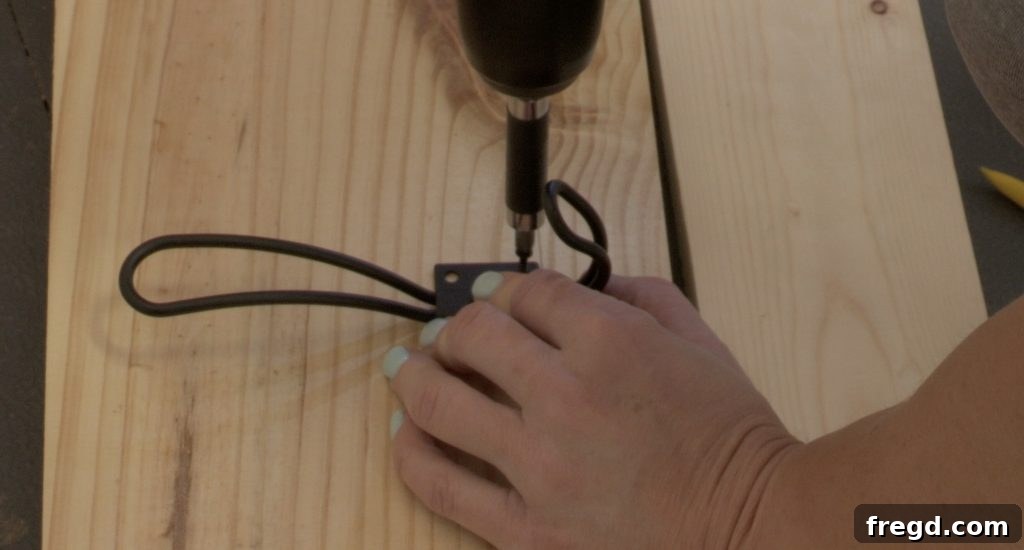
With the construction complete, it’s time to bring your DIY Modern Farmhouse Hall Tree to life with the perfect finish and hardware. This is where your personal style truly shines! After applying your chosen finish, whether it’s a rich stain, a crisp paint color, or a distressed look, the next step is to attach the functional and decorative elements. This includes the hooks for hanging and any additional decorative accents like nail heads that enhance the farmhouse charm. The right hardware can transform a functional piece into a stunning focal point.
For sturdy and stylish hanging solutions, we recommend high-quality hooks that complement the modern farmhouse aesthetic. You can find the hooks we used HERE, which perfectly blend functionality with the desired design.
To add an extra touch of character and detail, consider incorporating decorative nail heads. These small but impactful accents can elevate the overall look of your hall tree. You can find the specific nail heads we used HERE, offering a beautiful contrast and classic appeal.
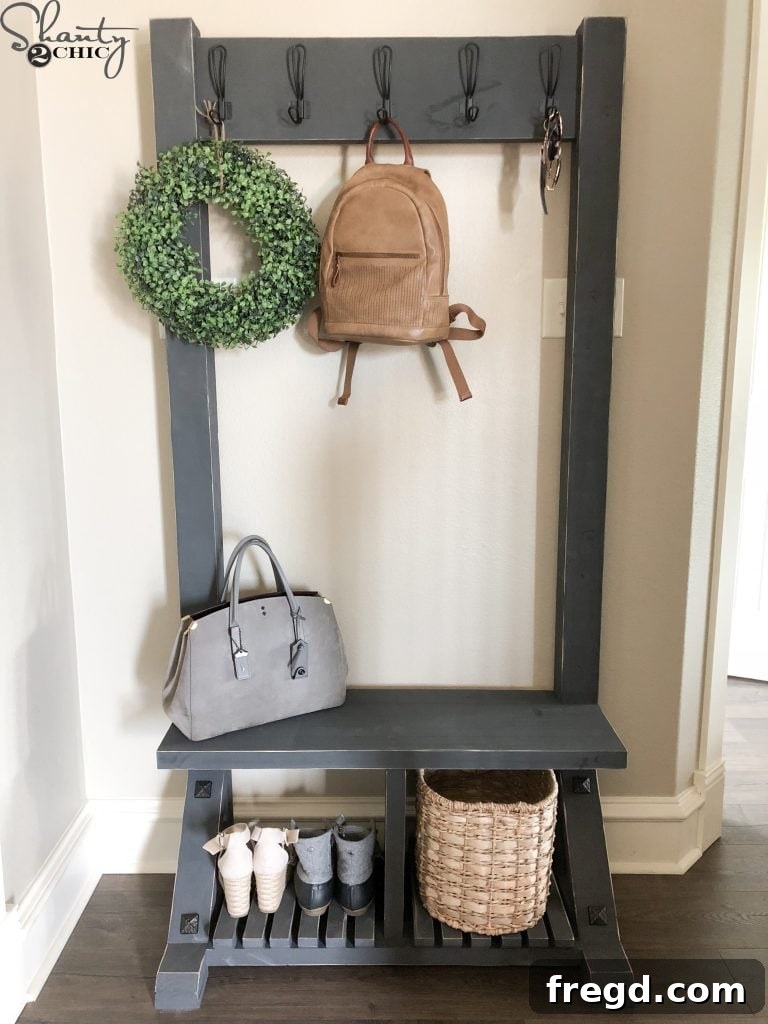
The choice of paint is paramount in achieving the desired modern farmhouse look. We opted for a clean, crisp finish that highlights the structural details without overwhelming them. For our DIY Modern Farmhouse Hall Tree, we used two coats of THIS paint for the finish, which provided excellent coverage and a durable, beautiful surface. Remember to properly prepare your wood by sanding and priming for the best paint adhesion and a flawless result. Allow each coat to dry completely before applying the next for optimal smoothness and durability.
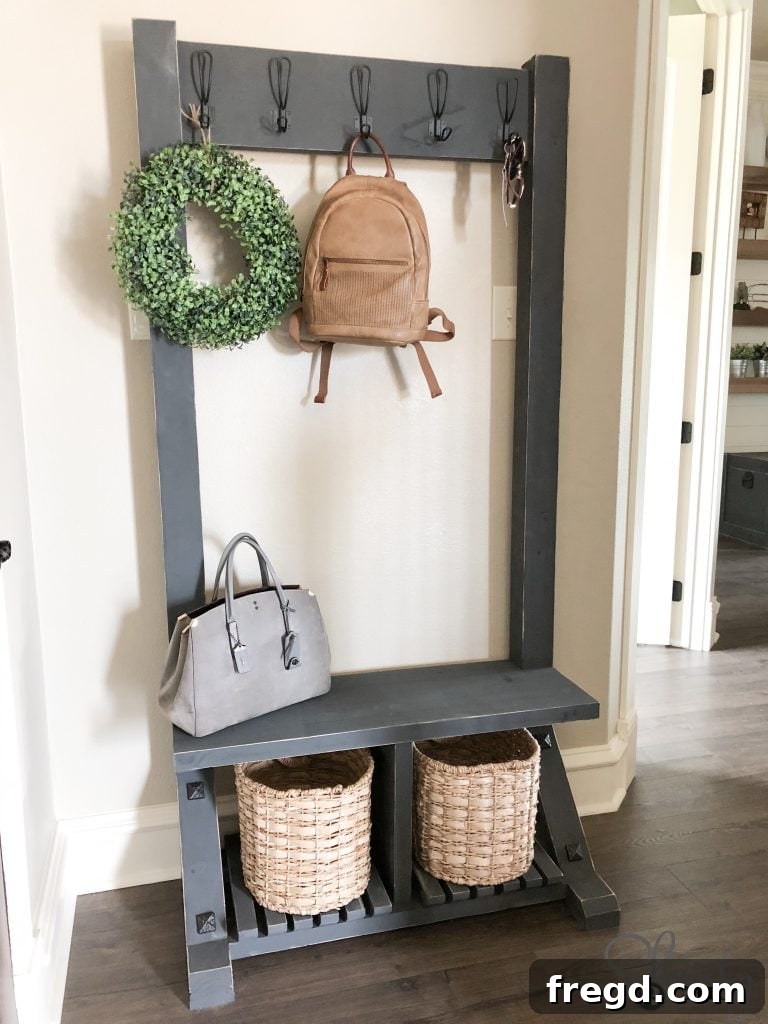
And just like that, you’ve created a functional masterpiece! This DIY Modern Farmhouse Hall Tree truly offers the perfect synergy of form and function, seamlessly blending rustic charm with contemporary clean lines. It’s an ideal storage solution for any entryway, mudroom, or hallway, providing a designated spot for coats, bags, shoes, and everyday essentials. If your space allows, don’t hesitate to customize the dimensions for a wider or taller piece; the modifications are incredibly easy to adapt to your specific needs. We absolutely love seeing your creations, so if you build this fantastic hall tree, please share your finished project with us on social media! Tag us and use the hashtag #shanty2chic so we can celebrate and share your amazing DIY accomplishments too!
To help you complete your project with ease and find all the exact items we used, here’s a comprehensive list of sources for everything from hardware to tools. We’ve meticulously curated these links to ensure you have access to the same quality products that helped us bring this beautiful piece to life.
Hooks
Nail Heads
Baskets (Note: We trimmed the handles off our baskets to achieve a perfect fit and a cleaner look within the hall tree’s lower compartments.)
Paint
Kreg Jig
Glue Bot
Happy Building, and enjoy your beautiful new Modern Farmhouse Hall Tree!