
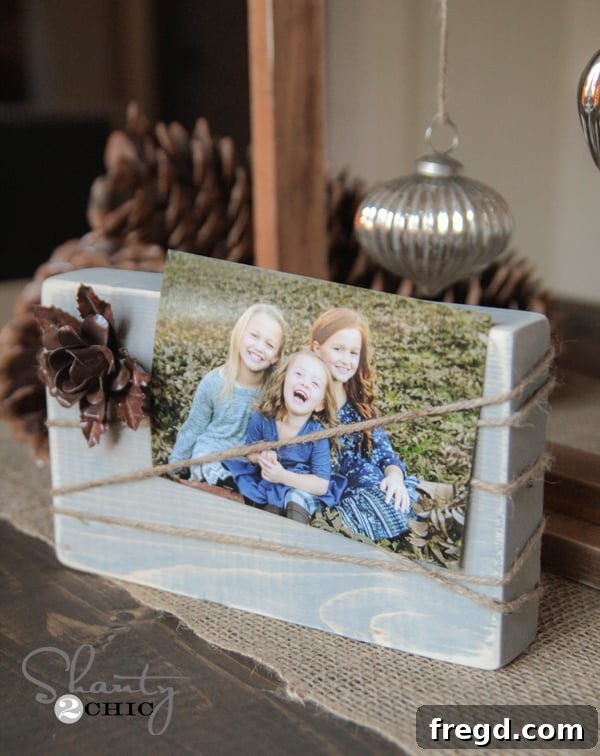
The Ultimate Guide to Crafting $1 DIY Wood Block Picture Frames: Perfect Handmade Gifts for Christmas!
Welcome, crafty friends, to Day 6 of our enchanting “12 Days of Christmas” series! As the festive season draws near, the quest for meaningful yet budget-friendly gifts becomes a delightful challenge. With a bustling household of five little ones, I truly understand the need for gift ideas that can cater to “the masses.” From cherished teachers and kind neighbors to beloved friends and family, finding thoughtful presents that don’t strain your wallet is an art form. Today, I’m thrilled to share a project that perfectly embodies this spirit: our incredibly charming and surprisingly affordable DIY Wood Block Picture Frame. Get ready to create beautiful, personalized gifts that truly come from the heart, all for around just $1 each!
Why Choose Handmade Gifts This Christmas?
In an era of mass-produced items, a handmade gift stands out. It’s not just an object; it’s a piece of your time, effort, and affection, making it infinitely more special than something bought off a shelf. Handmade gifts carry a unique warmth and personal touch that store-bought items often lack. Imagine the joy on a loved one’s face as they unwrap a custom-made picture frame, knowing the thought and care that went into creating it just for them. These DIY wood block frames are not only a testament to your creativity but also a smart way to manage your holiday budget without compromising on quality or sentiment. They allow you to spread cheer generously, proving that the most memorable gifts don’t always come with the highest price tags.
Introducing Your Next Favorite DIY Project: The $1 Wood Block Frame!
This project isn’t just easy; it’s incredibly versatile and rewarding. Whether you’re a seasoned DIYer or just starting your crafting journey, you’ll find immense satisfaction in transforming simple pieces of wood into beautiful, rustic picture frames. What makes this project truly shine is its adaptability. You can customize every aspect – from the wood stain to the embellishments – to perfectly match the recipient’s style or the aesthetic of your own home decor. Let’s dive into how you can create these charming frames, starting with just a basic wood block and a few simple supplies. You’ll be amazed at how a $1 investment can yield such a high-quality, heartfelt gift!
What You’ll Need: Materials and Tools
One of the best aspects of this DIY wood block frame project is its simplicity, both in design and in the materials required. You likely have some of these items already, making it even more budget-friendly!
Essential Materials:
- Wood Boards: We recommend using 2×6 boards, but the beauty of this project is its flexibility – any 2x sized wood (e.g., 2×4, 2×8) will work beautifully. The “2x” dimension is crucial as it allows the frame to stand freely without any additional support. A single 2×6 board, typically costing around $5, can yield up to 10 frames, bringing your per-frame cost for the wood down to a mere 50 cents!
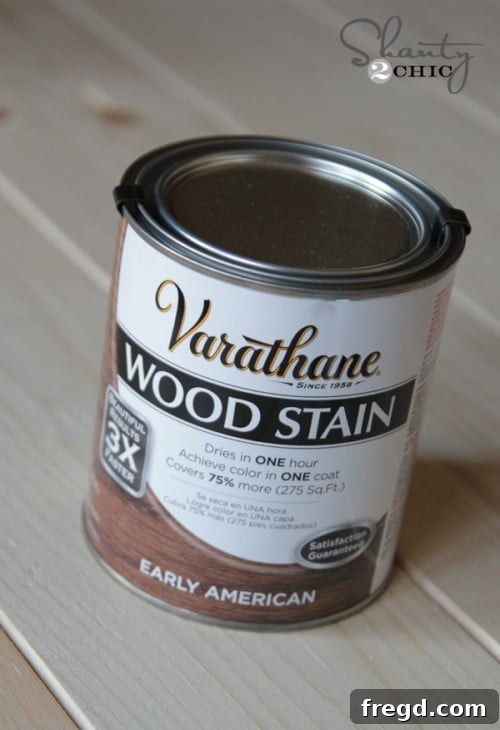
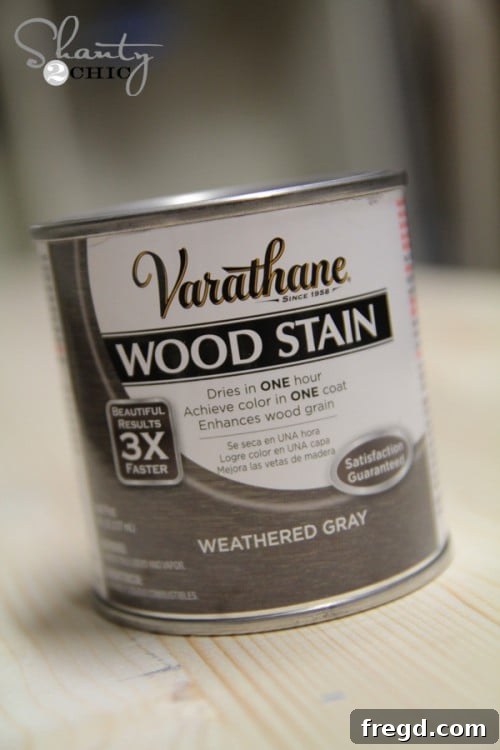
- Wood Stain: This is where you can truly personalize the look. I used Varathane Early American for a classic, warm tone and Varathane Weathered Gray for a more contemporary, rustic feel. You can choose any wood stain color that suits your style or the recipient’s preference.
- Rags or Old T-Shirt: Perfect for applying and wiping off excess stain. Old socks or cut-up fabric scraps also work great.
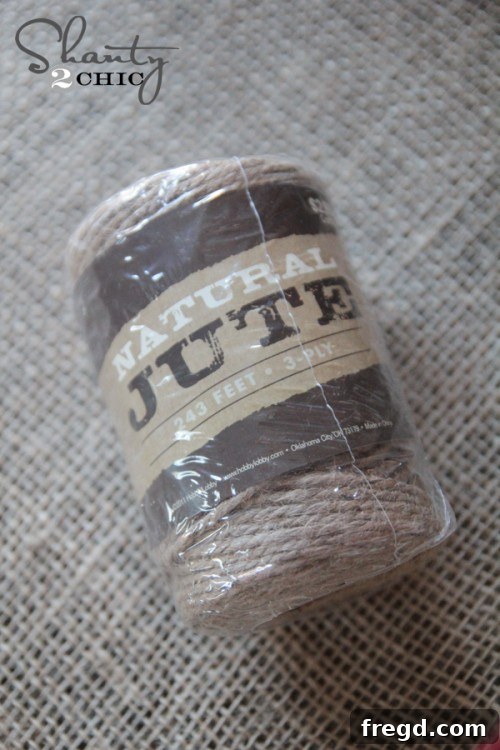
- Jute Twine: Available at most craft stores like Hobby Lobby, jute twine adds a lovely rustic touch. You can experiment with different types of twine or even thin rope for varied textures.
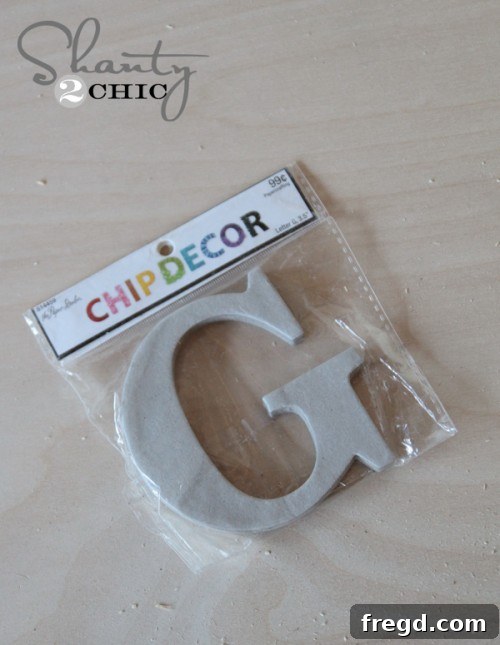
- Embellishments: This is the fun part where creativity truly shines! I used a $.50 chipboard letter (painted and distressed) and a metal rose. Other fantastic ideas include small wooden cutouts, dried flowers, small ornaments, fabric scraps, stenciled designs, or even printed quotes glued onto the block.
- Hot Glue Sticks: For securing embellishments and potentially the twine.
- Sandpaper (fine-grit): Optional, for distressing the edges of your wood block or painted embellishments for a weathered look.
Recommended Tools:
- Saw: A miter saw or hand saw for cutting your wood boards to size. If you don’t have one, many hardware stores offer cutting services, often for free or a small fee, which is a fantastic option!
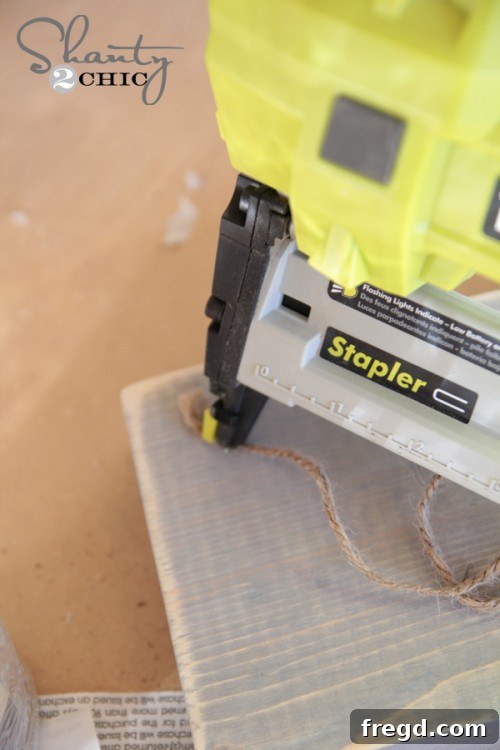
- Staple Gun: A Ryobi Airstrike Staple gun is excellent for quick and secure attachment of the twine. Alternatively, a hand stapler or even strong hot glue can work just as well for this step.
Step-by-Step Guide to Crafting Your Wood Block Frame
Step 1: Prepare Your Wood Blocks – Cutting for Perfection
The foundation of your beautiful frame starts with well-prepared wood blocks. While I opted for 9-inch long blocks, remember that customization is key! You can adjust the length to suit the size of the photos you plan to display – perhaps shorter for smaller prints or longer for a more dramatic statement. The most important dimension is the “2x” thickness, which ensures your frame will stand proudly on its own. If you’re new to woodworking or don’t have the tools, don’t hesitate to utilize the convenient cutting services at your local hardware store. Just ask them to cut your 2×6 board into your desired lengths. This not only saves you time and effort but also ensures precise, clean cuts, making the rest of the project a breeze. As mentioned, a single $5 2×6 board can typically yield about 10 frames, making this step incredibly cost-effective when crafting multiple gifts.
Step 2: Stain Your Wood Blocks – Adding Character and Charm
Staining is where your wood blocks truly begin to develop their personality. This step is incredibly simple but makes a huge impact on the final aesthetic. Gather your chosen wood stain (I loved Varathane Early American for its classic appeal and Weathered Gray for a modern farmhouse look) and a clean rag or an old t-shirt. Dip your rag into the stain, ensuring it’s saturated but not dripping. Then, apply the stain evenly across all surfaces of your wood block. Use gentle, circular motions to work the stain into the wood grain. For a deeper, richer color, you can apply a second coat after the first has dried slightly. Once you’ve achieved your desired color intensity, use a clean part of your rag to wipe off any excess stain. This prevents a sticky finish and allows the natural beauty of the wood grain to shine through. Set your stained blocks aside in a well-ventilated area and allow them to dry for at least an hour, or as per the product instructions. This drying time is crucial for preventing smudges and ensuring a durable finish.
Step 3: Attach the Jute Twine – Creating the Photo Holder
Once your wood blocks are completely dry and cured, it’s time to add the charming jute twine, which will serve as the perfect rustic holder for your photos or notes. Take your spool of jute twine and locate a top corner of your stained wood block. Using your staple gun (or a hand stapler, if preferred), firmly attach one end of the twine to the back of the block, near the top edge. Position the staple so it’s hidden from the front view, ensuring a clean finish. If you don’t have a stapler, a strong dab of hot glue can also work effectively here, just ensure it holds the twine securely as you begin to wrap. This initial anchor point is crucial for the stability of your photo display.
Step 4: Wrap the Twine – A Touch of Rustic Elegance
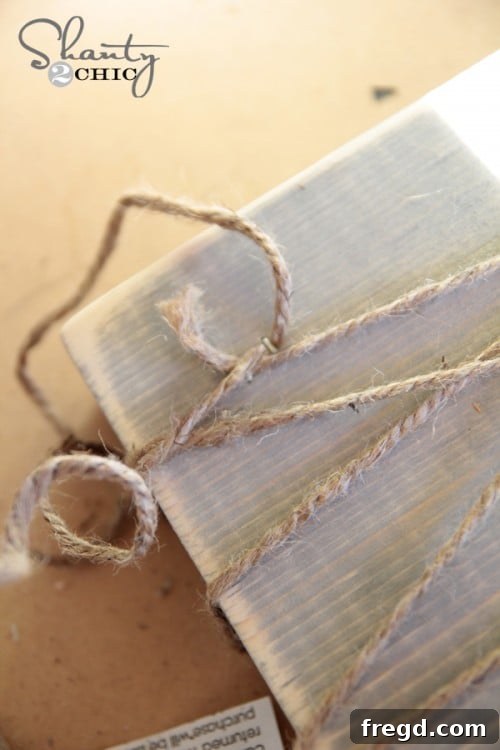
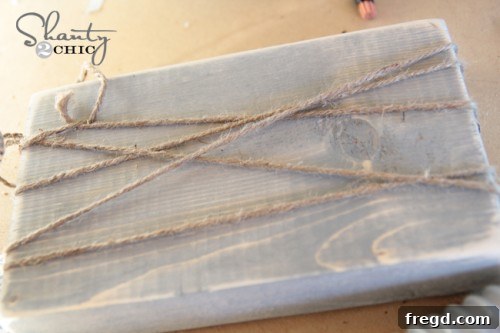
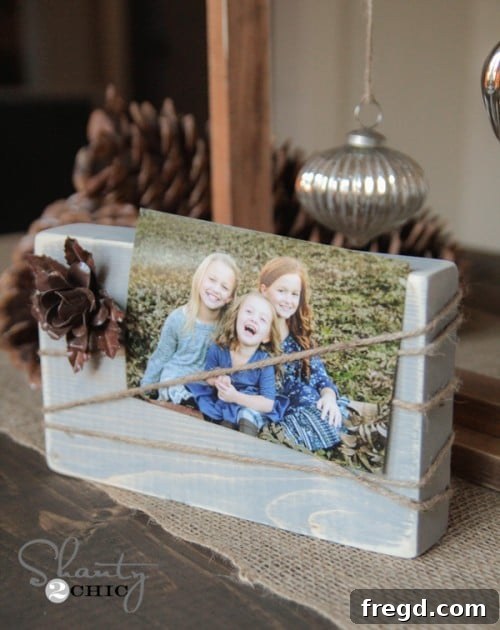
With your twine securely anchored, begin wrapping it around the wood block. I found that 4-5 wraps create an ideal look, providing enough space to tuck in photos without overcrowding. As you wrap, consciously space out the twine strands, aiming for even gaps between each line. This creates a neat, organized appearance that highlights the rustic charm of the twine. Maintain a consistent tension as you wrap to ensure the twine lies flat against the wood and doesn’t sag. Once you’ve completed your desired number of wraps, secure the end of the twine. Staple it to the back of the block, close to where you started, trimming any excess. Again, if using hot glue, apply a generous amount to secure the end firmly. This step is visually impactful and sets the stage for displaying your cherished memories.
Step 5: Embellish Your Frame – The Personalized Finishing Touch
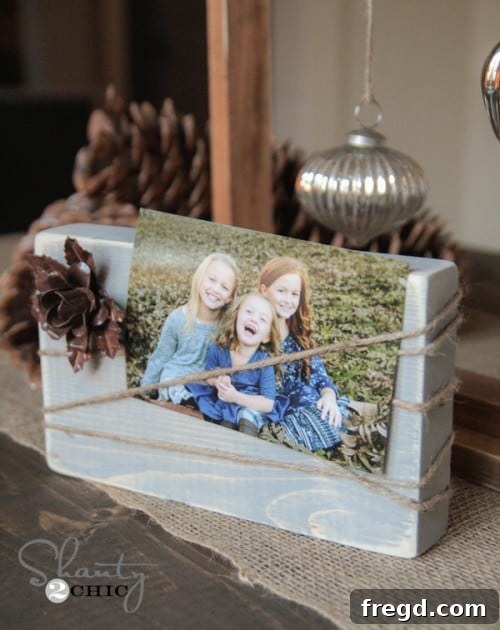
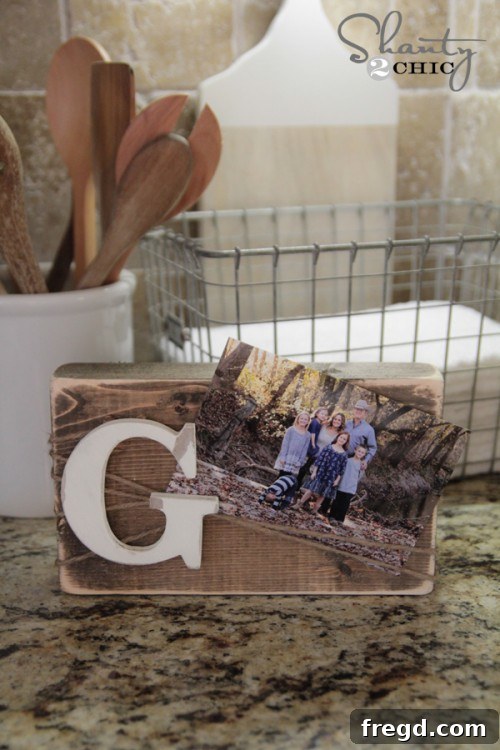
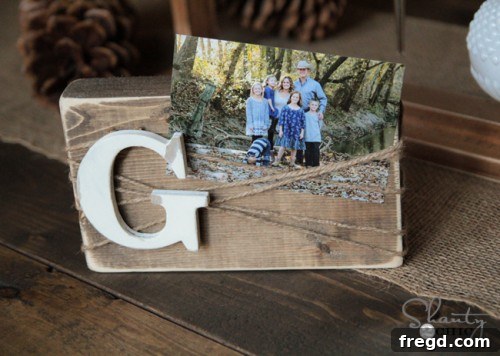
Now comes the most exciting part: adding embellishments to make your wood block frame truly unique and personalized! This is your chance to let your creativity soar and tailor each frame to its intended recipient. I opted for a $.50 chipboard letter, painted it an off-white, and then lightly distressed its edges with sandpaper for a charming, aged look. Hot glue is your best friend here for secure attachment. Remember to strategically place your embellishment to cover the starting point of your twine on the front of the block, ensuring a seamless finish. The possibilities for embellishments are endless!
Consider:
- Painted Wooden Shapes: Small stars, hearts, trees, or festive motifs.
- Mini Ornaments: For a Christmas-themed gift, tiny baubles or pinecones add festive cheer.
- Metal Accents: Like the metal rose I used, these add an elegant touch. Hobby Lobby has a great selection of metal embellishments near their craft wood aisle.
- Fabric Flowers or Ribbons: Add a soft, romantic, or colorful flair.
- Stenciled Words or Designs: Think “LOVE,” “HOME,” or a simple snowflake.
- Small Photos or Quotes: Glue a small, meaningful photo or an inspiring quote directly onto the block itself.
No matter what you choose, ensure it complements the stain color and the overall vibe you’re aiming for. This final touch transforms a simple block into a treasured keepsake.
Creative Customization Ideas for Every Occasion
Beyond the basic steps, these wood block frames offer boundless opportunities for customization. Think about the recipient: what are their favorite colors? What’s their interior design style? Do they prefer rustic, modern, or whimsical decor? You could use a bright, cheerful paint color instead of stain for a child’s room, or a glossy finish for a more contemporary look. Experiment with different types of twine or ribbon – velvet ribbon for elegance, striped baker’s twine for a playful feel. Instead of just photos, these frames can also hold small notes, inspiring quotes, or even a mini garland. For a baby shower gift, incorporate baby-themed embellishments and paint it in nursery colors. For a wedding, use white stain and delicate lace. The beauty of this project lies in its ability to be transformed for any holiday, season, or personal preference, making it a truly versatile craft for year-round gifting.
Presenting Your Handmade Masterpiece: Gift-Giving Tips
Once your gorgeous DIY wood block frames are complete, how do you present them to maximize their impact? Consider tucking in a favorite photo of you and the recipient, or a memorable group shot, before wrapping. This instantly personalizes the gift. Wrap each frame simply with brown craft paper and tie it with a coordinating ribbon, adding a small sprig of evergreen for a festive touch during Christmas. Alternatively, include the frame as part of a larger gift basket themed around home decor or photography. A handwritten tag expressing your sentiment adds another layer of thoughtfulness. These frames make perfect gifts for teachers, neighbors, co-workers, friends, or anyone on your holiday list who appreciates a touch of handmade charm and a heartfelt gesture.
And just like that, you’re DONE! How incredibly easy and satisfying is that? You’ve just created a beautiful, personalized, and budget-friendly gift that truly speaks volumes. These frames are not just functional; they are pieces of art, crafted with love and thoughtfulness.
Join Our Crafting Community!
Thank you so much for stopping by and embarking on this creative journey with me! I genuinely hope this tutorial inspires you to craft your own beautiful wood block frames. If you have any questions at all about the process, materials, or customization, please don’t hesitate to ask in the comments below. Your crafting success is my joy!
Don’t forget to explore the amazing Day 6 projects from my talented friends in our “12 Days of Christmas” series. Each button below is a portal to more festive inspiration and unique DIY ideas. Click through and discover more ways to make your holiday season bright and handmade!