
Table of Contents
Elevate Your Entryway: A DIY Wall Planter with Address Numbers
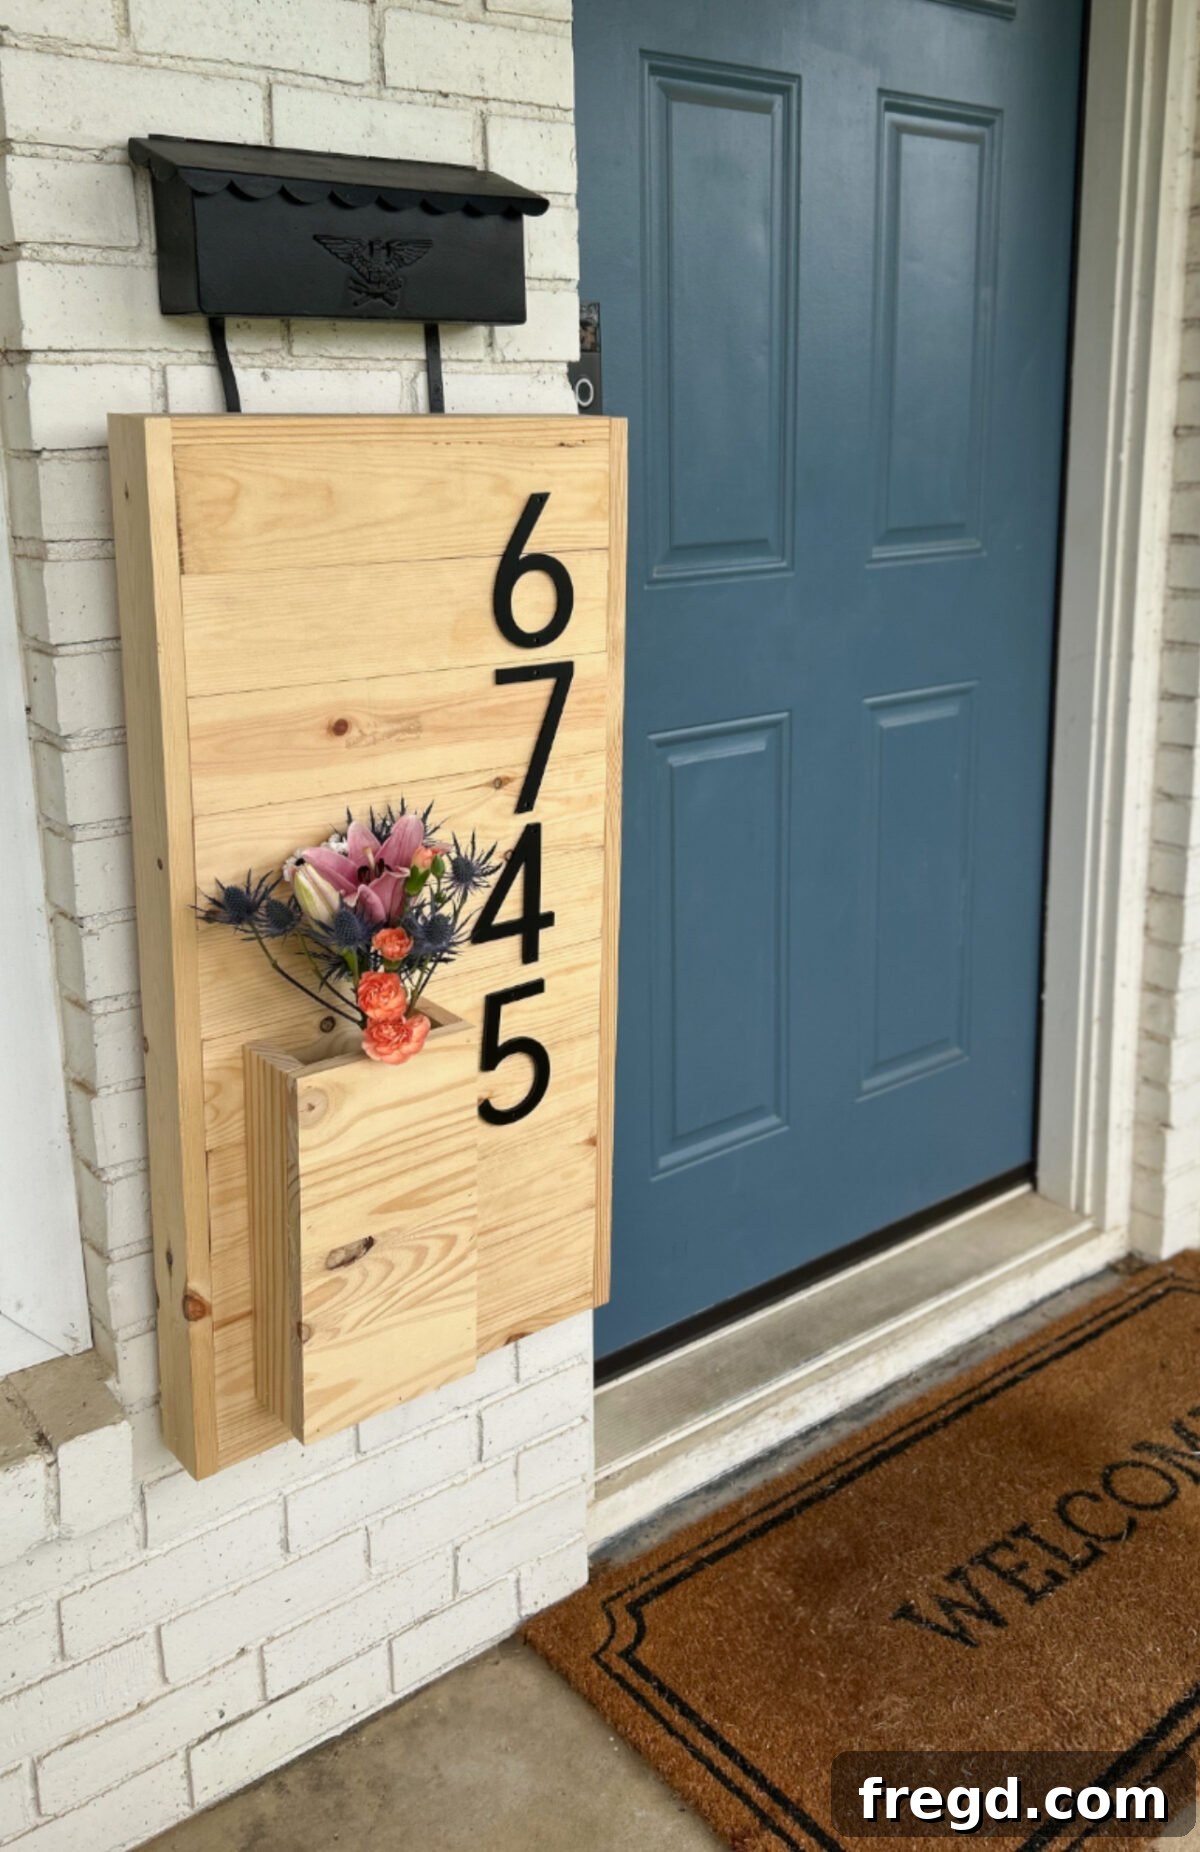
Summer is the perfect season for tackling outdoor DIY projects, and we’re embracing it wholeheartedly! There’s nothing quite like the satisfaction of creating something beautiful and functional with your own hands, especially when it adds a touch of charm to your home’s exterior. Today, we’re thrilled to share an exciting project: a stylish wall-mounted planter designed specifically for a front porch. This isn’t just any planter; it’s a clever two-in-one solution that not only provides a lovely home for your favorite plants but also prominently displays your address numbers, instantly boosting your home’s curb appeal and adding a personalized touch.
Imagine your guests being greeted by vibrant greenery and clearly visible address numbers, all beautifully integrated into a cohesive, handcrafted piece. This DIY wall planter is a testament to efficient design, combining aesthetic appeal with practical functionality. It’s a project that promises to transform your entryway into a welcoming focal point, leaving a lasting impression on anyone who visits.
Whether you’re a seasoned woodworker or just starting your DIY journey, this project is designed to be accessible and rewarding. With clear instructions and a little creativity, you can craft a custom piece that perfectly complements your home’s style. So, roll up your sleeves, embrace the sawdust and sunshine, and let’s dive into building this adorable, hardworking planter!
Ready to enhance your home with a touch of DIY magic? Let’s get started!
Essential Tools and Materials for Your DIY Planter
Before you begin any woodworking project, it’s crucial to gather all your necessary materials and tools. Having everything at hand will ensure a smoother, more efficient building process. For this DIY wall planter with address numbers, we’ve carefully selected items that are readily available and conducive to creating a sturdy, attractive finished product. This project also provides a fantastic opportunity to familiarize yourself with some essential woodworking tools, especially if you’re new to the craft.
Materials You’ll Need:
- Wood Planks: These will form the main face of your planter. Refer to the free printable plans for precise cut sizes, ensuring you have enough material for all the components.
- 1×3 Boards: These versatile boards will be used for both the decorative trim around the main panel and for constructing the planter box itself, adding depth and structure.
- Metal House Numbers: Choose a style and finish that complements your home’s aesthetic. These will be the focal point for displaying your address.
- Pocket Hole Screws (1 ¼”): Essential for creating strong, concealed joints with your Kreg Jig. These screws are designed for maximum holding power in pocket holes.
- Brad Nails (1 ¼”): Perfect for attaching trim pieces and the planter box front, providing a clean finish with minimal visibility.
- Wood Glue: A critical component for reinforcing joints, ensuring long-lasting durability and stability for your planter.
- Optional: Wood Stain or Paint: For finishing your planter and protecting it from the elements.
- Optional: Outdoor Sealant: To further enhance weather resistance and prolong the life of your planter.
Tools for the Job:
- Kreg Jig 720 Pro (or your favorite Kreg Jig model): This is the cornerstone tool for this project, enabling you to create incredibly strong and precise pocket hole joints effortlessly.
- Drill/Driver: For drilling pilot holes, driving screws, and using with your Kreg Jig.
- Nail Gun or Hammer: A nail gun (cordless or pneumatic) will make attaching trim quick and easy, while a hammer with brad nails is a perfectly viable alternative for a more traditional approach.
- Clamps: Indispensable for holding pieces securely in place while drilling, gluing, or screwing, ensuring accurate alignment and safe operation.
- Saw (Miter or Circular): For making precise cuts on your wood planks and boards. A miter saw offers excellent accuracy for angled and straight cuts, while a circular saw provides versatility for larger cuts.
- Safety Glasses and Hearing Protection: Always prioritize safety when working with power tools.
Gathering these items before you start will set you up for success and allow you to fully enjoy the building process. Remember, investing in quality tools can make a significant difference in the ease and quality of your DIY projects.
Step-by-Step Guide to Building Your Custom Planter
Now that you have all your materials and tools ready, let’s get into the heart of the project: the step-by-step instructions for building your beautiful and functional DIY wall planter. We’ll guide you through each stage, providing tips and insights to help you achieve professional-looking results. Get ready to transform raw wood into a charming addition to your home!
Understanding the Kreg Jig: A Game Changer for DIYers
One of the most frequently asked questions we receive is, “What exactly is a Kreg Jig?” For those unfamiliar, a Kreg Jig is a specialized pocket hole jig designed to help you drill angled holes into wood, creating incredibly strong and discreet joints. This innovative tool revolutionized our furniture-building journey by making it quicker, cleaner, and significantly sturdier than traditional methods like simply driving screws straight into boards or using complicated joinery techniques.
We discovered Kreg tools early on, and they instantly became a staple in our workshop. The joints created with a Kreg Jig are rock-solid, and the setup is remarkably beginner-friendly, making it an ideal choice for DIY enthusiasts of all skill levels. It allows for hidden fasteners, resulting in a cleaner, more professional finish that truly elevates your woodworking projects. For this particular build, we relied on the Kreg Jig 720 PRO, a model we’re absolutely obsessed with for its advanced features, ease of use, and precision. If you already own another Kreg Jig model, it will certainly get the job done, but the 720 PRO is definitely worth considering for an upgrade.
- Explore the Kreg Jig 720 Pro on Amazon for its innovative features.
- Enhance your skills by watching our comprehensive How to Use a Kreg Jig video tutorial.
Step 1: Precision Pocket Holes for a Strong Foundation
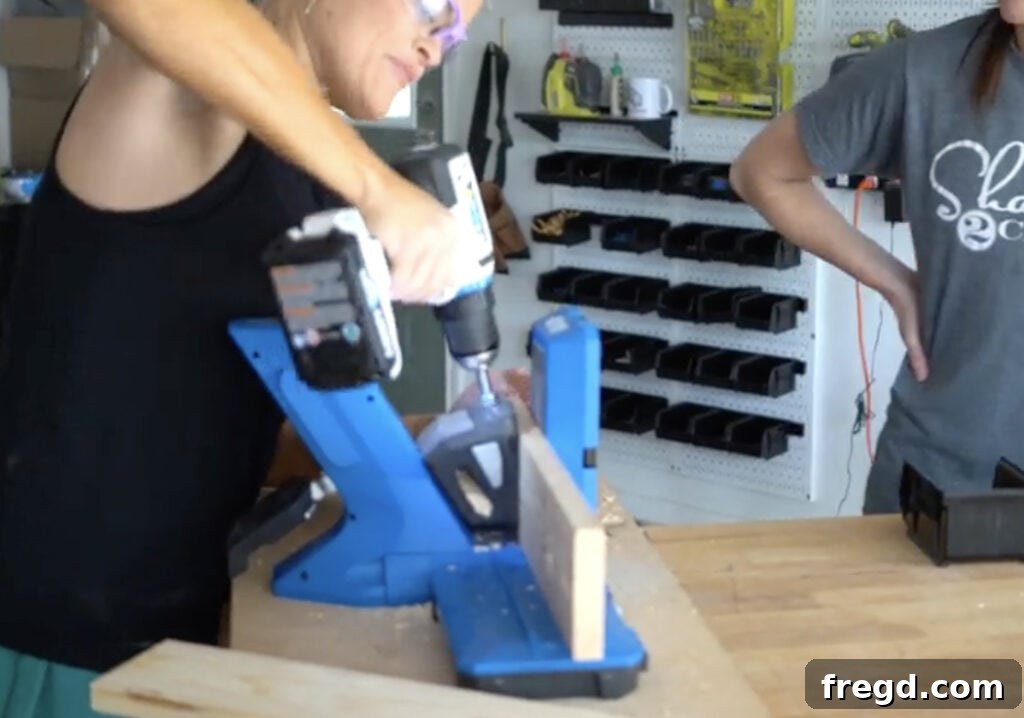
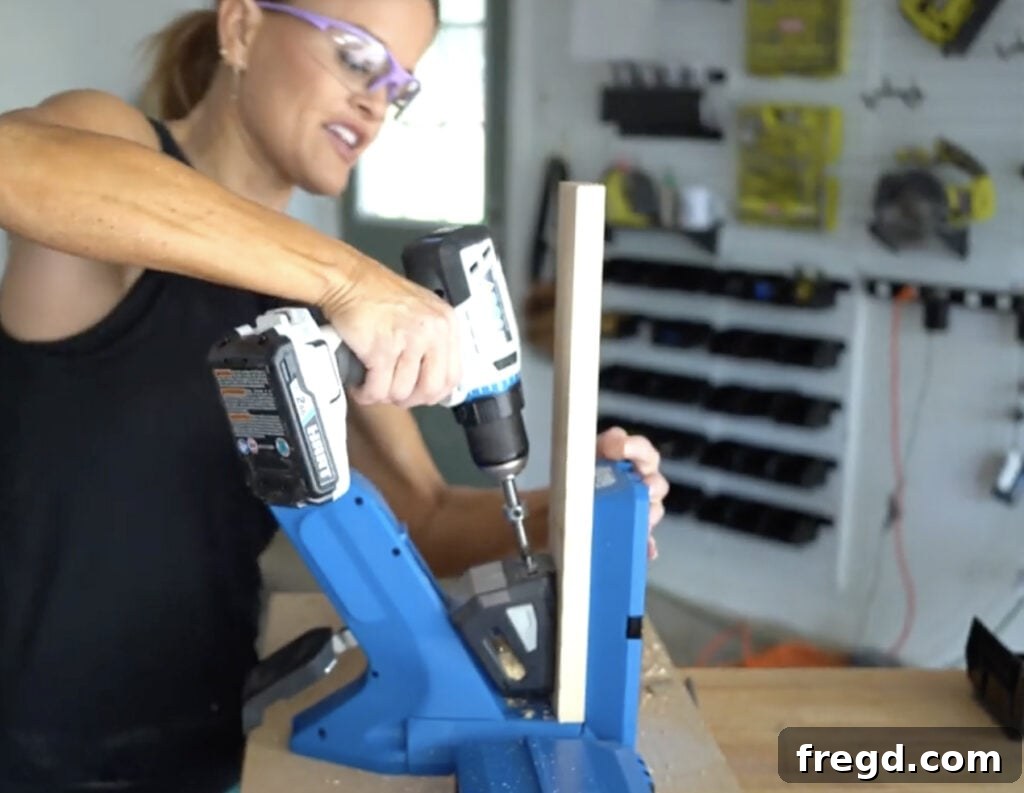
Your first task is to prepare the main planks that will form the face of your planter. Using your Kreg Jig, drill pocket holes into the top and bottom edges of each plank. These strategically placed holes are crucial for securely attaching the planks to each other, forming a robust panel, and later, for mounting the decorative trim. The Kreg Jig 720 Pro makes this step incredibly simple, offering easy adjustments for various board thicknesses and convenient on-board storage for all your bits and accessories. Ensure your settings are correct for your wood thickness to achieve optimal joint strength.
Step 2: Assemble the Main Planter Panel
Next, you’ll need to drill additional pocket holes into the side edges of at least one of your main boards. These side holes will be instrumental when attaching the vertical trim pieces later on. Once your holes are drilled, it’s time to join the eight planks together to create the large, flat panel that will serve as the planter’s face. Using 1 ¼-inch pocket hole screws, meticulously attach each plank side-by-side. At this stage, wood glue isn’t necessary for the main panel assembly; the pocket hole screws provide ample strength and allow for minor adjustments if needed. Ensure all planks are aligned flush for a smooth surface. This creates a solid foundation for your project.
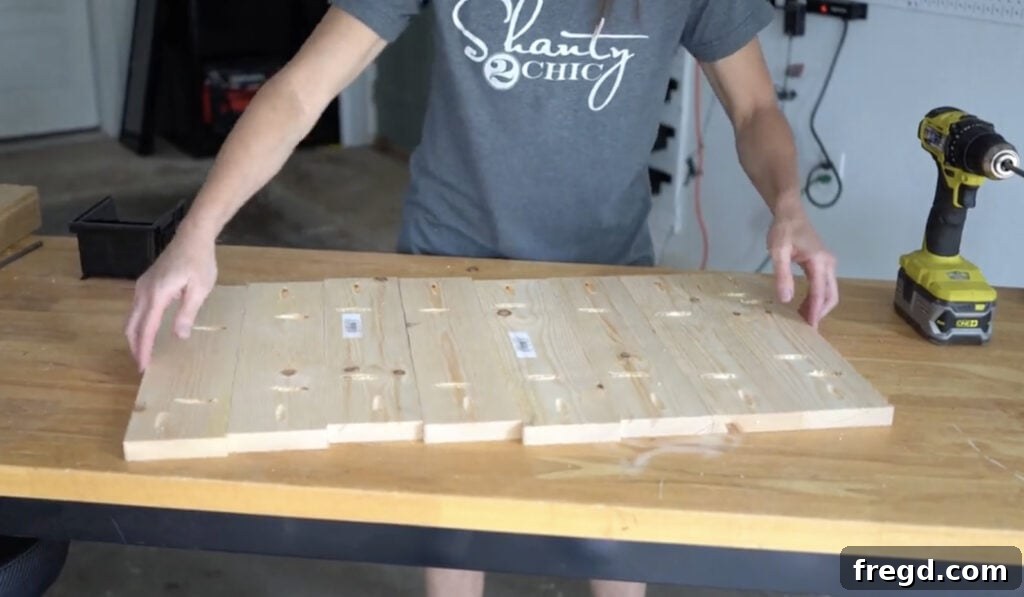
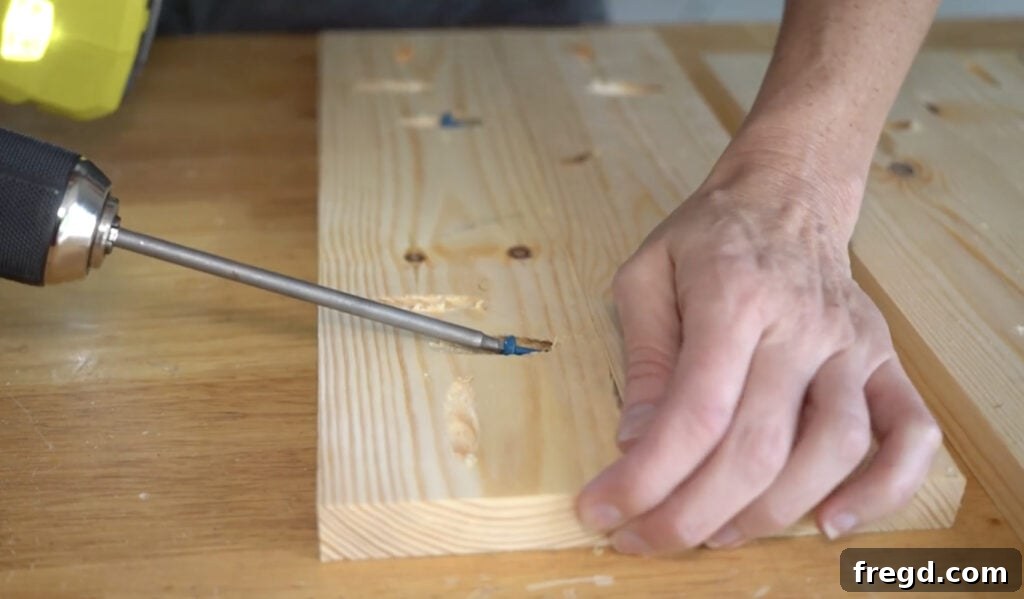
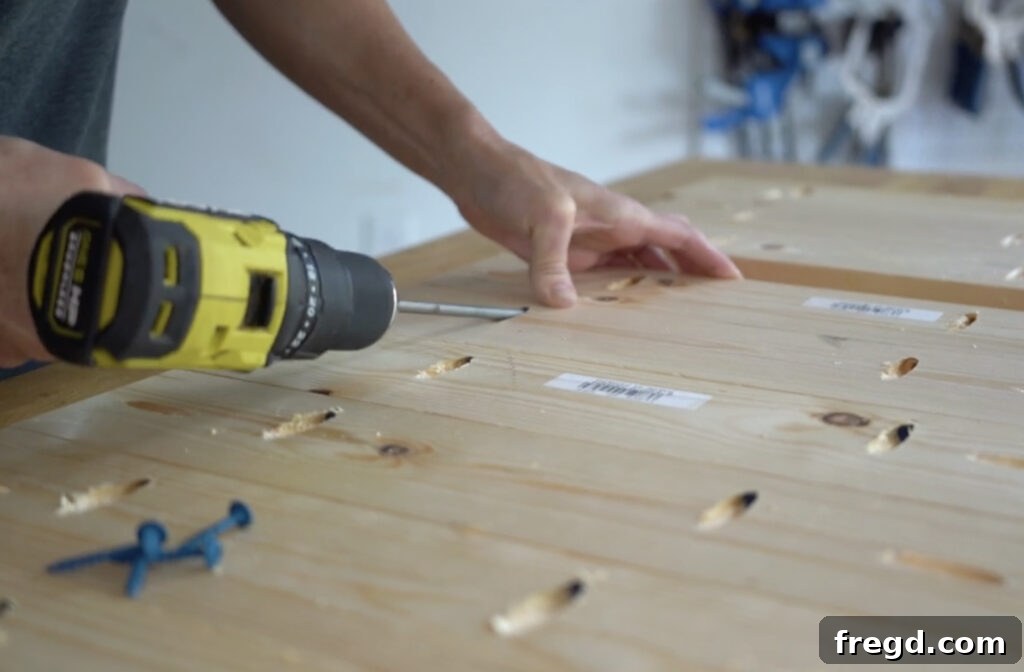
And remember, when it comes to plants, don’t feel pressured to have a green thumb! Faux plants are a fantastic, maintenance-free option that always look vibrant and require zero watering. Embrace the ease, folks!
Step 3: Frame It Out with Top and Bottom Trim
With your main panel assembled, it’s time to add the decorative top and bottom trim pieces. For this project, we opted for a rustic aesthetic, choosing to skip mitered corners. This simpler approach involves cutting your trim pieces to fit directly, creating clean, straight edges. Position the panel face-down on your workbench. Take your pre-cut trim pieces (refer to the free plans for exact measurements) and align them flush with the front edge of the planter panel. Attach these pieces securely using your pocket hole screws, reinforced with a dab of wood glue for extra durability. Clamping the pieces in place before driving screws will ensure a tight, precise fit.
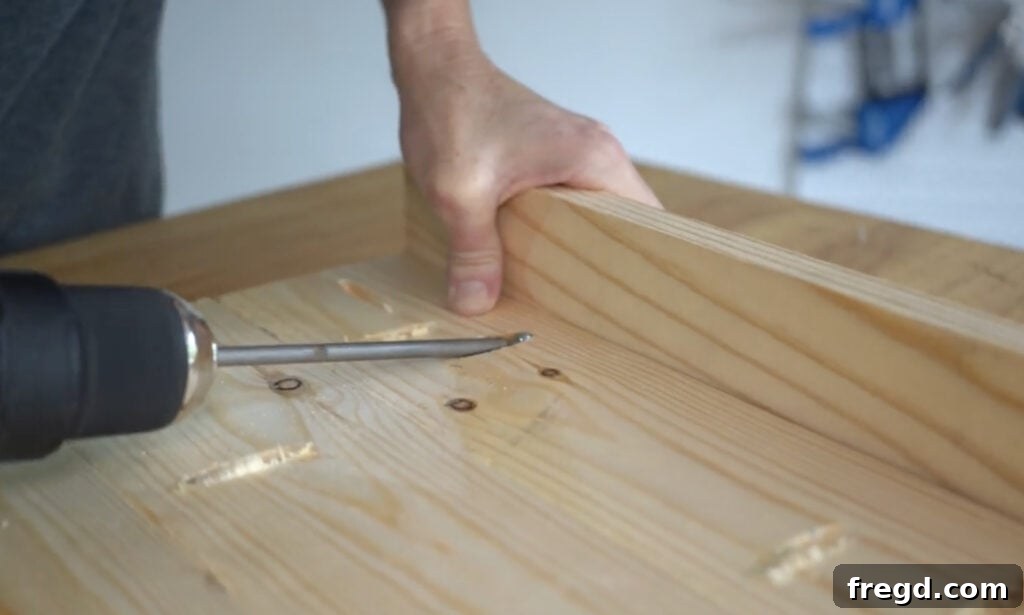
For all exact cut sizes and detailed diagrams, don’t forget to download the free printable plans available at the end of this post! These plans will be your ultimate guide throughout the building process.
Step 4: Adding the Side Trim for a Complete Frame
Following the top and bottom trim, you’ll now attach the side trim pieces. These pieces are crucial for framing the entire panel and giving your planter a finished, cohesive look. Cut your side trim boards to the appropriate length as specified in the plans. Similar to the top and bottom trim, align these boards flush with the front face of the planter panel. Utilize the pocket holes you drilled earlier into the side edges of the main planks, securing them with pocket hole screws. Again, a small amount of wood glue will enhance the bond and prevent any future movement, ensuring everything stays tight and sturdy. This step truly brings the main structure of your planter to life.
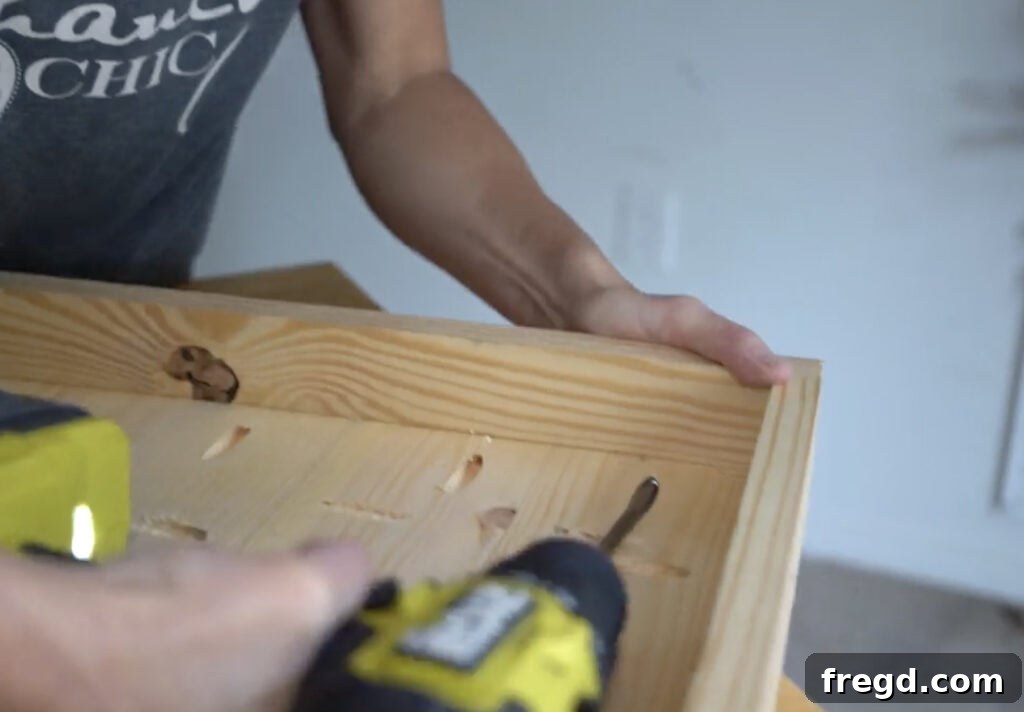
And yes, when it comes to gardening, everyone has their preference. If one of us prefers curling up on the couch with a good book over tending to a flower bed, we totally get it. Respect the relaxation, prioritize comfort, and choose your battles wisely!
Step 5: Design Layout and Finishing Preparations
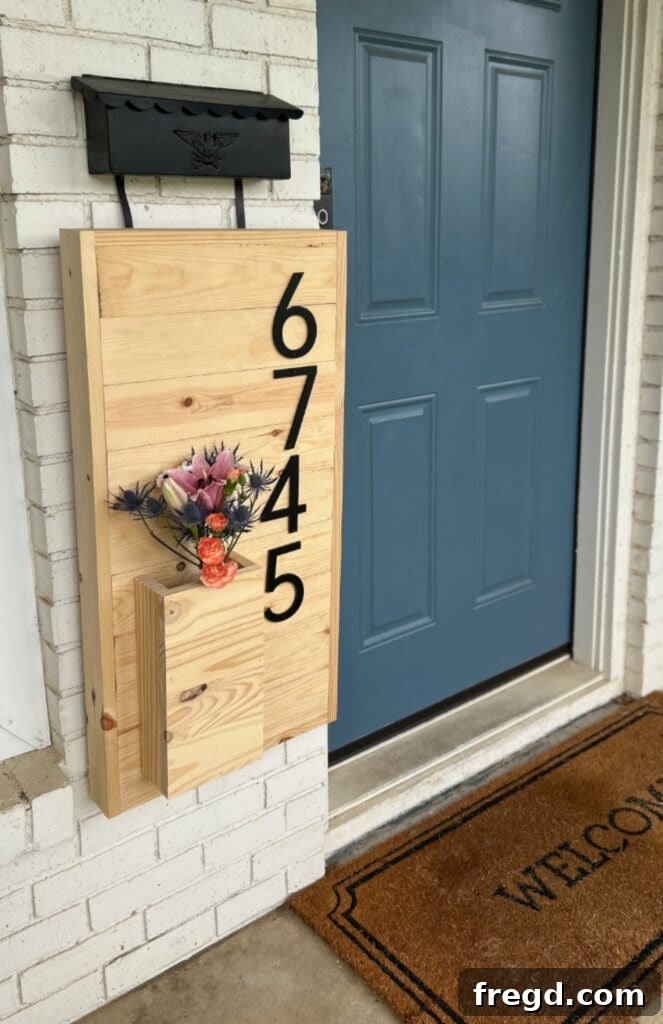
With the main frame of your planter complete, flip the entire piece over to its front side. This is the exciting part where you can start visualizing the final layout for your address numbers and the planter box. For a modern and distinctive look, we decided to arrange our address numbers vertically down one side. The planter box itself will be positioned lower on the panel, providing ample space for plants with trailing foliage or for taller, more upright varieties. This strategic placement ensures both the numbers and the plants have room to shine.
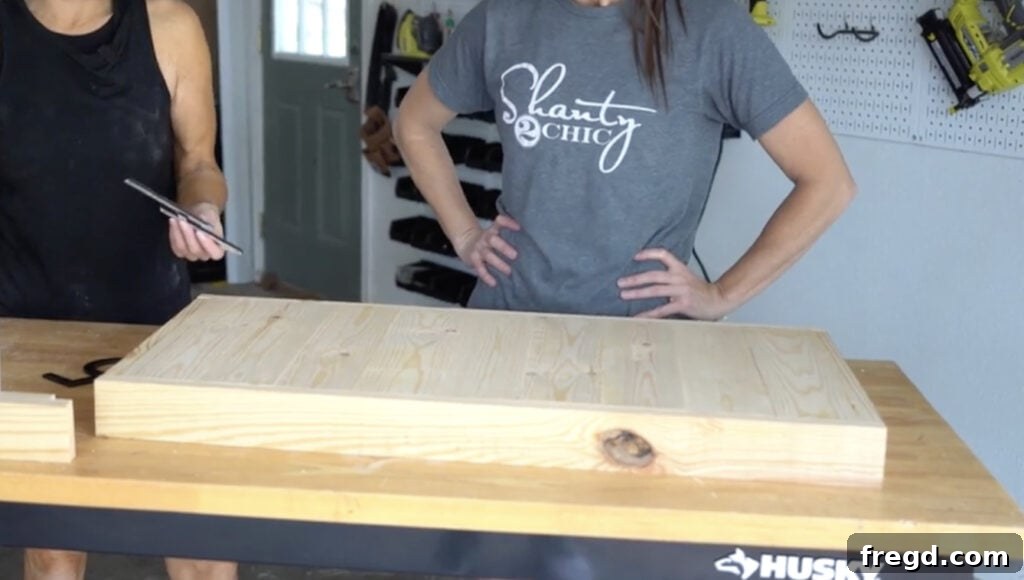
At this stage, you’ll also decide on the finish for your planter. Will it be a rich wood stain that highlights the natural grain, or a vibrant paint color that makes a bold statement? Since this planter was a gift for our sister, Alicia, we let her choose the perfect stain or paint color to match her existing porch decor. This personalization is what makes DIY projects so special and ensures the final piece truly belongs in its new home. Take your time to consider options that will withstand outdoor elements and enhance your home’s aesthetic.
Step 6: Constructing the Planter Box (Resourcefully!)
Building the planter box itself offers flexibility and an opportunity for resourcefulness. We were running low on some wood, so we adapted by using skinnier cuts of 1×3 boards to create a sturdy, U-shaped frame. This design allows for a simple yet effective container for your plants. Drill pocket holes into the ends of the side pieces to attach them to the bottom piece, forming a “U” shape. This approach allows total flexibility – you can adjust the dimensions of the planter box to be as wide or narrow as your desired plants and available space dictate. This is where your creativity can truly shine, even if it means using up those leftover scraps from other projects!
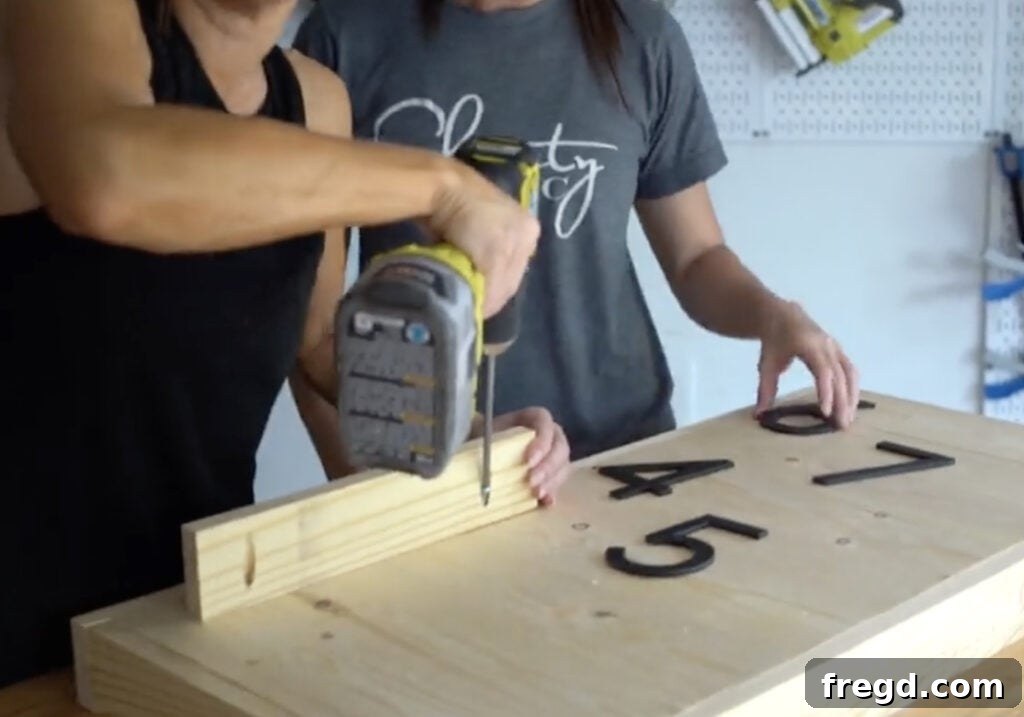
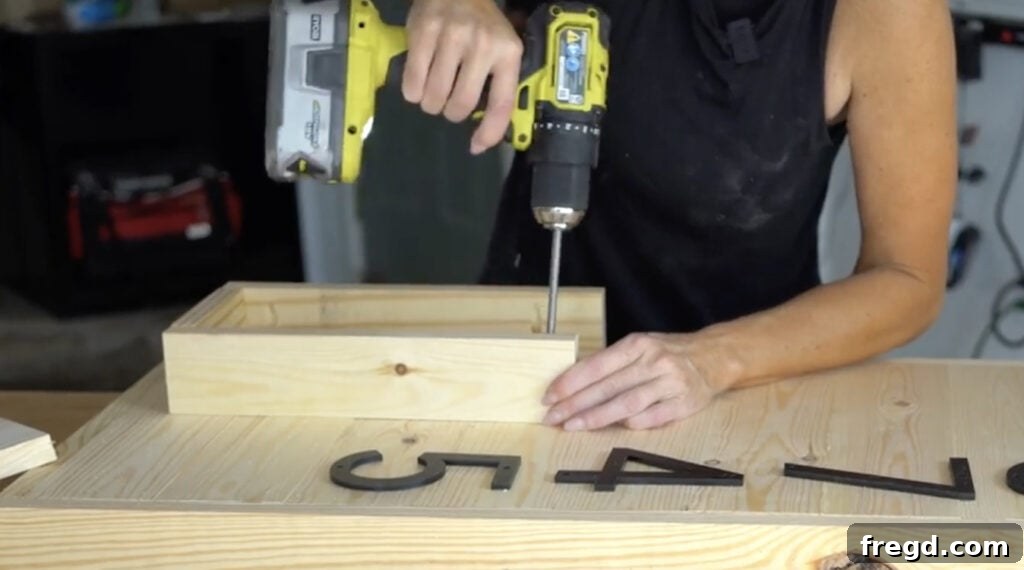
And on the topic of personalization: feel absolutely free to use any numbers you desire! Whether you want to boldly display your home address, get creative with numbers like “90210,” or even playfully use your Wi-Fi password (though maybe don’t actually do that one!), the choice is entirely yours. Make it uniquely *you*.
Step 7: Final Assembly, Finishing, and Hanging Your Masterpiece
The final steps involve attaching the planter box to the main panel and applying your chosen finish. Once your U-shaped planter box is assembled, attach the front face of the planter box. Apply a bead of wood glue along the edges where it meets the U-shaped frame, then secure it with 1 ¼-inch brad nails. This creates a clean, professional-looking front for your planter. Position the completed planter box onto the lower section of your main panel, ensuring it’s level and centered (or off-centered, based on your design preference). From the back of the main panel, drive screws through the planks into the back of the planter box to securely attach it. This method provides a strong, hidden connection.
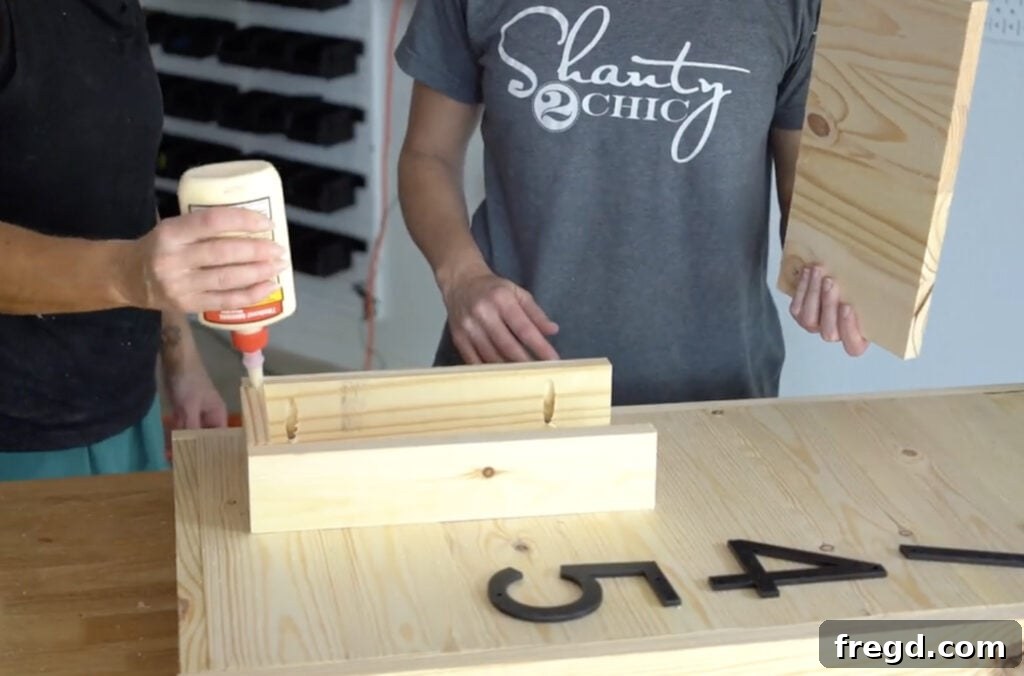
Now comes the transformative part: staining or painting your planter. Apply your chosen finish evenly, following the manufacturer’s instructions. Allow for proper drying time, and consider adding an outdoor sealant for extra protection against moisture and UV rays. Once the finish is dry, it’s time to attach your metal address numbers using screws or a strong adhesive, carefully aligning them according to your earlier layout design. Finally, choose a sturdy location on your front porch or exterior wall and securely hang your beautiful, custom wall planter. Ensure you use appropriate hardware for the weight of the planter and its contents.
- You can find the metal address numbers we used for this project.
With your new planter proudly displayed, all that’s left is to fill it with your favorite plants – whether they’re vibrant real flowers, lush greenery, or realistic faux options – and enjoy the enhanced curb appeal!
The Finished Masterpiece: Style, Function, and Curb Appeal
The journey from raw wood to a finished, functional piece of home decor is incredibly rewarding, and this DIY wall planter with address numbers is no exception. We are absolutely thrilled with how this project turned out, especially seeing it mounted against a beautifully painted front door with crisp white trim. The contrast creates a striking visual that immediately draws the eye, making the entryway feel more inviting and complete.
What makes this project truly stand out is its blend of simplicity, style, and practicality. It’s a design that is not only charming and custom-made but also completely beginner-friendly, proving that you don’t need years of woodworking experience to create something impactful for your home. The clean lines, the warmth of the wood, and the thoughtful integration of both plants and address numbers come together to form a cohesive piece that elevates the entire facade.
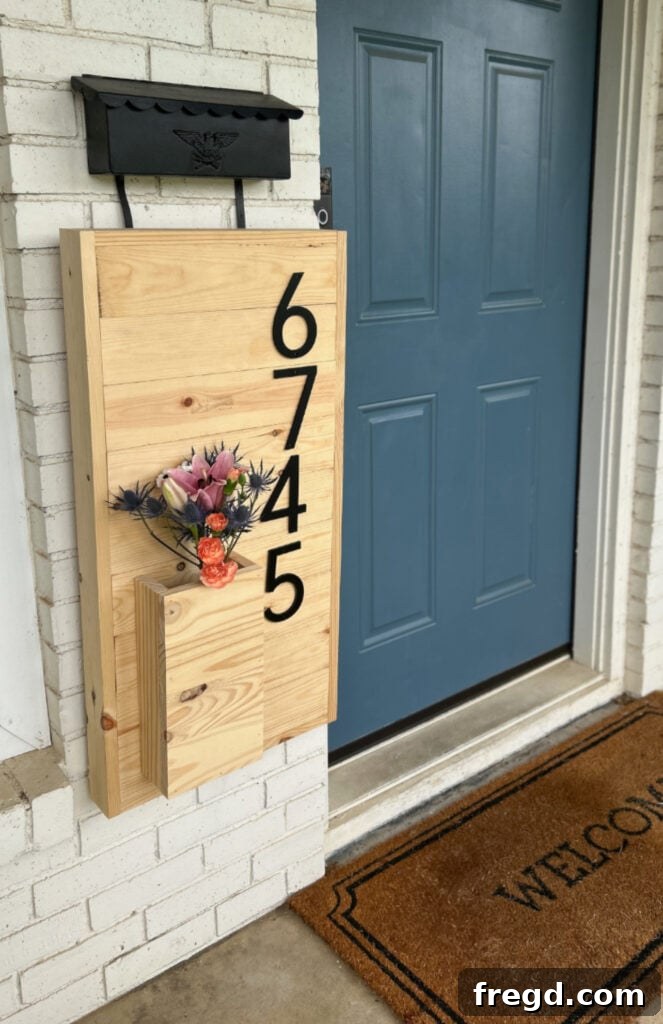
This custom planter doesn’t just hold plants; it makes a statement about your home’s personality and your dedication to creating a beautiful living space. It’s a functional piece that serves a crucial purpose (displaying your address for visitors and deliveries) while simultaneously acting as a stunning decorative element. The versatility of being able to choose your own finish – whether a natural stain, a vibrant paint, or a distressed look – ensures that the final product perfectly aligns with your personal taste and existing exterior decor. Imagine the compliments you’ll receive from neighbors and friends! This project truly is a testament to the power of DIY to transform ordinary spaces into extraordinary ones, adding significant curb appeal and a touch of handcrafted elegance that sets your home apart.
Download Your Free DIY Wall Planter Plans
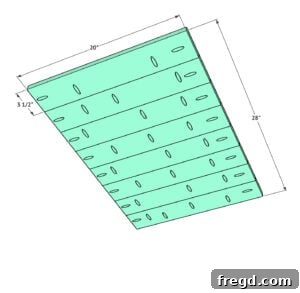
Inspired to create your own functional and beautiful DIY wall planter? We’ve made it even easier for you! Grab our free printable plans, which include exact measurements, detailed cut lists, and step-by-step diagrams to guide you through every stage of this rewarding project. These plans are designed to simplify the building process, ensuring you have all the information you need right at your fingertips.
Here they are – your blueprint to a stunning entryway!
DIY Wall Planter with Address Numbers
Instructions
-
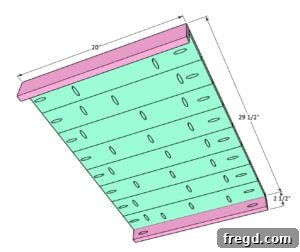
Prepare Main Panel Planks: Cut eight 1×4 boards to 20″ each. Using your Kreg Jig, drill 3/4″ pocket holes into the top, bottom, and side edges of each board. These holes are crucial for both joining the planks and attaching trim. Attach them side-by-side using 1 1/4″ pocket hole screws, ensuring they are flush. At this stage, wood glue is not necessary for initial assembly, allowing for minor adjustments. This process creates the robust planked front panel of your planter.

-
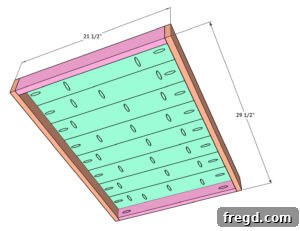
Add Top and Bottom Trim: Cut two 1×3 boards to 20″ – these will match the length of your assembled panel. Place the main panel face-down on your workbench. Position one 1×3 board at the top and the other at the bottom, ensuring they are flush with the front face of the panel. Secure them using pocket hole screws and a small amount of wood glue for enhanced strength and stability. Clamp the trim pieces in place before driving screws for a tight fit.
-
Attach Side Trim: Cut two 1×3 boards to 29 1/2″. These will serve as the vertical side trim pieces for your panel. Align them carefully along the sides of the panel, ensuring they are flush with the front face and match the top and bottom trim. Attach these pieces using the pocket holes previously drilled into the side edges of the planks, again using wood glue for extra adhesion and a durable bond. This completes the robust frame of your planter.
-
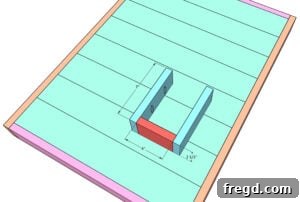
Construct the Planter Box: Prepare two side pieces at 7″ and one bottom piece at 4″, all from 1×3 boards. Drill pocket holes into the ends of the side pieces. Join these three pieces to create a sturdy, U-shaped box using pocket hole screws. This innovative design provides a customizable base for your plants. Position the assembled U-shaped box on the main panel where you envision your planter, allowing for ideal plant placement and visibility.
-
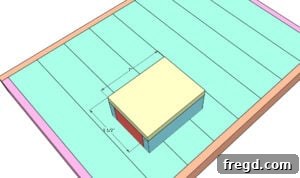
Final Assembly, Finish, and Adornments: Cut a front piece for the planter box at 7″ from a 1×3 board. Attach this piece to the U-shaped frame using wood glue and 1 1/4″ brad nails, creating a complete box. Secure the entire planter box to the main panel from the back using screws through the planks. Now, stain or paint your planter in your desired color or finish, ensuring full coverage and proper drying. Once dry, attach your chosen house numbers vertically down one side using screws or a strong adhesive. Finally, hang your beautiful custom planter securely on your wall and fill it with your favorite faux or real plants to complete this charming entryway feature!
Don’t Miss the Next Project!
Loved this tutorial? Make sure to subscribe to our YouTube channel so you never miss a new DIY tutorial, a fresh build, or our infamous bad puns that make woodworking even more fun. Join our community of builders and get inspired for your next home improvement adventure!
Happy building, friends, and enjoy the process of creating something truly special for your home!
For more inspiration and a detailed overview, check out our original DIY Address Number Wall Planter post!