
Crafting Beautiful DIY Flower Clips: A Fun and Easy Project for All Ages
There’s a special charm in handmade accessories, and these DIY flower clips are no exception. Perfect for adding a whimsical touch to any outfit, they’re incredibly simple to make and offer endless creative possibilities. Recently, my daughters expressed an interest in making some new flower clips, and it sparked the perfect opportunity for a delightful crafting session and a refresher on this beloved project. While we’ve previously shared how to create similar flowers for headbands, this guide focuses on backing them with clips, making them versatile and easy to wear. My girls absolutely adore sporting them, and I confess, I often “borrow” them for my own use too! This simple yet rewarding craft is an ideal summer activity, perfect for family bonding, and makes truly thoughtful, personalized gifts.
Why Choose DIY Flower Clips?
In a world filled with mass-produced items, creating something with your own hands offers a unique sense of satisfaction. DIY flower clips are not just pretty; they are a testament to creativity and personal style. They are incredibly cost-effective, allowing you to create a vibrant collection of accessories without breaking the bank. From simple everyday adornments to elegant statement pieces for special occasions, the versatility of these clips is unmatched. They are also fantastic for encouraging creativity in children, teaching them basic crafting skills, and allowing them to express themselves through color and design. Plus, imagine the joy of gifting a friend or family member a handmade item, knowing it was crafted with love and care.
Gather Your Essential Crafting Supplies
One of the best aspects of this project is that it requires only a few readily available materials, many of which you might already have around the house or can find easily at your local craft store.
- Artificial Flowers: The star of our project! Look for inexpensive faux flowers at craft stores like Hobby Lobby, Michaels, or even dollar stores. Choose flowers with multiple layers of petals for the best effect. Consider various colors, sizes, and textures to create a diverse collection of clips.
- Felt Fabric: A small sheet of felt (matching or contrasting the flower color) will serve as the sturdy base for your petals and clip. Felt is perfect because it doesn’t fray when cut and holds glue well.
- Hot Glue Gun and Glue Sticks: Essential for securely attaching the petals and clip. Always exercise caution when using a hot glue gun, especially when crafting with children.
- Sharp Scissors: For cutting felt and trimming any stray threads from the flowers.
- Embellishments (Optional but Recommended): Rhinestones, pearls, small buttons, or fabric centers to add a touch of sparkle and personalize your flowers.
- Hair Clips: Snap clips, alligator clips, or barrettes – choose the type that best suits your preference. You can find these at craft stores, beauty supply stores like Sally’s, or online retailers like RibbonRetreat.com.
- Small Dowel or Tweezers (Optional): Useful for precisely picking up and placing small embellishments.
Step-by-Step Guide: Crafting Your Own Flower Clips
Step 1: Choosing and Preparing Your Flowers
Begin your crafting adventure by selecting the perfect artificial flowers. I often find wonderful, affordable options at Hobby Lobby, which are ideal for deconstruction. Once you have your chosen blooms, carefully pull one flower head off its stem. Most artificial flowers are designed to be easily detachable.
After detaching the entire flower head, you’ll need to further disassemble it to access the individual petals. Gently pull apart the remaining components of the flower, separating the petals from any plastic stamens or central pieces. The goal is to have a collection of loose petals, ready for reassembly into a new, layered design. This step is crucial for achieving the desired fluffy, dimensional look.
Continue the process of deconstruction until you have separated all the individual layers of petals. Some artificial flowers have many layers, ranging from large outer petals to smaller inner ones. Keeping these layers organized by size can be helpful for the next step, where we’ll recreate a natural, voluminous look. Discard any plastic or wire components that were part of the original flower’s structure.
Step 2: Preparing the Felt Base
The felt circle acts as the foundation for your flower, providing a stable surface for gluing the petals and later attaching the hair clip. Cut a circle of felt that is just slightly smaller than the overall diameter of your finished flower. This ensures that the felt base will be hidden once all the petals are attached, giving your clip a professional and polished appearance. You can trace a coin or use a small circular template for a perfect shape.
Step 3: Layering the Petals with Hot Glue
Now comes the fun part: reassembling your flower! Using your hot glue gun, carefully attach the petals to the felt circle, working one layer at a time. Start with the largest petals at the bottom, arranging them evenly around the felt circle to form the base of your flower. Apply a small dab of hot glue to the very bottom center of each petal layer, then press it firmly onto the felt.
Continue layering the petals, moving from larger to smaller sizes, and staggering them slightly to create a full, natural-looking bloom. Each new layer should be glued just above the previous one, building dimension and volume. Don’t be afraid to experiment with the arrangement until you achieve a look you love. The beauty of this DIY project is the freedom to create a flower that’s uniquely yours. Once all the layers are glued, you’ll have a beautifully textured flower ready for its finishing touches.
Step 4: Adding “Bling” and Embellishments
This is where your flower truly comes to life! It’s “bling time”—adding a sparkling centerpiece. For smaller flowers, I love using rhinestones, but pearls, small buttons, or even a contrasting fabric circle can work beautifully. To pick up and accurately place tiny rhinestones, try wetting the tip of a small dowel or toothpick with a tiny drop of water; the surface tension will allow you to easily lift and position the rhinestone directly into a dab of hot glue in the center of your flower. Press gently to secure.
Step 5: Attaching the Hair Clip
The final step is to attach the hair clip to the back of your felt base. I prefer snap clips for their secure hold and ease of use, often purchasing them from RibbonRetreat.com, though they are also widely available at craft stores like Hobby Lobby and beauty supply stores such as Sally’s. To attach, simply open the clip and run a generous line of hot glue along the top flat surface. Carefully press the glued surface onto the back of your felt circle, ensuring it’s centered and straight. Hold firmly for a few seconds until the glue sets. Always be mindful of your fingers when working with hot glue!
Voila! Your Beautiful Handmade Flower Clips
And that’s all there is to it! In just a few simple steps, you’ve created adorable, custom flower clips that are both cheap to make and incredibly charming. This method allows for endless creativity, enabling you to produce a diverse collection of clips for every occasion and outfit. Here are just a couple of the lovely creations made using this straightforward technique:
Get Creative with Variations and Tips
- Mix and Match: Don’t limit yourself to one type or color of flower per clip. Combine petals from different artificial flowers to create unique, multi-toned blooms.
- Layering Techniques: Experiment with how you layer the petals. For a fuller look, bunch some petals more closely together. For a flatter profile, spread them out. You can also curl the edges of some petals slightly before gluing for added realism.
- Alternative Embellishments: Beyond rhinestones, consider tiny pearl beads, small fabric leaves peeking out from under the petals, or even small charms for a bohemian touch.
- Safety First: When crafting with children, always supervise the use of the hot glue gun. Consider using a low-temperature glue gun or having an adult handle the gluing steps.
- Gift Ideas: These clips make fantastic party favors, stocking stuffers, or additions to a gift basket. Present them on a pretty card or in a small decorative box.
- Beyond Hair: Think outside the box! These flower embellishments aren’t just for hair clips. You can glue them onto headbands, pins for clothing, or even use them to decorate gift packages or picture frames.
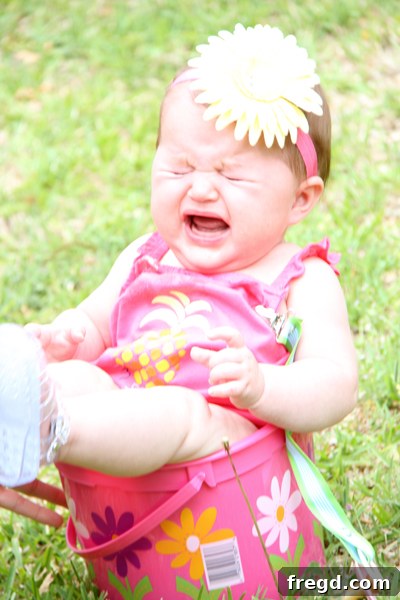
My friend Ash also loves making these, and her collection truly trumps mine in size and variety! It’s wonderful to see how everyone puts their own spin on this simple craft. Here’s a delightful picture of her little one modeling a beautiful flower clip during Easter – a perfect example of how these accessories add a touch of charm to any occasion.
We absolutely love both the flower and this precious picture, of course!
This DIY flower clip project is more than just a craft; it’s an invitation to creativity, a chance to bond with loved ones, and an opportunity to make something truly beautiful and functional with your own hands. We hope you feel inspired to gather your supplies and start crafting your own collection of charming flower clips.
Thank you so much for stopping by and sharing in our crafting joy! Don’t forget to check back for more exciting DIY ideas and projects. Happy crafting!