
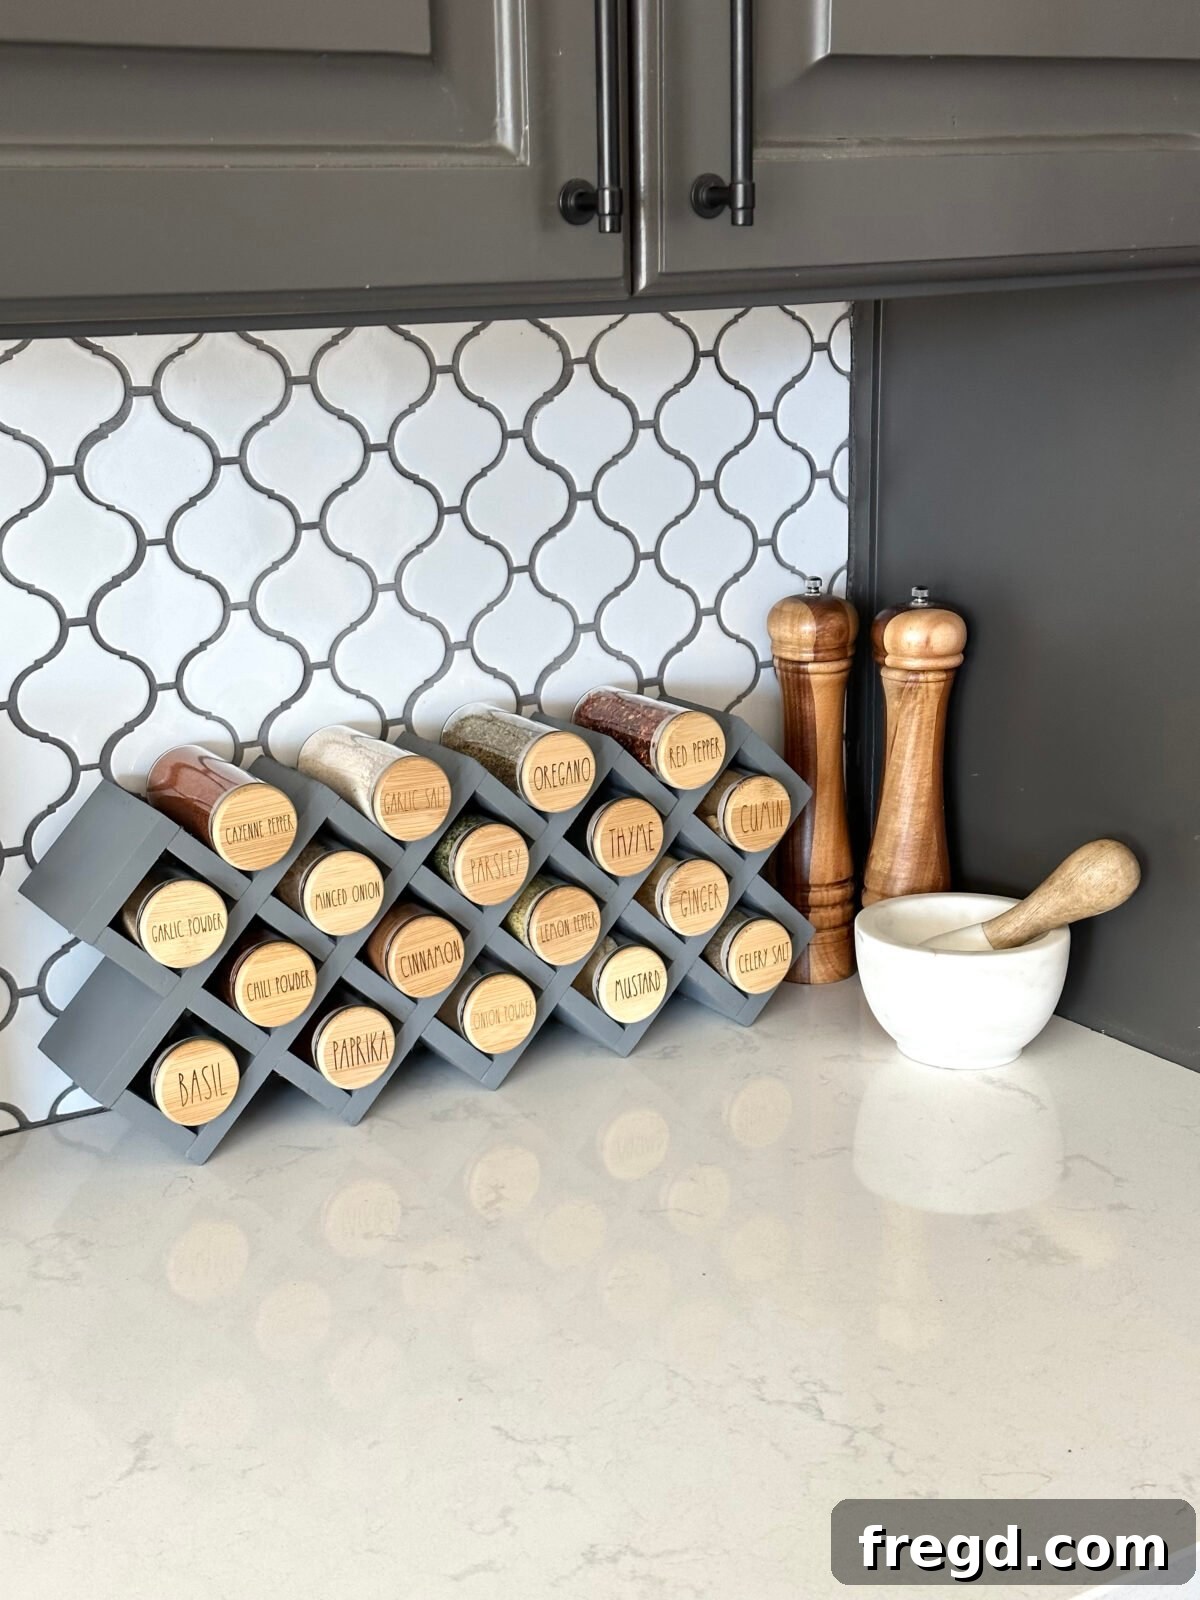
DIY Countertop Spice Rack: Build a Beautiful & Functional Kitchen Organizer
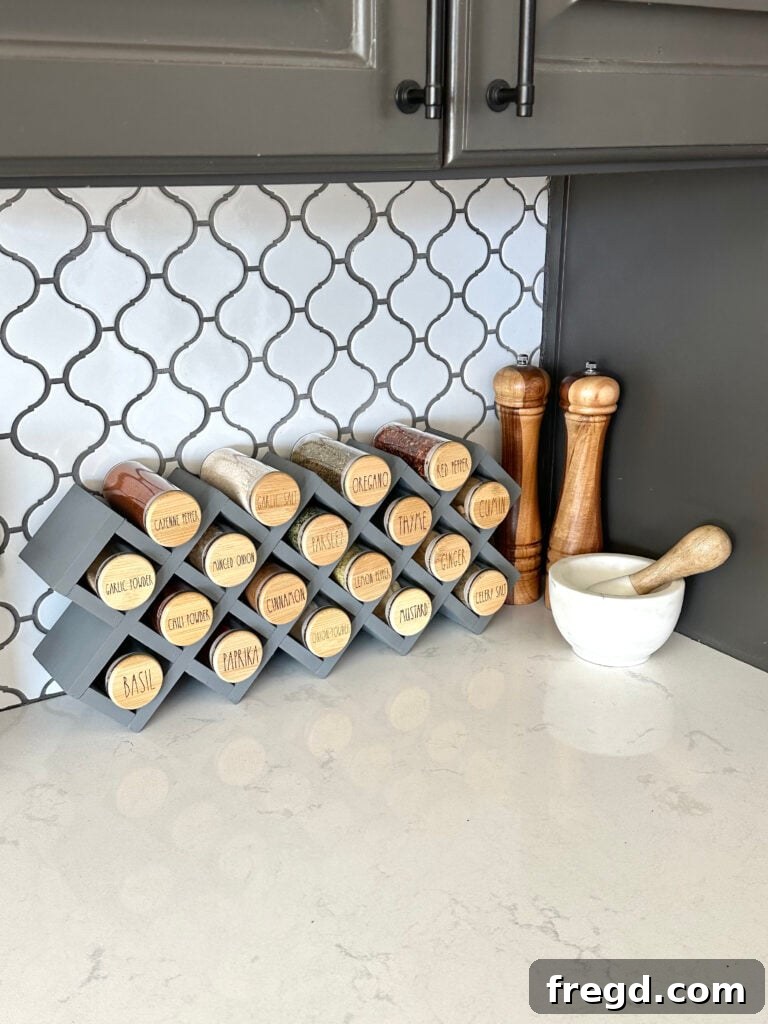
Spring often ignites a desire for decluttering and refreshing our living spaces, and for many, the kitchen is at the top of that list. If you’ve been dreaming of a more organized and aesthetically pleasing kitchen, then this DIY Countertop Spice Rack project is exactly what you need. It’s a simple, inexpensive build that’s perfect for beginner woodworkers, offering a practical solution for quick access to your most-loved spices while cooking.
While a built-in spice rack in the pantry is excellent for extensive collections, having a smaller, readily accessible countertop version can truly revolutionize your daily cooking experience. No more rummaging through cabinets or drawers – your essential flavors will be right at your fingertips. The inspiration for this particular design came from discovering stylish spice jars with bamboo lids, which sparked an idea to create a rack that perfectly complements them, especially with the added touch of personalized engraving. So, grab your tools, and let’s dive into building this fantastic addition to your kitchen!
Table of Contents
Benefits of a Countertop Spice Rack
A countertop spice rack isn’t just another kitchen accessory; it’s a strategic organizational tool that brings numerous advantages. Firstly, it offers unparalleled convenience. During cooking, every second counts, and having your most frequently used spices within arm’s reach significantly streamlines meal preparation. No more interrupting your flow to search through cluttered pantries or deep cabinets.
Secondly, it’s a fantastic space-saving solution. For those with limited drawer or cabinet space, a compact countertop rack efficiently utilizes vertical space that might otherwise go unused. This particular design is sleek and minimalist, ensuring it doesn’t overwhelm your kitchen counter but rather enhances it. Furthermore, a beautifully crafted wooden spice rack adds a touch of rustic charm or modern elegance, depending on your chosen finish, transforming a utilitarian item into a piece of kitchen decor. It allows you to display your vibrant spice collection, adding color and life to your cooking area.
Finally, building your own DIY spice rack offers immense satisfaction. It’s a project that builds confidence for beginner woodworkers, proving that functional and attractive items can be created with minimal tools and materials. The ability to customize its finish and labels means your spice rack will be uniquely yours, perfectly tailored to your kitchen’s style and your personal taste.
Tools You’ll Need for Your DIY Spice Rack
One of the best aspects of this project is its simplicity, requiring only a few basic tools. Even if you’re new to woodworking, these tools are highly versatile and great additions to any DIY enthusiast’s collection.
- Miter Saw (or Circular Saw): Essential for making precise, straight cuts in your wood. A miter saw is ideal for accuracy, but a circular saw with a straight edge guide can also achieve excellent results. Always ensure your blade is sharp and wear appropriate safety gear when operating power saws.
- Pin Nailer (or Brad Nailer): This tool helps secure pieces together quickly and discreetly. Pin nails are very small and leave minimal holes, making them perfect for decorative projects like this. A brad nailer uses slightly larger nails but works equally well and is often more common for beginners. Whichever you use, remember that nails provide clamping force while the wood glue dries, ensuring a strong, lasting bond.
- Measuring Tape and Pencil: For accurate measurements and marking your cuts.
- Safety Glasses and Ear Protection: Always prioritize safety when using power tools.
Materials for Your Custom Spice Storage
The beauty of this project lies in its economical use of materials, primarily requiring just a couple of poplar boards. Poplar is an excellent choice for beginner woodworkers due to its affordability, ease of cutting, and smooth finish, which readily accepts both paint and stain.
- 2 – 1/2″x4x4 Poplar Boards: These boards will form the main structure of your spice rack. Poplar is a hardwood that’s relatively soft, making it easy to cut and nail, yet durable enough for a functional piece of furniture. Its fine grain also means it takes paint or stain beautifully, allowing for diverse finishing options.
- 1″ Pin Nails: These small nails provide strong, virtually invisible fasteners when combined with wood glue, crucial for a clean, professional finish on your spice rack.
- Wood Glue: The unsung hero of any woodworking project. Wood glue creates a bond stronger than the wood itself, ensuring the longevity and stability of your spice rack. Always apply a thin, even layer to all mating surfaces before nailing.
- Spice Jars: For this design, we recommend jars with flat bamboo lids, as they are perfect for engraving custom labels, adding a bespoke and organized touch to your collection.
Step-by-Step: Building the Countertop Spice Rack Frame
Follow these detailed instructions to construct a sturdy and attractive frame for your countertop spice rack. Remember, precision in cutting and careful alignment are key to a professional-looking result.
Step 1: Prepare Your Wood Pieces and Assemble the First End Section
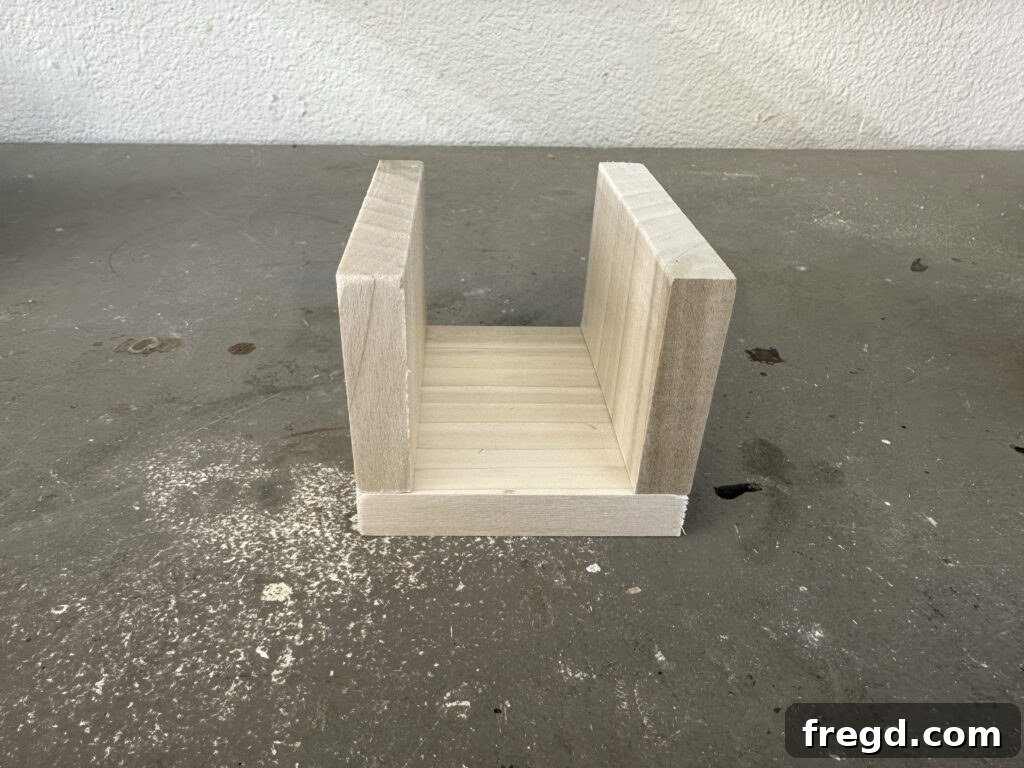
Begin by carefully cutting all your poplar pieces to the specified sizes (refer to the free plans for exact dimensions). Accurate cuts are paramount for a square and sturdy rack. Once cut, take the pieces for the first end section of your rack. Apply a thin, even layer of wood glue to the mating surfaces, then align them precisely and secure them together with 1″ pin nails. Ensure the joint is flush and square.
Step 2: Attach the End Piece to the Main Base Board
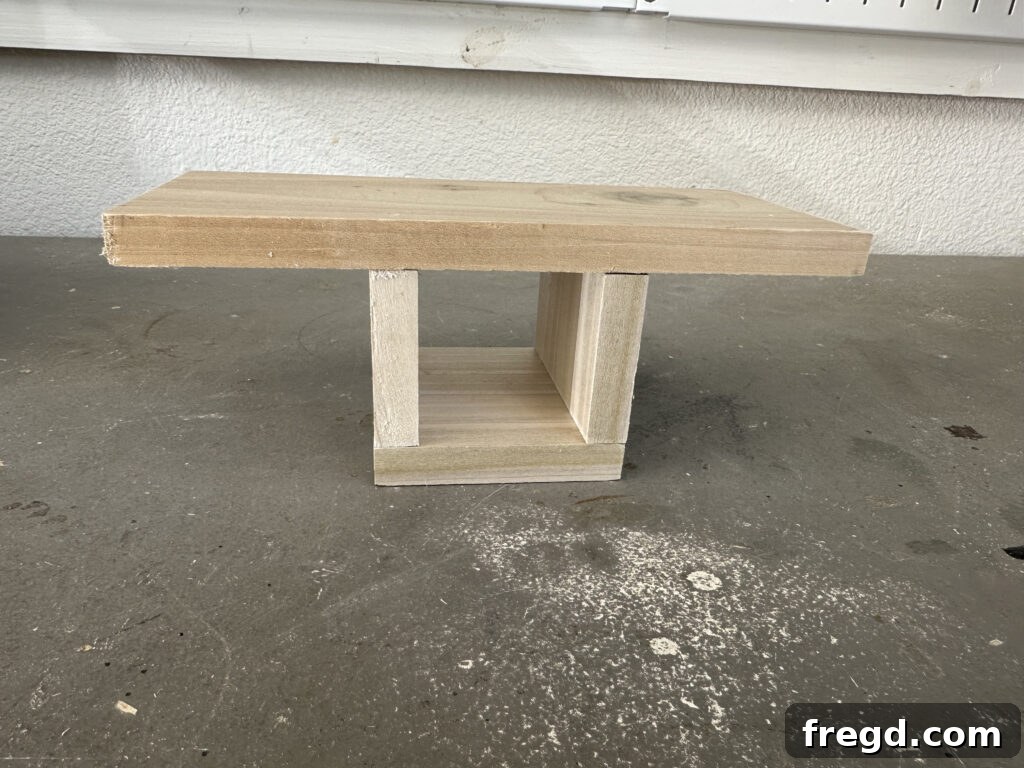
With the first end section assembled, center it carefully onto one of the longer “orange” pieces (likely your bottom baseboard). Apply wood glue to the contact area, then firmly attach the end piece using 1″ pin nails. Make sure it’s perfectly centered and perpendicular to the baseboard for a balanced structure.
Step 3: Add the First Set of Short Dividers
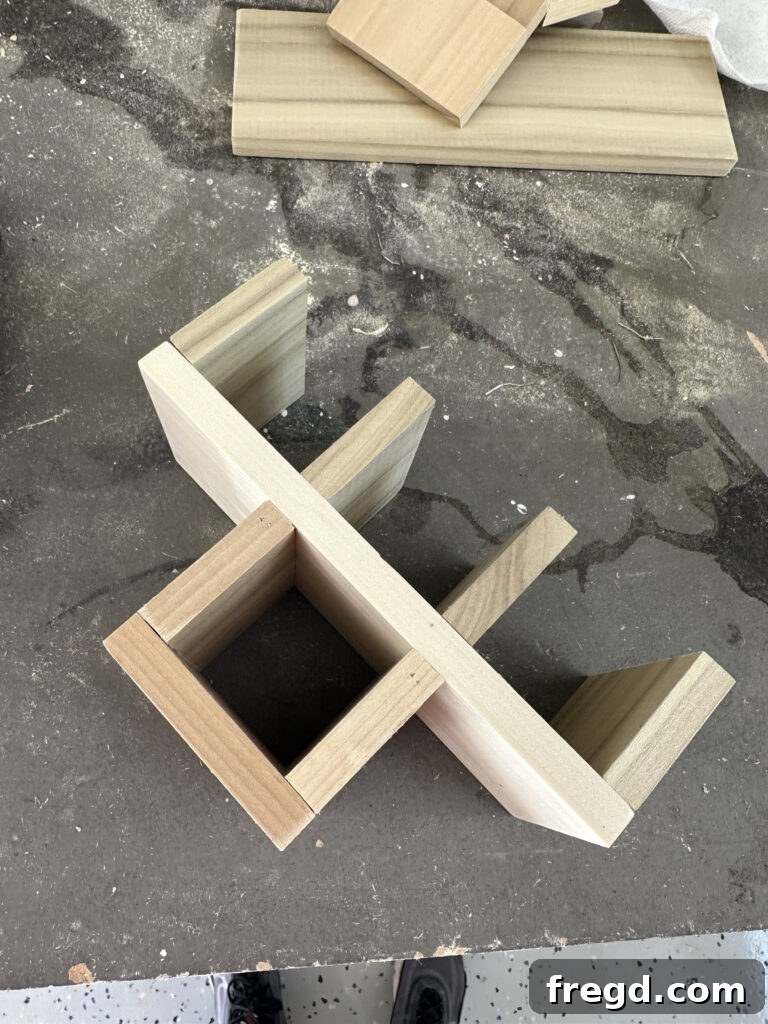
Now, it’s time to create the initial compartments. Take four of your short vertical divider pieces. Apply wood glue and attach them to the “orange” baseboard, spaced evenly to accommodate your spice jars. Secure each piece with 1″ pin nails. For the two inner divider pieces, you may find it easier to angle your pin nails slightly from the front face of the board to ensure a strong hold without breaking through the side.
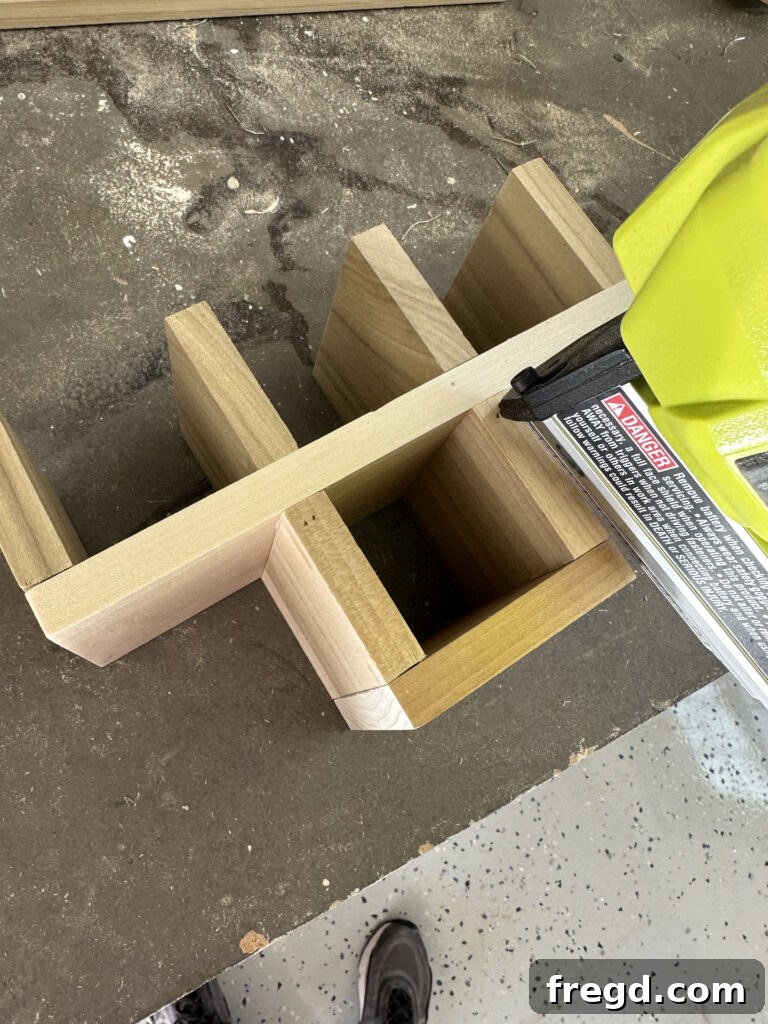
This diagonal nailing technique helps to secure the pieces effectively where direct nailing might be difficult or compromise the appearance.
Step 4: Attach the Next Horizontal Shelf (First Blue Piece)
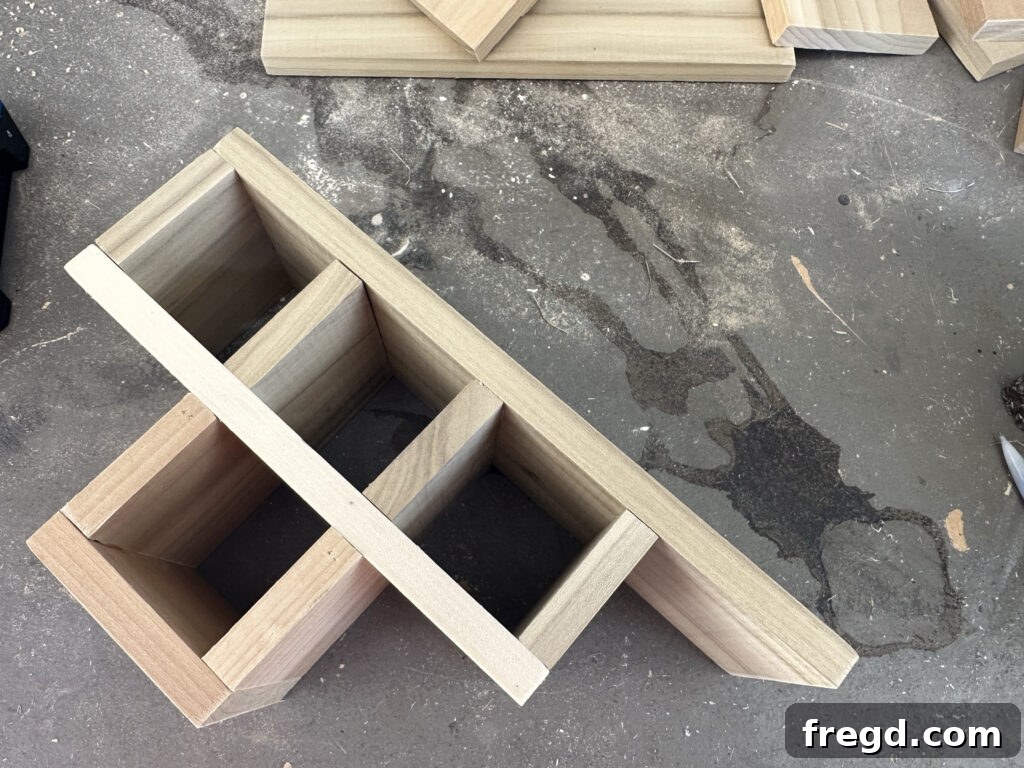
Carefully take the next horizontal shelf piece (referred to as the “blue” piece). Apply wood glue along the top edges of the short vertical dividers you just installed. Position this shelf piece flush with the top of the adjacent “green” piece (likely a side panel or back panel if present at this stage). Secure it firmly with 1″ pin nails, ensuring a level and stable attachment across all dividers.
Step 5: Continue with the Next Set of Vertical Dividers (Green Pieces)
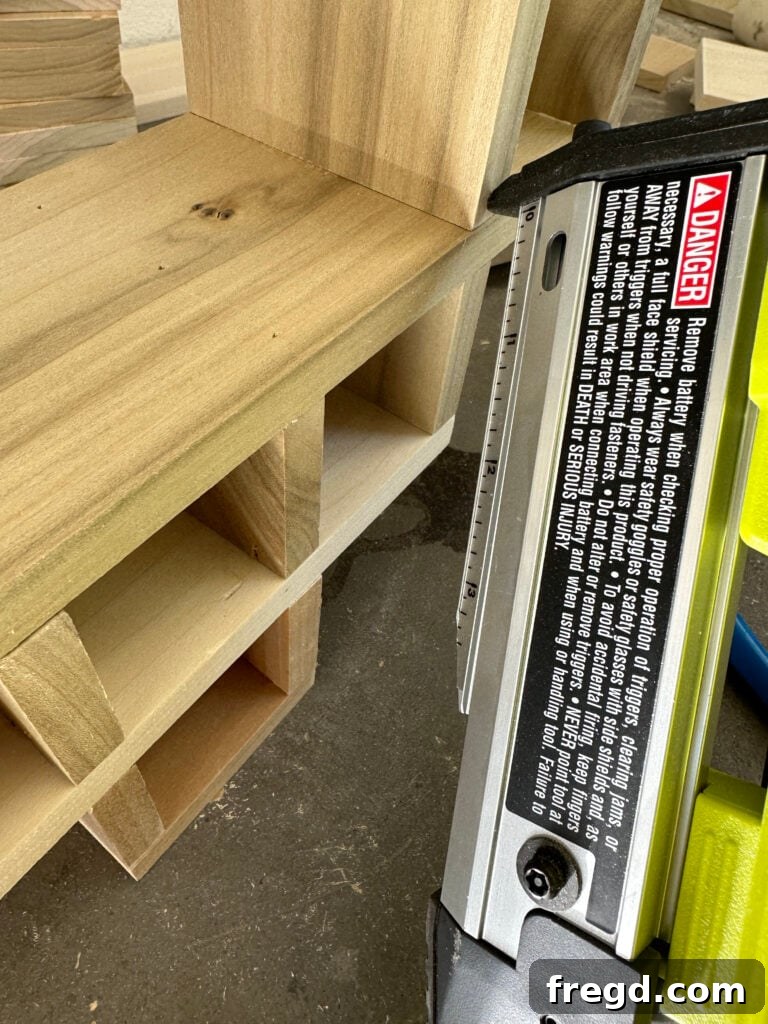
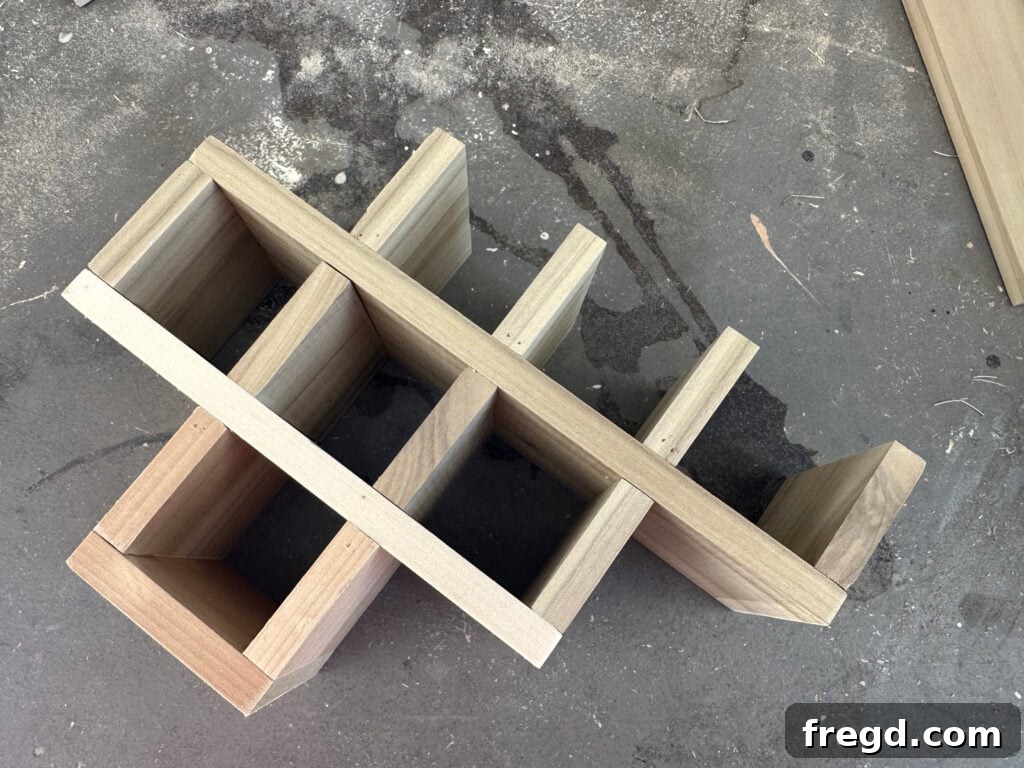
Now, repeat the process from Step 3 for the next tier of the rack. Take the next set of “green” vertical divider pieces. Apply wood glue to their bottom edges and align them flush with the bottom of the “blue” horizontal shelf you just attached. Secure these new dividers with 1″ pin nails, making sure they are perfectly plumb and aligned with the dividers below them.
Step 6: Install the Next Horizontal Shelf (Second Blue Piece)
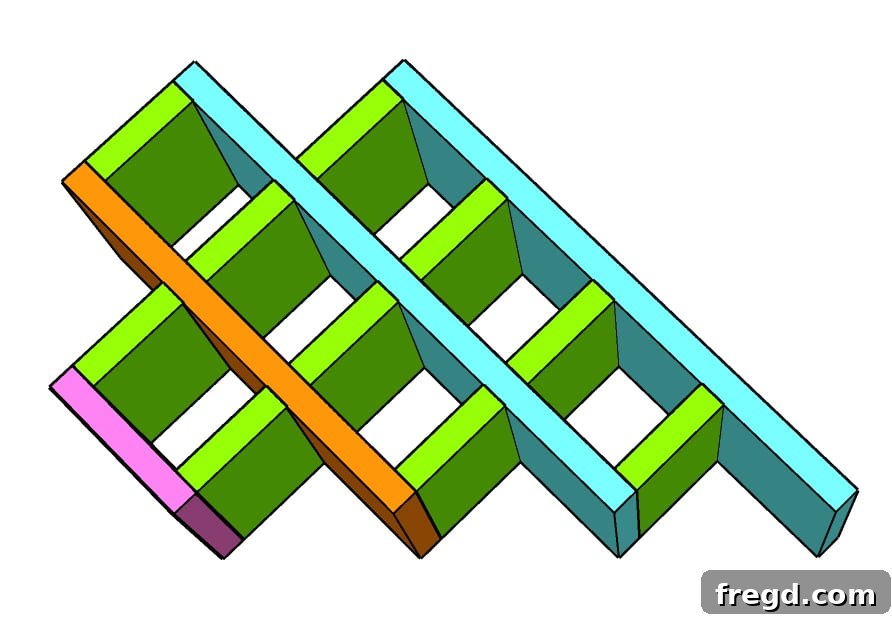
Similar to Step 4, take another “blue” horizontal shelf piece. Apply wood glue to the top edges of the newly installed “green” vertical dividers. Carefully position this shelf piece, ensuring it is flush with the top of the existing “green” section. Fasten it securely with 1″ pin nails, creating another stable level for your spice jars.
Step 7: Add the Third Set of Vertical Dividers (Green Pieces)
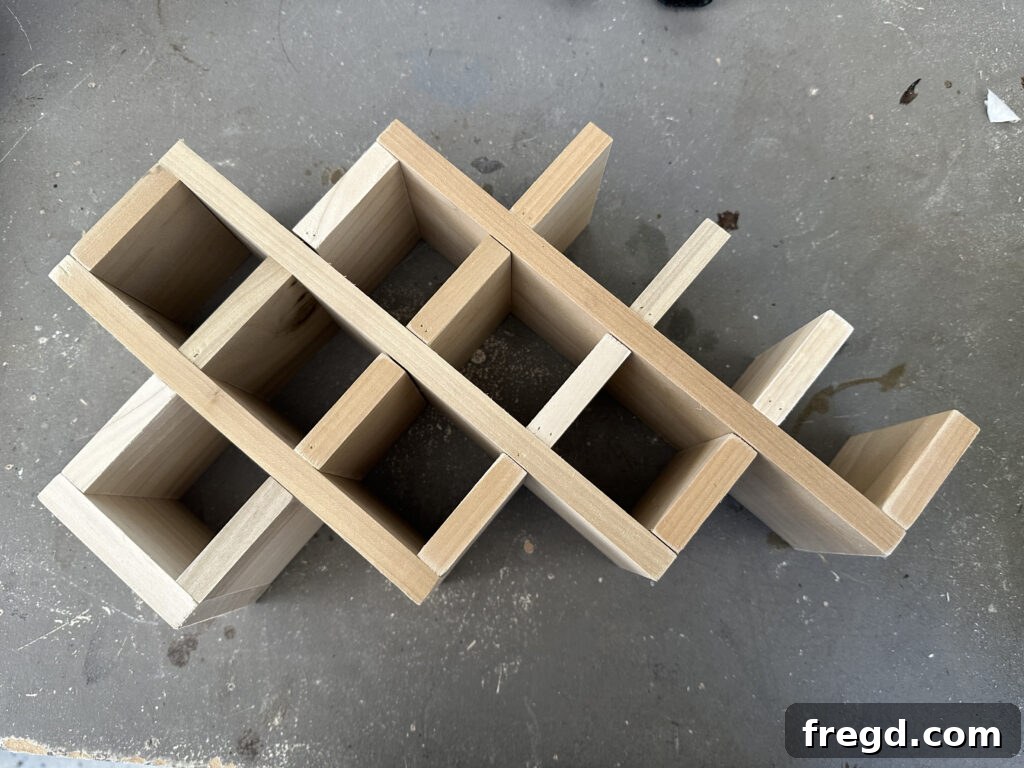
Continue building upwards by adding the third set of “green” vertical divider pieces. Apply wood glue to their bottom edges and align them precisely, starting flush with the bottom of the “blue” horizontal shelf you just fastened. Use 1″ pin nails to secure these dividers, maintaining consistent spacing and alignment with the lower tiers.
Step 8: Attach the Final Horizontal Shelf (Third Blue Piece)
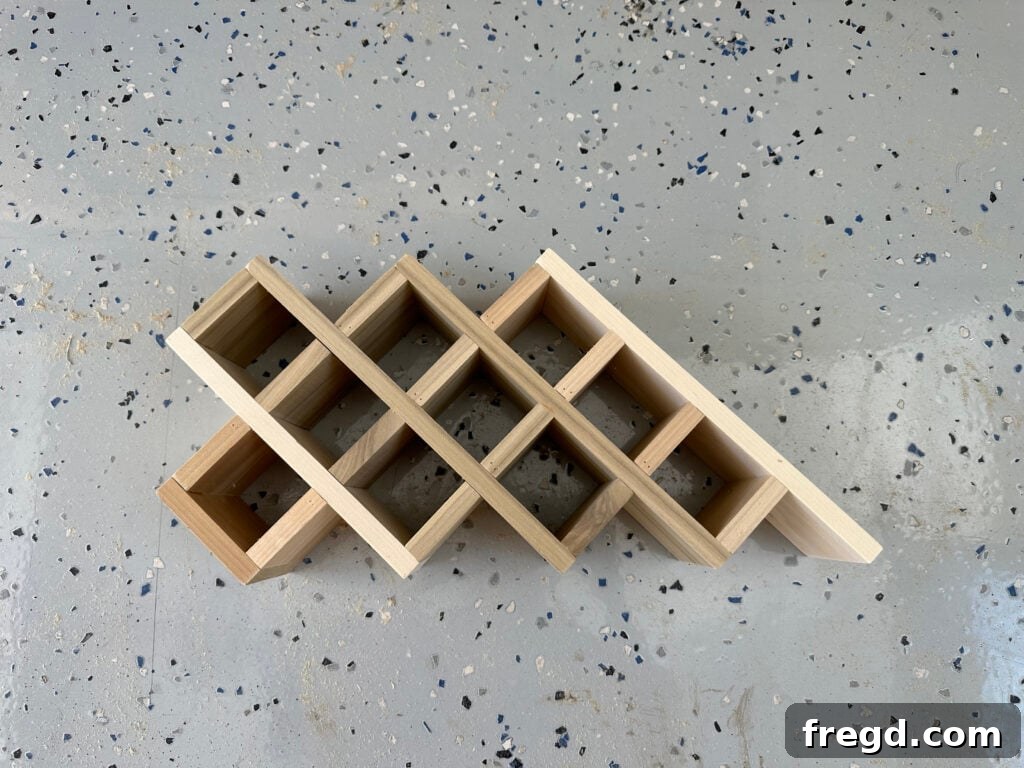
At this stage, you’re near the top of the frame. Take the final “blue” horizontal board, which will serve as the uppermost shelf. Apply wood glue to the top edges of the “green” dividers. Position this board flush with the very top of the structure, ensuring a neat and even finish. Secure it with 1″ pin nails, making sure all connections are robust.
Step 9: Complete the Top Tier with the Last Vertical Dividers (Green Pieces)
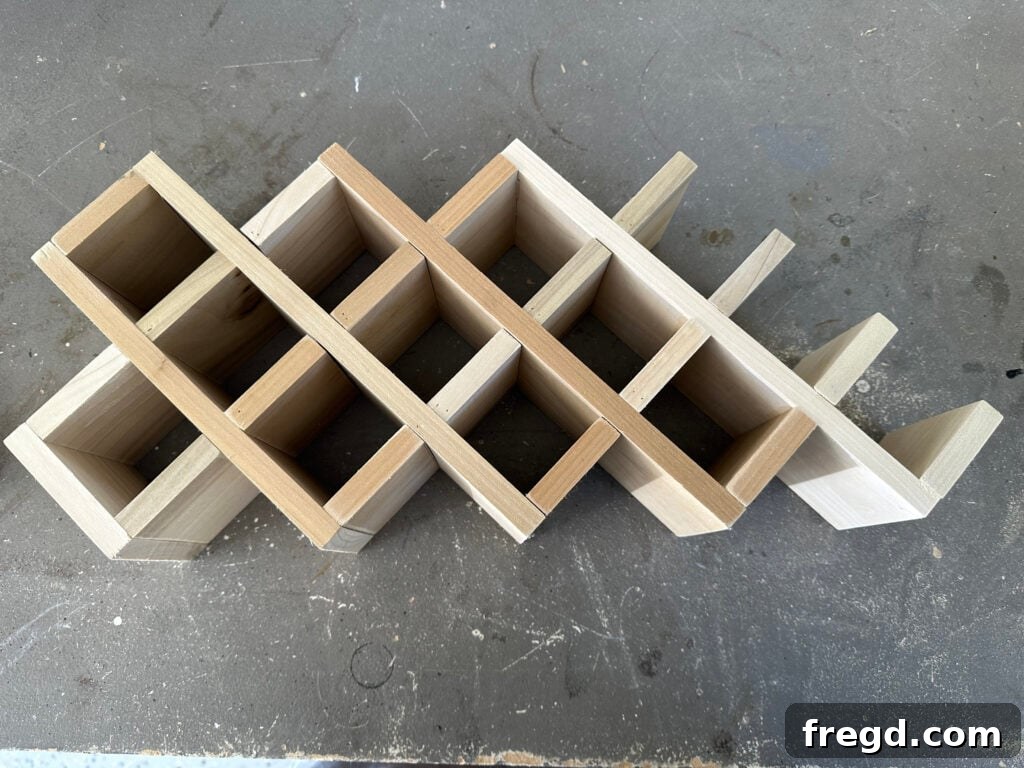
Now, attach the remaining four “green” vertical divider pieces in the same manner as previous steps. Apply wood glue and secure them with 1″ pin nails, starting flush with the bottom of the top “blue” horizontal board. These will complete the final set of compartments for your spice jars, giving the rack its full tiered structure.
Step 10: Attach the Final Main Base Board
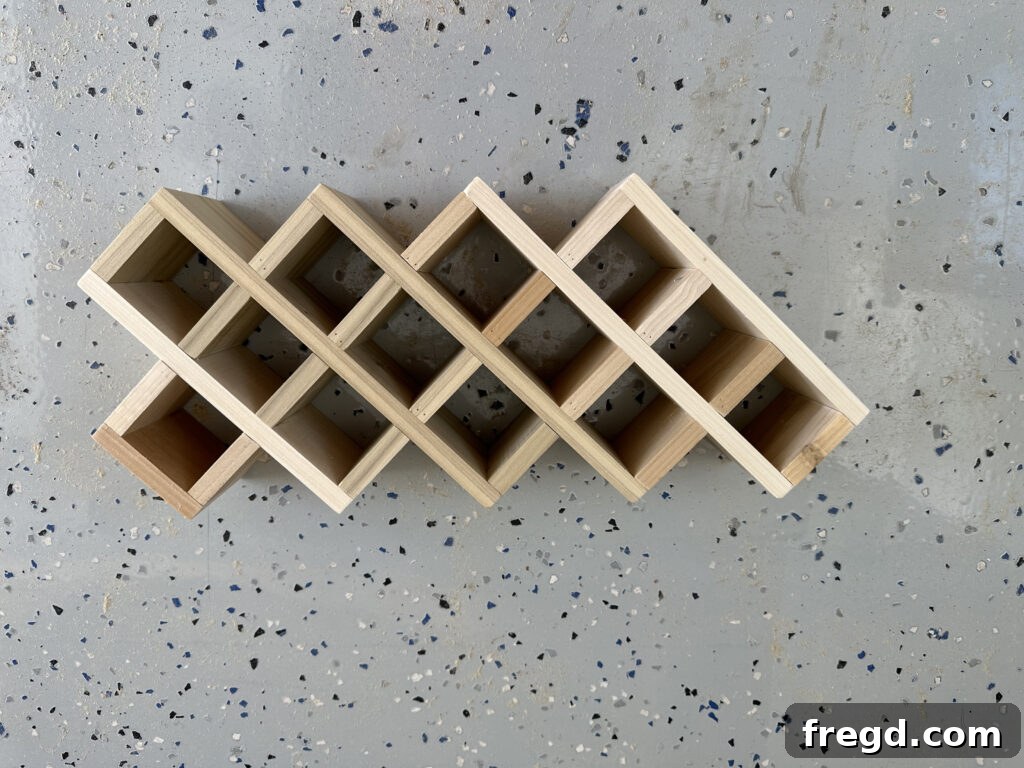
Once all the internal dividers and shelves are in place, it’s time to secure the other main “orange” baseboard. Apply wood glue generously to the contact surfaces of all the vertical and horizontal pieces where this final baseboard will sit. Carefully align and attach this board to the structure using 1″ pin nails, ensuring it’s flush and creates a strong, unified base for the entire rack.
Step 11: Assemble and Attach the Final End Piece
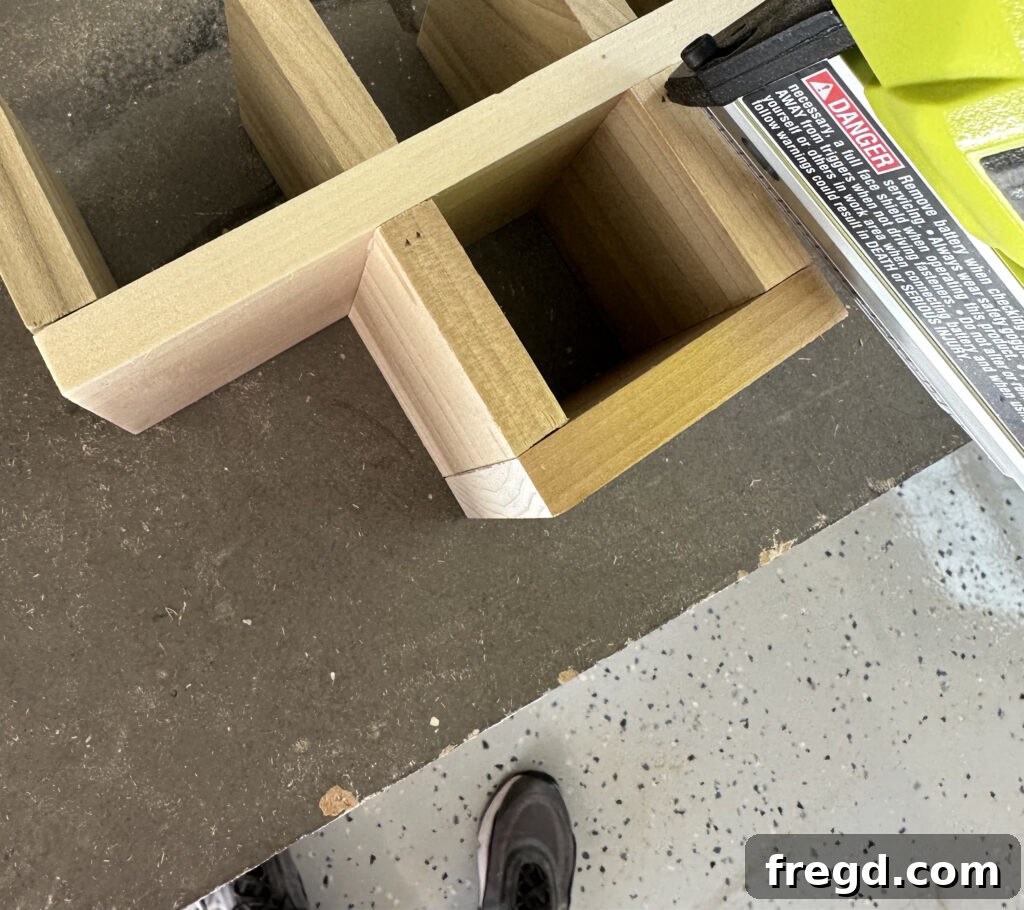
The last structural component is the second end piece. First, assemble this end piece using 1″ pin nails and wood glue, just as you did for the first end piece in Step 1. Once assembled, apply wood glue to the mating surfaces at the end of your spice rack frame. Carefully center the assembled end piece onto the frame, ensuring it aligns perfectly with all the shelves and dividers. Secure it firmly with 1″ pin nails. This completes the robust frame of your countertop spice rack.
Finishing Touches: Personalizing Your Spice Storage
Now that the structure is complete, it’s time to prepare your spice rack for its final look. The finishing process not only protects the wood but also allows you to customize the rack to perfectly match your kitchen aesthetic.
Step 12: Fill, Sand, and Apply Your Chosen Finish
Begin by inspecting your assembled rack for any exposed nail holes or minor imperfections. Fill these with wood putty or a suitable wood filler, allowing it to dry completely. Once dry, sand the entire piece thoroughly. Start with a medium-grit sandpaper (e.g., 120-grit) to smooth out any rough spots or filler, then progress to a finer grit (e.g., 220-grit) for a silky-smooth finish. This meticulous sanding ensures that your chosen finish will adhere evenly and look professional.
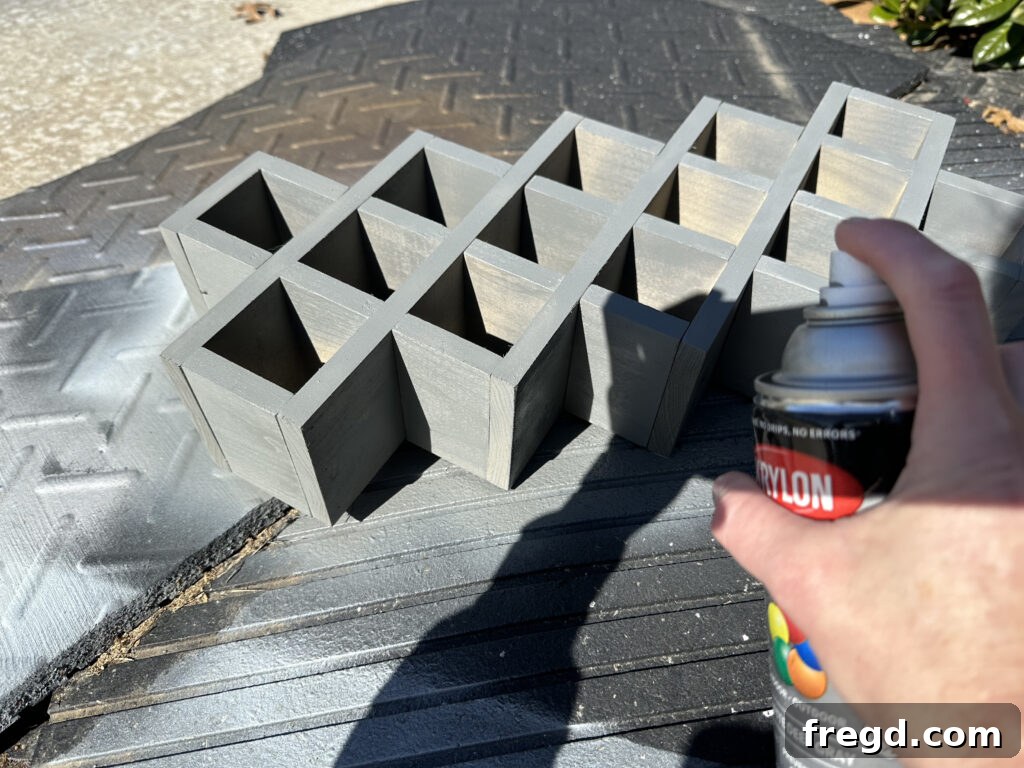
After sanding, wipe down the rack with a tack cloth to remove all dust. Now, you can apply your finish! For a sleek, modern look that seamlessly integrates with existing decor, consider painting it. I opted for a chic gray spray paint to complement my kitchen cabinets, achieving a cohesive and polished appearance. Alternatively, poplar wood takes stain beautifully, allowing the natural grain to show through for a warmer, more traditional feel. If staining, remember to apply a protective topcoat for durability.
- You can find the gray spray paint I used here for a similar finish.
Creative Labeling: Engraving Spice Labels for Jars
Beyond the rack itself, proper labeling of your spice jars is crucial for efficient cooking and a professional look. This project takes it a step further by utilizing a cutting-edge method for labeling.
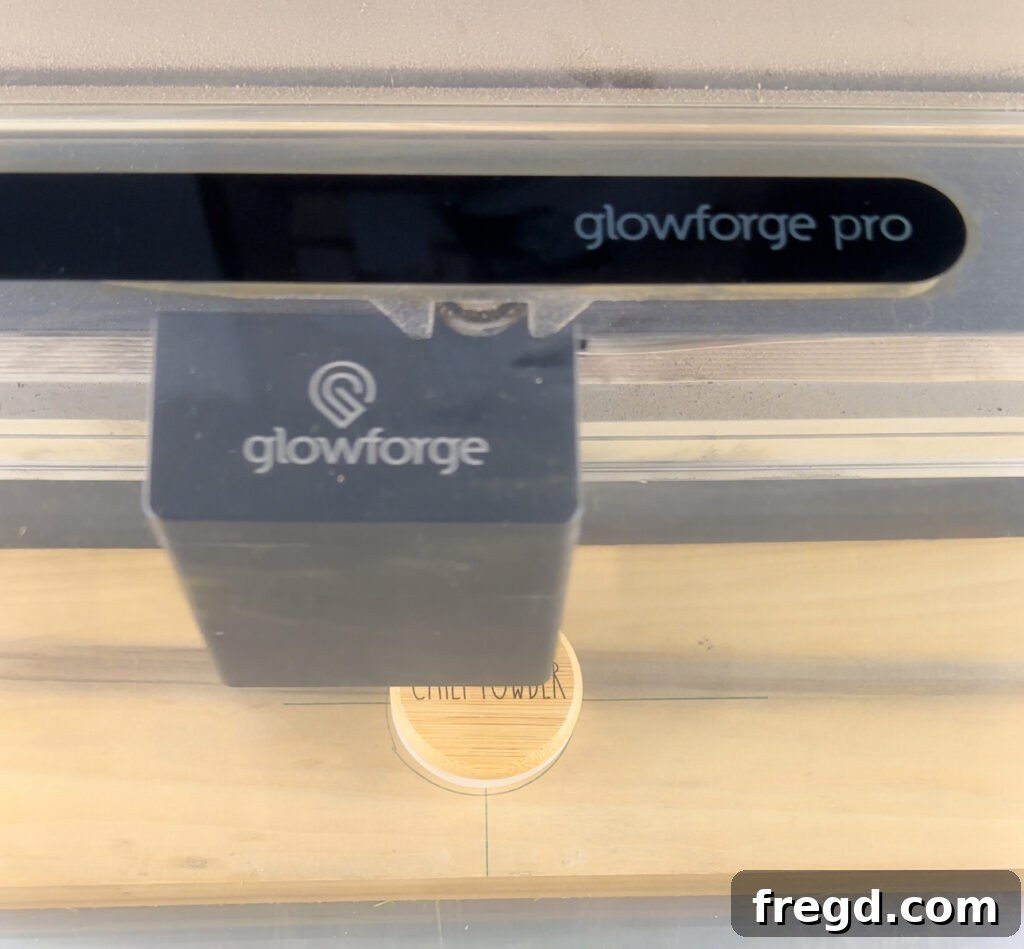
For a truly custom and durable solution, I chose to use my Glowforge laser engraver to etch the names of the spices directly onto the bamboo lids of the jars. This method creates elegant, permanent labels that won’t smudge or fade over time. It’s an ideal choice for this type of spice rack because only the lids are visible when the jars are nestled in their compartments, making it incredibly easy to identify each herb or spice at a glance. If you don’t have a laser engraver, consider other creative labeling options such as vinyl decals, paint pens, or printable labels that can be applied to the lids or sides of the jars. The goal is clear, legible, and aesthetically pleasing identification for all your culinary staples.
Filling and Organizing Your Glass Jars with Spices
With your custom labels ready, the next step is to populate your new spice rack with your favorite flavors. This is where your kitchen truly begins to transform into an organized haven.
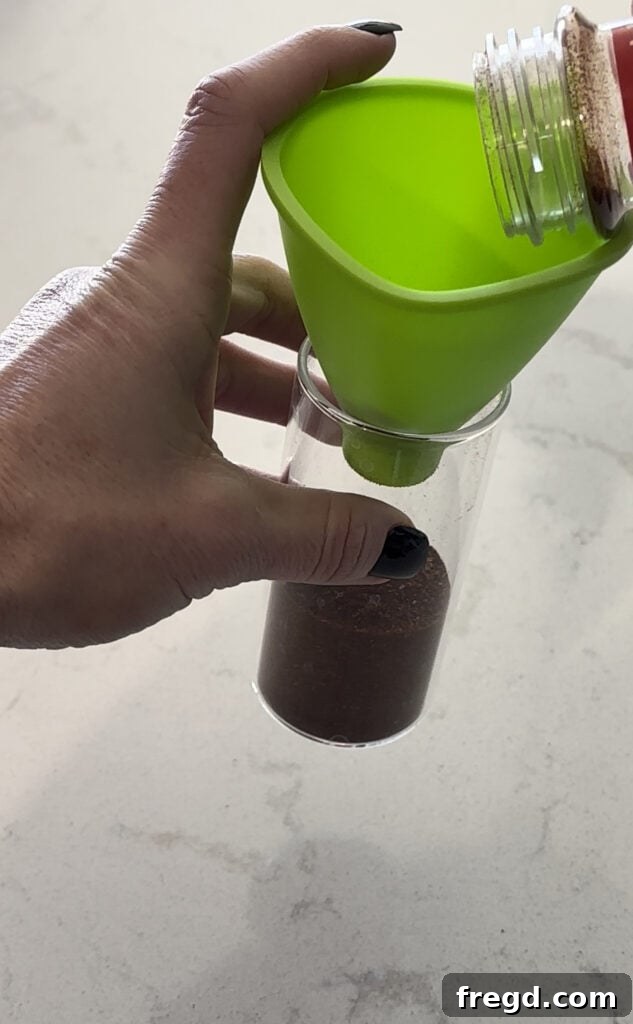
After carefully engraving all the spice jar lids with their respective contents, it’s time to transfer your spices into the glass jars. Using a small funnel can make this process mess-free and efficient. Ensure each jar is filled appropriately and sealed tightly with its newly labeled bamboo lid to preserve freshness and flavor. Once all your jars are filled and sealed, they are ready for their new home.
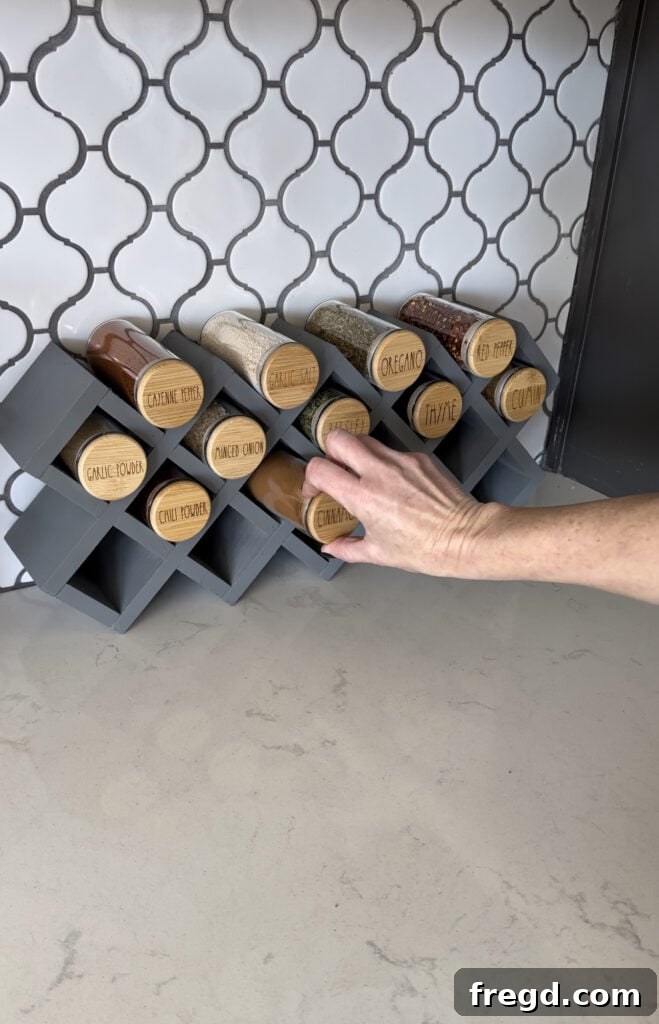
Carefully place each labeled jar into its designated compartment within the spice rack. You might choose to arrange them alphabetically for easy finding, or perhaps by frequency of use. The beauty of this design is how neatly the jars fit, creating a uniform and accessible display. The custom labels on the bamboo lids will shine, offering a sophisticated and highly functional organization system.
- You can find the spice jars I used here to replicate this organized look.
Showcase Your Handiwork: Displaying Your DIY Spice Rack
The final step is to proudly display your newly built and organized countertop spice rack. This isn’t just about storage; it’s about adding functionality and beauty to your kitchen space.
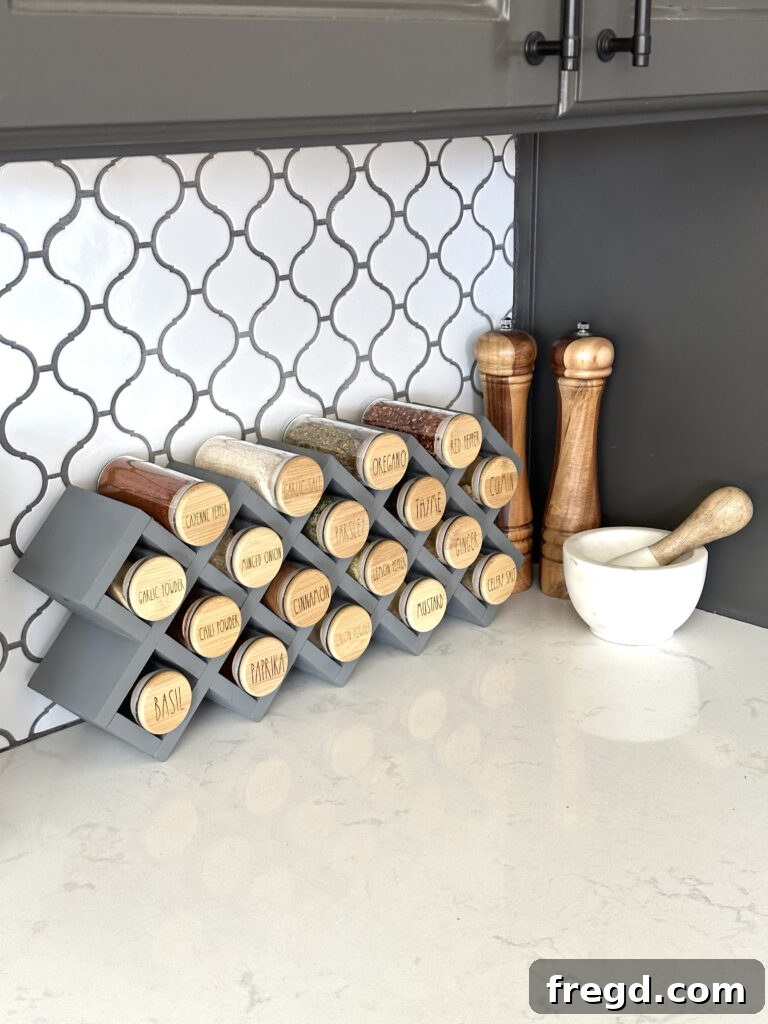
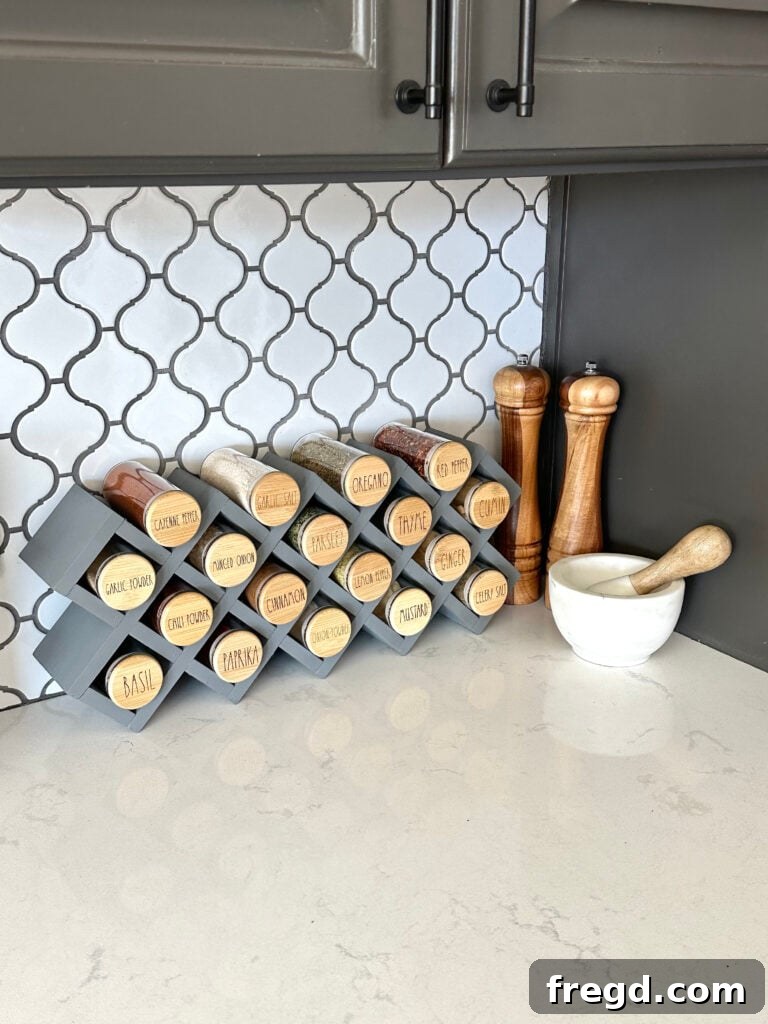
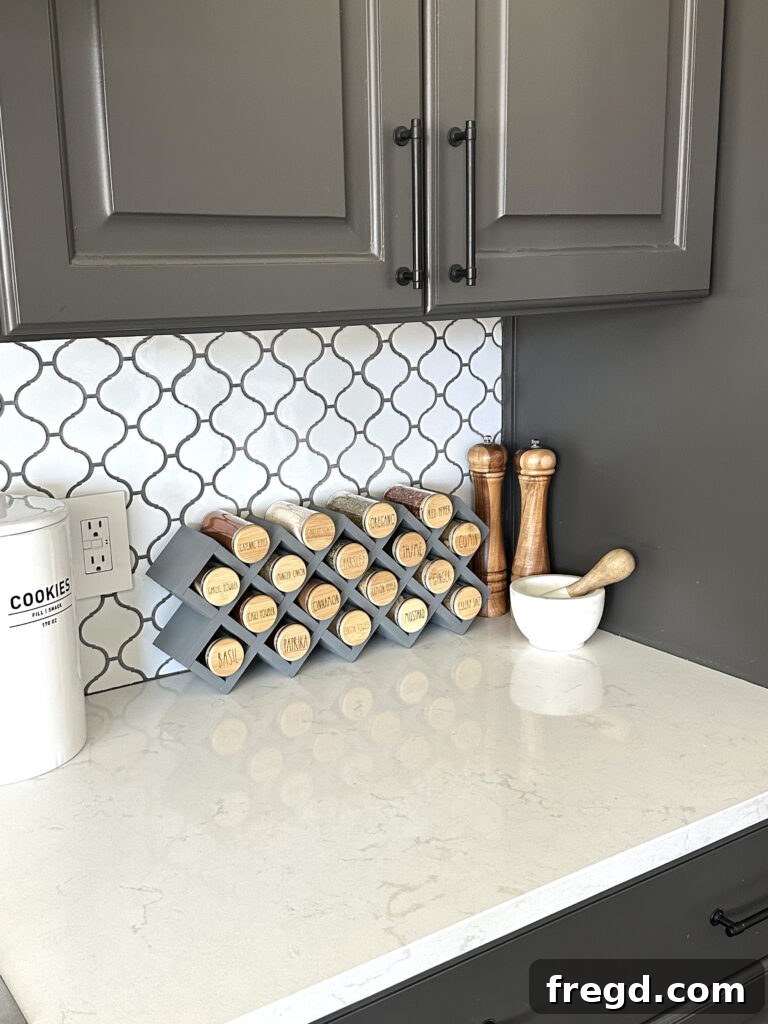
I absolutely adore how this spice rack looks against my kitchen wall backsplash. The clean lines and organized jars bring a sense of calm and efficiency to the cooking area. A well-organized kitchen not only looks appealing but also significantly enhances the cooking experience, making it more enjoyable and less stressful. This rack instantly elevates the visual appeal of your countertop, transforming a functional necessity into a stylish design element.
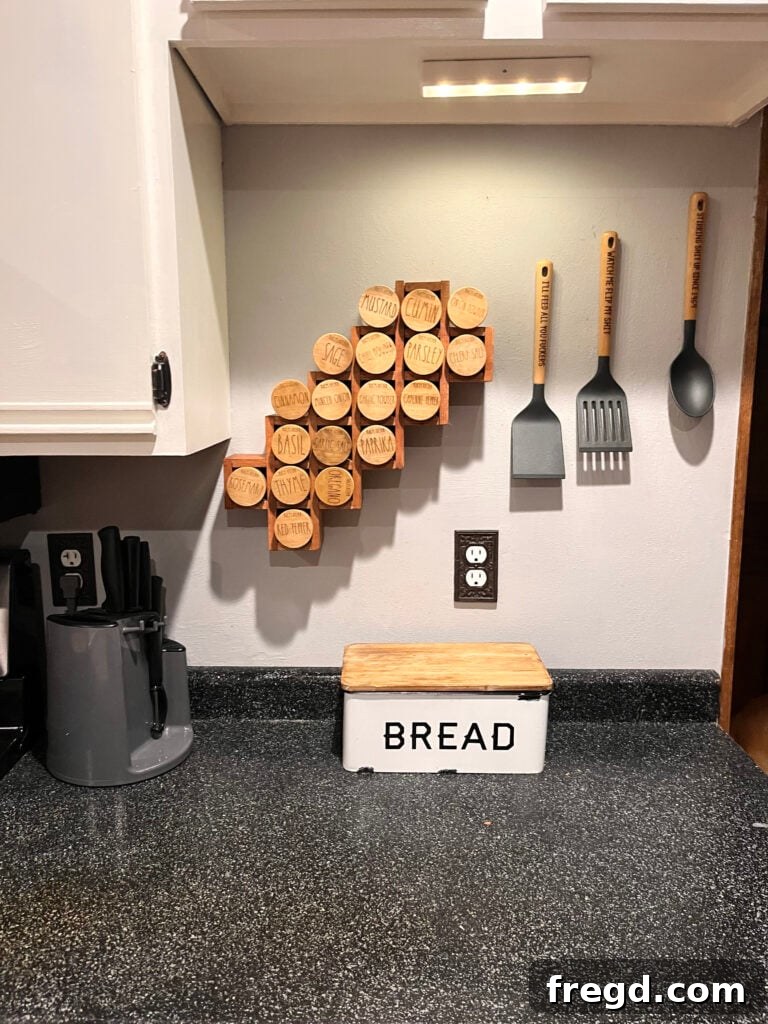
The versatility of DIY projects is one of their greatest advantages. I even made one of these as a surprise Christmas gift for a friend, and she sent me pictures of how she personalized hers! Instead of placing it on the countertop, she ingeniously used brackets to hang it on her backsplash, creating a beautiful and space-saving Spice Rack Shelf. This demonstrates how you can adapt the design to fit your specific kitchen layout and needs.
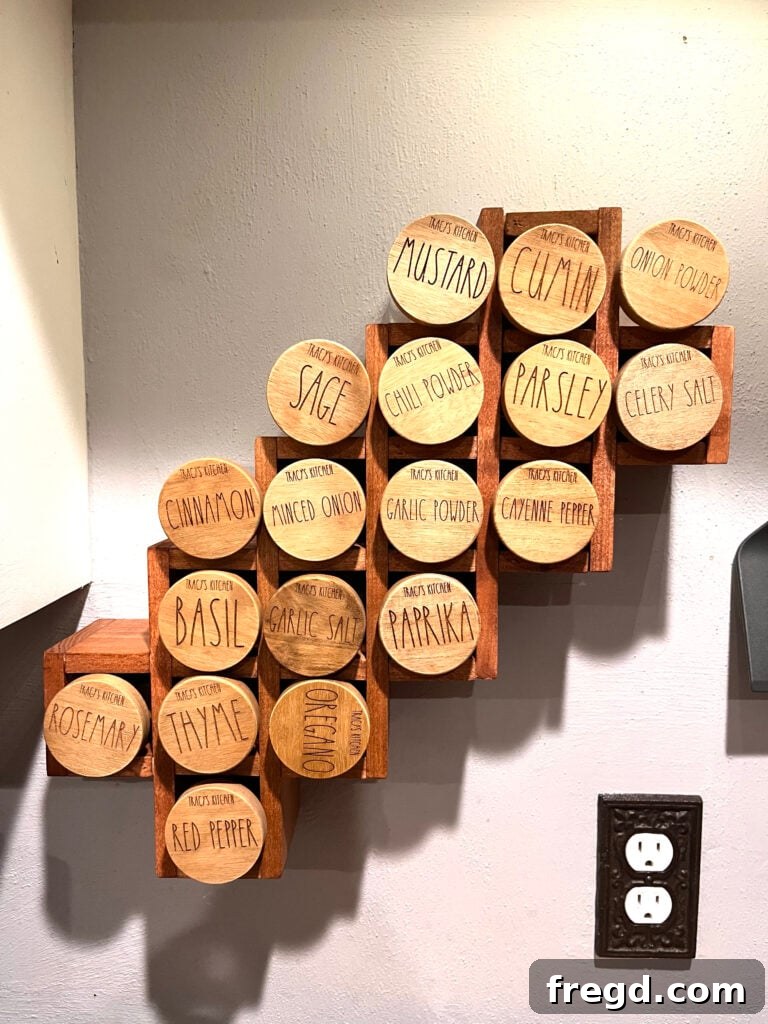
The best part about DIY is truly the freedom to unleash your creativity. Don’t hesitate to put your own spin on this project, whether it’s through a unique paint color, different labeling methods, or an alternative mounting solution. We love seeing your unique creations! Make sure to share your own DIY Spice Rack with us on social media using the hashtag #shanty2chic so we can celebrate and share your amazing work with our community!
Happy Building!
Explore Other Spice Rack Ideas!
While this countertop spice rack is fantastic, we understand that every kitchen is different. If you have limited counter space, cupboard space, or are looking for other innovative storage solutions for a small kitchen, we have more free plans available that might be perfect for your needs. Explore these alternatives to find the ideal spice organization system for your home:
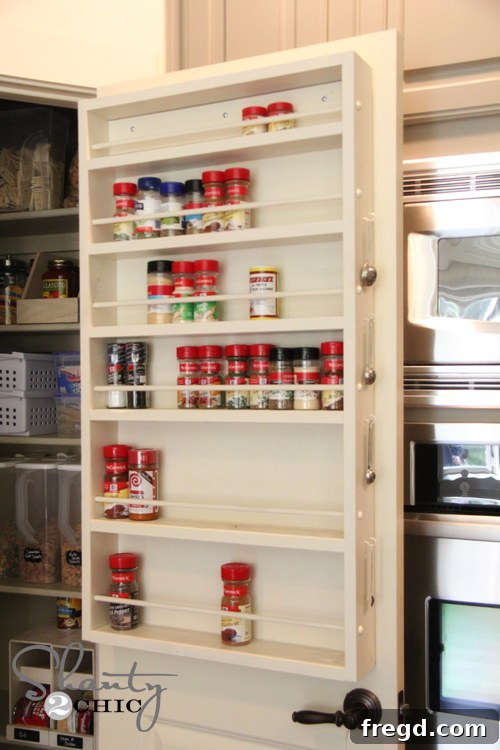
Pantry Door Spice Rack: Maximize often-unused vertical space on the back of your pantry door. This design is perfect for those with a large spice collection who want to keep them out of sight but still easily accessible without taking up valuable counter or cabinet real estate.
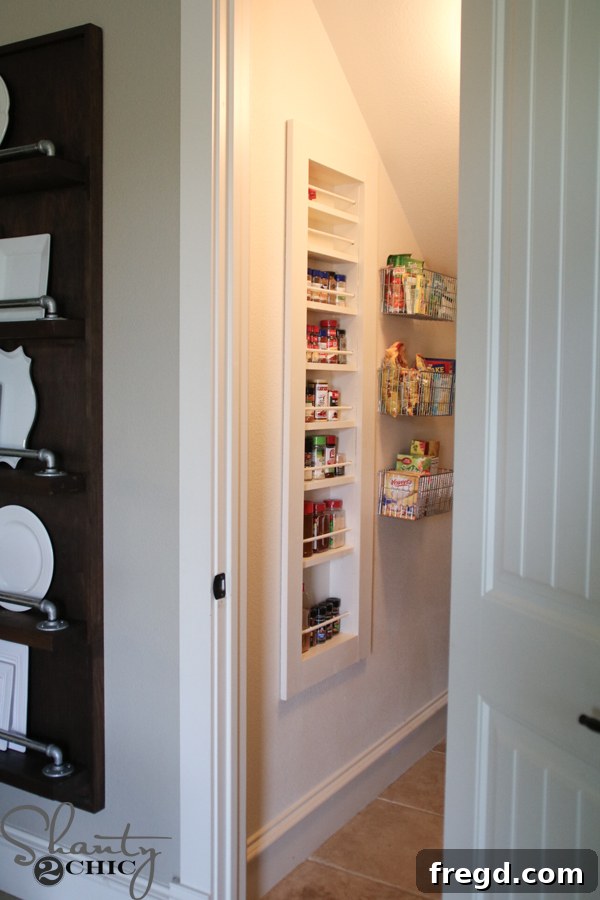
Built-in Spice Rack: For a truly seamless and integrated look, a built-in spice rack offers custom storage that blends perfectly with your kitchen cabinetry. Ideal for new builds or kitchen renovations, this option provides a polished and permanent organization solution.
Summary: How to Build a Countertop Spice Rack
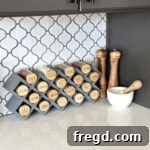
How to Build a Countertop Spice Rack
Learn how to craft this stylish and functional Countertop Spice Rack using just two boards and a couple of essential tools. This project is ideal for beginners and provides an excellent way to organize your spices for easy access while cooking. For detailed cutting dimensions and a shopping list, you can download the free printable plans HERE!
Tools
- Miter Saw (or Circular Saw for cuts)
- Pin Nailer (or Brad Nailer for securing joints)
Supply List
- 2 x 1/2″x4x4 Poplar boards
- 1″ Pin Nails
- Wood Glue
- Spice Jars (with bamboo lids recommended)
Instructions
Cut List
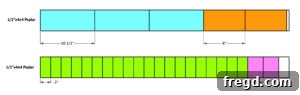
- Cut all poplar pieces to the required dimensions as per the free plans.
Building the Spice Rack Frame
- Assemble the first end piece using wood glue and 1″ pin nails.
- Center and attach the assembled end piece to the long baseboard using wood glue and 1″ pin nails.
- Add four short vertical divider pieces to the baseboard with wood glue and 1″ pin nails. For the middle two, nail diagonally from the front.
- Attach the first horizontal shelf board, flush with the top of the adjacent vertical pieces, using wood glue and 1″ pin nails.
- Attach the next set of four green vertical divider pieces, starting flush with the bottom of the horizontal shelf, using wood glue and 1″ pin nails.
- Follow up by attaching the next blue horizontal shelf board, flush with the top of the newly installed green vertical pieces.
- Attach the third set of four green vertical divider pieces with wood glue and 1″ pin nails, starting from the bottom of the blue board.
- Attach the final blue horizontal shelf board, flush with the top of the structure, with wood glue and 1″ pin nails.
- Attach the final four green vertical divider pieces in the same manner.
- Attach the final long baseboard with wood glue and 1″ pin nails.
- Assemble the final end piece and then center it on the end of the spice rack, securing it with wood glue and 1″ pin nails.
Finishing and Personalization
- Fill any exposed nail holes, sand the entire piece smooth, and then apply your desired finish (paint or stain).
- Engrave or label your spice jars (especially bamboo lids) for clear identification.
- Fill the jars with spices and arrange them neatly in your finished rack.
We encourage you to share your finished projects with us on social media using #shanty2chic! Happy Building!