
Transform Your Kitchen: A Comprehensive Guide to Painting Cabinets for a Stunning Makeover
Are you dreaming of a kitchen refresh without the hefty price tag of a full renovation? One of the most impactful and budget-friendly ways to revitalize your kitchen is by painting your cabinets. It’s a common question we receive – “How do I paint my kitchen cabinets effectively?” And for good reason! The thought of tackling such a significant project can seem daunting, with countless methods and products available. However, we’re here to demystify the process and share a proven method that has yielded incredible results, transforming ordinary kitchens into extraordinary spaces.
Join us as we walk you through the step-by-step journey of giving our sister’s kitchen cabinets a spectacular new lease on life with just a few cans of paint and some expert tips. This guide will provide you with all the insights and confidence you need to embark on your own DIY cabinet painting adventure, ensuring a smooth, durable, and professional-looking finish. Get ready to unveil the kitchen of your dreams!
Why Paint Your Kitchen Cabinets? The Ultimate DIY Kitchen Makeover
Painting your kitchen cabinets isn’t just about changing their color; it’s about reimagining your entire kitchen’s aesthetic and functionality. This cost-effective solution offers numerous benefits that make it an attractive option for homeowners looking to upgrade their space without breaking the bank. Instead of spending thousands on new cabinetry, a fresh coat of paint can deliver a custom, high-end look at a fraction of the cost.
Beyond the financial savings, painting allows for unparalleled customization. You can choose any color to match your decor, reflect your personal style, and brighten up your space. Old, dated, or worn cabinets can instantly be modernized, giving your kitchen a brighter, cleaner, and more inviting atmosphere. It also provides an excellent opportunity to deep clean and organize your cabinets as you work through the process. With the right preparation and application techniques, painted cabinets can be remarkably durable, standing up to the daily wear and tear of a busy kitchen. This guide will ensure you achieve both beauty and longevity in your cabinet transformation.
Essential Supplies for a Professional Cabinet Painting Project
Success in cabinet painting begins with having the right tools and materials. Don’t cut corners on quality when it comes to your supplies, as they play a crucial role in the final outcome. Here’s a comprehensive list of what you’ll need to achieve a flawless finish:
- Degreaser: A high-quality degreaser is non-negotiable for proper adhesion. It removes years of grease and grime that accumulate in a kitchen. We highly recommend using a powerful degreaser like THIS ONE to ensure your surfaces are impeccably clean.
- Paint: The heart of your project! Choose a paint specifically designed for cabinets, offering durability and a smooth finish. We achieved stunning results with a specific type of cabinet paint, and the color we selected for our sister’s cabinets was “Platinum Ring.” You can find the exact paint we used HERE.
- Paint Brushes: A combination of brush sizes will be invaluable. A larger brush is ideal for broad, flat surfaces, ensuring quick and even coverage. For intricate details, corners, and smaller spaces, a smaller, more precise detail brush is a must-have. Grab your larger surface brush HERE and your detail brushes HERE.
- Polycrylic Topcoat: Absolutely essential, especially if you’re using water-soluble paints like chalk paint. This protective layer ensures durability against moisture and wear. Don’t skip this step! We used THIS Polycrylic HERE.
- Screwdriver: For removing cabinet hardware and doors.
- Painter’s Tape: High-quality painter’s tape is crucial for protecting adjacent surfaces like walls, countertops, and flooring.
- Drop Cloths or Plastic Sheeting: To protect your floors and any other items in your kitchen from paint splatters.
- Clean Rags or Microfiber Cloths: For cleaning and wiping down surfaces.
- Sandpaper or Sanding Sponge: Fine-grit sandpaper (180-220 grit) for light sanding or scuffing, which helps paint adhere better.
- Labeling System: Numbered tape or labels for marking cabinet doors and their corresponding locations.
- Small Containers for Hardware: To keep screws and hinges organized.
Step-by-Step Guide to Painting Kitchen Cabinets
Follow these detailed steps to achieve a beautiful, long-lasting finish on your kitchen cabinets:
Step 1: Meticulous Preparation – The Foundation of a Flawless Finish
Preparation is, without a doubt, the most critical stage of cabinet painting. Skimping on prep will compromise the final result and durability of your paint job. Start by completely emptying all your cabinets and drawers. This is also an excellent opportunity for a thorough declutter and organization.
Next, meticulously remove all cabinet doors and drawer fronts. It’s incredibly important to label each door and drawer with its corresponding cabinet opening as you remove it. A simple numbering system using masking tape can save you immense frustration during reassembly. Also, remove all hardware – hinges, pulls, and knobs – and store them safely in labeled bags to ensure no pieces are lost and you know which goes where.
Once all components are removed, it’s time for a deep clean. Kitchen cabinets are notorious for collecting grease, grime, and food residue, which can prevent paint from adhering properly. Apply your chosen degreaser generously to all surfaces – cabinet doors, drawer fronts, and the cabinet frames. Use a clean rag or sponge to scrub away all contaminants. Rinse thoroughly with clean water and wipe down with a fresh, damp cloth to remove any degreaser residue. Allow everything to dry completely.
While often overlooked in quick guides, a light sanding or “scuffing” of all surfaces (doors, drawer fronts, and frames) is highly recommended, especially for slick finishes. Use a fine-grit sandpaper (180-220 grit) to create a slightly rough surface, which provides better adhesion for the paint. After sanding, wipe away all dust with a tack cloth or a damp cloth to ensure a perfectly clean, ready-to-paint surface.
Step 2: Protecting Your Workspace
Before you even think about opening a can of paint, protect the areas you don’t want painted. Lay down drop cloths or plastic sheeting to cover your floors completely. Use high-quality painter’s tape to meticulously tape off any areas adjacent to the cabinets, such as walls, countertops, and appliances. This barrier will protect against drips and overspray, making cleanup much easier and ensuring crisp, clean paint lines.
Step 3: The Art of Painting – Doors and Drawers First
Begin by painting your cabinet doors and drawer fronts. Lay them flat on a protected surface in a well-ventilated area. Starting with the doors allows you to get into a rhythm and perfect your technique before moving to the stationary frames.
When applying paint, here’s a crucial tip for a smoother finish: for certain types of paint, especially thicker ones, dipping your brush in a tiny bit of water before loading it with paint can significantly help the paint flow more smoothly and reduce visible brush strokes. This “wet brush” technique is a game-changer for achieving a professional look.
Always paint the back side of each door first. This way, if you make any minor mistakes or have drips, they will be on the less visible side. Once the back is dry to the touch, flip the door over and paint the front. Focus on applying thin, even coats. Avoid overloading your brush, which can lead to drips and uneven texture.
Allow the first coat to dry completely before applying the second. Many cabinet paints dry quickly, but always refer to the manufacturer’s instructions for specific drying times. The second coat builds depth of color and improves coverage. A third coat, though optional, can be beneficial for eliminating any remaining brush strokes, achieving a richer hue, or perfecting any minor imperfections. This final coat is often quicker to apply as the surface is already well-covered.
Step 4: Painting the Cabinet Frames
Once all your doors and drawer fronts are dry and safely set aside, turn your attention to the stationary cabinet frames. While some might remove drawers entirely for painting, we found that simply pulling each drawer out a few inches and painting them in place was efficient, especially when time was a factor. Just be careful to protect the inside of the drawer boxes.
Using the same wet brush technique and applying thin, even coats, paint the cabinet frames. Pay close attention to corners and edges, using your smaller detail brush where necessary. Work systematically, painting all visible surfaces of the frames, stiles, and rails. Just like with the doors, allow each coat to dry thoroughly before applying the next. Aim for the same number of coats (two or three) for consistency across your entire kitchen.
Step 5: The Crucial Topcoat – Polycrylic for Durability
After all paint coats have been applied and allowed to dry completely (this can take 24-48 hours, depending on paint type and humidity), it’s time for the final, and perhaps most important, step: applying a protective topcoat. We used and highly recommend a coat of Polycrylic. You can see the specific one we used HERE.
This step is an absolute must, especially if you’ve used a chalk-based paint, which is water-soluble. Without a durable topcoat, your beautifully painted cabinets would be vulnerable to moisture, spills, and everyday wear and tear common in a kitchen environment. Over time, the paint would likely start to chip, scratch, or even dissolve with repeated cleaning.
Apply Polycrylic in thin, even coats, following the product’s instructions for drying times between coats. Typically, two to three coats provide excellent protection. A foam roller can help achieve a super smooth, streak-free finish with polycrylic. Allow the final topcoat to cure completely (which can take several days to a few weeks, depending on the product) before heavy use or reattaching hardware. This curing period is vital for maximum durability.
Beyond Paint: Completing Your Kitchen Transformation
Once your paint has fully cured, it’s time for the exciting part – reassembling your cabinets! Carefully reattach all hardware, ensuring screws are snug but not overtightened. The labels you meticulously placed earlier will now prove invaluable in getting every door and drawer back to its rightful place.
But the transformation doesn’t have to end with paint. While paint alone creates an astonishing difference, integrating new elements can truly elevate your kitchen’s style. Replacing old, dated hardware with modern drawer pulls can instantly update the look and feel. These details are like jewelry for your cabinets. You can find links to the stylish drawer pulls HERE that perfectly complemented our sister’s newly painted cabinets.
Adding a new rug can also bring warmth, texture, and a pop of color to your kitchen. A well-chosen rug ties the room together and enhances the overall aesthetic. Take a look at the rug we used HERE for inspiration.
The Amazing Transformation: Before & After Reveal!
Now, let’s take a delightful walk down memory lane – this is always the most satisfying part! Witnessing the power of paint in transforming a space is truly incredible. See for yourself the dramatic change:
From builder-grade BLAH before…
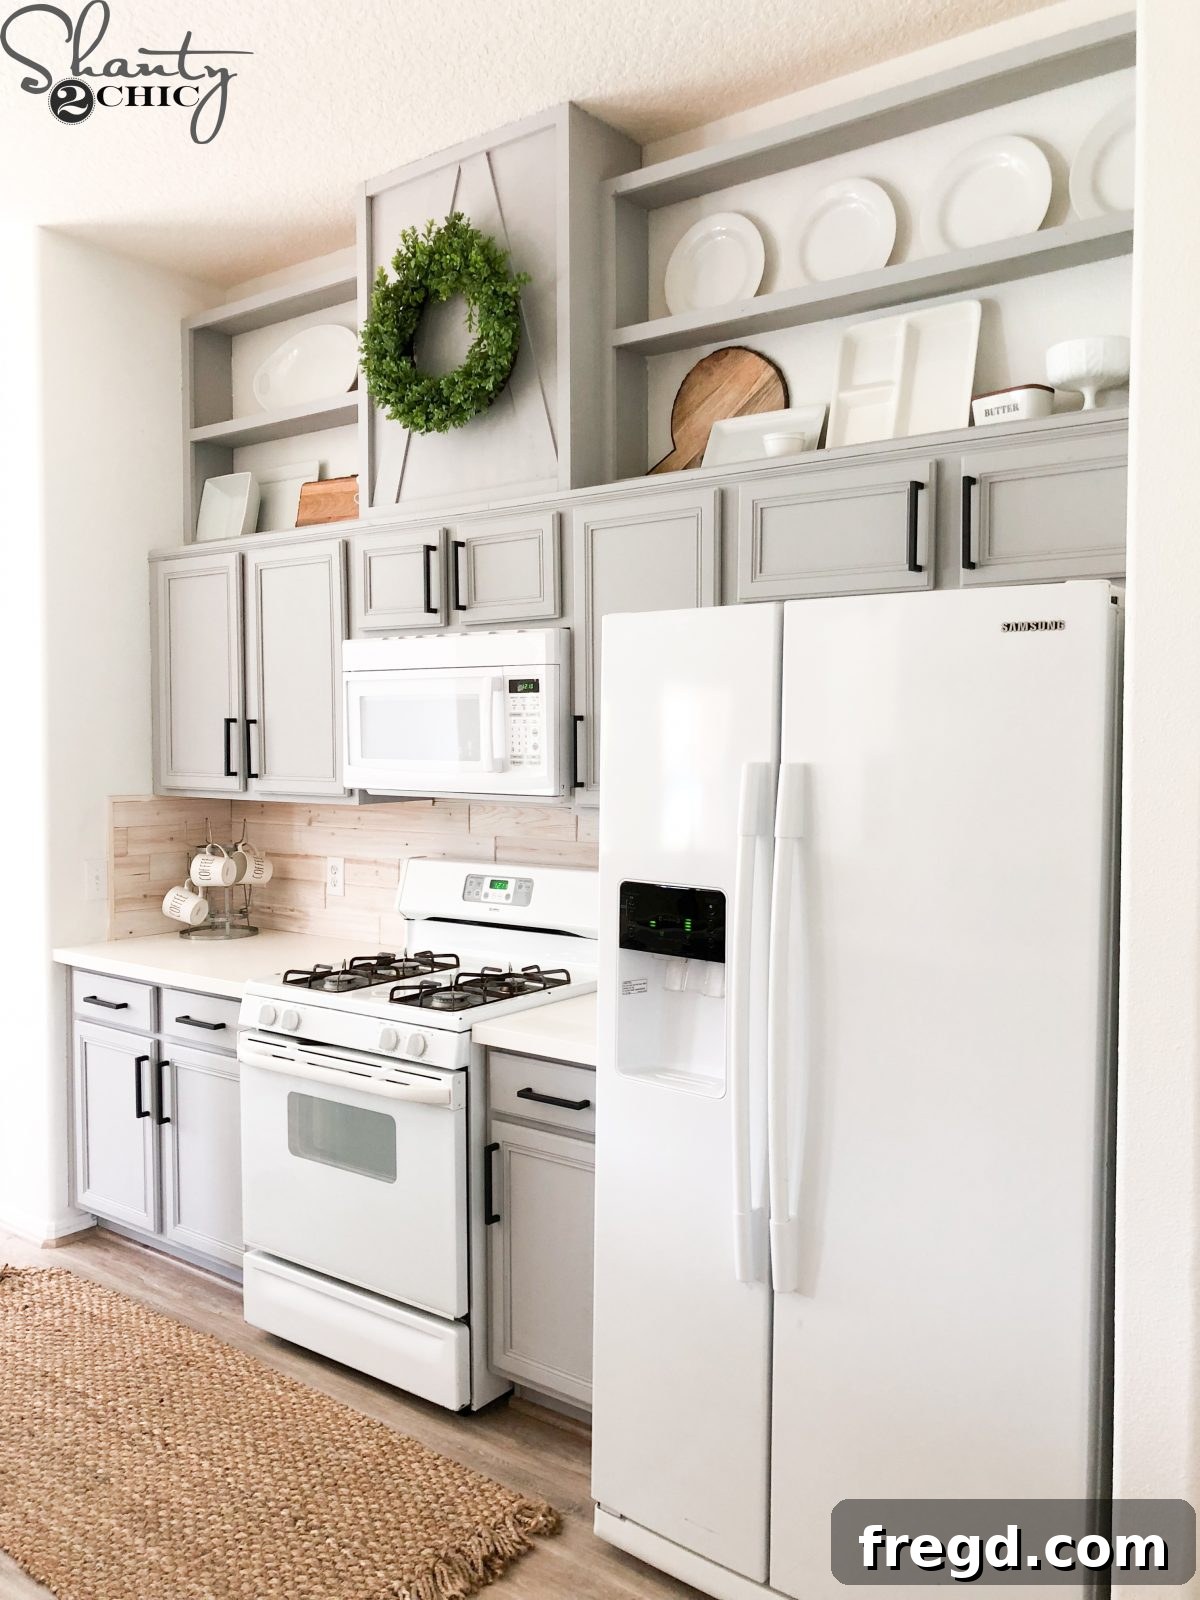
To this AMAZING, fresh, and modern kitchen!
It’s truly astonishing how much change and personality you can infuse into your space with just a few cans of paint! The transformation speaks for itself, proving that a DIY approach can yield professional, stunning results.
Discover More Kitchen & Home Renovation Projects
Painting your cabinets is just one piece of the puzzle in creating your dream home. If you’re inspired to tackle more projects and personalize your living spaces, explore these related DIY guides and tutorials we’ve put together:
- Craft Your Own Farmhouse Dining Table – Free plans and how-to video available!
- Install a DIY Driftwood Backsplash – Free plans and how-to video available!
- Learn How to Add Height to Kitchen Cabinets – Free Plans and how-to video available!
- Master the Custom Cabinet Trim Hack – Free Plans and how-to video available!
- Deep Dive into How We Paint Cabinets – Free Plans and how-to video available!
- Frame and Cover a Crescent Window – Free Plans and how-to video available!
- Build Your Own DIY Round Kitchen Table – Free plans and how-to video available!
- Construct Functional DIY Pipe Shelves – Free plans and how-to video available!