
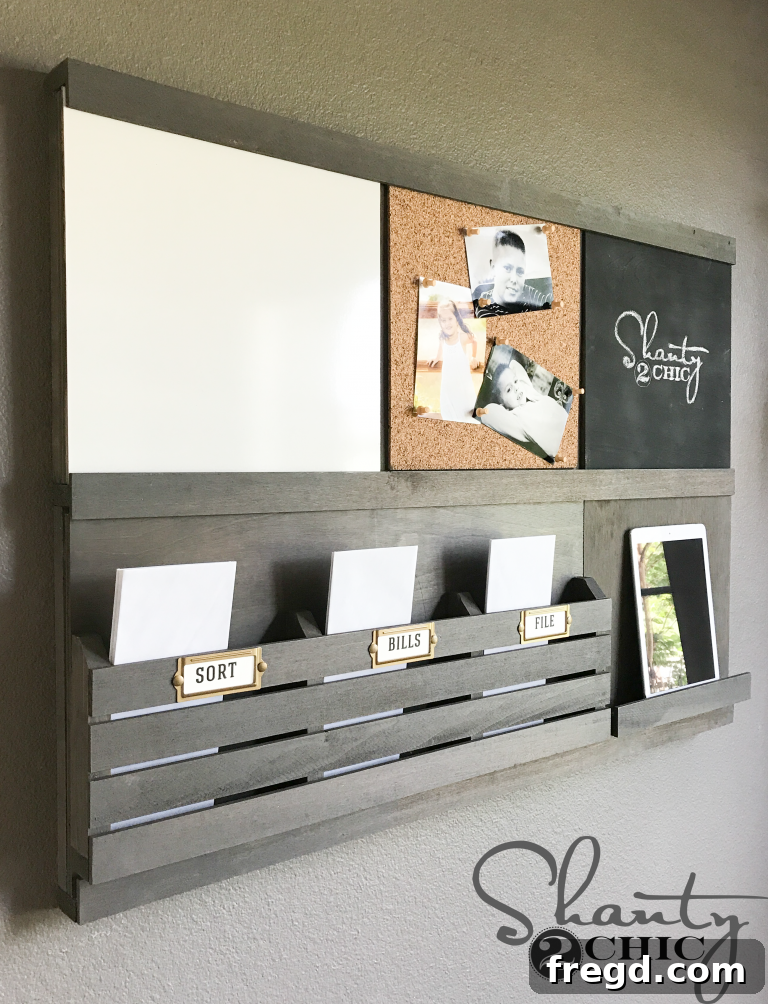
As the new school year commences, the universal quest for robust organization systems takes center stage in countless homes. The sheer volume of school notices, essential forms, impending appointments, and daily household clutter can quickly overwhelm even the most diligent among us. To conquer this organizational challenge, we’ve meticulously designed and constructed this Custom DIY Wall Organizer – a project we believe will provide the perfect head start needed to streamline busy schedules and maintain a tidy living space. This innovative solution promises to bring order and efficiency right where you need it most, transforming chaotic corners into highly functional command centers.
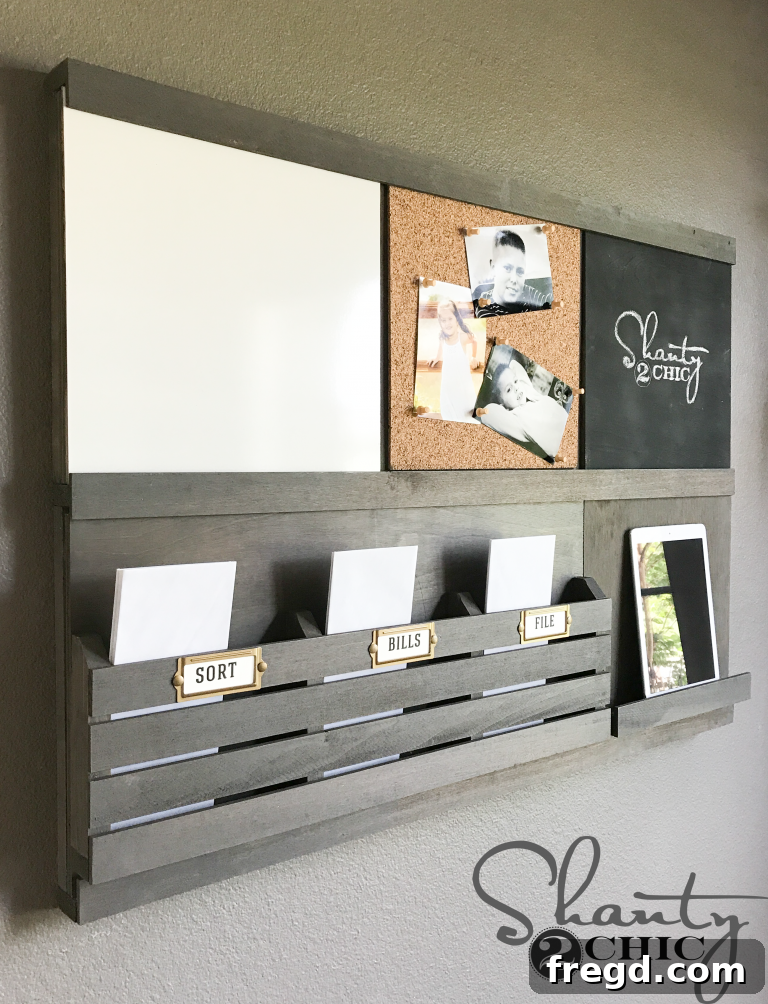
DIY Custom Wall Organizer: Affordable, Versatile, and Easy to Build
Embark on an incredibly rewarding DIY journey with this custom wall organizer project, perfectly suited for beginners and seasoned builders alike. This design is not only straightforward and budget-friendly but also delivers an abundance of vertical storage without encroaching on precious floor space. What truly sets this organizer apart is its ingenious modular design: each component effortlessly slides in and out, allowing for 100% customization. Imagine the possibilities – you can easily duplicate specific modules to meet unique needs or even unleash your creativity to invent entirely new inserts. This flexibility ensures your wall organizer evolves with your family’s changing demands, making it a truly long-term solution for home organization. It’s more than just a storage unit; it’s a dynamic system tailored to your lifestyle.
Download the FREE Printable Plans HERE! These comprehensive plans will guide you through every step, ensuring a smooth and successful build.
Ready to transform your home organization? Here’s a detailed, step-by-step guide on how to construct your very own versatile and custom wall organizer:
Step 1: Preparing the Back Frame Boards
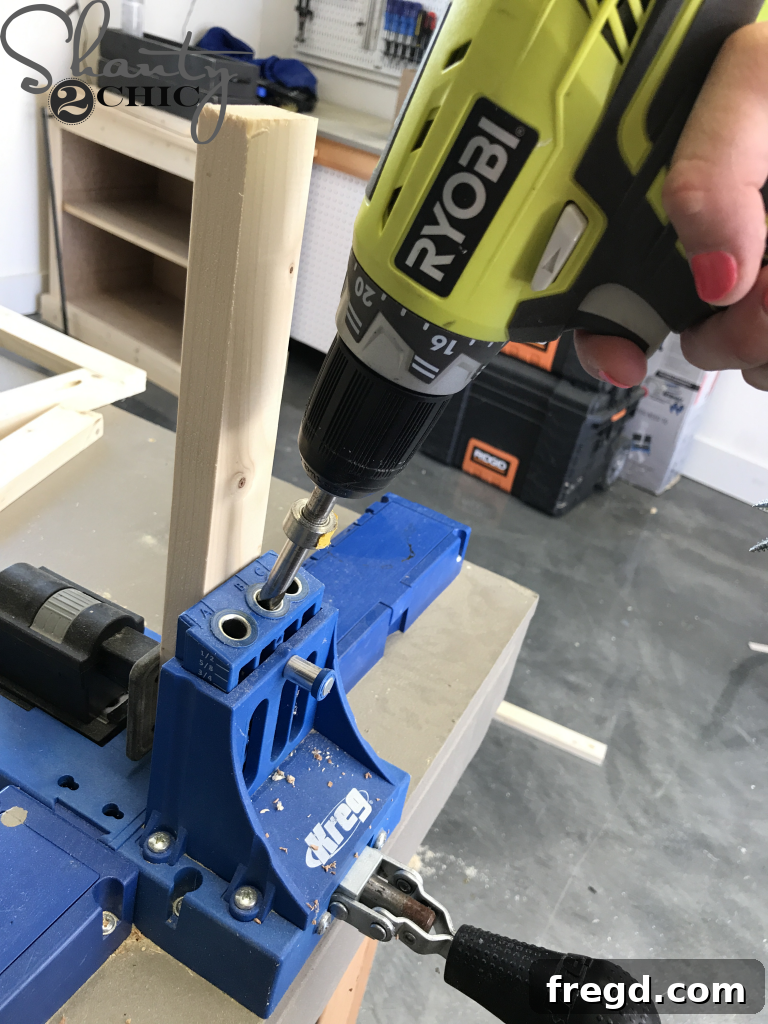
To begin, accurately cut the necessary boards for the main back frame of your DIY wall organizer. Precision in this initial stage will ensure a sturdy and well-aligned final product. Once cut, take each of the shorter pieces and utilize your trusty Kreg Jig to drill precisely 3/4-inch pocket holes. These pocket holes are critical for creating strong, concealed joints, providing a professional finish to your organizer. Using a Kreg Jig simplifies the process, making it accessible even for those new to woodworking. It ensures perfectly angled holes for robust screw placement, which is essential for the durability of your wall-mounted storage solution. You can find our favorite Kreg Jig model HERE on Amazon, a tool we highly recommend for its versatility and ease of use in various DIY projects.
Step 2: Assembling the Back Frame Components
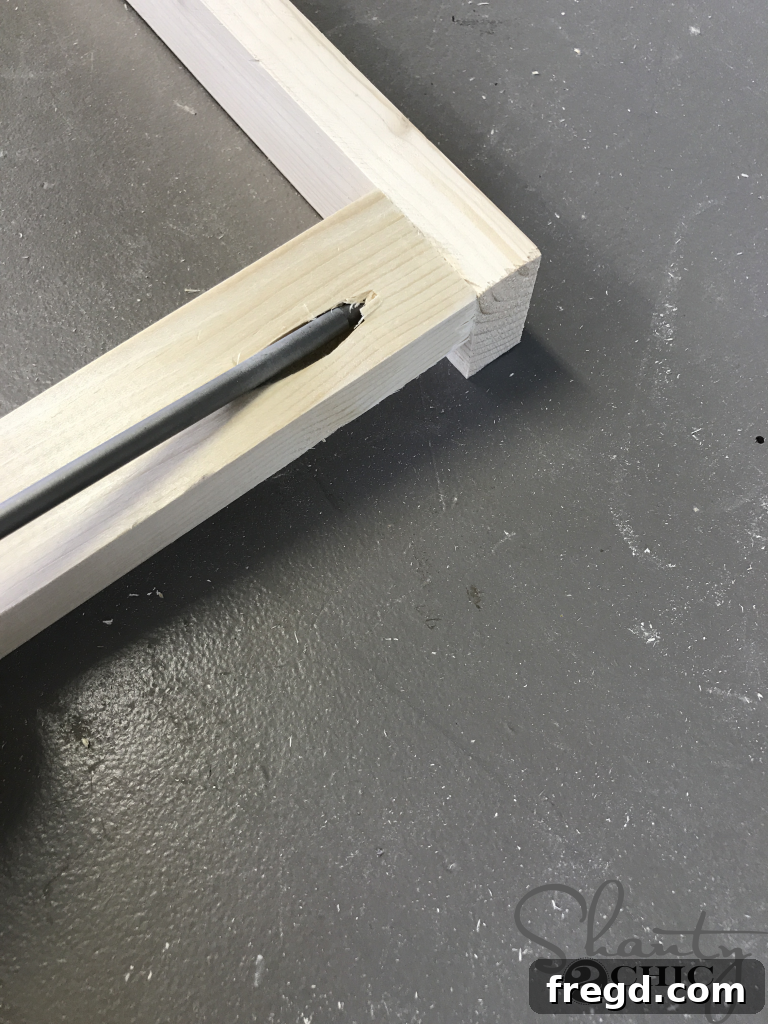
With the pocket holes drilled, it’s time to assemble the frame. Carefully align the shorter pieces with the longer pieces, ensuring they form a precise rectangular structure. Apply a generous, even layer of wood glue to the joining surfaces before securing them. Wood glue, when properly applied, significantly enhances the strength and longevity of the joint. Then, using 1 1/4-inch pocket hole screws, firmly attach the short pieces to the long pieces. Drive the screws into the pre-drilled pocket holes until they are snug, creating a tight and secure connection. This combination of wood glue and pocket hole screws provides exceptional stability, which is vital for a wall organizer designed to hold various items securely.
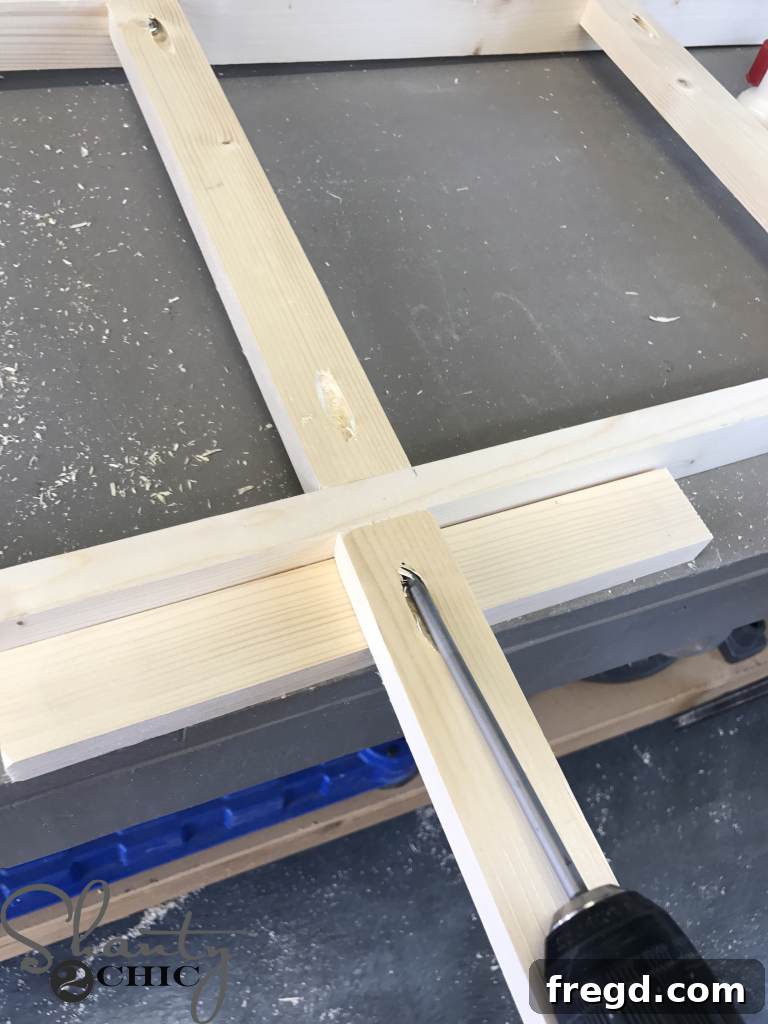
A crucial detail for a clean finish: ensure the back edge of the shorter pieces is perfectly flush with the back edge of the longer pieces. This alignment is not just aesthetic; it ensures that the organizer will sit flat against the wall when mounted. For easier attachment and to maintain this flush alignment, place a scrap board underneath the short pieces. This elevates them slightly, making it simpler to hold them steady and drive the screws accurately. This small tip can make a big difference in the overall quality and ease of your DIY wall organizer build.
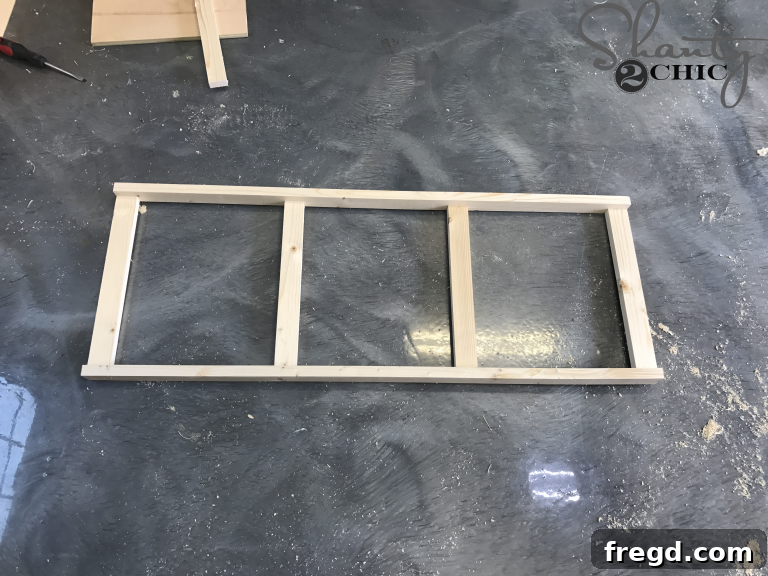
Building the Sturdy Frame for Your DIY Wall Organizer
Once you’ve completed the initial attachments, pause to observe your progress. From the front view, the first half of your frame assembly should present a clean, rectangular shape, indicative of the strong foundation being laid for your custom DIY wall organizer. This is where the structural integrity begins to take shape, ready to support all the future organizational components.
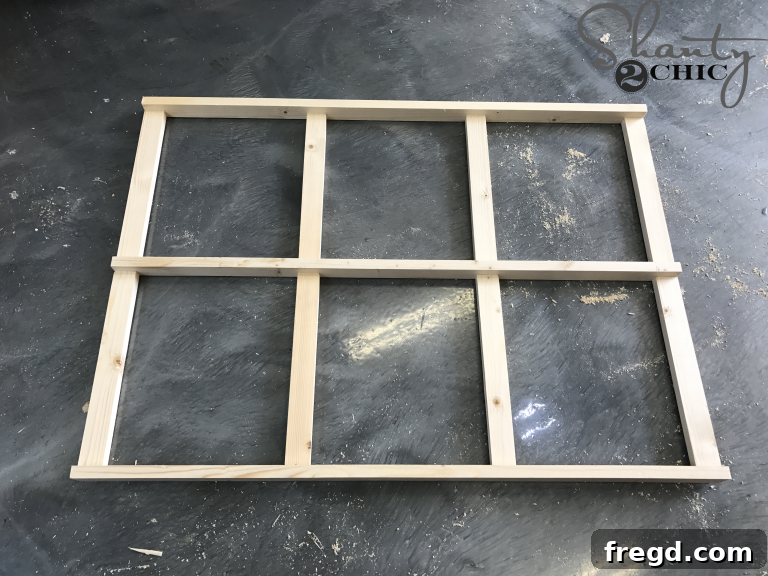
After all connections are made and secured, you should now have a completely assembled front frame. This forms the main structure into which all the customizable inserts will slide. Take a moment to admire the solid framework—it’s the backbone of your entire organization system, ready for the next exciting phase of construction.
Step 3: Attaching the Front Slats for Modular Inserts
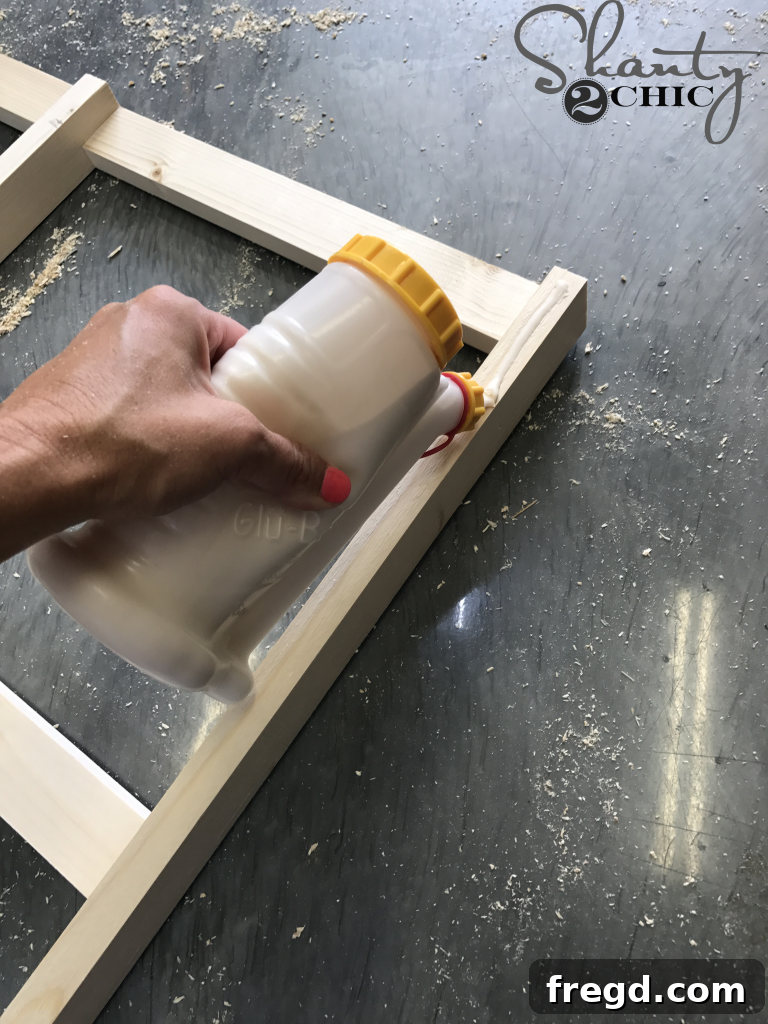
With the main frame solidly built, your next step is to prepare and attach the front slats. These slats are crucial as they form the tracks and supports for your interchangeable modules. Begin by cutting the front slats to their precise dimensions, as indicated in the plans. Accuracy here ensures a smooth sliding mechanism for your custom inserts. Once cut, using an 18-volt Ryobi Airstrike Brad Nailer, attach these slats securely to each of the three 1×2 slides on the frame. The brad nailer offers a quick and clean method for fastening, leaving minimal holes. Complement the nails with a strong wood glue for maximum hold; specifically, use 5/8-inch brad nails. This combination provides both immediate hold and long-term structural integrity. We LOVE this glue bottle for its precise application, and you can find it HERE on Amazon!
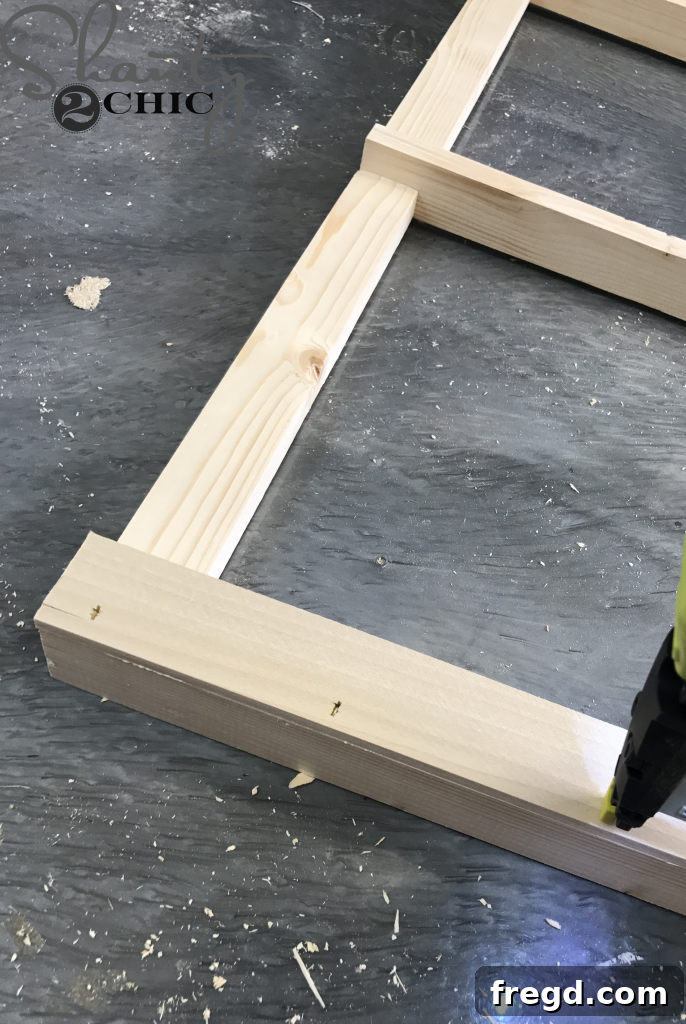
For a symmetrical and functional design, ensure the top and bottom slats are perfectly flush with the corresponding top and bottom edges of the frame. This precise alignment contributes to the overall aesthetic and ensures that the custom inserts will slide in and out without obstruction. Pay close attention to these details for a professional-looking finish on your DIY organization unit.
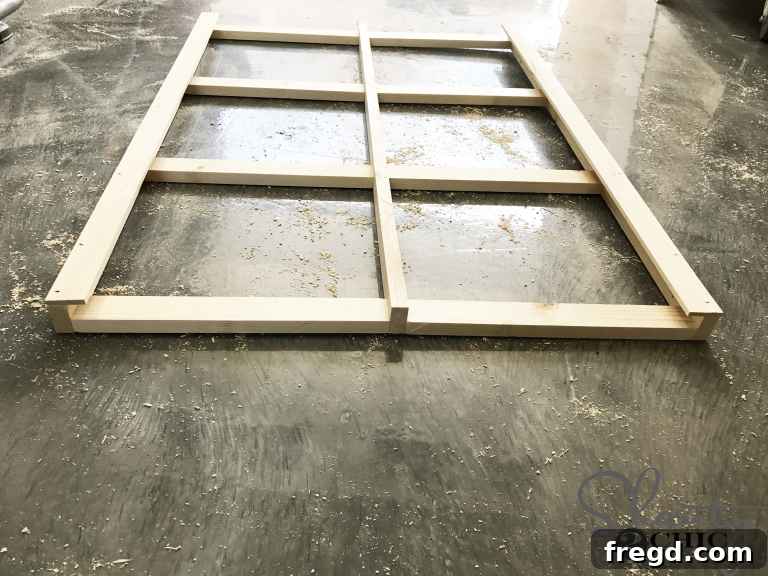
The middle slat requires specific positioning to ensure proper functionality of the modular system. It should be centered precisely over the middle slide, creating a consistent 3/8-inch overhang on both sides. This careful placement is vital for the smooth operation and balanced appearance of your custom wall organizer. At this stage, you should have the frame with both the top and bottom slats securely attached, forming the basic structure that will house your interchangeable organizational tools. The frame is now ready to receive its various customizable inserts.
Crafting the Functional Mailbox Component for Your Organizer
Step 4: Assembling the Mailbox Base and Dividers
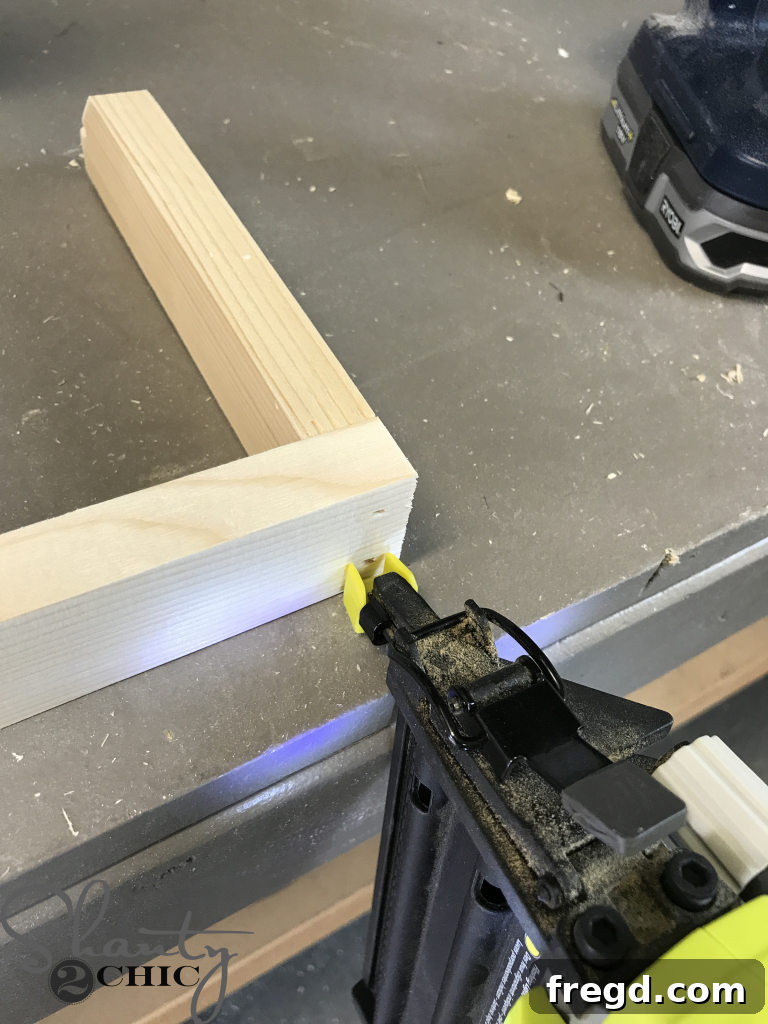
One of the most essential components for any home organization system is a dedicated spot for mail, forms, and important documents. Begin by cutting the bottom piece of the mailbox and its internal dividers to the exact sizes specified in the provided plans. Accuracy here is key to creating neat and functional compartments. Once cut, apply wood glue to the edges of the dividers where they will meet the mailbox bottom. Then, firmly attach these dividers to the mailbox bottom using 1 1/4-inch brad nails. The brad nails provide a strong, immediate hold while the glue cures, ensuring a durable and robust mailbox component for your custom DIY wall organizer.
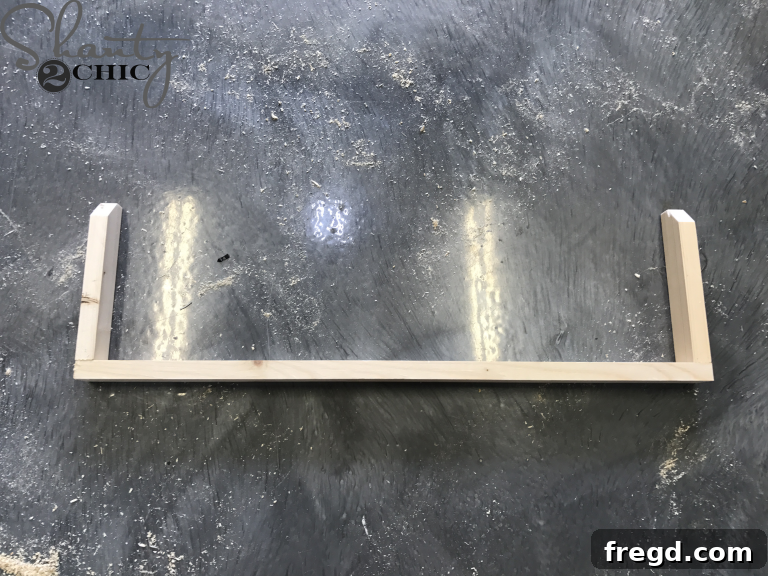
When attaching the dividers, it’s best practice to start with the two outermost pieces. Secure these first, ensuring they are perfectly square and flush with the edges of the mailbox bottom. This establishes the outer boundaries and helps guide the placement of the interior dividers. Working from the outside in often leads to a more precise and symmetrical assembly, which is particularly important for an item like a mail sorter where even compartments are desired.
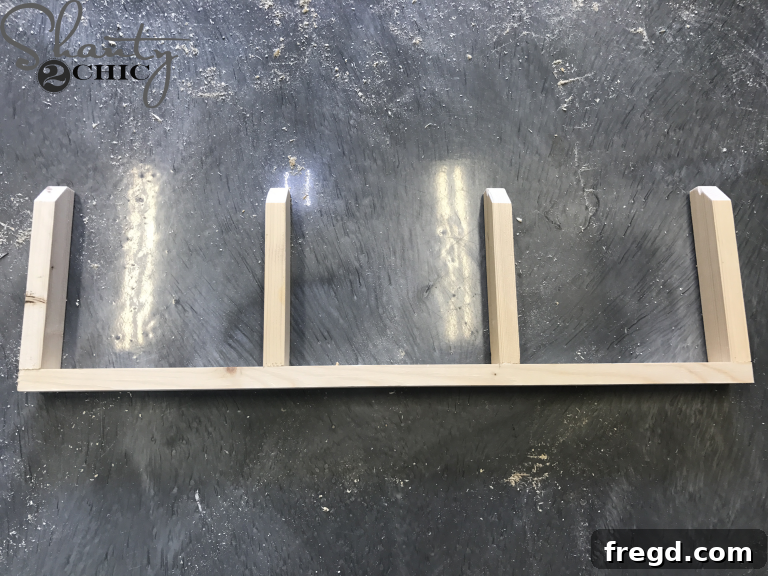
Once the outer dividers are secured, proceed to attach the middle dividers. For exact positioning and spacing, always refer back to your detailed printable plans. The plans provide critical measurements that ensure your mailbox compartments are evenly spaced and perfectly sized for standard mail and documents. This modular mailbox insert will significantly reduce countertop clutter and ensure important papers are always within reach, making your DIY wall organizer even more practical and indispensable.
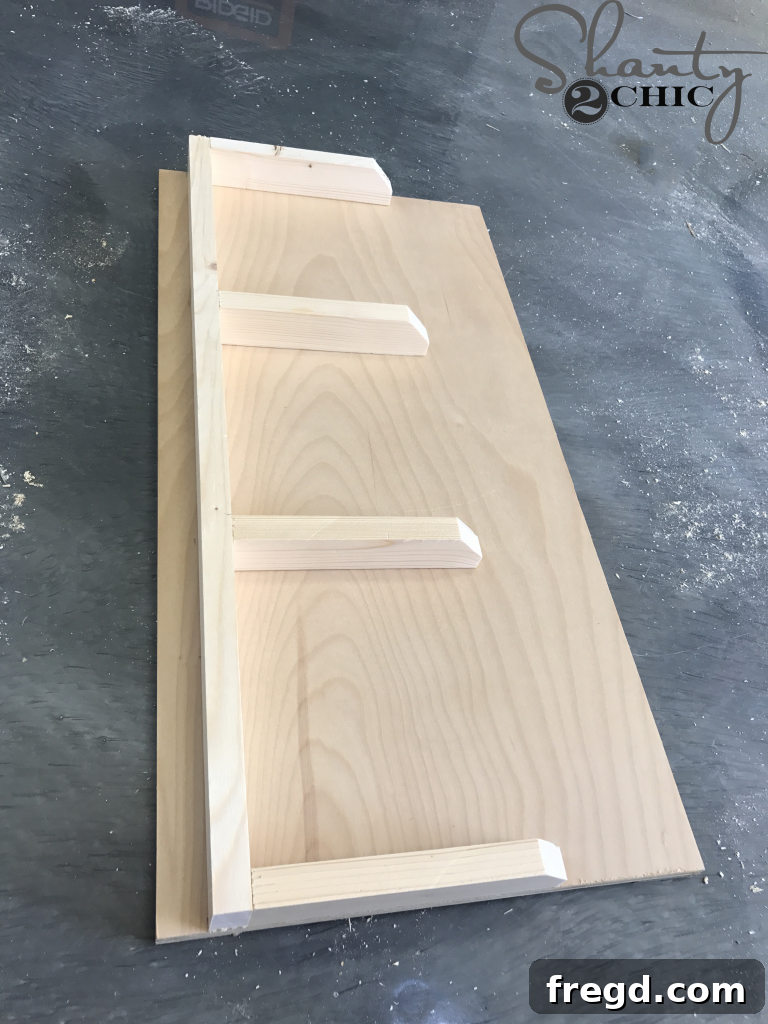
Next, carefully attach the mail divider to the mailbox tile. Position this divider precisely 1 inch up from the bottom edge of the tile. This specific measurement creates a practical and accessible slot for mail. For a robust connection, drive 1 1/4-inch brad nails through the back of the mailbox tile, ensuring they penetrate securely into both the mail dividers and the mailbox bottom. Always supplement your nail connections with wood glue for maximum strength and durability, guaranteeing that this section of your custom wall organizer will withstand daily use.
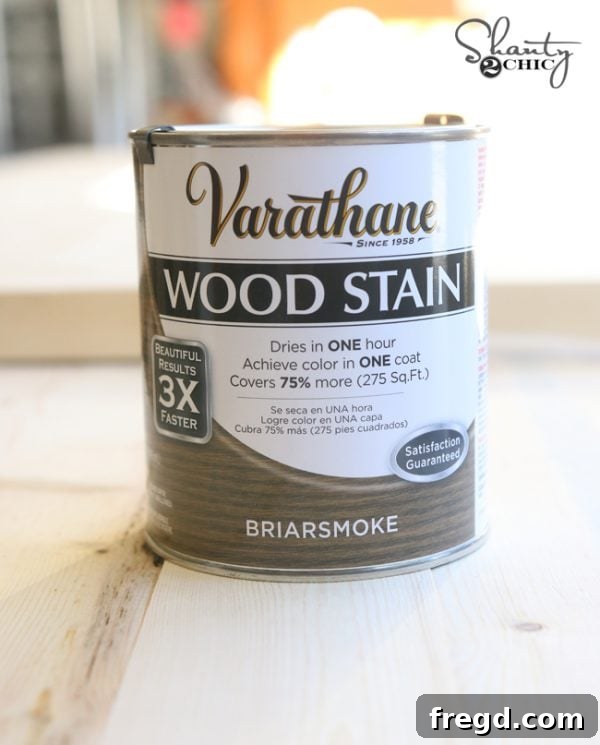
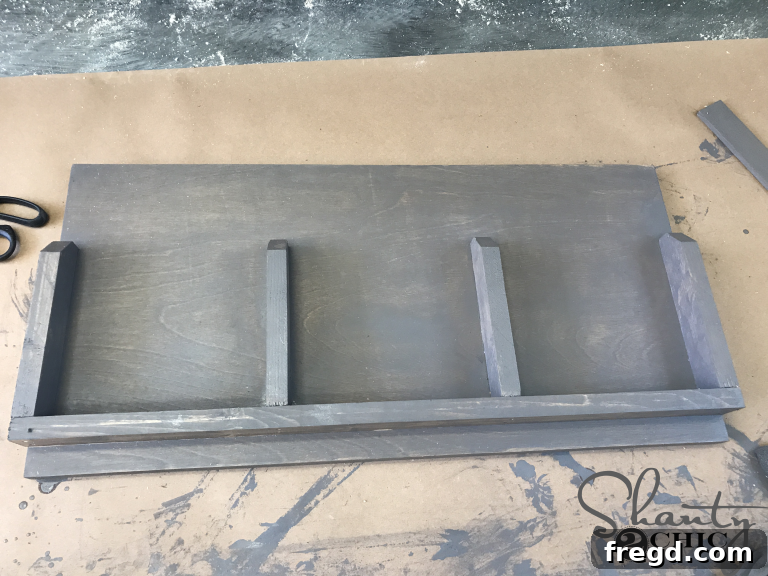
Before proceeding with the final assembly of the mail sorter, it’s highly recommended to apply your chosen finish to the individual components. This ensures even coverage and prevents difficult-to-reach areas from being left unfinished. For this project, we selected Briarsmoke stain by Varathane, which imparts a beautiful, rich depth to the wood, enhancing the overall aesthetic of your DIY wall organizer. Staining now means a smoother, cleaner finish. You can find this Varathane Briarsmoke stain HERE on Amazon, a fantastic choice for adding character to your woodworking projects.
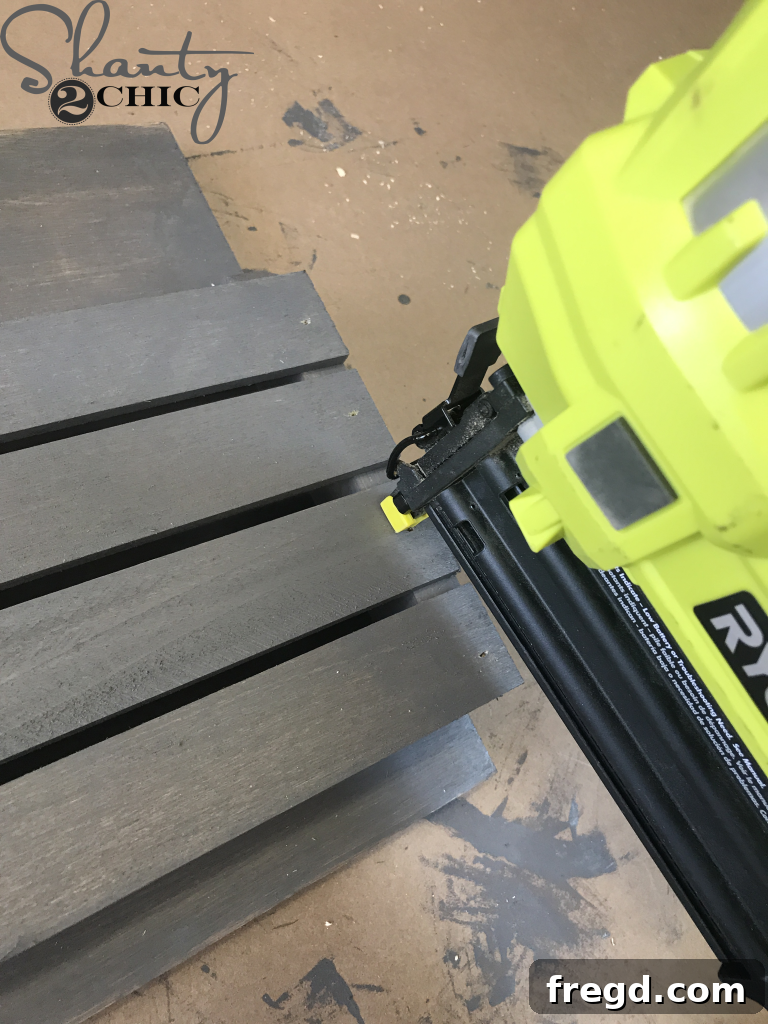
Once the stain has fully dried and cured according to the manufacturer’s instructions, you can attach the front slats to the mail dividers. Use 5/8-inch brad nails for a neat and secure fastening, combined with a strong wood glue. This final step completes the mail sorter module, making it ready to be slid into your main organizer frame. The contrast of the stained wood with the overall frame will add a refined touch to your versatile custom wall organizer.
Personalizing Your Organizer: Custom Inserts & Modules
Step 5: Creating the Dry Erase, Chalk, and Cork Boards
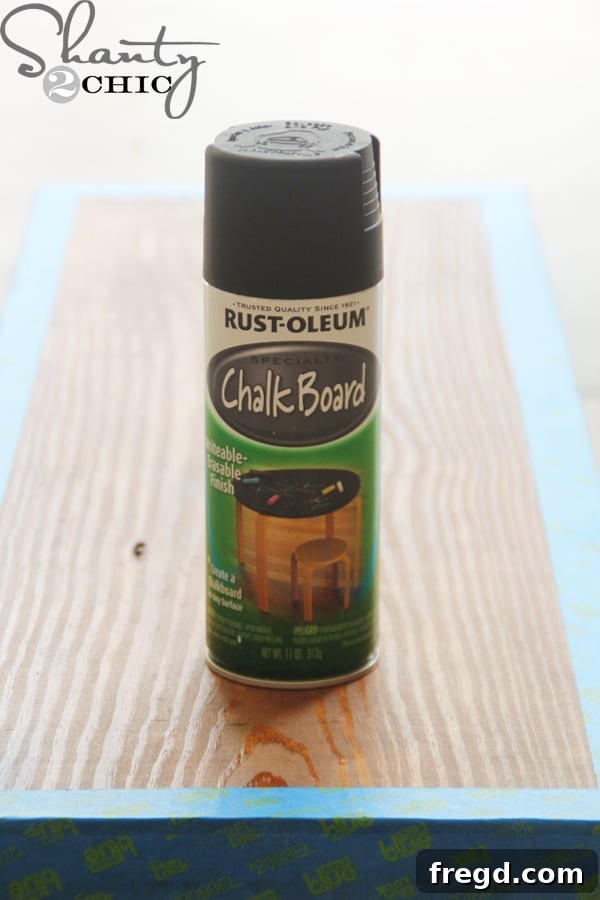
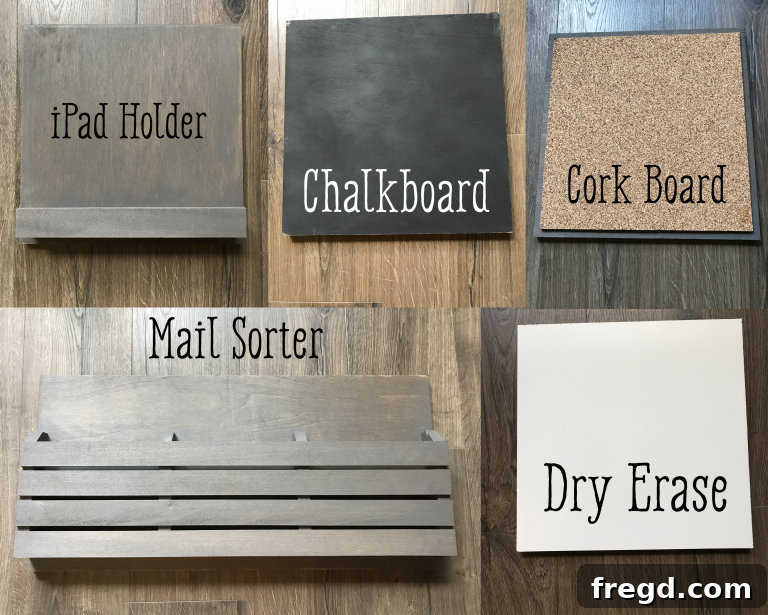
The beauty of this DIY wall organizer lies in its customizable inserts, allowing you to tailor functionality to your specific needs. To create the essential dry erase, chalkboard, and cork boards, begin by cutting three individual wood tiles to the precise dimensions outlined in the plans. These tiles will serve as the base for each unique function. For the chalkboard, liberally spray one of the wood tiles with high-quality chalkboard paint. Apply several thin, even coats, allowing adequate drying time between each, to achieve a durable and smooth writing surface. This personalized touch makes your organizer truly dynamic.
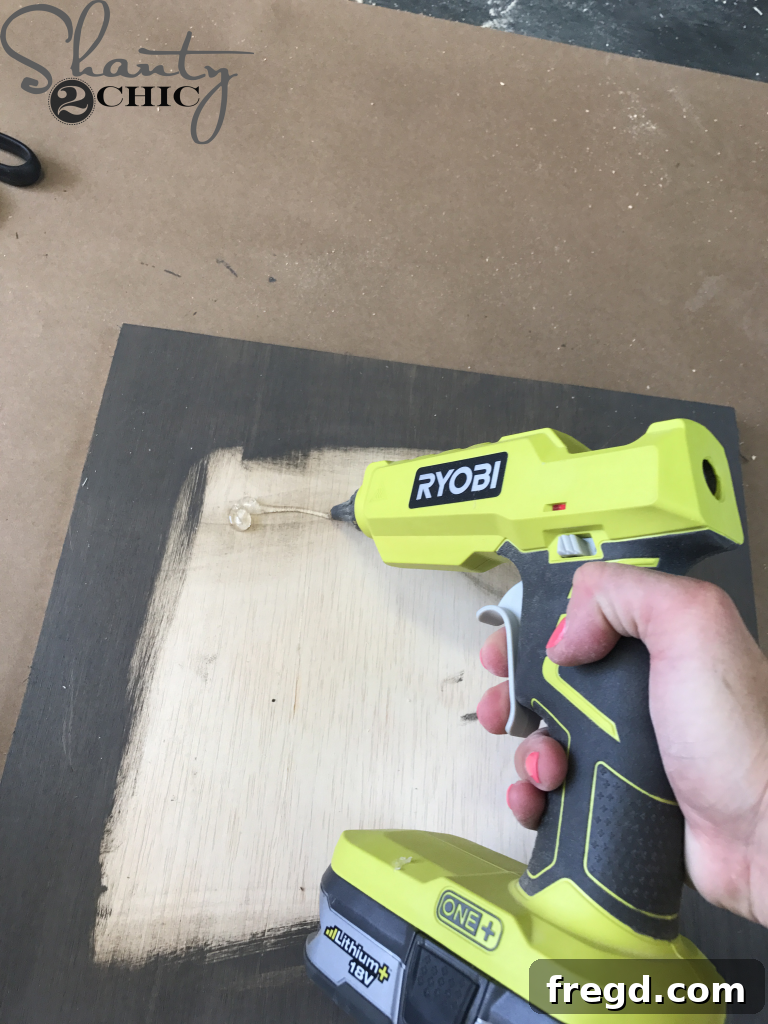
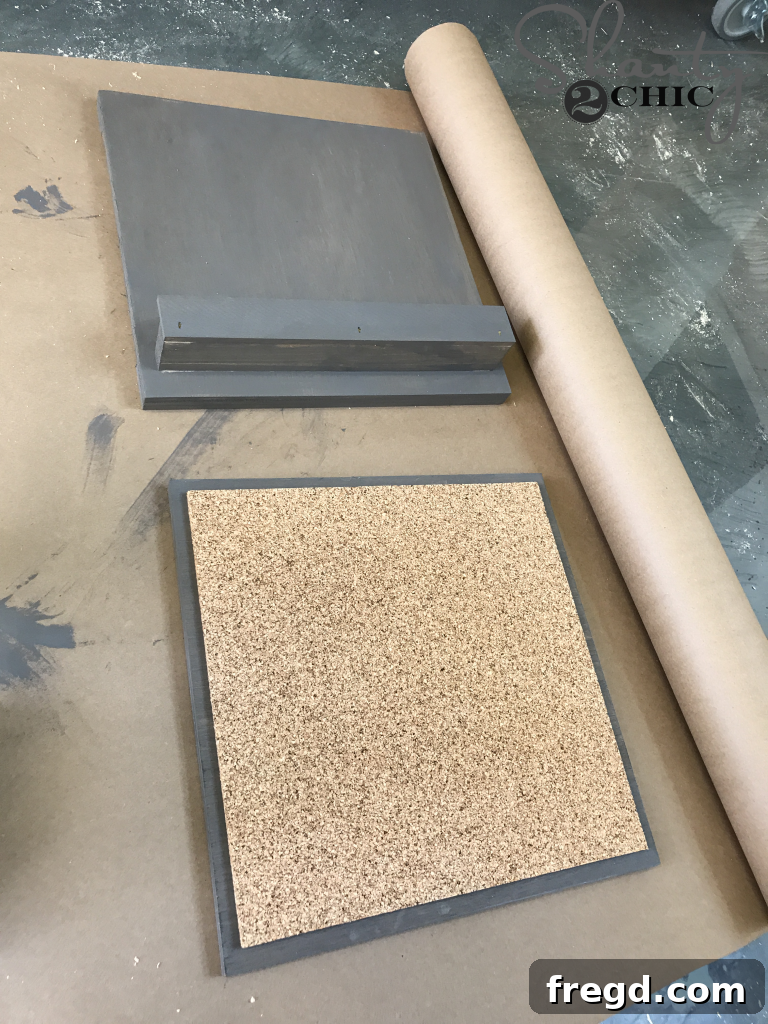
For the dry erase board, carefully cut the dry erase material to size and secure it to its designated wood tile using wood glue. Ensure a smooth, bubble-free application. For the cork board, use an 18-volt hot glue gun to firmly attach the cork tile to its respective wood base. The hot glue provides an instant and strong bond. A helpful tip: consider adding a protective finish (like a clear coat or sealant) to the cork board wood tile *before* attaching the cork. This protects the wood and gives a more polished look to the edges. These versatile boards are perfect for jotting down notes, reminders, or pinning up important documents, making your DIY wall organizer incredibly functional for any busy household. You can find the high-quality cork tile that I used HERE, ensuring a durable and attractive finish.
Step 6: Constructing the iPad Holder Insert
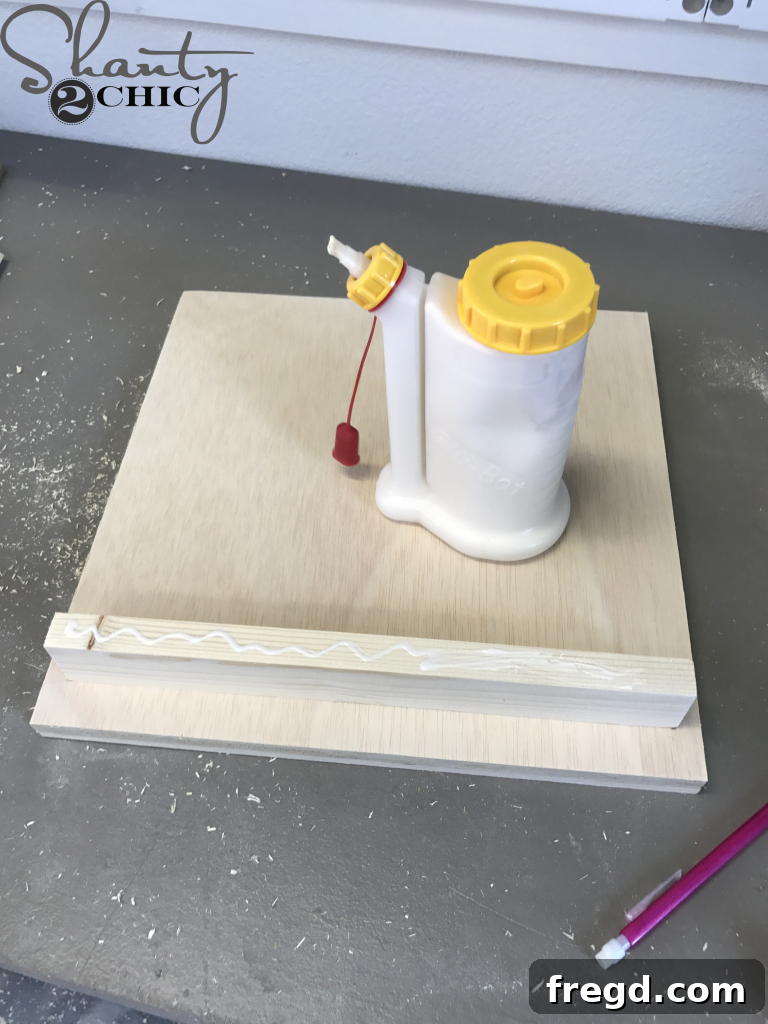
Another incredibly useful and modern addition to your custom DIY wall organizer is a dedicated iPad holder. Start by cutting the main iPad tile to its precise size. This tile will form the back support for your device. Next, cut the bottom piece of the iPad holder, which will create the ledge for the iPad to rest on. Securely attach this bottom piece to the iPad tile, positioning it exactly 1 inch from the bottom edge. Use 1 1/4-inch brad nails and wood glue, driving the nails through the back of the main iPad tile for a clean front appearance. It’s crucial to ensure there is a 1/2-inch gap on both sides of this bottom piece, allowing for easy insertion and removal of the iPad while keeping it securely cradled. This thoughtful design element ensures practicality and protects your device.
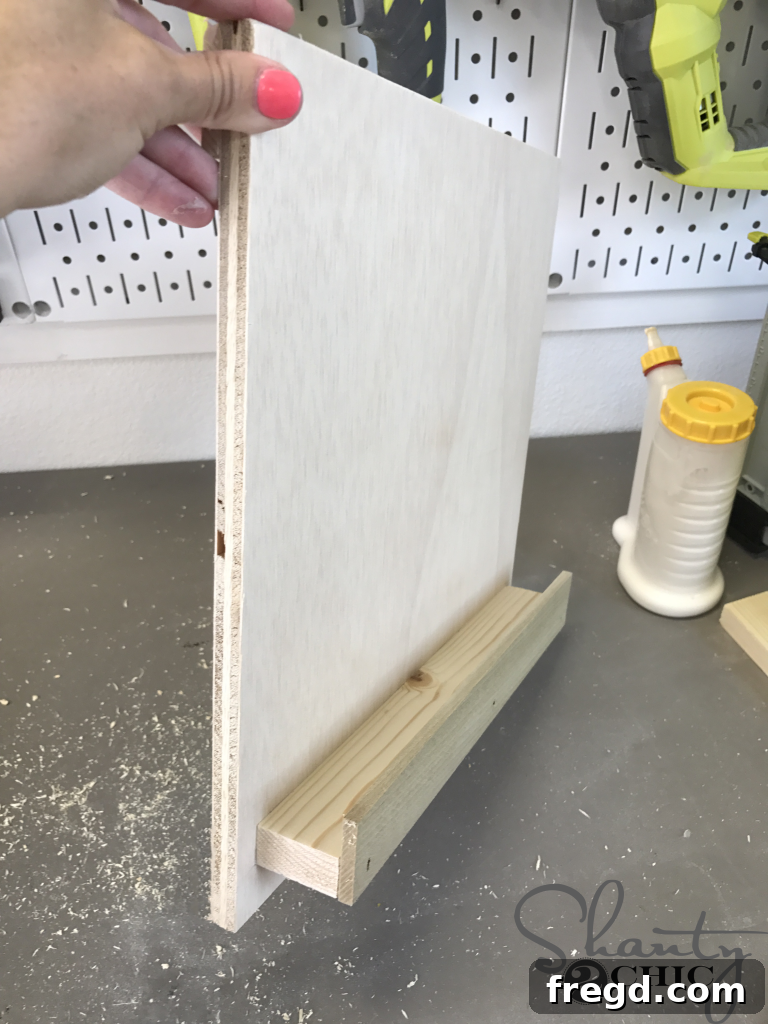
To complete the iPad holder, cut the front piece to its specified size. This piece will secure the iPad in place. Apply wood glue to the contact surfaces and then attach it firmly to the bottom piece using 5/8-inch brad nails. This creates a secure pocket, ensuring your iPad remains safely stored and easily accessible, whether you’re following a recipe, checking a schedule, or video-chatting. This specialized module elevates the functionality of your custom DIY wall organizer, making it a truly comprehensive command center for your digital life and daily tasks.
Step 7: Applying the Final Finish
Once all components—the main frame and each individual insert (mailbox, dry erase, chalk, cork, and iPad holder)—are fully assembled, it’s time for the final aesthetic touch: applying a protective and beautiful finish. This step not only enhances the appearance of your DIY wall organizer but also protects the wood from wear and tear, moisture, and stains, ensuring its longevity. You can choose a stain that matches your home decor, a clear sealant to highlight the natural wood grain, or even paint for a bold statement. Ensure you apply the finish evenly, following the product’s instructions for drying and curing times. This meticulous attention to detail will elevate your handmade organizer to a piece of functional art.
Step 8: Securely Attaching the Organizer to the Wall
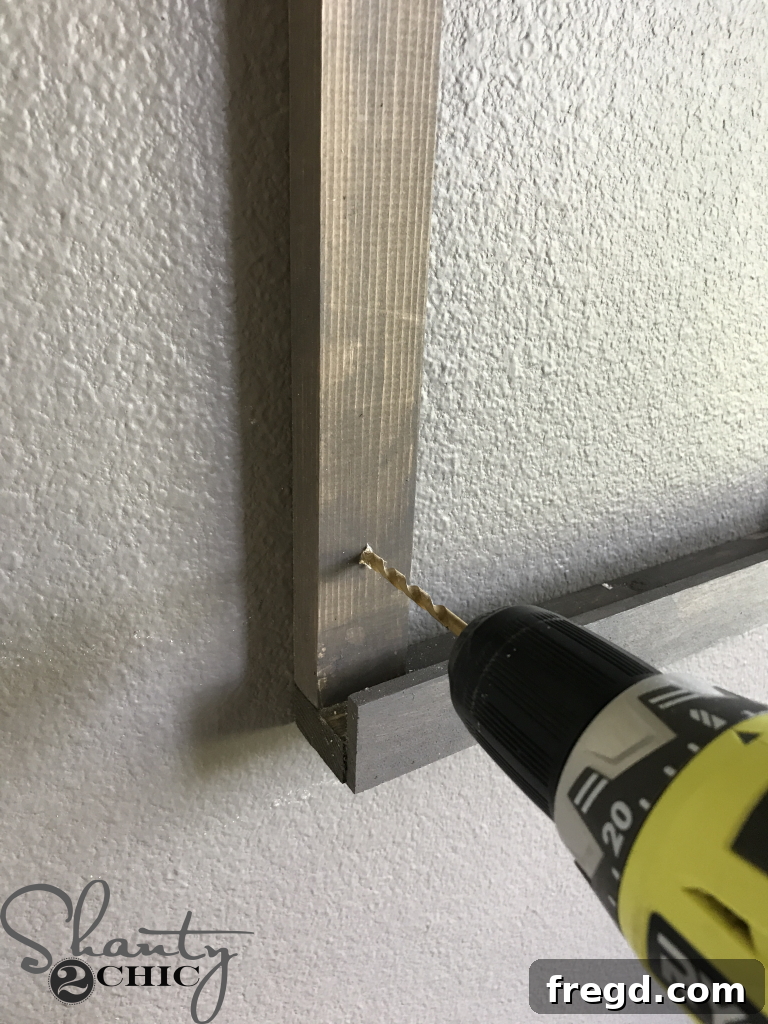
After the finish has completely dried and cured, it’s time to mount your custom DIY wall organizer. Secure installation is paramount for safety and stability. In instances where drilling into wall studs isn’t feasible, using reliable wall anchors is the perfect solution. To begin, carefully hold the assembled frame against the wall in your desired location, ensuring it’s level. Using a drill bit, predrill a pilot hole through the frame and into the wall. Repeat this process close to all four corners and once in the center of the frame, creating five strong attachment points. These predrilled holes will guide your anchors and screws for a perfectly aligned and secure installation.
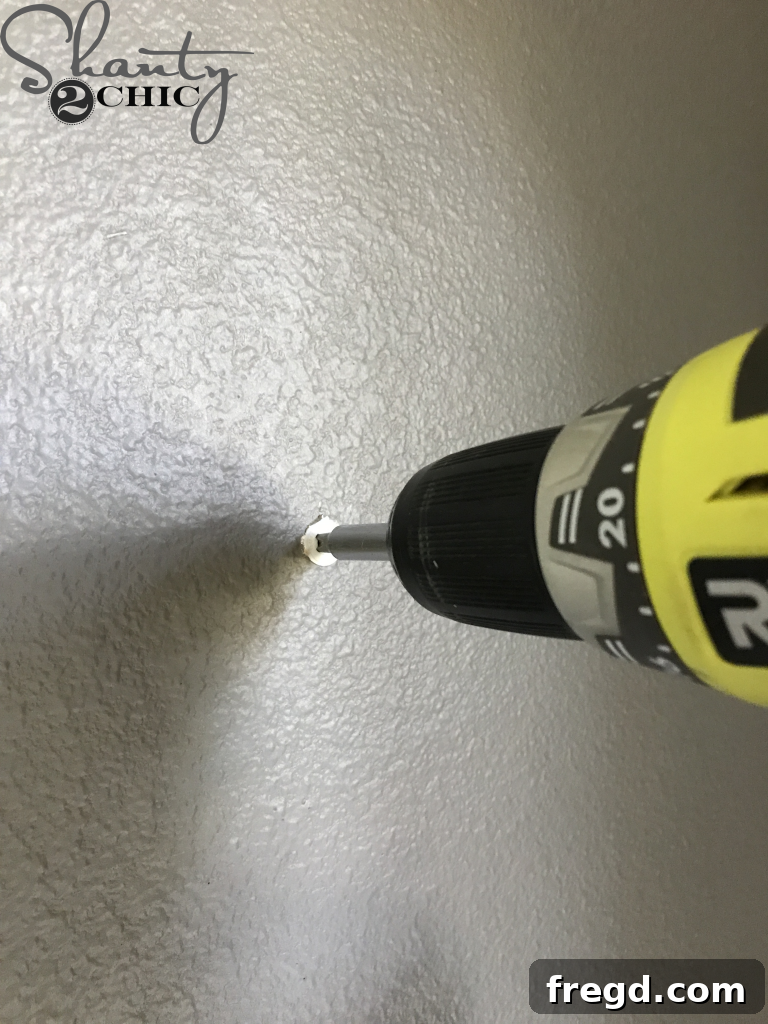
Next, for each of the five pre-drilled holes, carefully drill a wall anchor into the wall. These anchors expand within the drywall, providing a robust and load-bearing attachment point capable of holding significant weight. Choosing the right type of anchor for your wall material (drywall, plaster, etc.) is crucial for maximum security. Using high-quality anchors ensures that your heavily loaded DIY wall organizer will remain firmly in place without any wobbling or risk of falling. You can find the reliable wall anchors I use HERE on Amazon, a must-have for secure wall-mounted projects.
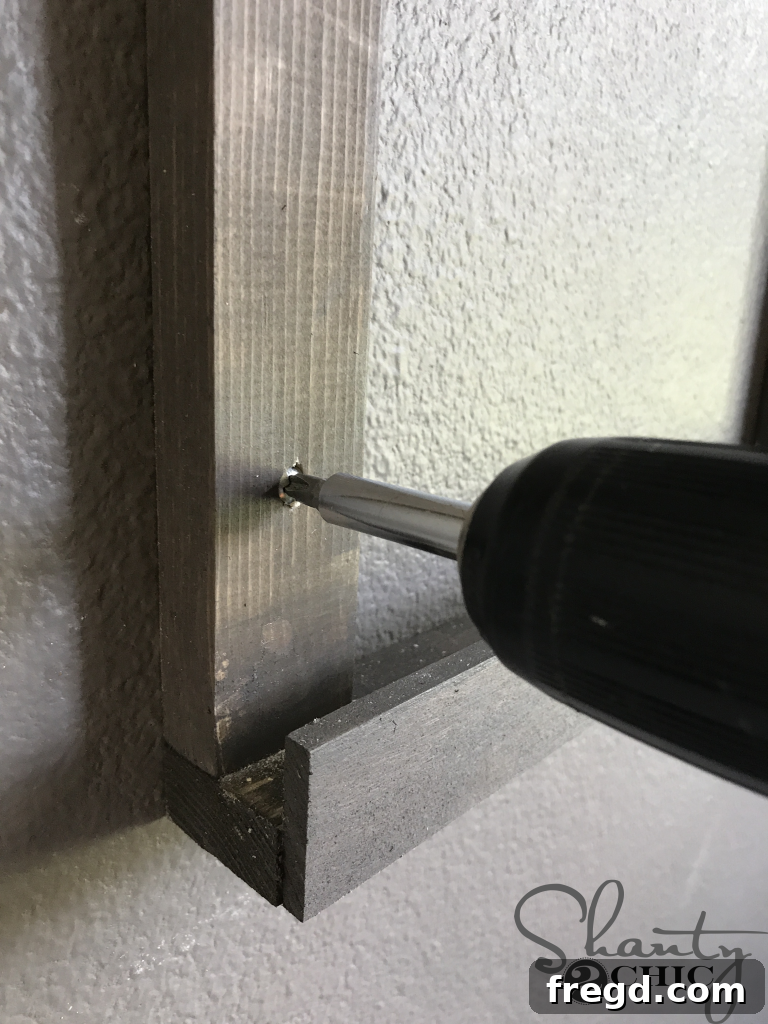
Finally, align the frame with the installed anchors. Insert a screw (typically provided with the anchors) through each pre-drilled hole in the frame and into the corresponding anchor in the wall. Tighten each screw firmly but carefully, avoiding overtightening which could strip the anchor or damage the drywall. You’ll feel the frame pull snugly against the wall, indicating a secure installation. Once all screws are in place, give the frame a gentle tug to confirm its stability. Your custom DIY wall organizer is now robustly mounted and ready for action!
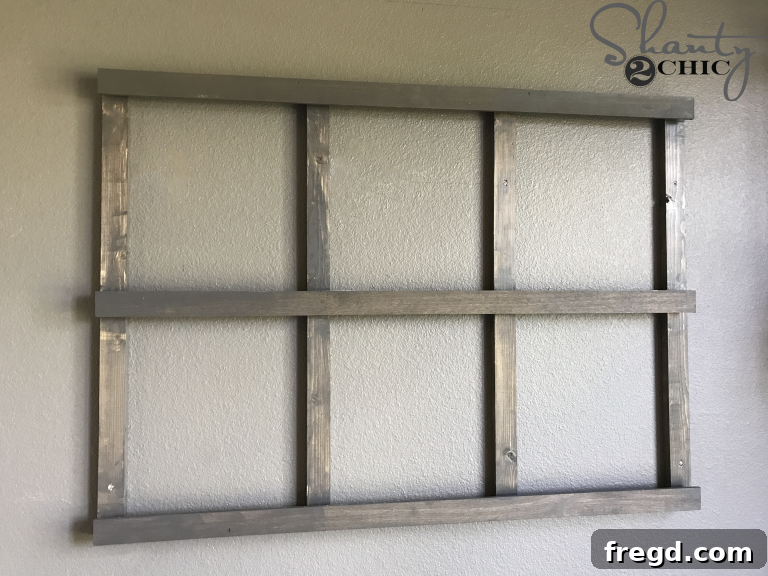
With the frame now firmly mounted on the wall, it won’t budge! This solid installation is critical for a high-traffic organization hub, ensuring it can withstand the rigors of daily family life without any concerns about stability. Your custom DIY wall organizer is now ready for its personalized components, bringing unparalleled order to your home.
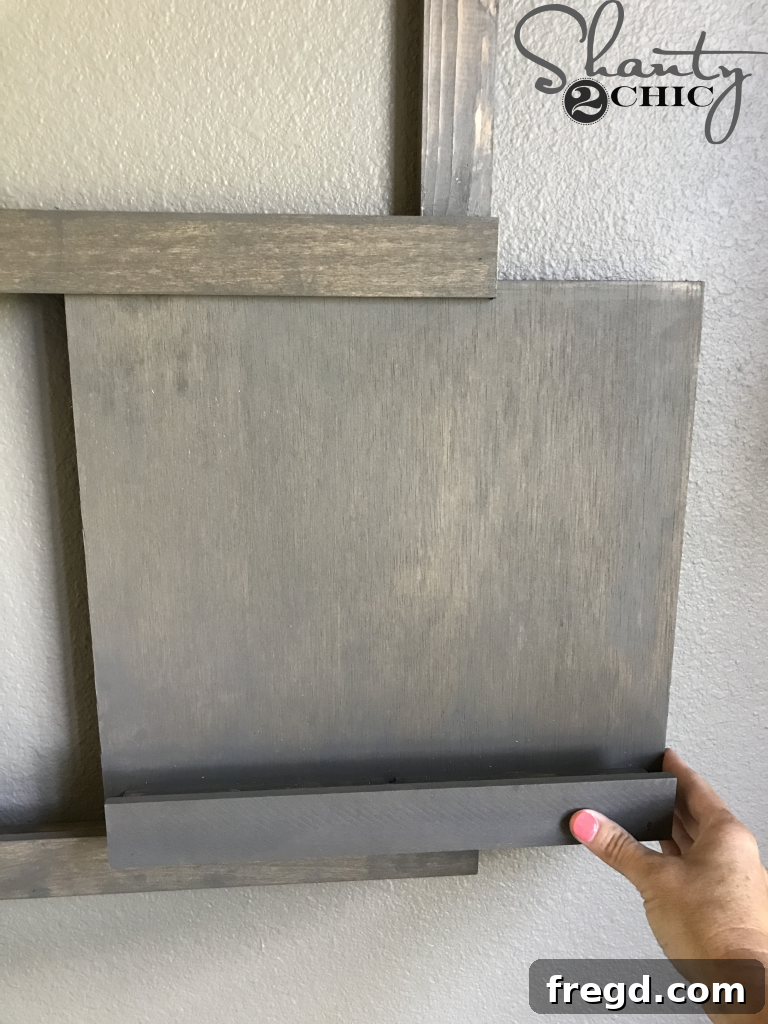
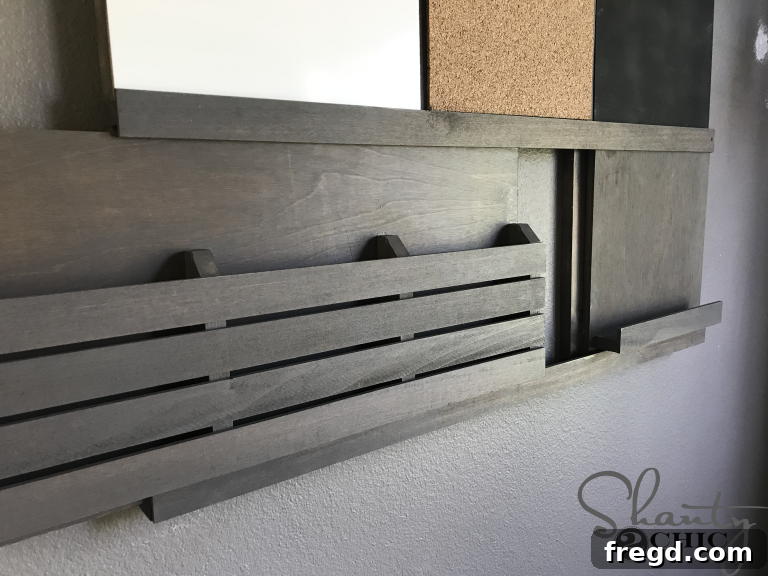
Step 9: Arranging and Finalizing Your Custom Organizer
With the main frame securely installed, the most exciting part begins: sliding in your custom components! Thanks to the modular design, you can arrange your mailbox, dry erase board, chalkboard, cork board, and iPad holder in any order that best suits your family’s needs and workflow. This effortless customization means you can reconfigure your DIY wall organizer whenever your organizational demands change, truly making it a dynamic and adaptable solution. Experiment with different layouts to find the perfect setup for your daily routine.
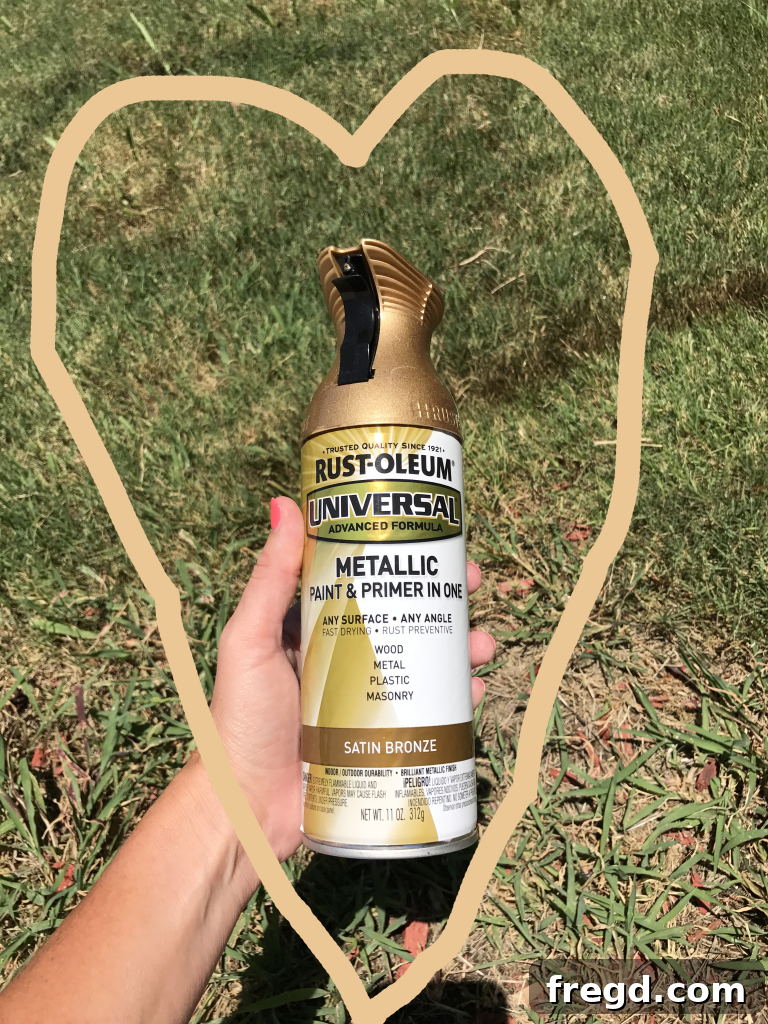
To add a touch of elegance and clear labeling to your mail sorter, prepare your label holders. For a stylish finish that complements the overall aesthetic, spray paint the label holders with Satin Bronze by Rust-Oleum. This metallic finish adds a sophisticated accent and helps to clearly distinguish between compartments, further enhancing the functionality of your custom DIY wall organizer. Allow ample drying time for the paint before handling.
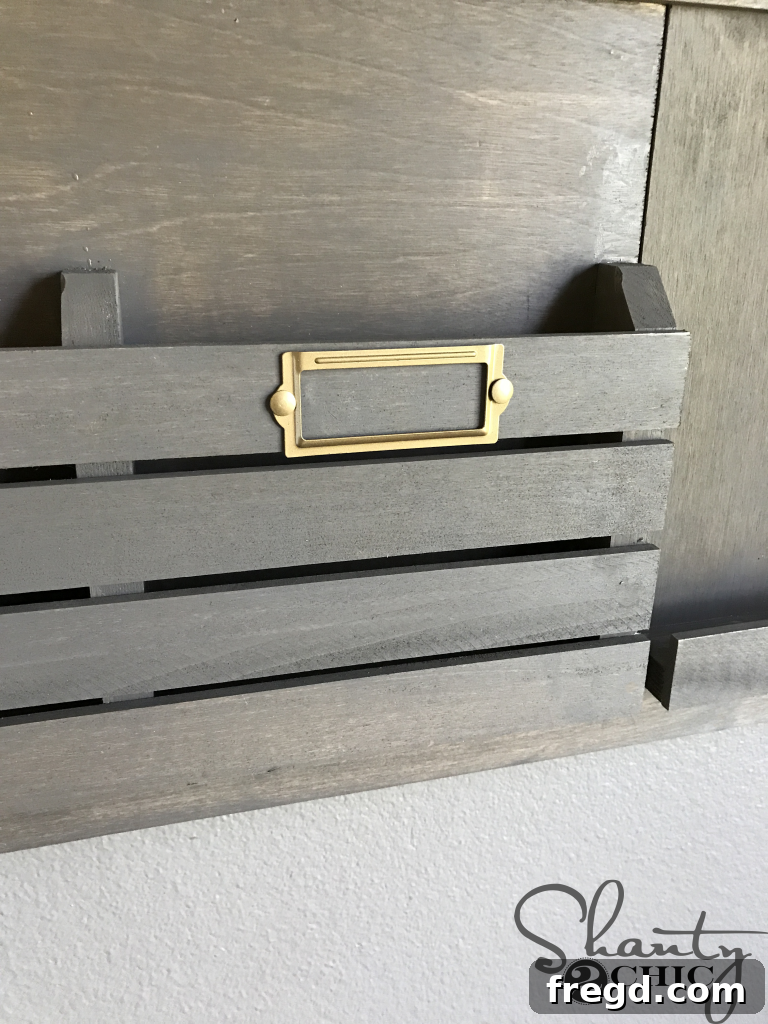
Finally, once the spray paint on the label holders is completely dry, firmly attach them to the front of your mail sorter compartments. This last detail brings your custom DIY wall organizer to full completion, making it not just organized but also aesthetically pleasing and highly efficient. The labels will help categorize incoming and outgoing mail, school forms, or bills, ensuring nothing gets lost in the shuffle. You can find these practical and stylish label holders HERE on Amazon, a small but impactful addition to your home organization system.
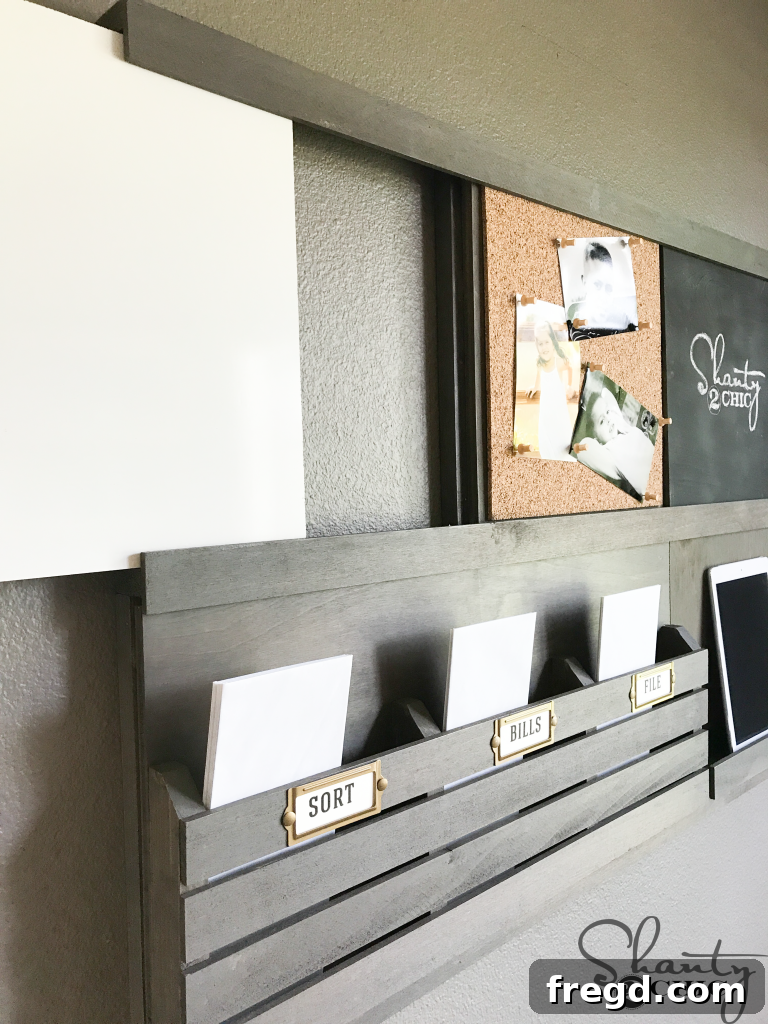
With the custom DIY wall organizer now complete and functional, I feel a renewed sense of readiness for the demanding school year ahead! Fingers crossed that this versatile organizational powerhouse truly delivers the structured efficiency that my family and I so desperately need during this busy time of year. It’s more than just a piece of furniture; it’s a strategic tool designed to bring calm to the chaos, ensuring every note, form, and appointment has its place. Here’s to a brilliantly organized year!
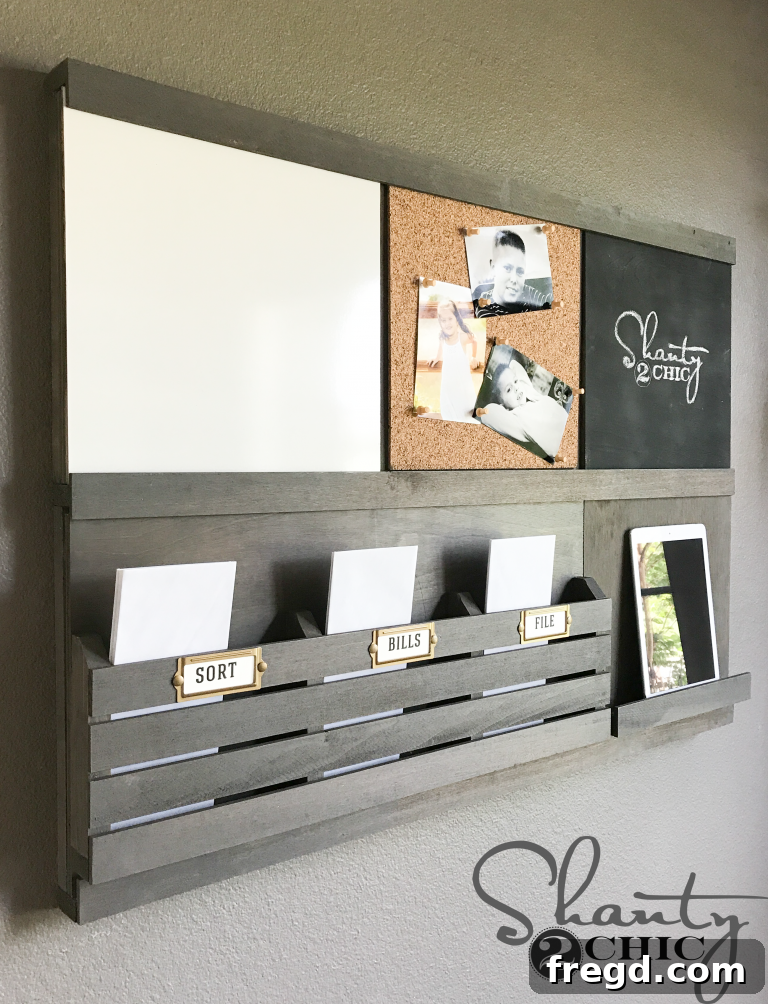
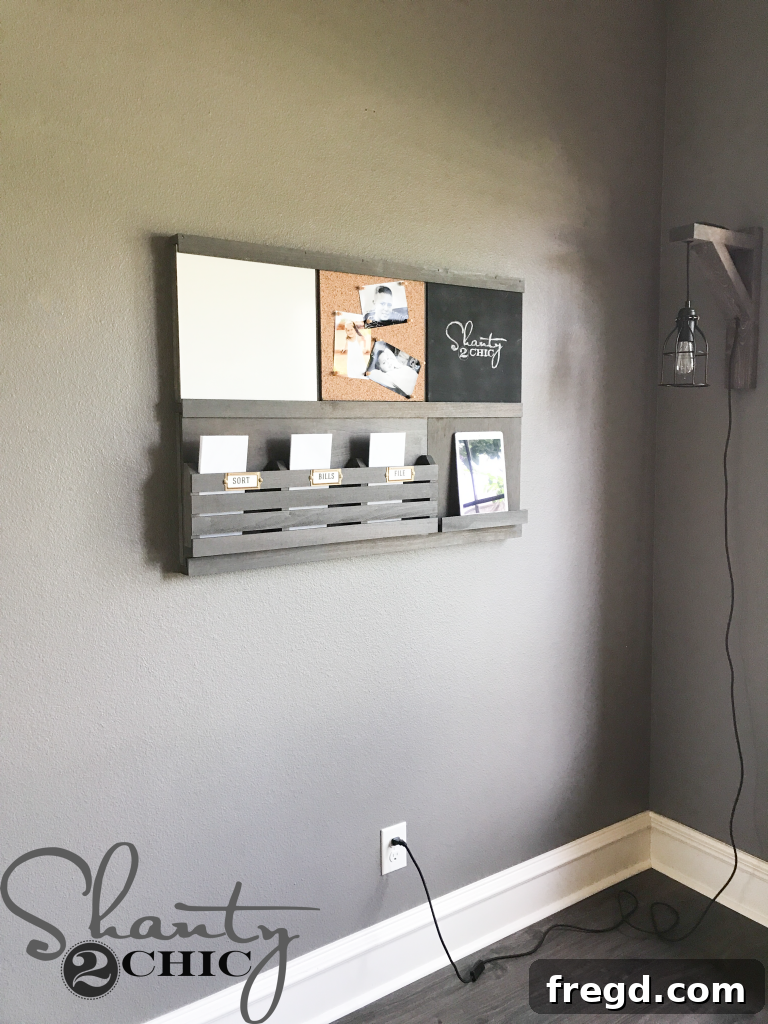
While this custom DIY wall organizer already offers incredible storage and functionality, I have even more exciting plans for optimizing this space in the future! However, I wanted to provide you with a clear idea of the impressive scale and storage capacity of this completed piece. It truly offers ample room for everything from daily mail and school papers to digital devices and quick notes, making it an indispensable hub for any household. The potential for further customization is endless, ensuring it remains perfectly suited to your evolving needs.
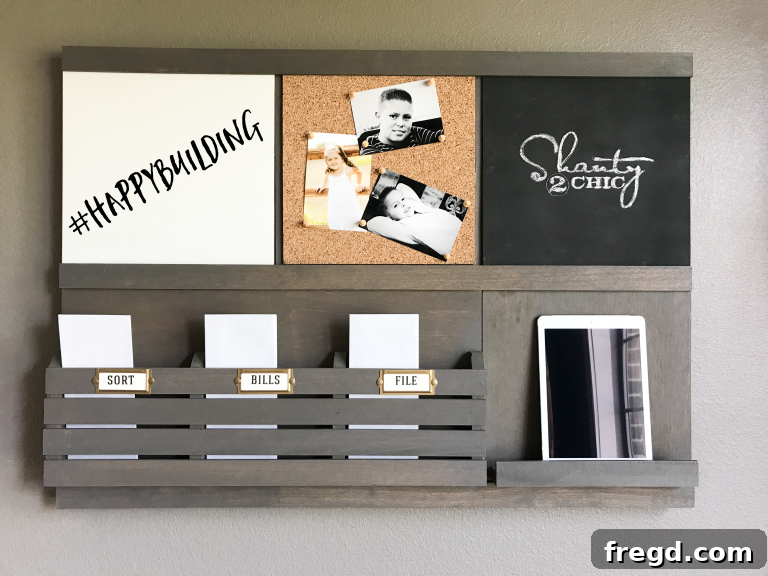
We absolutely love seeing your creative woodworking projects! If you decide to build your own version of this custom DIY wall organizer or any other project inspired by our designs, please make sure to share your builds with us. Use the hashtag #shanty2chic on social media so we can discover and celebrate your fantastic creations with our community! Happy Building – and happy organizing!