
Master the Art of Outdoor Comfort: Build Your Own DIY Lounge Chair
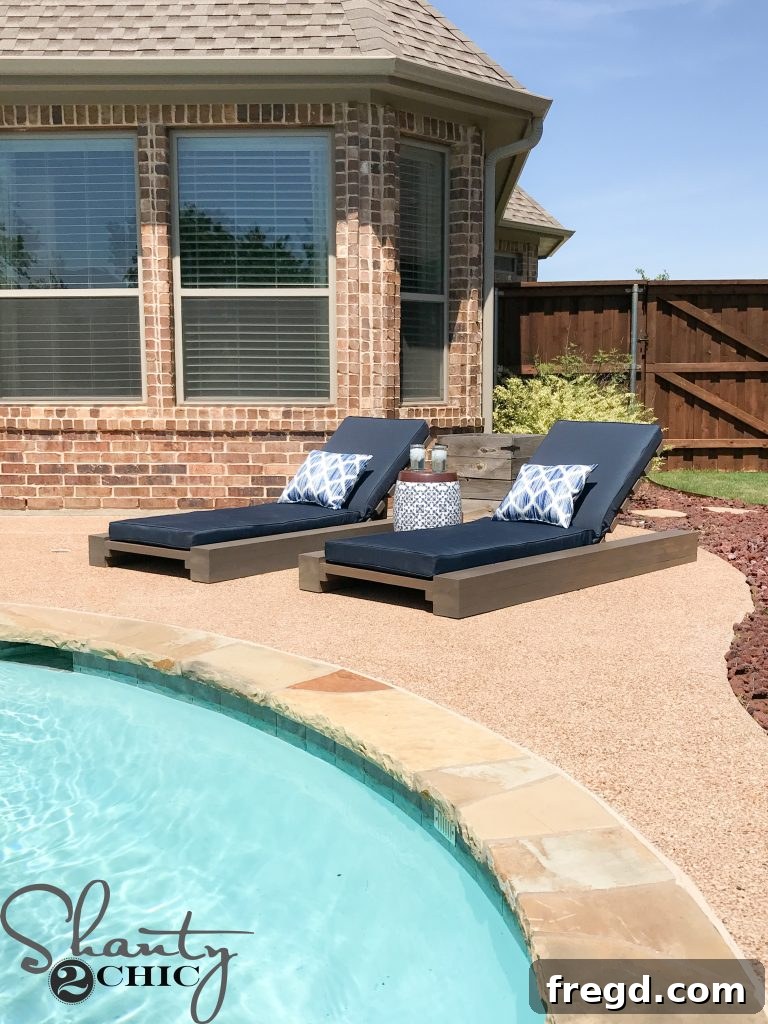
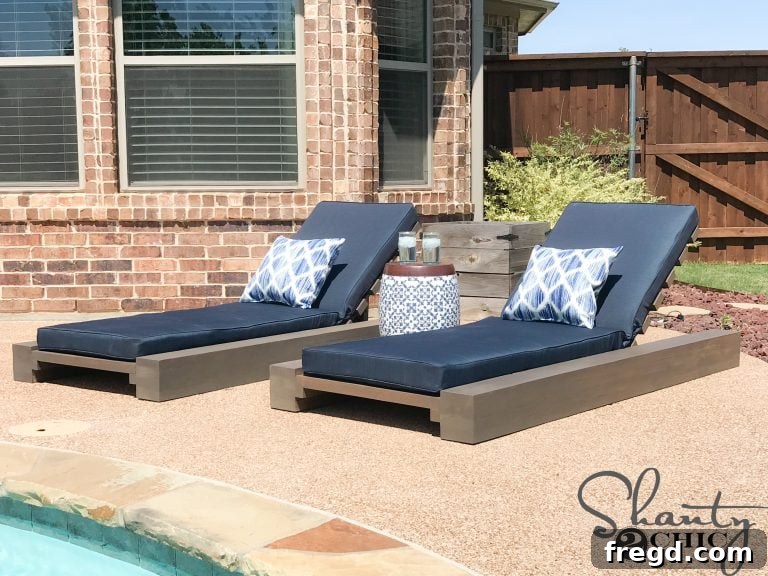
As the Texas heat descends and summer break officially kicks off, my thoughts, like many, drift towards long, lazy days spent outdoors. All winter, I dreamt of a robust set of DIY outdoor lounge chairs to elevate our back patio’s comfort and style. The existing chairs, while functional, just didn’t capture the vision I had. So, I decided it was time for an upgrade – a custom-designed set that promises both durability and aesthetic appeal. And the best part? These beauties were built for an astonishingly low cost, using only about $85 worth of lumber! That’s right, premium outdoor relaxation doesn’t have to break the bank.
The satisfaction of crafting something with your own hands is truly unparalleled, and these lounge chairs are a testament to that. They not only look fantastic but also offer the perfect spot to unwind and soak up the sun. The chunky, substantial design provides a luxurious feel without the hefty price tag of store-bought alternatives. Ready to transform your outdoor living space?
Join us on our journey to build these incredible DIY outdoor lounge chairs! We’ve put together a comprehensive how-to video on our YouTube Channel that walks you through every single step. Just click HERE or use the link below to watch the transformation unfold before your eyes.
Building your own furniture is not only fun and rewarding but also incredibly straightforward with the right guidance. To ensure your project is a complete success, don’t forget to download the FREE printable plans HERE. These detailed plans, combined with the video and the step-by-step photos below, will make your DIY experience smooth and enjoyable.
Finding the perfect cushions can often be the most challenging part of any outdoor furniture project. After extensively searching the internet for affordable, high-quality outdoor cushions, I discovered an excellent option from Target. I specifically designed these lounge chairs around the dimensions of these comfortable cushions, ensuring a perfect fit and maximum comfort. You can find the exact cushions I used HERE to replicate the look and feel of our chairs.
Now, let’s gather our tools, roll up our sleeves, and get ready to build the ultimate DIY outdoor lounge chair!
Essential Materials and Tools for Your DIY Lounge Chair
Before diving into construction, gather all your materials and tools. Having everything ready will streamline your building process and make the experience much more enjoyable.
Materials List:
- Lumber:
- 2×6 boards (for the main frame)
- 2×4 boards (for back supports and slats)
- 1×4 boards (for back guide)
- 1×2 boards (for back guide)
- Optional: 2×2 boards (or rip from 2x4s) for cleats
- Hardware:
- 2 1/2″ exterior deck screws (or exterior wood screws)
- 1 1/4″ exterior deck screws
- Wood glue (exterior grade is recommended for durability)
- Piano hinge (approximately 30-inch length, check plans for exact size)
- Utility hinges (for adjustable backrest arm)
- Finishing:
- Wood stain (e.g., Varathane Briarsmoke)
- Outdoor protectant/spar varnish (e.g., Rustoleum Spar Varnish)
- Cushions:
- Outdoor lounge chair cushions (dimensions based on your design, like the Target cushions mentioned)
Tools List:
- Miter saw (for precise cuts)
- Table saw or circular saw with a guide (if ripping your own boards or edges)
- Orbital sander (with various grits for smooth finish)
- Drill/driver (for screws)
- Nail gun (e.g., Ryobi 18-Volt Airstrike Nailer, for smaller attachments)
- Measuring tape
- Pencil
- Safety glasses
- Hearing protection
- Clamps (optional, but highly recommended for stability during glue-up)
Once you have all your supplies, you’re ready to begin constructing your sturdy and stylish outdoor lounge chair!
How to Build a DIY Outdoor Lounge Chair
This guide will walk you through the process of building a durable and comfortable DIY outdoor lounge chair. We’ll start with the main structure and gradually add the features that make it truly exceptional.
Building the Sides of The DIY Lounger
Step 1: Ripping the Round Edges Off of the Boards for a Seamless Look
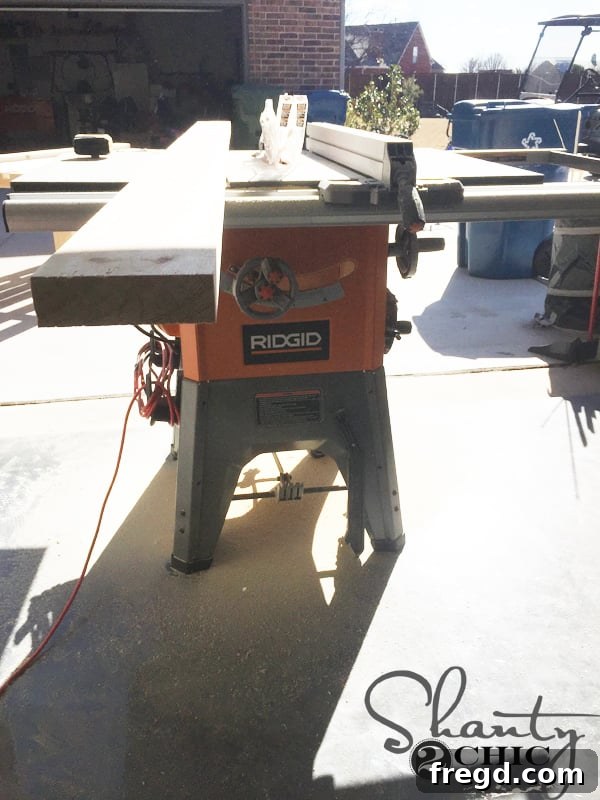
To begin constructing the robust side panels of your lounge chair, I highly recommend a technique that will elevate the professional appearance of your finished project: ripping the round edges off of every 2x board. While this step isn’t strictly necessary for the chair’s structural integrity, it makes a significant difference in the final aesthetic. By removing these rounded edges, you create smooth, straight surfaces that allow the stacked 2×6 boards to seamlessly join together, creating the illusion of one solid, giant beam rather than individual planks. This small detail enhances the custom, high-quality look of your DIY outdoor lounge chair. Additionally, to save on lumber costs, as noted in the free plans, I opted to rip my own 2x2s from larger 2×4 boards, which reduced material expenses by approximately $15 per chair.
Step 2: Precisely Cutting the Boards to Size
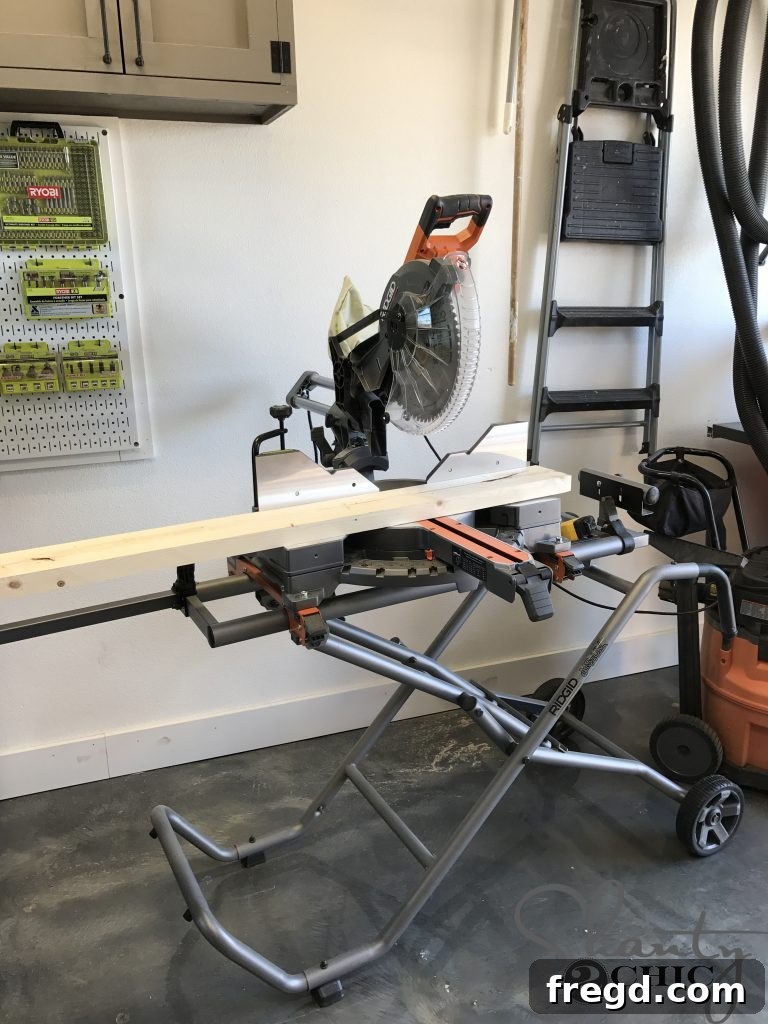
Once all the boards had their rounded edges expertly ripped off, the next crucial step was to cut them to their precise lengths. Accuracy in this stage is paramount for a perfectly aligned and sturdy chair. I utilized my miter saw for every single cut, which allowed for consistent angles and dimensions. Always double-check your measurements against the provided free plans before making any cuts. This attention to detail will prevent costly mistakes and ensure all components fit together flawlessly, forming the foundation of your comfortable DIY outdoor lounge chair.
Step 3: Achieving a Smooth Surface Through Sanding
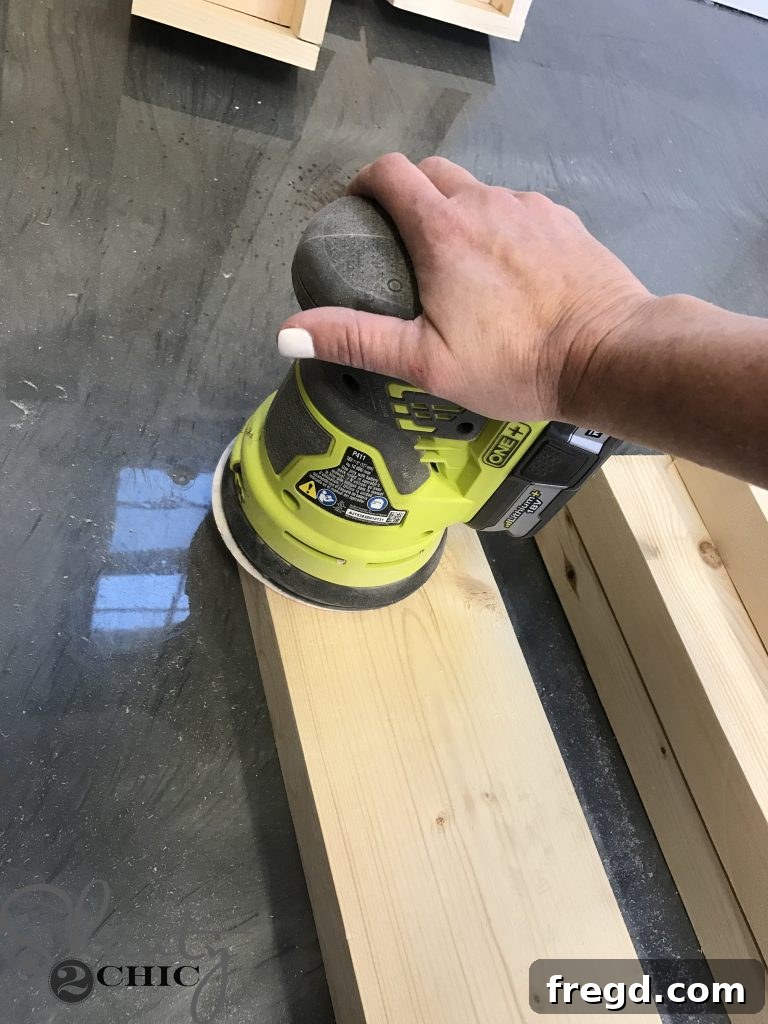
With all the boards cut to their exact dimensions, the next step is to prepare them for assembly and finishing. This involves thoroughly sanding the face of every 2×6 board. Sanding is more than just a cosmetic step; it removes any remaining rough spots, splinters, and mill marks, creating a smooth and pleasant surface. This not only makes the chair more comfortable to touch but also ensures that stain or paint will be absorbed evenly, resulting in a professional and beautiful finish. I recommend starting with a coarser grit sandpaper (e.g., 80 or 100) to remove imperfections, then progressing to a finer grit (e.g., 150 or 220) for a silky-smooth feel. A well-sanded surface is key to the overall quality of your DIY outdoor lounge chair.
Step 4: Securely Combining the 2×6 Boards for the Side Panels
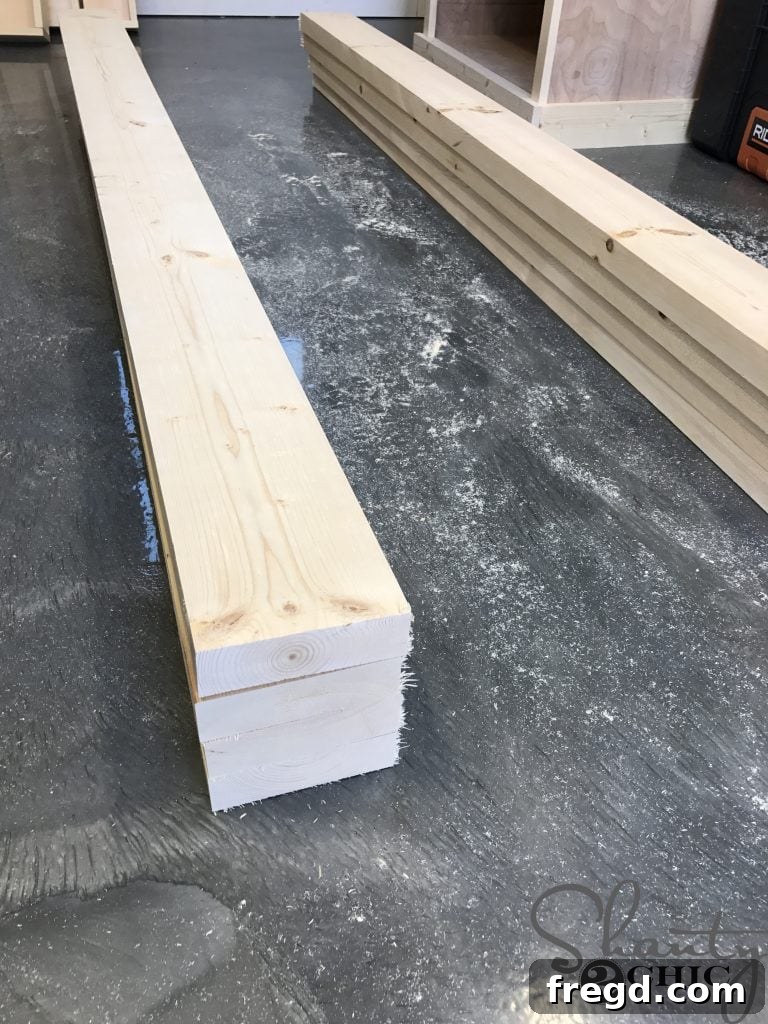
Now, it’s time to assemble the robust side panels of your outdoor lounge chair. I stacked the 2×6 boards four high, creating a substantial and sturdy side frame. Ensuring perfect alignment at this stage is crucial for a clean, professional look. Use clamps to hold the boards together if possible, which will greatly assist in maintaining alignment during the next steps.
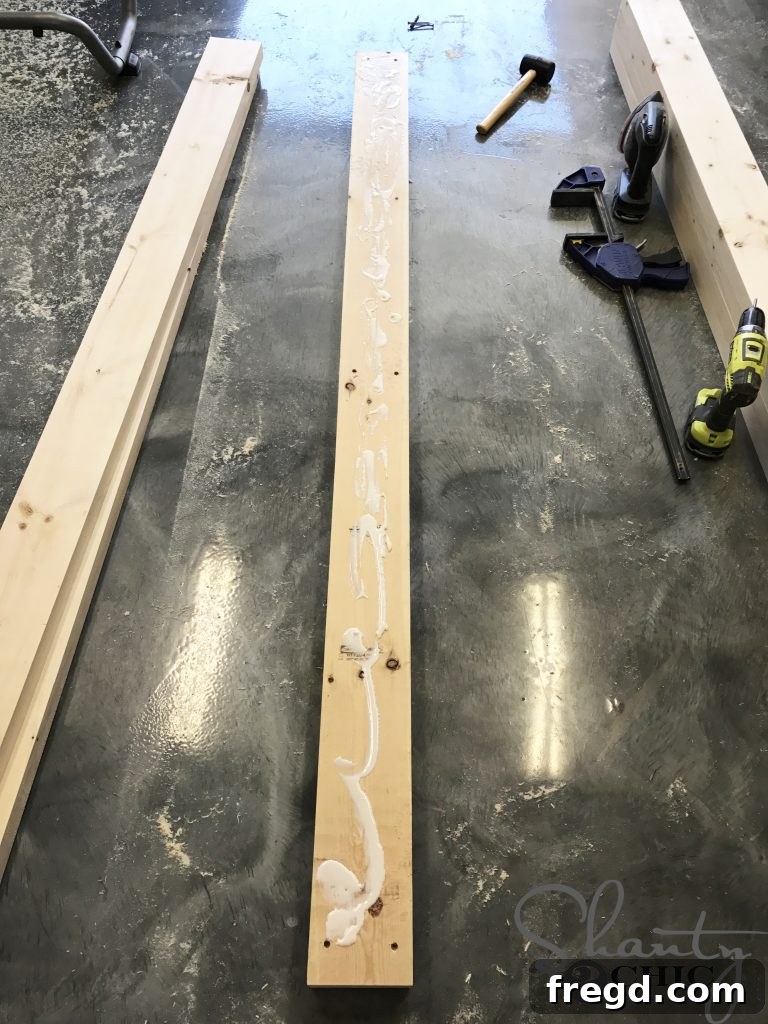
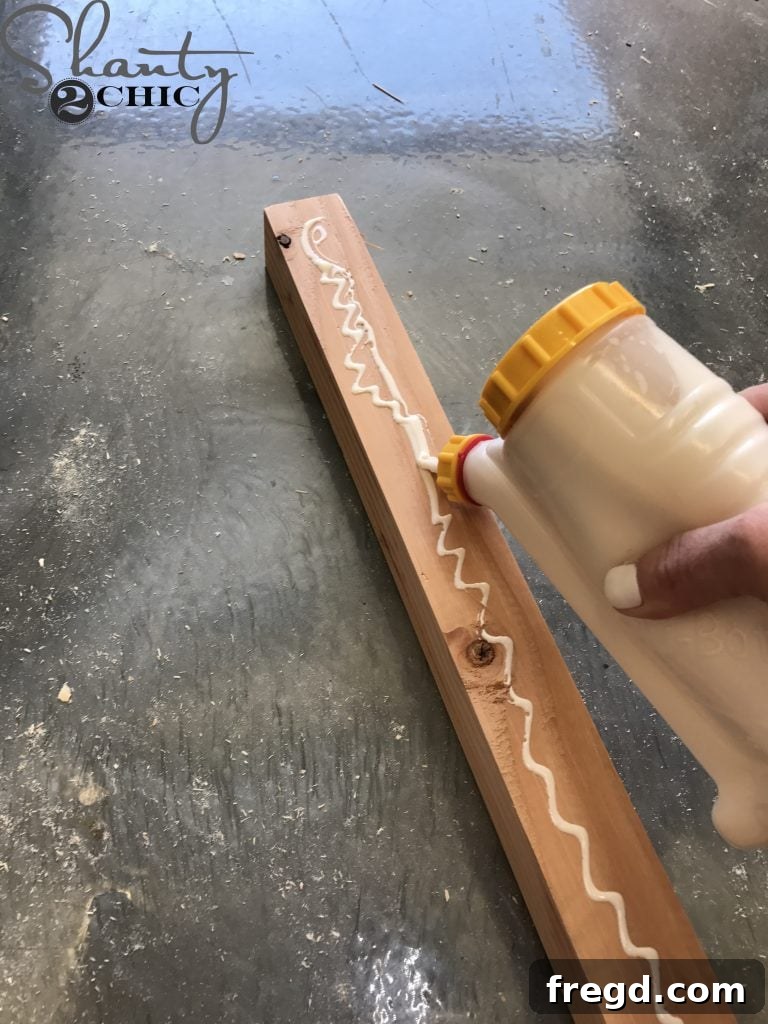
To firmly attach the 2×6 boards, start with the top piece. Flip this board upside down and apply a generous, continuous bead of exterior-grade wood glue along its entire length. Wood glue is incredibly important for outdoor furniture as it creates a bond stronger than screws alone, preventing warping and enhancing durability against the elements. Spread the glue evenly to ensure maximum surface contact when joining the pieces.
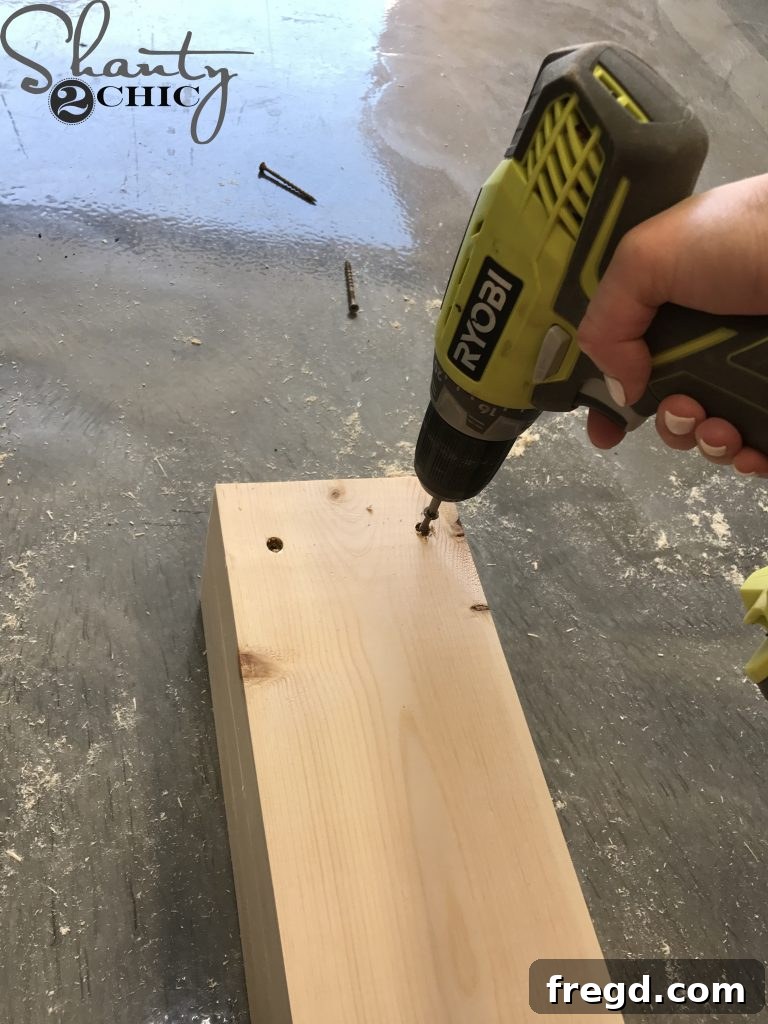
Next, carefully place the second board, also upside down, directly on top of the glued surface of the first board. Ensure the edges are perfectly flush. Then, secure this board to the top piece using 2 1/2-inch exterior deck screws (or other suitable exterior wood screws). I spaced about 10 screws evenly down the length of the board, providing ample reinforcement. The beauty of assembling it upside down is that all the screw holes will be completely hidden once the side panel is flipped over, giving your DIY outdoor lounge chair a clean, professional finish with no visible fasteners.
Step 5: Attaching the Cleats for Seat Support
Once both of your robust side panels for the DIY outdoor lounge chair are fully assembled and the glue has had a moment to set, the next critical step is to attach the cleats. These cleats will serve as essential support for the bottom seat slats, providing the structural foundation for comfortable lounging.
I began by applying a generous amount of wood glue to each 2×2 cleat. For this task, I absolutely love using our Glue Bot, which you can find HERE on Amazon. It’s truly a game-changer! No more frustrating clogs, and you can apply glue effortlessly with the bottle upright, ensuring a consistent and mess-free application. This tool has quickly become one of our new favorites for its efficiency and ease of use.
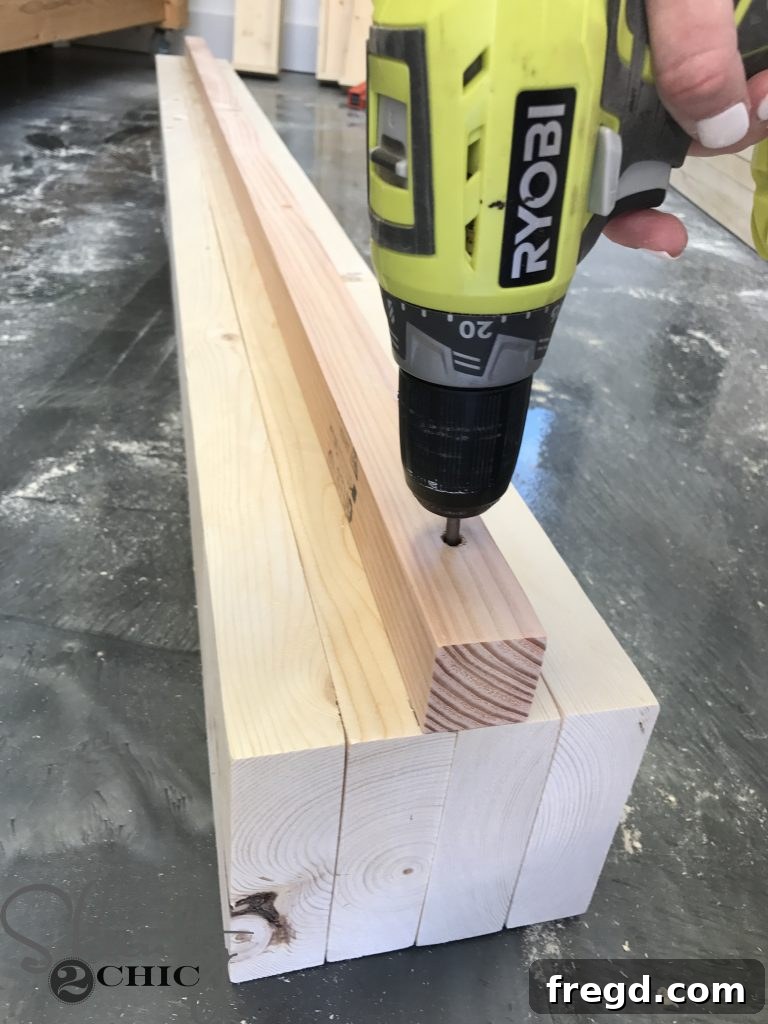
With the glue applied, I carefully positioned each cleat to the inside of each 2×6 side panel. Refer to your free plans for the precise placement, as proper positioning is vital for the seat’s stability and correct height. I then secured the cleats firmly in place with 2 1/2-inch exterior deck screws, using approximately five screws spaced evenly down the entire length of each cleat. This combination of wood glue and screws creates an exceptionally strong bond, ensuring that your seat will be well-supported for years of outdoor enjoyment.
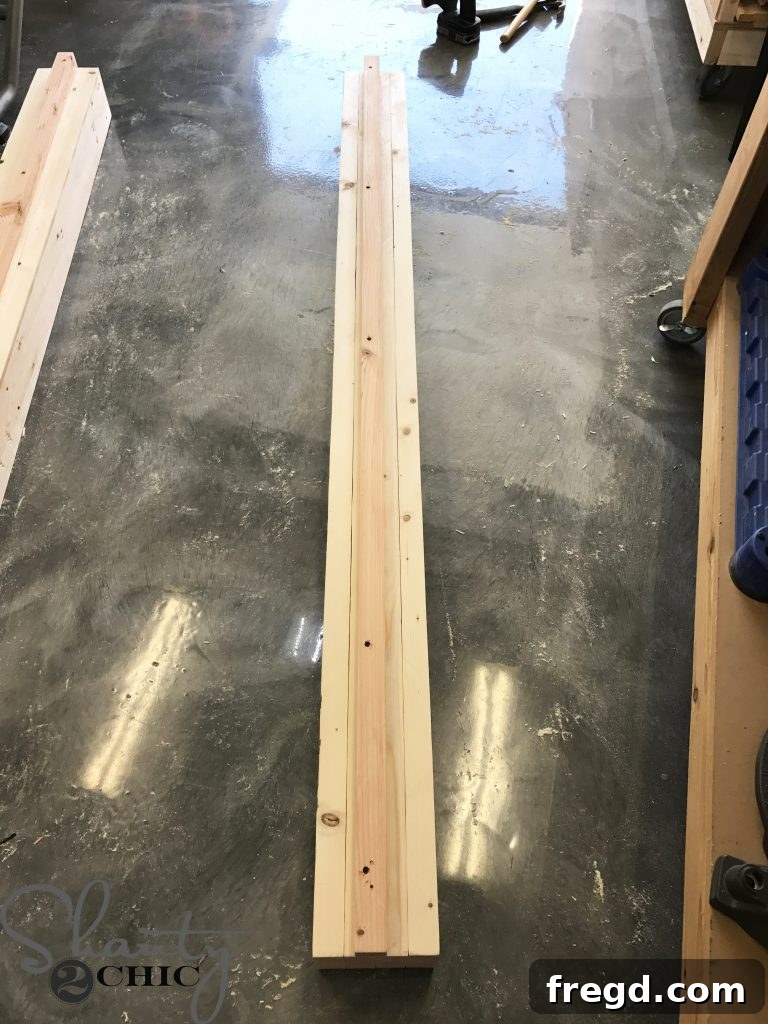
Above, you can see one of the completed side panels with its cleat securely attached, ready to form the robust base of your DIY outdoor lounge chair.
Back Assembly
The backrest is a crucial component for comfort and adjustability in your DIY outdoor lounge chair. This section focuses on assembling its key elements.
Step 6: Creating the Arm Guide for the Adjustable Backrest
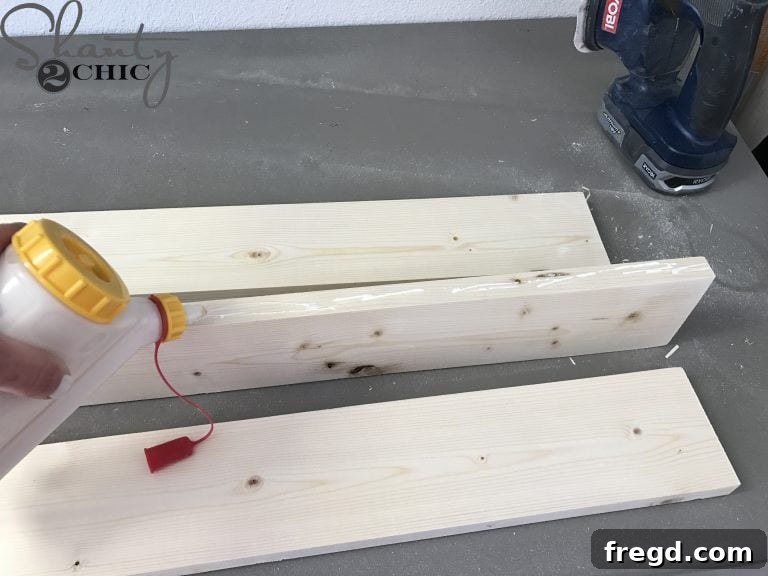
Next, we move on to assembling the critical arm guide for the backrest of your DIY outdoor lounge chair. This component allows for the smooth, adjustable movement of the backrest, enabling you to find your perfect reclining position. To construct this guide, I started by applying a thin, even line of wood glue to both sides of the 1×4 piece. This glue will provide a strong bond, ensuring the guide remains stable and secure over time, even with repeated use.
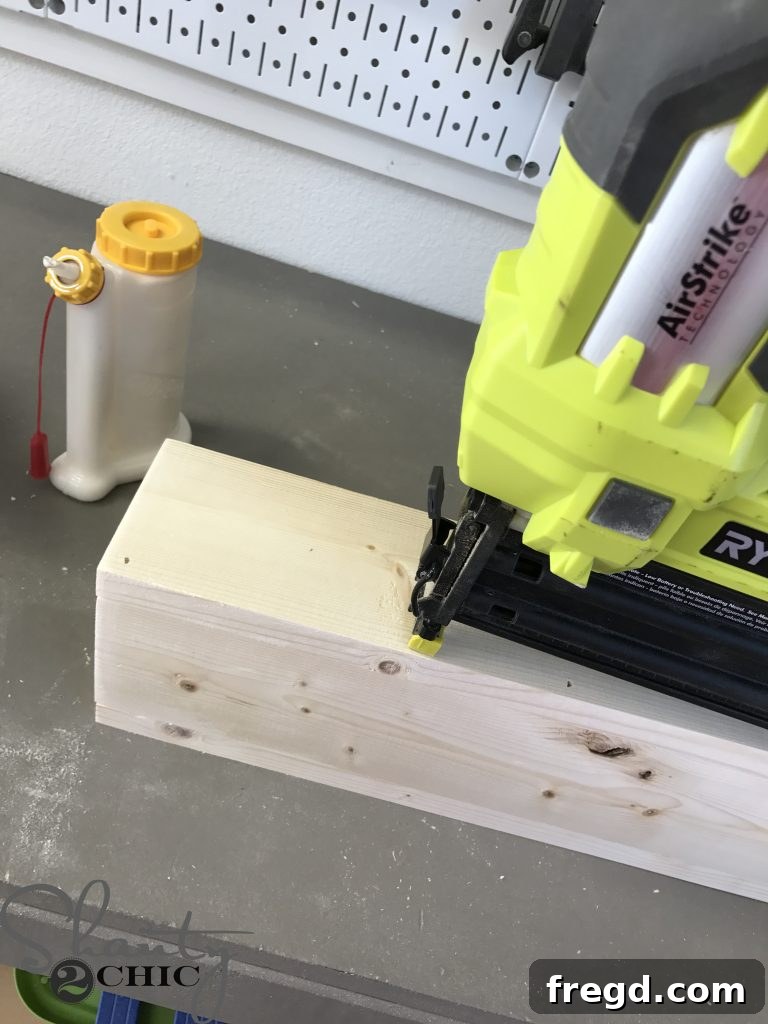
Once the glue was applied, I used my reliable Ryobi 18-Volt Airstrike Nailer to securely attach the 1×2 pieces to the 1×4. The nailer provides a quick and strong initial hold while the wood glue dries, ensuring a robust assembly. Make sure the 1×2 pieces are aligned perfectly with the edges of the 1×4, creating a channel for the adjustable arm to slide smoothly. This precise construction is vital for the functional elegance of your outdoor lounge chair.
Step 7: Attaching the Back Slats for Comfort and Support
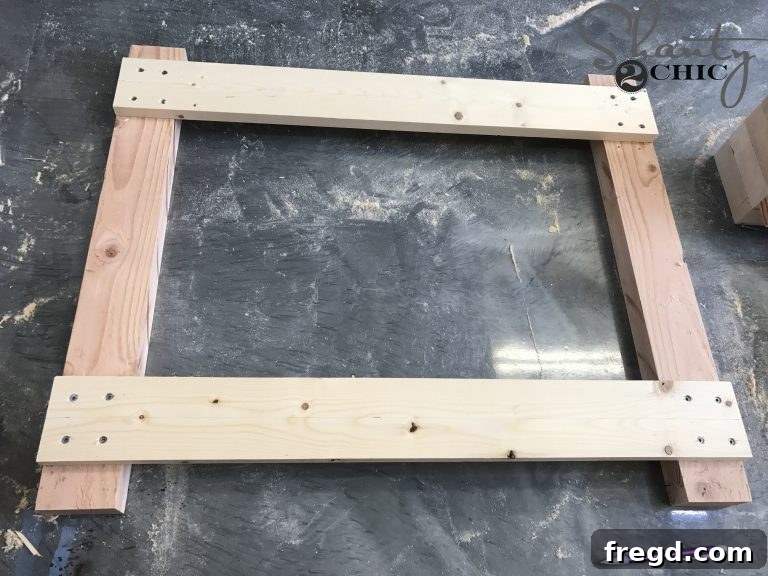
Now, it’s time for the main backrest assembly – the part of your DIY outdoor lounge chair that provides essential comfort and support. I began this process by attaching the vertical back supports to the horizontal top and bottom 2×4 slats. This forms the foundational frame of the backrest. To ensure maximum strength and durability, I applied exterior-grade wood glue to the contact surfaces before securing them with 1 1/4-inch exterior deck screws, driven from the back support into the slat. This method creates a strong, long-lasting joint capable of withstanding outdoor conditions and regular use.
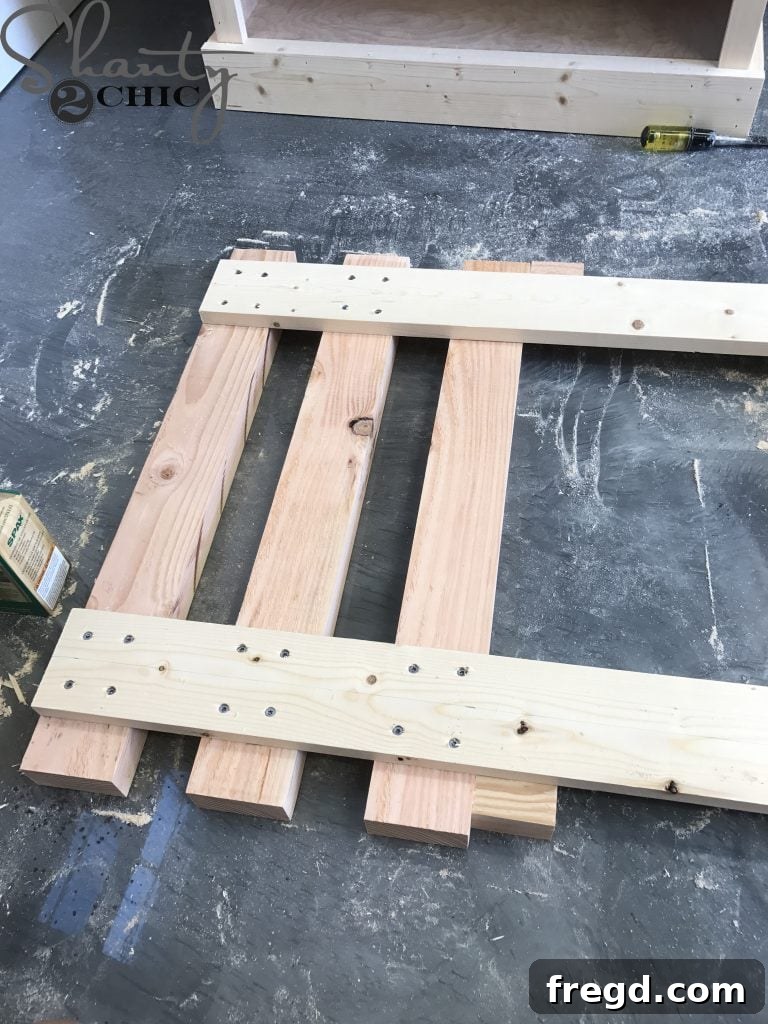
With the top and bottom slats in place, I then used the spacer block (as detailed in your free plans) to precisely and evenly space out the remaining back slats. Consistent spacing is vital for both aesthetic appeal and ergonomic comfort. Each slat was attached with the same combination of wood glue and 1 1/4-inch deck screws, mirroring the technique used for the initial supports. Take your time to ensure each slat is perfectly aligned before fastening. This methodical approach will result in a beautifully uniform and incredibly comfortable backrest for your DIY outdoor lounge chair.
Step 8: Integrating the Arm Guide into the Backrest Structure
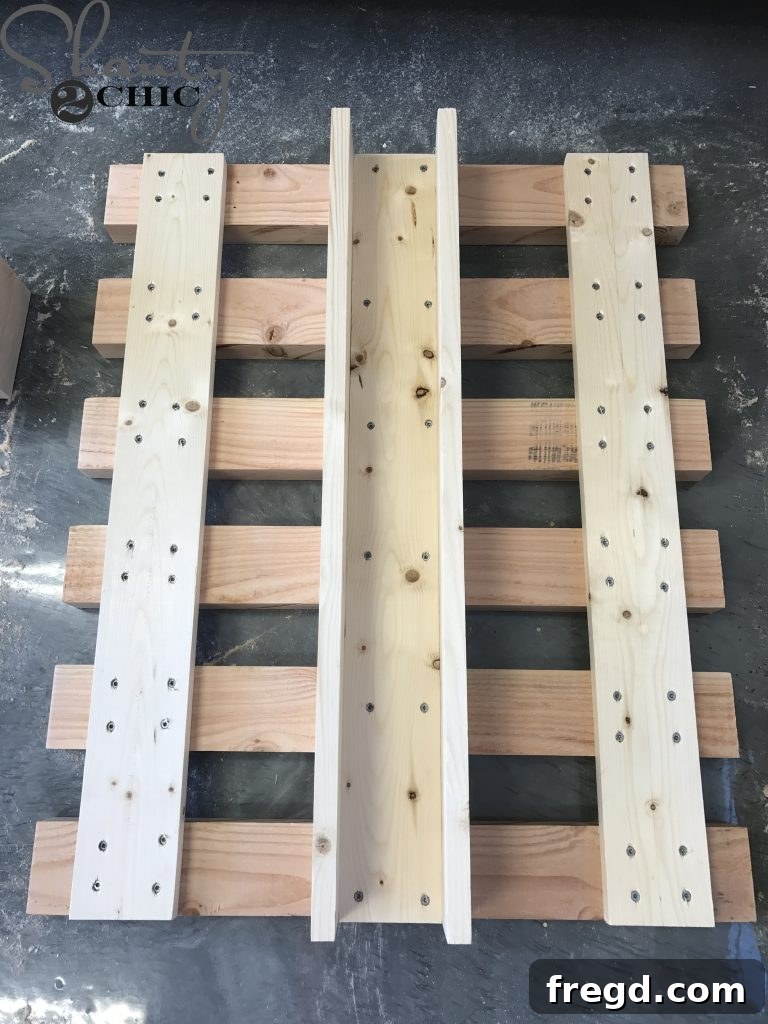
To complete the backrest assembly and prepare it for its adjustable mechanism, the final step involves integrating the arm guide we built earlier. I carefully positioned the arm guide onto the assembled back slats, ensuring it was perfectly aligned according to the free plans. To secure it firmly in place, I applied wood glue to the contact surfaces and then fastened it with 1 1/4-inch exterior deck screws. This creates a strong, rigid connection that is essential for the smooth operation of the adjustable backrest. This step brings us closer to the full functionality of your custom DIY outdoor lounge chair, ready for comfortable reclining.
Building the Bottom Seat
With the backrest complete, let’s turn our attention to the foundation of comfort: the bottom seat of your DIY outdoor lounge chair. This section outlines how to install the slats that will support your cushions.
Step 9: Adding the Bottom Seat Slats for Support and Comfort
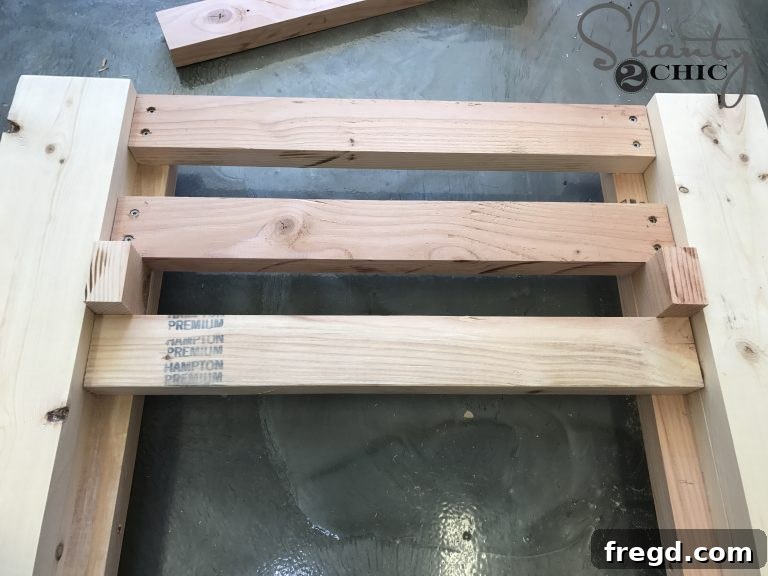
Once the backrest of your DIY outdoor lounge chair was fully assembled, I transitioned to constructing the bottom seat. This involves attaching the remaining slats across the frame, providing the essential support for your outdoor cushions.
Start by attaching the very last slat at the foot of the chair frame, working your way gradually towards the back. This approach helps to ensure proper alignment and spacing from the front. Crucially, utilize the spacer blocks (as detailed in your plans) as guides for achieving consistent and even spacing between each slat. Uniform spacing not only looks professional but also provides optimal support for your cushions. Attach every slat with both 2 1/2-inch exterior deck screws and a generous application of exterior-grade wood glue. This combination of fasteners and adhesive creates a rock-solid seat base designed for longevity and comfort.
NOTE: Before attaching the *final* slat at the very back of the seat, perform a critical alignment check. Lay the assembled backrest onto the cleats, ensuring it sits flush with the very back of the chair frame. The final seat slat should then butt up perfectly against the end of the backrest. This precise alignment is absolutely necessary for the seamless attachment of the piano hinge in the subsequent steps, which will connect the seat to the adjustable backrest. This crucial detail is thoroughly covered in the free plans, so please refer to them for a visual guide.
Attaching the Back Rest
This section is all about bringing the main components of your DIY outdoor lounge chair together, focusing on how the adjustable backrest connects to the seat frame.
Step 10: Adding the Bottom Arm Support for Hinge Integration
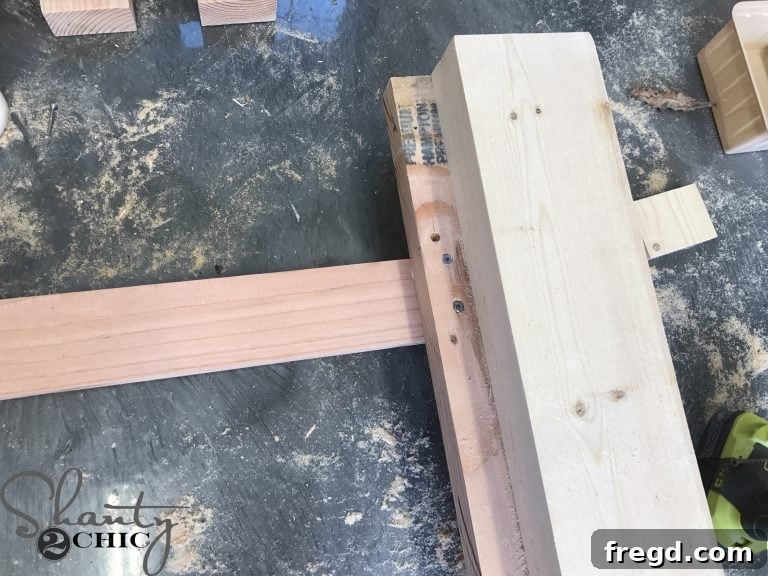
After temporarily removing the backrest, the next step is to install the remaining slat, which will serve as the crucial bottom arm support and hinge board. This piece sits underneath the cleats, providing a sturdy anchor for the piano hinge. I attached it with 2 1/2-inch exterior deck screws and exterior-grade wood glue, driving the screws from the top of the cleat down into the slat. This creates a powerful, integrated joint. Refer to your free plans for the precise placement of this slat; its accurate positioning is essential for the proper function of the adjustable backrest mechanism on your DIY outdoor lounge chair.
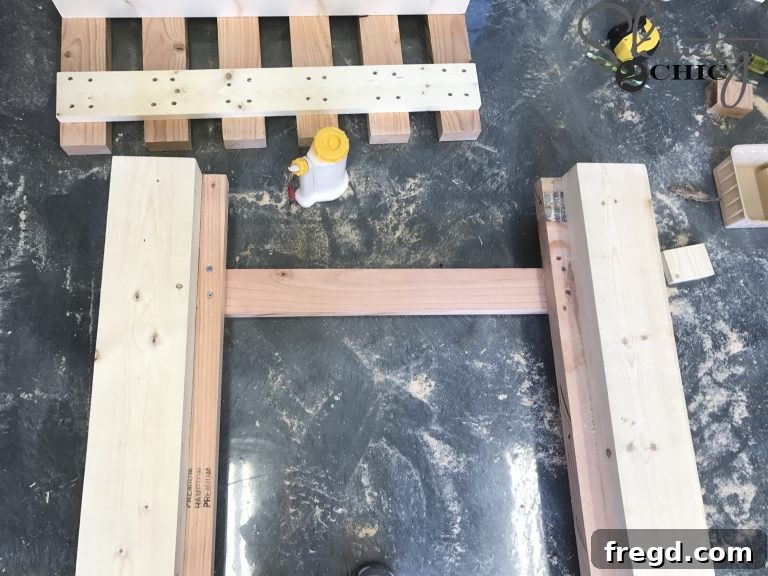
As you can see, this strategically placed slat forms what we call the “hinge board,” creating a perfectly level and secure surface for mounting the piano hinge. This robust foundation ensures the smooth and reliable operation of your adjustable backrest.
Step 11: Installing the Piano Hinge for Backrest Movement
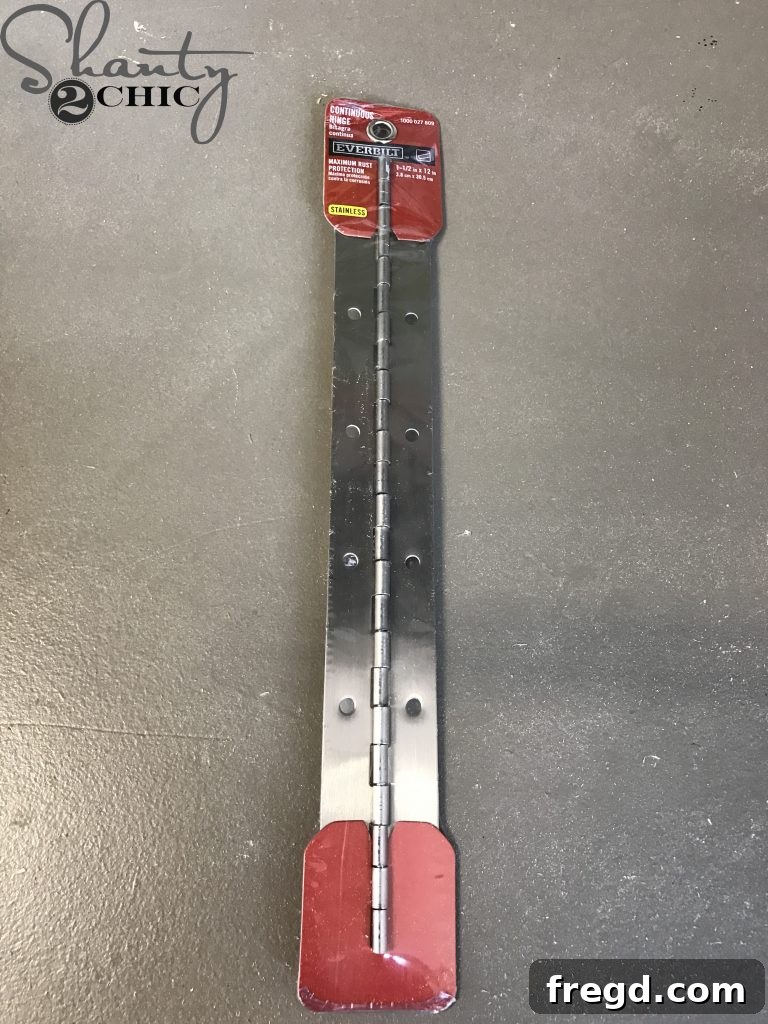
Now, it’s time to integrate the piano hinge, the key component that allows the backrest of your DIY outdoor lounge chair to smoothly articulate and adjust. I sourced this particular piano hinge at Home Depot, but for convenience, you can also find a suitable option HERE on Amazon. Ensure you choose a heavy-duty, outdoor-rated hinge for maximum durability against weather and frequent use.
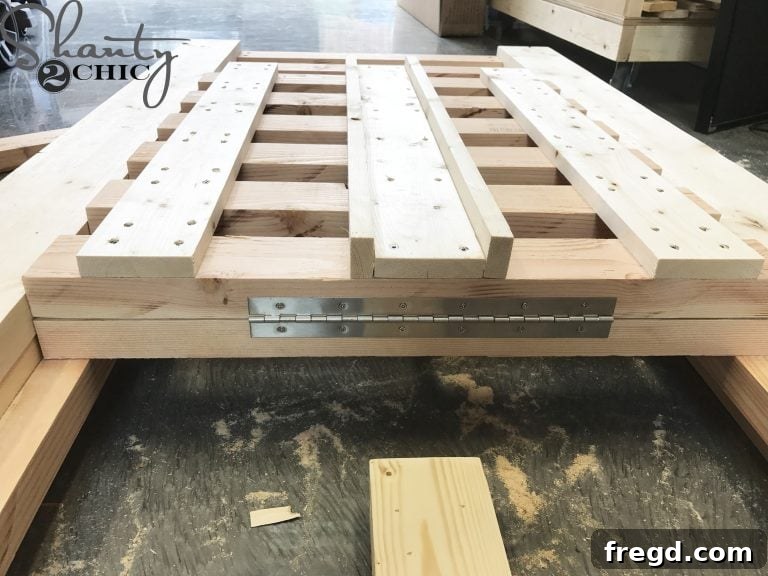
To accurately attach the piano hinge, I carefully laid the backrest upside down, positioning it perfectly flush with the top slat of the chair’s seat (the hinge board we just installed). This ensures a clean, tight seam when the backrest is upright. With the backrest in this position, I then meticulously attached the piano hinge using the provided screws. Take your time to align the hinge perfectly straight and centered, ensuring smooth, snag-free operation for years to come. This step is crucial for the overall comfort and adjustability of your custom outdoor lounge chair.
Step 12: Assembling the Arm for the Adjustable Backrest Guide
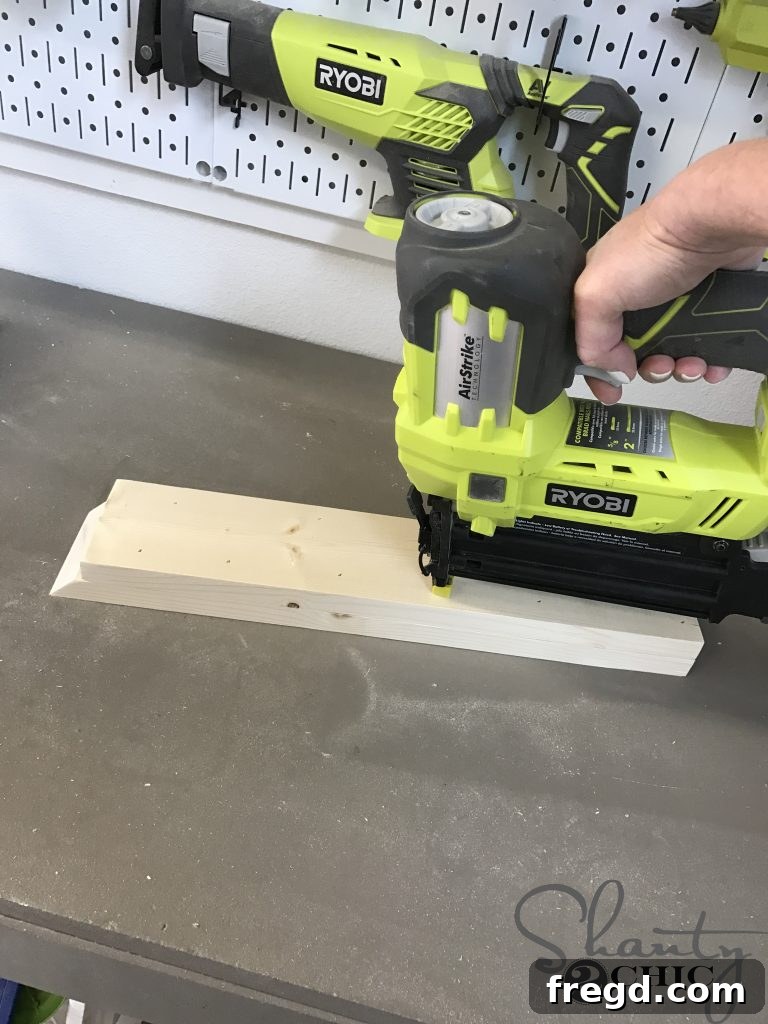
With the piano hinge securely in place, the next step for your DIY outdoor lounge chair is to construct the arm that will interact with the arm guide for adjustable reclining. This arm needs to be sturdy and precisely assembled. I used my nailer along with exterior-grade wood glue to build this component. The nailer provides immediate hold, allowing the glue to cure and create a strong, lasting bond, essential for a part that will experience regular movement and stress. Follow your plans for the specific dimensions and assembly of this arm, ensuring it fits snugly within the previously built arm guide.
Step 13: Attaching the Adjustable Arm with Utility Hinges
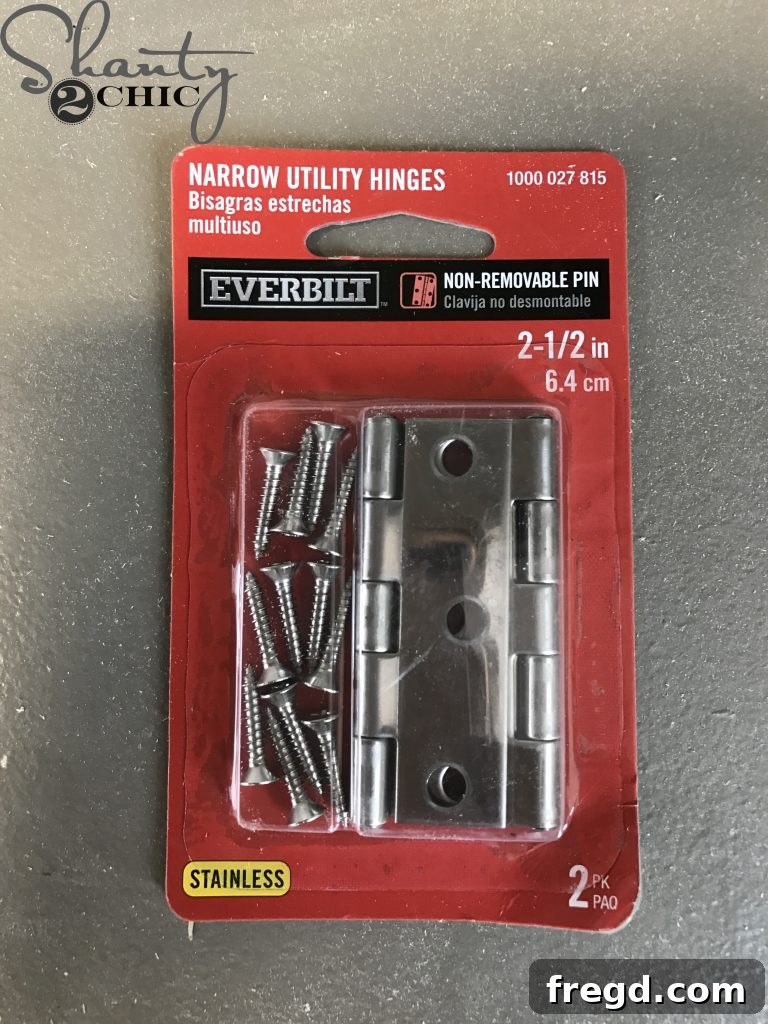
Now that the adjustable arm is assembled, it’s time to connect it to the main chair frame using utility hinges. These hinges are crucial for allowing the arm to pivot, facilitating the reclining action of the backrest. I found suitable utility hinges at Home Depot, but you can also find similar options HERE on Amazon. Ensure the hinges are strong enough to support the backrest and are rated for outdoor use to prevent rust and degradation.
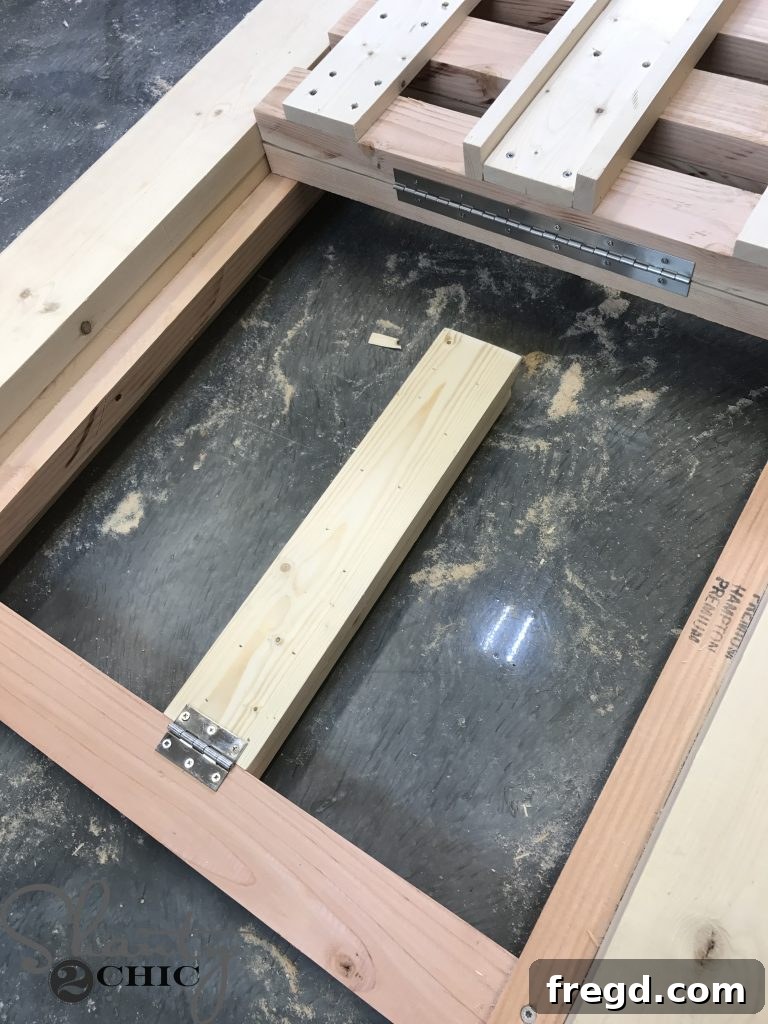
I attached one side of the utility hinge to the adjustable arm and the other side to the hinge board (the slat we installed in Step 10). Proper placement is key here; the hinge should allow for a full range of motion while providing solid support in any reclined position. Use appropriate exterior-grade screws provided with the hinges for a secure attachment. This assembly completes the primary mechanism for adjusting the backrest on your DIY outdoor lounge chair, bringing you closer to ultimate relaxation.
Stop Blocks
The final touch for the adjustable backrest mechanism on your DIY outdoor lounge chair is the installation of stop blocks. These small but important pieces allow you to customize and lock in your preferred reclining positions.
Step 14: Attaching the Stop Blocks for Adjustable Recline
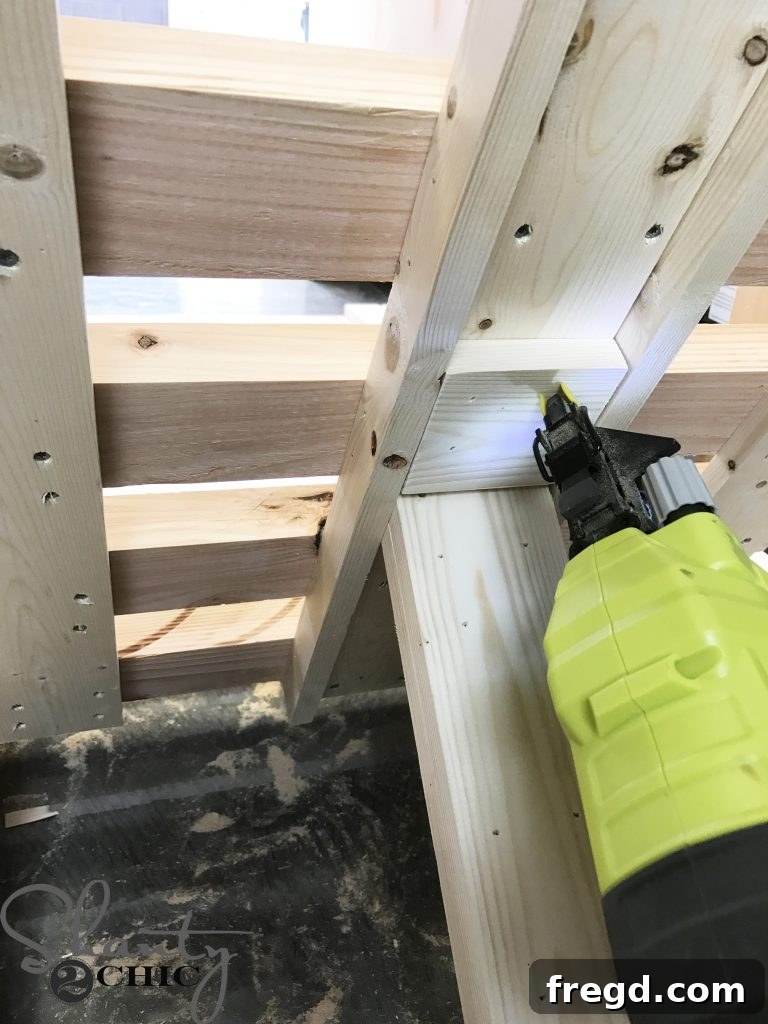
Finally, to complete the adjustable backrest mechanism of your DIY outdoor lounge chair, it’s time to attach the stop blocks. These blocks are small pieces of wood that will be installed on the inside of the arm guide, acting as physical stops for the adjustable arm. This ingenious design allows you to set multiple reclining angles for your backrest, providing personalized comfort.
I used my trusty nailer and exterior-grade wood glue to secure the stop blocks firmly in place. The beauty of this step is its customizability: you can place these stop blocks wherever you desire to achieve your perfect reclining positions. Experiment with different angles that suit your comfort needs – perhaps a more upright position for reading, and a fully reclined position for sunbathing. Once attached, these blocks will hold the backrest securely in your chosen position, completing the functional design of your comfortable outdoor seating.
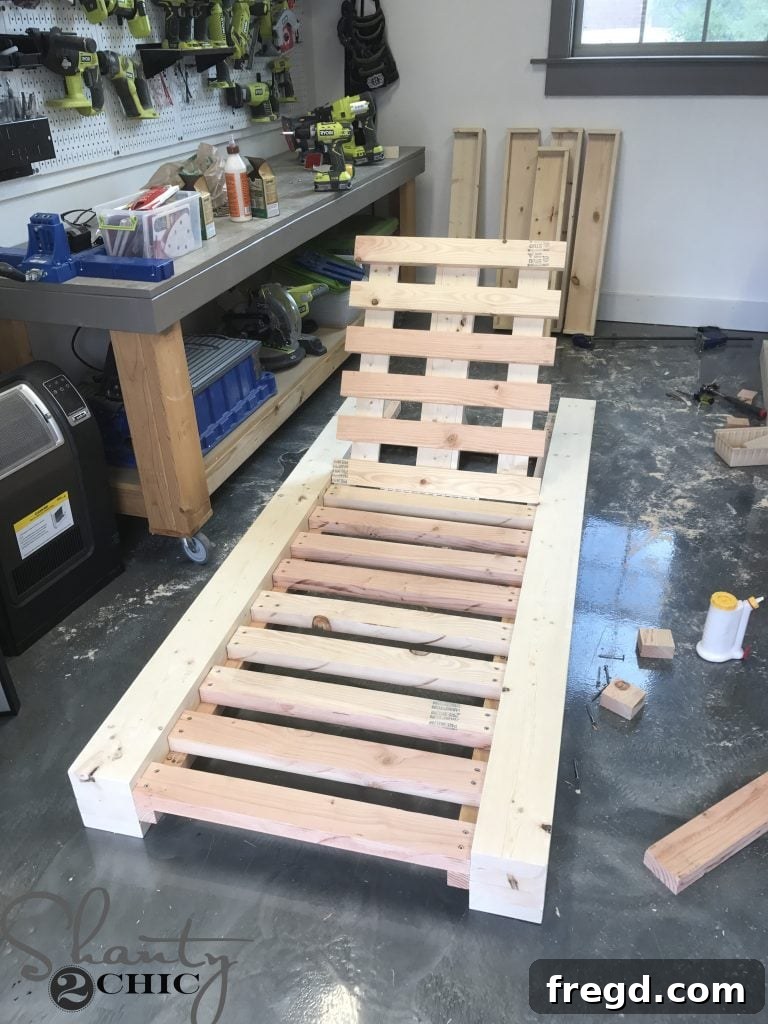
And with that, the main construction of your DIY outdoor lounge chair is all done! Look at that sturdy frame, ready to provide countless hours of outdoor relaxation.
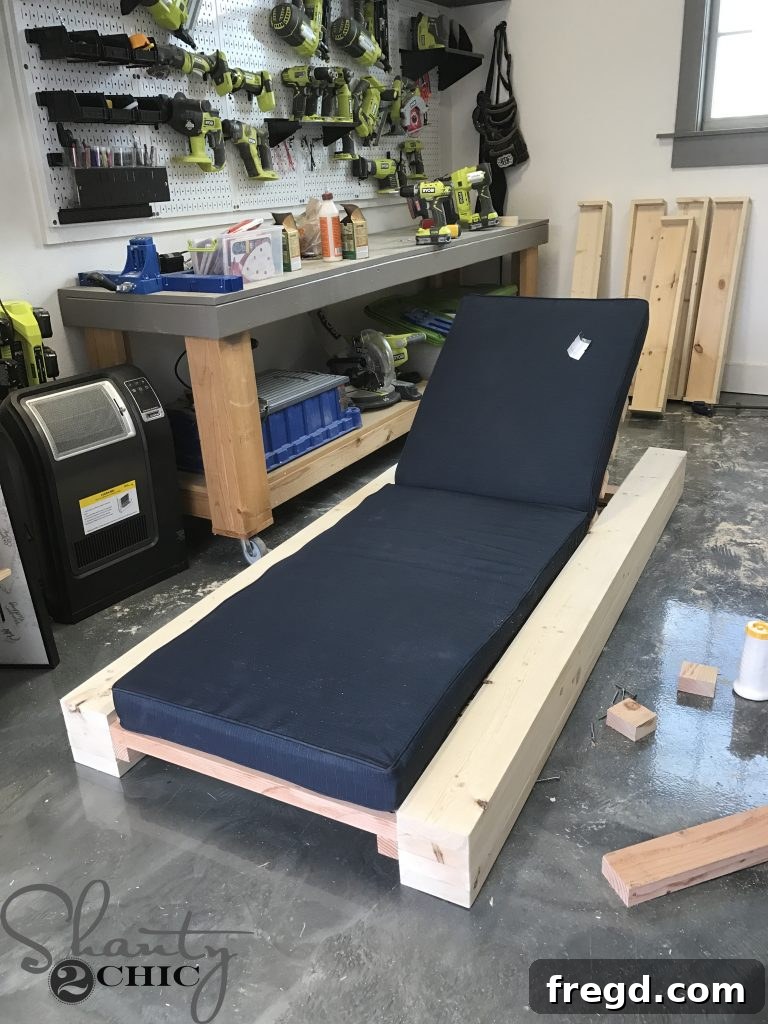
Of course, I had to immediately test the cushion for size and fit. It’s always a satisfying moment when everything comes together as planned!
The Finish
The finish is what truly transforms your raw lumber into a beautiful, resilient piece of outdoor furniture. This section covers staining and protecting your DIY outdoor lounge chair.
Step 15: Applying the Perfect Stain for Aesthetic Appeal
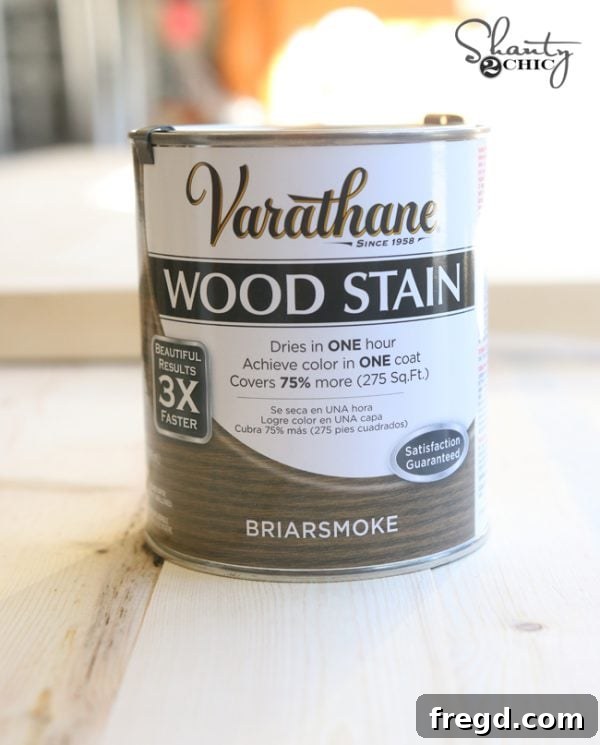
With the construction complete, it’s time to add character and depth to your DIY outdoor lounge chair through staining. I opted for one generous coat of Briarsmoke stain by Varathane on each chair. This particular shade provides a rich, rustic, yet modern look that beautifully highlights the natural wood grain. You can find this exquisite stain HERE on Amazon. When applying, ensure the wood is clean and dry. Use a brush or rag to apply the stain evenly, wiping off any excess to prevent tackiness and achieve a uniform color. The right stain not only enhances the beauty of your furniture but also provides the first layer of defense against the elements.
Step 16: Essential Outdoor Protectant for Longevity
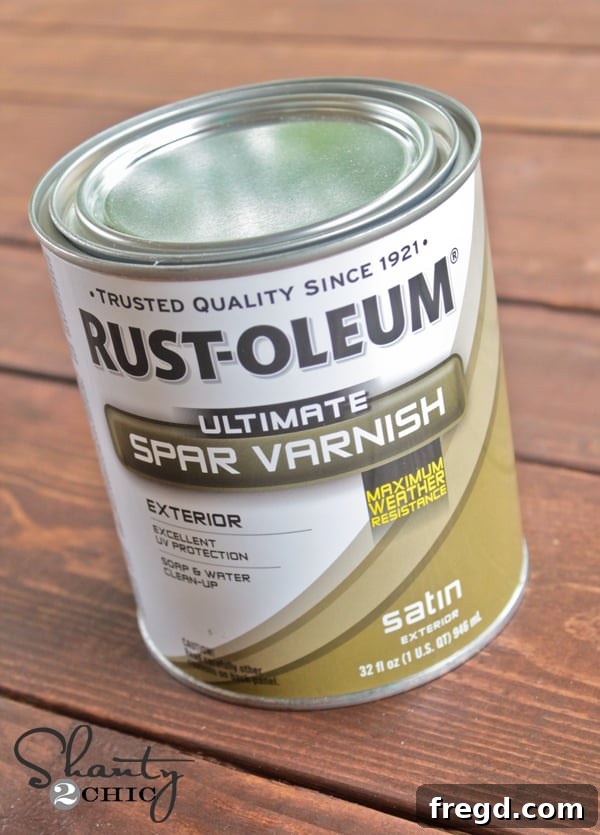
After the stain has thoroughly dried, the most critical step for any outdoor furniture project is applying a high-quality protectant. This final coat is what truly shields your DIY outdoor lounge chair from the harsh outdoor elements – sun, rain, and humidity – ensuring its longevity and beauty for years to come. I applied one coat of Spar Varnish by Rustoleum, which is specifically designed for marine environments and offers superior UV and moisture resistance. Apply the varnish evenly with a brush, ensuring all surfaces are covered. Allow adequate drying time between coats if applying more than one (check product instructions). This protective barrier is indispensable for preventing rot, fading, and weathering, allowing you to enjoy your handcrafted chairs season after season.
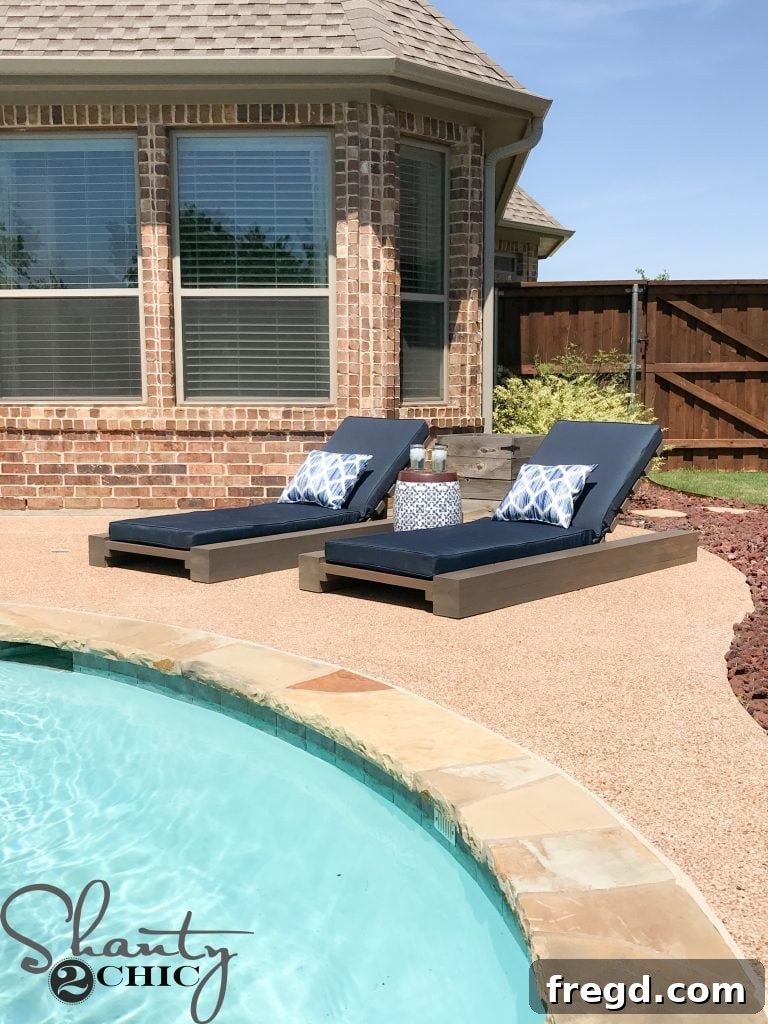
Now, with the stain dry and the protective finish applied, it’s truly time to sit back, relax, and savor the fruits of your labor! There’s immense satisfaction in creating such a beautiful and functional piece for your home.
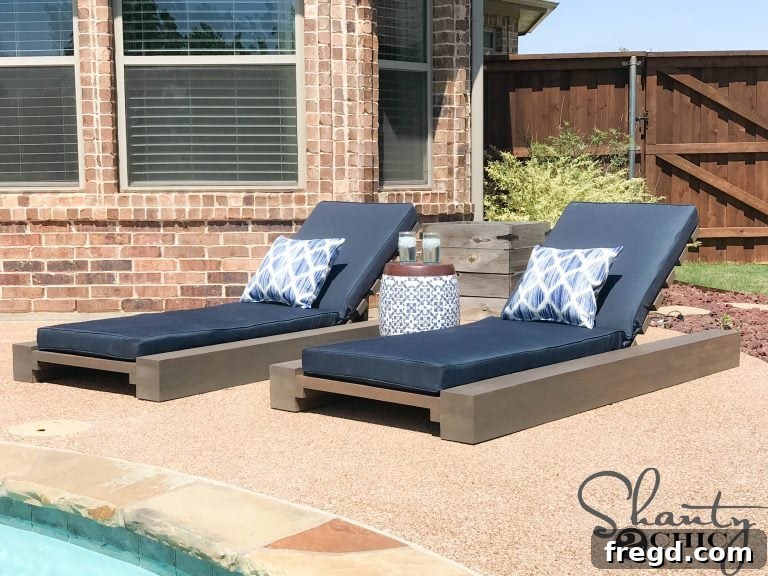
To complete the look and maximize comfort, I found these fantastic outdoor pillows, which you can find HERE. They add a pop of color and an extra layer of coziness to your new favorite relaxation spot.
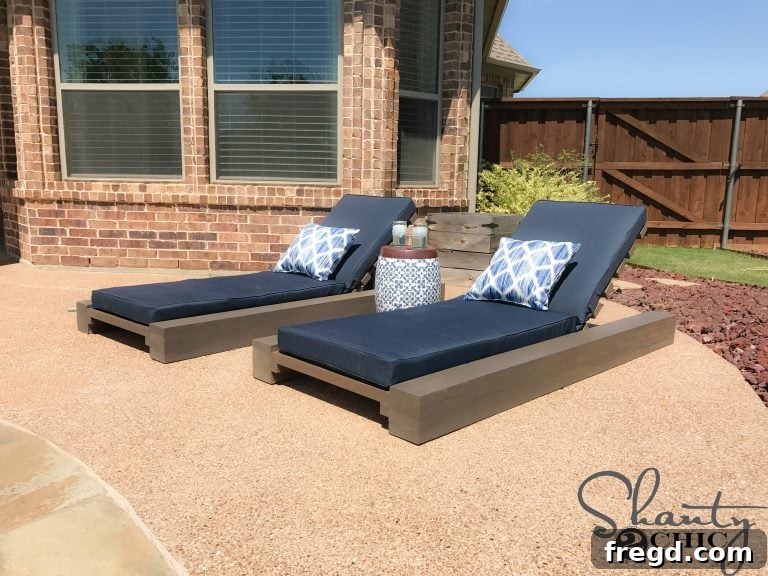
And no outdoor lounge setup is complete without a convenient spot for your drink or a good book! I discovered this chic garden stool, which perfectly complements the chair and patio aesthetic, and you can find it HERE.
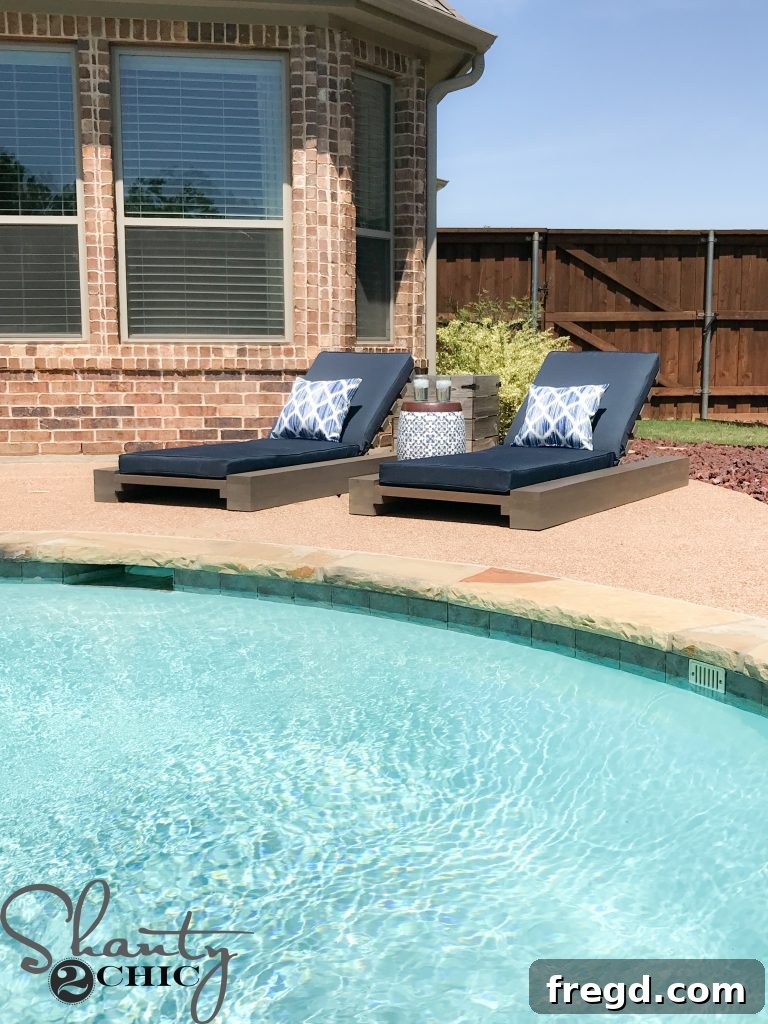
Thank you so much for following along with this DIY outdoor lounge chair project! We hope this detailed guide empowers you to create your own outdoor oasis. Happy building, and enjoy your beautifully handcrafted furniture!
Ashley and Whitney
More DIY Outdoor Plans to Inspire Your Next Project
If you loved building your outdoor lounge chair, you’re in for a treat! We have a treasure trove of other fantastic DIY outdoor plans to help you further enhance your backyard, patio, or garden. Explore these projects for more opportunities to create beautiful and functional pieces for your home.
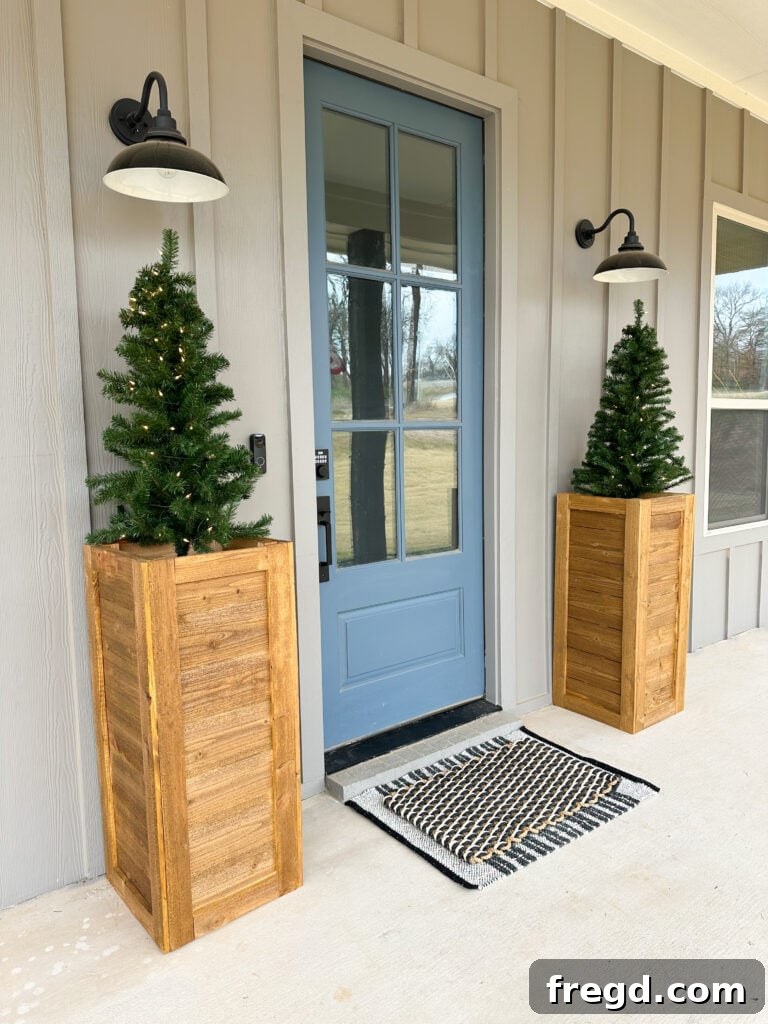
Tall Cedar Planter Box
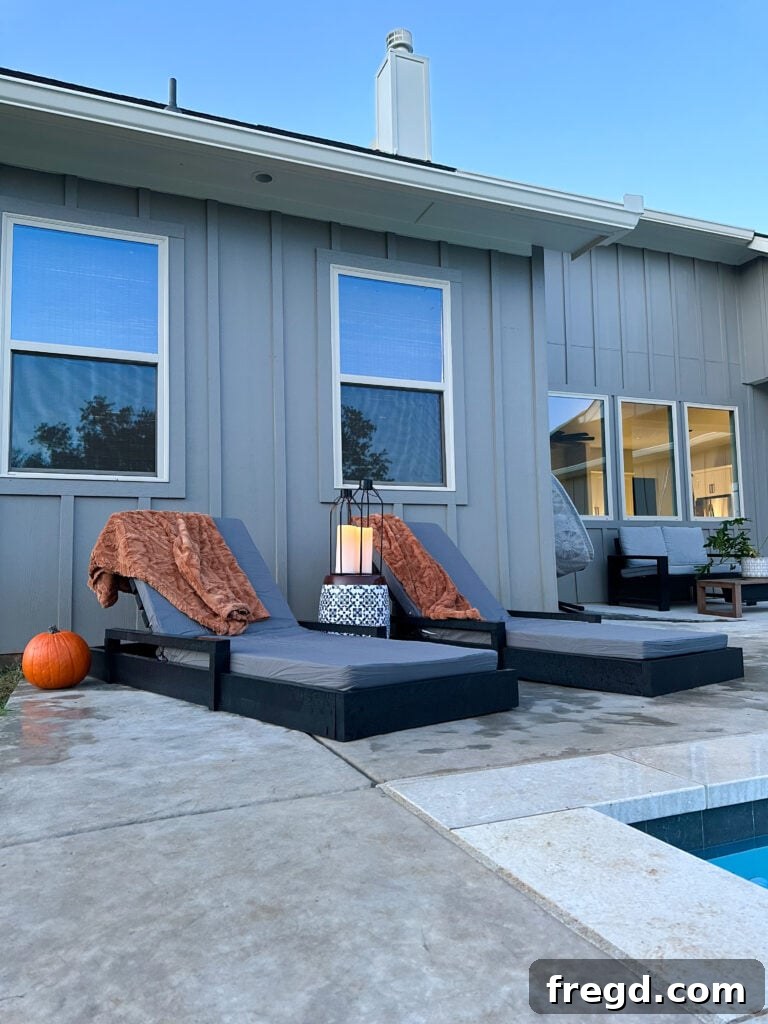
Modern Lounge Chairs
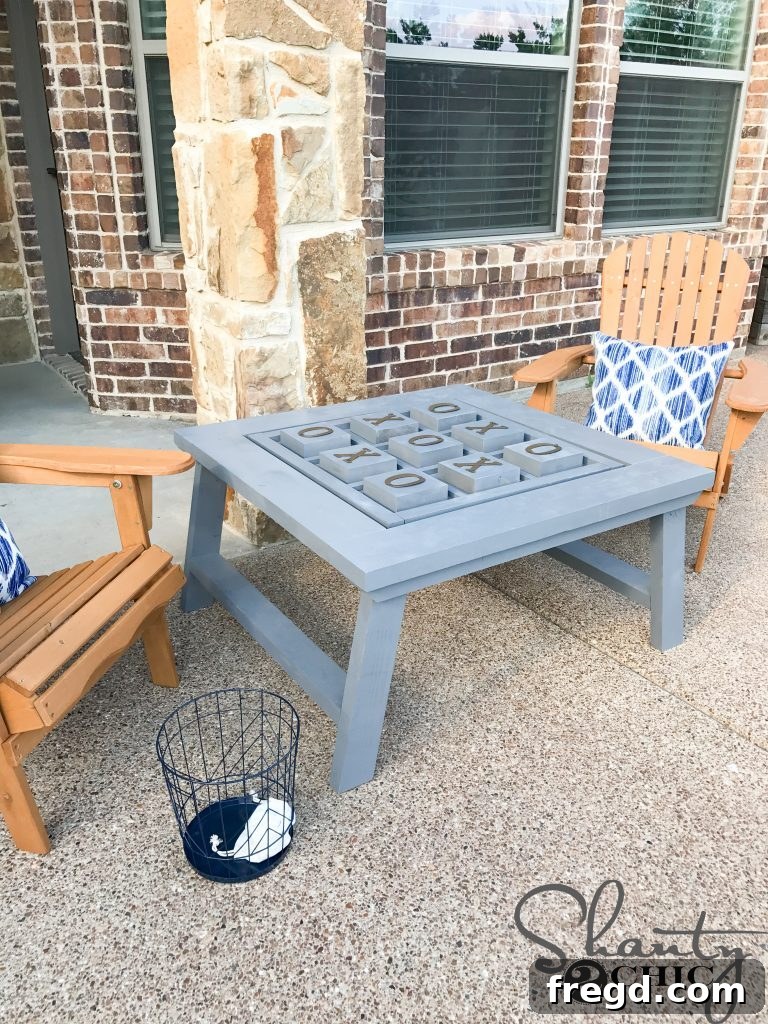
Outdoor Game Table