
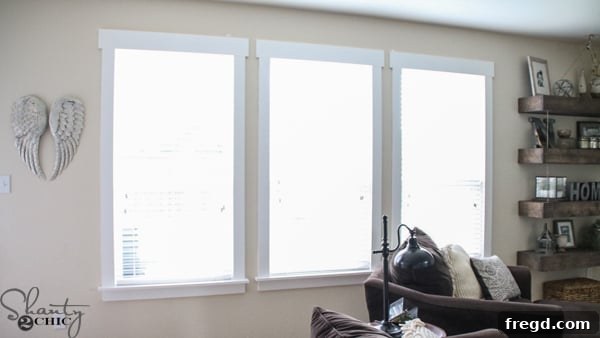
DIY Farmhouse Window Trim: Transform Your Home from Builder-Grade to Custom Charm
Every house has potential, but sometimes it takes a little love and a few strategic DIY projects to truly make it feel like a home. Our latest adventure began with a mission: to help our beloved sister transform her house into a warm, inviting home within an ambitious 36-hour window! Living approximately five hours away and juggling the beautiful chaos of four children under the age of five, our baby sister found herself in a common predicament. A year after moving in, her house, while functional, hadn’t quite taken on that personalized, lived-in feel. She often remarked that it still didn’t feel like she had “really moved in.”
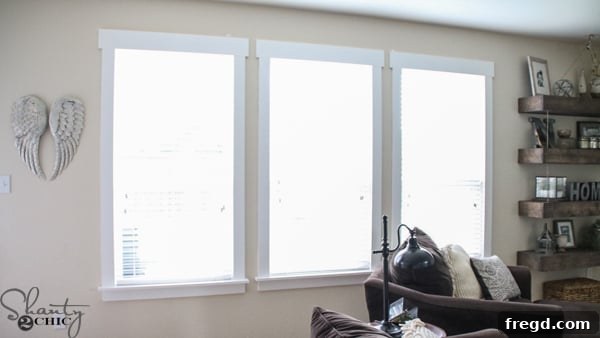
That’s where the idea for a “Shanty House Crash” was born! We packed our trailer to the brim with lumber, a full arsenal of tools, loaded the kids into the car, and embarked on a journey to bring our sister’s vision to life. Among a long list of projects designed to maximize impact in minimal time, one particular transformation stood out for its dramatic yet simple elegance: adding custom DIY Farmhouse Window Trim. This project promised to infuse character and warmth into her builder-grade windows, turning ordinary openings into focal points of farmhouse charm.
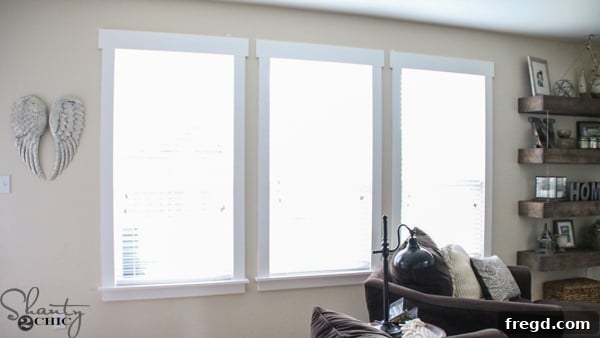
Why Upgrade Your Builder-Grade Windows with DIY Trim?
Many new homes come with basic, builder-grade windows. While perfectly functional, they often lack the architectural detail and personality that truly elevate a space. These windows typically feature minimal or no trim, contributing to a bland, unfinished aesthetic that can leave a home feeling generic rather than bespoke. This was precisely the case at our sister’s house, where the windows, though new, offered little in the way of visual interest.
We knew from experience that transforming these windows could be incredibly easy and surprisingly inexpensive. Adding DIY window trim, especially in the popular farmhouse style, is one of the most impactful and budget-friendly home improvement projects you can undertake. It’s a game-changer that introduces depth, texture, and a custom-built feel, significantly enhancing your home’s aesthetic appeal and perceived value without breaking the bank.
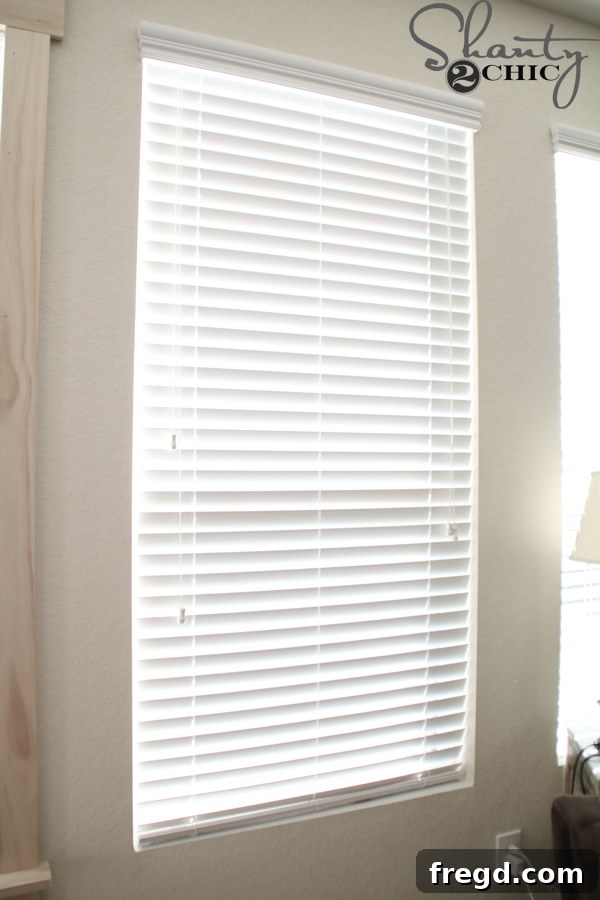
The Transformative Power of Window Casing
A window without proper casing is like a painting without a frame – it lacks definition and presence. Adding trim instantly upgrades your windows from purely functional elements to significant design features. Here’s why DIY farmhouse window trim is such a brilliant choice for any homeowner looking to add character:
- Aesthetic Appeal: Farmhouse trim, often characterized by its clean lines and robust profile, brings a rustic elegance and cozy charm that complements a wide range of interior styles. It creates a focal point, drawing the eye and making the room feel more complete and thoughtfully designed.
- Increased Home Value: Custom touches are highly valued by potential buyers. Well-executed window trim can significantly enhance your home’s curb appeal and interior aesthetics, making it stand out in the market.
- Cost-Effectiveness: Compared to professional installation or extensive renovations, DIY window trim is incredibly affordable. You primarily pay for the lumber, nails, caulk, and paint, allowing for a high-impact upgrade on a minimal budget.
- Personalization: This project allows you to tailor the look to your specific taste. Whether you opt for a simple, classic farmhouse style or add more decorative elements, the trim reflects your unique design vision.
- Relatively Easy for DIYers: With basic tools and a good set of plans, this project is accessible to most homeowners, even those with limited DIY experience. The satisfaction of seeing the transformation wrought by your own hands is immense.
Our 36-Hour “Shanty House Crash” Mission: A Labor of Love
The “Shanty House Crash” was more than just a home improvement spree; it was a heartfelt mission to help our sister create the sanctuary she deserved. With four energetic toddlers, time and energy for home projects are precious commodities. We understood her longing for a space that truly felt like her own, reflecting her family’s warmth and personality. Our goal was ambitious: to tackle multiple projects, including this farmhouse window trim, and leave her house feeling undeniably like a home, all within a whirlwind 36 hours.
The journey itself was part of the adventure. The five-hour drive felt like a prelude to the creative energy we were about to unleash. Unloading the trailer, filled with every tool and piece of lumber imaginable, felt like preparing for a friendly construction blitz. We knew that even small changes could make a monumental difference, and the window trim was earmarked as a project that would yield immediate and striking results. It was an act of love, turning simple windows into charming architectural statements that would greet her every day.
Planning Your DIY Farmhouse Window Trim Project
Embarking on a DIY window trim project requires a bit of planning, but the steps are straightforward. The key to success lies in accurate measurements, careful cuts, and patient finishing. Here’s a general overview of what you’ll need and what to consider:
Essential Tools & Materials:
- Wood Boards: Typically pine or common board, cut to desired widths and thicknesses (e.g., 1x4s for sides/top, 1×6 for the header, 1×2 for the sill ledge).
- Miter Saw: Essential for precise, angled cuts.
- Measuring Tape: Accuracy is paramount!
- Pencil: For marking cuts.
- Nail Gun (and compressor): For quick and secure installation. Brad or finish nails are common.
- Level: To ensure your trim is perfectly straight.
- Caulk Gun & Paintable Caulk: For filling gaps and creating a seamless finish.
- Wood Filler: To fill nail holes.
- Sanding Blocks or Sander: For smooth surfaces.
- Paint or Stain: To finish your trim to match your decor.
- Safety Glasses: Always protect your eyes!
Design Considerations:
The farmhouse style is versatile. You can opt for a simple, flat board design, or add a small ledge to the sill for extra character. Consider the existing architectural style of your home and the overall aesthetic you’re aiming for. For our sister’s house, we chose a classic, clean farmhouse profile with a slightly thicker header to make a statement.
Step-by-Step Installation: Bringing Your Windows to Life
While detailed plans are invaluable (and we’ll show you where to get ours!), understanding the basic process will give you confidence. This is a general guide, but remember to always refer to specific measurements and instructions from your chosen plans.
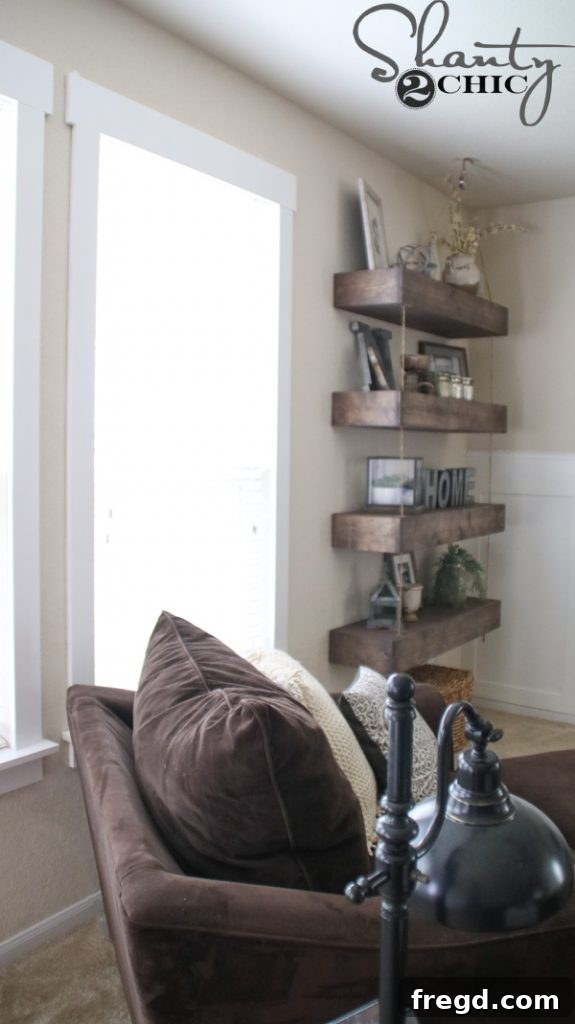
- Preparation: Clean the existing window frame thoroughly. If there’s old trim, carefully remove it, ensuring the area is smooth and free of debris.
- Measure and Cut the Sill: Start with the bottom piece, known as the sill or stool. This piece typically extends past the window opening on both sides. Measure precisely and make your cuts.
- Install the Sill: Secure the sill to the bottom of the window frame using your nail gun. Use a level to ensure it’s perfectly flat.
- Measure and Cut Side Casings: Measure the height from the top of your installed sill to the desired height of your top trim. Cut two side pieces to these exact measurements.
- Install Side Casings: Position the side pieces against the window frame, flush with the edge of the sill, and nail them in place. Ensure they are plumb (vertically straight) with your level.
- Measure and Cut the Top Header: This is often the most prominent piece in farmhouse trim. Measure the distance between the outer edges of your installed side casings. You might want to cut this piece slightly longer than the side casings for an overhang, which is common in farmhouse styles.
- Install the Top Header: Secure the header board above the window opening, ensuring it’s level and centered.
- Add the Top Ledge (Optional): For extra detail, you can add a thinner piece of wood on top of the header, creating a small decorative ledge.
- Finishing Touches:
- Fill Nail Holes: Use wood filler to cover all visible nail holes. Let it dry completely.
- Caulk Gaps: Apply paintable caulk along all seams where the trim meets the wall and where trim pieces meet each other. This creates a clean, seamless look and seals out drafts.
- Sand: Lightly sand the entire trim once the wood filler and caulk are dry to ensure a smooth surface for painting.
- Paint or Stain: Apply your chosen paint or stain. Multiple coats may be necessary for a durable and beautiful finish.
Download Your FREE Printable Plans!
To make this project even easier, we’ve created detailed, printable plans that walk you through every step, including exact measurements, material lists, and helpful tips. These plans are designed to simplify the process, ensuring you achieve professional-looking results. Don’t guess; get the guide!
Click HERE to download the FREE Printable Plans!
The Impact: From Builder-Grade to Custom in a Flash
Watching the transformation unfold was truly rewarding. The difference that simple pieces of wood, carefully cut and installed, made to the overall feel of the room was astounding. What were once stark, uninspired openings became inviting, framed views that added instant architectural interest. The farmhouse window trim brought a sense of completion and warmth that had been missing, truly making the house feel more like a home for our sister and her family.
This project perfectly embodies the spirit of DIY home improvement: maximum impact with minimal fuss and cost. It proves that you don’t need extensive renovations or a huge budget to significantly upgrade your living space. A little creativity and elbow grease are all it takes to turn ordinary features into extraordinary ones.
Beyond Window Trim: More Quick Home Transformations
Inspired by the success of our 36-hour “Shanty House Crash,” we encourage you to look for other quick, high-impact DIY projects that can elevate your home’s aesthetic. Consider:
- Upgrading Interior Doors: Painting doors a new color or adding simple trim can create a fresh look.
- Installing Picture Frame Molding: Adds elegant detail to plain walls.
- Replacing Cabinet Hardware: A small change that makes a big difference in kitchens and bathrooms.
- Adding Floating Shelves: Functional and decorative, perfect for displaying personal touches.
- Creating an Accent Wall: A bold paint color or textured wallpaper can instantly define a space.
Conclusion: Happy Building and a House That Feels Like Home!
The DIY Farmhouse Window Trim project was not just about aesthetics; it was about contributing to a feeling of comfort, permanence, and personalization for our sister’s growing family. It was a simple, inexpensive, and incredibly quick way to take her home from its basic builder-grade origins to a custom, cherished space.
We hope this inspires you to tackle your own home transformation projects. Remember, every small upgrade contributes to the overall warmth and character of your home. With a good plan, the right tools, and a touch of determination, you can create spaces that genuinely reflect who you are and bring joy every day.
Happy Building!