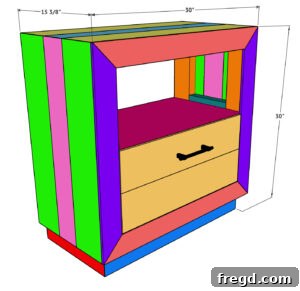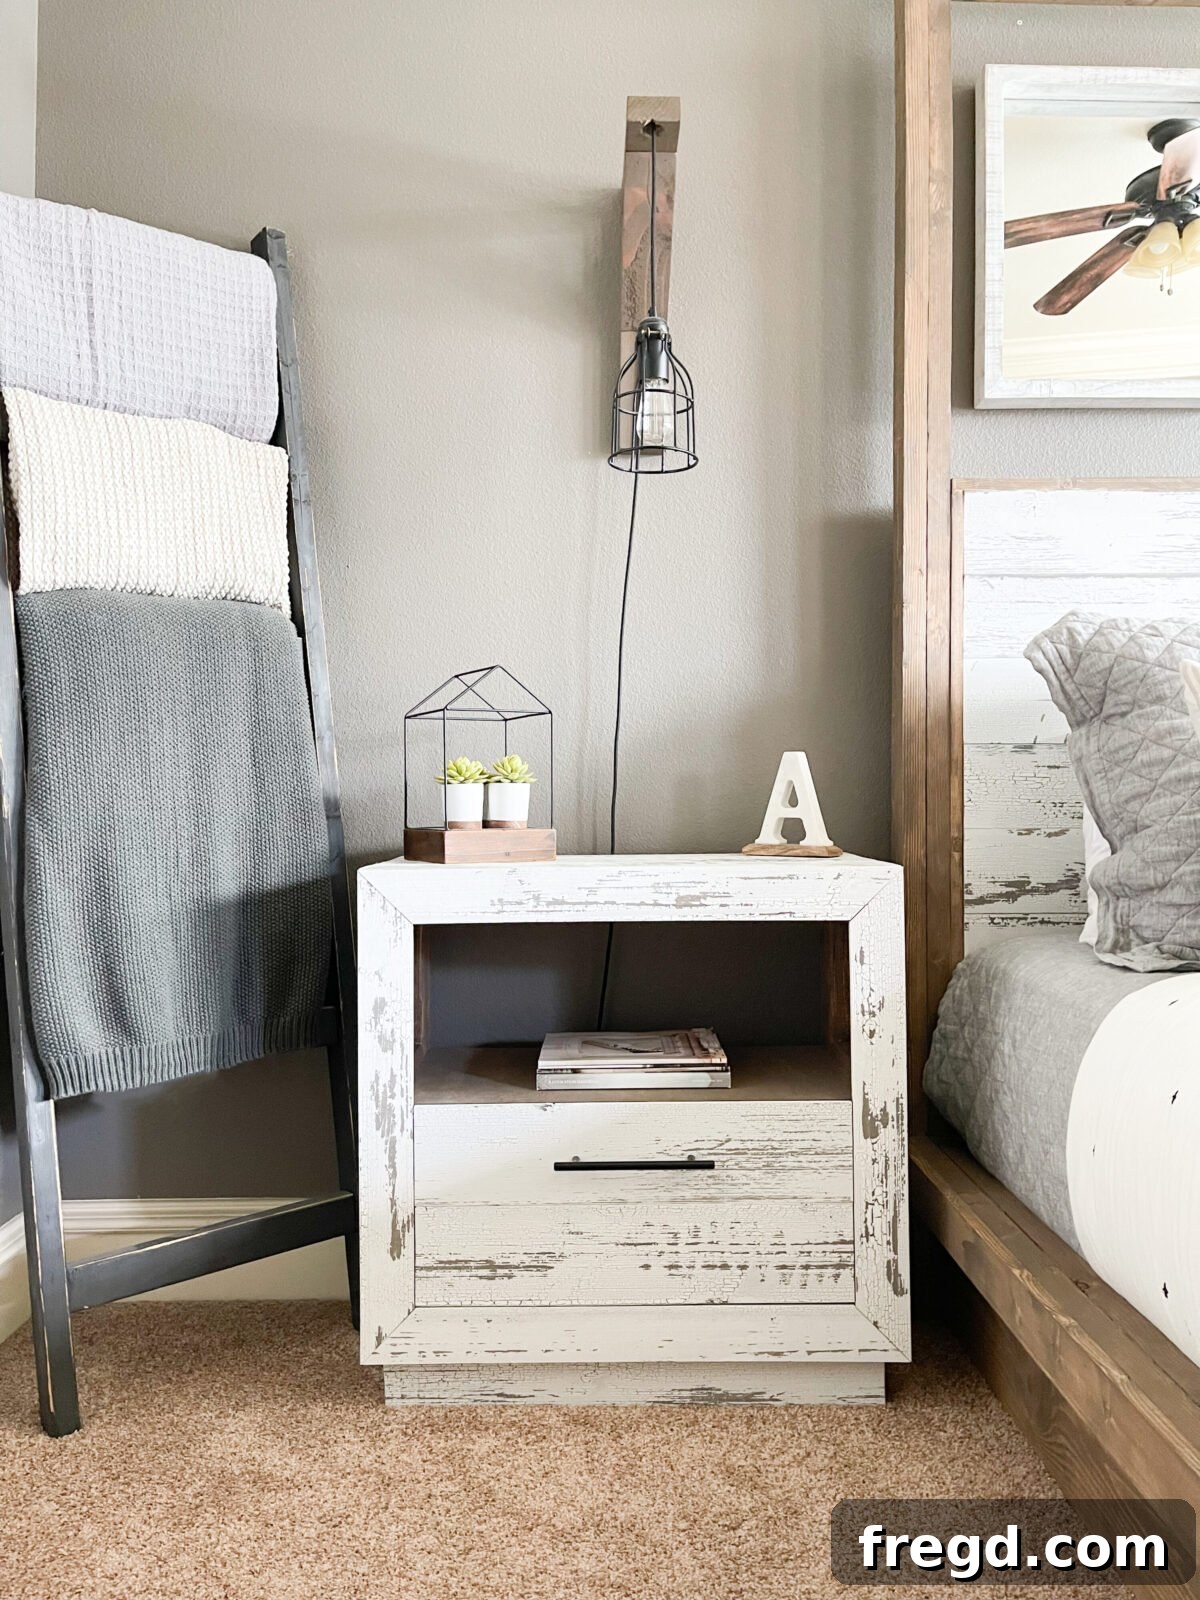
Transform your bedroom with a touch of DIY charm! This comprehensive guide provides everything you need to build a stunning and functional DIY Nightstand with a Drawer. Whether you’re a beginner woodworker or looking for an engaging project, our free plans and detailed tutorial will walk you through each step. Imagine complementing your existing bedroom decor, perhaps even a DIY Canopy Bed, with custom-built bedside tables that offer both style and practical storage.
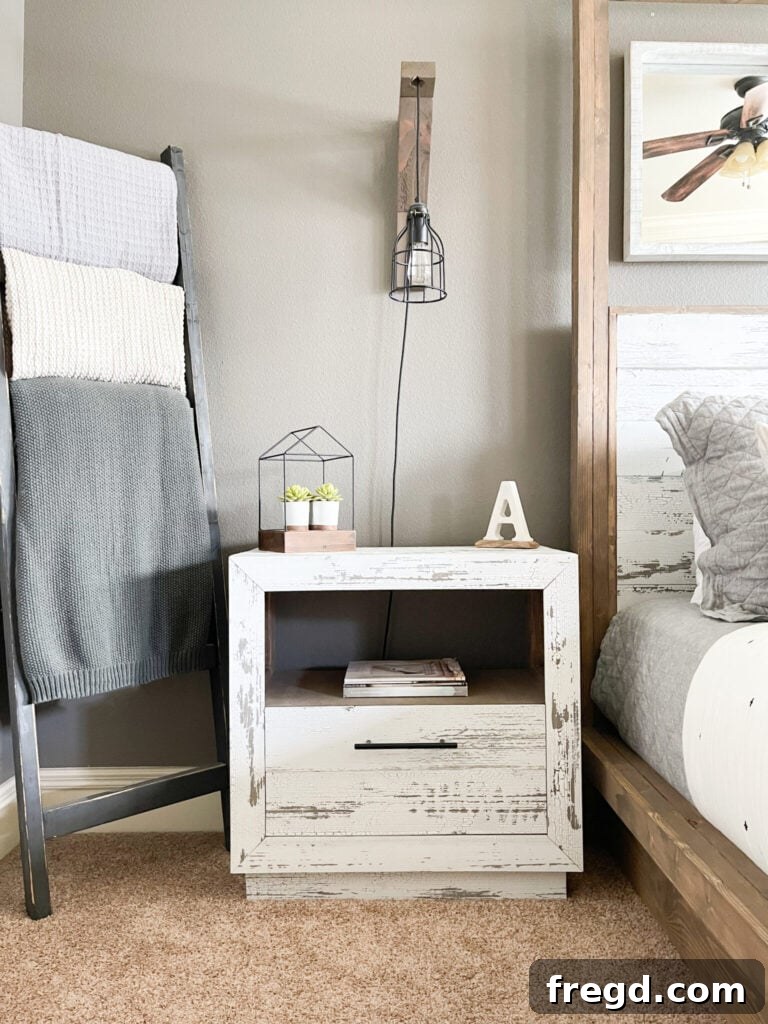
Hello, fellow makers! I’m thrilled to share the plans for these beautiful bedside tables, which I designed to perfectly match the DIY Canopy Bed recently completed for my master bedroom transformation. This is truly an accessible project for anyone looking to add custom furniture to their home. Watch the video below for a quick overview of the build process – you’ll be amazed at how simple it is!
Excited to start building? The complete step-by-step tutorial, along with free printable plans, is available right here. We’ve ensured every detail is covered, making this an ideal woodworking project for those new to DIY furniture. Dive in and create something truly unique for your living space!
Click here to jump to the free printable plans and cut list!
Let’s gather our materials and tools, and get started on this rewarding DIY journey!
How to Build a DIY Nightstand with a Drawer: Step-by-Step Guide
Building your own nightstand allows for complete customization, from the type of wood to the finish and hardware. This particular design balances rustic charm with modern clean lines, creating a versatile piece that complements various bedroom styles. Follow our instructions carefully, and you’ll soon have a sturdy, beautiful nightstand that you can proudly say you built yourself.
Table of Contents
Essential Tools for Building Your Nightstand
Having the right tools is crucial for any successful woodworking project. For this DIY nightstand, we recommend the following, many of which are common in a basic woodworking shop:
- Miter Saw: Essential for making precise crosscuts on your lumber, ensuring clean, tight joints for the nightstand frame.
- Drill: You’ll use this for drilling pilot holes, driving screws, and creating pocket holes. A good cordless drill offers excellent portability and convenience.
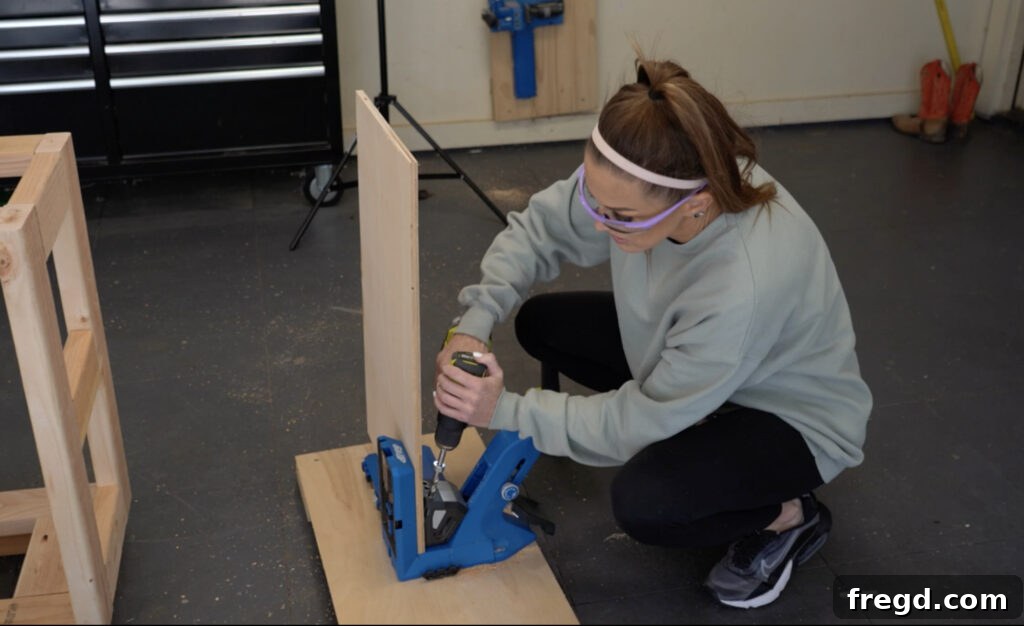
- Kreg Jig: Our favorite tool for creating strong, concealed pocket-hole joints, perfect for attaching frame pieces without visible fasteners. We specifically recommend the Kreg Jig 720Pro for its ease of use and versatility.
- Table Saw (optional): While not strictly necessary, a table saw can greatly speed up cutting plywood and ripping wider boards to specific widths. If you don’t have one, a circular saw with a guide can achieve similar results.
- Brad Nailer: Ideal for attaching thinner trim pieces, back panels, or for holding parts in place while wood glue dries, leaving minimal holes to fill.
- Stapler (optional): A powerful alternative to a brad nailer for attaching drawer bottoms or other thin materials, offering a secure hold.
- Pin Nailer (optional): For the most discreet fastening of delicate trim, leaving almost invisible holes. This is particularly useful for the barnwood trim.
- Sander: Essential for smoothing rough edges, preparing surfaces for finish, and achieving a professional look. An orbital sander is highly recommended.
Materials You’ll Need for This Project
Careful selection of your materials will impact both the aesthetic and durability of your nightstand. This list is tailored for building one rustic yet modern nightstand:
- 16 – 1″x6″x48″ Barnwood Boards: We recommend 6″ barnwood from Timeline Skinnies for its authentic look and relatively consistent dimensions. This will give your nightstand a beautiful, textured finish.
- 1 – 1/2″x48″x48″ Hardwood Plywood Sheet: For the drawer box and internal shelf, hardwood plywood provides stability and a smooth surface.
- 5 – 2x4x8 Framing Lumber Boards: These will form the sturdy internal frame of the nightstand.
- 1 1/4″ Pocket Hole Screws: For attaching thinner pieces, like the shelf.
- 2 1/2″ Pocket Hole Screws: For joining the main framing lumber pieces together.
- 3/4″ Staples (or brad nails): For assembling the drawer box components.
- 5/8″ Pin Nails (or brad nails): For securing the drawer face trim.
- 1″ Pin Nails (or brad nails): For attaching the barnwood trim panels.
- 2 1/2″ Wood Screws: For attaching the pedestal and cleats.
- 2 – Drawer Slides: High-quality full-extension drawer slides will ensure smooth operation and full access to your drawer’s contents.
- 1 – Drawer Pull: Choose a style that complements your desired aesthetic, whether rustic, modern, or industrial.
- Wood Glue: An essential for creating strong, lasting joints. Always use wood glue in conjunction with fasteners.
- Wood Filler: For filling any nail holes or minor imperfections before finishing.
Important Note: This detailed supply list and plans are for constructing one nightstand. If your bedroom makeover includes a pair of bedside tables, remember to double the quantities of all materials listed above.
While we selected 6″ barnwood from Timeline Skinnies for its unique character and ease of use, it can be a more expensive option. For those on a tighter budget, you can easily substitute 1x6x8 common pine boards for the barnwood trim. Alternatively, consider creating a truly upcycled piece by using old pallet wood. If you opt for these alternatives, be aware that board thickness might vary, so it’s crucial to measure and cut as you build to ensure accurate fits and a cohesive final product.
Step 1: Constructing the Side Frames
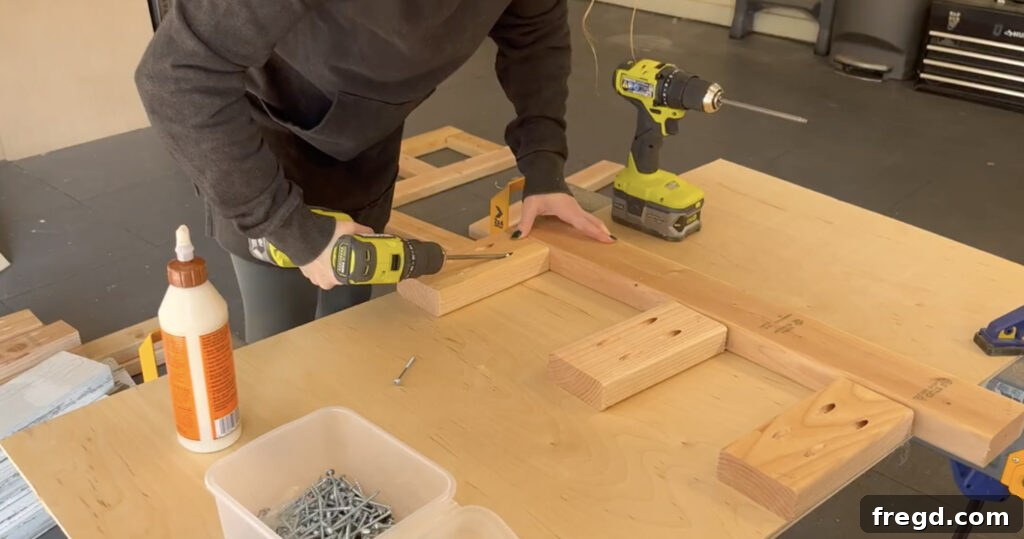
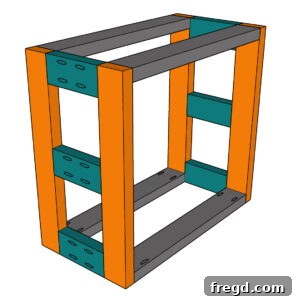
Begin by cutting all the necessary side frame pieces from your 2×4 framing lumber according to the dimensions in the printable plans. Accuracy in these initial cuts will ensure your nightstand is square and stable. Once cut, take the shorter cross pieces and drill 1 1/2″ pocket holes at both ends using your Kreg Jig. These pocket holes will create strong, concealed joints. We highly recommend our favorite Kreg Jig model, the Kreg Jig 720Pro, for its robust design and reliability.
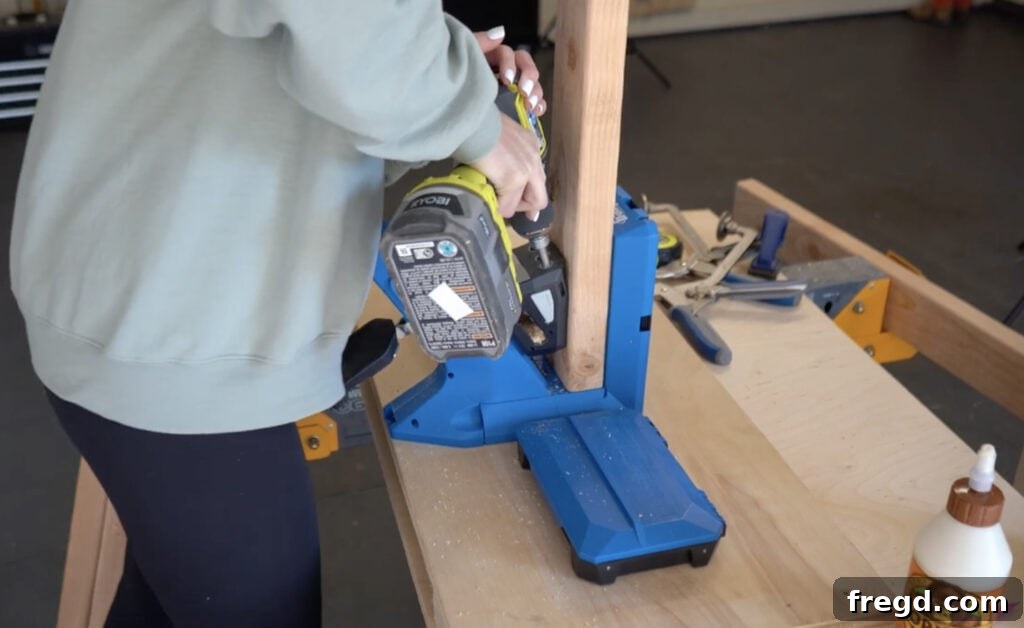
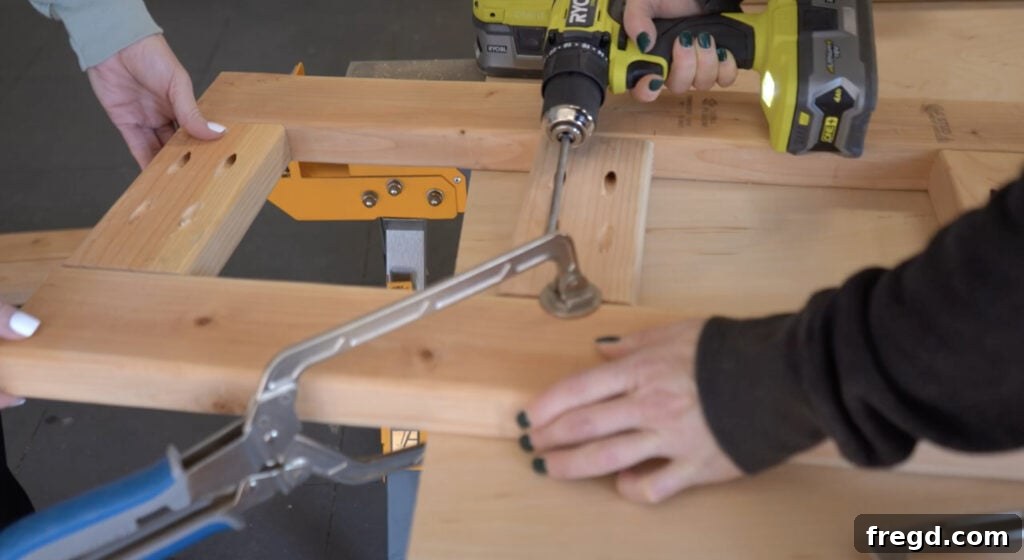
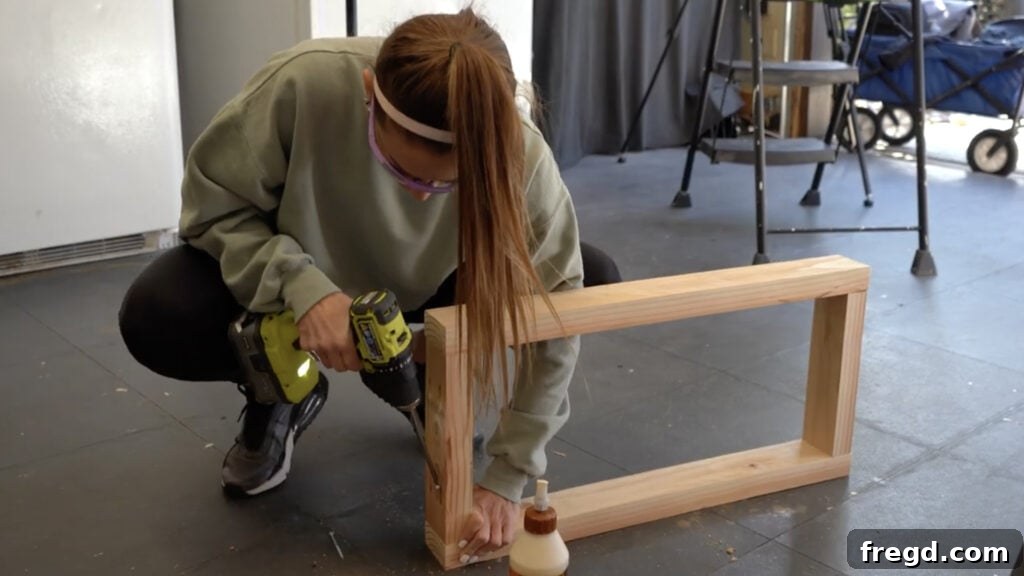
Next, apply a generous amount of wood glue to the ends of the short cross pieces before attaching them to the longer side pieces. Secure these joints with 2 1/2″ pocket hole screws. The combination of wood glue and pocket hole screws provides exceptional strength and durability for your frame. Repeat this process to build a second identical side frame. For best results and to ensure your joints remain perfectly flush during assembly, we find Kreg Face Clamps to be indispensable. These clamps hold your pieces tightly together as you drive the screws, preventing any unwanted movement or gaps.
Step 2: Attaching Top and Bottom Supports
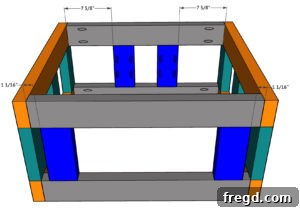
With your two side frames ready, it’s time to connect them. Cut the top and bottom support pieces to their specified lengths. Just like the cross pieces in Step 1, drill 1 1/2″ pocket holes at both ends of these support pieces. These supports will bridge the gap between your side frames, forming the overall width and depth of your nightstand. Apply wood glue to the joint surfaces, then attach these supports to both side frame assemblies using 2 1/2″ pocket hole screws. Ensure everything is square as you make these connections, as this forms the main structure of your nightstand.
Step 3: Integrating Cross Supports
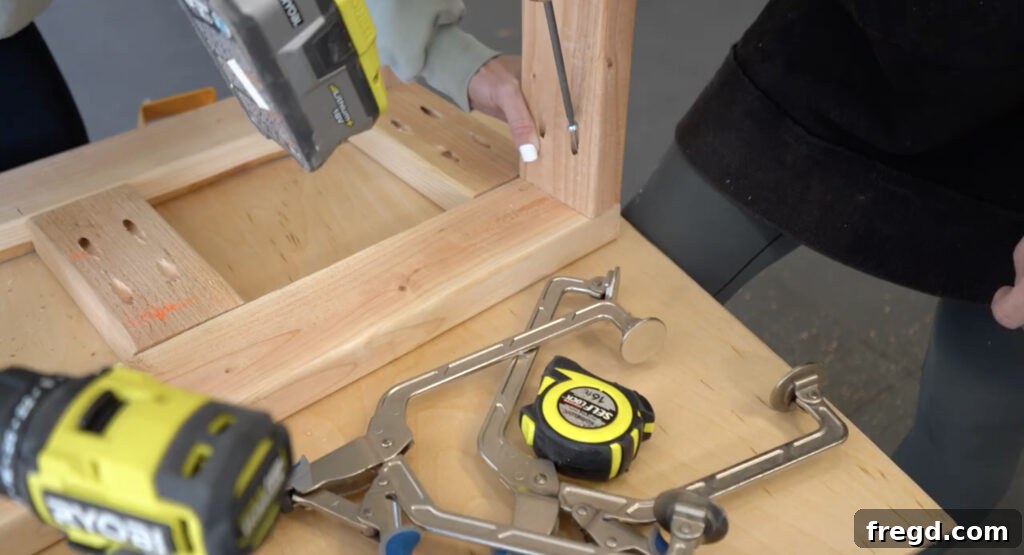
To further reinforce the structure and create mounting points for other components, cut the top and bottom cross supports to size. These pieces will run perpendicular to the main top and bottom supports you just installed. Drill 1 1/2″ pocket holes at both ends of these new cross supports. Using wood glue and 2 1/2″ pocket hole screws, attach them securely to the top and bottom supports. These additions will significantly enhance the rigidity of your nightstand frame and prepare it for the next stages of assembly.
Step 4: Assembling the Pedestal Base
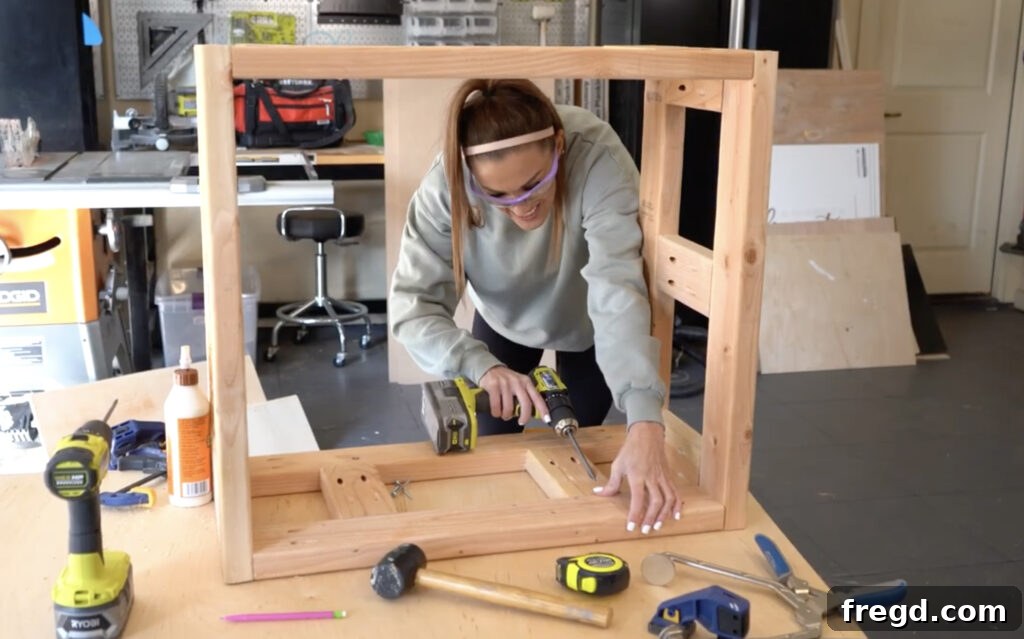
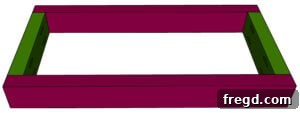
The pedestal base adds a stylish foundation to your nightstand. Cut the pedestal pieces to their designated sizes. Drill 1 1/2″ pocket holes at both ends of the short side pieces of the pedestal. These will connect the short sides to the longer front and back pieces, creating a robust box-like structure for the base. Attach these components together using wood glue and 2 1/2″ pocket hole screws. Ensure that all corners are square before the glue sets to guarantee a stable and aesthetically pleasing base.
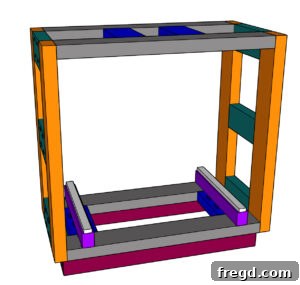
Step 5: Securing the Pedestal to the Nightstand
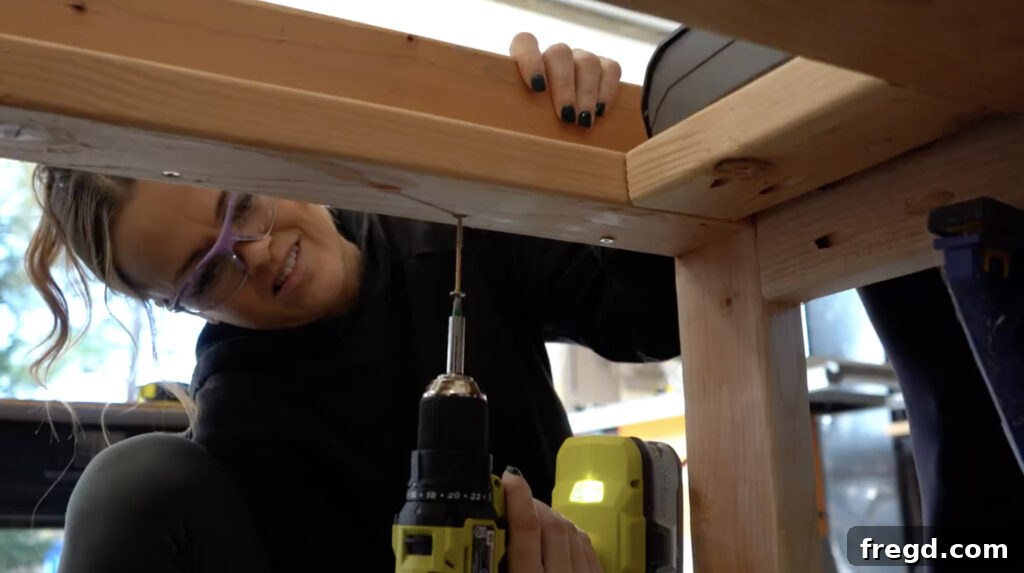
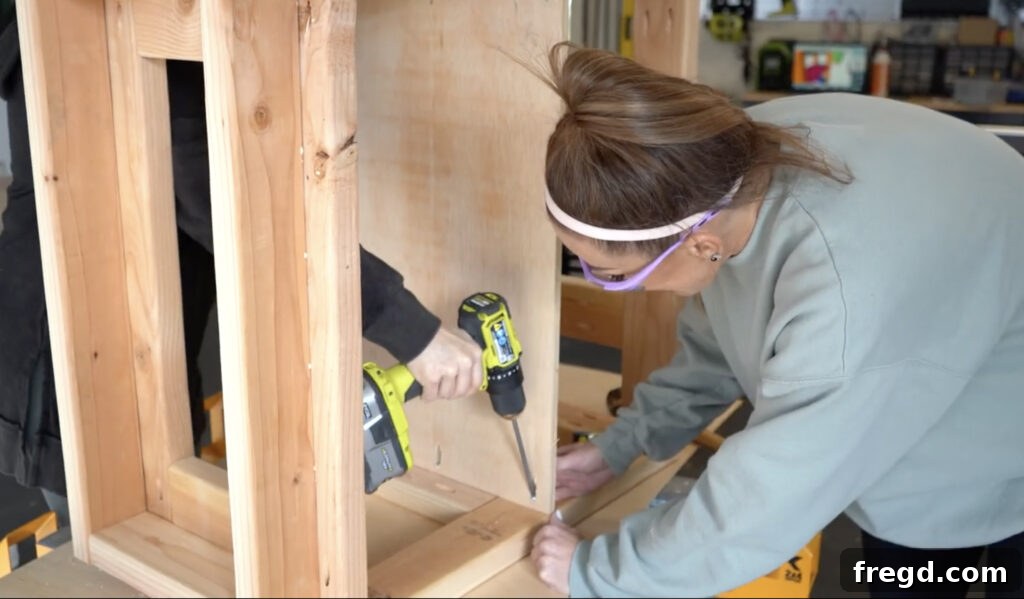
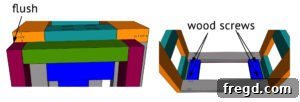
Now, it’s time to integrate the pedestal with the main nightstand frame. Carefully position the assembled pedestal directly onto the bottom of the nightstand frame, ensuring it is centered and aligned as shown in the plans. From the bottom of the inside of the nightstand, drive 2 1/2″ wood screws upwards into the top of the pedestal. This method ensures a secure attachment while keeping the fasteners hidden from view on the exterior, contributing to a clean, finished look. Double-check alignment before fully tightening all screws.
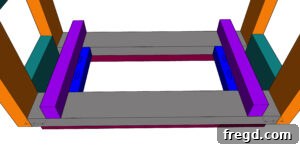
Step 6: Adding Drawer Cleats
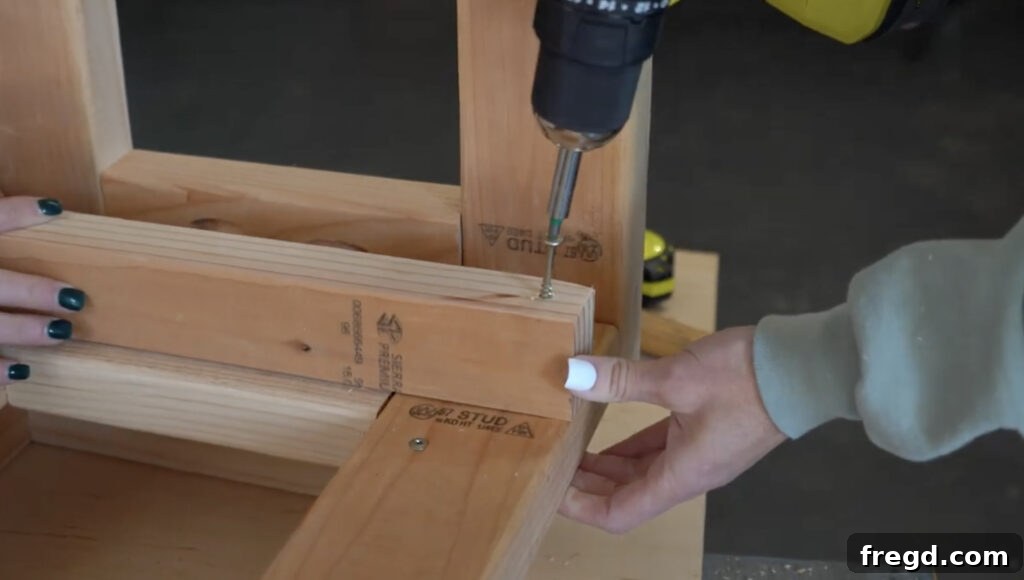
The cleats provide the necessary support for your drawer slides. Cut these smaller pieces of wood to the dimensions specified in your plans. Center each cleat over the bottom cross supports within the nightstand frame. Once properly positioned, attach them securely using 2 1/2″ wood screws driven from the top of the cleat down into the cross supports. This method ensures a robust connection capable of supporting the drawer. Before cutting new material, it’s always a good idea to check your scrap wood pile for smaller pieces like these – it’s a great way to minimize waste!
Step 7: Installing Drawer Slides
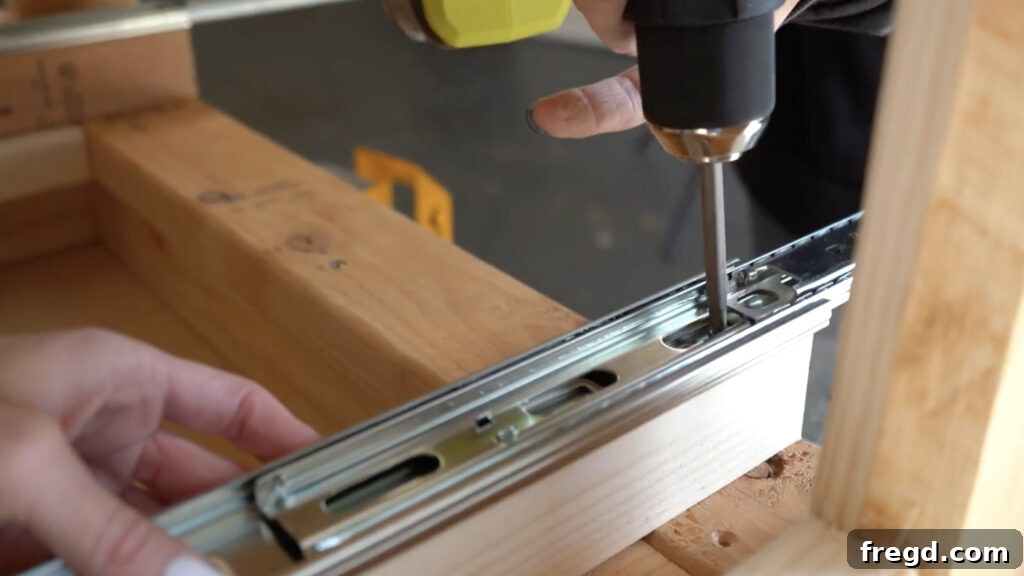
With the cleats in place, you can now install the drawer slides. Ensure you follow the specific instructions provided with your chosen drawer slides, as installation can vary slightly between brands. Typically, one half of the slide attaches to the cleat you just installed, and the other half will attach to the drawer box itself later. Measure carefully and use the recommended screws to attach the slides to the cleats, making sure they are perfectly level and parallel to each other. This step is critical for a smooth-gliding drawer.
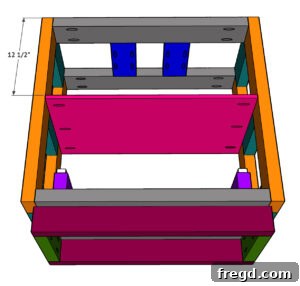
Step 8: Attaching the Interior Shelf
The interior shelf provides additional storage space within your nightstand. Cut the shelf piece from your hardwood plywood to the exact dimensions. On both long edges of the shelf, drill 3/4″ pocket holes. You can use a miter saw, circular saw, or table saw for cutting the shelf, depending on your available tools. Apply wood glue to the edges that will contact the supports, then attach the shelf to the side cross supports of the nightstand frame using 1 1/4″ pocket hole screws. Make sure the shelf is level and secure for optimal functionality.
Building and Installing the Drawer
A functional drawer is a key feature of this nightstand, providing convenient storage for bedside essentials. Building a sturdy drawer box is straightforward with accurate cuts and proper assembly techniques.
Step 1: Constructing the Drawer Box
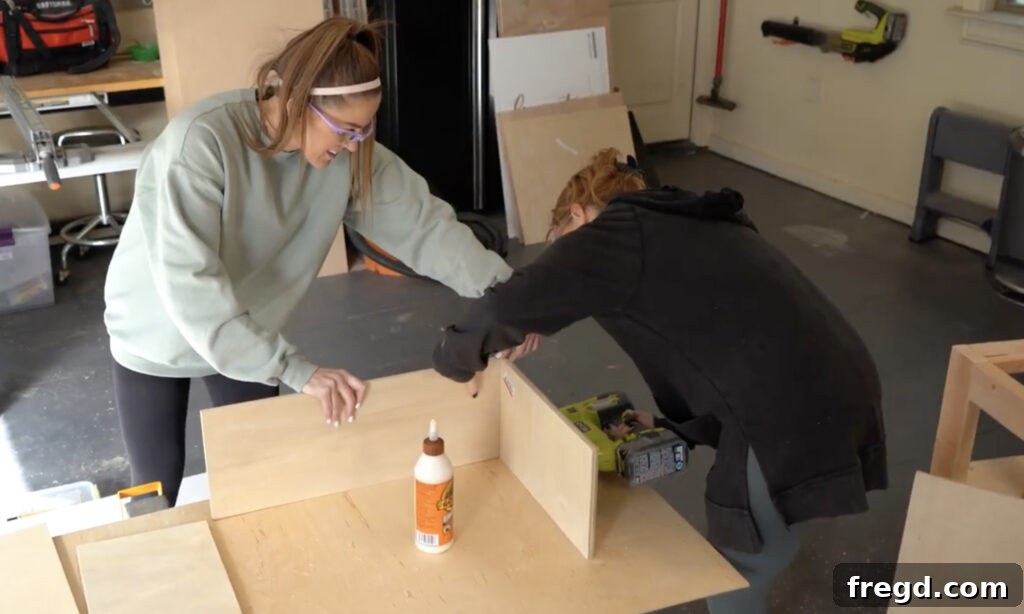
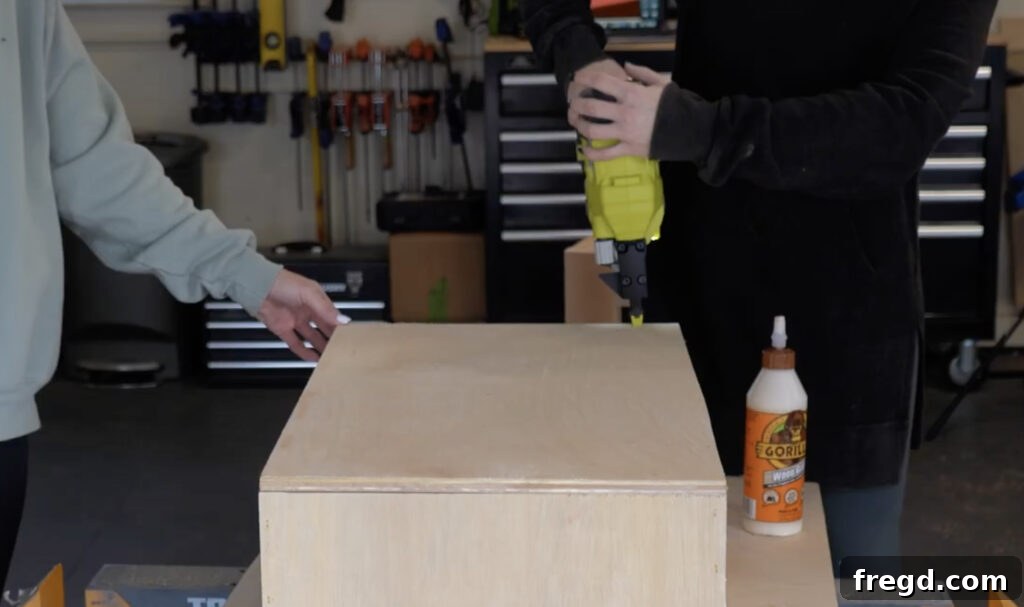
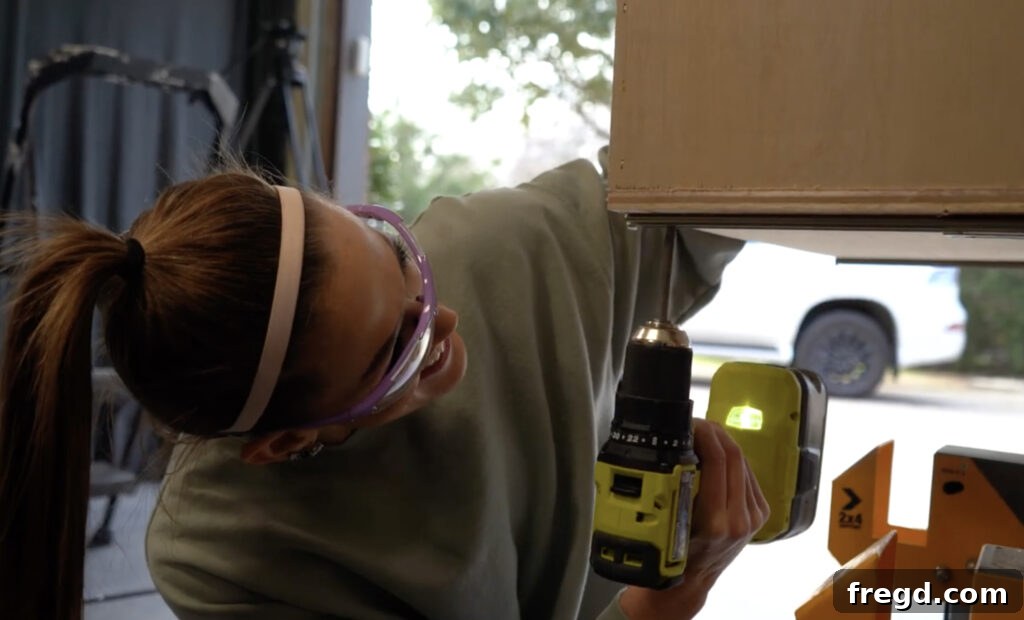
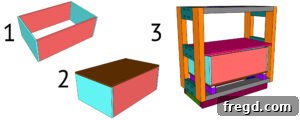
First, cut the plywood pieces for the drawer sides, front, and back to their precise dimensions. Apply wood glue to the edges and join them together using 3/4″ staples or brad nails. This combination creates a strong and durable drawer box. Next, cut the drawer bottom to size. Apply glue along the bottom edges of the assembled drawer box and attach the drawer bottom in the same manner, securing it with staples or brad nails. This creates a solid base for your drawer. Once the drawer box is fully assembled and the glue has dried, carefully pull the extendable halves of the drawer slides forward and attach them to the bottom sides of the drawer box, following the manufacturer’s instructions. Ensure they are aligned correctly for smooth operation.
Adding the Barn Wood Trim
The barnwood trim is what gives this nightstand its distinctive rustic yet modern farmhouse aesthetic. Careful measurement and application are key to achieving a professional finish.
Step 1: Attaching Side Panels
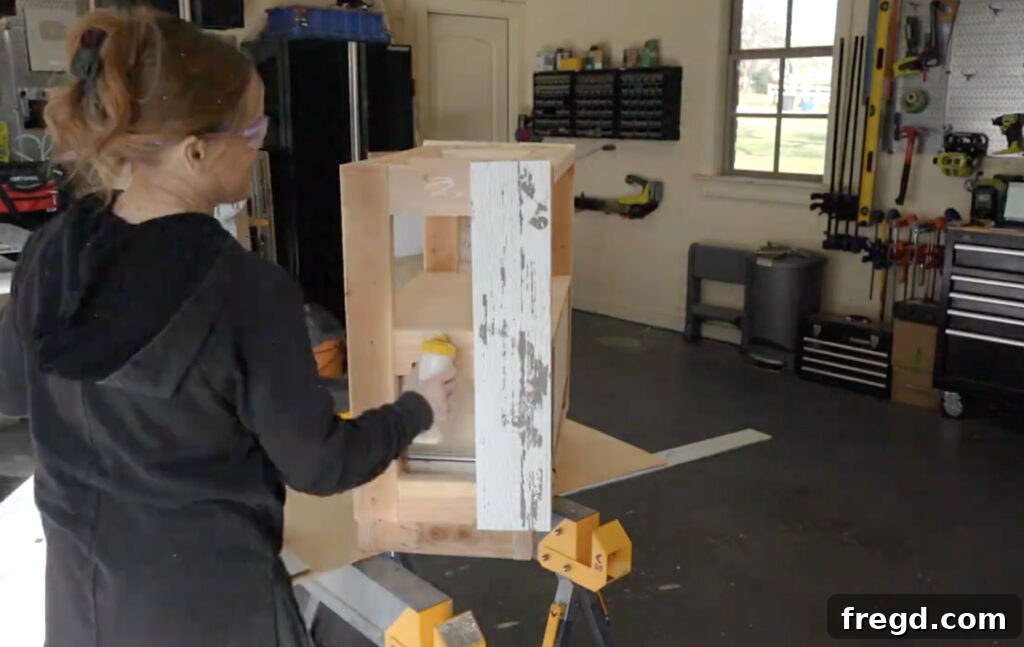
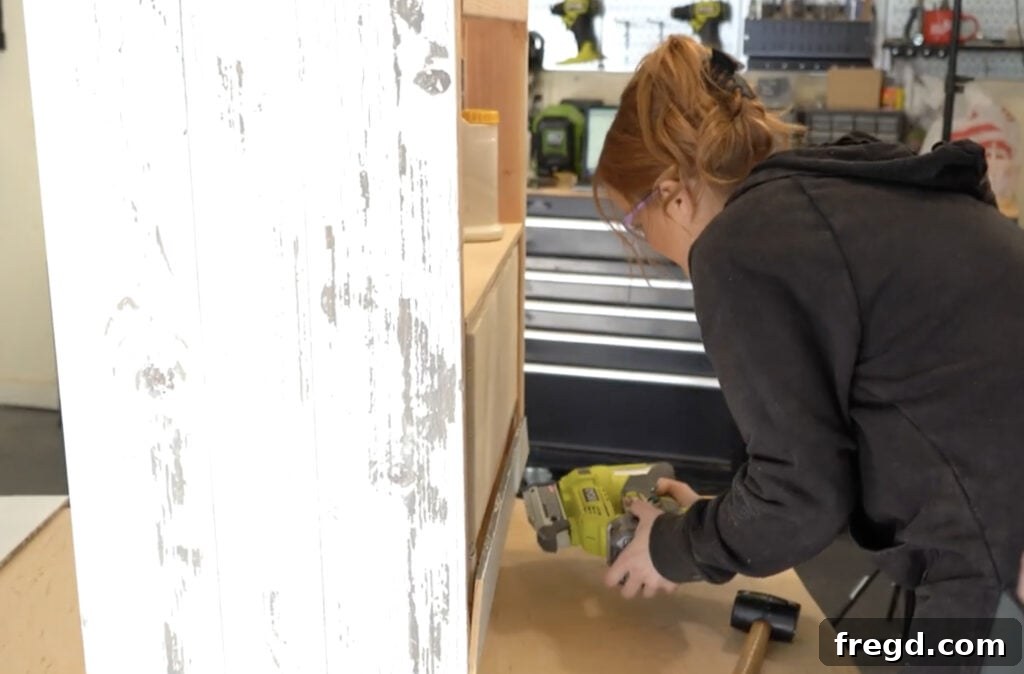
Start by cutting the barnwood pieces for the side panels to size. It’s often easiest to begin with the two outside pieces for each side. Once these are cut and dry-fitted, you can then measure and cut the middle piece to fit perfectly in between, ensuring tight seams. Apply wood glue to the back of each barnwood piece and then attach them to the nightstand frame using 1″ pin nails. Ensure the bottom edge of these boards is flush with the bottom of the nightstand frame. For a clean look at the top, cut the upper edge of these side panels at a 45° angle to meet the top trim pieces that will be added next. Repeat this process for both sides of the nightstand.
Step 2: Installing Top Trim Boards
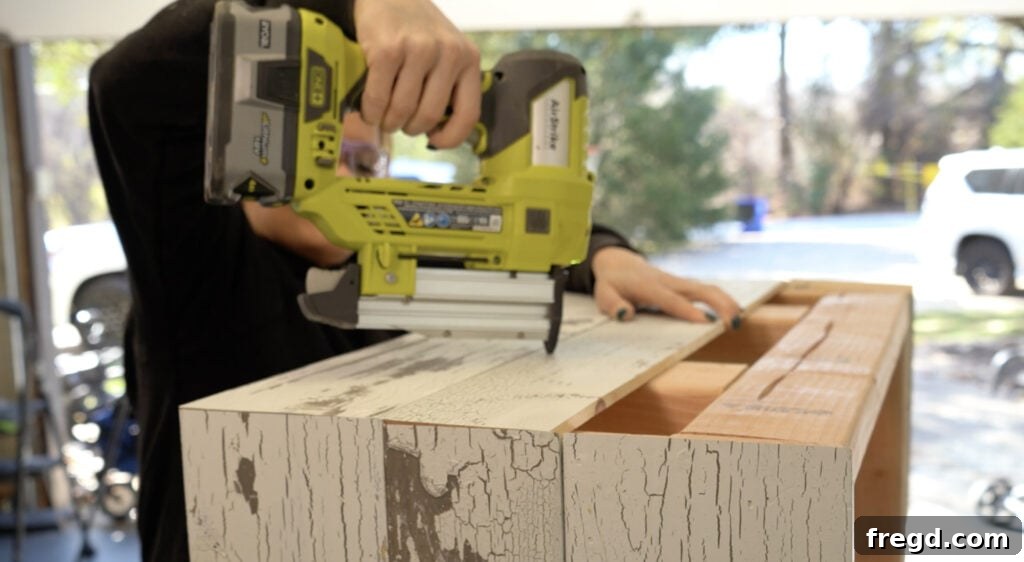
Next, cut the barnwood boards for the top of the nightstand to size. These pieces will sit on top of the frame and meet the angled cuts of the side panels. Just as with the side panels, apply wood glue to the contact surfaces and secure them with 1″ pin nails. Ensure these boards are flush with the outer edges of the nightstand frame, creating a smooth and finished tabletop surface. The seamless connection with the side panel angles will contribute to the nightstand’s cohesive design.
Step 3: Trimming the Pedestal
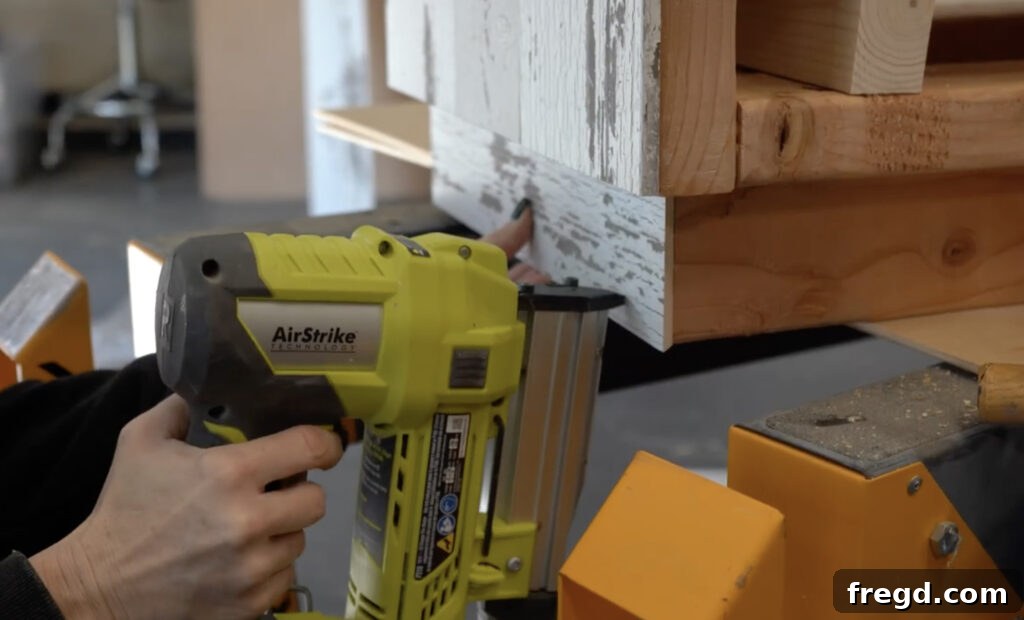
To continue the integrated barnwood look, cut the side and bottom trim pieces for the pedestal to size. Apply wood glue and attach these pieces to the sides of the pedestal using 1″ pin nails. Once the side pieces are in place, measure and cut the front pedestal trim piece to fit precisely, attaching it with wood glue and 1″ pin nails. This trim will encase the pedestal, tying it into the overall barnwood aesthetic of the nightstand.
Step 4: Attaching Front Miter Trim
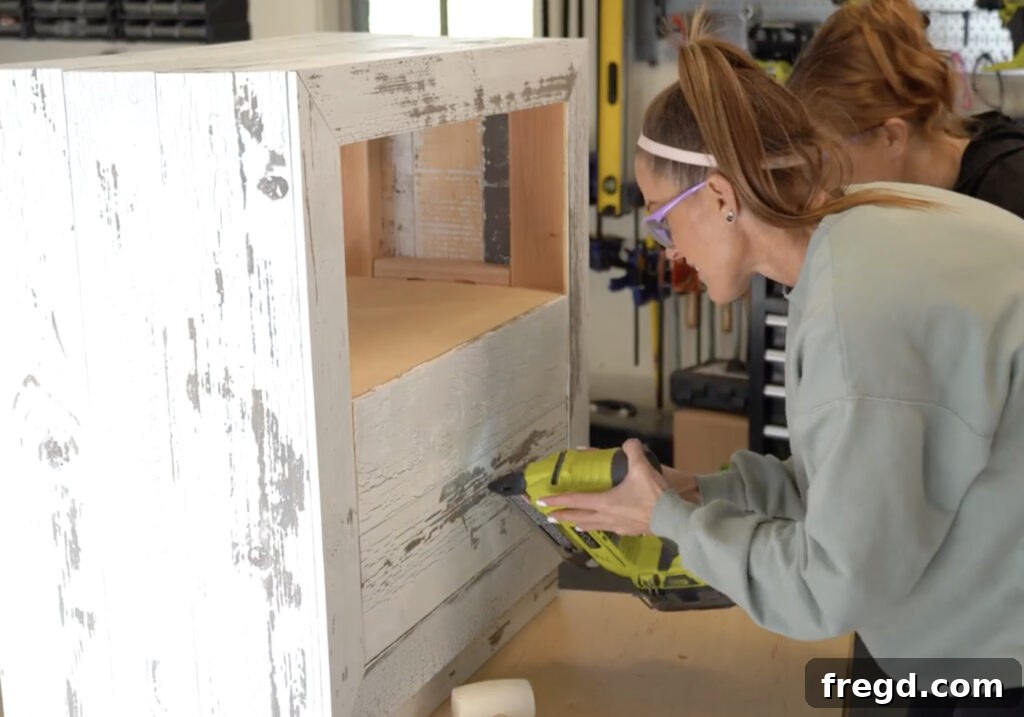
The front miter trim pieces frame the drawer opening, providing a clean and finished look. Carefully measure and cut these pieces, ensuring accurate mitered corners for seamless joints. Attach them one piece at a time to the front of the nightstand frame using wood glue and 1″ pin nails. Take your time during this step to achieve perfectly aligned corners, as these are prominent features of the nightstand’s facade.
Step 5: Finishing the Drawer Face
Finally, cut the drawer face pieces from your barnwood to size. These will be purely decorative, creating the visible front of your drawer. Carefully align them on the front of the assembled drawer box. It’s crucial to leave a small 1/8″ gap on all sides (top, bottom, and sides) between the drawer face and the surrounding nightstand frame. This small gap ensures that the drawer can slide open and closed smoothly without catching or binding. Once properly positioned, attach the drawer face pieces to the drawer front using wood glue and 5/8″ pin nails.
The Finish and Personalization
Now that the structural assembly and trim are complete, it’s time for the final touches that truly make this nightstand your own. The finishing stage allows for immense personalization, letting you dictate the overall look and feel of your custom furniture piece.
Begin by thoroughly sanding all surfaces of the nightstand. Start with a coarser grit sandpaper (e.g., 120-grit) to smooth out any rough spots or imperfections, then move to a finer grit (e.g., 220-grit) for a silky-smooth finish. Don’t forget to fill any visible nail holes with wood filler and sand those areas flush once dry. A well-sanded surface is key for an even and professional-looking finish.
Once sanding is complete, you can choose to stain or paint your nightstand. If you’ve used new wood for the interior shelf, consider staining it to match or complement the barnwood. For instance, I opted to apply one coat of a coordinating wood stain to the backside of the exposed barnwood and the interior shelf to create a consistent and refined look. The beauty of barnwood is often in its natural, weathered appearance, so a clear coat or light stain might be all you need to preserve its character.
To protect the top surface of your nightstand, which will likely see daily use, apply a durable sealant. A few coats of polyurethane or a similar clear topcoat will provide excellent protection against spills, scratches, and general wear and tear, ensuring your nightstand remains beautiful for years to come.
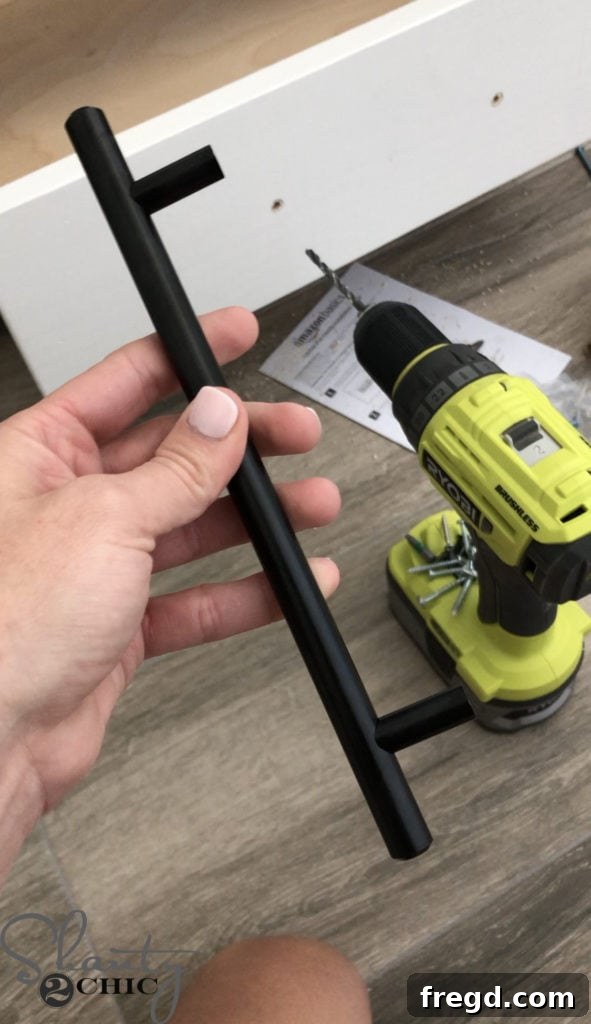
Finally, select and install your chosen drawer pull. This is a small detail that can have a significant impact on the nightstand’s overall style. From minimalist metal bars to ornate vintage knobs, or even a rustic leather pull, your hardware selection offers another opportunity for customization. Think about the existing decor in your room – do you want to lean into the rustic farmhouse vibe with an aged bronze pull, or introduce a modern touch with a sleek chrome handle?
Beyond the finish and hardware, consider other creative additions. For a more modern or industrial aesthetic, you could replace the wooden pedestal base with stylish hairpin legs. This simple change can dramatically alter the look, transforming it from rustic to a chic contemporary piece. The beauty of DIY lies in the freedom to adapt and innovate!
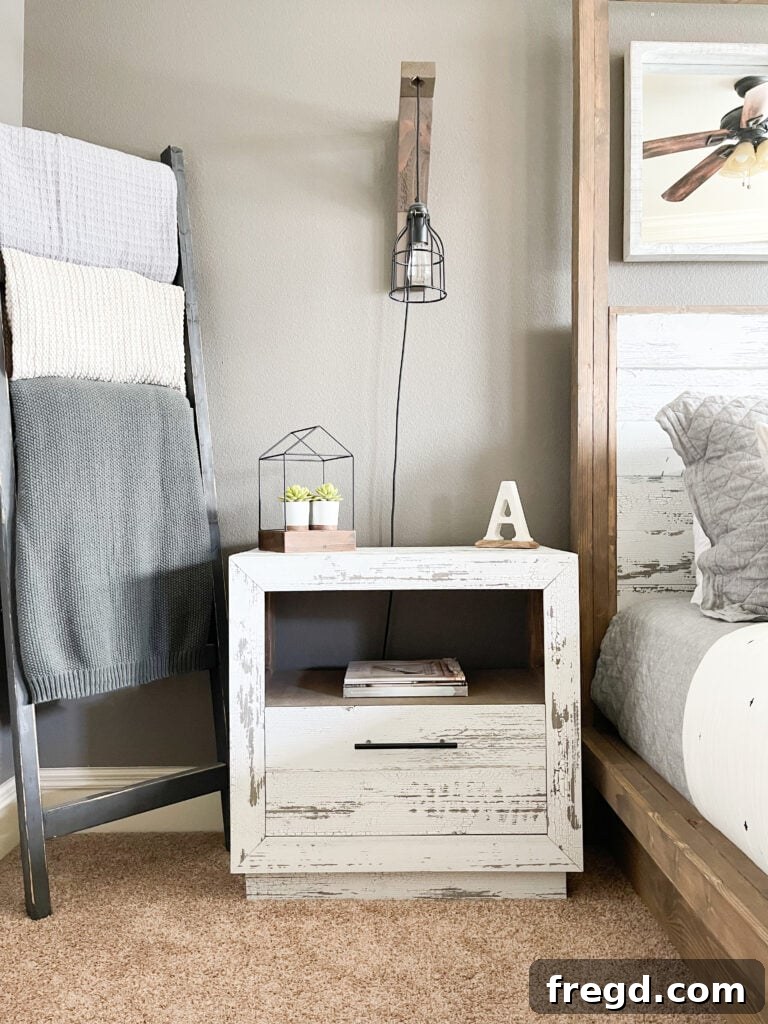
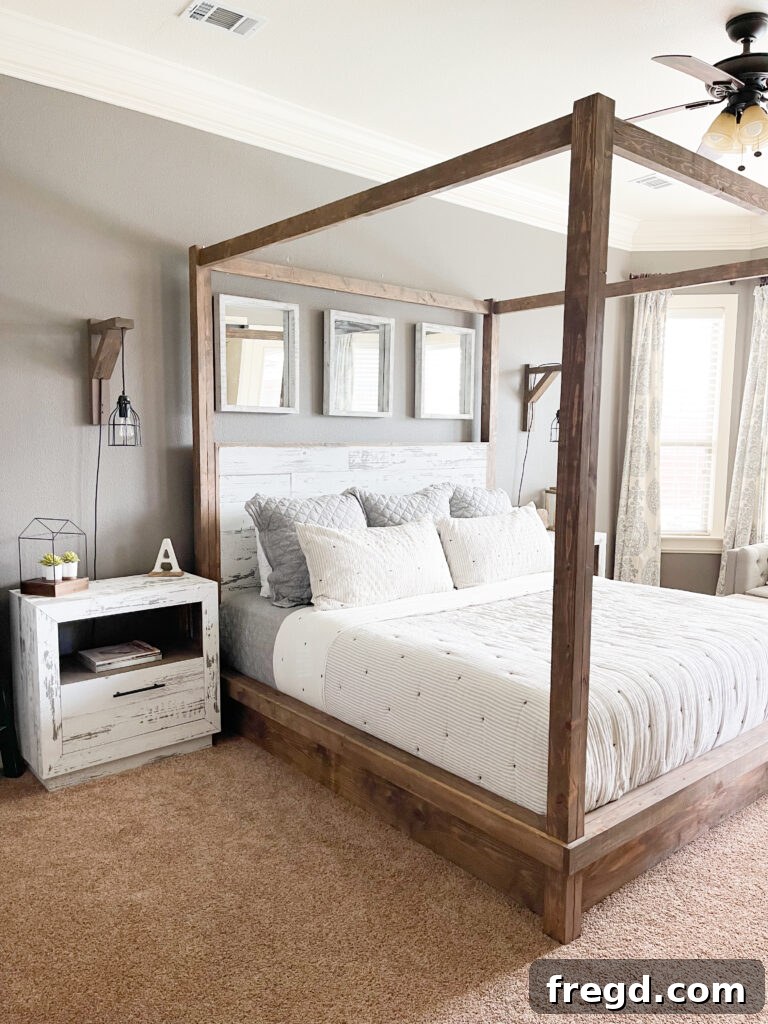
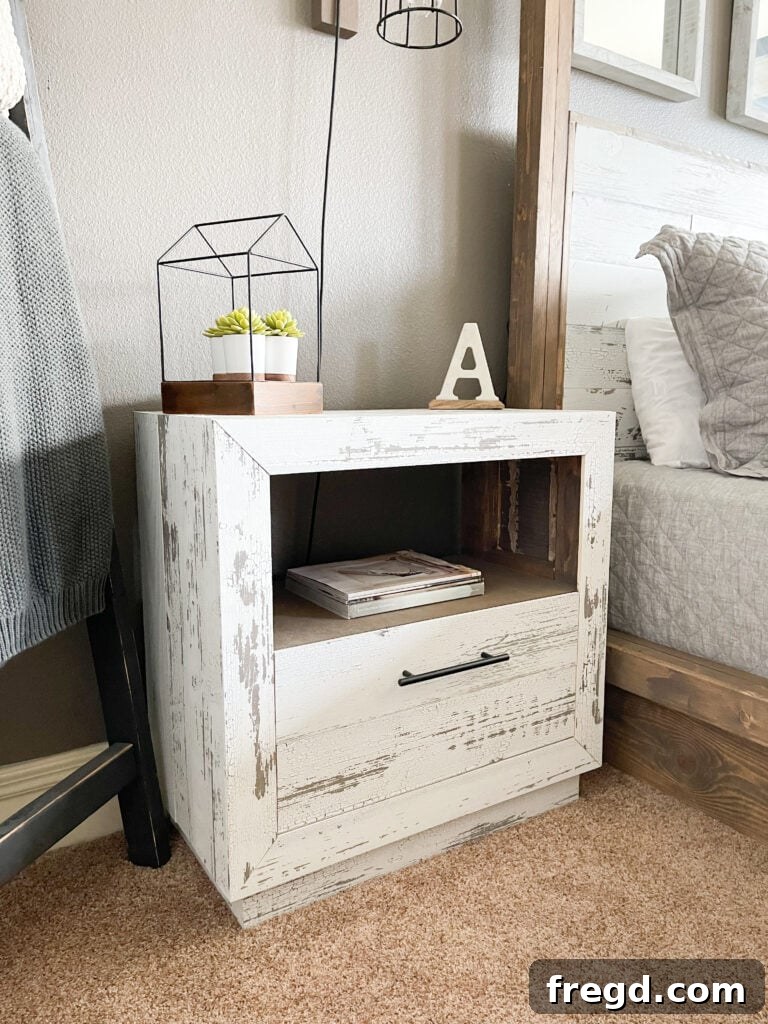
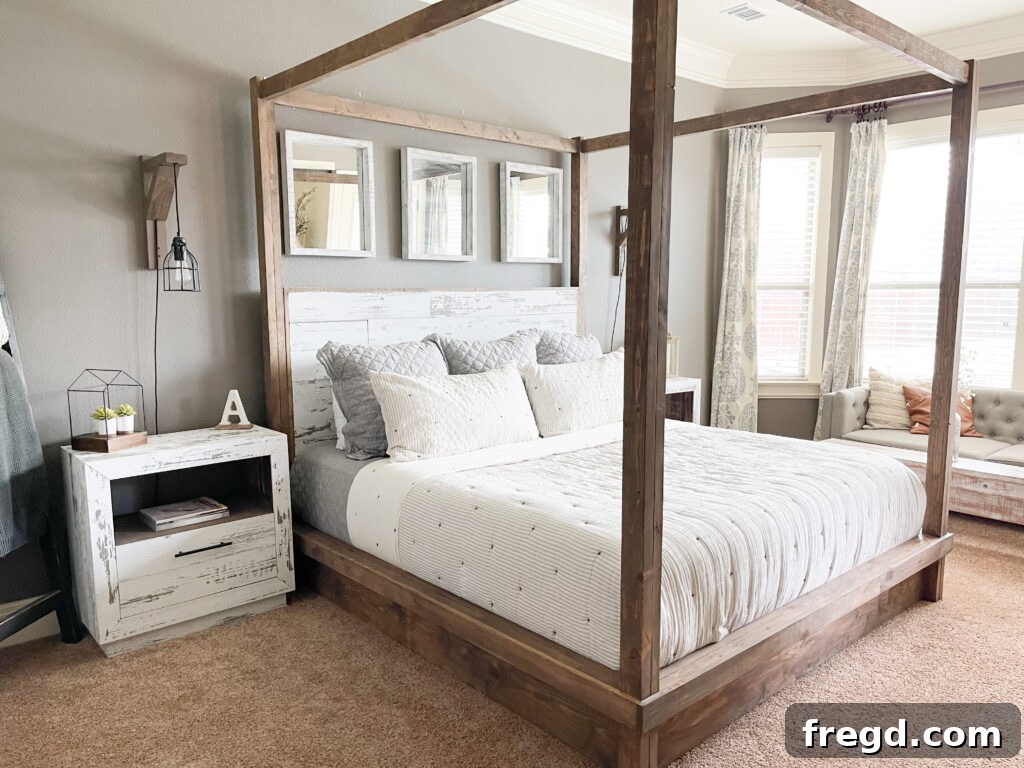
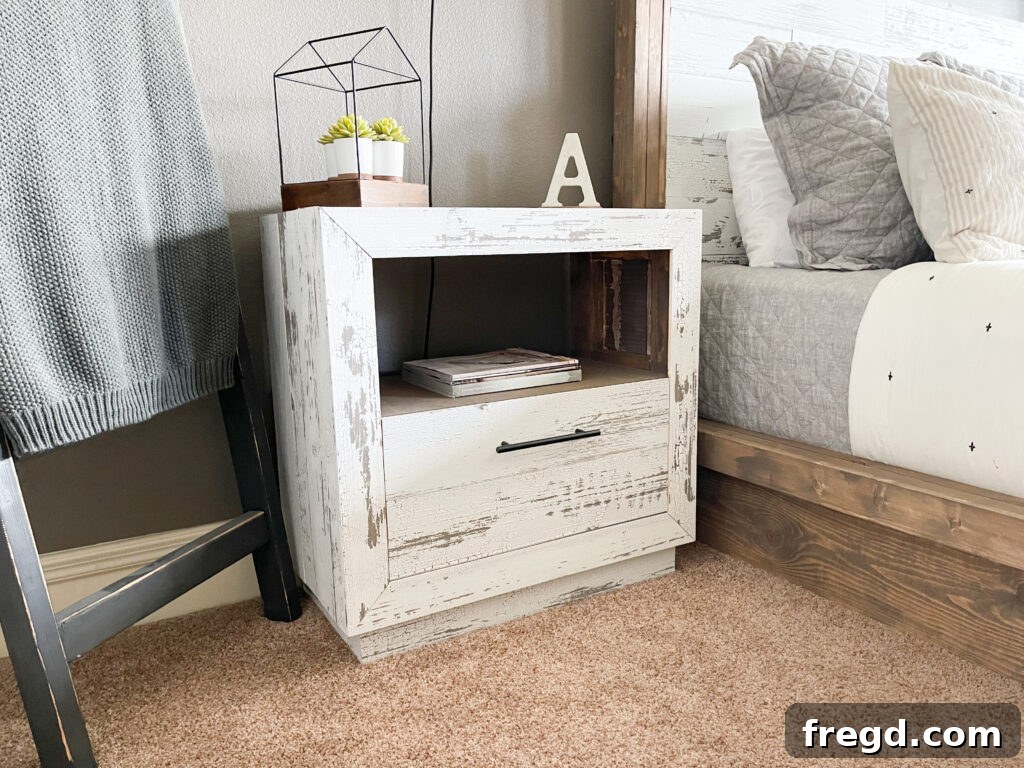
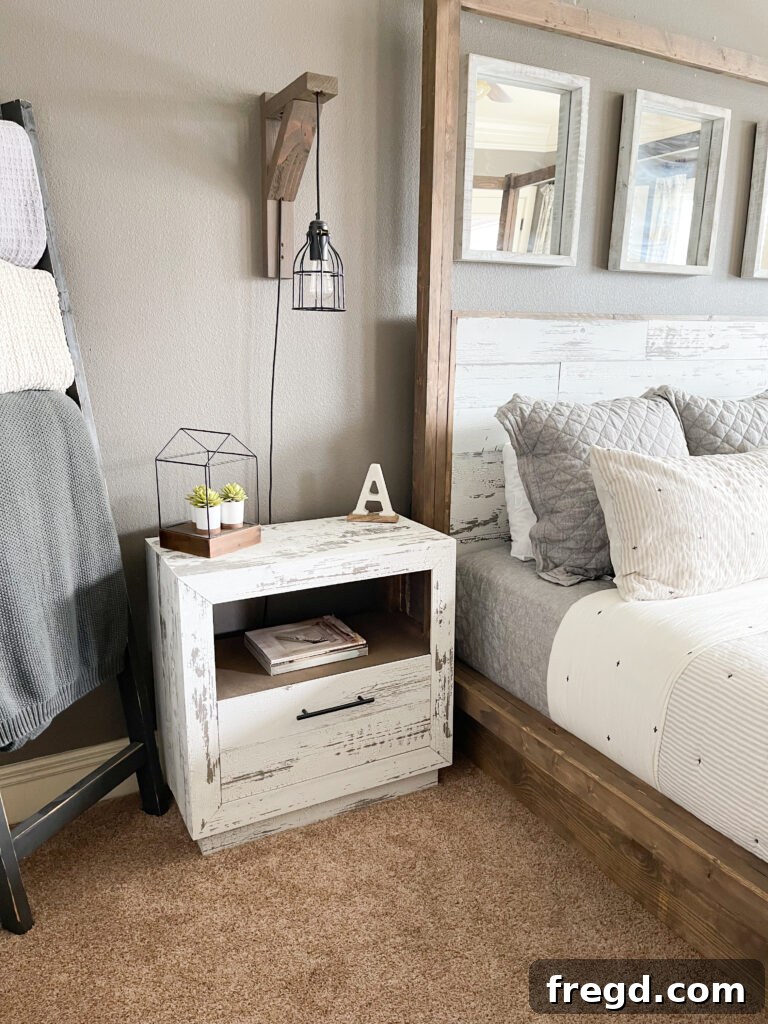
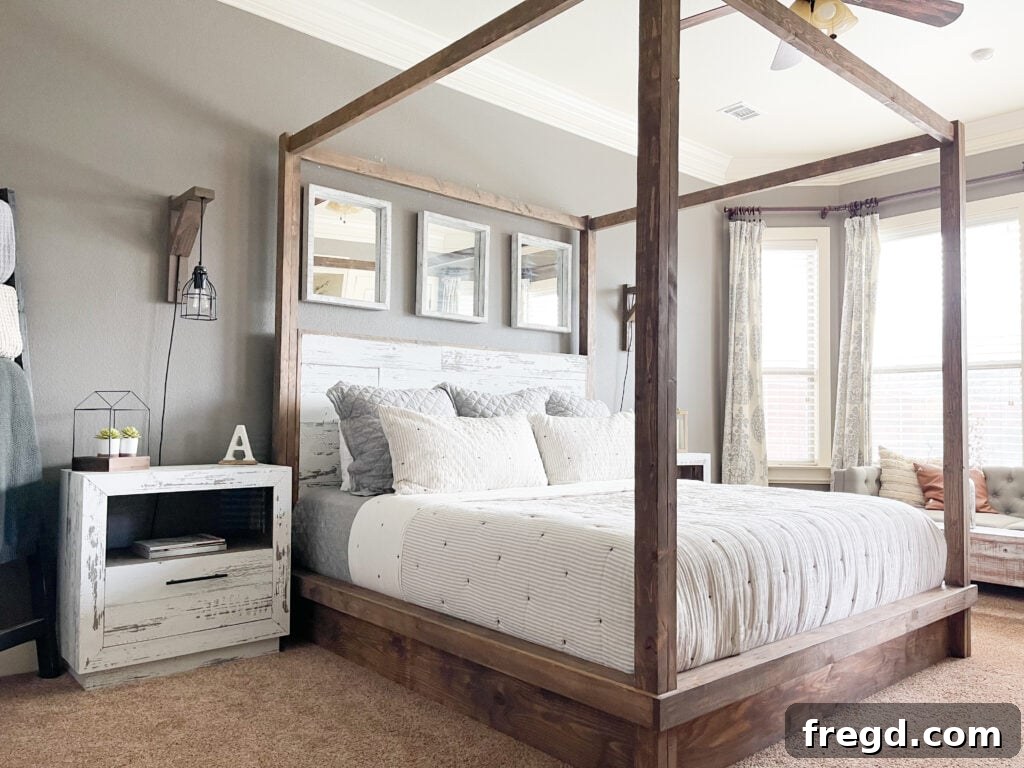
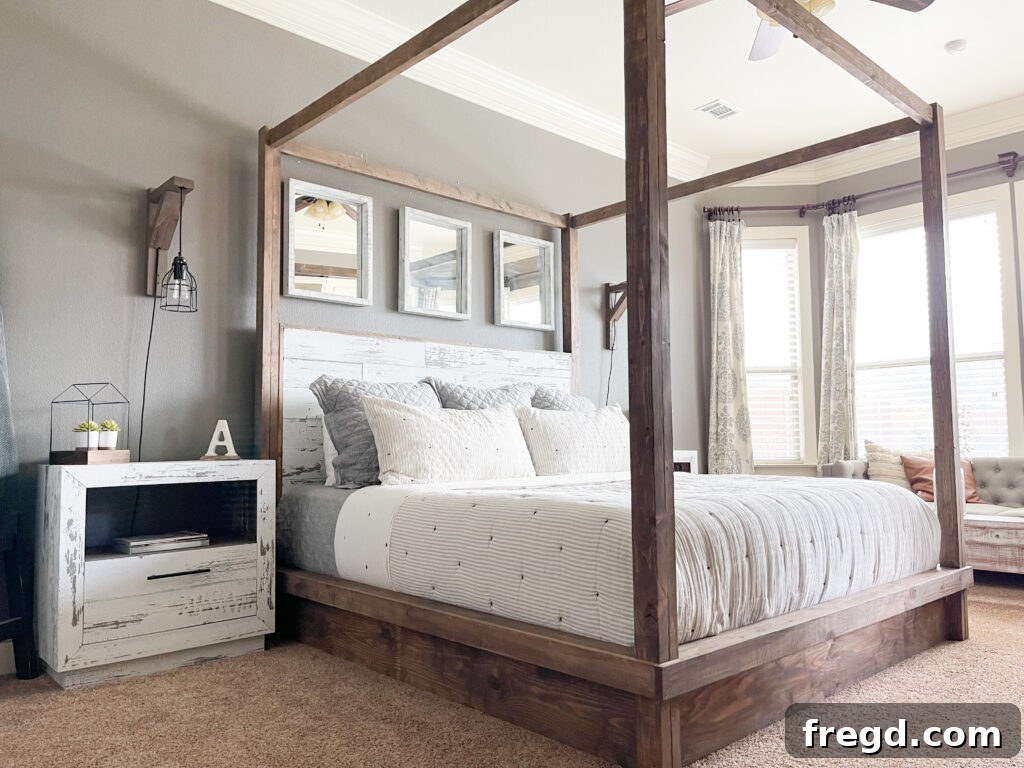
I am absolutely thrilled with how my custom DIY Nightstands turned out! With just a little framing lumber, some character-rich barnwood, and a bit of elbow grease, I was able to craft these functional and stylish side tables. They don’t just provide perfect storage space; their unique blend of rustic barnwood and clean, straight lines creates a truly distinctive modern farmhouse nightstand look – a style we lovingly call ‘shanty chic’!
The satisfaction of building your own furniture is immense, and the ability to customize every detail means your nightstand will be perfectly suited to your needs and aesthetic preferences. Don’t be afraid to get creative and make this design truly your own. We encourage you to share your completed projects on social media; just remember to use the hashtag #shanty2chic so we can see and share your amazing work too! Happy Building, and enjoy your beautiful new bedside addition!
Other Shanty2Chic DIY Nightstand Ideas
If you loved this project and are hungry for more DIY inspiration, explore some of our other popular nightstand designs. Each one comes with free plans to help you create more custom pieces for your home!
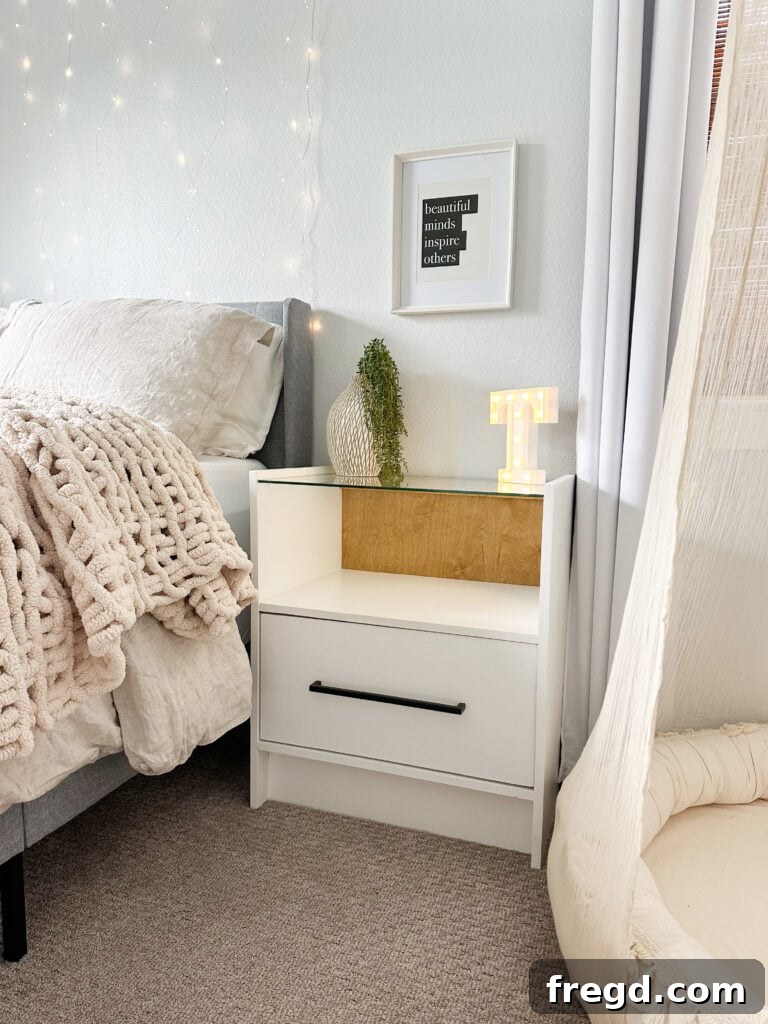
Glass Top Nightstand
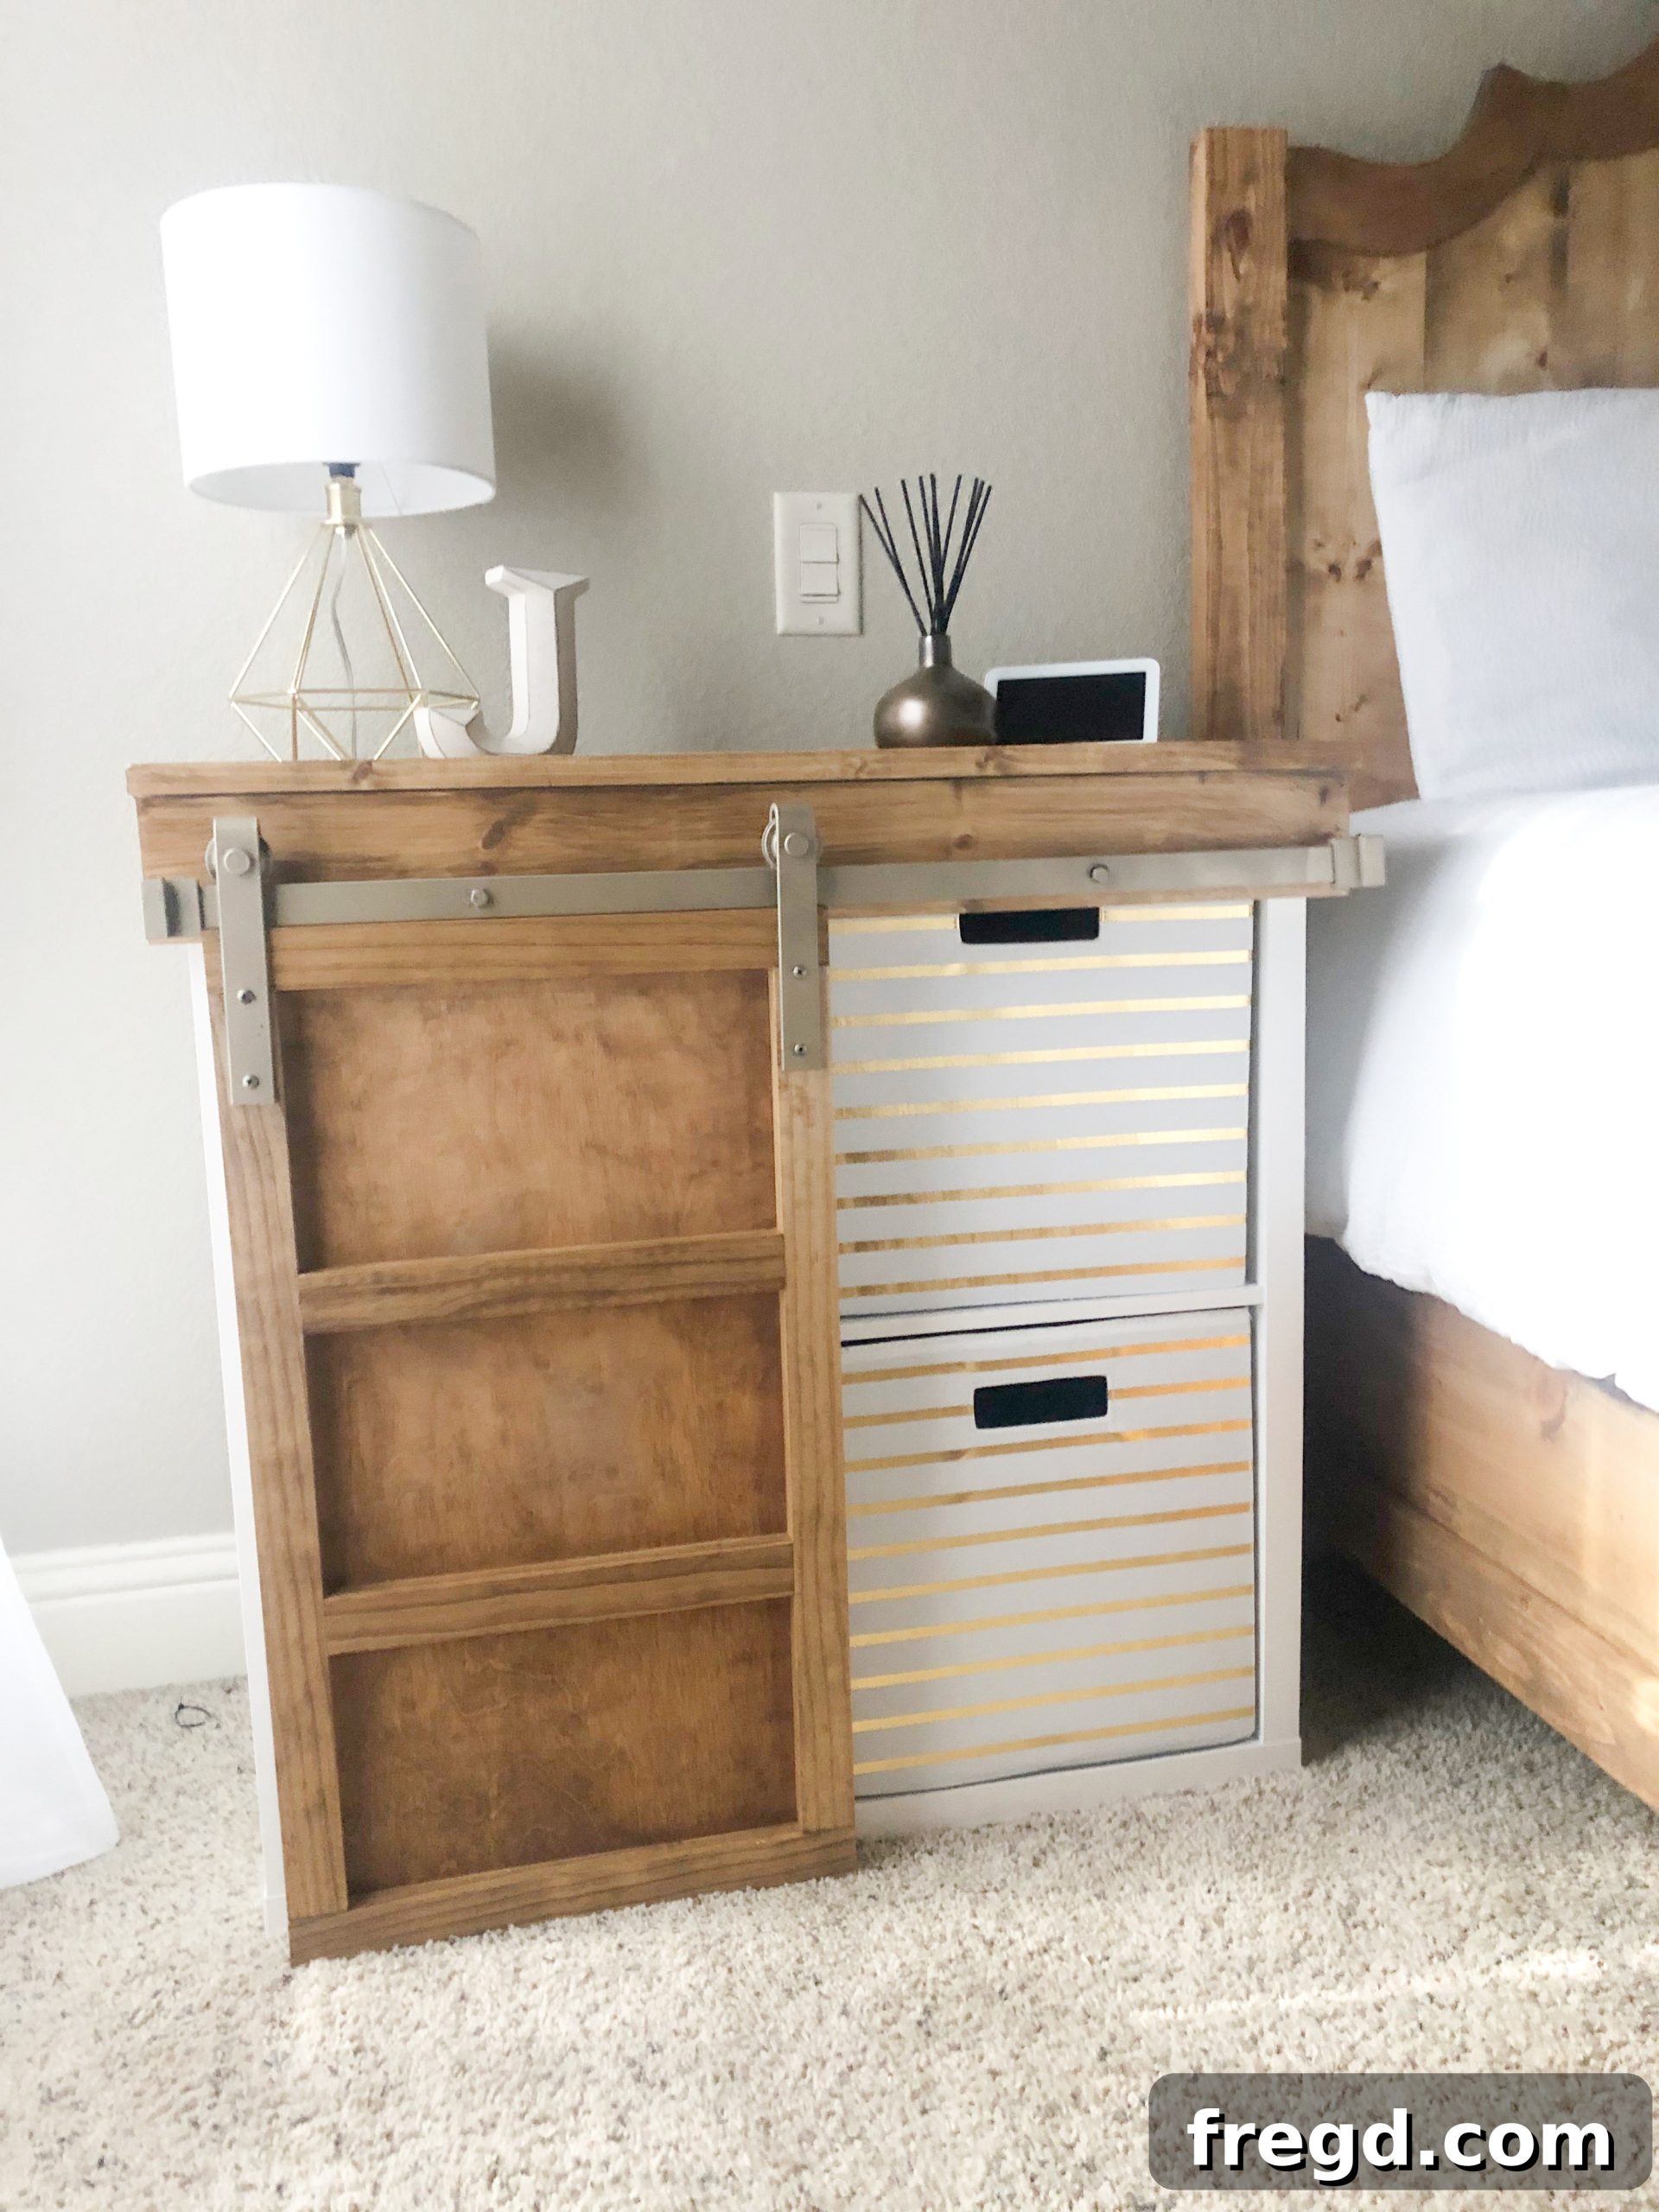
DIY Nightstand with Wooden Crates
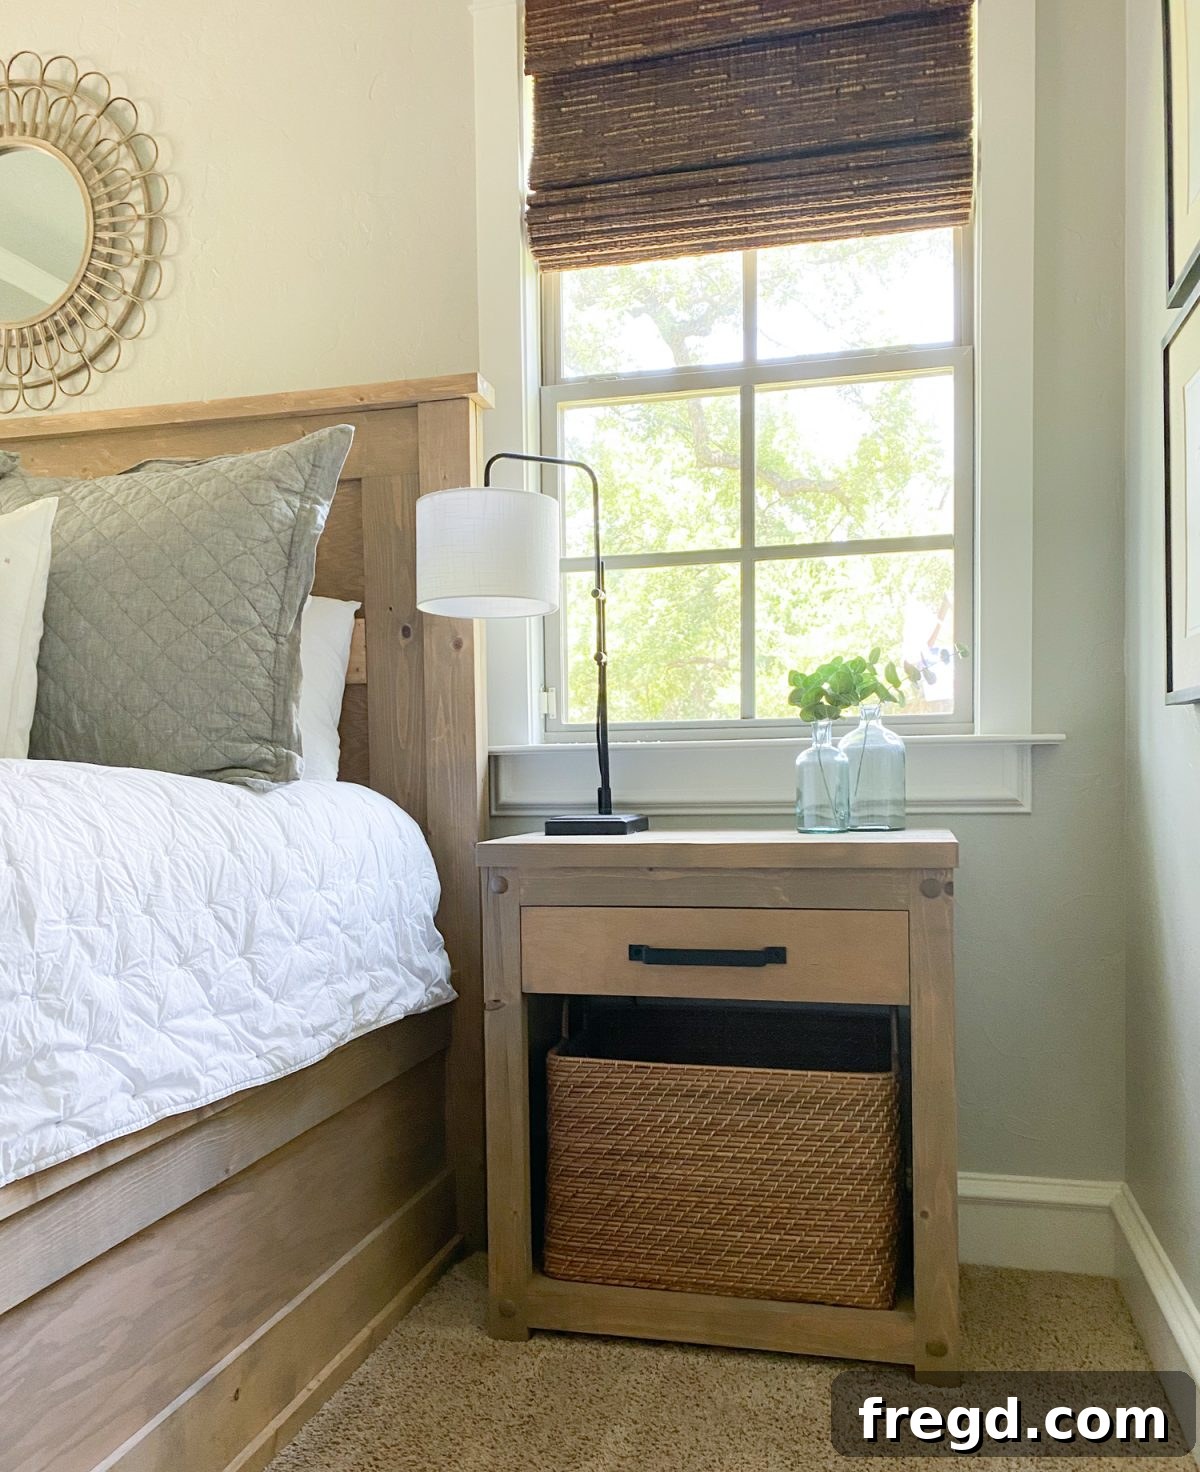
DIY Rustic Nightstand
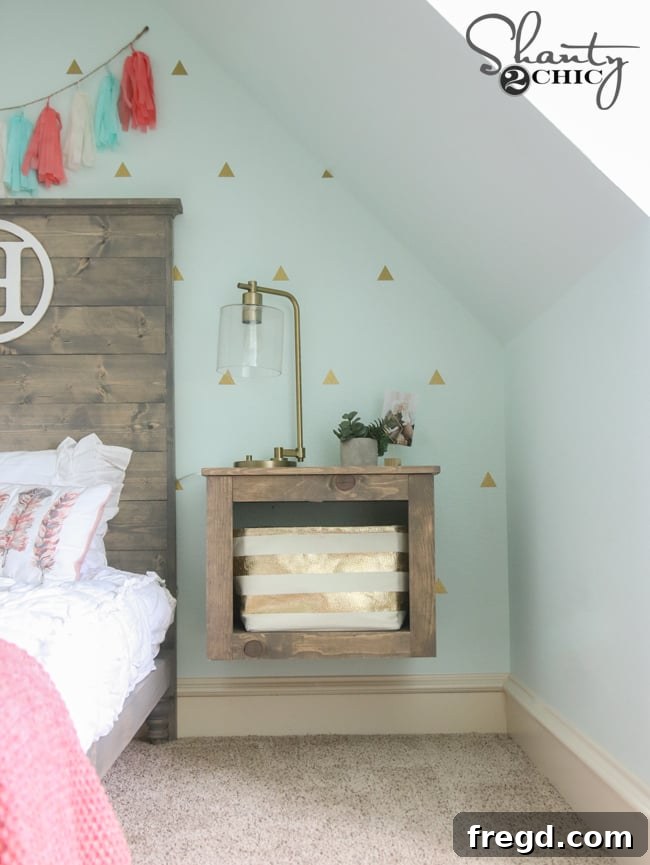
Floating Nightstand
DIY Nightstand with Drawer
Tools
-
Miter Saw
-
Drill
-
Kreg Jig
-
Table Saw (optional)
-
Brad Nailer
-
Stapler (optional)
-
Pin Nailer (optional)
Supply List (for one nightstand)
- 16 1″x6″x48″ Barnwood Boards
- 1 1/2″x48″x48″ Hardwood Plywood Sheet
- 5 2x4x8 Framing Lumber Boards
- 1 1/4″ Pocket Hole Screws
- 2 1/2″ Pocket Hole Screws
- 3/4″ Staples (or brad nails)
- 5/8″ Pin Nails (or brad nails)
- 1″ Pin Nails (or brad nails)
- 2 1/2″ Wood Screws
- 2 Drawer Slides (full extension recommended)
- 1 Drawer Pull (style of your choice)
- Wood Glue
- Wood Filler
Instructions
Cut List – Plans are for one nightstand (refer to printable PDF for detailed measurements)
-
Cut List 1: Framing Lumber (e.g., 2x4s)

-
Cut List 2: Plywood Pieces (e.g., 1/2″ hardwood plywood)
-
Cut List 3: Barnwood Trim (e.g., 1×6 barnwood)
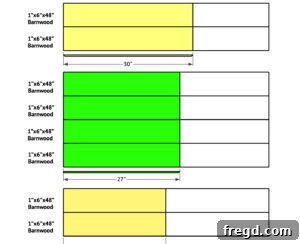
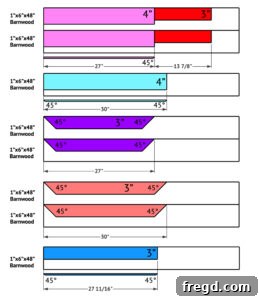
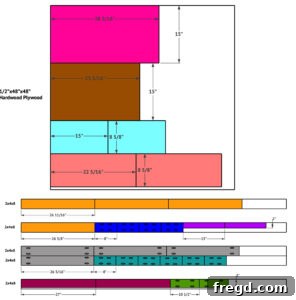
Building the Nightstand Frame
-
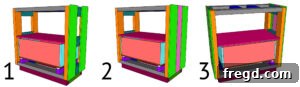
Cut the side frame pieces to size. Drill 1 1/2″ pocket holes at both ends of the short cross pieces and attach them to the side pieces with 2 1/2″ pocket hole screws and wood glue. Build 2 identical side frames.
-
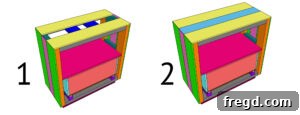
Cut the top and bottom support pieces to size and drill 1 1/2″ pocket holes at both ends. Attach them to both side frame assemblies with 2 1/2″ pocket hole screws and wood glue.
-
Cut the top and bottom cross supports and drill 1 1/2″ pocket holes at both ends. Attach them to the top and bottom supports with 2 1/2″ pocket hole screws and wood glue.
-
Cut the pedestal pieces to size and drill 1 1/2″ pocket holes at both ends of the short side pieces. Attach them to the long, front and back piece with 2 1/2″ pocket hole screws and wood glue to form the pedestal box.
-
Attach the pedestal to the bottom of the nightstand frame. Use 2 1/2″ wood screws from the bottom of the inside of the nightstand and into the top of the pedestal for a secure, hidden connection.
-
Cut the cleats to size, center them over the bottom cross supports, and attach them with 2 1/2″ wood screws from the top of the cleat into the supports.
-
Attach the drawer slides to the cleats, ensuring they are level and parallel for smooth drawer operation.
-
Cut the interior shelf to size and attach 3/4″ pocket holes on both edges. Attach it to the side cross supports with 1 1/4″ pocket hole screws and wood glue.
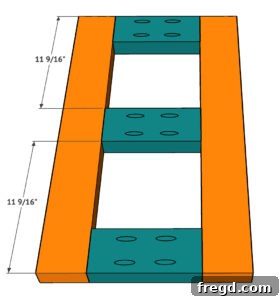
Drawer Assembly
-
Cut the drawer sides, front, and back pieces to size from plywood. Attach them together with 3/4″ staples or brad nails and wood glue to form the drawer box. Cut the drawer bottom to size and attach it to the drawer box in the same way.
Barnwood Trim Application
-
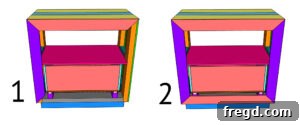
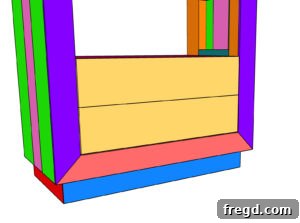
Cut the side trim pieces to size from barnwood and attach them to the nightstand frame with 1″ pin nails and wood glue. Start with the two outside pieces, then measure and cut for the middle piece. Ensure the bottom of the boards is flush with the nightstand frame, and the top has a 45° angle cut. Repeat for both sides.
-
Cut the top boards to size from barnwood and attach them to the top of the nightstand frame in the same manner, ensuring flush edges.
-
Cut the side, bottom trim pieces for the pedestal to size. Attach them to the sides of the pedestal with 1″ pin nails and wood glue. Cut the front pedestal trim piece to size and attach it similarly.
-
Measure and cut for the front miter trim pieces. Attach them one piece at a time around the drawer opening with 1″ pin nails and wood glue.
-
Cut the drawer faces to size from barnwood and attach them to the front of the drawer box with 5/8″ pin nails and wood glue. Remember to leave a 1/8″ gap on all sides for smooth drawer operation.

The Final Touches
-
Sand all surfaces, apply your desired finish (stain, paint, or clear coat), and install your chosen drawer pull. Add a polyurethane or durable topcoat to protect the nightstand’s surfaces.
Get creative and make it your own! Be sure to share it on social media and use #shanty2chic so we can share it too!
Happy Building!