
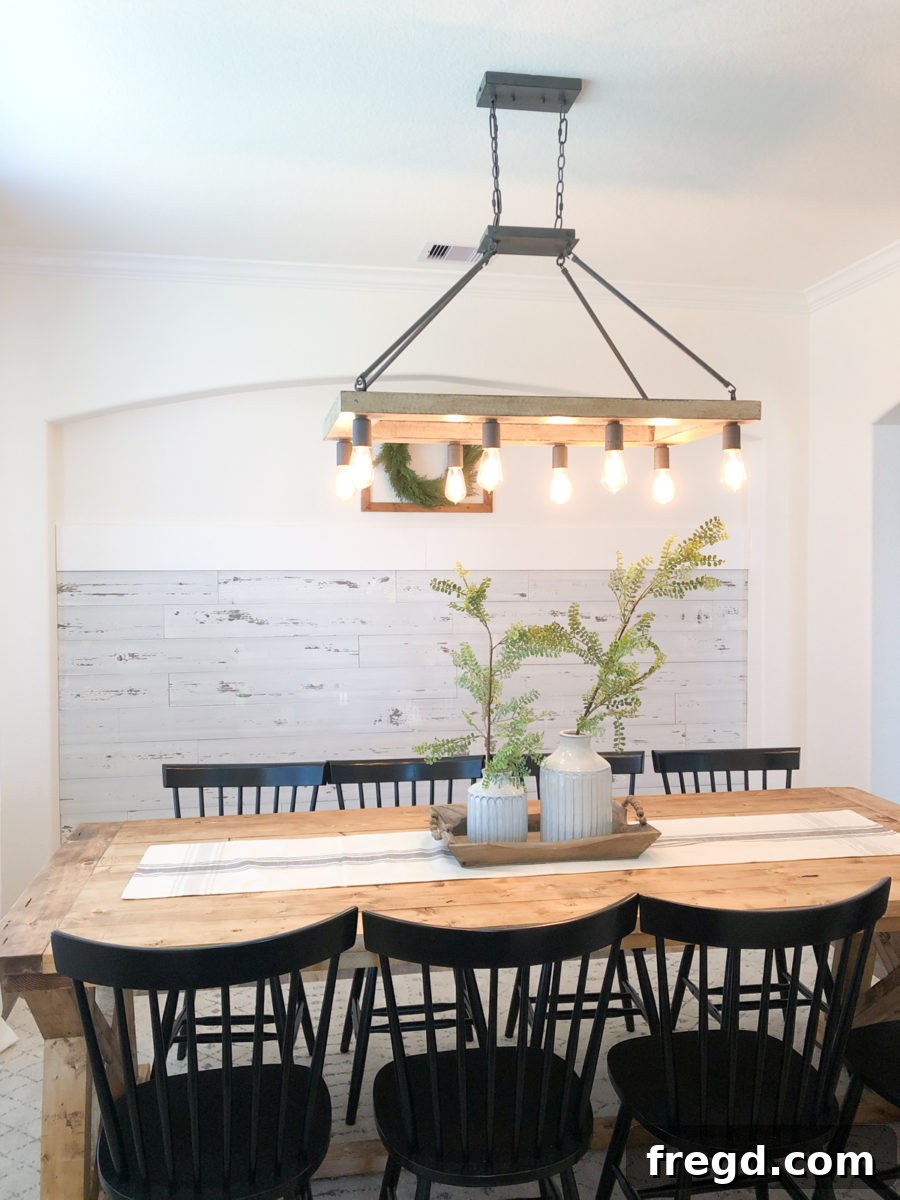
DIY Wood Plank Accent Wall: Transform Your Dining Room with Rustic Charm
Welcome, fellow DIY enthusiasts! We’re thrilled to share one of our absolute favorite home renovation projects: a captivating wood plank accent wall designed for our little sister’s dining room. If you’ve followed our adventures, you know we can’t resist incorporating the unique texture and warmth of a “shanty plank” wood wall treatment into almost every home we touch. This time, her dining room presented the perfect canvas with a beautifully recessed inset, offering an ideal spot for a truly impactful accent.
This project isn’t just about adding wood to a wall; it’s about infusing a space with personality, creating a focal point, and achieving a high-end look without the high-end cost. We invite you to join us on this journey as we break down every step, ensuring you can replicate this charming transformation in your own home. Get ready to discover how simple and rewarding it can be to bring a touch of rustic elegance to your dining area!
Why Choose a DIY Wood Plank Accent Wall?
A wood plank accent wall is more than just a decorative feature; it’s a statement piece that brings numerous benefits to your home. It’s an incredibly versatile and impactful way to update a room, adding warmth, texture, and a unique character that painted walls simply cannot achieve.
The Allure of Wood Walls
Wood, in its natural form, introduces an organic element into your living space. Whether you opt for a smooth, stained finish or embrace the rustic charm of raw planks, a wood wall instantly elevates the aesthetic. It can evoke feelings of a cozy farmhouse, a stylish modern cabin, or even an industrial loft, depending on your choice of wood, finish, and surrounding decor. This particular “shanty plank” style, characterized by its slightly imperfect, organic look, lends itself perfectly to creating a relaxed yet sophisticated atmosphere.
Budget-Friendly Home Renovation
One of the most compelling reasons to undertake a DIY wood wall project is its cost-effectiveness. Compared to professional installations or more elaborate wall treatments, sourcing planks from local lumber yards and installing them yourself can result in significant savings. Our chosen method, using lightweight 1/2-inch boards and a brad nailer, minimizes material costs and reduces the need for specialized tools, making it accessible for most DIYers.
Adding Texture and Character
Flat, painted walls can sometimes feel sterile or uninspired. A wood plank accent wall breaks up this monotony by introducing dynamic texture and visual interest. The natural grain, the subtle variations in each plank, and the shadow lines created by their edges all contribute to a rich, dimensional surface that draws the eye. This texture can make a room feel cozier, more inviting, and undeniably stylish, turning an ordinary dining room into an extraordinary one.
Planning Your Wood Wall Treatment: The Essentials
Success in any DIY project begins with thorough planning. Before you make your first cut or drive your first nail, taking the time to prepare will save you headaches and ensure a smoother, more enjoyable process.
Measuring and Material Calculation
First, carefully measure the dimensions of the wall or inset you intend to cover. Measure the height and width, then calculate the total square footage. For our lightweight 1/2-inch boards, we recommend purchasing about 10-15% extra material to account for miscuts, knot holes, or damaged pieces. Remember to also factor in the 1×8 pine board for the cap, measuring the width of your wall for this piece. Knowing your measurements will ensure you have enough material to complete your beautiful wood wall transformation without interruptions.
Gathering Your Tools & Materials
Having the right tools is crucial for an efficient and safe project. Here’s a list of what you’ll need:
- Wood Planks: We used 1/2-inch thick boards. You can explore a variety of wood types like pine, cedar, or even reclaimed wood for different looks. For the specific wood we used on this wall, you can find details here.
- Cap Board: A 1×8 pine board (or similar dimension) for a finished top edge.
- Brad Nailer: This tool is a game-changer for speed and ease. The specific brad nailer we used, which significantly simplified this project, is available here.
- Brad Nails: 2-inch length, suitable for 1/2-inch boards.
- Miter Saw or Circular Saw: For making precise cuts to your planks.
- Construction Adhesive: Essential for securing the heavier cap board.
- Stud Finder: To locate wall studs for secure fastening.
- Level: A long level (4-6 ft) is ideal for ensuring straight lines.
- Tape Measure and Pencil: For accurate marking.
- Utility Knife or Box Cutter: For scoring around outlets.
- Safety Glasses: Always protect your eyes!
- Optional: Sandpaper, wood filler, paint or stain, caulk gun.
Safety First
Always prioritize safety. Wear safety glasses when cutting or nailing. If working with power tools, ensure you understand how to operate them correctly. When working near electrical outlets, always turn off the power at the circuit breaker to prevent accidents.
Step-by-Step Guide: Creating Your Shanty Plank Wood Wall
Now that you’re prepared, let’s dive into the hands-on process of installing your beautiful wood plank wall.
Step 1: Preparing Your Wall
Begin by ensuring your wall is clean and free of dust or debris. Remove any existing baseboards or trim if you want the wood planks to extend seamlessly to the floor. Use a stud finder to locate and mark the wall studs with a pencil. These marks will serve as critical reference points for securely attaching your heavier cap board later. If you have outlets, remove their covers now.
Step 2: Starting the Plank Installation
We recommend starting from one side of your chosen wall. Using a level, ensure your first plank is perfectly horizontal or vertical (depending on your desired orientation). A straight first plank sets the foundation for the entire project, so take your time with this step. Don’t rush it; accuracy here prevents headaches down the line.
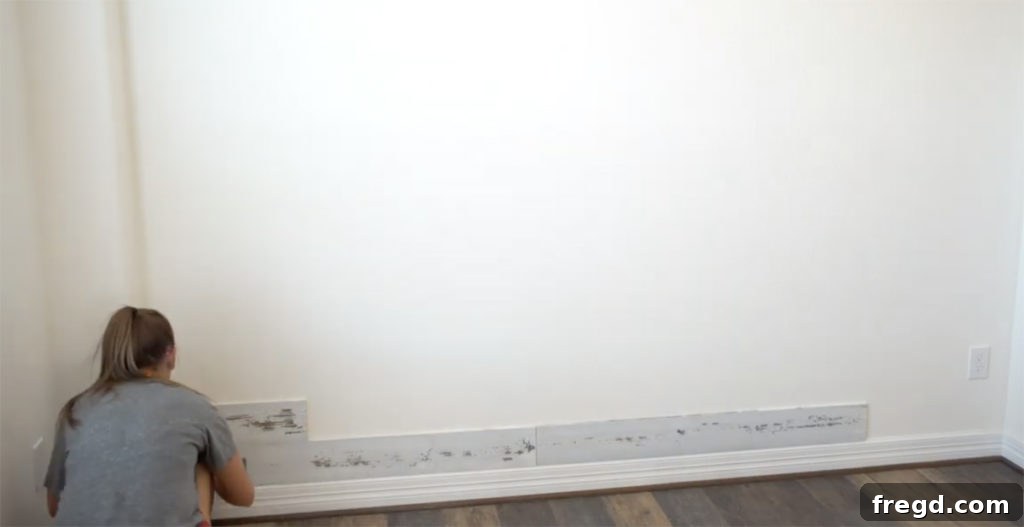
Step 3: Mastering Random Cuts and Seams
The key to achieving a professional, organic look with wood planks is to create random, staggered seams. Avoid lining up the ends of your planks in neat rows, as this can look manufactured and less appealing. As you progress, cut planks to varying lengths. When starting a new row or section, use the leftover piece from the previous row if it’s long enough, rotating patterns to ensure no two vertical seams align in adjacent rows. This technique adds depth and makes the wall feel more authentic and visually engaging.
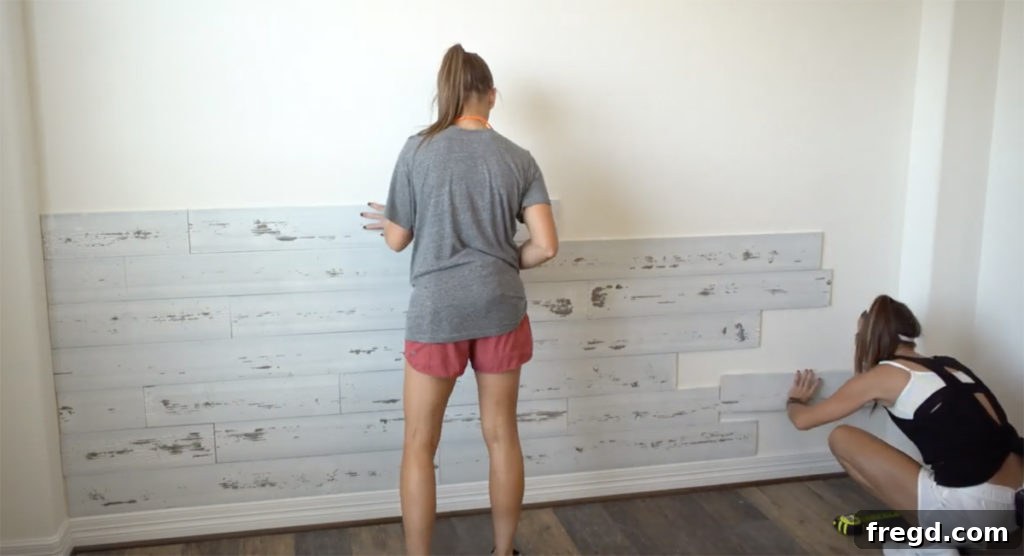
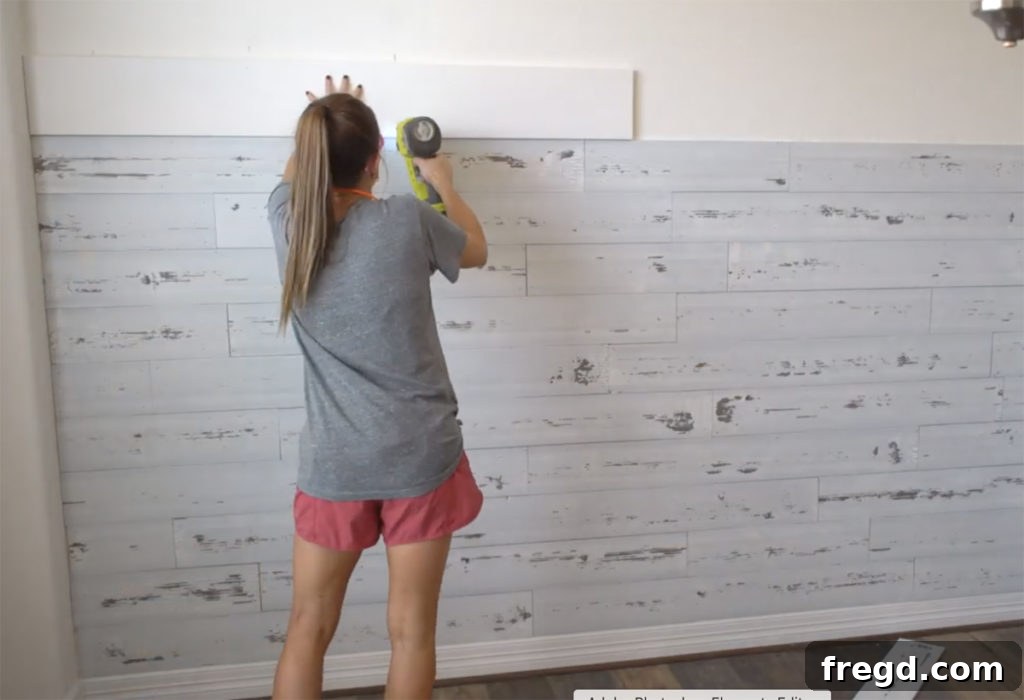
Step 4: Attaching the Planks
Our choice for attachment was 2-inch brad nails. We found this method incredibly simple and effective for our 1/2-inch lightweight boards. Unlike heavier planks that might require construction adhesive, these boards are light enough to be held securely by nails alone. The advantage of skipping glue is twofold: it makes the installation process cleaner and faster, and crucially, it allows for easier removal or modification of the wall in the future, should your style evolve. Using a brad nailer makes quick work of fastening, sending nails flush into the wood with minimal effort.
Step 5: Navigating Around Outlets and Obstacles
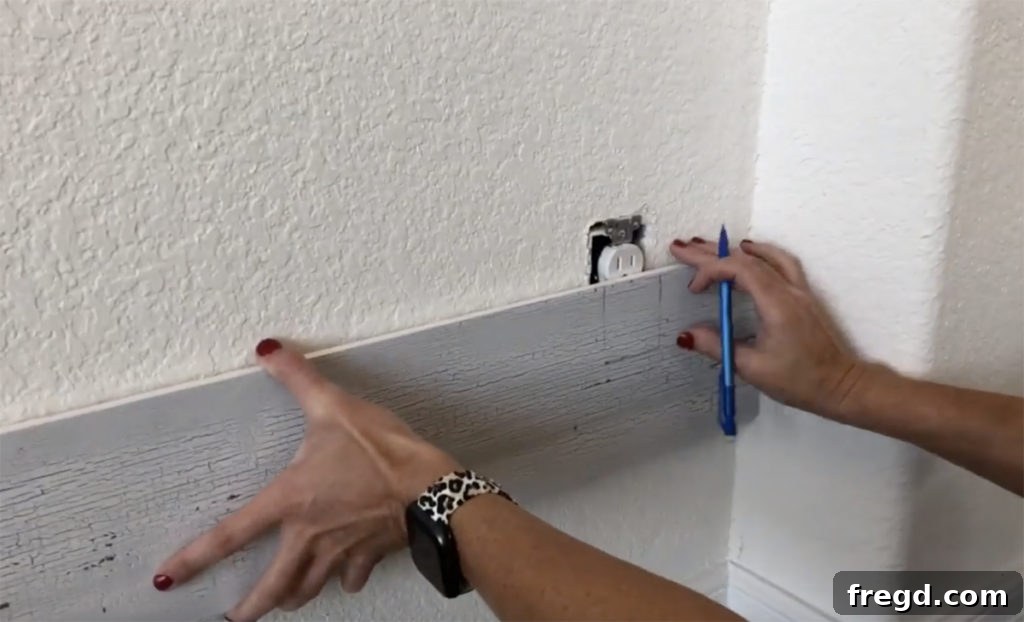
Cutting around electrical outlets might seem daunting, but it’s remarkably straightforward. First, and most importantly, ensure the power to the outlet is turned off at the circuit breaker. Measure and mark the dimensions of the outlet box onto your plank. Carefully use a jigsaw or a utility knife to score and cut out the rectangular opening. Precision is key here, but remember that the outlet cover will conceal any minor imperfections. For a visual demonstration of this technique, refer back to our video tutorial where Ashley walks you through the precise steps!
Step 6: The Finishing Touch: Capping the Wall
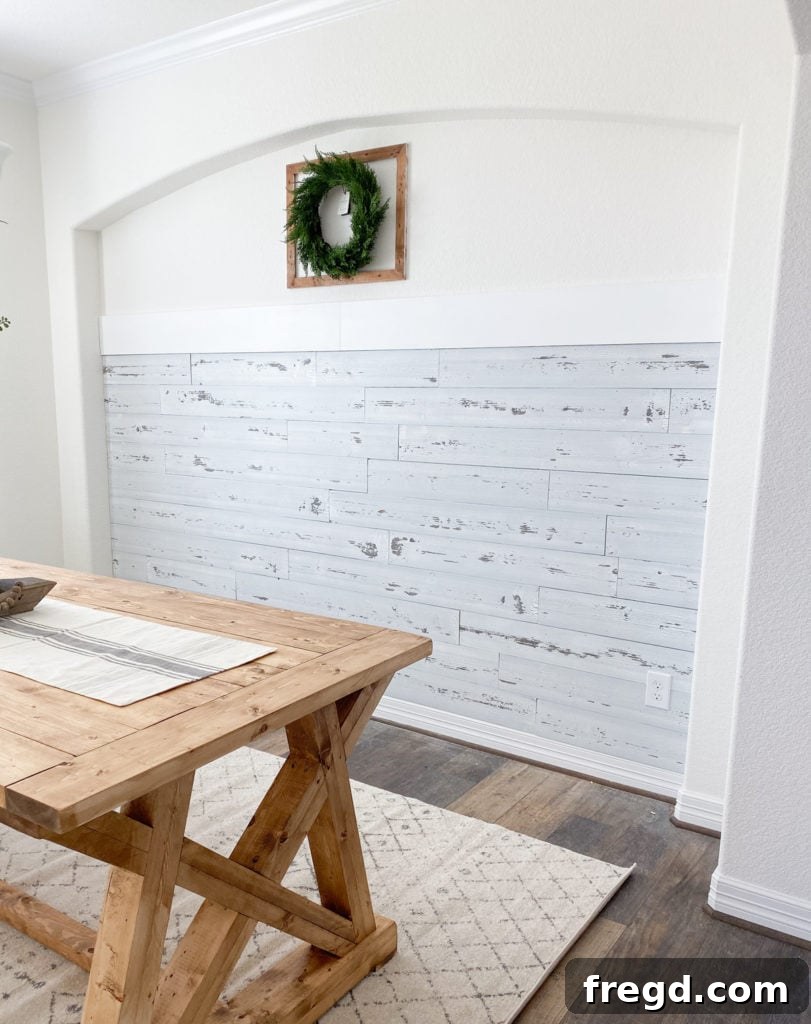
Once all your planks are installed, it’s time to add the cap board. We opted for a 1×8 pine board to create a beautifully finished top edge. This board adds a substantial, polished look, transforming the raw edges of the planks into a refined architectural detail. Since this board is heavier, secure it with both construction adhesive and nails driven into the wall studs you marked earlier. If you prefer, you can also use screws and then fill the holes with wood putty for an even more robust attachment. This final step truly completes the wall, giving it a custom-built appearance.
Elevating Your Dining Room with a Wood Accent Wall
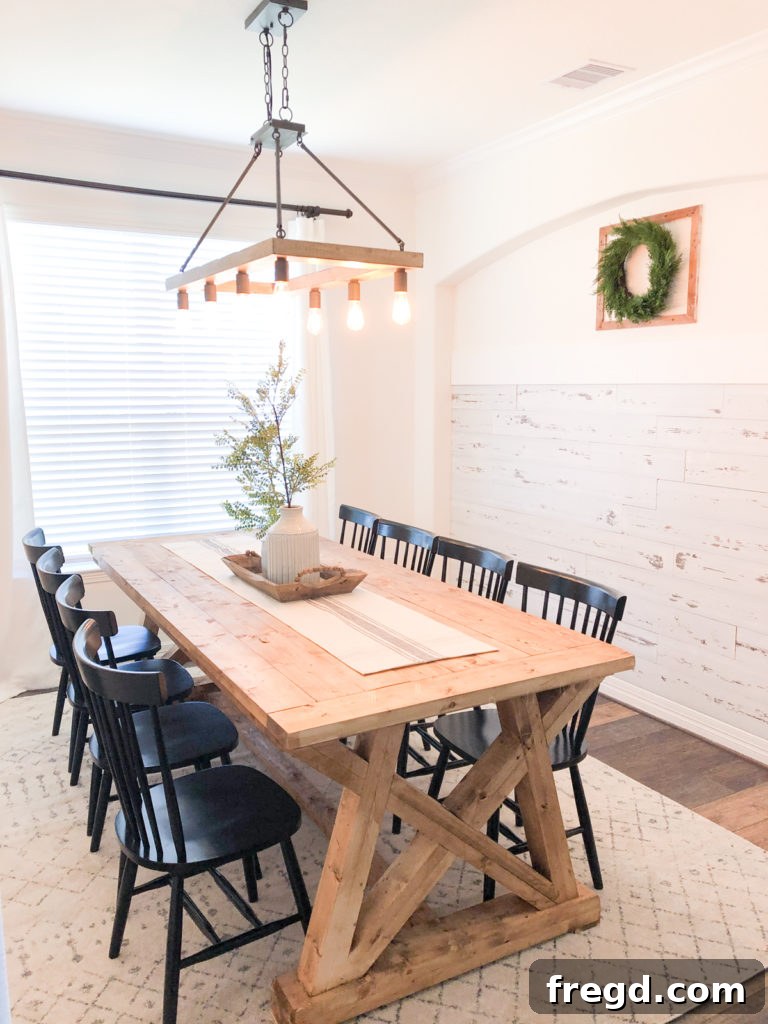
The transformation is complete, and the results are truly stunning! We couldn’t be happier with how this accent wall turned out in our sister’s dining room. It effortlessly adds immense texture, character, and a welcoming warmth that instantly makes the space feel more inviting and thoughtfully designed.
Styling Your Newly Transformed Space
With your new wood plank accent wall as a focal point, consider how it influences the rest of your decor. The rustic charm of the wood pairs beautifully with various styles, from modern farmhouse to transitional or even minimalist with carefully chosen accents. You can leave the wood in its natural state, apply a clear coat to enhance its raw beauty, or stain it to match existing wood tones in your home. Painting the planks in a soft white or a bold color can also create a completely different aesthetic, offering endless possibilities for personalization. Consider complementing the wall with simple, elegant dining furniture and perhaps a large piece of art or a mirror to reflect light and expand the space.
Maintenance and Care
One of the great advantages of a wood plank wall is its relatively low maintenance. Regular dusting with a soft cloth will keep it looking its best. For any minor scuffs or marks, a gentle wood cleaner or a touch of wood polish can often do the trick. If you’ve opted for a painted finish, occasional touch-ups with the original paint color will keep your wall looking fresh for years to come.
Frequently Asked Questions About DIY Wood Walls
As you embark on your wood wall project, you might have some questions. Here are answers to a few common ones:
- Can I use thicker wood planks? Yes, you can. However, thicker planks will be heavier and may require additional adhesive or more substantial fasteners (like longer nails or screws into studs) for secure attachment. They also tend to be more expensive.
- What if my wall isn’t perfectly even? Minor imperfections in the wall can sometimes be hidden by the planks themselves. For significant unevenness, consider using shims behind the planks to create a level surface, or address the wall preparation before installation.
- Can I paint or stain the wood after installation? Absolutely! You can pre-finish your planks before installation for a cleaner process, or paint/stain them once they are on the wall. If painting, consider using a good quality primer.
- Is it difficult to remove a wood plank wall? If you’ve used only brad nails (without glue), removal is relatively straightforward. You can carefully pry the boards off, fill the small nail holes in the drywall, and repaint. If glue was used, removal will be more challenging and may damage the drywall.
- How long does this project take? The time required depends on the size of your wall and your DIY experience. For an average accent wall, it can typically be completed in one to two days, including prep and finishing.
Other Inspiring DIY Projects for Your Home
If you’ve enjoyed transforming your dining room with this wood plank accent wall, you might be interested in some of the other fantastic DIY projects we’ve completed. These ideas can help you continue adding personalized charm and functionality to various rooms in your house. Dive into our other tutorials and discover more ways to enhance your living spaces:
Craft Your Own DIY Dining Table
Build a Stylish DIY Media Console
Create a Simple DIY Square Coffee Table
We hope this detailed guide empowers you to tackle your own DIY wood plank accent wall project. It’s a remarkably rewarding endeavor that not only enhances the aesthetic appeal of your home but also gives you a tremendous sense of accomplishment. Don’t hesitate to share your creations and experiences with us; we love seeing your unique interpretations!