
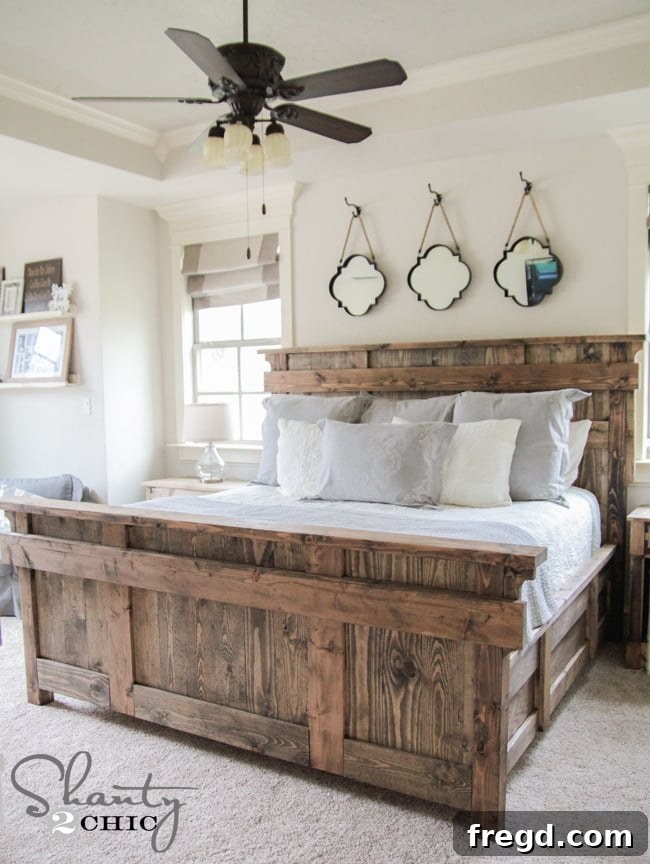
Are you dreaming of a luxurious king-size bed but hesitant about the high price tag? Imagine building your very own custom bed frame that rivals high-end designer pieces, all while saving thousands of dollars and gaining immense satisfaction. This comprehensive guide will show you exactly how to construct a beautiful DIY King Size Bed with detailed free plans and a step-by-step tutorial. Designed with beginners in mind, this project requires no specialized tools, making it accessible to anyone eager to dive into woodworking.
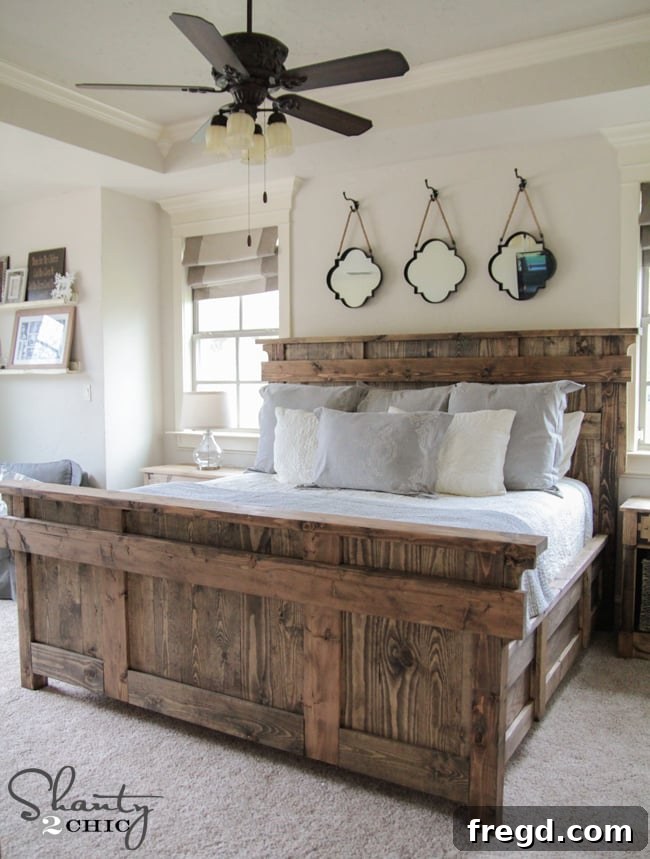
For years, the idea of crafting my own bed was a persistent desire. I had a lovely store-bought bed that served me well, but the creative urge to build something with my own hands was undeniable. The perfect inspiration finally struck during a visit to Arhaus, a store renowned for its exquisite furniture and endless design ideas – accompanied by equally impressive price tags. The particular bed that captured my imagination was priced at a staggering $3,699, not including shipping or tax. Yes, you read that correctly.
Instead of yielding to the exorbitant cost, I resolved to create my own rendition of that dream bed. The outcome has been nothing short of thrilling: I successfully built this magnificent king-size bed for under $400. This incredible saving alone justifies every moment spent, and the final piece is everything I envisioned and more. Prepare to be inspired by my new DIY king-size bed, complete with free, downloadable plans!
To simply say “I love it” would be a vast understatement. The sheer joy and pride I feel with how this project turned out are immeasurable. This bed isn’t just a piece of furniture; it’s a testament to what can be achieved with passion and a willingness to learn.
As always, my goal is to empower you to tackle this project with confidence. I will meticulously guide you through each stage of this build with clear, concise instructions. This tutorial features an abundance of detailed photos (over 40!), ensuring you have a visual reference for every step. Additionally, you’ll find free, downloadable, and printable plans at the very end of this article to streamline your building process.
Let’s embark on this exciting woodworking journey together. I suspect writing this detailed tutorial might take longer than the actual construction of the bed, so let’s jump right into the heart of the project!
Table of Contents
DIY King Size Bed Free Plans: An Overview
Embarking on a DIY bed frame project is an incredibly rewarding experience, especially when the end result is a luxurious, custom-built king-size bed that costs a fraction of retail prices. This particular design offers a sophisticated, rustic charm, inspired by high-end furniture aesthetics. Our free plans are meticulously crafted to guide even novice woodworkers through each phase, from cutting the initial posts to applying the final stain. You’ll learn essential woodworking techniques, including using a miter saw for precise cuts, mastering the Kreg Jig for strong joinery, and applying finishes that bring out the natural beauty of the wood. Get ready to transform your bedroom with a centerpiece you built yourself!
Essential Tools and Materials for Your Build
Before you begin, gathering the right tools and materials is crucial for a smooth and successful build. Investing in quality tools will not only make this project easier but also prepare you for future woodworking endeavors. Here’s what you’ll need:
Tools:
- Miter Saw: A 12-inch sliding compound miter saw (like the Ridgid or Ryobi models mentioned) is ideal for cutting the substantial 4×4 posts. If you have a smaller saw, many hardware stores offer cutting services for larger lumber. Alternatively, a sharp hand saw and a miter box can work with a bit of extra effort.
- Kreg Jig: An absolute game-changer for joinery, especially for beginners. The Kreg Jig K5 is highly recommended for its user-friendly features and versatility. It makes creating strong, hidden pocket holes straightforward.
- Cordless Drill/Driver: Essential for driving screws.
- Finish Nailer: A 16-gauge finish nailer (such as the Ryobi Airstrike) is perfect for attaching trim pieces and planks, leaving minimal nail holes.
- Jigsaw: Needed for creating the decorative curves on the headboard and footboard trim.
- Clamps: Various clamps, including Kreg clamps and right-angle clamps, will be invaluable for holding pieces securely in place during assembly and glue drying.
- Tape Measure, Pencil, & Speed Square: For accurate measurements and markings.
- Safety Gear: Always wear safety glasses and hearing protection.
- Orbital Sander & Sandpaper: For preparing wood surfaces for staining and achieving a smooth finish.
Materials:
- Lumber:
- 4×4 untreated boards (for posts)
- 1×6 white wood boards (for planks, cost-effective and takes stain beautifully)
- 2×6 boards (for structural elements and decorative runners)
- 2×3 boards (for headboard/side rail frames)
- 1×4 boards (for footboard supports)
- Plywood: PureBond Birch Plywood (for side rail bases). Have your local hardware store rip it to size for easier transport.
- Wood Glue: High-quality wood glue for strong, lasting joints.
- Pocket Hole Screws: 2.5-inch and 1.25-inch sizes (for specific applications as detailed in the steps).
- Finish Nails: 1.25-inch and 2-inch lengths.
- Wood Screws: Additional wood screws for extra reinforcement where needed.
- Wood Stain: Varathane Ash wood stain (or your preferred color).
- Clean Rags: For applying and wiping off stain.
Building the Headboard: The Centerpiece of Your Bed
The headboard is often the focal point of a bed, and this design combines sturdy construction with rustic elegance. We’ll start with the main posts and then build up the planked surface and decorative elements.
Step 1: Precision Cutting the 4×4 Posts
The foundation of your bed begins with the robust 4×4 posts. These untreated lumber pieces are readily available at major hardware stores. Accurate cuts are essential here, so take your time.
For cutting 4×4 lumber, a 12-inch miter saw is highly recommended due to its capacity. A 10-inch miter saw may not cut through a 4×4 in a single pass, requiring you to flip the board and cut from the other side, which can compromise accuracy. If you only have a smaller saw or prefer not to purchase a new one, most hardware stores offer lumber cutting services, which can be a great option for these few critical cuts. Alternatively, a sharp hand saw combined with a miter box can achieve satisfactory results with a bit more manual effort. I personally rely on my Ridgid 12-inch sliding compound miter saw for its power and precision, and I’m always excited about new tool releases like Ryobi’s upcoming 12-inch sliding miter saw for future projects!
If you’re new to using a miter saw, I highly recommend watching a tutorial video to familiarize yourself with its safe and effective operation. Understanding the basics will build your confidence for this and future projects.
Step 2: Expert Planking for a Rustic Headboard Look
Before assembling the main headboard support structure, I opted to attach all the planks first. This allowed me to obtain exact measurements for the frame that would sit behind them. For the planks, I chose white wood boards. They are an economical choice and, when stained, beautifully showcase a rustic aesthetic that I adore. The primary tool for this entire build, and one I cannot recommend enough, is the Kreg Jig.
I predominantly use the Kreg K5, but I also own the K4 and the new Foreman. Each model has its unique advantages, but if you’re looking to make your first investment in a Kreg Jig, the K5 is my top recommendation. It’s only slightly more expensive than the K4 but offers significant upgrades, making it much more user-friendly and versatile – truly my favorite. It’s simple enough for a beginner to master, and I firmly believe a Kreg Jig is an invaluable tool for any aspiring woodworker, greatly simplifying the assembly process.
Understanding pocket holes is key to strong, invisible joinery. Here’s a detailed explanation of how I executed the pocket holes on the headboard planks, which utilize a combination of 1×6 and 2×6 boards. Note that I did not create pocket holes in any of the 2×6 boards themselves. For most of the 1×6 planks, I drilled 3/4-inch pocket holes along one long side, as shown in the image below. This ensures a clean, hidden attachment when joined to adjacent planks.
When arranging all the planks, you’ll notice that for the boards positioned directly next to the 2×6 boards, I drilled pocket holes along *both* long sides. This strategic placement allowed me to securely attach the plank not only to the adjacent 2×6 but also to the next 1×6 plank in the sequence. This method provides maximum stability and a seamless appearance.
Once all the planks are laid out as intended, you can clearly visualize the precise positioning of all the pocket holes. This layout ensures a strong, hidden connection for the entire planked headboard surface.
Step 3: Assembling the Sturdy Headboard Frame
With the planking complete and accurately measured, the next step is to build the structural frame that will support the entire headboard from behind. This frame provides rigidity and the attachment points for the main posts. For this, I used 2×3 boards, creating 1.5-inch pocket holes on each end of these pieces. These will be used to attach the frame to the 4×4 posts.
Attach the 2×3 frame pieces to the 4×4 posts using 2.5-inch pocket hole screws. A critical detail here is to ensure the face of the support frame sits 1.5 inches back from the front edge of the 4×4 posts. This precise alignment is crucial for all the components to come together correctly, creating a flush and professional finish. Once the frame was securely constructed, I carefully laid it onto the backside of the assembled planks. To ensure a robust bond, I applied a generous amount of wood glue and then used my Ryobi 16G finish nailer with 1.25-inch finish nails to attach the frame through to the planks. This combination of glue and nails provides exceptional strength.
With the frame attached, here’s a view of the front of the headboard, showcasing the beautiful planked surface and the strong structure behind it.
Step 4: Enhancing Your Headboard with Decorative Trim
The next stage involves adding the crucial trim pieces that define the headboard’s aesthetic. These are relatively simple cuts, but precision is key. Rather than relying solely on the plans for exact measurements, I highly recommend measuring the specific space for each trim piece directly on your headboard. This accounts for any slight variations in your build, ensuring a perfect fit.
Once cut, apply wood glue generously to the back of each trim piece. Then, use 1.25-inch finish nails with your nailer to secure them firmly to the front of the headboard. The combination of glue and nails creates a lasting bond that prevents any movement over time.
Here you can see the first two lines of planks, meticulously glued and nailed in place, beginning to define the headboard’s finished look.
Now, let’s turn our attention to the decorative side pieces, which add a touch of custom flair to the headboard. These are easily crafted using a jigsaw. Begin by making a miter cut on your 2×4 board using your miter saw, as specified in the plans. This forms the angled base of the decorative piece.
Once the miter cut is made, clamp the 2×4 piece securely to your workbench. This provides stability and safety while you work. Carefully draw out the desired design for the decorative curve, referencing the provided plans for the exact dimensions and aesthetics.
With the design drawn, use your Ryobi 18V jigsaw to slowly and carefully cut along the lines. Take your time, allowing the saw to do the work, to achieve a smooth and accurate curve. Practice on scrap wood if you’re new to using a jigsaw.
Observe the beautifully crafted decorative piece below! Once cut, it’s time to integrate it into the headboard design.
Apply a generous amount of wood glue to the end of the decorative piece that will connect to the headboard. This ensures a strong, lasting bond.
Secure the decorative piece in place using your finish nailer with 2-inch nails. These longer nails provide extra holding power for this decorative, yet important, component.
Next, you will attach the 2×6 boards, which add substantial presence and strength to the headboard. These are heavy, so ensure you have proper support. I applied a generous amount of wood glue and then secured them with 2-inch finish nails. For an extra layer of security, I also drove a few wood screws through the back of the headboard and into the 2×6 boards. This additional reinforcement guarantees the stability of these key elements.
At this point, I also added the top board of the headboard. After applying wood glue and nailing it with 2-inch nails, I went a step further for peace of mind. I added several wood screws through the top surface and into the headboard frame, ensuring maximum stability for this prominent piece.
You might notice my new Kreg clamps in action! I absolutely love them; they are incredibly handy. I currently have four, but honestly, I could use 36 more! They truly act like an extra set of hands, making clamping tasks remarkably simple and efficient.
Creating the Footboard: Completing the Bed’s Foundation
The footboard complements the headboard beautifully, echoing its design elements while providing stability to the opposite end of the bed. The construction process for the footboard is very similar to that of the headboard, though with different dimensions as outlined in the free plans. We’ll proceed with the same attention to detail and joinery techniques.
Step 5: Building the Robust Footboard Frame
Just like the headboard, the footboard begins with a sturdy frame. This phase is almost identical in method, but adjust your measurements according to the footboard specifications in the plans. I utilized 1×4 boards for the footboard supports, as it is generally smaller in scale than the headboard. The process of drilling pocket holes and assembling the frame remains consistent for a strong, hidden connection.
I found my right-angle clamp incredibly useful for holding the frame pieces perfectly square while attaching them. This ensures accurate alignment and a strong joint. Use 2.5-inch pocket hole screws to attach the frame supports securely into the footboard legs (4×4 posts). This robust connection is vital for the stability of the entire bed.
Here you can see the footboard frame fully assembled and ready for the planking stage. Its clean lines and secure joinery promise a solid foundation for the planks that will follow.
Step 6: Attaching Planks to the Footboard
With the frame established, it’s time to plank the footboard, mirroring the technique used for the headboard. Once again, I used wood glue for a strong adhesive bond and secured the planks from the back of the supports into the planks using finish nails. This method keeps the nail holes hidden on the back, preserving the clean look of the front-facing planks.
Step 7: Applying Footboard Trim and Decorative Elements
Just like the headboard, the footboard requires trim to complete its polished look. Carefully measure and cut your trim pieces, then attach them to the front of the footboard using wood glue and finish nails. Ensure snug fits and clean lines for a professional finish.
Next, integrate the decorative side pieces into the footboard, mirroring the method used for the headboard. These distinctive elements contribute significantly to the overall aesthetic of the bed. Ensure they are aligned correctly and securely fastened with wood glue and finish nails.
Finally, attach the 2×6 runners to the footboard. These pieces add a sturdy base and visual weight, harmonizing with the headboard’s design. Use wood glue for a strong bond, along with finish nails and potentially additional wood screws for extra security, especially given their structural role.
The top 2×6 board is the last piece to be added to the footboard, providing a finished cap. Once this is securely attached with glue, nails, and screws for ultimate stability, your footboard will be ready, and we can move on to constructing the bed’s side rails.
Crafting the King Bed Side Rails: Structural Integrity
The side rails are essential components, connecting the headboard and footboard while providing robust support for your mattress. This section details the construction of these vital pieces, focusing on both their aesthetic trim and structural framing.
Step 8: Trimming and Preparing Plywood for Side Rails
For the core of the side rails, I chose PureBond Plywood, specifically Birch, for its strength and smooth finish. Plywood offers excellent stability and is more cost-effective for large panels. To make transportation and initial handling easier, I highly recommend having your local Home Depot or hardware store rip the large plywood sheets to the required size. This ensures straight cuts and saves you time and effort.
You will start with two plywood pieces that form the main body of the side rails, shaped as depicted below.
Next, we will trim these plywood pieces to enhance their appearance and strength. Begin by attaching the top board using wood glue and 1.25-inch finish nails. Apply a consistent bead of glue along the edge, then carefully position the trim piece and secure it with nails, ensuring it’s flush and level.
Once the top board is secured, proceed to add the smaller trim boards along the sides and bottom, as specified in your plans. Again, use wood glue and finish nails for each piece, creating a sturdy and visually appealing perimeter around the plywood core.
Step 9: Framing and Pocket Holes for Strong Side Rails
With the plywood base and outer trim completed, it’s time to add the internal framing that will give the side rails their structural integrity and allow for attachment to the headboard and footboard. I utilized my Kreg Jig to make 1.5-inch pocket holes on each end of the side rails, as well as running along the top edge of the inside face. For convenience, I often mount my Kreg K3 (or K5) to a board, making it easier to drill consistent pocket holes on longer pieces like these side rails.
The ends of each side rail should feature pocket holes, which will be critical for a strong and seamless connection to the headboard and footboard posts. Ensure these are drilled accurately according to your plans.
To construct the internal frame, I used 2.5-inch pocket hole screws to attach the top 2×3 pieces and the side rail supports. This creates a robust internal structure that will bear the weight of the mattress and provide durable support for years to come. The goal is to create a strong, stable framework within each side rail.
The Finishing Touch: Staining Your Custom Bed
With all the major components of your DIY king-size bed constructed, it’s time for the exciting phase of applying the finish. Staining not only protects the wood but also brings out its natural beauty and gives your bed its desired aesthetic. I opted to stain all the individual components before bringing them inside for final assembly, which is generally easier and allows for more thorough coverage.
Step 10: Applying Your Chosen Wood Stain
Before staining, ensure all wood surfaces are clean, dry, and thoroughly sanded. Start with a medium-grit sandpaper (e.g., 120-grit) to smooth out any imperfections, then follow with a finer grit (e.g., 180 or 220-grit) for a silky-smooth finish. Proper sanding opens the wood grain, allowing the stain to penetrate evenly.
For this project, I discovered a new favorite stain color: “Ash” by Varathane, which you can easily find at Home Depot. This particular stain offers a unique depth of color. While it doesn’t present as an overly dark brown, the way the wood grain absorbs the pigment creates beautiful variations, often developing a rich, almost black tone where the grain is most prominent. I absolutely adore this effect, as it adds a sophisticated, rustic character to the bed.
To apply the stain, use a clean rag or foam brush, wiping it onto the wood in the direction of the grain. Allow the stain to penetrate for a few minutes (refer to the product instructions for specific timing), then wipe off any excess with a clean, dry rag. For a deeper color, you can apply a second coat after the first has dried. Always work in a well-ventilated area and wear appropriate protective gear. After staining, consider applying a protective topcoat like polyurethane for enhanced durability and longevity.
Assembling Your DIY King Size Bed: Bringing It All Together
With all the components built and beautifully stained, the final stage is to assemble your magnificent king-size bed. This is where your hard work truly comes together, transforming individual pieces into a cohesive and stunning piece of furniture. Due to the size and weight of the headboard and footboard, I highly recommend enlisting the help of a friend or family member for this step.
Step 11: Securely Attaching Side Rails to the Headboard
Begin by positioning the headboard in its desired location. My husband and his friend were instrumental in carefully moving the large headboard into place. Next, you’ll attach the side rails to the headboard posts. To facilitate this, I cut a few scrap pieces of 4×4 lumber to use as temporary supports. These scraps helped hold the heavy side rails level and in the correct position while I secured them.
Using 2.5-inch pocket hole screws, drive them through the pre-drilled pocket holes on the ends of the side rails and into the 4×4 posts of the headboard. Ensure a tight, secure connection. The pocket holes provide a hidden, incredibly strong joint that is perfect for this application.
Step 12: Completing the Footboard and Mattress Support
Once the side rails are firmly attached to the headboard, repeat the process for the footboard. Carefully position the footboard, aligning it with the other ends of the side rails. Again, use 4×4 scraps for support if needed, and secure the side rails to the footboard posts using 2.5-inch pocket hole screws through the pre-drilled holes. Double-check all connections to ensure everything is square and incredibly stable.
Finally, it’s time to add the mattress support system. Cut several planks of wood to the appropriate length to span across the width of the bed, resting on the internal runners of the side rails. For additional strength and to prevent sagging, place small support blocks underneath these planks, centrally positioned, to distribute the weight of the mattress evenly. Secure each mattress support plank in place by nailing them with 2-inch finish nails into the side rail runners. This creates a solid, breathable foundation for your king-size mattress.
And there you have it! The journey from raw lumber to a stunning, custom-built king-size bed is complete. Yes, it was an endeavor, but every moment of effort culminates in this magnificent result.
I must emphasize that while this is not an advanced woodworking project, it does require a good amount of patience and physical effort. All the cuts are straightforward and linear, with many pieces being identical, making it perfect for beginners to learn foundational skills. However, it is quite labor-intensive. I was certainly sore for a couple of days after building it – a testament to the satisfying workout, though I’ll happily blame the bed! 😉
I sincerely hope you enjoy building and loving your new DIY king-size bed as much as I do! It’s more than just a bed; it’s a statement piece born from your own creativity and effort. Enjoy the comfort and pride of sleeping in a bed you built yourself!
FREE PRINTABLE PLANS
Ready to start building your own dream bed? Download and print the FREE, comprehensive plans by clicking HERE. These plans include detailed cut lists, diagrams, and measurements to guide you through every step.
Decor and Sourcing Information
For those curious about the styling elements shown with the finished bed:
- The luxurious bedding was a thoughtful Valentine’s gift and is sourced entirely from Restoration Hardware, known for its high-quality linens.
- The captivating large metal ampersand magnet board can be found HERE! It adds a unique, industrial touch to the room’s decor.
- The serene color on the walls is Valspar Homestead Resort Parlor Taupe, creating a warm and inviting ambiance.
- The elegant mirrors and the hooks used to hang them were discovered at Hobby Lobby. If you’re looking for a similar aesthetic, Wayfair offers a very similar and charming option HERE!
- Keep an eye out for an upcoming project! The stylish nightstands featured in the photos are a sneak peek of a future tutorial, which I know you’ll absolutely love once they’re fully revealed and finished.