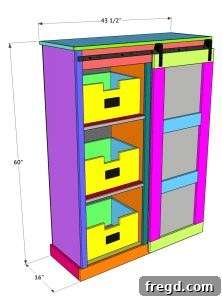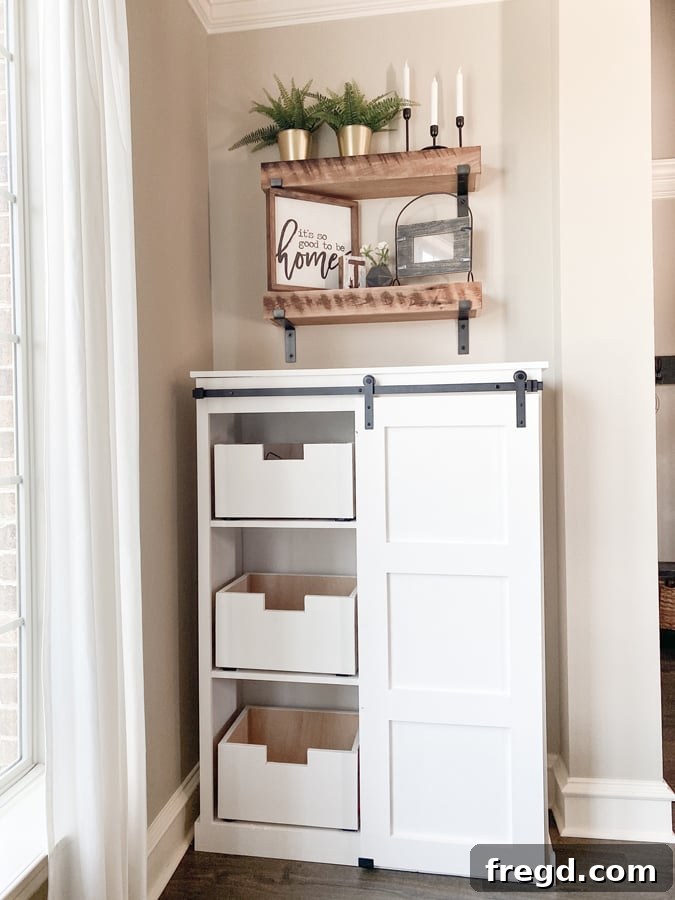
Transform your living space and conquer clutter with a stunning and highly functional DIY Sliding Barn Door Utility Cabinet. This project isn’t just about building a piece of furniture; it’s about creating a dedicated, stylish home for your essential cleaning tools, making daily tidying effortless and enjoyable. We’re thrilled to share our journey and detailed instructions, complete with free plans and a helpful how-to video, brought to you by Shanty2Chic in collaboration with the innovative team at Hoover.
In today’s world, where homes have become multi-functional hubs for work, learning, and relaxation, maintaining a clean and organized environment is more important than ever. After months of remote work and home-schooling, we found our pantry overflowing with cleaning supplies. The solution? A beautiful yet practical storage cabinet that offers easy access and keeps everything neatly tucked away. This unique sliding barn door utility cabinet is specifically designed to house all your essential cleaning gadgets, particularly our beloved Hoover ONEPWR battery-powered cleaning tools.
The Hoover ONEPWR line has revolutionized our cleaning routine, offering unparalleled convenience and performance. This modular system allows you to swap batteries between various tools, streamlining your entire cleaning process. We were especially excited to integrate some of their newest additions into our dedicated storage solution. Get ready to meet the new Dust Chaser Cordless Handheld Vacuum, the indispensable Dual Bay Charger, and the powerful ONEPWR™ Evolve Pet Cordless Upright Vacuum! This entire range of Hoover ONEPWR tools is designed for maximum efficiency, making cleaning tasks feel less like a chore. Best of all, acquiring these indispensable tools is incredibly simple; you can order the full lineup directly from Hoover.com or conveniently through Amazon.com.

Introducing the Hoover ONEPWR Cleaning Arsenal: Why These Tools are a Must-Have
Let’s dive deeper into how these remarkable Hoover ONEPWR tools make maintaining a pristine home easier and more efficient than ever, perfectly complementing your new organization cabinet:
Hoover ONEPWR Dust Chaser Cordless Handheld Vacuum
- Unmatched Versatility for Every Nook and Cranny: This handheld vacuum is a game-changer for tackling messes in tight spaces. Its built-in extendable nozzle, combined with a 2-in-1 crevice tool and upholstery attachment, allows you to effortlessly clean corners, car interiors, furniture, and hard-to-reach areas around your home. No crumb or dust bunny is safe!
- Superior Filtration for a Healthier Home: Equipped with advanced dual filtration, including a certified HEPA filter, the Dust Chaser captures an impressive 99.97% of dust, pet dander, and common allergens. This not only cleans your surfaces but also ensures cleaner air and a healthier living environment for you and your family.
- Cordless Freedom for Unrestricted Cleaning: Experience the ultimate convenience of a cordless design. No more searching for outlets, dealing with tangled cords, or being restricted by a power source. The Dust Chaser allows for quick, spontaneous clean-ups anywhere, anytime, making it ideal for busy households.
- Purchase the Dust Chaser on Amazon
- Purchase the Dust Chaser on Hoover.com
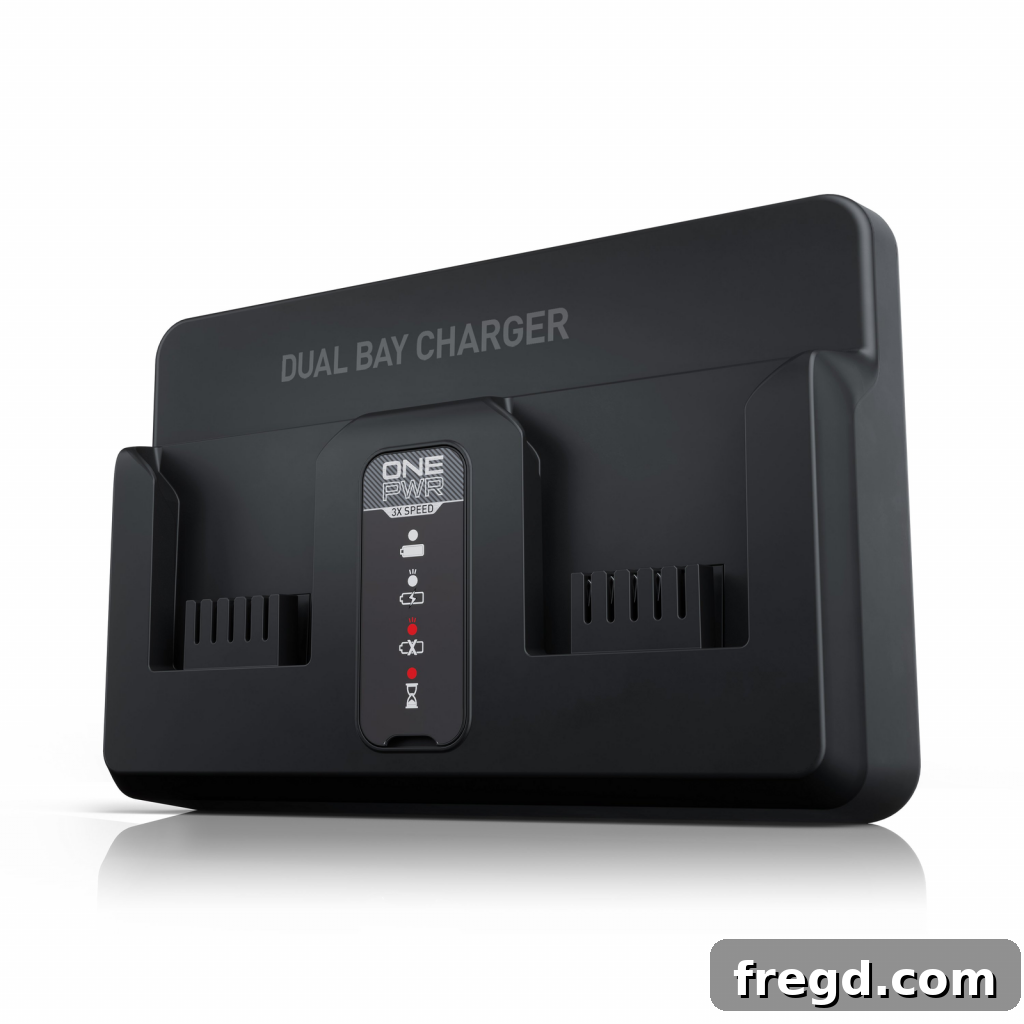
Hoover ONEPWR Dual Bay Battery Charger
- Continuous Power for Uninterrupted Cleaning: Say goodbye to frustrating interruptions during your cleaning sessions. The Dual Bay Charger allows you to charge and conveniently store two ONEPWR batteries simultaneously, ensuring you always have a fully charged battery ready to go when you need it most. This means less downtime and more effective cleaning.
- Efficient Storage and Accessibility: Beyond just charging, this unit provides a neat and organized spot for your batteries, further contributing to a clutter-free and highly functional cleaning station within your new utility cabinet.
- Purchase the Dual Bay Charger on Amazon
- Purchase the Dual Bay Charger on Hoover.com
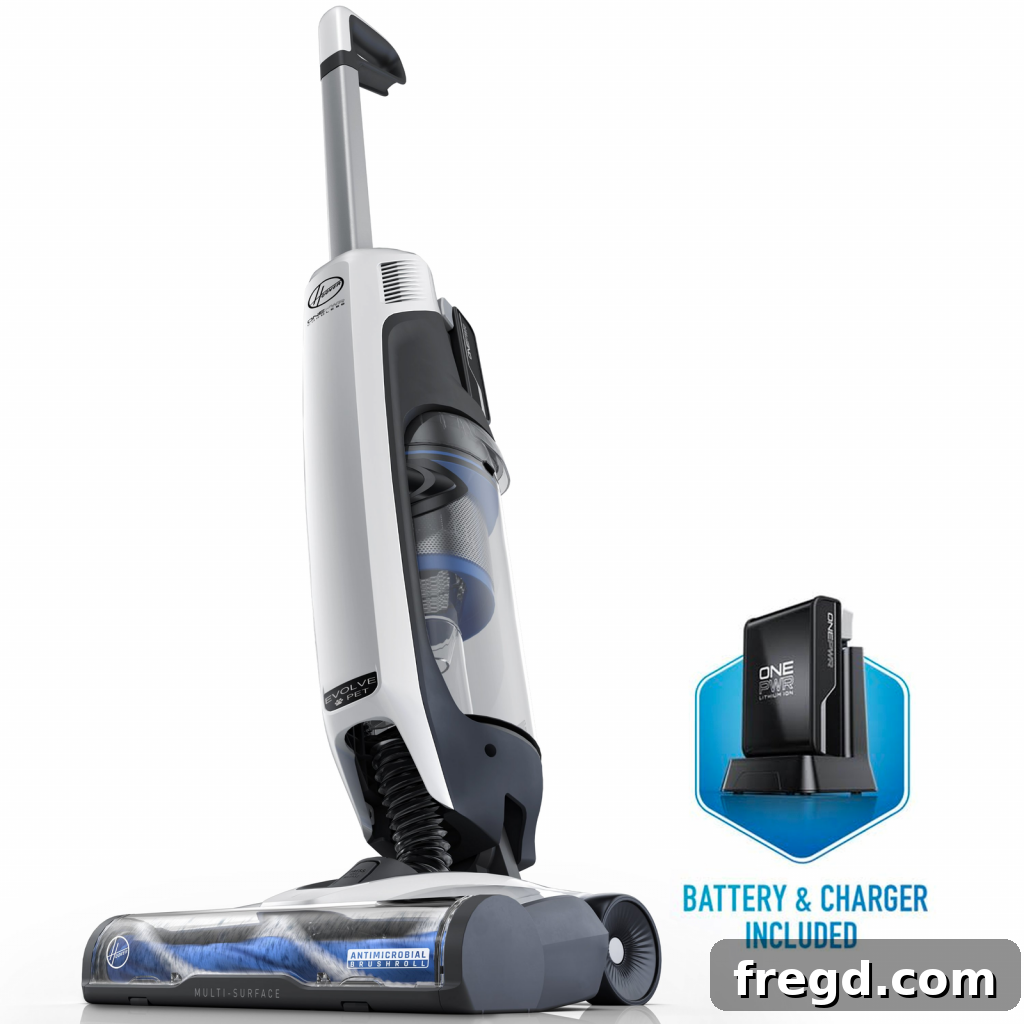
Hoover ONEPWR Evolve Pet Cordless Upright Vacuum
- Corded Power, Unrestricted Freedom: Experience the robust cleaning power of a traditional corded upright vacuum, but with the incredible portability and freedom of a cordless design. Remarkably, it weighs 50% less than standard uprights, making it incredibly easy to maneuver around your home, up and down stairs, and into every corner without straining.
- Pet Hair Eradicator for Pristine Floors: Engineered with pet owners in mind, this vacuum expertly lifts embedded pet hair, stubborn dirt, and debris from both carpets and hard floors with ease, leaving surfaces impeccably clean and fresh. Its powerful suction and specialized brush roll make quick work of even the most challenging pet messes.
- Extended Cleaning Capacity: Its generously sized dirt cup holds three times more dirt and pet hair than most standard stick vacuums, significantly reducing the frequency of trips to the trash can during your cleaning routine. This means you can clean more in less time.
- Odor Prevention for a Fresher Home: Featuring an antimicrobial brush roll and a specialized pet filter, the Evolve Pet actively helps prevent the growth of odor-causing bacteria that can linger from pet accidents or general use, keeping your home smelling fresh and clean, always.
- Effortless Mobility: Like all ONEPWR tools, its cordless nature provides ultimate flexibility, allowing you to move seamlessly from room to room, tackling entire areas without needing to unplug or search for new outlets.
- Purchase the Evolve Pet Vacuum on Amazon
- Purchase the Evolve Pet Vacuum on Hoover.com
With these incredible Hoover ONEPWR tools at your disposal, creating a dedicated, organized space for them is the next logical step to maximize their efficiency and keep your home immaculate. Now that we’ve highlighted our favorite cordless cleaning companions, let’s roll up our sleeves and delve into the rewarding process of building this practical and charming Sliding Barn Door Utility Cabinet!
Wasn’t that inspiring? This project truly embodies the perfect synergy of functional design and rustic charm, proving that practical storage can also be a beautiful focal point in your home.
To ensure you have all the necessary details at your fingertips, you can click HERE to download the Free Printable Plans. These plans provide precise measurements, cut lists, and visual aids to guide you every step of the way, making this DIY project accessible to woodworkers of all skill levels.
Now, let’s get into the comprehensive step-by-step guide to bring this incredible utility cabinet to life, enhancing your home’s organization and aesthetic appeal!
Table of Contents
How to Build Your DIY Sliding Barn Door Utility Cabinet
Embarking on a DIY project like this is incredibly rewarding. With the right tools, a clear plan, and a touch of patience, you’ll be amazed at what you can achieve. This cabinet is designed not only for utility but also to be a beautiful addition to any room, offering a seamless blend of form and rustic farmhouse charm. We recommend reviewing the full plans before making any cuts.
Essential Tools and Materials for Your Build
Before you begin any construction, ensuring you have all the necessary tools and high-quality materials is paramount. Proper preparation is the foundation for a successful build, contributing to both the ease of assembly and the professional appearance of your finished cabinet. For your convenience, many of these specialized tools and common supplies can be found through the links provided below:
Required Tools:
- Miter Saw: Absolutely essential for making precise crosscuts on your lumber, ensuring all your pieces fit together perfectly.
- Drill: A versatile tool required for drilling pilot holes, driving screws, and creating pocket holes.
- Kreg Jig: A game-changer for creating strong, concealed pocket hole joints, which are key to the clean look of this cabinet.
- Brad Nailer: Ideal for attaching trim and thinner panels quickly and securely, often with minimal visible fasteners.
- Sander: Crucial for achieving a smooth, finish-ready surface, whether you’re staining or painting.
- Stapler (optional): Can be very useful for attaching back panels or other decorative elements where speed and holding power are preferred.
Material Supply List:
- 1 pc – 1x10x6 Pine or Common Board: For structural components requiring wider boards.
- 1 pc – 1x5x8 Pine or Common Board: For specific smaller frame or shelf elements.
- 3 pcs – 1x4x8 Pine or Common Board: Versatile boards for various parts of the cabinet frame and shelving.
- 3 pcs – 1x2x8 Pine or Common Board: Excellent for internal supports, trim, and smaller frame elements.
- 1 pc – 1/2″x3/4″x80″ Trim: For longer decorative trim pieces.
- 1 pc – 1/2″x3/4″x40″ Trim: For shorter decorative trim sections.
- 2 pcs – 3/4″x48″x96″ Hardwood Plywood: This durable plywood forms the primary construction material for the main cabinet structure, offering strength and stability.
- 2 pcs – 1/4″x48″x96″ Hardwood Plywood: Lighter gauge plywood, ideal for drawer bottoms and the cabinet back panel.
- 1 1/4″ Pocket Hole Screws: The specialized fasteners for creating those strong, invisible Kreg Jig joints.
- 5/8″ Brad Nails or 3/4″ Staples: For securing thinner materials like the back panel and some trim pieces.
- 1 1/4″ Brad Nails: For general assembly and attaching various trim elements.
- Wood Glue: The essential adhesive for durable and long-lasting joints, used in conjunction with screws and nails.
- Drawer Slides: Critical components for ensuring smooth, effortless operation of your cabinet’s drawers.
- Barn Door Hardware: The distinctive element that gives this utility cabinet its charming and functional sliding barn door aesthetic.
Building the Cabinet Frame: The Foundation of Your Storage Solution
The cabinet frame serves as the sturdy backbone of your entire utility cabinet. Dedicating sufficient time to ensure accurate cuts, precise measurements, and robust joints during this stage will significantly contribute to the overall stability, durability, and professional appearance of your finished piece. Follow these steps meticulously to build a strong foundation:
Step 1: Assemble the Main Frame Components
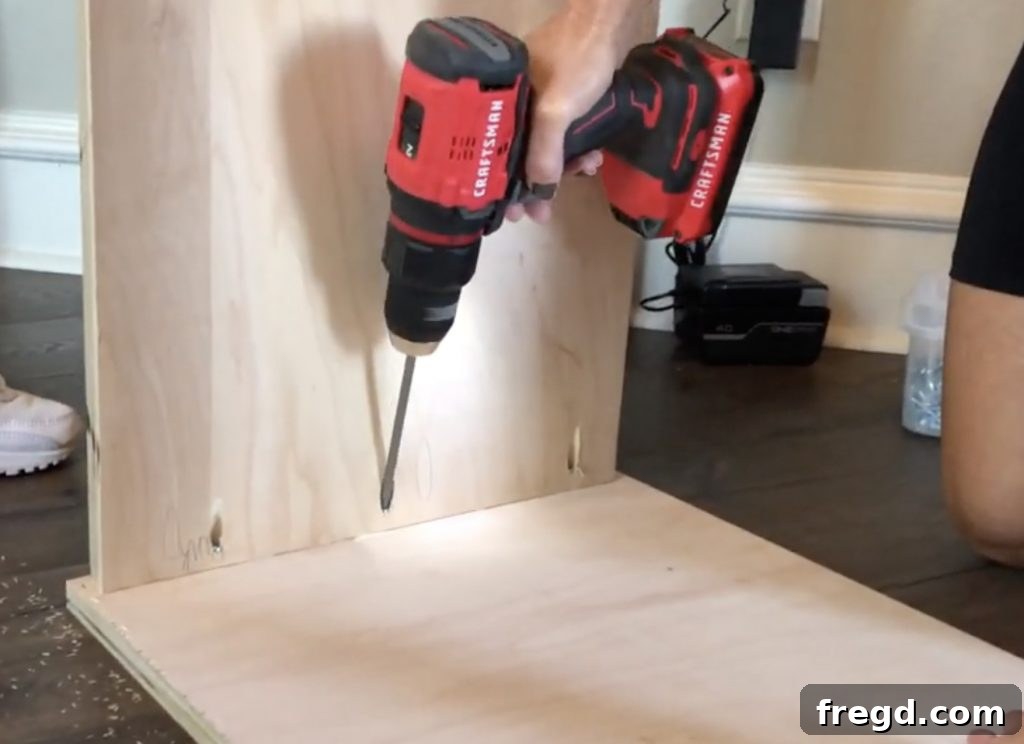
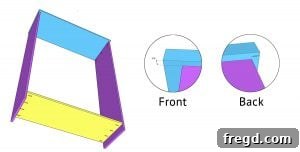
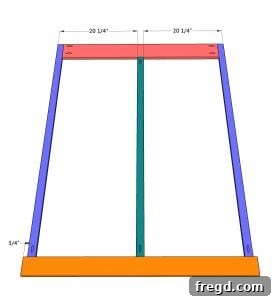
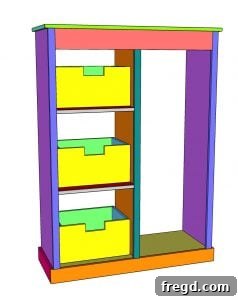
Begin by accurately cutting your primary frame pieces—the two side panels, the top, and the bottom—to the precise dimensions detailed in the free plans. Using your Kreg Jig, drill 3/4″ pocket holes into the top end of both side pieces and into both ends of the bottom piece. These pocket holes create incredibly strong, yet discreet, hidden joints. Apply a generous amount of high-quality wood glue to all mating surfaces before joining the boards together with 1 1/4″ pocket hole screws. Pay close attention to the top piece, which should gracefully overhang the front of the cabinet by 3/4″ and the sides and back by 1/4″. This slight overhang adds a refined, built-in look and provides a functional lip for the top.
Step 2: Install the Middle Divider for Structure and Organization
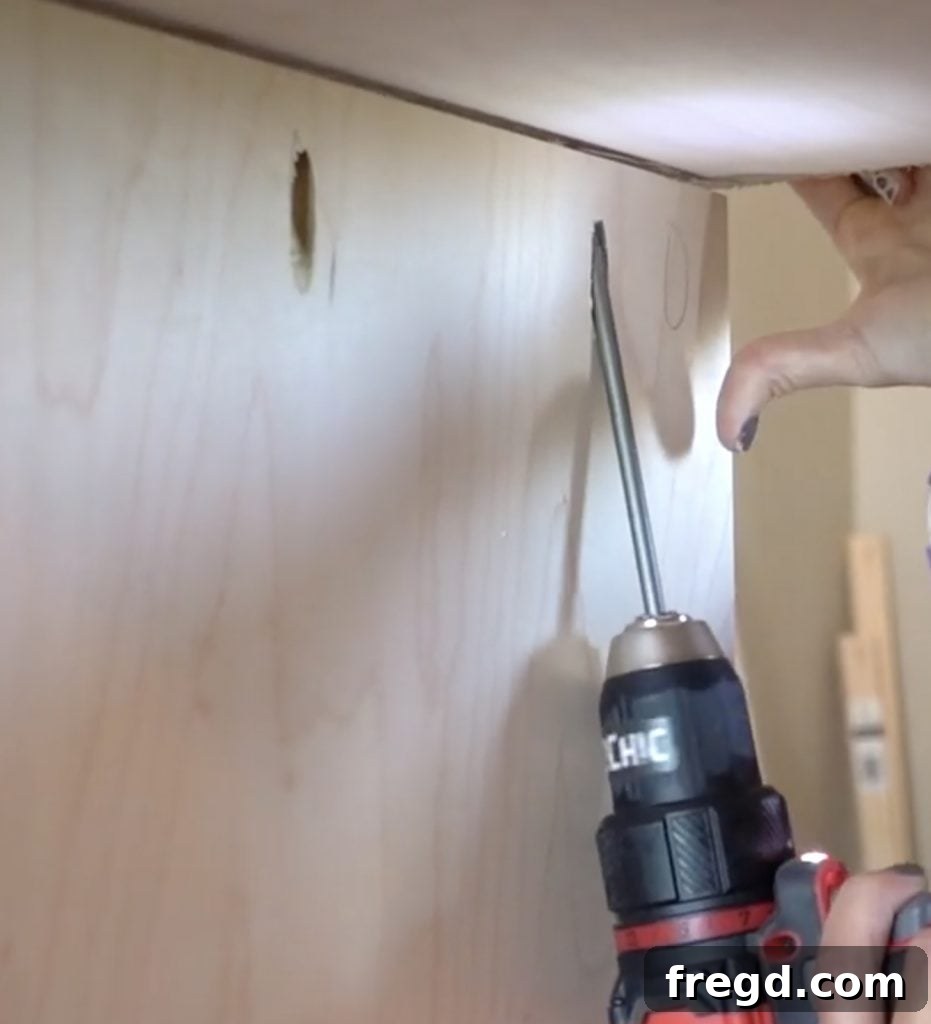
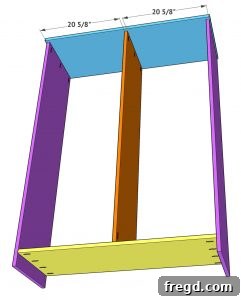
Cut the middle divider board to its specified size. This vertical divider is crucial for both the cabinet’s structural integrity and for creating distinct storage compartments within your utility cabinet, allowing you to separate different types of cleaning tools. Drill 3/4″ pocket holes at both ends of this divider board. Carefully center the divider inside the cabinet frame, ensuring it is perfectly plumb and square before securing it firmly in place using 1 1/4″ pocket hole screws and wood glue. This step creates two robust vertical sections, one typically for larger cleaning tools like your Hoover ONEPWR Evolve vacuum and another for shelves and drawers.
Step 3: Add the Interior Shelves for Versatile Storage
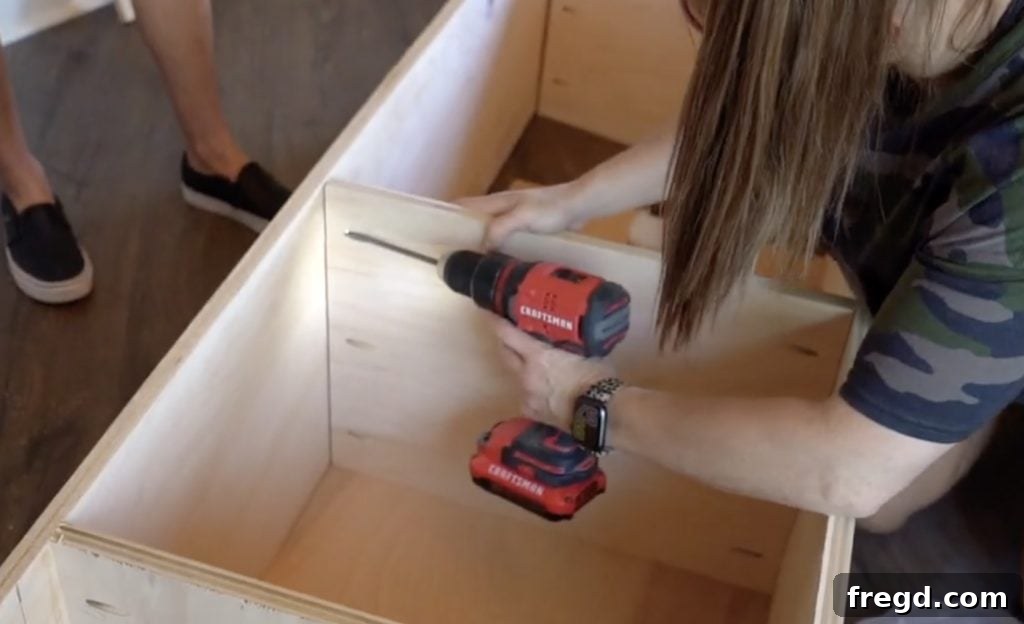
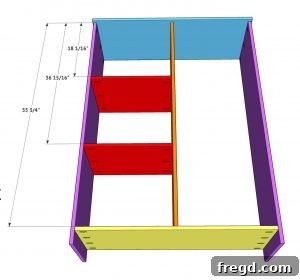
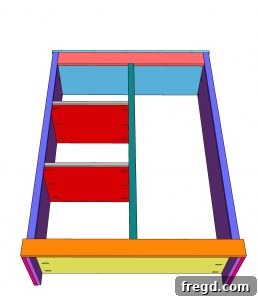
Once your middle divider is securely in place, proceed to cut your shelf pieces to the required length as per your plans. Drill 3/4″ pocket holes on both ends of each shelf board. These shelves provide essential horizontal storage, ideal for organizing smaller items, storing cleaning solutions, housing a charging station for your Hoover ONEPWR batteries, or even accommodating additional Hoover ONEPWR accessories. Position them at your desired heights within the cabinet (refer to the plans for suggested placements that optimize space) and attach them using 1 1/4″ pocket hole screws and wood glue. Always double-check that your shelves are perfectly level and firmly attached.
Step 4: Construct the Face Frame for a Polished Look
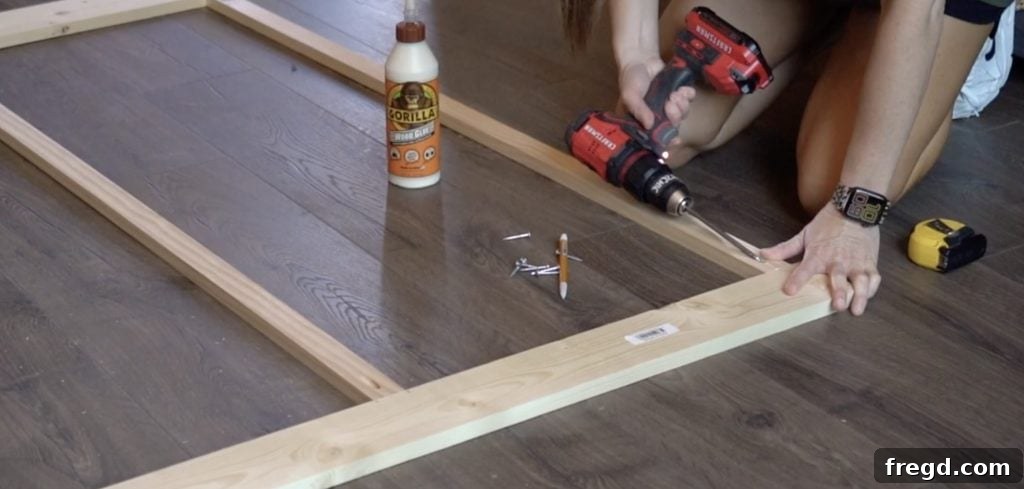
The face frame is a critical element that adds a professional, finished appearance to your utility cabinet and provides crucial structural support for the drawers and the barn door hardware. Cut the individual pieces of the face frame—the top, side stiles, and middle stiles—to their precise dimensions. Drill 3/4″ pocket holes into the ends of the top, side, and middle boards that will connect to each other. Assemble these pieces with utmost precision, ensuring all joints are tight, flush, and perfectly square. Use 1 1/4″ pocket hole screws and wood glue for a strong, lasting connection that will hold up over time.
Step 5: Attach the Face Frame to the Cabinet Carcass
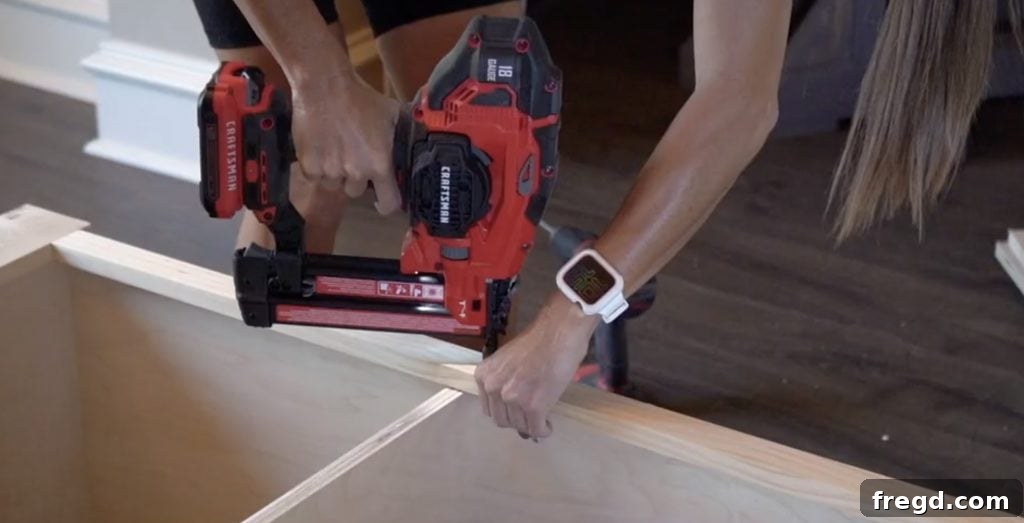
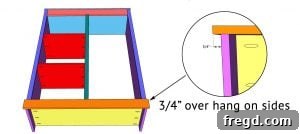
With the face frame expertly assembled, it’s time to attach it to the front of your cabinet carcass. Apply a consistent bead of wood glue to all mating surfaces between the face frame and the cabinet front. Carefully position the face frame so it sits just under the main top of the cabinet, creating a seamless transition. The sides of the face frame should be flush with the cabinet’s sides, and the bottom of the face frame should elegantly overhang the cabinet sides by 3/4″, creating a subtle, attractive detail. Secure the face frame firmly in place using 1 1/4″ brad nails. This step transforms the raw cabinet box into a polished piece, ready for its final finishing touches.
Step 6: Install the Bottom Side Trim for a Clean Base
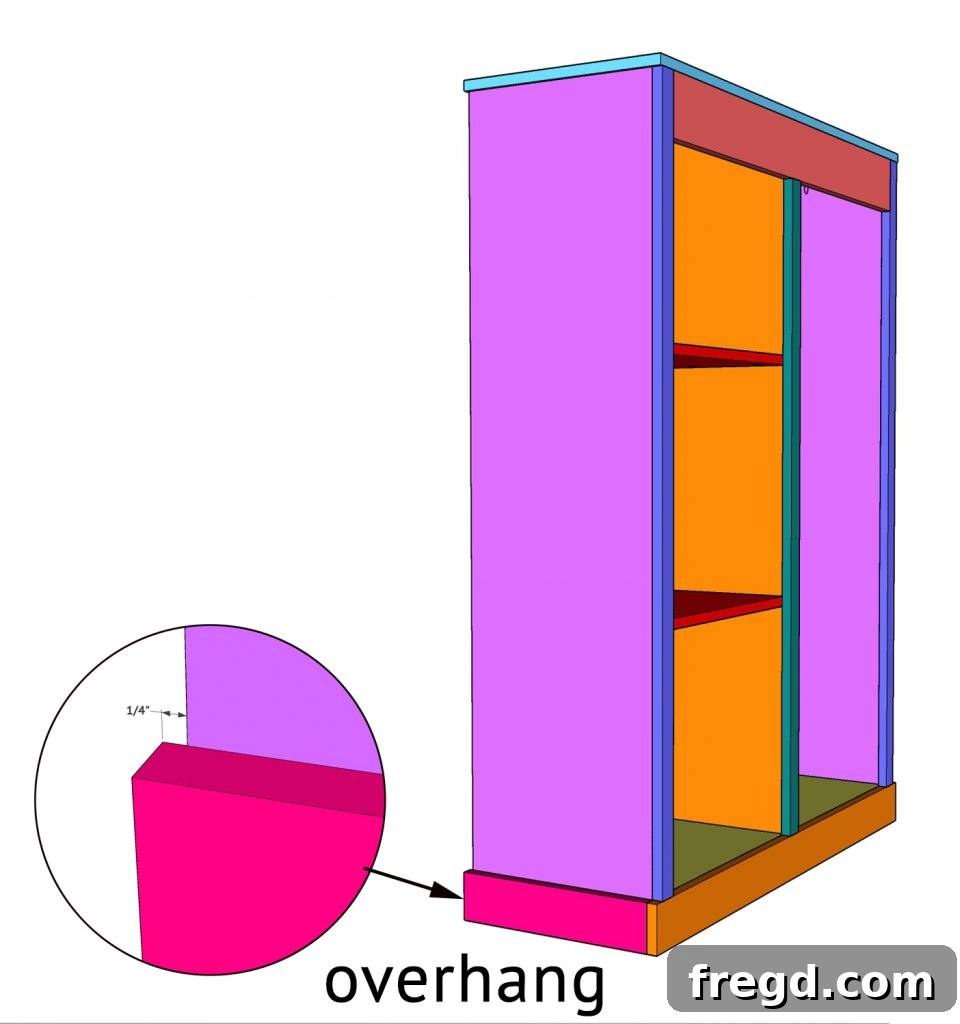
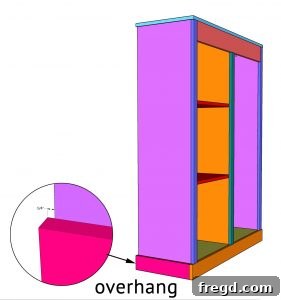
Cut the side trim pieces designated for the cabinet’s bottom to their correct lengths. These trim pieces are essential for providing a neat, finished edge to the base of the cabinet and offering some protection to the lower part of the structure. Attach them meticulously to the bottom sides of the cabinet using 1 1/4″ brad nails and wood glue. Ensure there is a precise 1/4″ overhang off the back of the cabinet, which will provide a clean and professional transition when the back panel is attached later.
Step 7: Apply the Top Trim Pieces for Refinement
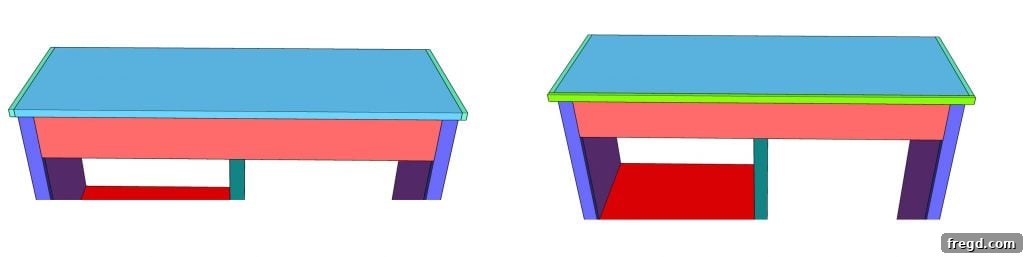
Further enhance the top of your cabinet by adding the decorative trim. Cut the top side trim pieces to their specified sizes and attach them to the sides of the cabinet’s main top using both wood glue and 5/8″ brad nails for a secure hold. Repeat this precise process for the front trim piece, ensuring it aligns perfectly with the top edge and creates a continuous, clean line. This trim detail not only adds significant visual appeal and a custom look but also provides a more robust and finished edge to the cabinet’s lid.
Step 8: Finish the Shelves with Decorative Trim
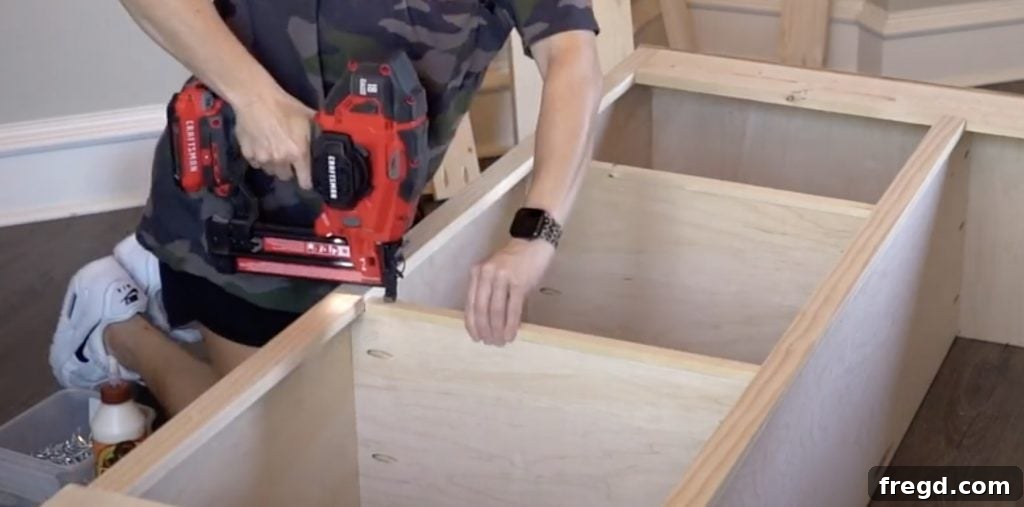
To give your interior shelves a truly polished and complete look, as well as to add a practical barrier that prevents items from easily sliding off, attach trim pieces to their front edges. Cut the shelf trim pieces to their appropriate sizes. Secure them firmly to the front of the shelves using 1 1/4″ brad nails and a strong wood glue. These trim pieces should sit back 1 1/4″ from the face frame, creating a subtle, attractive inset that enhances the overall depth and design of the cabinet while providing a functional lip for the contents of the shelves.
Crafting the Drawers: Smart Storage for Smaller Essentials
Drawers are an indispensable and highly functional feature for any utility cabinet, offering discreet, accessible storage for smaller cleaning supplies, microfiber cloths, extra Hoover ONEPWR batteries, or miscellaneous household items. Building them accurately is key to ensuring smooth operation and maximizing their utility within your organized space.
Step 1: Construct the Sturdy Drawer Boxes
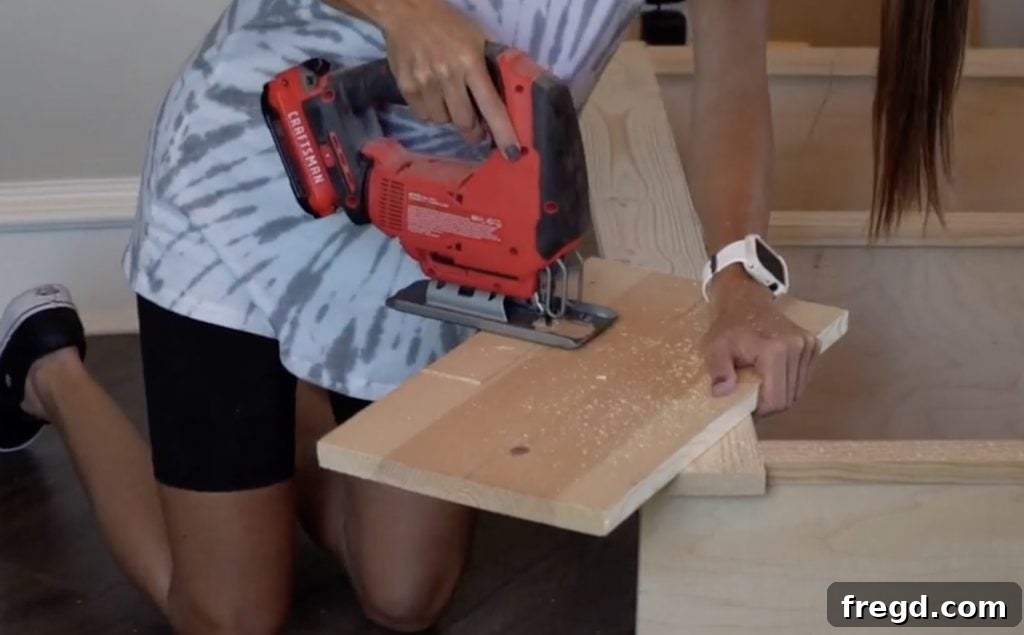
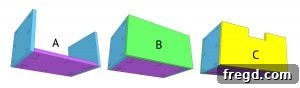
Begin by cutting all the individual drawer pieces—the front, back, two sides, and the plywood bottom—to the precise measurements specified in your free plans. Using your Kreg Jig, drill 3/4″ pocket holes into both ends of the side pieces. Additionally, drill pocket holes all around the perimeter of the bottom plywood piece. This specialized pocket hole technique ensures a robust and durable drawer box that can withstand regular use and heavy items. Apply wood glue to all joining surfaces and carefully attach everything together using 1 1/4″ pocket hole screws. It is crucial to ensure your drawer boxes are perfectly square during assembly for seamless and smooth functionality once installed.
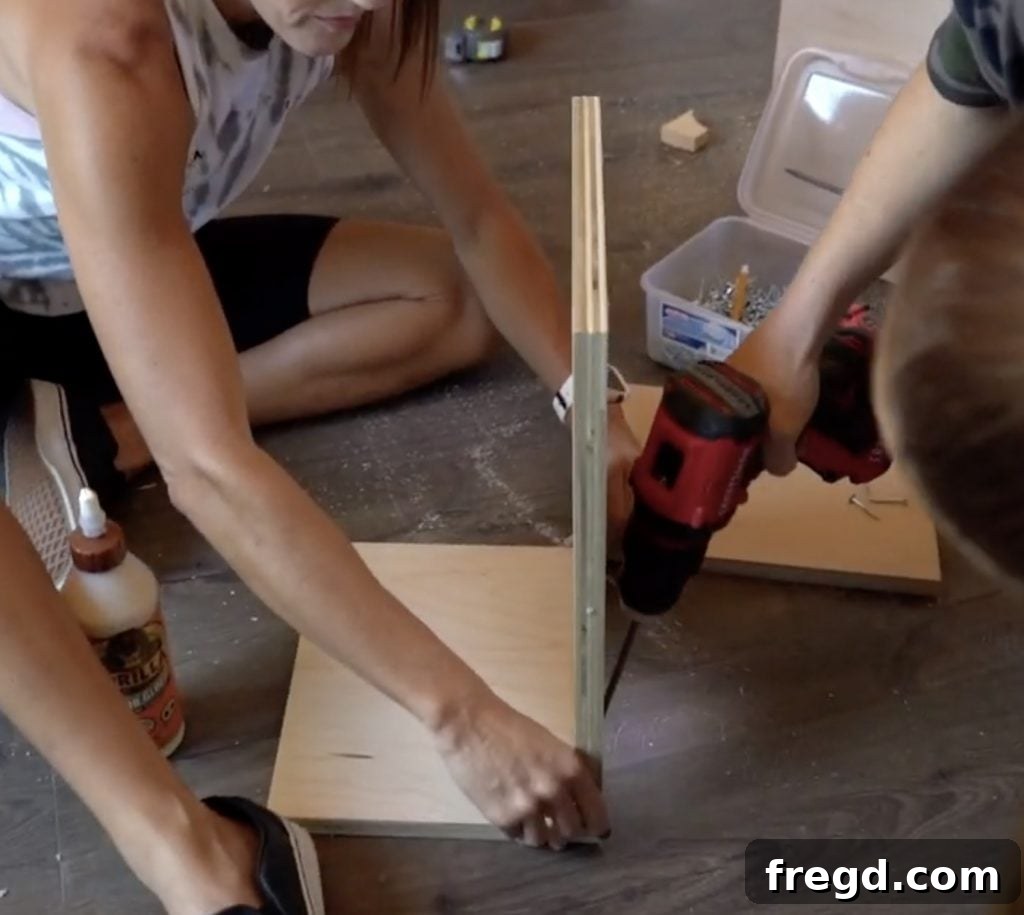
Once assembled, allow the wood glue to cure completely according to the manufacturer’s instructions before moving on to the next step, ensuring maximum strength and stability for your drawer boxes.
Step 2: Install the Drawer Slides for Smooth Operation
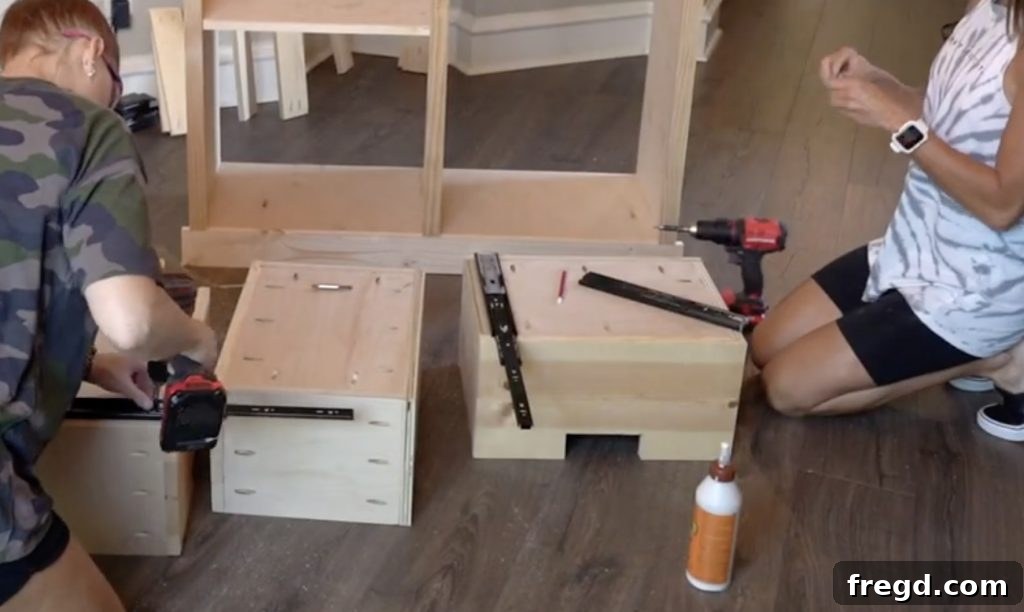
Carefully install the drawer slides, first into the cabinet frame and then onto your newly built drawers. Precise alignment at this stage is absolutely critical for achieving smooth, effortless, and consistent operation of each drawer. Refer meticulously to the manufacturer’s instructions for your specific drawer slides to ensure correct placement, height, and spacing. With the slides properly in place and adjusted, your drawers will glide open and closed seamlessly, providing convenient and reliable access to your organized cleaning essentials.
Creating the Hand Vac Holder: A Custom Fit for Your Dust Chaser
A custom-designed holder for your Hoover ONEPWR Dust Chaser is a thoughtful and highly functional addition to your utility cabinet. It ensures that this indispensable tool is always within easy reach, securely stored, and ready for immediate use. This dedicated spot elevates the overall functionality and organization of your cabinet.
Step 1: Assemble and Mount the Custom Holder
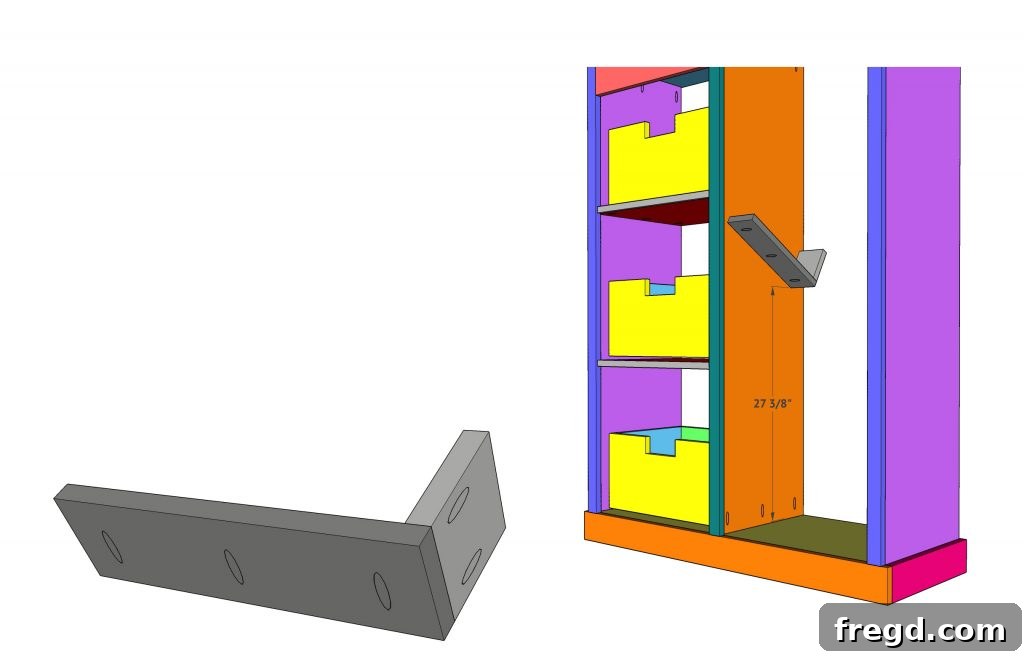
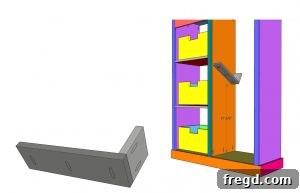
Cut the individual pieces for the hand vac holder to their precise sizes as indicated in your plans. Using your Kreg Jig, drill 3/4″ pocket holes along one edge of the longer piece and into one end of the shorter piece. Apply wood glue generously to the mating surfaces and attach these pieces together using 1 1/4″ pocket hole screws to form the holder. Once assembled, carefully position the holder inside the cabinet at a convenient height that allows for easy retrieval and storage of your Dust Chaser. Secure it firmly using the same pocket hole method and wood glue, attaching it to the cabinet’s interior side. This dedicated spot means your Hoover ONEPWR Dust Chaser will always be charged, accessible, and ready for quick clean-ups, perfectly integrating into your sophisticated and organized cleaning system.
Constructing the Barn Door: The Signature Feature of Your Cabinet
The sliding barn door is arguably the defining aesthetic element of this utility cabinet, offering both rustic charm and highly practical access to its contents. Building it carefully and accurately is crucial to ensure it slides smoothly, operates reliably, and looks fantastic as a focal point in your home.
Step 1: Assemble the Robust Barn Door Frame
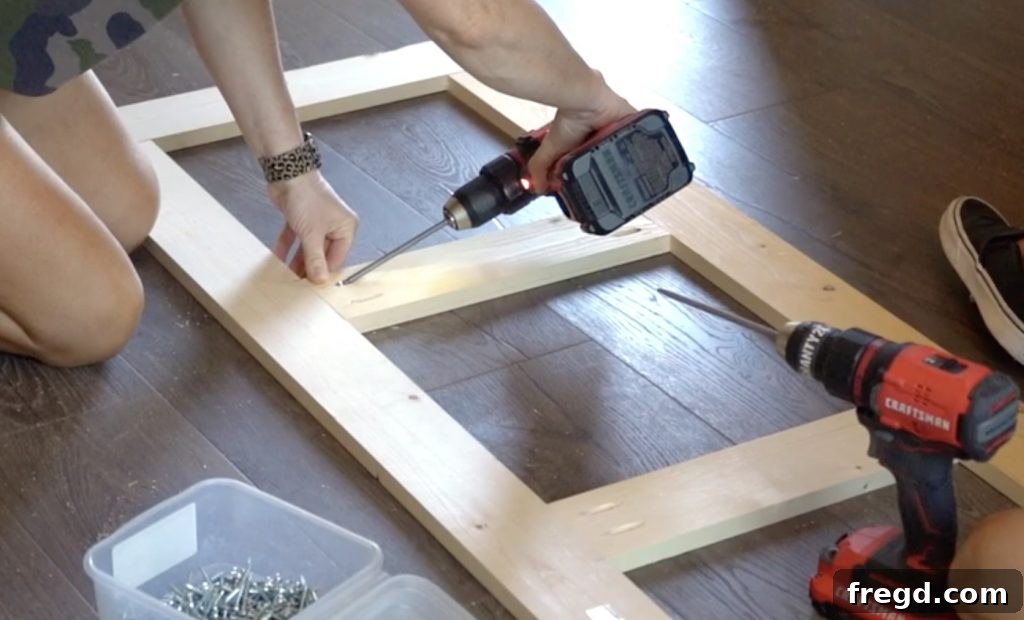
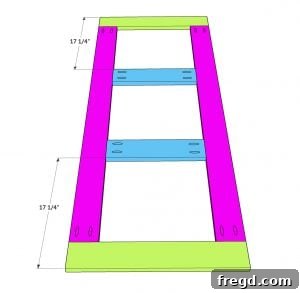
Start by cutting all the individual pieces for the barn door frame to their precise dimensions according to your free plans. Using your Kreg Jig, drill 3/4″ pocket holes into the ends of the vertical and middle boards where they will connect. Apply a consistent bead of wood glue to all mating joints and securely attach the pieces together using 1 1/4″ pocket hole screws. It is imperative that you ensure the frame is perfectly square and robust at this stage, as it will bear the weight of the door panel and the sliding hardware. A square frame is essential for a door that slides smoothly and fits correctly.
Step 2: Attach the Barn Door Panel for a Complete Look
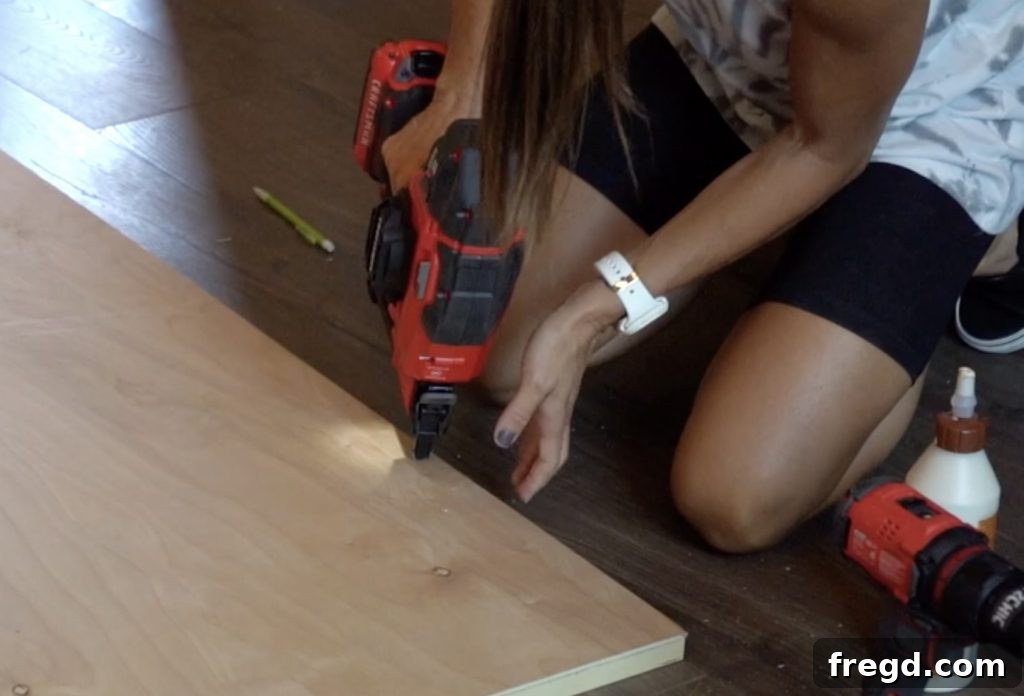
Cut the barn door panel (typically crafted from thinner plywood, like 1/4″ hardwood plywood) to size, ensuring it fits snugly and precisely within your assembled frame. Lay the panel flat onto the back of the barn door frame. Apply wood glue carefully around the entire perimeter of the frame where it meets the panel, ensuring good adhesion. Securely attach the panel from the back into the frame using 5/8″ brad nails or 3/4″ staples, spacing them evenly for a strong hold. This method ensures a clean, unblemished appearance on the front of the door and results in a sturdy, integrated door structure ready for hardware installation.
Attaching the Back Panel: Completing the Enclosure and Adding Rigidity
The back panel serves multiple crucial functions: it not only completely encloses the cabinet, protecting its contents from dust and debris, but also provides significant additional structural rigidity, squaring up the entire assembly. This step brings your cabinet closer to completion and prepares it for its final usage.
Step 1: Secure the Cabinet’s Back Panel
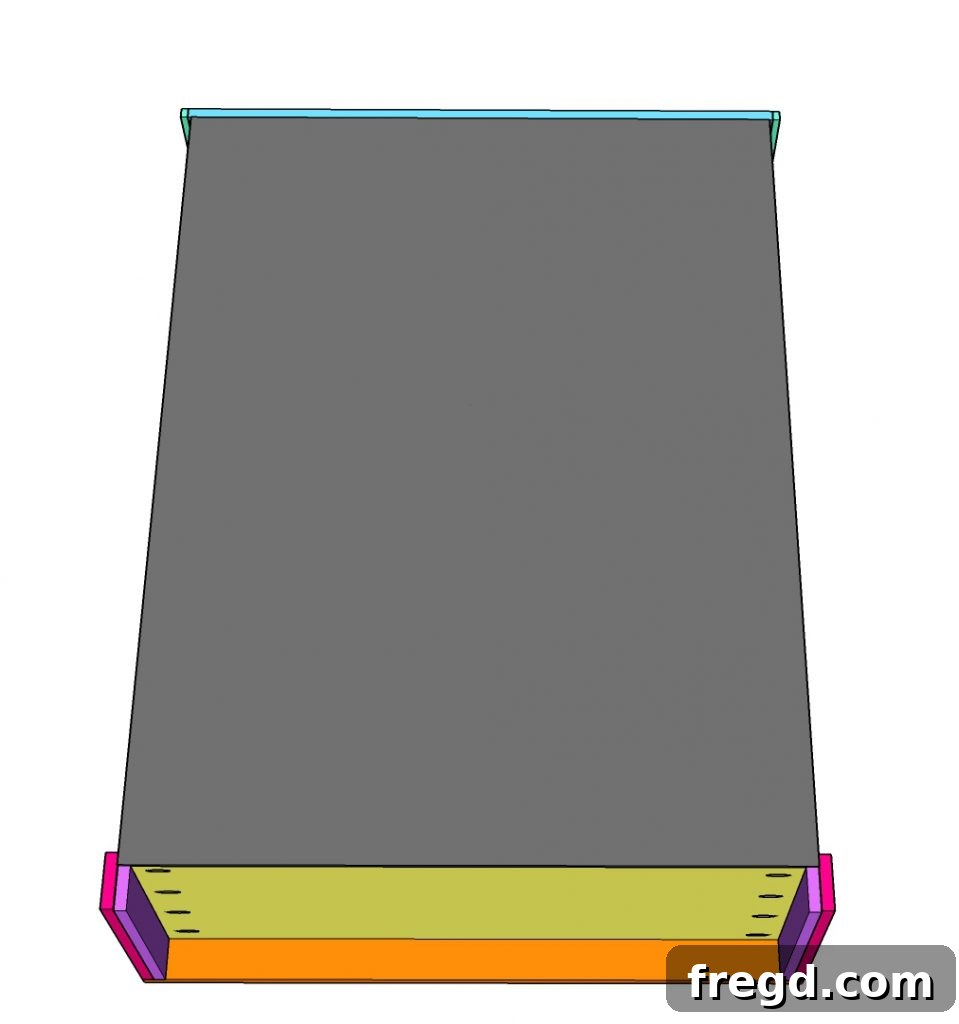
Cut the back panel board (typically 1/4″ hardwood plywood, matching the drawer bottoms) to the exact dimensions of the cabinet’s rear opening. Before permanently attaching it, carefully consider any functional requirements: if you plan to mount the Hoover ONEPWR Dual Bay Charger inside the cabinet, now is the absolute ideal time to cut a small, discreet hole for the power cord to run neatly out the back of the cabinet. This foresight prevents having to modify a finished piece later. Once any necessary cuts or modifications are made, align the panel perfectly with the cabinet’s back edges. Secure it to the back of the cabinet using 5/8″ brad nails or 3/4″ staples, driving them from the back panel directly into the cabinet frame and internal dividers. This final structural step fully encloses the storage space and makes your cabinet a robust, functional enclosure.
A note on our building experience: We built this entire cabinet indoors to escape the relentless and often stifling Texas heat, which frequently makes outdoor woodworking challenging. Despite creating a bit of a sawdust storm and a general mess during the construction process, cleanup was an absolute breeze thanks to our powerful and convenient Hoover ONEPWR tools! They truly make all the difference, transforming post-project tidying from a chore into a quick task.

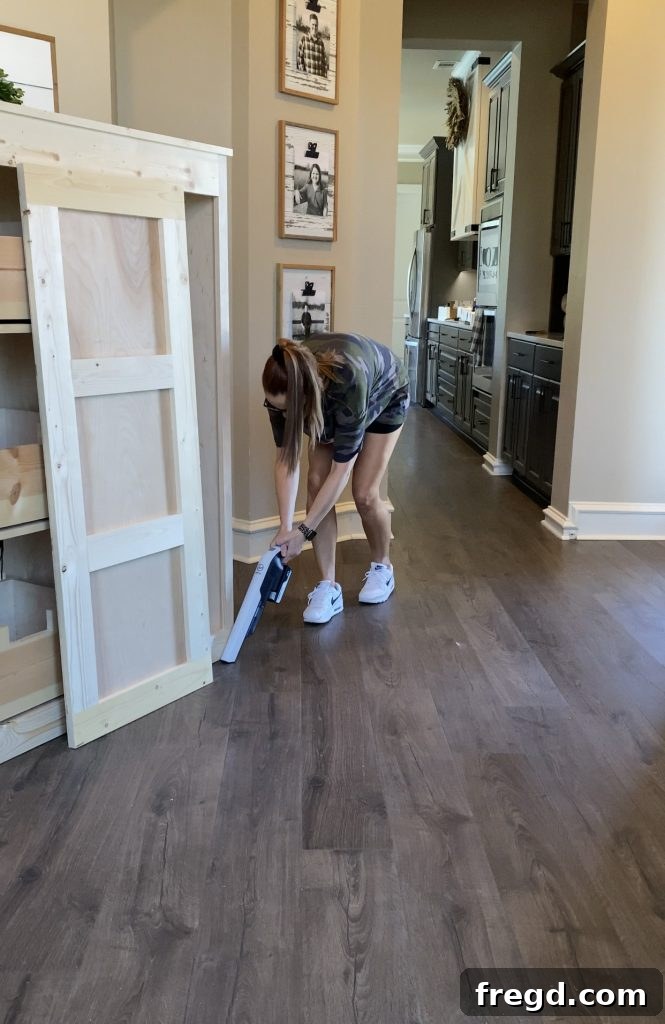
Cleaned up and ready for the exciting final steps – adding the finish and installing the barn door hardware that will bring your vision to life!
The Finishing Touches: Bringing Your Vision to Life with Style
The finishing stage is where your DIY sliding barn door utility cabinet truly comes alive, allowing you to infuse it with your personal style and integrate it seamlessly into your existing home decor. This is also the exciting moment when you install the signature barn door hardware, giving the cabinet its distinctive character and functionality.
Step 1: Apply Finish and Install Barn Door Hardware
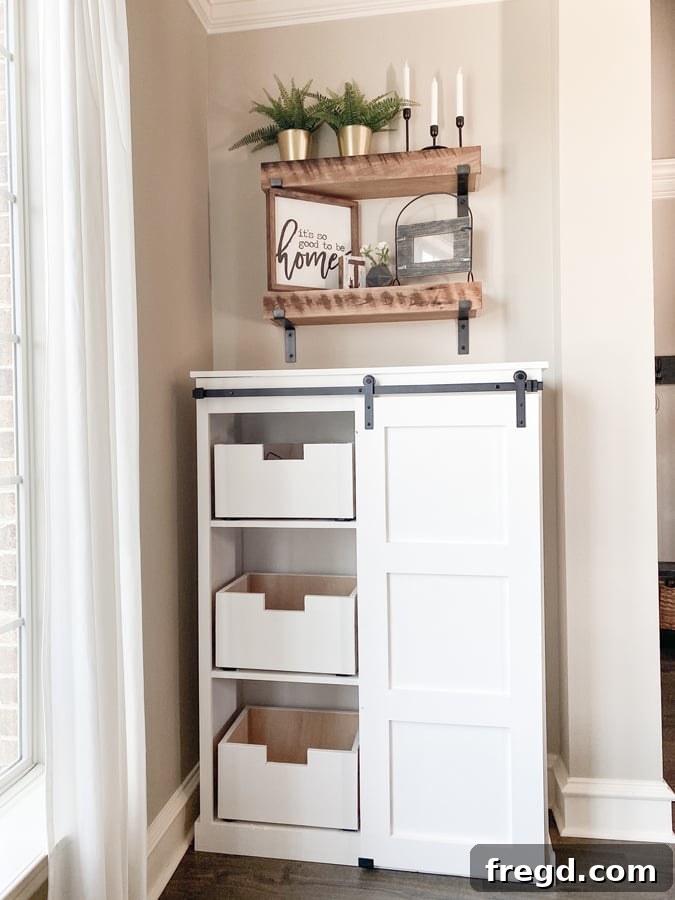
Now comes the most creative and impactful part: applying your chosen finish. Whether it’s a rich, deep stain that highlights the wood grain, a vibrant paint color that makes a statement, or a clear protective coat that enhances natural beauty, take your time with this step. Prior to application, ensure thorough sanding to achieve an impeccably smooth, professional result. Once the finish is completely dry and cured, it’s time to meticulously attach the barn door hardware according to the manufacturer’s instructions. This hardware is not only crucial for the cabinet’s distinctive aesthetic but also for ensuring smooth and reliable sliding action of the door. With the hardware expertly in place, your beautiful and highly functional DIY Sliding Barn Door Utility Cabinet is officially complete and ready to elevate your home organization!
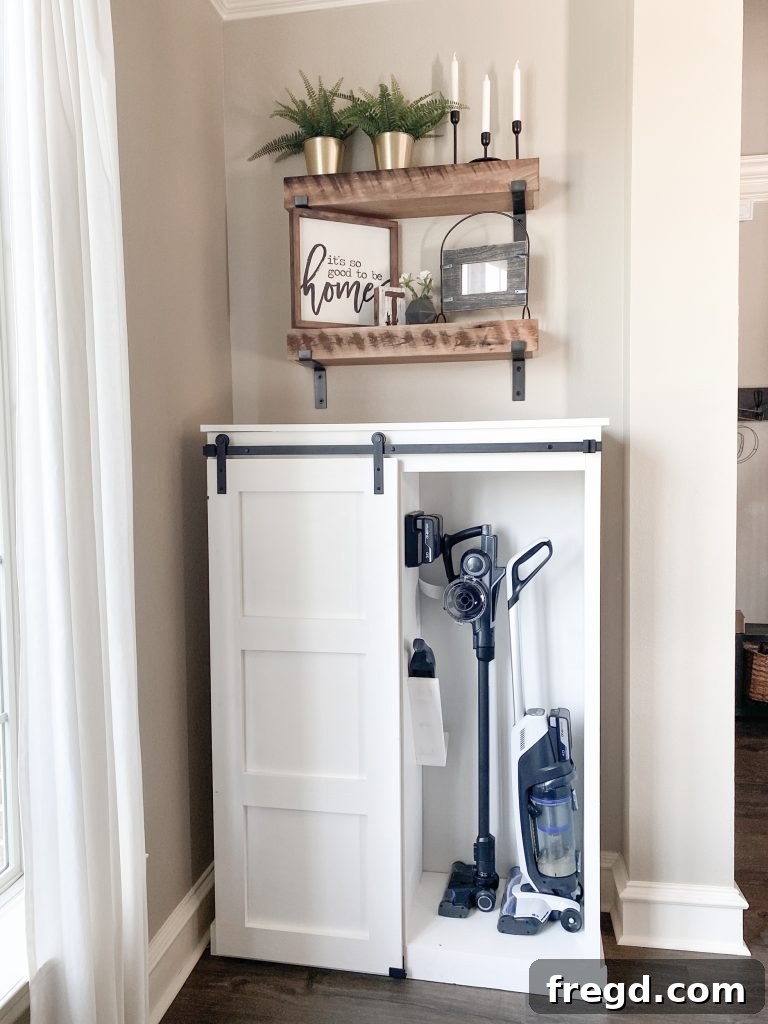
We are absolutely delighted with how this project turned out! It’s the perfect, dedicated place to store all of our Hoover ONEPWR tools, keeping them impeccably organized, easily accessible, and always ready for action. Beyond its supreme functionality, its charming rustic design makes it a stylish and welcomed addition to our dining room, proving unequivocally that utility can indeed be beautiful and seamlessly integrated into your living spaces.
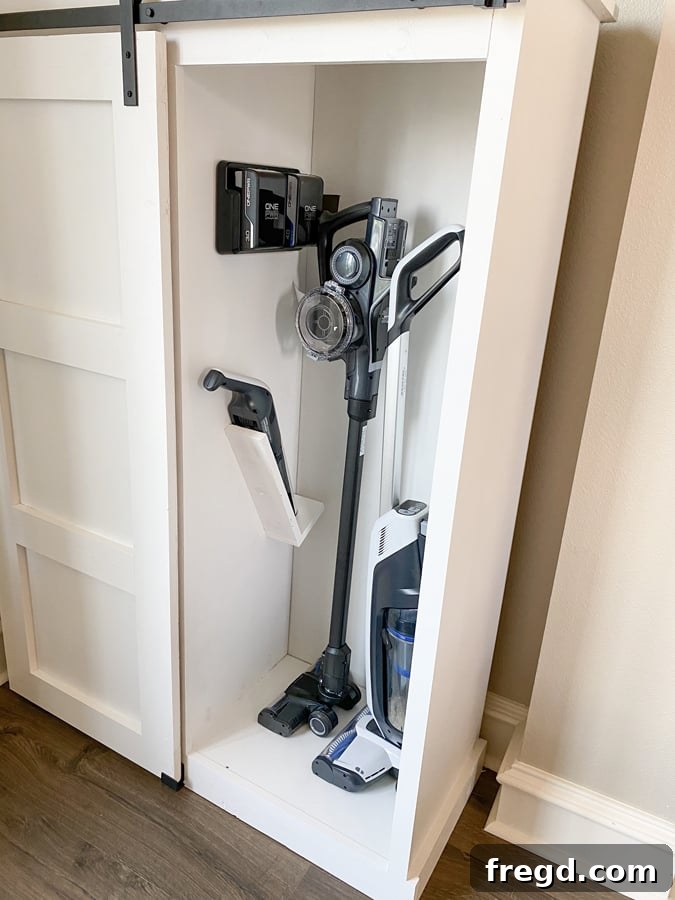
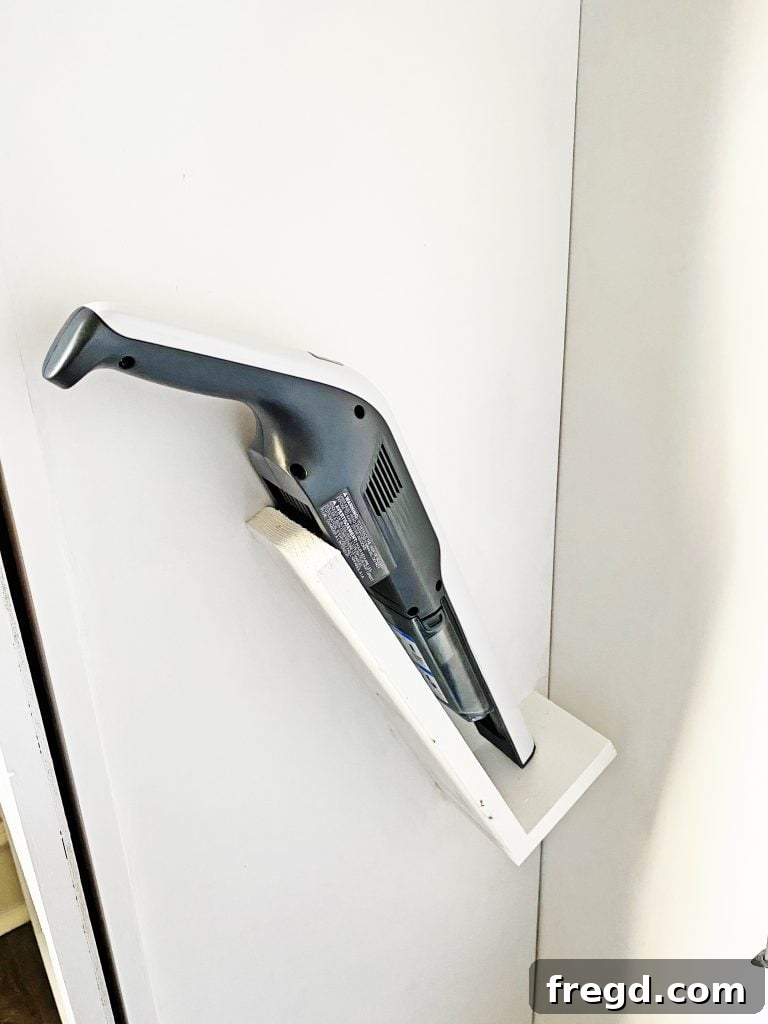
Having a dedicated, custom-built spot for our Hoover ONEPWR Dust Chaser is incredibly handy! Its easy accessibility means it’s super simple for anyone, even the kids, to quickly grab for unexpected spills or daily touch-ups, actively encouraging a cleaner and tidier home for everyone in the family.
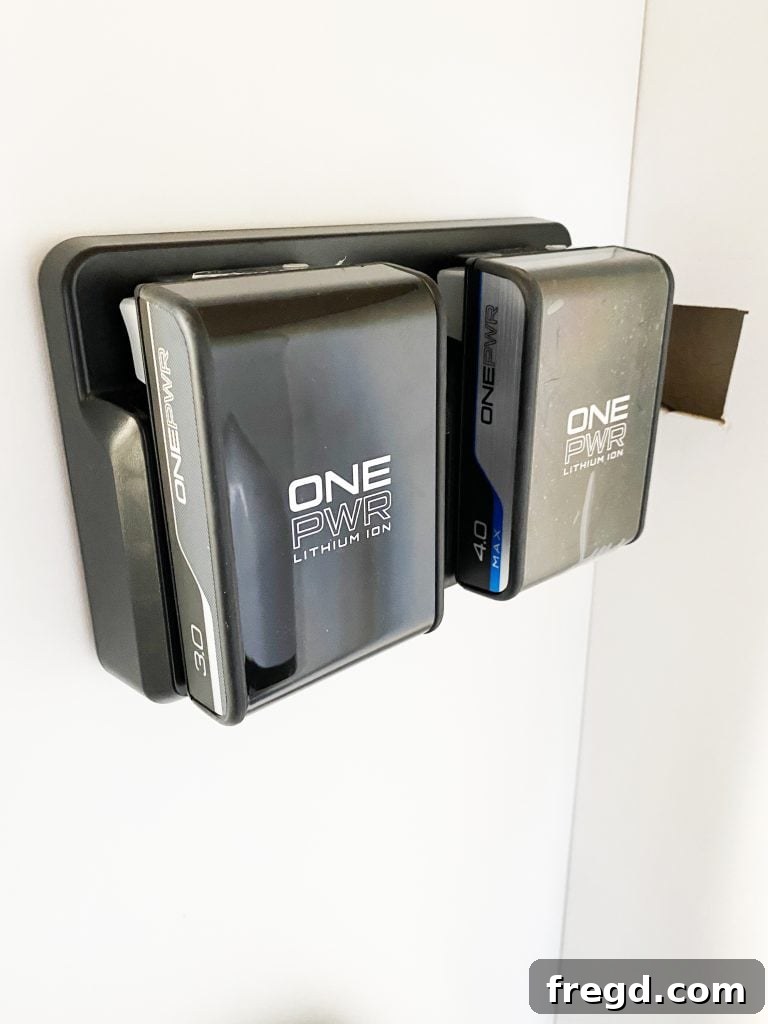
The strategically integrated Hoover ONEPWR Dual Bay Charger inside the cabinet is an absolutely fantastic and practical feature. With batteries always charging and ready to go, we never have to worry about them dying mid-clean. It’s a brilliant testament to smart design that flawlessly supports practical and efficient daily living, ensuring continuous power for your Hoover ONEPWR system.
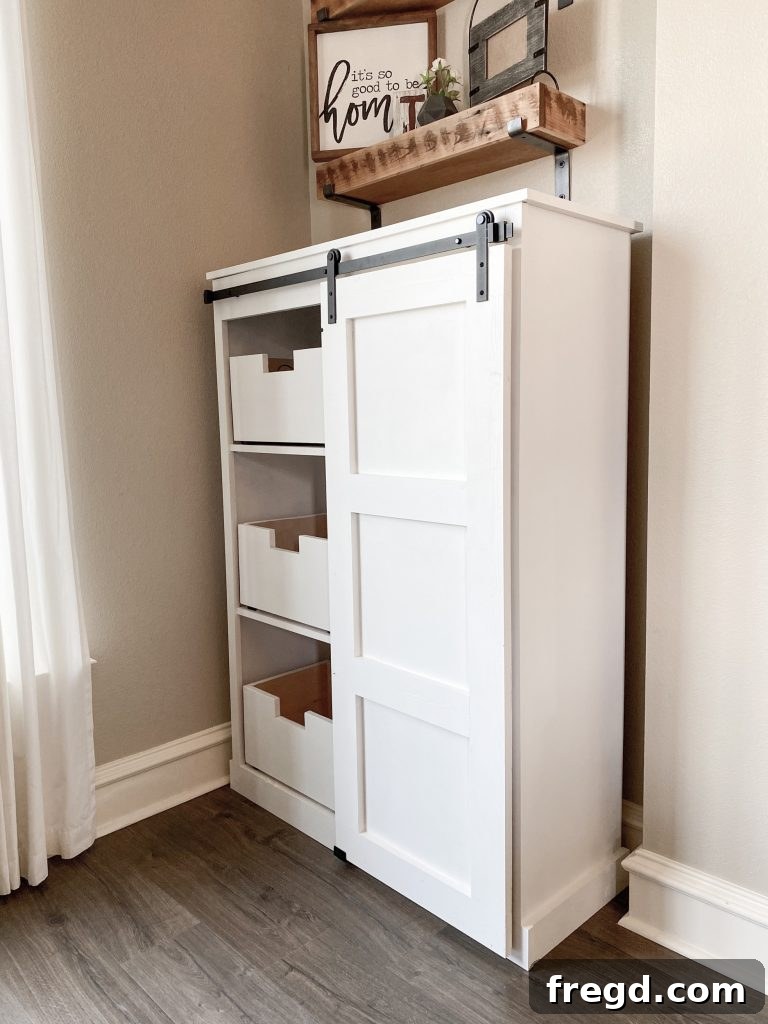
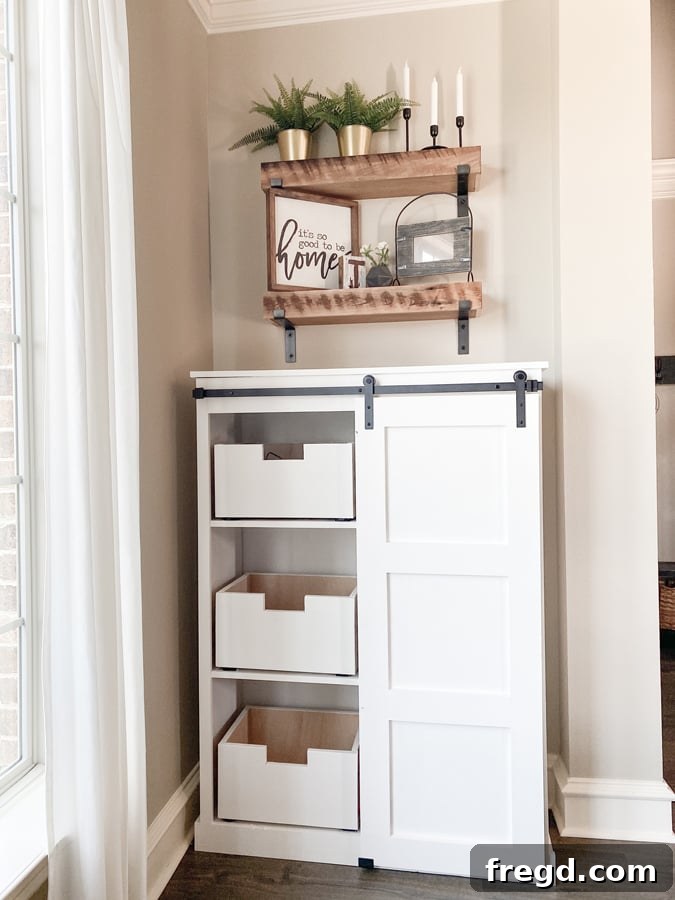
We wholeheartedly encourage you to embark on this incredibly rewarding DIY journey and create your own custom storage solution. It’s a project that delivers immense satisfaction and a tangible improvement to your home’s functionality and aesthetic. Don’t forget to share your amazing builds with us on social media using #shanty2chic so we can celebrate your craftsmanship and share your inspiration with our wonderful community of DIY enthusiasts!
Happy Building… and even happier cleaning with your newly organized and easily accessible tools!

Sliding Barn Door Utility Cabinet (Full Recipe Summary)
Click here to download the full set of free printable plans including the comprehensive supply list!
Tools Required
-
Miter Saw
-
Drill
-
Kreg Jig
-
Brad Nailer
-
Sander
-
Stapler (optional)
Supply List
- 1 1x10x6 Pine or Common Board
- 1 1x5x8 Pine or Common Board
- 3 1x4x8 Pine or Common Board
- 3 1x2x8 Pine or Common Board
- 1 1/2″x3/4″x80″ Trim
- 1 1/2″x3/4″x40″ Trim
- 2 3/4″x48″x96″ Hardwood Plywood
- 2 1/4″x48″x96″ Hardwood Plywood
- 1 1/4″ Pocket Hole Screws
- 5/8″ Brad Nails or 3/4″ Staples
- 1 1/4″ Brad Nails
- Wood Glue
- Drawer Slides
- Barn Door Hardware
Step-by-Step Instructions
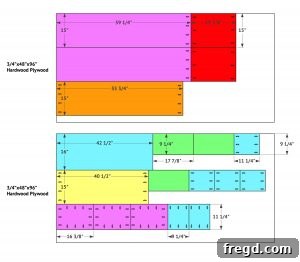
Cut List Overview
-
Consult Cut List 1 for initial lumber cuts.

-
Refer to Cut List 2 for plywood panel cuts.
-
Review Cut List 3 for all trim pieces.

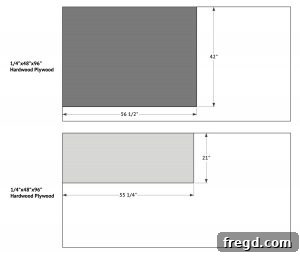
Cabinet Frame Construction
-
Cut the frame pieces to size and drill 3/4″ pocket holes at the top end of both side pieces and both ends of the bottom piece. Attach the boards together with 1 1/4″ pocket hole screws and wood glue. The top should over hang the cabinet 3/4″ on the front and 1/4″ on the sides and back.
-
Cut the middle divider to size and drill 3/4″ pocket holes at both ends. Center it inside the cabinet and attach it with 1 1/4″ pocket hole screws and wood glue.
-
Cut the shelf pieces to size and drill 3/4″ pocket holes on both ends of the boards. Attach them to the inside of the cabinet with 1 1/4″ pocket hole screws and wood glue.
-
Cut the face frame pieces to size and drill 3/4″ pocket holes in the top, sides and middle boards. Attach them together with 1 1/4″ pocket hole screws and wood glue.
-
Attach the face frame to the front of the cabinet with 1 1/4″ brad nails and wood glue. The face frame should sit just under the top of the cabinet, the sides should be flushand the bottom should over hang on the sides 3/4″.
-
Cut the side trim pieces to size and attach them to the bottom of the cabinet with 1 1/4″ brad nails and wood glue. There should be a 1/4″ over hang off the back of the cabinet.
-
Cut the top, side trim pieces to size and attach them to the sides of the top with wood glue and 5/8″ brad nails. Cut the front trim piece to size and attach it the same way.
-
Cut the shelf trim pieces to size and attach them to the front of the shelves with 1 1/4″ brad nails and wood glue. The shelf trim will sit back from the face frame 1 1/4″.

Drawer Assembly
-
Cut the drawer pieces to size. Drill 3/4″ pocket holes at both ends of the side pieces and all around the bottom piece. Attach everything with 1 1/4″ pocket hole screws and wood glue.
-
Install the drawers with drawer slides.
Hand Vac Holder Setup
-
Cut the hand vac holder pieces to size and drill 3/4″ pocket holes along one edge of the long piece and one end of the short piece. Attach them together with 1 1/4″ pocket hole screws and wood glue. Attach it to the inside of the cabinet the same way.
Barn Door Construction
-
Cut the barn door pieces to size. Drill 3/4″ pocket holes in the vertical and middle boards. Attach the pieces together with 1 1/4″ pocket hole screws and wood glue.
-
Cut the barn door panel to size and lay it on the back of the barn door frame. Attach it with 5/8″ brad nails or 3/4″ staples and wood glue from the back of the panel and into the frame.
Back Panel Attachment
-
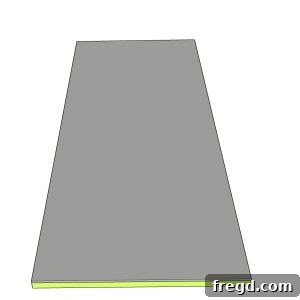
Cut the back panel board to size and attach it to the back of the cabinet with 5/8″ brad nails or 3/4″ staples from the back panel into the cabinet.
The Finishing Stages
-
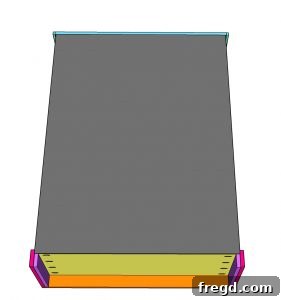
Apply your desired finish (stain, paint, or clear coat) and then meticulously attach the barn door hardware.
Feel free to personalize your cabinet and make it uniquely your own!
We’d love to see your creations! Share your finished cabinets with us on social media using #shanty2chic so we can celebrate your craft and feature your amazing work!
Happy Building!