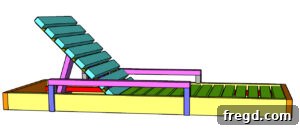
Build Your Own Modern Outdoor Lounge Chair: Free DIY Plans & Step-by-Step Guide
Transform your backyard into a luxurious retreat with a custom-built outdoor lounge chair! This comprehensive guide provides everything you need to know, from free plans and a detailed video tutorial to step-by-step instructions. Crafted with a sleek, low-profile design and a convenient armrest, this DIY chaise lounge not only looks fantastic but also offers the perfect spot to relax and unwind. Best of all, it’s an incredibly rewarding project that won’t break the bank, allowing you to achieve high-end outdoor aesthetics on a budget.
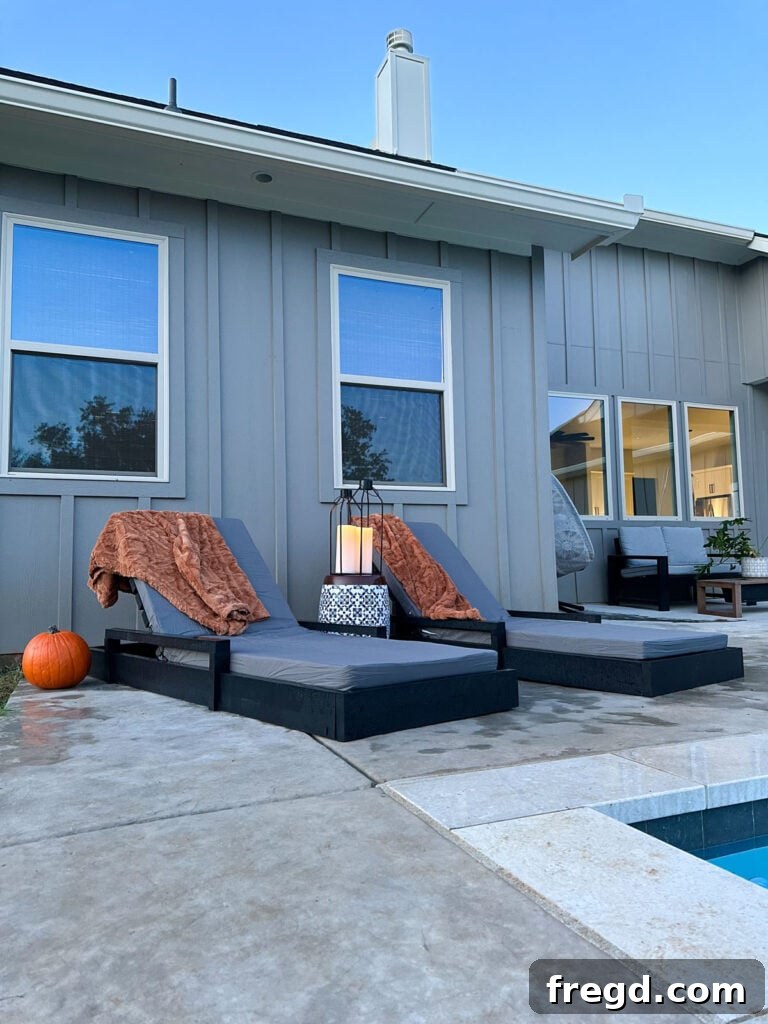
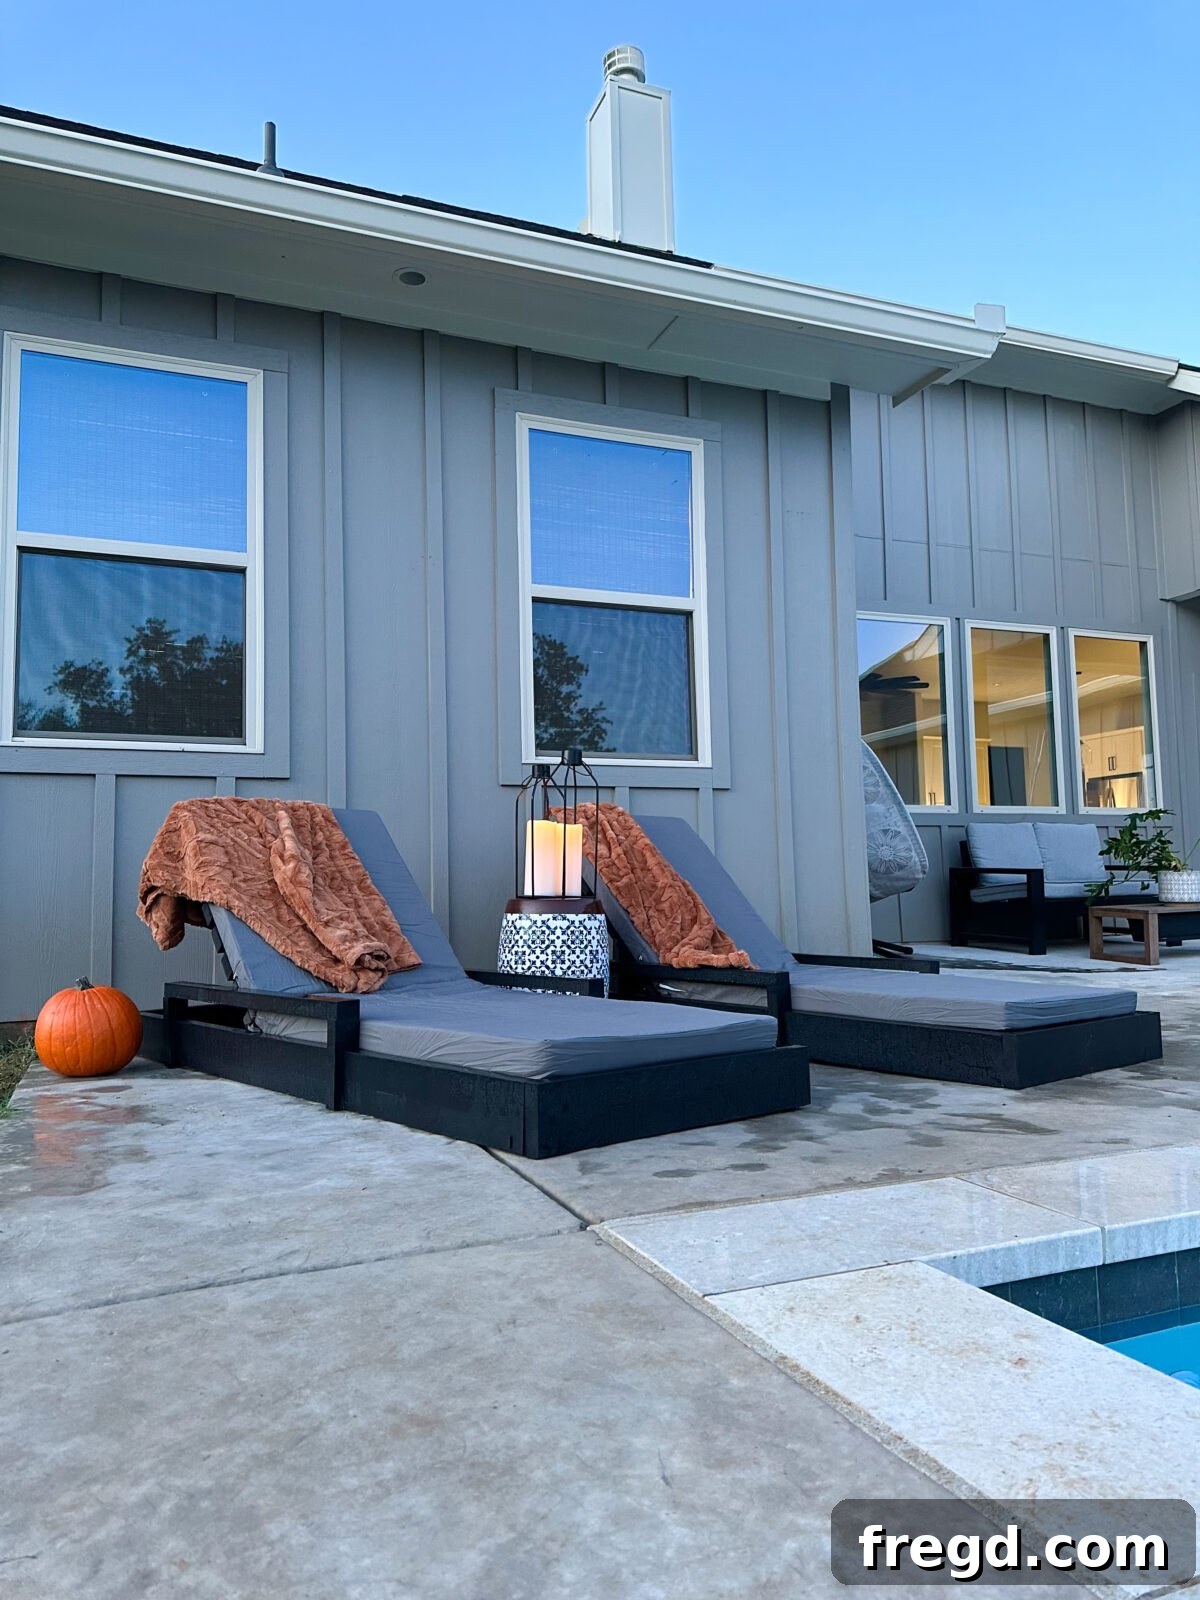
Even as the seasons shift towards cooler weather, there’s always an opportunity to enhance your outdoor living space. Having recently settled into a new home and organized my workshop, my passion for building furniture has been reignited. One of my top priorities was to create a set of matching lounge chairs for my pool area, complementing the outdoor couch and chairs I had already built. The result is this uniquely designed, low-profile lounge chair featuring a practical armrest – ideal for holding a refreshing drink while you soak up the sun or enjoy a peaceful evening. Its modern aesthetic seamlessly integrates with any contemporary outdoor decor, making it a truly versatile addition to your patio or deck. This project is surprisingly straightforward, making it an excellent choice for DIY enthusiasts of all skill levels, and it promises significant value for your investment.
Watch the DIY Outdoor Lounge Chair Build in Action!
To give you an even clearer understanding of the construction process, we’ve put together a detailed video tutorial. Join us as we walk you through each step, offering valuable visual cues and tips that complement the written instructions. Simply click the play button below to watch us build this fantastic lounge chair together!
This video provides a step-by-step visual guide to help you construct your outdoor lounge chair with confidence. Follow along for expert tips and tricks!
Wasn’t that inspiring? Building this lounge chair is not only enjoyable but also incredibly cost-effective, offering a substantial return on your time and effort. You’ll end up with a high-quality, durable piece of furniture that’s perfectly suited for your outdoor space.
Ready to Start Building? Download Your Free Plans!
Now that you’re excited to begin, let’s gather your resources! We’ve made it easy for you to tackle this project by providing free, comprehensive chaise lounge plans. These plans include detailed measurements, a complete shopping list, and a precise cut list, ensuring you have all the information at your fingertips. Follow the link below to access and download your plans, then come back here for our step-by-step instructions to guide you through the entire build process.
Click HERE TO JUMP TO THE FREE PLANS & CUT LIST
The Ultimate DIY Lounge Chair for Your Outdoor Oasis
Creating your own outdoor lounge chair is more than just a woodworking project; it’s an opportunity to infuse your personal style and comfort into your living space. This DIY lounge chair design is specifically tailored to provide a modern, sleek profile that complements contemporary outdoor aesthetics. Its thoughtful construction ensures not only durability but also a remarkable level of comfort, making it the ideal spot for relaxation by the pool, on your deck, or in any part of your garden. The integrated armrest isn’t just a stylish detail; it’s a functional addition, perfect for placing a beverage, a book, or your sunglasses, keeping essentials within easy reach. By following these plans, you’re not just building a chair; you’re crafting a piece of personalized furniture designed for endless enjoyment.
Essential Tools and Materials for Your DIY Project
Before diving into the construction of your outdoor lounge chair, it’s crucial to gather all the necessary tools and materials. Having everything ready ensures a smooth and efficient building process. Investing in quality tools will not only make this project easier but will also serve you well for future DIY endeavors. For outdoor furniture, selecting appropriate lumber and fasteners is key to ensuring longevity and resistance to the elements.
Tools Required: Precision and Efficiency for Your Build
- Drill: Essential for pre-drilling holes and driving screws. A cordless drill offers maximum flexibility.
- Miter Saw: Critical for making precise, accurate cuts at various angles, ensuring all your pieces fit together perfectly.
- Kreg Jig: This tool is a game-changer for creating strong, concealed pocket-hole joints, which are ideal for a clean, professional finish on your furniture.
- Brad Nailer: Excellent for attaching trim and smaller pieces, providing a secure hold with minimal visible fasteners.
- Table Saw (optional): While not strictly necessary, a table saw can be incredibly useful for ripping wider boards to specific widths, offering more versatility in your cuts.
- Orbital Sander: For achieving a smooth, professional finish on all wooden surfaces, preparing them perfectly for paint or stain.
- Tape Measure & Pencil: For accurate measurements and markings.
- Safety Glasses & Ear Protection: Always prioritize safety when working with power tools.
Supplies Needed: Durable Materials for Outdoor Use
- 3 – 2x6x8 Pine or Framing Lumber: These boards will form the robust structural components of your lounge chair, providing strength and stability. Opt for pressure-treated pine or cedar for enhanced outdoor durability if available.
- 10 – 2x4x8 Pine or Framing Lumber: Used for the frame, supports, and adjustable backrest mechanism. Again, outdoor-rated lumber is recommended.
- 2 – 1x4x8 Pine or Whitewood: Ideal for the armrest trim and other finishing details, providing a cleaner aesthetic.
- 2 1/2″ Pocket Hole Screws: These are essential for strong, hidden joints in the main frame and other load-bearing areas.
- 1 1/4″ Pocket Hole Screws: Used for lighter-duty pocket hole joints.
- 2 1/2″ Wood Screws: General purpose screws for securing various structural components. Ensure they are outdoor-rated to prevent rust.
- 1 1/4″ Brad Nails: Perfect for attaching the armrest trim and other decorative elements discreetly.
- 2 1/2″ Outdoor Hinge: Used for the backrest arm support, providing robust and weather-resistant articulation.
- Piano Hinge: Crucial for connecting the seat and adjustable backrest, allowing for smooth and stable movement.
- Wood Glue (Outdoor Rated): Essential for reinforcing all screw joints, adding significant strength and durability to the overall structure.
- Outdoor Finish: Whether paint, stain, or a clear sealant, an outdoor-grade finish is vital for protecting your lounge chair from moisture, UV rays, and general wear.
- Outdoor Wood Filler: To fill any exposed screw holes or imperfections before finishing, ensuring a flawless look.
- Sandpaper (120-grit, 180-grit, 220-grit): For progressive sanding to achieve a super smooth surface.
- Cushions (optional): Choose cushions that fit your finished dimensions for ultimate comfort.
Note: These plans and the materials list are for building one lounge chair. If you plan to build a pair or more, remember to double or multiply the materials accordingly.
Step-by-Step Construction Guide: Building Your Outdoor Lounge Chair
Follow these detailed instructions carefully to construct your durable and stylish outdoor lounge chair. Each step is designed to be clear and straightforward, guiding you from raw lumber to a finished piece of furniture.
Building the Robust Chair Frame
The foundation of your lounge chair is its frame. A strong and square frame ensures stability and longevity, especially for outdoor use.
Step 1: Assembling the Base Frame
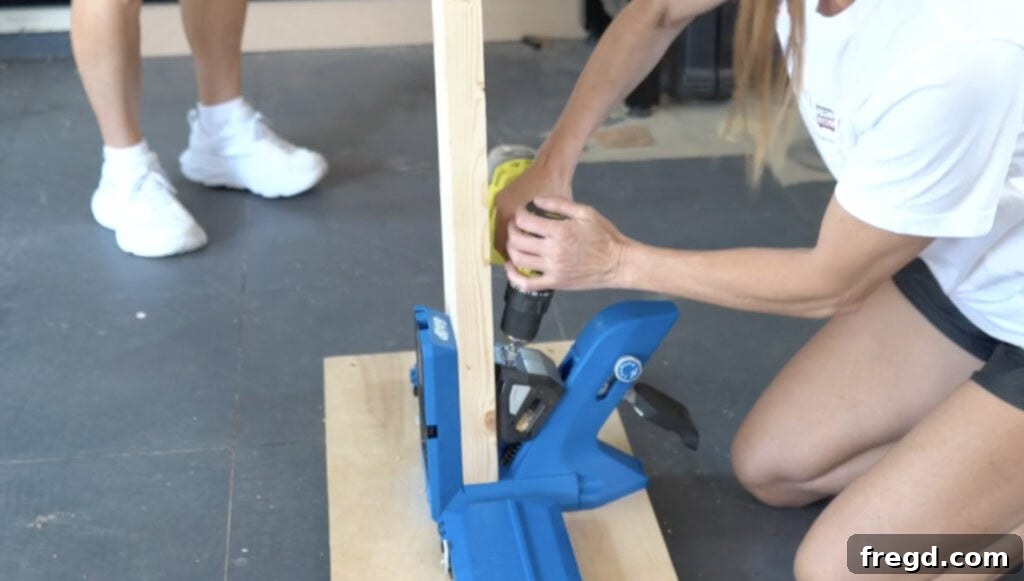
Start by cutting all the frame boards to their specified sizes according to the free plans. Precision here is paramount for a sturdy build. Once cut, take your long frame boards and, using a Kreg Pocket Hole Jig, drill 1 1/2-inch pocket holes at both ends of each long board. Pocket holes create incredibly strong joints, ideal for outdoor furniture where durability is key.
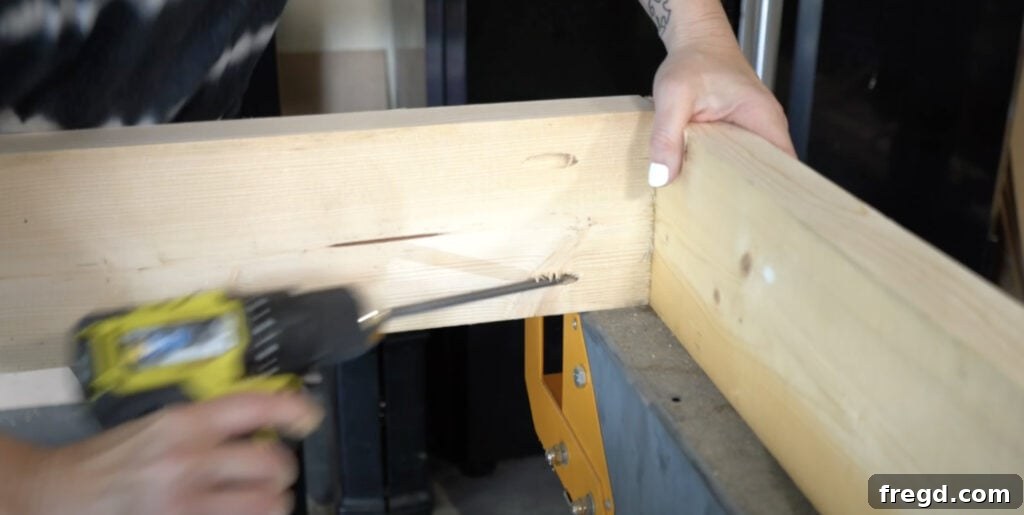
Next, apply a generous amount of outdoor-rated wood glue to the ends of the long boards where they will meet the short boards. Carefully align the pieces to form a rectangular frame. Secure these joints using 2 1/2-inch pocket hole screws. It’s vital to ensure your frame is perfectly square at this stage; use a speed square or framing square to check all corners before the glue dries completely. This initial step forms the robust foundation of your lounge chair.
Step 2: Integrating the Bottom Support
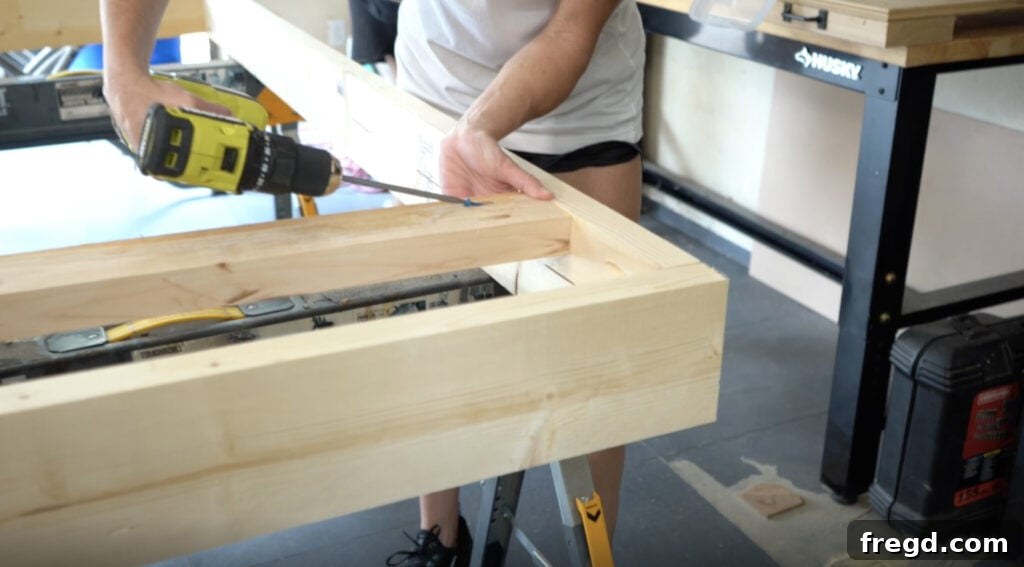
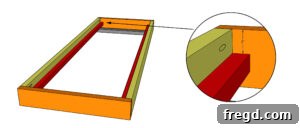
With the main frame assembled, turn your attention to the bottom support. Cut this board to the precise size indicated in your plans. Drill 1 1/2-inch pocket holes at both ends of this support piece. This component is critical for adding structural integrity and preventing the frame from racking. Position the bottom support inside the assembled frame, precisely 6 inches from one of the short ends. It should sit flush with the top edge of the surrounding frame boards. Attach it firmly using 2 1/2-inch pocket hole screws and wood glue, making sure the pocket holes face upwards. This will be the bottom side of your lounge chair, keeping the fasteners hidden from view once the chair is upright.
Step 3: Securing the Cleats for Seat Support
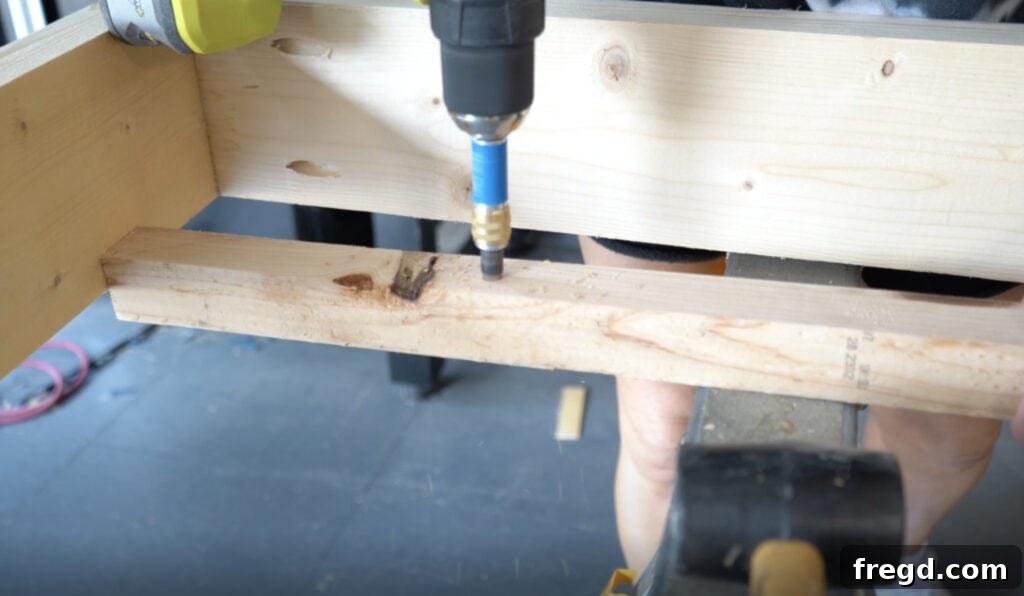
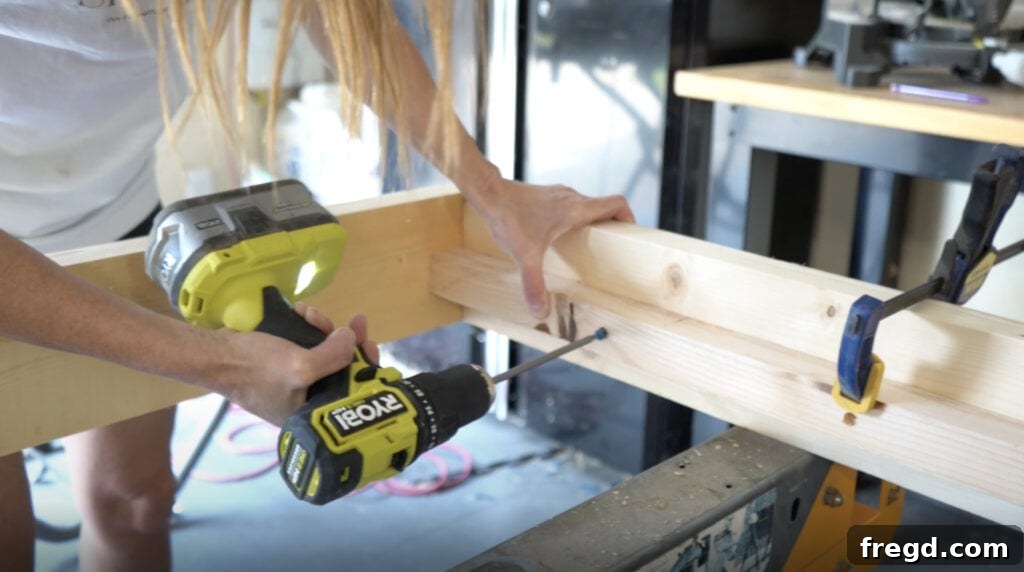
Now, measure and cut the cleats to the specified length. These cleats will serve as the crucial support for your seat slats. Flip your assembled frame over so it is right-side-up. Position the cleats along the inside of the long frame boards, ensuring they are exactly 2 inches down from the top edge. Secure them firmly with 2 1/2-inch outdoor-rated wood screws and wood glue. For a cleaner finish and to effectively conceal screw holes, we highly recommend using a Kreg Quick Flip tool to pre-drill your holes. This specialized bit drills a pilot hole and countersinks simultaneously, allowing the screw heads to sit flush or slightly below the surface, which can then be filled for a seamless appearance.
Crafting the Adjustable Seat and Backrest
The seat and backrest are central to the comfort and functionality of your lounge chair. This section details their construction and how to integrate the adjustable mechanism.
Step 4: Installing the Comfortable Seat Slats
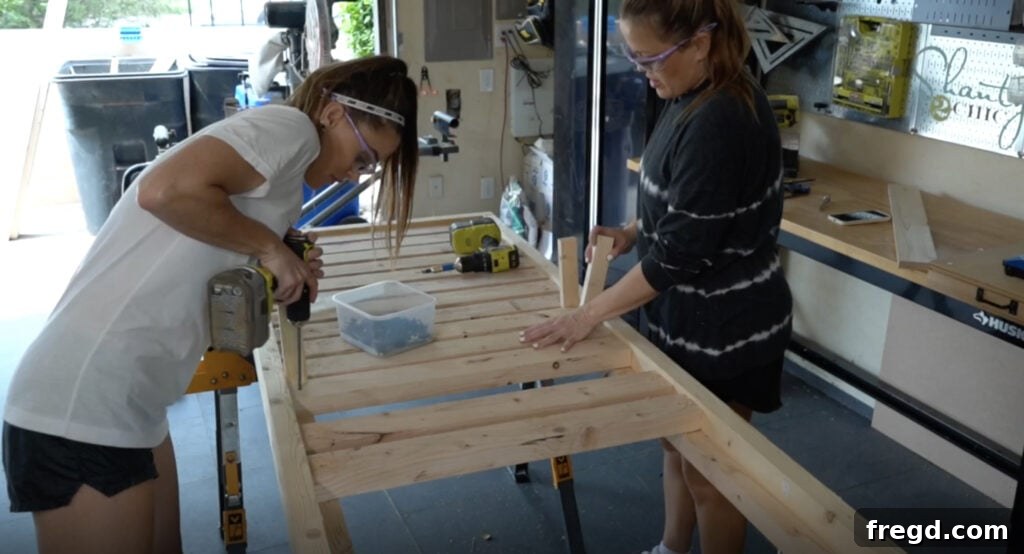
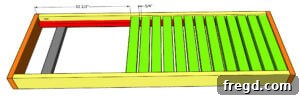
Measure and cut your seat slats to the required length. These slats form the primary seating surface of your lounge chair. It’s important to space them out evenly across the cleats to ensure uniform support and a comfortable sit. Refer to the diagram in the free plans for precise spacing recommendations. Begin attaching the slats starting from the end of the frame opposite to where you installed the bottom support. Secure each slat to the cleats using 2 1/2-inch outdoor-rated wood screws and wood glue. The very first slat on this end should be flush with the end frame board. To achieve consistent spacing between slats, a simple trick is to use 3/4-inch scrap wood pieces as temporary spacers, removing them once each slat is secured.
Step 5: Assembling the Backrest Slats
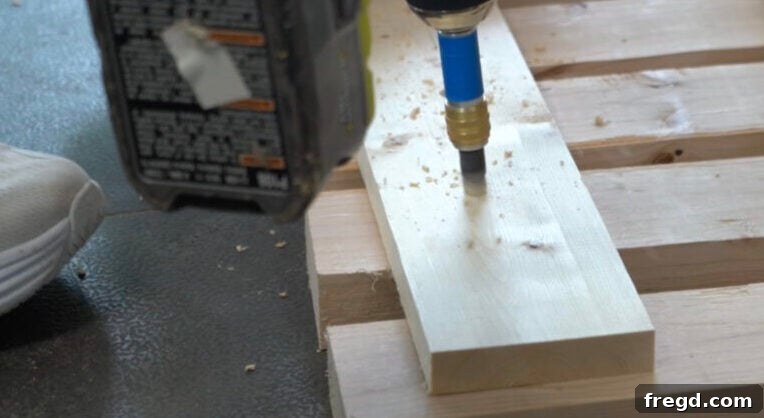
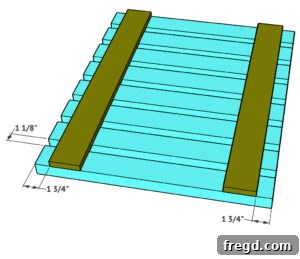
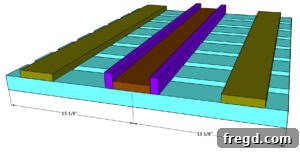
For the adjustable backrest, begin by cutting the back slats and the back braces to their specified dimensions. Lay out the back slats on a flat surface, spreading them evenly according to the design in your plans. These will form the main reclining surface. Then, position the back braces perpendicular to the slats. Attach the back braces securely to the slats using 1 1/4-inch outdoor-rated wood screws and wood glue. Ensure that the assembly is square and rigid, as this panel will bear the weight of someone leaning back and needs to be robust.
Step 6: Building the Backrest Track Mechanism
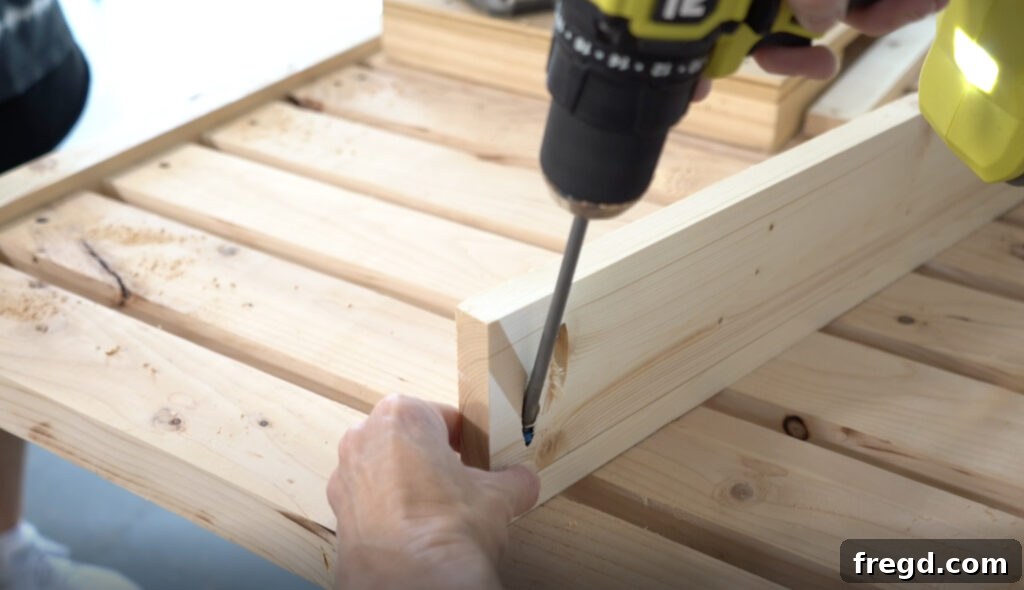
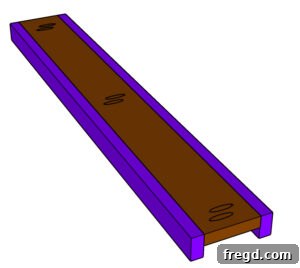
The back track assembly is a clever mechanism that allows your lounge chair’s backrest to adjust to various reclining angles. It will hold the stop blocks and guide the backrest’s arm support. To build this, cut the individual back track pieces to the specified sizes. Take the middle board of this assembly and drill 3/4-inch pocket holes along both its long edges. Then, attach the side boards to this middle board using 1 1/4-inch pocket hole screws and wood glue. This creates a channel where the arm support will slide and rest against the stop blocks, providing the adjustable feature.
Step 7: Attaching the Back Track to the Backrest Assembly
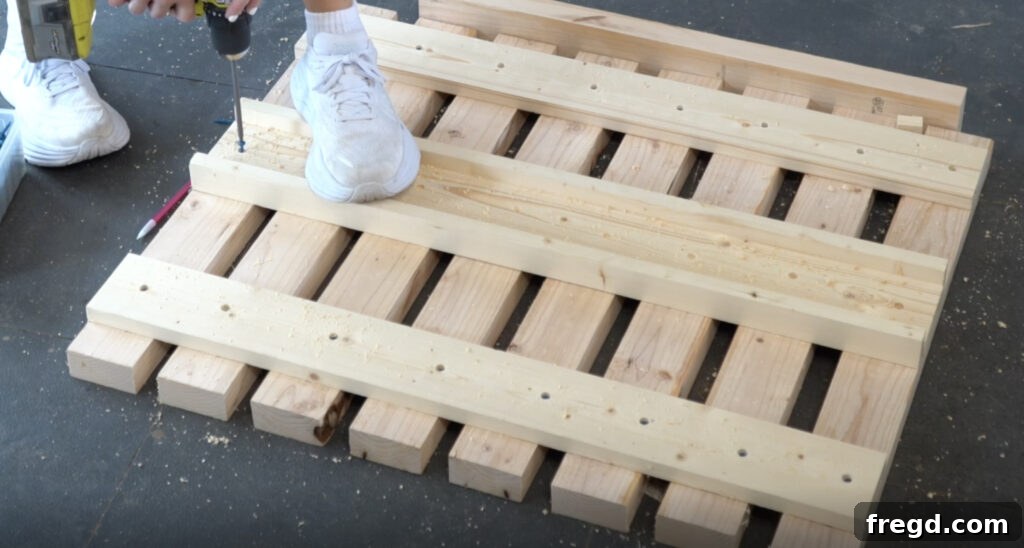
Once your back track assembly is complete, it’s time to integrate it with the backrest. Carefully center the back track assembly onto the assembled back slats. Ensure it is perfectly aligned both horizontally and vertically to guarantee smooth operation of the adjustable mechanism. Attach it firmly using 1 1/4-inch outdoor-rated wood screws and wood glue. This connection must be robust, as it will endure repeated adjustments and the weight of the backrest in various positions.
Step 8: Positioning the Back Stops for Recline Angles
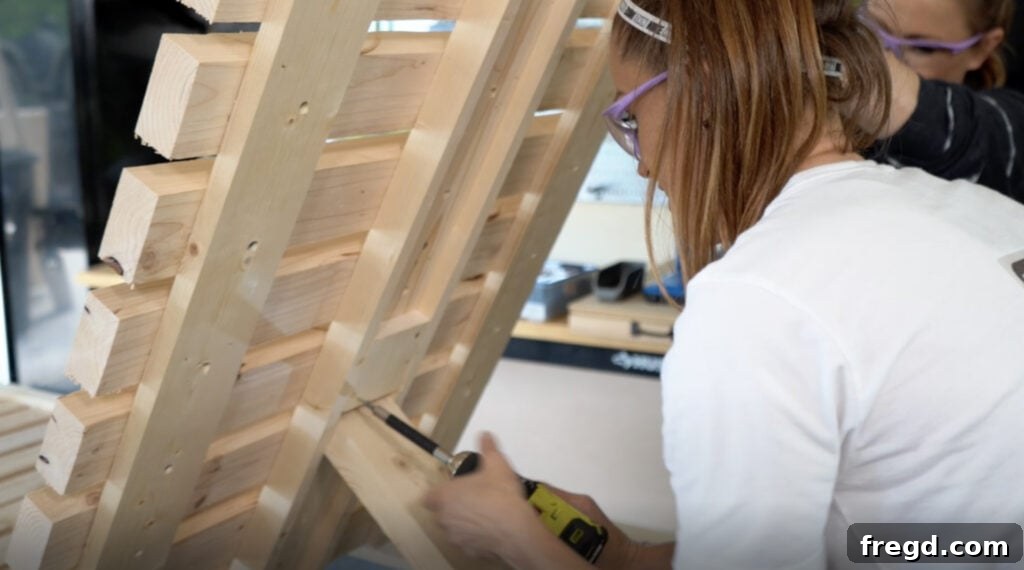
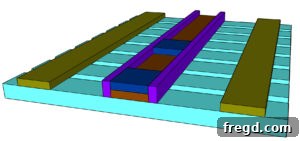
The back stops are the small blocks that determine the reclining angles of your lounge chair. Cut these stop blocks to the specified size. Now, attach them to the inside of the back track. This step offers a fantastic opportunity for customization: you can place these stops at intervals that correspond to your preferred reclining positions. Consider a fully upright position, a slightly reclined position for reading, and a fully reclined position for sunbathing. Secure each stop block with 1 1/4-inch outdoor-rated wood screws and wood glue. Test out the angles as you go to ensure they meet your comfort requirements.
Step 9: Installing the Back Assembly with a Piano Hinge
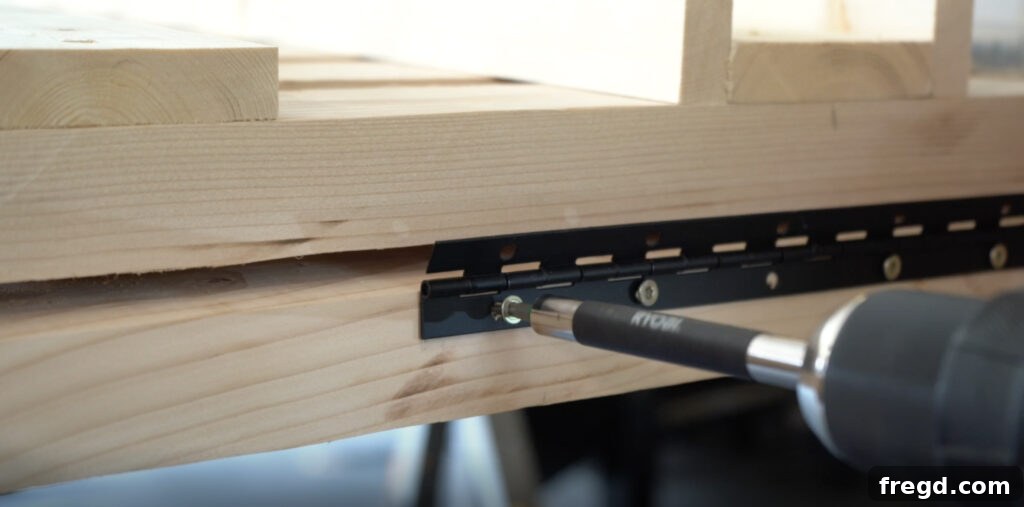
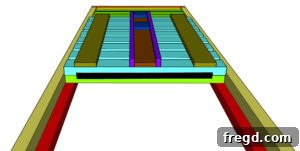
This is where the magic of adjustability truly comes to life! Carefully lay the entire back assembly upside down, positioning it directly on top of the seat slats. The key component here is the piano hinge, which provides a long, continuous pivot point for smooth, stable movement. Attach the back assembly to the seat slats using the piano hinge. When securing, make sure to leave a small gap – approximately 1/8 inch – between the back slat assembly and the seat slats. You can achieve this consistent spacing by using a thin piece of scrap wood or even a strip of cardboard as a temporary spacer. This crucial gap ensures that the back assembly can move up and down freely without binding, providing effortless adjustment to your desired angle.
Step 10: Creating the Arm Support for the Backrest
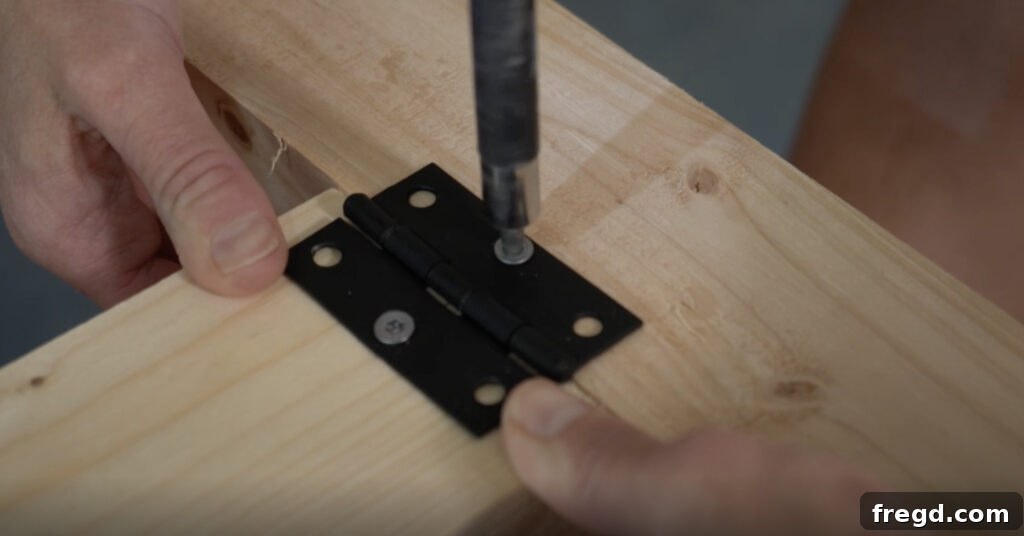
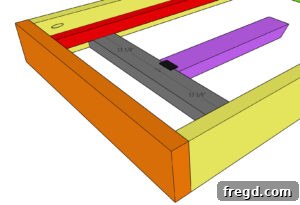
The arm support is the final piece of the adjustable backrest mechanism. It consists of a 2×4 board, which you will need to rip down to a 3-inch width (if you don’t have a table saw, you can purchase 2×3 lumber or carefully cut it with a circular saw). Cut one end of this board at a 45-degree angle. This mitered edge will be the point that rests within the back track against the stop blocks. Once cut to the precise size, attach the square end of this arm support to the chair’s main frame support using a durable 2-inch outdoor hinge. Ensure the long point of the mitered edge is facing upwards when the arm is installed. This setup allows the arm to swing freely and engage with the back stops, securely holding the backrest at any chosen angle.
Adding Functional Armrests to Your Lounge Chair
The armrests are a signature feature of this modern design, offering both comfort and practicality. While optional, they significantly enhance the user experience.
Step 11: Attaching the Arm Rest Blocks
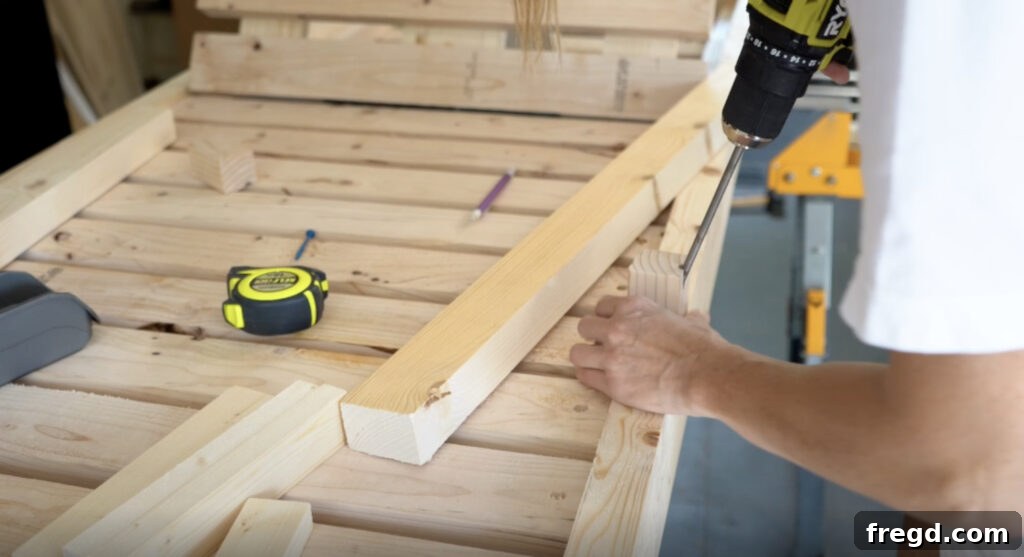
These armrests, though optional, come highly recommended for the added comfort and convenience they provide. Begin by cutting the short arm rest blocks to their specified size. Using your Kreg Jig, drill 3/4-inch pocket holes into one end of all these blocks. This strategic placement of pocket holes allows for hidden joinery. Attach these blocks to the top of the main lounge chair frame using 2 1/2-inch pocket hole screws and wood glue. It’s crucial that the pocket holes face outwards, as they will be beautifully concealed by the trim in a later step, contributing to the clean, modern aesthetic of the chair.
Step 12: Installing the Top of the Arm Rest
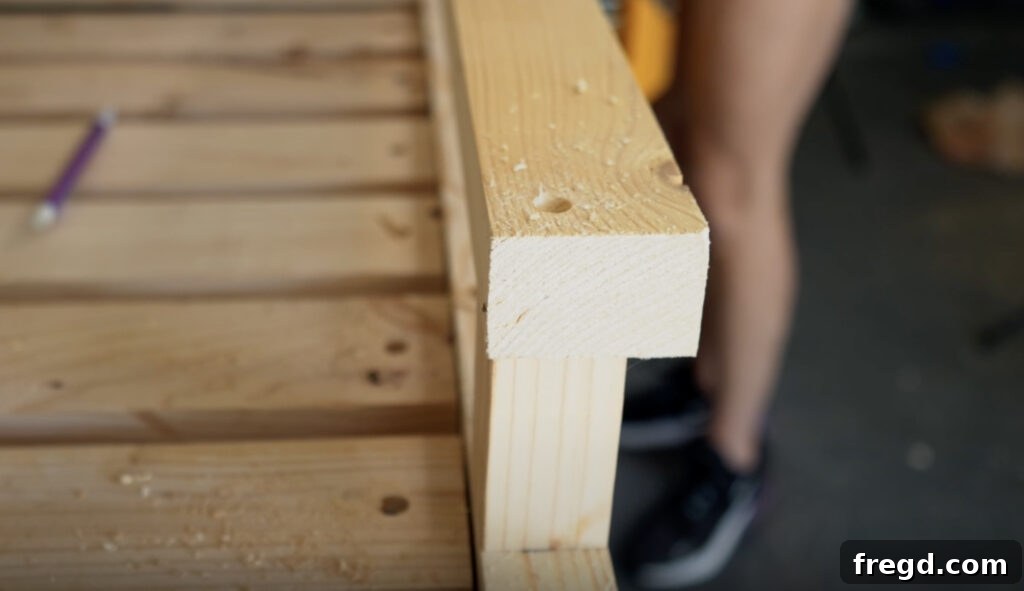
To ensure a perfect, custom fit for the top armrest pieces, measure the distance precisely from one armrest block to the other. Cut two pieces of lumber to these exact measurements. Lay these cut pieces directly on top of the installed armrest blocks. Align the back side of each top piece to be perfectly flush with the back side of the underlying blocks. Secure these top pieces firmly to the blocks using 2 1/2-inch outdoor-rated wood screws and wood glue. As with the cleats, employing your Kreg Quick Flip tool here can help create pilot holes that allow for the screws to be neatly countersunk, contributing to an overall smoother and more professional finish.
Step 13: Adding the Arm Rest Trim for a Refined Look
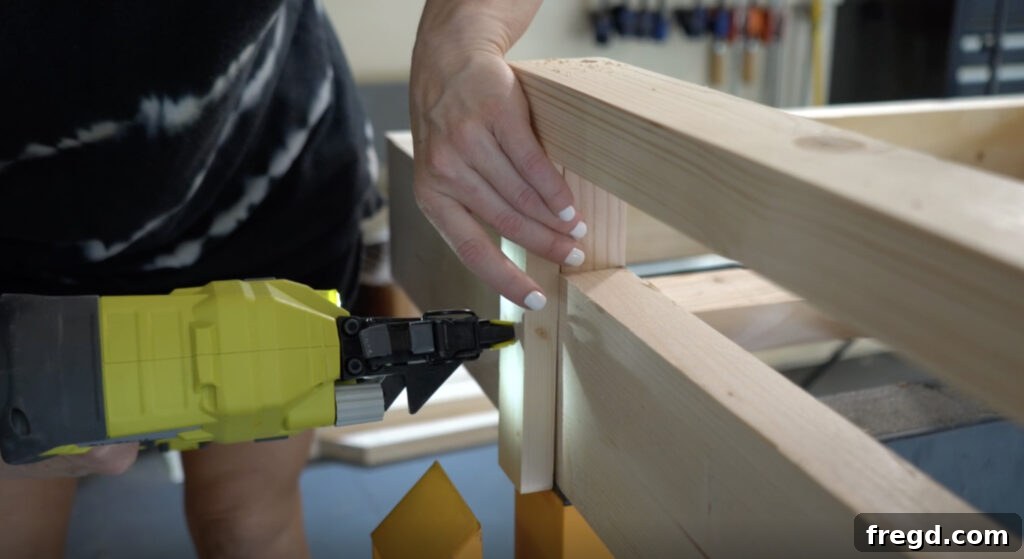
The final step in constructing the armrests is to add the trim pieces. This step is crucial for two reasons: it not only provides a beautiful, finished look to your armrests but also cleverly conceals the exposed pocket holes on the armrest blocks, maintaining the clean lines of the modern design. Measure and cut the arm rest trim pieces to their precise sizes. Apply wood glue to the back of each trim piece, then attach them to the front of the armrest blocks, ensuring they extend slightly over the chair frame for a seamless transition. Secure them in place using 1 1/4-inch brad nails. The brad nails will hold the trim firmly while the glue dries, providing a strong, almost invisible fastening that completes the elegant look of your DIY outdoor lounge chair.
The Perfect Finish for Durability and Style
Applying the right finish is just as important as the construction itself, especially for outdoor furniture. A proper finish protects the wood from moisture, UV damage, and everyday wear, ensuring your lounge chair remains beautiful and functional for years to come.
Step 14: Filling Exposed Holes and Imperfections
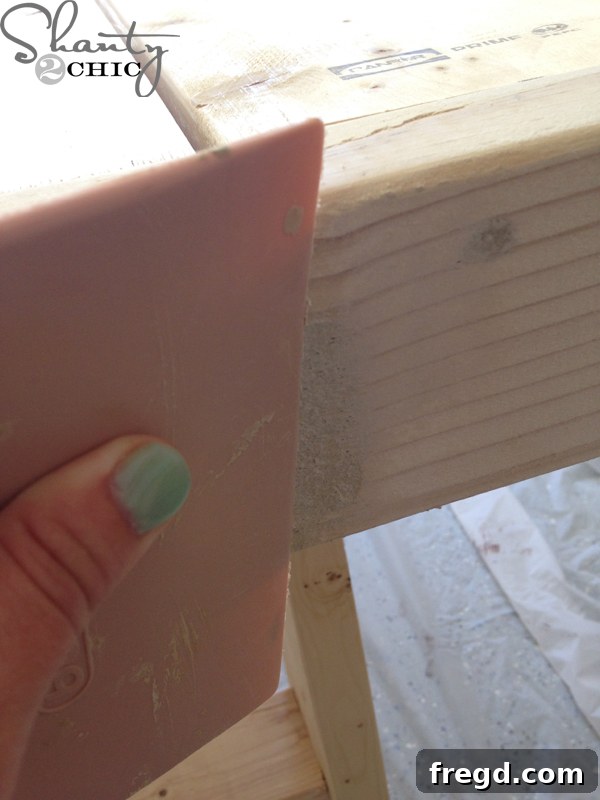
Before sanding and applying any finish, thoroughly inspect your entire lounge chair for any exposed screw holes, minor gaps, or imperfections in the wood. It’s essential to fill these areas with an outdoor-rated wood filler. This specialized filler is designed to withstand harsh weather conditions, preventing moisture intrusion and ensuring a smooth, continuous surface. Apply the filler according to the manufacturer’s instructions, usually by pressing it firmly into the holes and smoothing it flush with the surrounding wood. Allow ample time for the filler to dry completely before moving on to the next step.
Step 15: Achieving a Silky Smooth Surface with Sanding
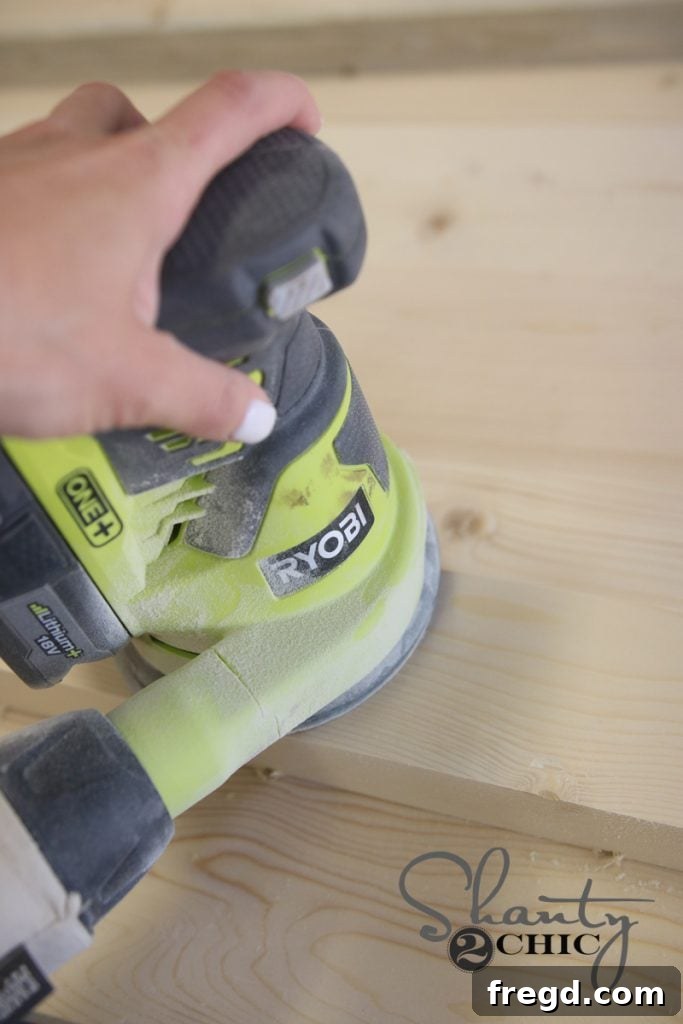
Sanding is a critical step that prepares the wood for finishing and enhances the overall look and feel of your lounge chair. Begin by sanding the entire chair thoroughly with 120-grit sandpaper. This grit is effective for removing any rough spots, minor imperfections, and excess wood filler. Once you’ve achieved a uniform surface, switch to a finer 180-grit sandpaper. This step refines the surface, removing the deeper scratches left by the 120-grit. Finally, follow up with 220-grit sandpaper for an exceptionally smooth, professional finish. I typically use an orbital sander for efficiency, but hand-sanding is also effective, especially in tighter areas. Ensure all sanding dust is completely removed before proceeding to the finishing stage.
Step 16: Applying Your Chosen Outdoor Finish!
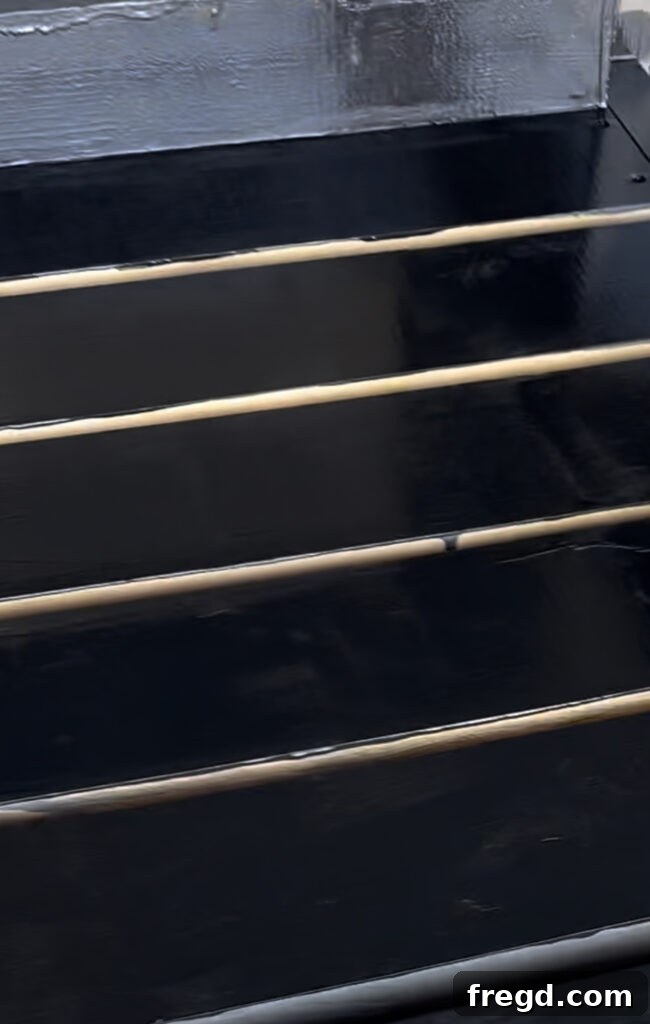
The final and most visually impactful step is applying your chosen finish. For my lounge chairs, I opted for an outdoor-rated paint tinted in a sophisticated Tricorn Black. This choice not only provides a striking modern look but also offers excellent protection against the elements. If you prefer the natural beauty of wood, you can choose an outdoor wood stain. However, if you go the stain route, it is absolutely crucial to follow up with an outdoor protective clear coat or sealant. This protective layer is vital for guarding against UV damage, moisture, and mildew, which can quickly degrade untreated wood outdoors. Apply your finish according to the product’s instructions, ensuring even coats and proper drying times. Two to three coats are generally recommended for optimal durability.
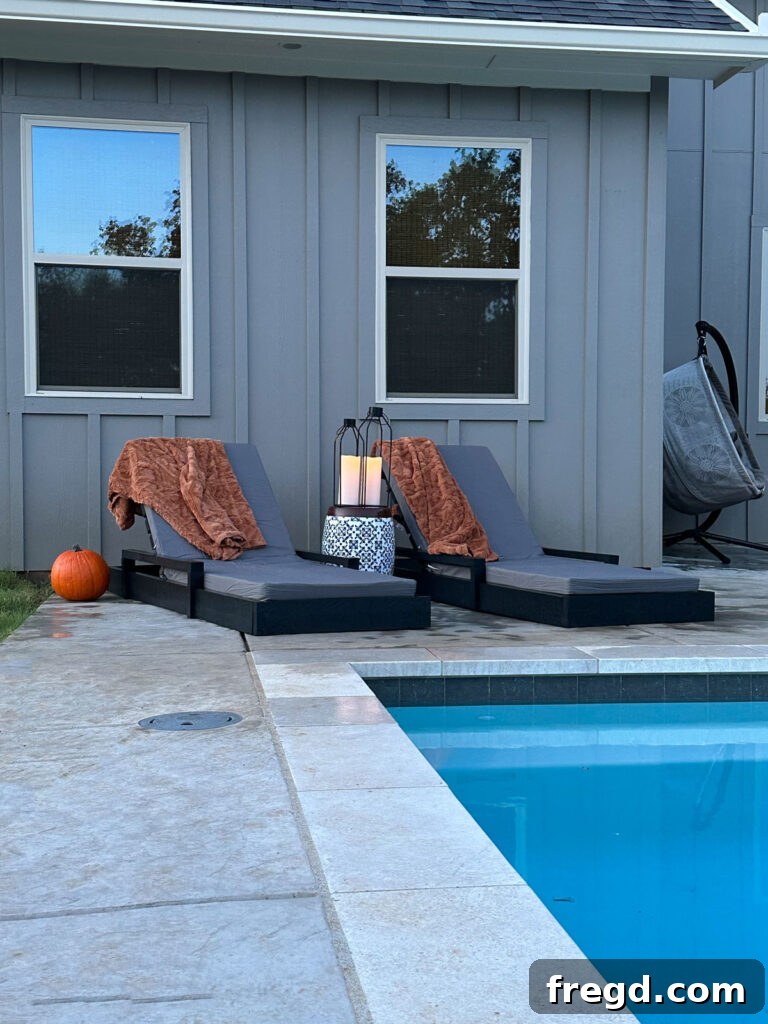
And there you have it! The journey from raw lumber to a stunning, custom-built outdoor lounge chair is complete. I absolutely adore my new lounge chairs. Even though the official swim season might be winding down, these chairs provide the perfect spot to kick back, relax, and enjoy a crisp fall evening by the poolside on my deck. The satisfaction of building something so functional and beautiful with your own hands is truly unparalleled.
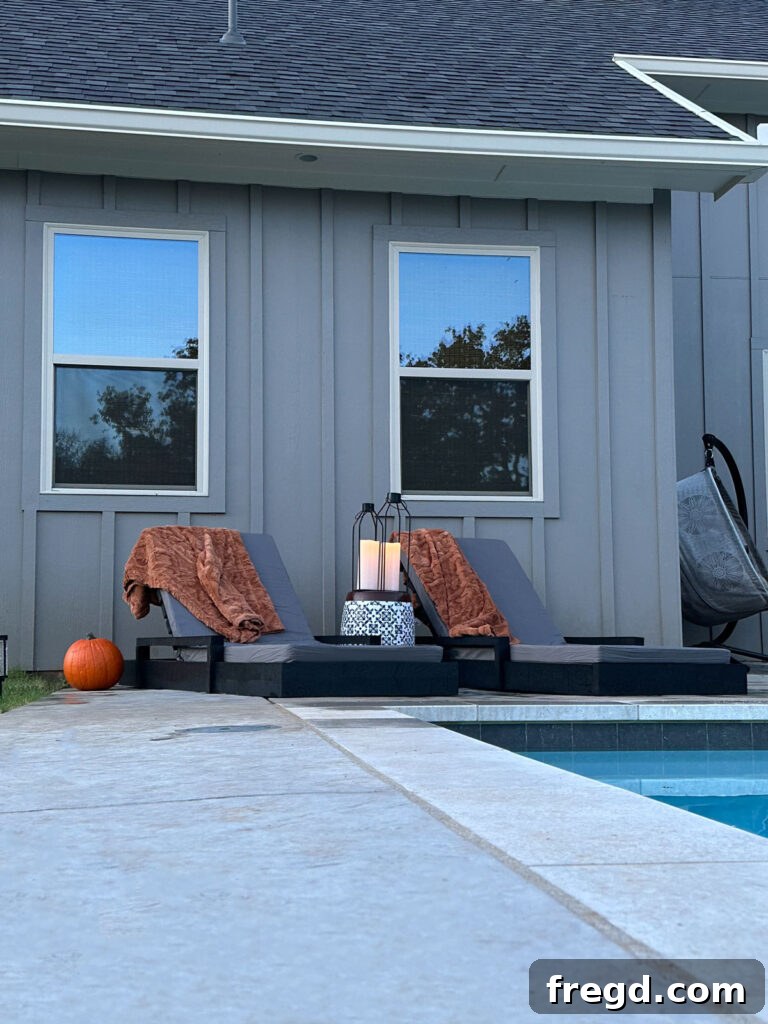
To maximize comfort and complete the look, I designed these loungers to perfectly fit specific cushions. You can find the exact outdoor cushions that I used here, ensuring a snug and luxurious fit for your new chairs.
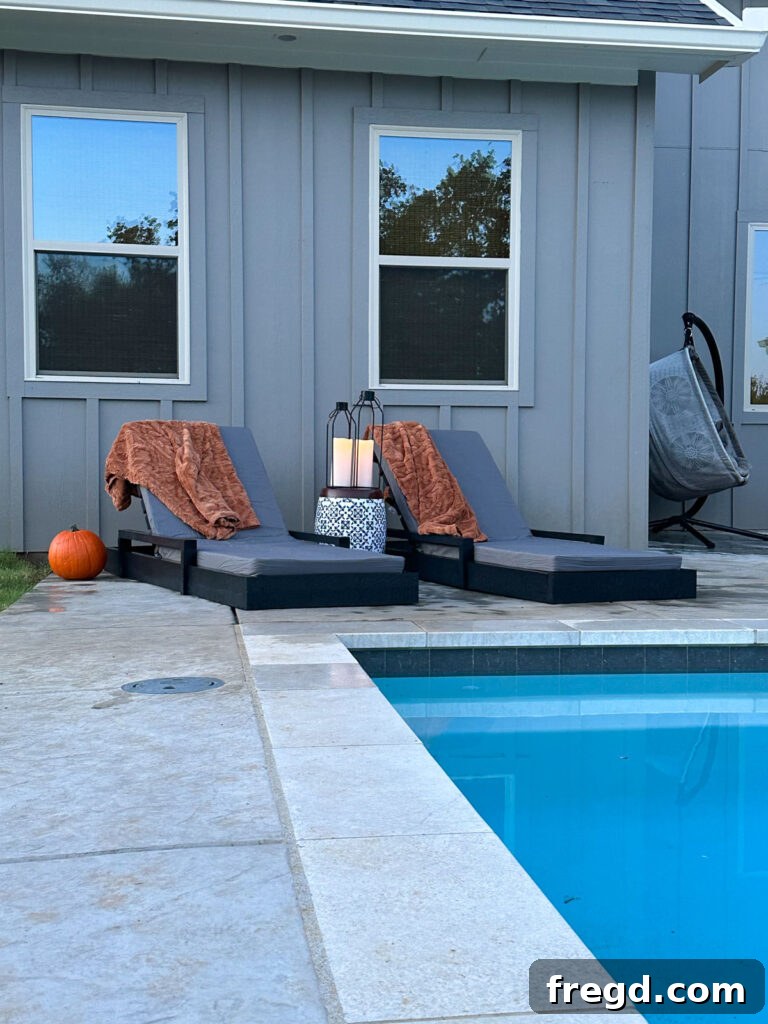
Don’t miss out on future exciting DIY projects! Be sure to subscribe to our YouTube Channel for more inspiring builds and step-by-step tutorials.
Explore More Outdoor Furniture Projects by Shanty2Chic
If you enjoyed building this lounge chair, you’ll love our other outdoor furniture projects. Expand your outdoor living collection with these complementary DIY builds:
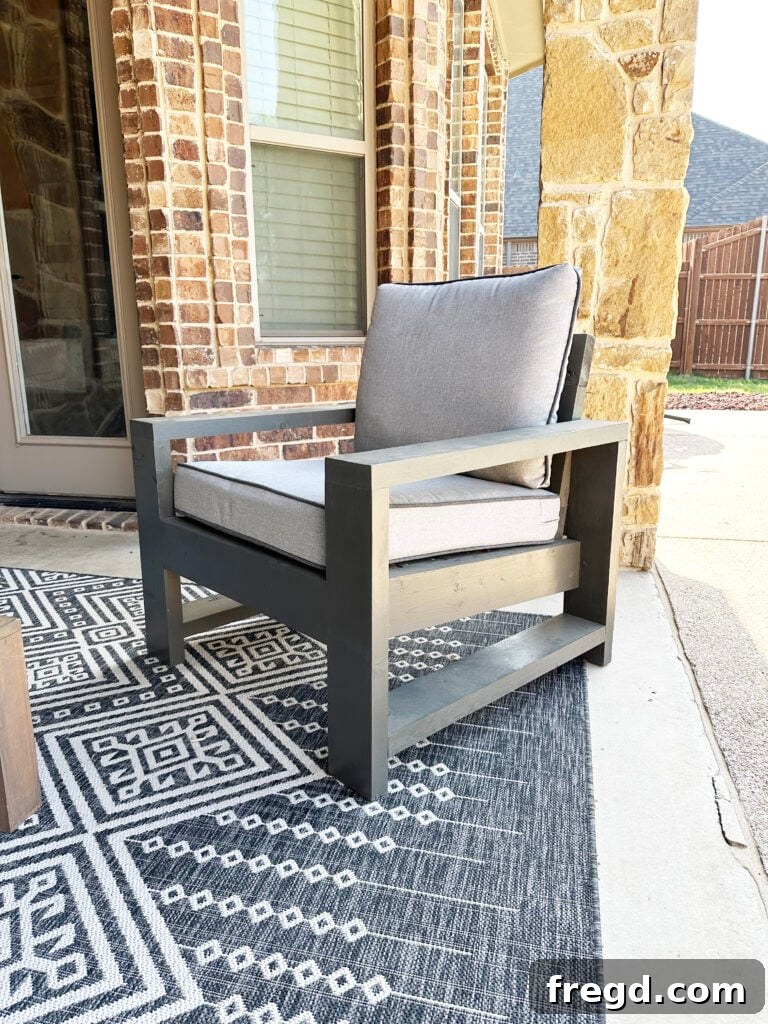
DIY Outdoor Chair: Perfect for creating a cohesive seating arrangement.
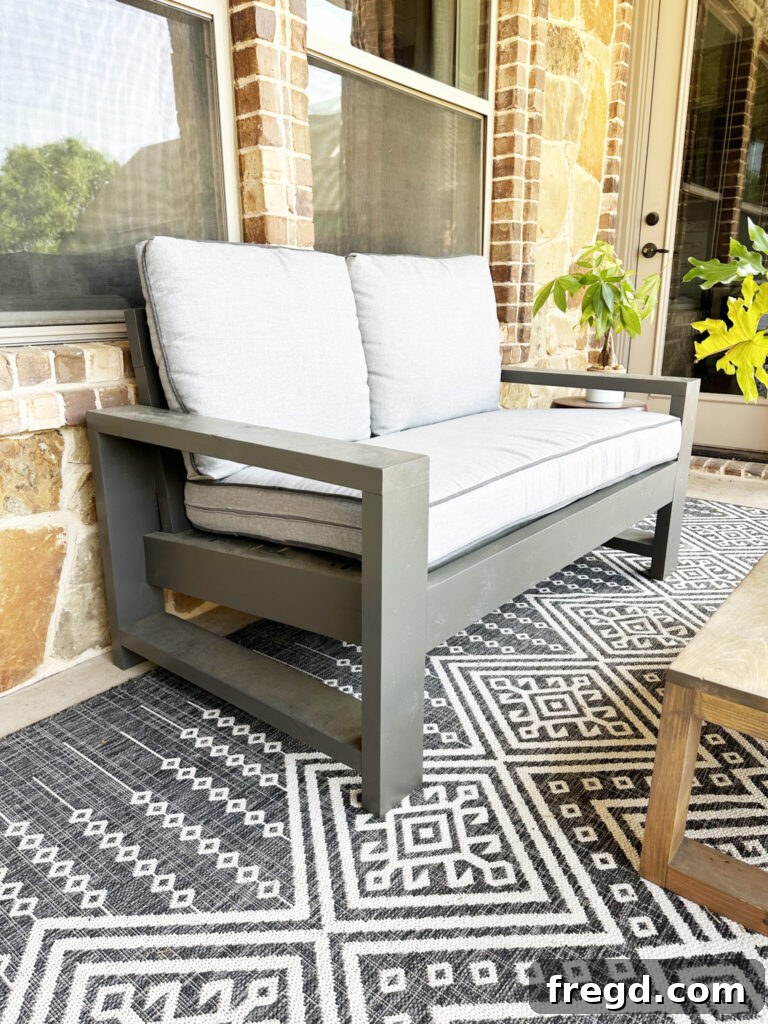
DIY Outdoor Couch: Learn to build a comfortable and affordable outdoor sofa.
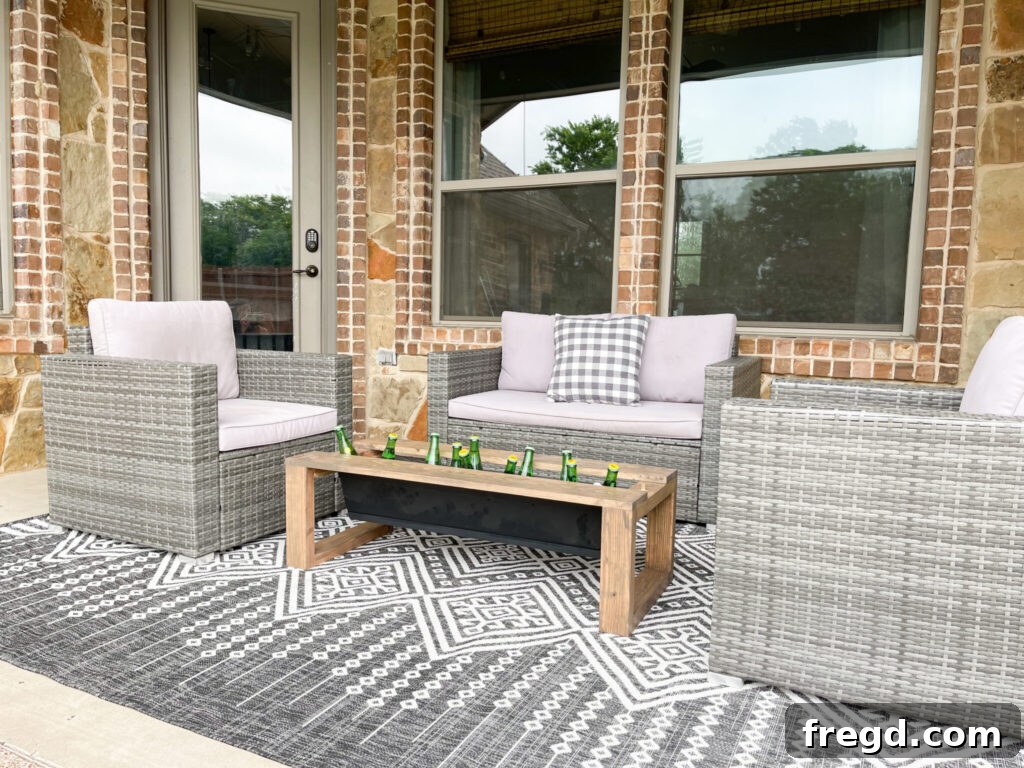
Cooler Coffee Table: A smart, dual-purpose addition to your patio.
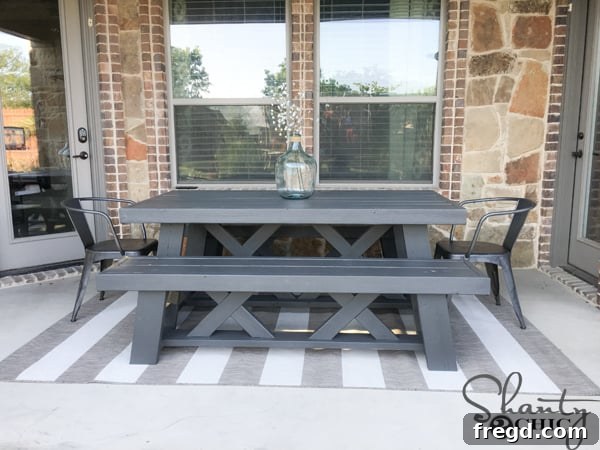
DIY Outdoor Table: Build a functional and stylish table for al fresco dining.
Free DIY Outdoor Lounge Chair Plans
Get ready to build! Below you’ll find the complete plans for your modern outdoor lounge chair. These free printable plans include a comprehensive shopping list, a precise cut list, and simplified step-by-step instructions to ensure your project is a success.
Click here to download the free printable plans (PDF) that include a shopping and cut list!
Tools Required for This Project
- Kreg Jig
- Drill
- Miter Saw
- Brad Nailer
- Sander
- Table Saw (optional, for ripping boards)
Supply List for One Lounge Chair
- 10 x 2x6x8 Framing Lumber (or outdoor-rated equivalent like cedar/pressure-treated)
- 4 x 2x4x8 Framing Lumber (or outdoor-rated equivalent)
- 2 x 1x4x8 Pine or Whitewood
- 1 1/4″ Pocket Hole Screws (outdoor rated)
- 2 1/2″ Pocket Hole Screws (outdoor rated)
- 2 1/2″ Wood Screws (outdoor rated)
- 1 1/4″ Brad Nails (outdoor rated)
- 1 x 2 1/2″ Outdoor Hinge
- 1 x Piano Hinge (outdoor rated)
- Outdoor Wood Glue
- Outdoor Finish (Paint, Stain, or Sealer)
- Outdoor Wood Filler
- Sandpaper (various grits: 120, 180, 220)
Detailed Step-by-Step Instructions
Cut List Overview
Refer to the downloadable PDF plans for detailed measurements and diagrams.
-
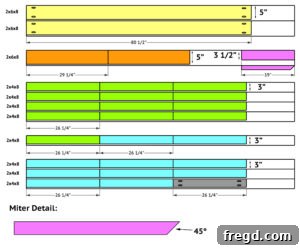
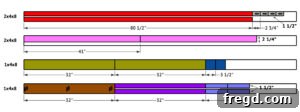
Cut List 1: Main frame components and supports. (Refer to image for visual guidance).

-
Cut List 2: Slats, track components, and armrest pieces. (Refer to image for visual guidance).
Building the Chair Frame
-
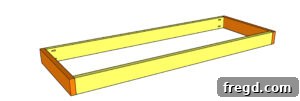
Step 1: Assemble the Base Frame. Cut all main frame boards to size. Drill 1 1/2″ pocket holes at both ends of the long frame boards. Apply outdoor wood glue to the joints and attach the long boards to the short boards using 2 1/2″ pocket hole screws. Ensure the frame is square.
-
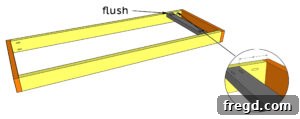
Step 2: Attach the Bottom Support. Cut the bottom support board to size and drill 1 1/2″ pocket holes at both ends. Attach this support to the inside of the frame, 6″ from one end, flush with the top of the frame boards, using 2 1/2″ pocket hole screws and wood glue. Ensure pocket holes face upwards (this will be the bottom of the chair).
-
Step 3: Secure the Cleats. Cut the cleats to size. Flip the main frame right-side-up. Attach the cleats to the inside of the long frame boards, 2″ down from the top edge, using 2 1/2″ wood screws and wood glue. Pre-drill pilot holes for cleaner attachment.
How to Create the Seat and Back of the Chair
-
Step 4: Install the Seat Slats. Cut the seat slats to size. Starting from the end opposite the bottom support, evenly space and attach the slats to the cleats using 2 1/2″ wood screws and wood glue. The last slat on this end should be flush with the end frame board. Use 3/4″ scrap wood for consistent spacing.
-
Step 5: Assemble the Back Slats. Cut the back slats and back braces to size. Lay out the back slats evenly spaced and attach the back braces to them using 1 1/4″ wood screws and wood glue, creating a rigid backrest panel.
-
Step 6: Build the Back Track. Cut the back track pieces to size. Drill 3/4″ pocket holes on both long edges of the middle track board. Attach the side track boards to the middle board with 1 1/4″ pocket hole screws and wood glue to form the track channel.
-
Step 7: Attach the Back Track. Center and attach the completed back track assembly to the backrest assembly (from Step 5) using 1 1/4″ wood screws and wood glue.
-
Step 8: Position the Back Stops. Cut the back stops to size. Attach them inside the back track at your desired reclining positions using 1 1/4″ wood screws and wood glue. Customize these for optimal comfort.
-
Step 9: Install the Back Assembly. Lay the back assembly (from Step 7) upside down on top of the seat slats. Use a piano hinge to attach them together, ensuring a small 1/8″ gap between the back and seat slats for free movement.
-
Step 10: Create the Arm Support for the Backrest. Cut the 2×4 arm support (ripped to 3″ width if needed) to size, with one end cut at a 45° angle. Attach the square end of this arm to the main chair frame support with a 2 1/2″ outdoor hinge. The long point of the mitered edge should be on top.
Building the Arm Rests
-
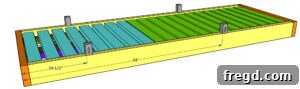
Step 11: Attach the Arm Rest Blocks. Cut the short arm rest blocks to size. Drill 3/4″ pocket holes into one end of each block. Attach these blocks to the top of the lounge chair frame with 2 1/2″ pocket hole screws and wood glue, ensuring the pocket holes face outwards.
-
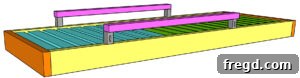
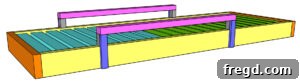
Step 12: Install the Top of the Arm Rest. Measure between the installed blocks and cut two arm rest top pieces to size. Attach them to the top of the blocks with 2 1/2″ wood screws and wood glue. The back edge of the top piece should be flush with the back edge of the blocks.
-
Step 13: Add the Arm Rest Trim. Measure and cut the arm rest trim pieces to size. Attach them to the front of the blocks, overlapping the chair frame, using 1 1/4″ brad nails and wood glue. This conceals the pocket holes and finishes the armrests.
The Finishing Touches
-
Step 14: Fill and Finish. Fill any exposed holes with outdoor-rated wood filler. Once dry, sand the entire chair progressively with 120, 180, and then 220-grit sandpaper for a smooth finish. Finally, apply your chosen outdoor-rated paint, stain, or protective sealant according to product instructions.
Make sure to share your incredible builds with us on social media! Use the hashtag #shanty2chic so we can see and share your beautiful creations with our community!
Happy Building!