
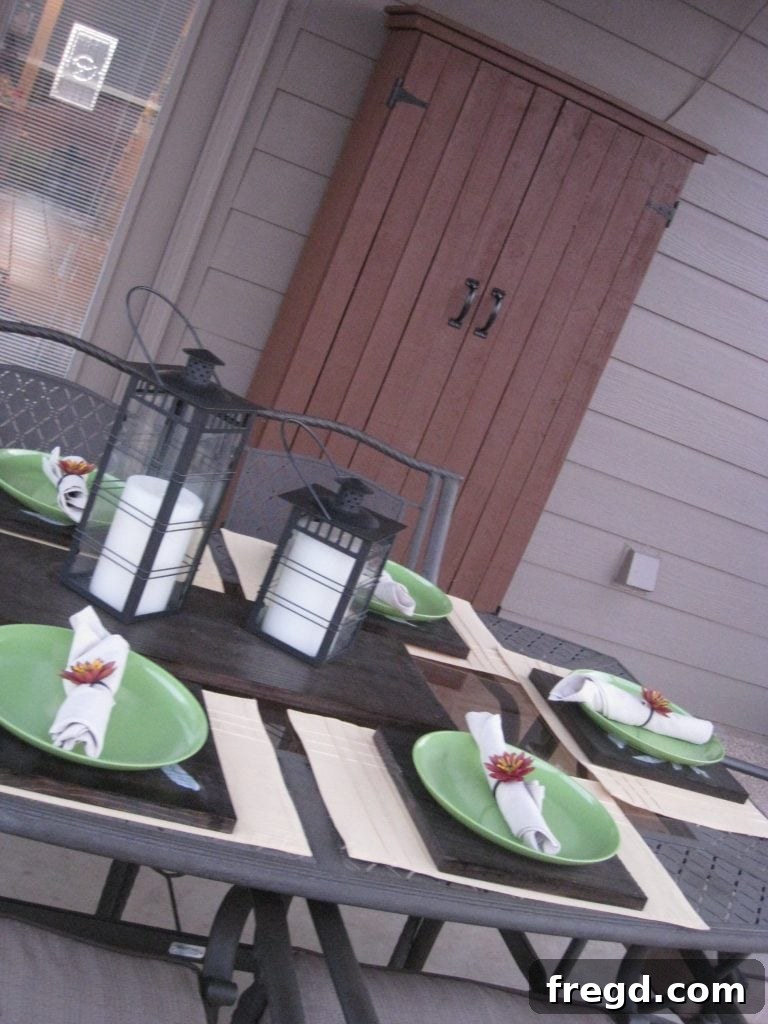
Transform Your Outdoor Space: My DIY Storage Cabinet Reveal
Hello fellow DIY enthusiasts and home improvement seekers! I am absolutely thrilled to finally share the culmination of a project that has brought immense satisfaction and much-needed organization to my outdoor living space: my custom-built outdoor storage cabinet! After investing time and effort, seeing the finished piece standing proudly in my backyard is incredibly rewarding, and I can’t wait to walk you through the details.
The Inspiration: Tackling Outdoor Clutter Head-On
Every homeowner knows the struggle of outdoor clutter. Gardening tools, children’s toys, patio cushions, pool supplies – they all tend to accumulate and create an unsightly mess, especially when left exposed. My motivation for embarking on this DIY outdoor storage cabinet project stemmed from a very real and persistent issue: a constantly untidy outdoor area. If you’re curious about the initial build process and how I constructed this sturdy piece from the ground up, you can find the complete step-by-step guide and more inspiration RIGHT HERE.
This image captures the ultimate driving force behind the new storage cabinet. As you can see, the need for organized outdoor storage was paramount. The transformation from a cluttered corner to a neatly contained space is truly satisfying!
Creating an organized outdoor environment not only enhances the aesthetic appeal of your home but also protects your valuable items from the elements, extending their lifespan. This cabinet was designed to be not just functional, but also a seamless addition to our existing outdoor decor.
Smart Painting Techniques for Durability and Ease
One of the key strategies I employed for this project was a strategic approach to painting. Instead of assembling the entire cabinet and then attempting to paint all the nooks and crannies, I opted to paint the individual components before full assembly. Specifically, I painted each shelf prior to nailing the back panel into place, and the front side of the plywood panels was painted before they were attached to the cabinet frame. The back of the cabinet was painted last, after it was assembled. This method made the painting process incredibly easy and efficient, ensuring thorough and even coverage without awkward angles or missed spots.
Using high-quality outdoor-grade paint is crucial for any exterior project. It provides a protective barrier against moisture, UV rays, and temperature fluctuations, which are all common culprits in deteriorating outdoor furniture. By taking the time to paint thoroughly and correctly at this stage, I’ve ensured that this outdoor storage cabinet will stand up to the elements and maintain its beautiful finish for years to come.
Choosing Robust Hardware for Lasting Performance
When constructing outdoor furniture, the hardware choices are just as important as the wood itself. They need to withstand exposure to varying weather conditions, from intense sunlight to driving rain. For the doors of my outdoor storage cabinet, I specifically sought out fence hinges.
These hinges are designed for outdoor use, meaning they are inherently more durable and resistant to rust and corrosion compared to standard indoor hinges. Their robust construction ensures that the cabinet doors will operate smoothly and reliably, even with frequent use and exposure to the elements.
Continuing with the theme of outdoor-grade components, I also selected fence hardware for the cabinet handles. This not only provides excellent durability but also contributes to the cabinet’s rustic, functional aesthetic, perfectly complementing our existing fence and other outdoor elements. To tie everything together visually, I applied an outdoor stain that specifically matches the finish of our fence and the lounge chairs that I previously built. This attention to detail ensures that the new storage cabinet integrates seamlessly into our outdoor decor, creating a cohesive and inviting space.
Ensuring Security and Functionality with Rolling Catches
Beyond hinges and handles, securing the cabinet doors is essential, especially for an outdoor unit exposed to wind and curious critters. For this, I opted for rolling catches.
These small but mighty pieces of hardware are incredibly effective at ensuring the doors stay firmly shut. Their simple mechanism provides a satisfying and secure closure, preventing the doors from swinging open in a breeze or allowing dust and debris to enter the cabinet. Plus, they were super easy to install, adding minimal time to the overall project but providing maximum functionality.
The Grand Reveal: Organized Outdoor Living
And with those final touches, the outdoor storage cabinet was complete!
The beauty of this project is not just in its construction but in its immediate impact on our outdoor living space. That “mess” that once occupied our outdoor table and various corners has now been neatly relocated into the cabinet. The true magic lies in the fact that this previously chaotic clutter is now completely hidden behind attractive, sturdy doors. This simple act of containment instantly elevates the entire ambiance of our patio, making it feel more expansive, welcoming, and enjoyable.
I think my husband appreciates the newfound order and the tidier outdoor environment just as much as I do!
The DIY Advantage: Cost-Effective and Sturdy Design
What truly makes this project even more satisfying is its incredible affordability. The total cost for all materials, including lumber, paint, stain, and hardware, came in at approximately $70. This is a fraction of the price you would pay for a comparable store-bought outdoor storage unit, which often lacks the customization and sturdy construction of a DIY project. The ability to create a functional, durable, and aesthetically pleasing piece of furniture for such a modest investment is one of the greatest joys of DIY.
Despite the low cost, this cabinet is incredibly sturdy. The construction methods, combined with the quality of the wood and hardware chosen, ensure it can withstand the rigors of outdoor life and reliably store a variety of items, from gardening tools to outdoor cushions and everything in between. It’s a testament to the fact that you don’t need to spend a fortune to achieve high-quality results in your home improvement projects.
Final Thoughts on Enhancing Your Outdoor Living
Building this outdoor storage cabinet has not only solved a practical problem of clutter but has also added a beautiful, functional element to our backyard. It demonstrates how a relatively simple DIY project can make a significant difference in the usability and appearance of your outdoor spaces. If you’ve been grappling with outdoor clutter, I highly encourage you to consider a DIY storage solution. The satisfaction of building something with your own hands, tailoring it to your specific needs, and saving money in the process is truly unparalleled.
Thank you so much for joining me on this journey and stopping by to see the finished project. I hope this inspires you to tackle your next DIY challenge and transform your own outdoor areas into havens of organization and beauty!
~Ashley