Craft Your Own Stylish DIY Faux Drawer Console Table: An Affordable & Easy Woodworking Project
Transform your entryway, living room, or hallway with a custom-built console table that exudes charm and sophistication without breaking the bank. This comprehensive guide will walk you through the process of creating a beautiful and functional DIY Faux Drawer Console Table, a project so rewarding you’ll wonder why you didn’t tackle it sooner. Combining clever design with budget-friendly materials, this console table offers the aesthetic of intricate cabinetry at a fraction of the cost, making it the perfect addition for anyone looking to enhance their home decor with a personal touch. With supplies costing under $100, and a straightforward build process, you’re just a few steps away from a stunning piece of furniture that’s both practical and stylish.
Whether you’re a seasoned woodworker or just starting your DIY journey, the detailed instructions and tips provided here will ensure a smooth and enjoyable building experience. We’ll cover everything from selecting your materials to mastering pocket hole joinery and adding those final decorative elements. The charming appeal of this console table lies in its clever design, mimicking the look of traditional drawers without the complexity of building functional ones. This simplicity makes it an ideal project for beginners while still delivering a high-impact aesthetic. Ready to create a conversation-starting piece that truly reflects your style and provides essential surface space? Let’s dive into the build!
Project Overview: Why Build This Console?
The allure of a custom-built console table is undeniable. Not only does it offer practical surface space and storage for items like keys, mail, or decorative accents, but it also serves as a captivating focal point in any room. This particular DIY Faux Drawer Console Table stands out for several compelling reasons. Firstly, its design cleverly incorporates faux drawers, giving it the sophisticated appearance of a piece with multiple storage compartments, without the added complexity or cost of actual drawer slides and boxes. This makes the construction process significantly simpler and faster, ideal for those seeking a quick yet impactful project that still delivers a polished, high-end look.
Secondly, the project emphasizes extreme affordability. By carefully selecting standard lumber and craft boards, you can complete this entire build for under $100, a remarkable saving compared to purchasing a similar piece from a retail store. This budget-friendly approach doesn’t compromise on style or durability, ensuring you get a high-quality piece of furniture that will last for years. Imagine transforming your space with a custom piece for less than the cost of a few decor items! Lastly, the satisfaction of building something beautiful and functional with your own hands is truly immeasurable. Each step of this project is designed to be manageable, providing a fulfilling experience as you watch your console table take shape from raw materials into a beautiful, functional centerpiece ready to enhance your home.
Essential Tools & Materials for Your Console Table
Before you begin, gathering the right tools and materials is crucial for a smooth and efficient building process. Having everything organized and on hand will save you time and prevent frustration, allowing you to focus on the joy of creation. Here’s a detailed look at what you’ll need to successfully construct your faux drawer console table:
Recommended Tools:
- Kreg Pocket-Hole Jig: This is an indispensable tool for creating strong, concealed joints, which are a hallmark of professional-looking DIY furniture. The Kreg Foreman is excellent for speed, while the Kreg K5 offers versatility and ease of use, making either a great choice for this project. Pocket holes allow for secure fastening without visible screws on the exterior, ensuring a clean finish.
- Drill/Driver: Essential for drilling pilot holes and accurately driving pocket-hole screws. A cordless drill offers maximum mobility around your workspace.
- Miter Saw or Circular Saw: For making precise, straight cuts to your lumber. A miter saw is ideal for repeatable, accurate cross-cuts, while a circular saw is versatile for various cuts, especially when paired with a guide.
- Table Saw: Highly recommended for ripping down larger boards (like the 2x6s for shelf supports) to specific widths and for cutting the laminated pine project panel to size. This ensures perfectly straight and clean edges, critical for a professional appearance.
- Brad Nailer or Pin Nailer: A nailer, such as the Ryobi Pin Nailer mentioned in the original build, is perfect for attaching smaller, decorative elements like the faux drawer faces. Pin nailers create tiny holes that are barely visible, minimizing the need for extensive wood filler and sanding after assembly.
- Wood Glue: An absolute must for reinforcing all joints. When used in conjunction with screws or nails, wood glue creates incredibly strong, long-lasting bonds, significantly enhancing the structural integrity and durability of your console table.
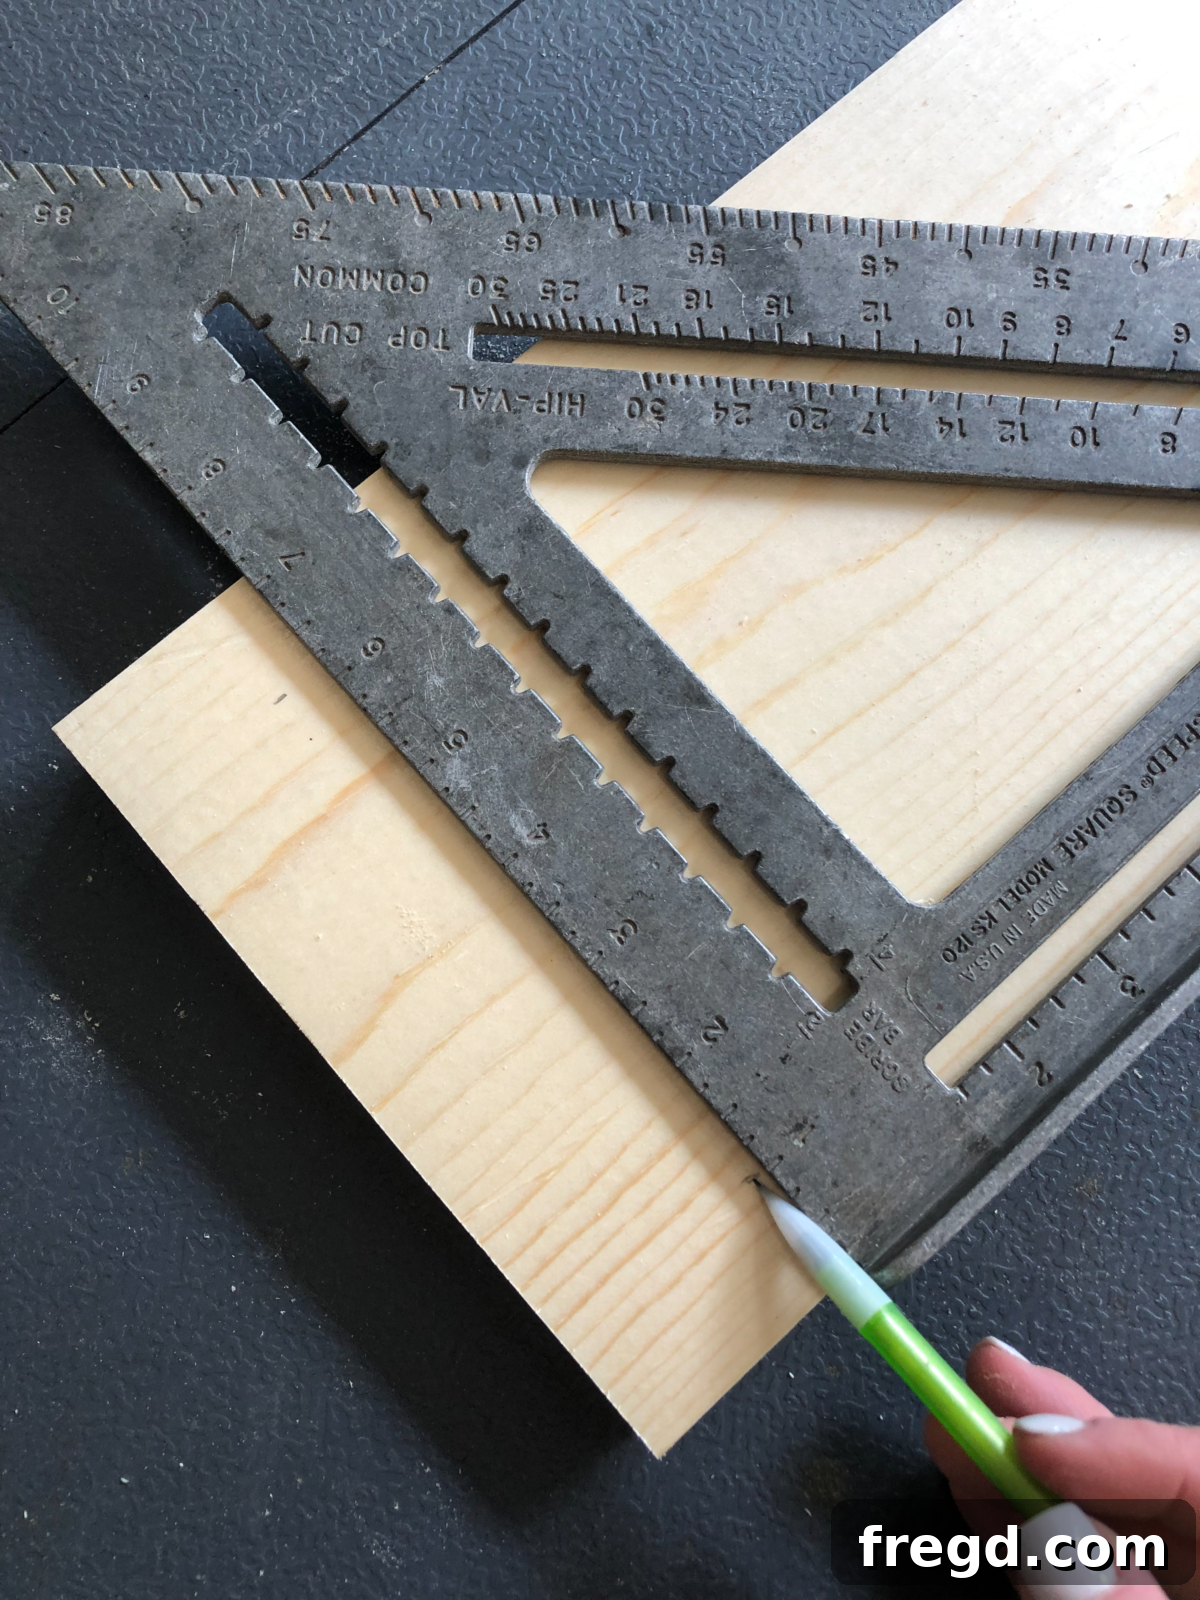
- Speed Square: An invaluable tool for quickly and accurately marking straight lines, checking squareness of cuts, and ensuring precise alignments during assembly.
- Measuring Tape and Pencil: For accurate measurements and clear markings on all your wood pieces. “Measure twice, cut once” is a golden rule in woodworking.
- Clamps: Essential for holding pieces securely in place while glue dries or screws are driven. Clamps ensure precise alignment and prevent shifting, resulting in tighter, stronger joints.
Materials List:
Supply List
- 2 x 6 x 8 Framing Lumber (2 pieces): This sturdy lumber will form the core structural components, including the main aprons and robust shelf supports.
- 1 x 8 x 8 Pine or Whitewood (2 pieces): These boards will be used for the table legs and other essential supporting elements, providing stability and definition.
- 1/2″ x 6″ x 48″ Poplar or Pine Craft Board (2 pieces): This material is crucial for crafting the smooth, elegant faux drawer faces. Poplar is particularly recommended for its fine grain and smoothness, which takes paint or stain beautifully, ensuring a flawless finish.
- Laminated Pine Project Panels (2 pieces): These panels will serve as the smooth, ready-to-finish tabletop and the functional bottom shelf. Check the free plans for the exact dimensions needed, as a common size like 16″ x 72″ will often require cutting down.
- 1.5″ Pocket Hole Screws: For larger, more robust structural joints, providing superior holding power.
- 1.25″ Pocket Hole Screws: For general pocket hole applications where slightly less depth is required.
- 1″ Brad or Pin Nails: Specifically for attaching the delicate faux drawer faces, leaving minimal holes.
- 2.5″ Pocket Hole Screws: Reserved for specific, stronger connections, such as the shelf supports, where maximum stability is paramount.
- Wood Filler (optional but recommended): For seamlessly filling any nail holes, minor gaps, or imperfections before you apply your chosen finish, ensuring a professional, smooth surface.
- Sandpaper: Various grits (e.g., 120, 180, 220) for progressively smoothing all surfaces, preparing the wood for an impeccable finish.
- Paint or Stain, and Sealer: To finish your console table according to your desired aesthetic. This step allows for immense personalization.
- Decorative Hardware (Drawer Pulls): To complete the illusion of functional drawers. Elegant knobs or pulls can elevate the table’s appearance, and you can find stylish options HERE.
Always refer to the free printable plans (link at the end of this post) for precise cutting dimensions and quantities of materials needed, as these will provide the most accurate guidance for your build.
Step-by-Step Building Guide for Your Console Table
Follow these detailed steps carefully to construct your beautiful faux drawer console table. Precision in measuring and cutting, along with proper fastening techniques, will ensure a sturdy, durable, and professional-looking finished product. Take your time with each step, and don’t hesitate to double-check your measurements and alignments.
Step 1: Prepare Apron Pieces with Pocket Holes
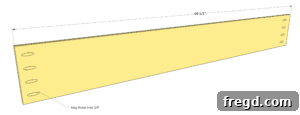
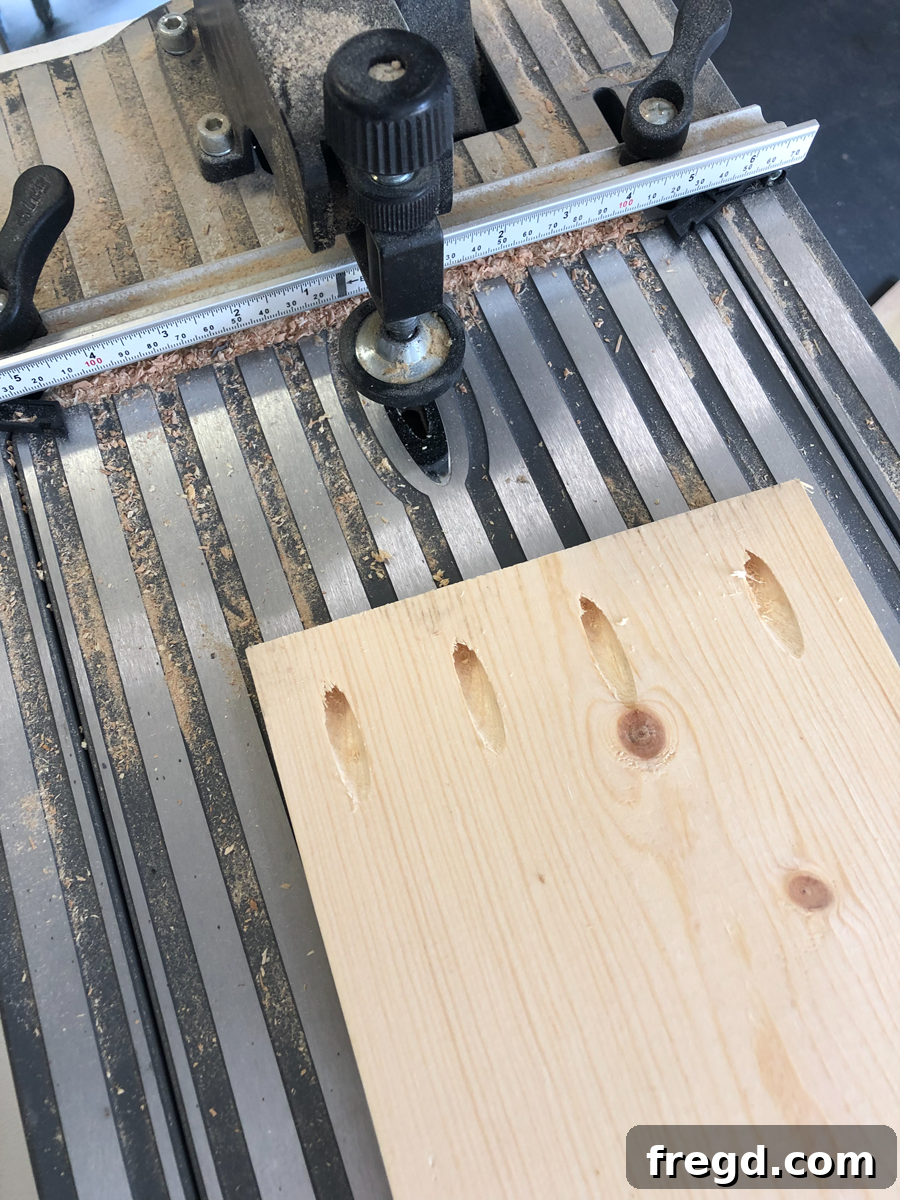
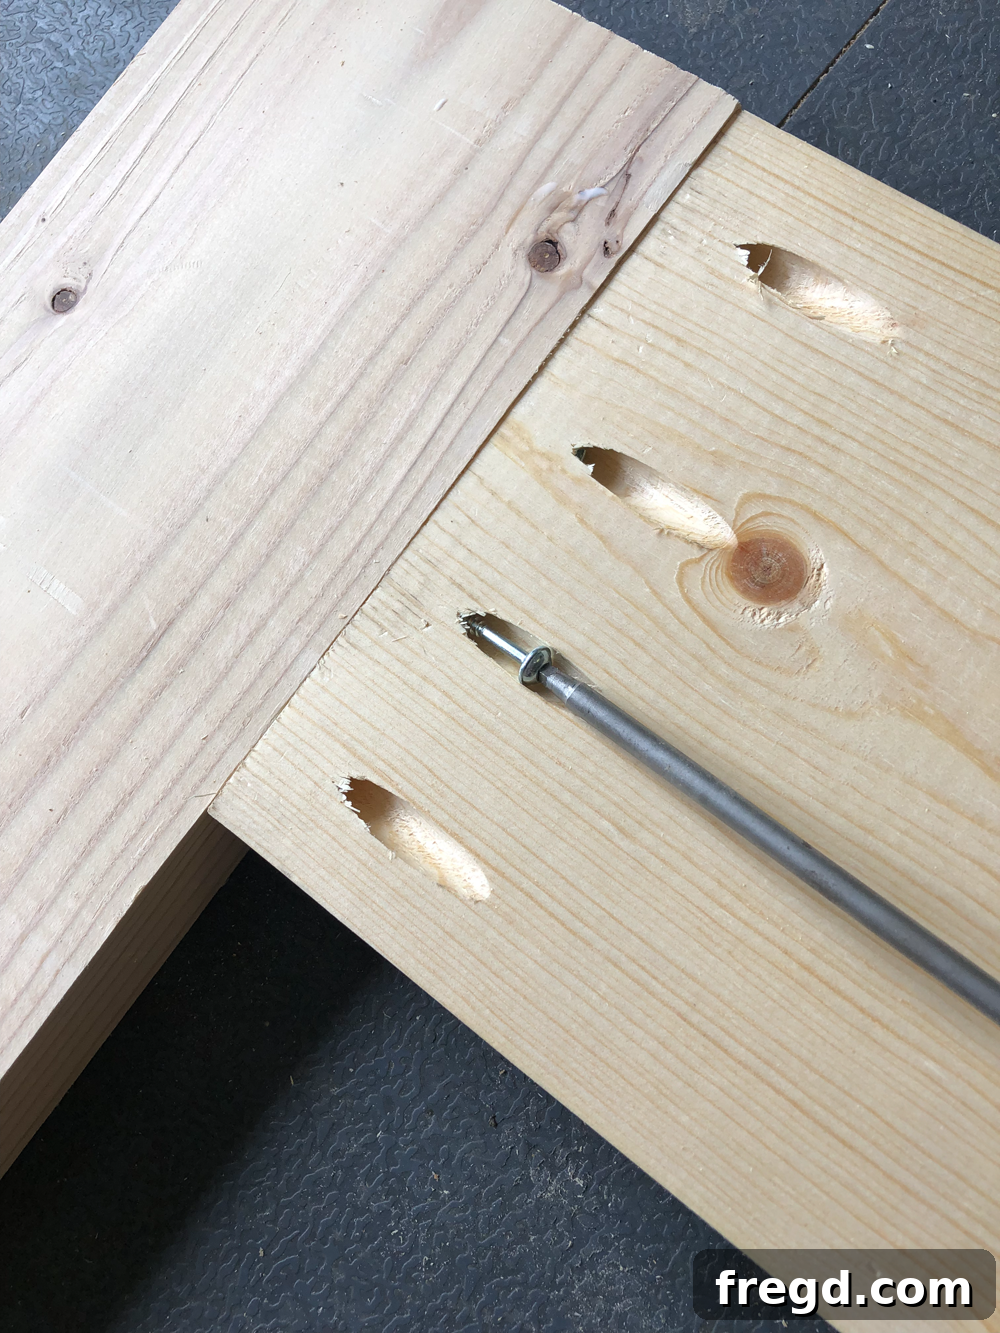
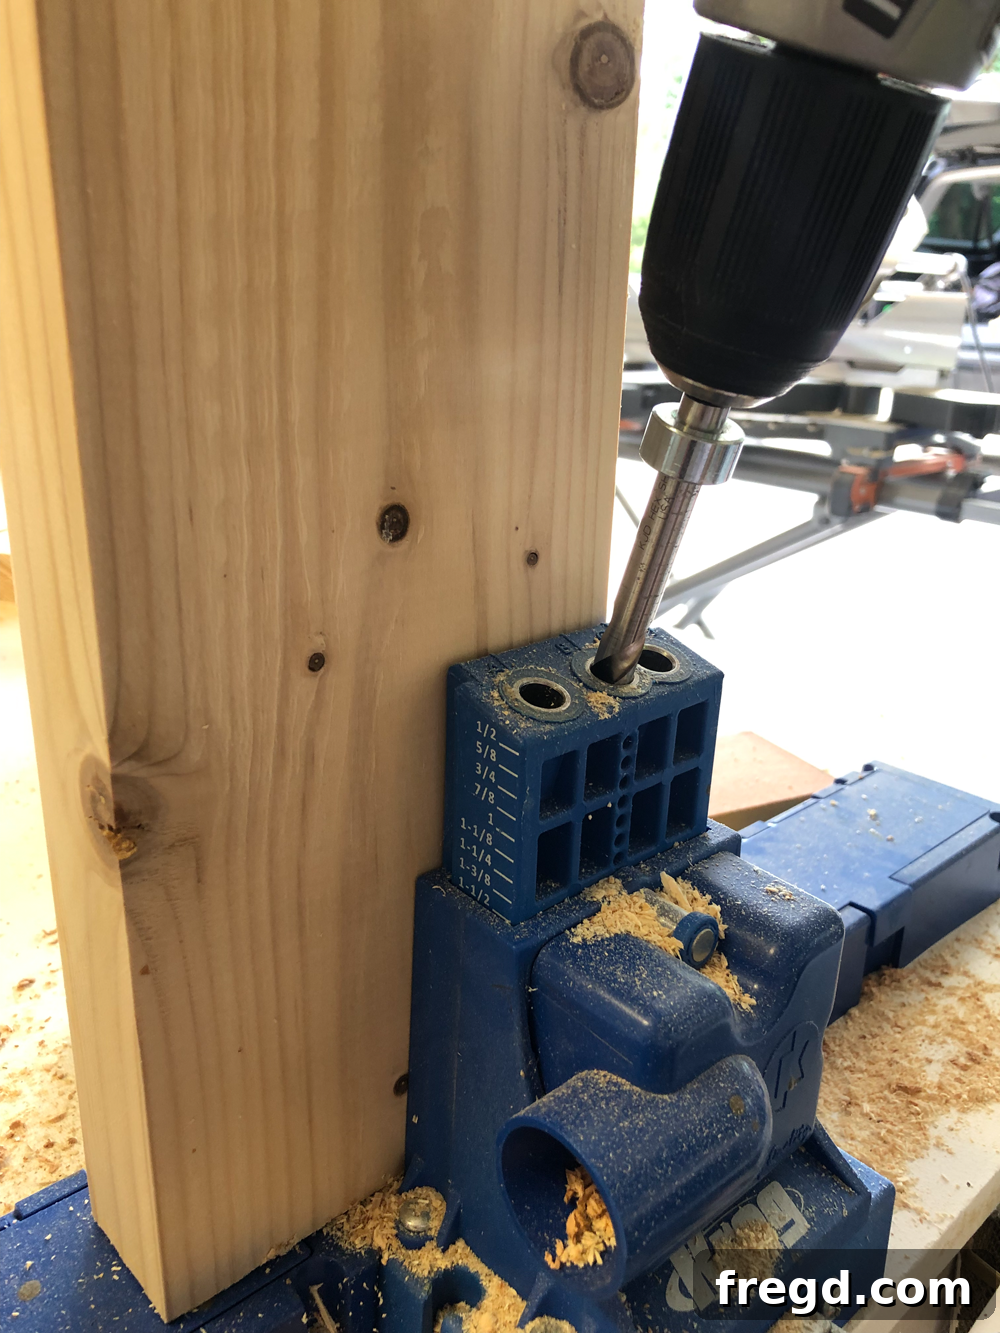
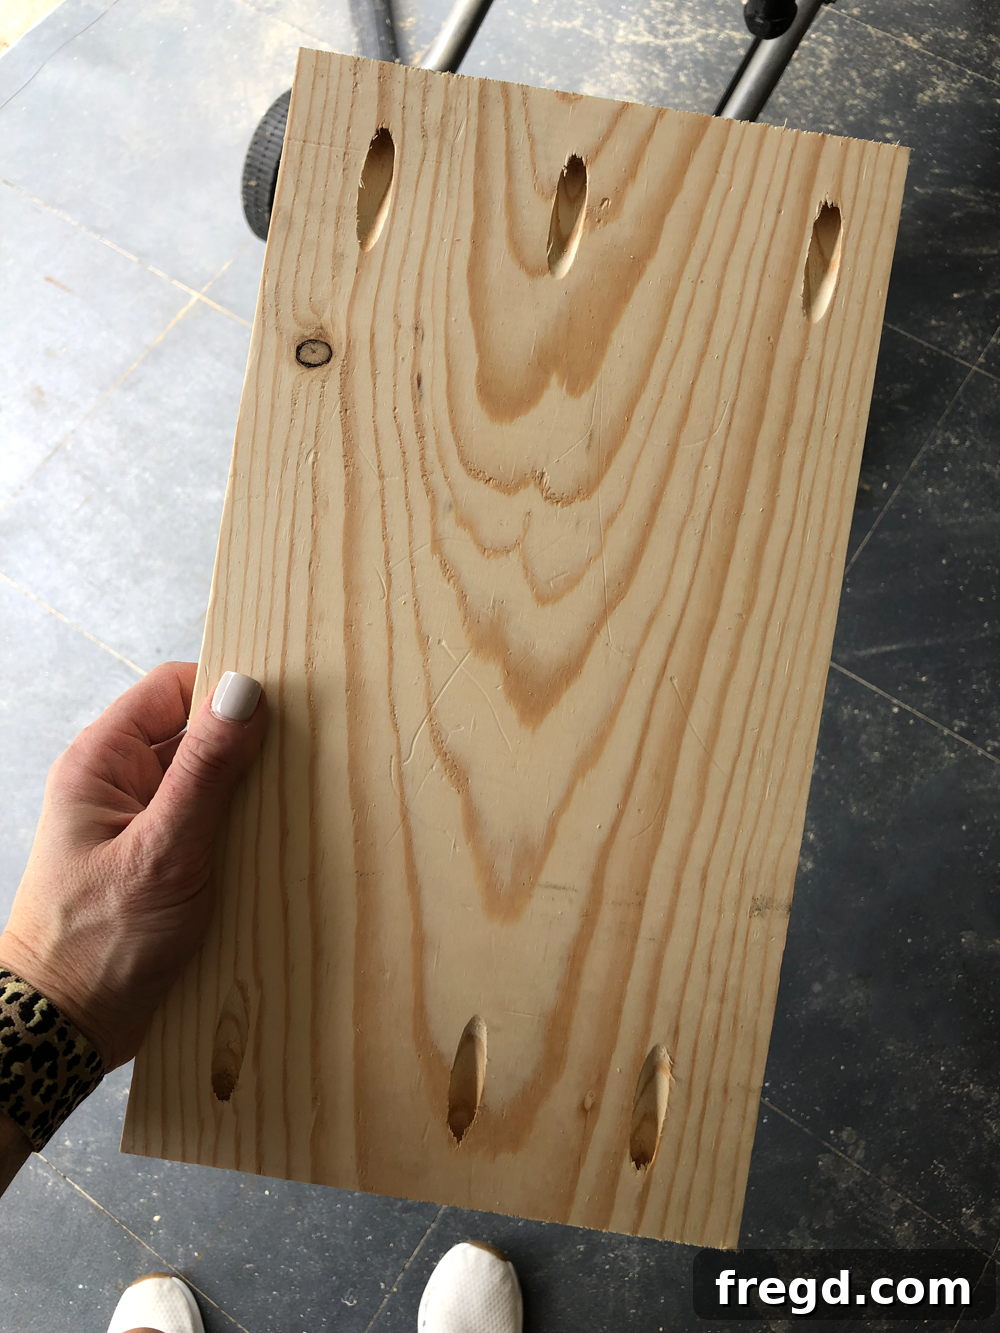
Begin by cutting your apron pieces to their specified lengths according to the detailed plans. These aprons will form the top frame of your console table, providing the primary support for the tabletop. Once cut, take the two longer apron pieces and, on the backside (the surface that will face inwards or downwards, out of sight), add 3/4” pocket holes to each end. These pocket holes will later allow you to securely attach the aprons to the legs, creating strong, hidden joints that maintain the clean aesthetic of your furniture. Using a Kreg Jig, such as the Kreg Foreman for efficiency or the Kreg K5 for versatility, makes this process incredibly precise and efficient. Remember to adjust your jig for the correct material thickness (3/4″ in this case) to ensure proper screw depth and optimal joint integrity.
The Kreg Foreman is a fantastic tool for high-volume pocket hole drilling, making quick work of repetitive tasks. For home DIYers, the Kreg K5 offers excellent performance, ease of adjustment, and versatility for various projects. These jigs are engineered to create incredibly strong, self-tapping screw joints that are essential for sturdy furniture construction. For visual guidance on setting up and using your Kreg Jig, numerous tutorials are available online, or you can refer to product descriptions like the one for the Kreg K5 on Amazon. Proper pocket hole placement ensures your console table will be stable and durable.
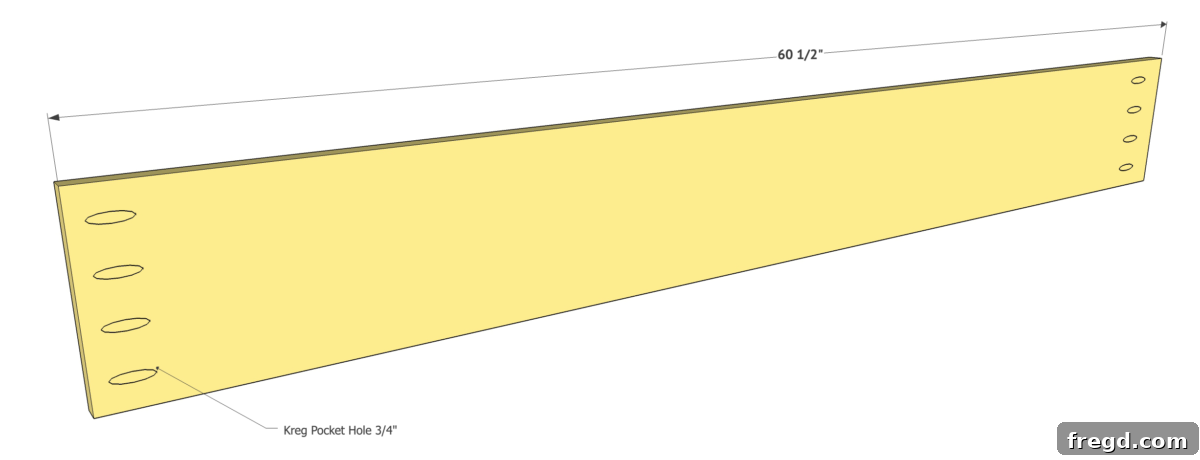
Step 2: Install the Decorative Faux Drawer Faces
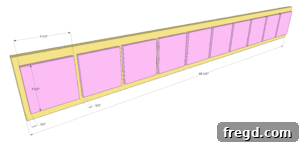
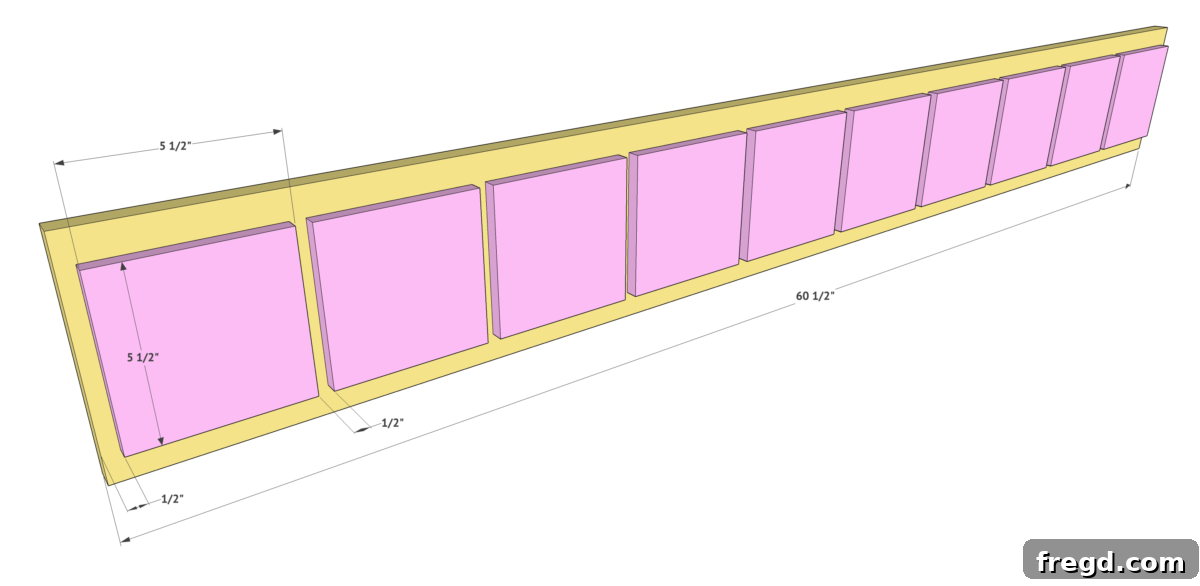
This step adds the signature “faux drawer” look to your console table, transforming a simple apron into a visually interesting focal point. These decorative faces are crafted from 1/2” x 6” craft boards, with poplar being an excellent choice due to its smooth texture, fine grain, and ease of finishing. Begin by cutting each piece of craft board into precise 5.5” squares. Precision in these cuts is paramount for a uniform and professional appearance across all the faux drawers.
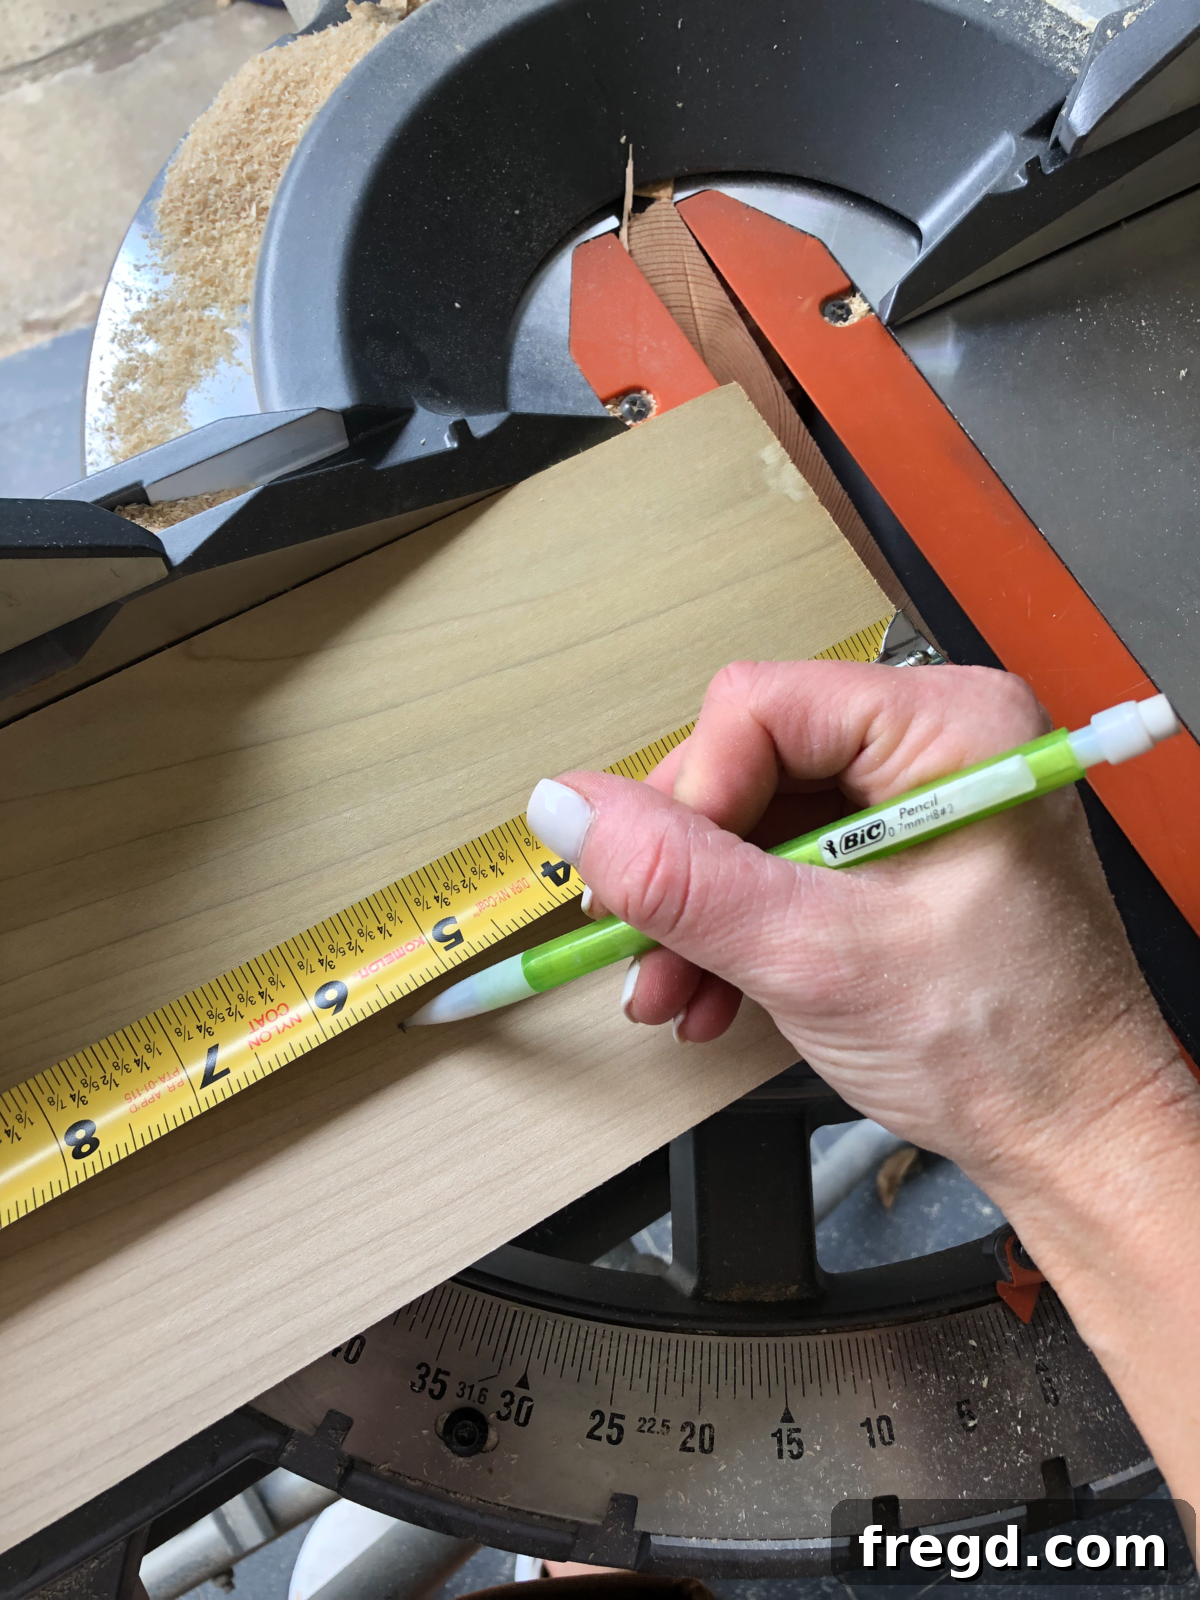
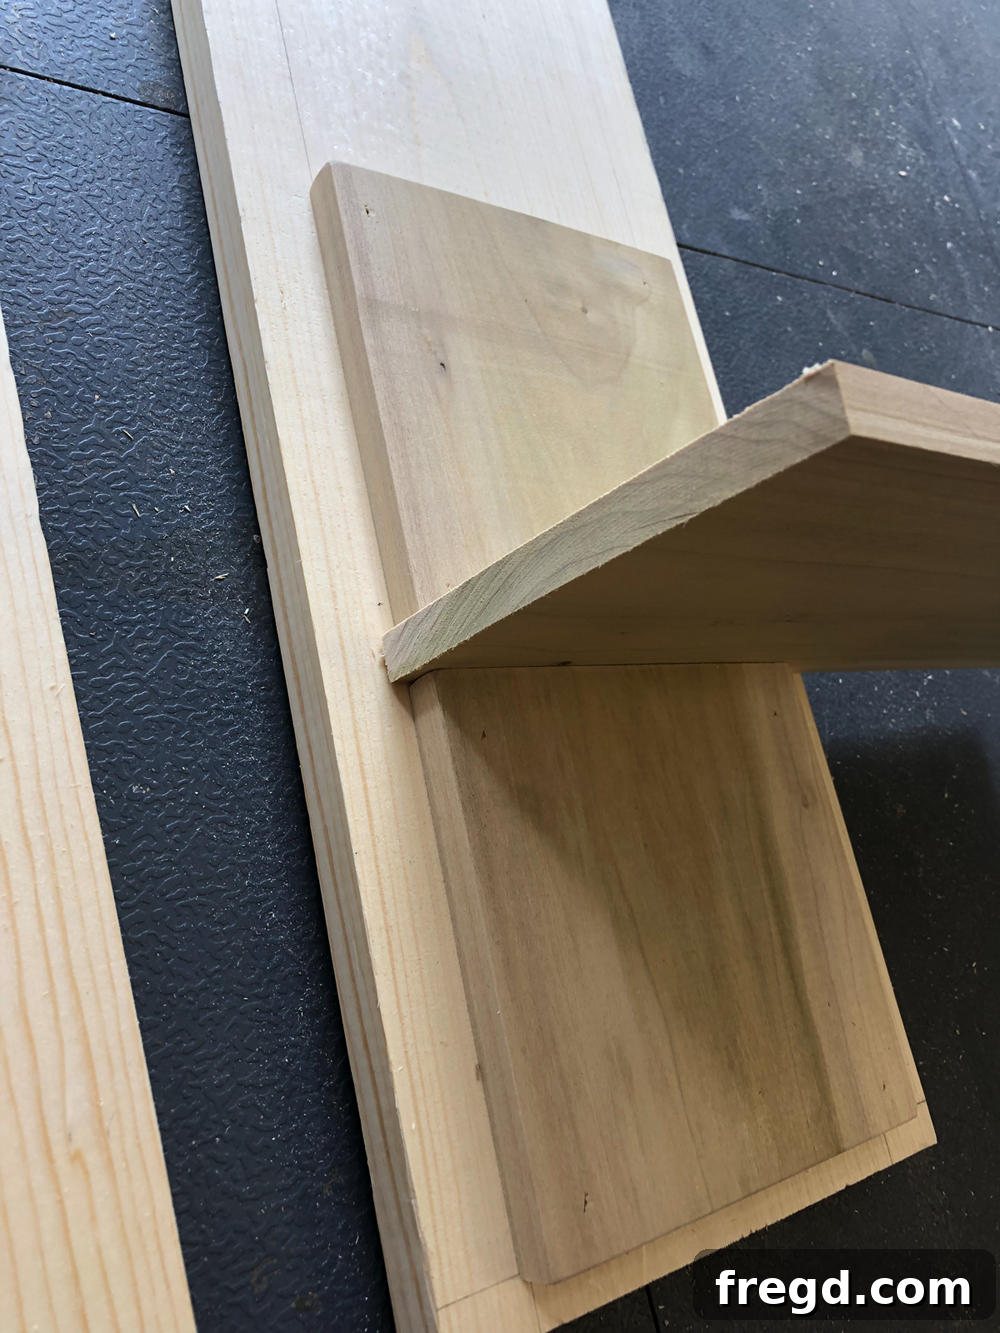
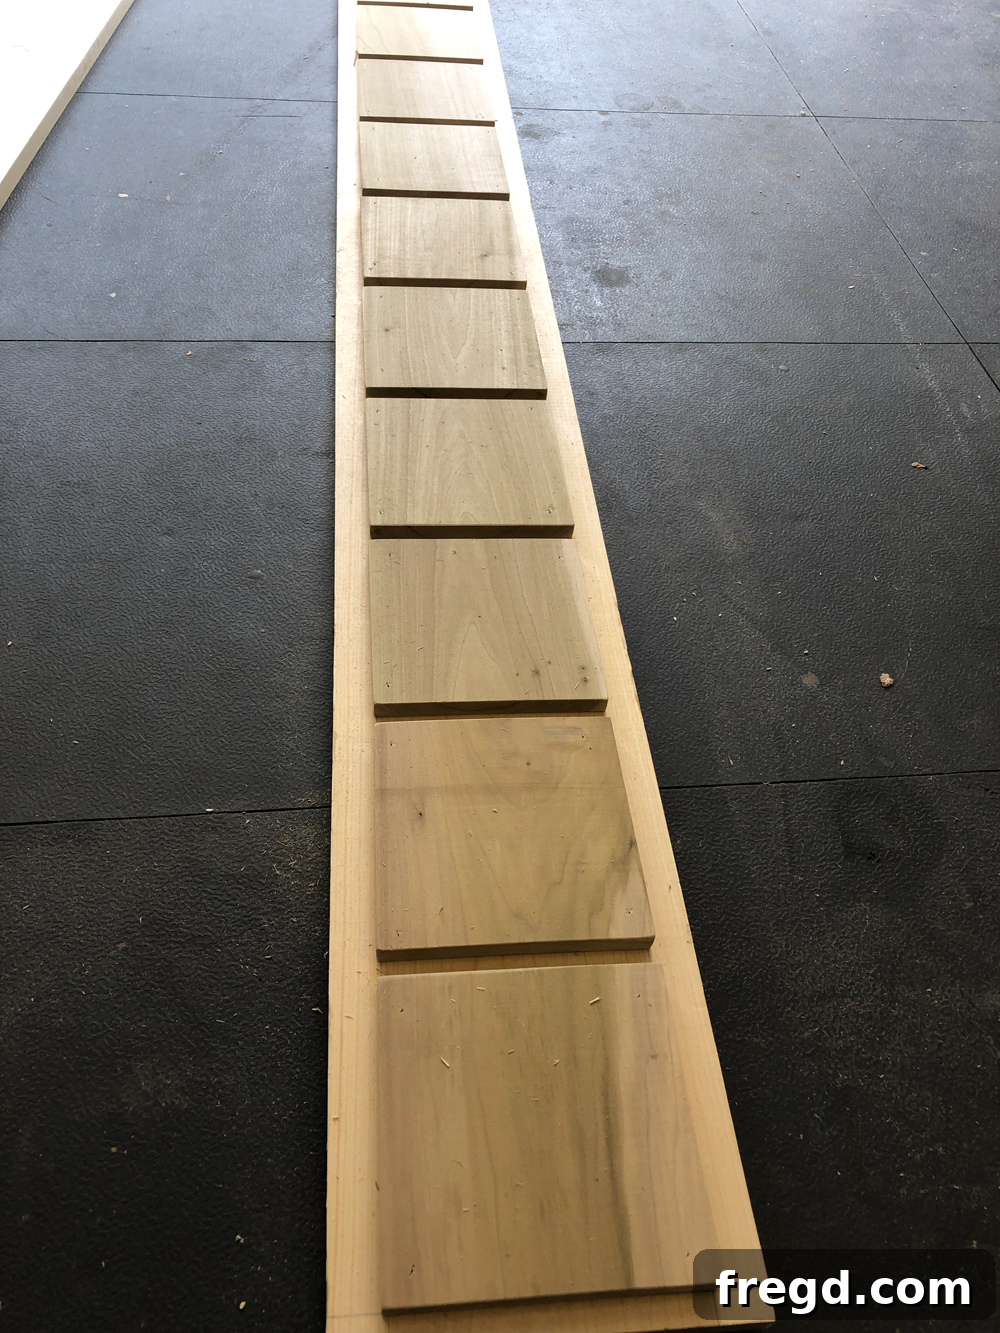
Next, you will attach these squares along the front of one of your longer apron pieces. Before permanent attachment, it’s crucial to establish a reliable guide line for perfect vertical alignment. Use another scrap board or a long straight edge to mark a line 1 inch down from the top edge of the apron. This line will serve as the consistent upper boundary for all your faux drawer faces, ensuring they are perfectly level and consistent across the entire length of the apron. Once this guide is set, evenly space the cut squares along this line. A simple yet highly effective trick for achieving consistent horizontal spacing is to use a scrap piece of the 1/2″ craft board (or any 1/2″ thick material) as a temporary spacer between each faux drawer face. This method makes the alignment process incredibly fast, accurate, and foolproof.
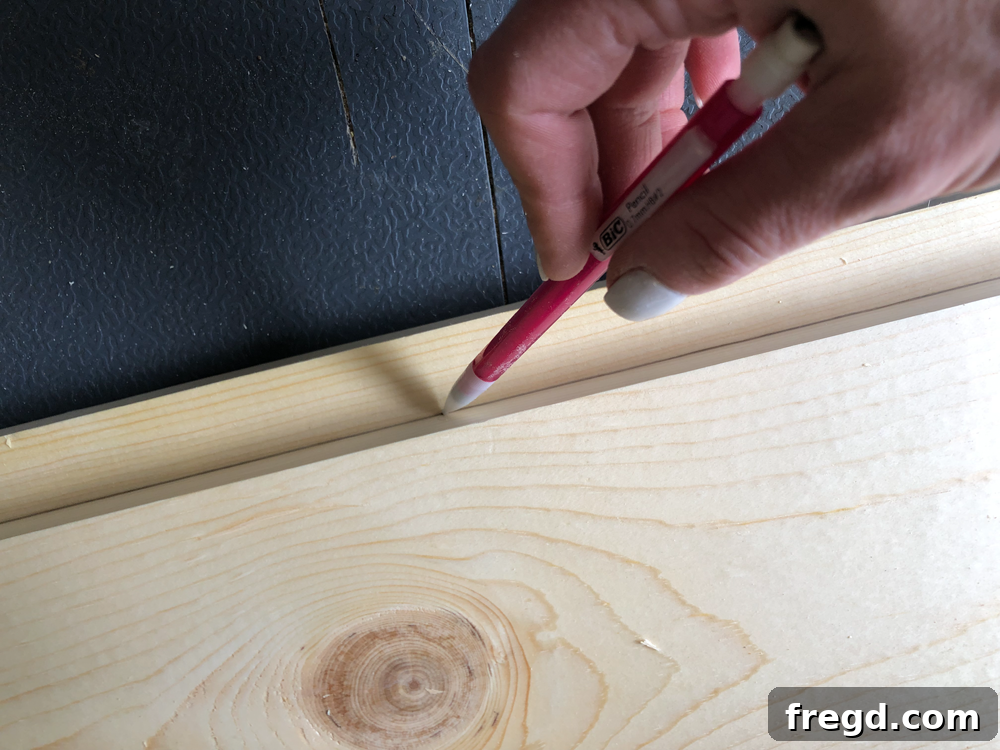
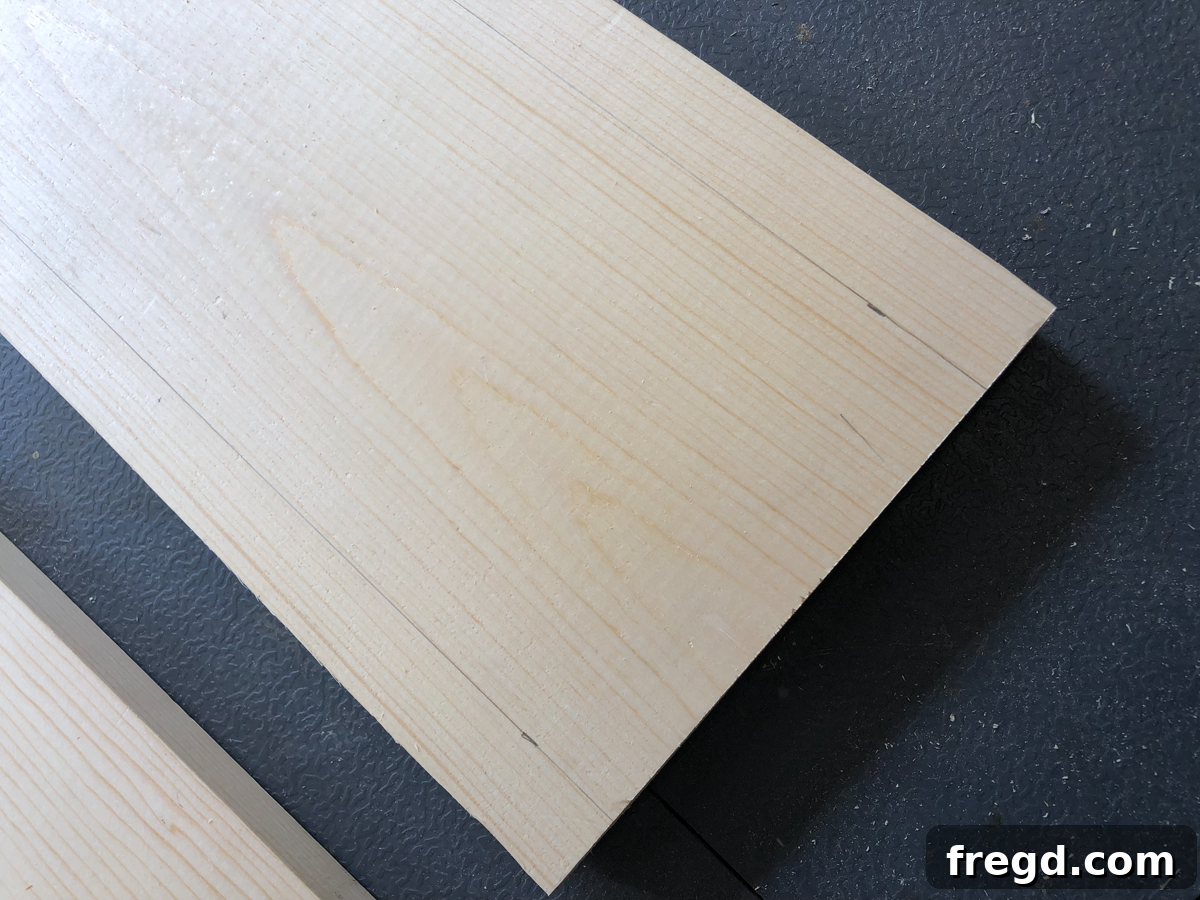
Once perfectly aligned and spaced, attach the faux drawer faces using a combination of wood glue and 1” brad or pin nails. The wood glue provides a strong, permanent bond that prevents the pieces from shifting over time, while the nails hold the pieces securely in place while the glue dries and cures. A pin nailer, such as the Ryobi Pin Nailer, is highly recommended for this task as it leaves incredibly small holes that are easy to conceal with minimal wood filler, leading to a truly flawless and professional-looking finish. This meticulous attention to detail during the attachment phase will significantly enhance the final appearance and perceived quality of your console table.
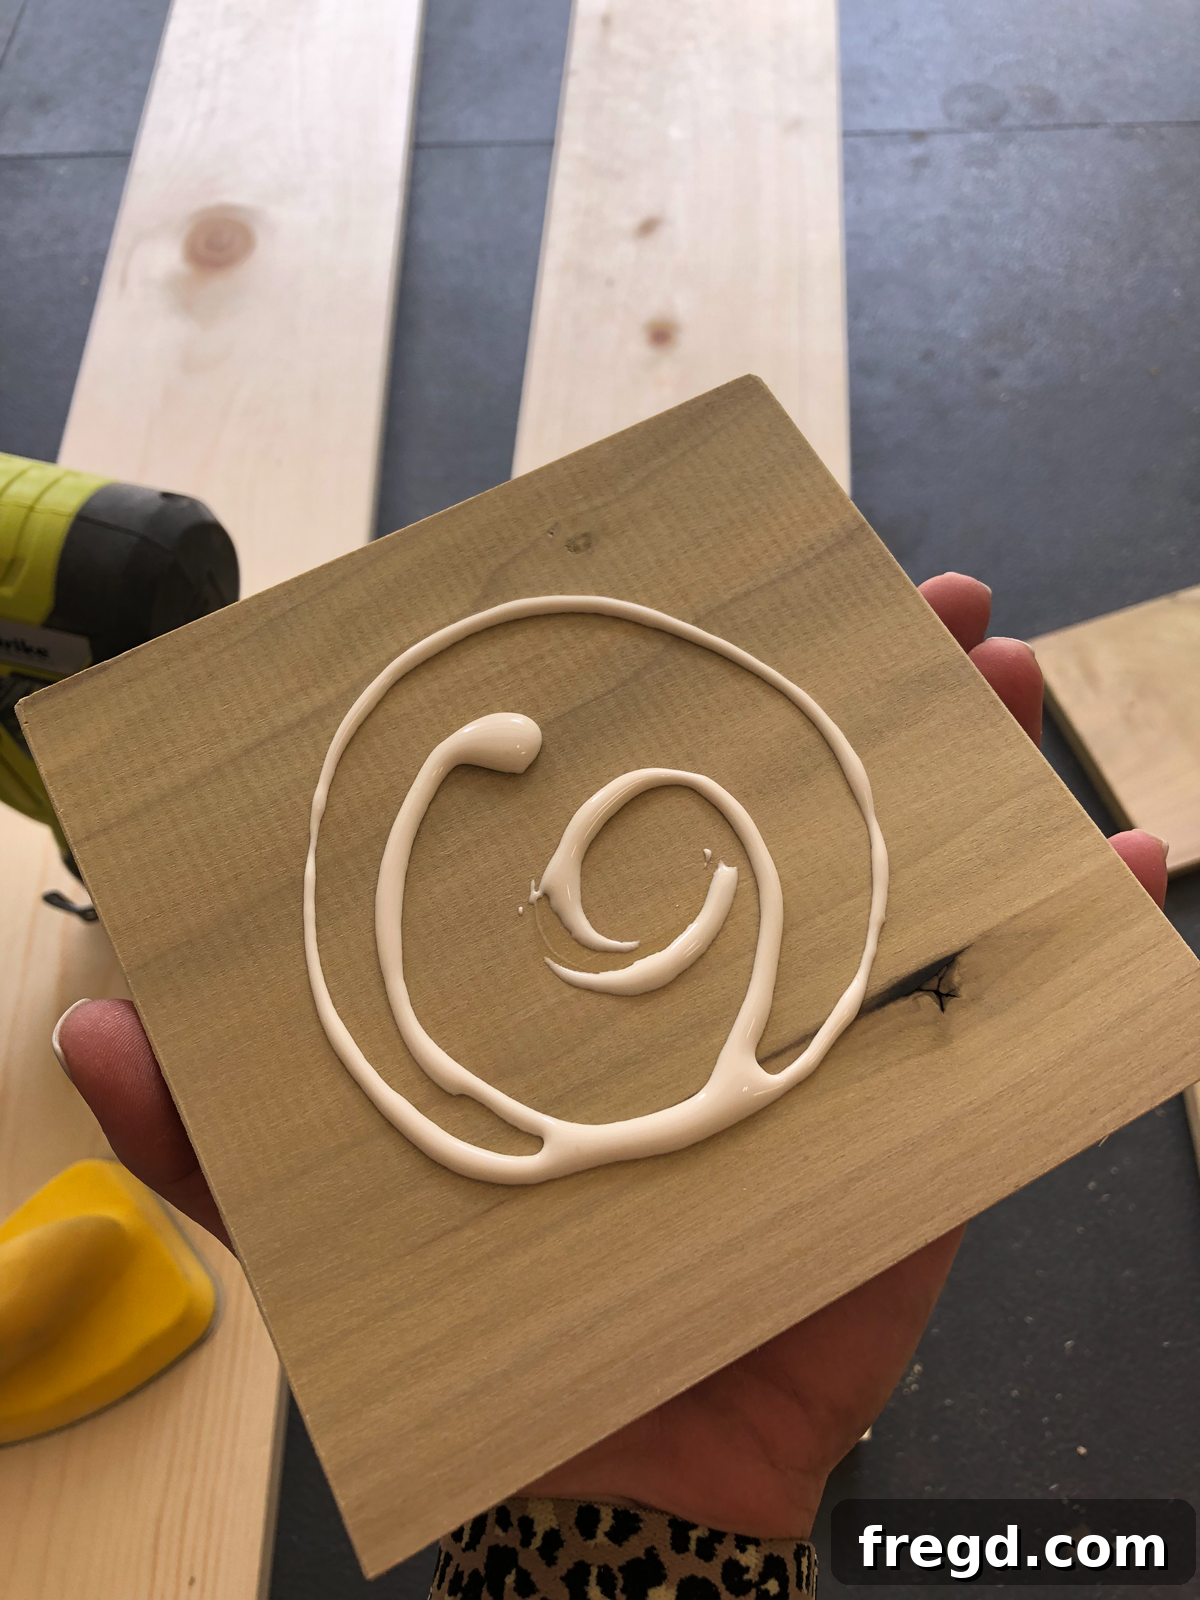
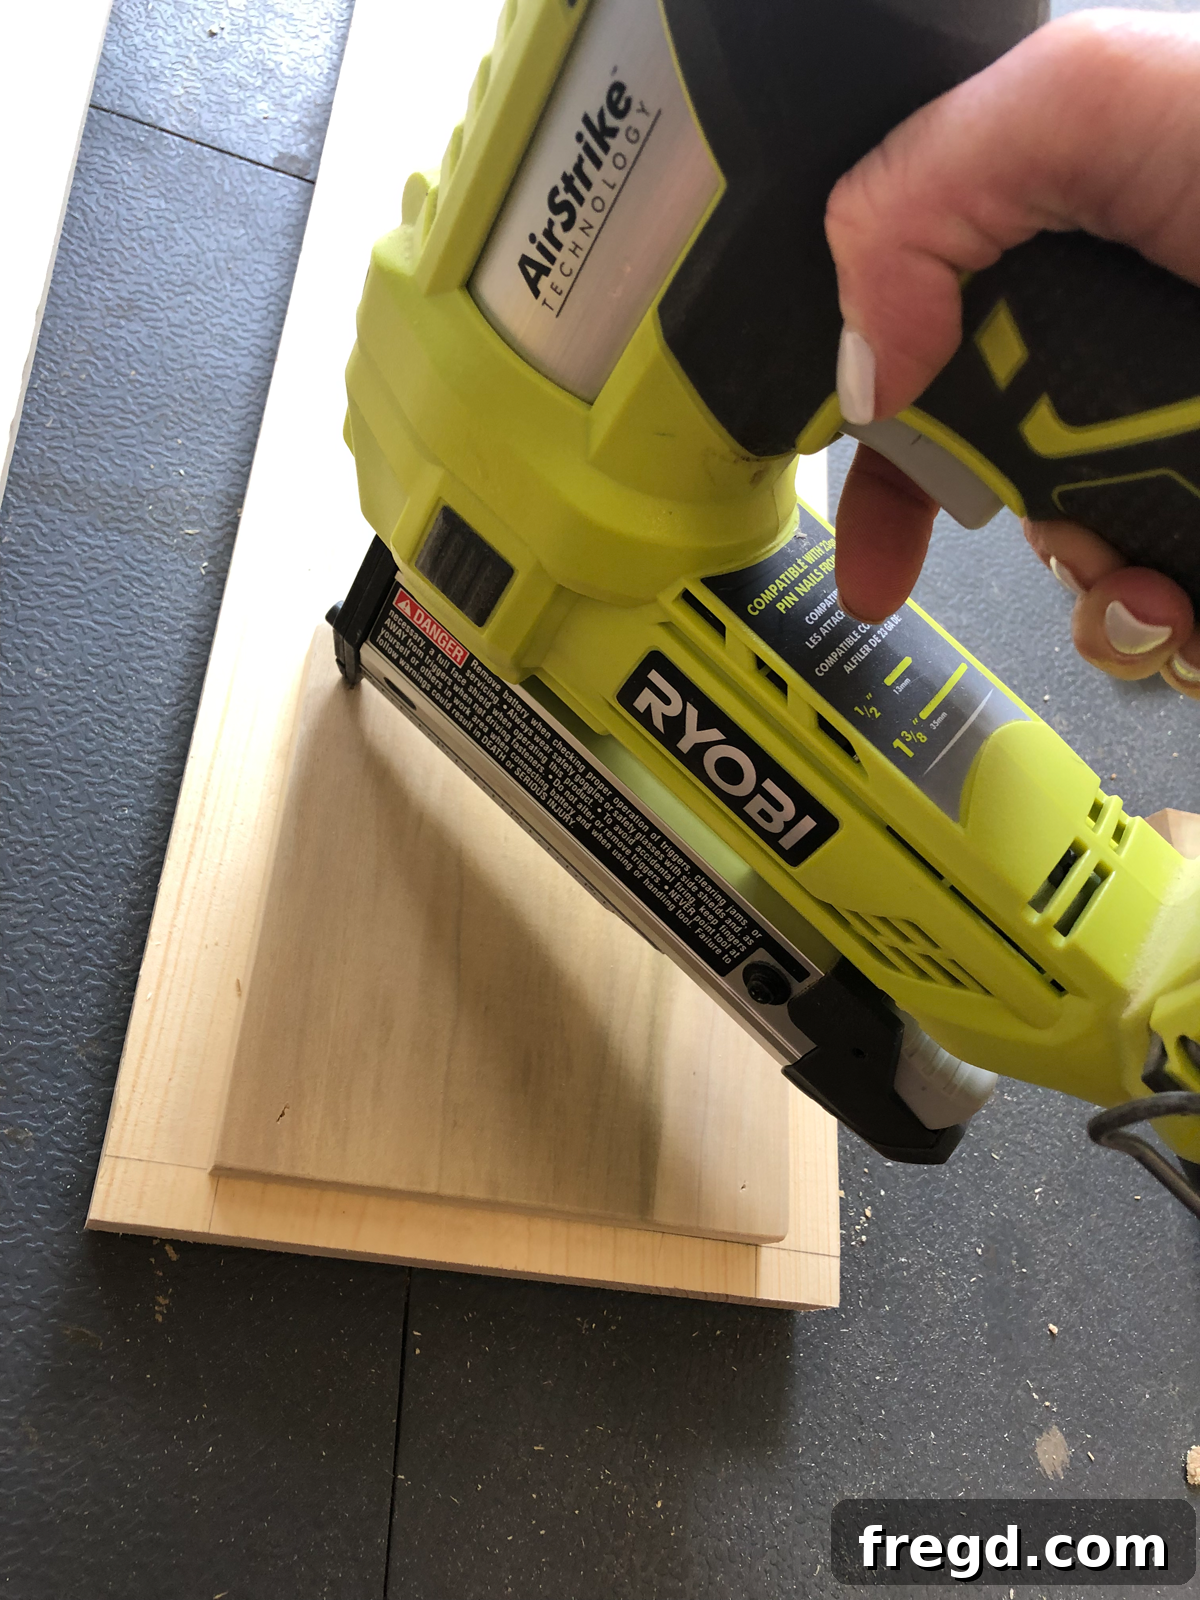
To ensure perfect 1/2″ spacing between each individual drawer face, consistently use a scrap piece of the 1/2″ craft board as your spacer. This small but incredibly effective technique will result in professional-looking, uniform gaps that elevate the overall craftsmanship of your project.
Step 3: Assemble Aprons to Legs
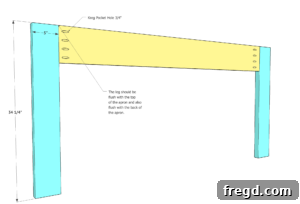
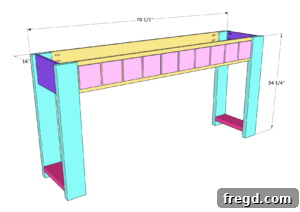
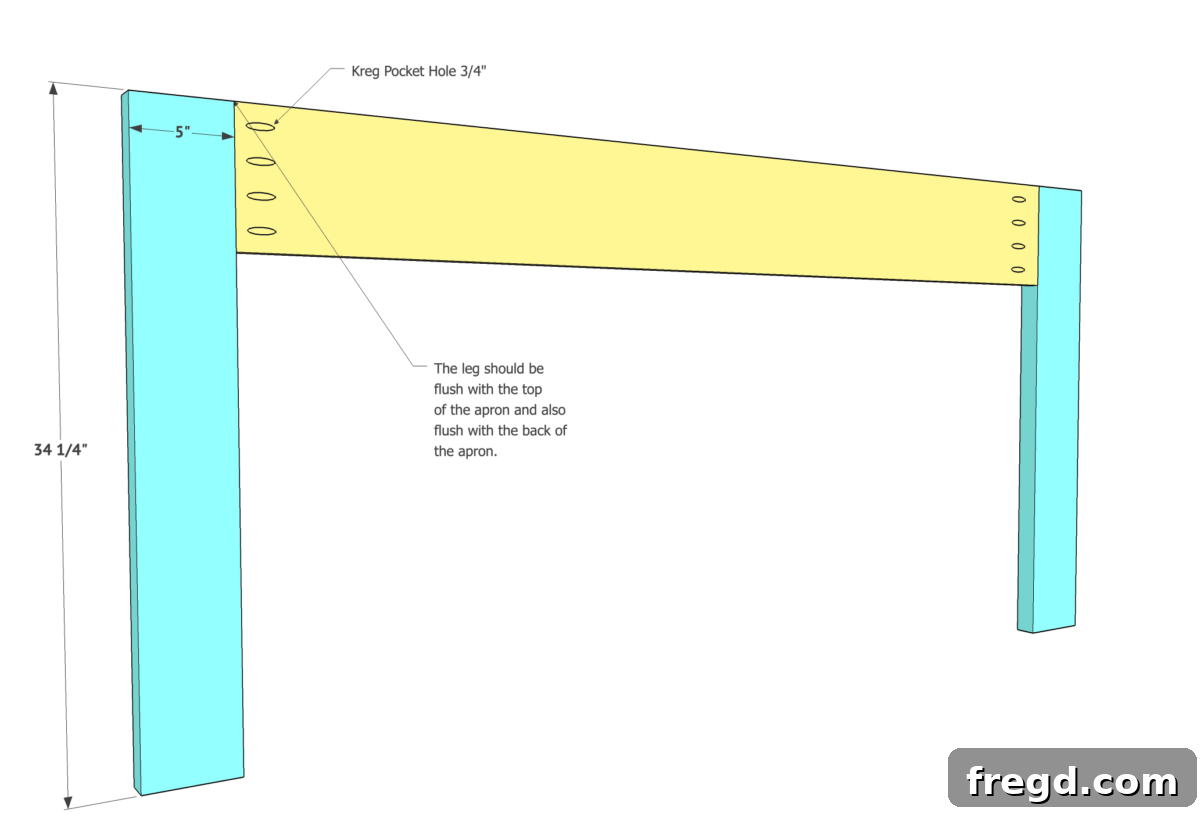
With your aprons prepared and the charming faux drawer faces in place on one of them, it’s time to integrate them with the table legs, forming the initial upright structure of your console. Carefully position each apron against its corresponding legs. It is vital to ensure that the back of each apron is perfectly flush with the back of each leg. Additionally, the top edge of the apron should be flush with the top of each leg. This precise alignment is absolutely critical for establishing a square, stable, and aesthetically pleasing table structure.
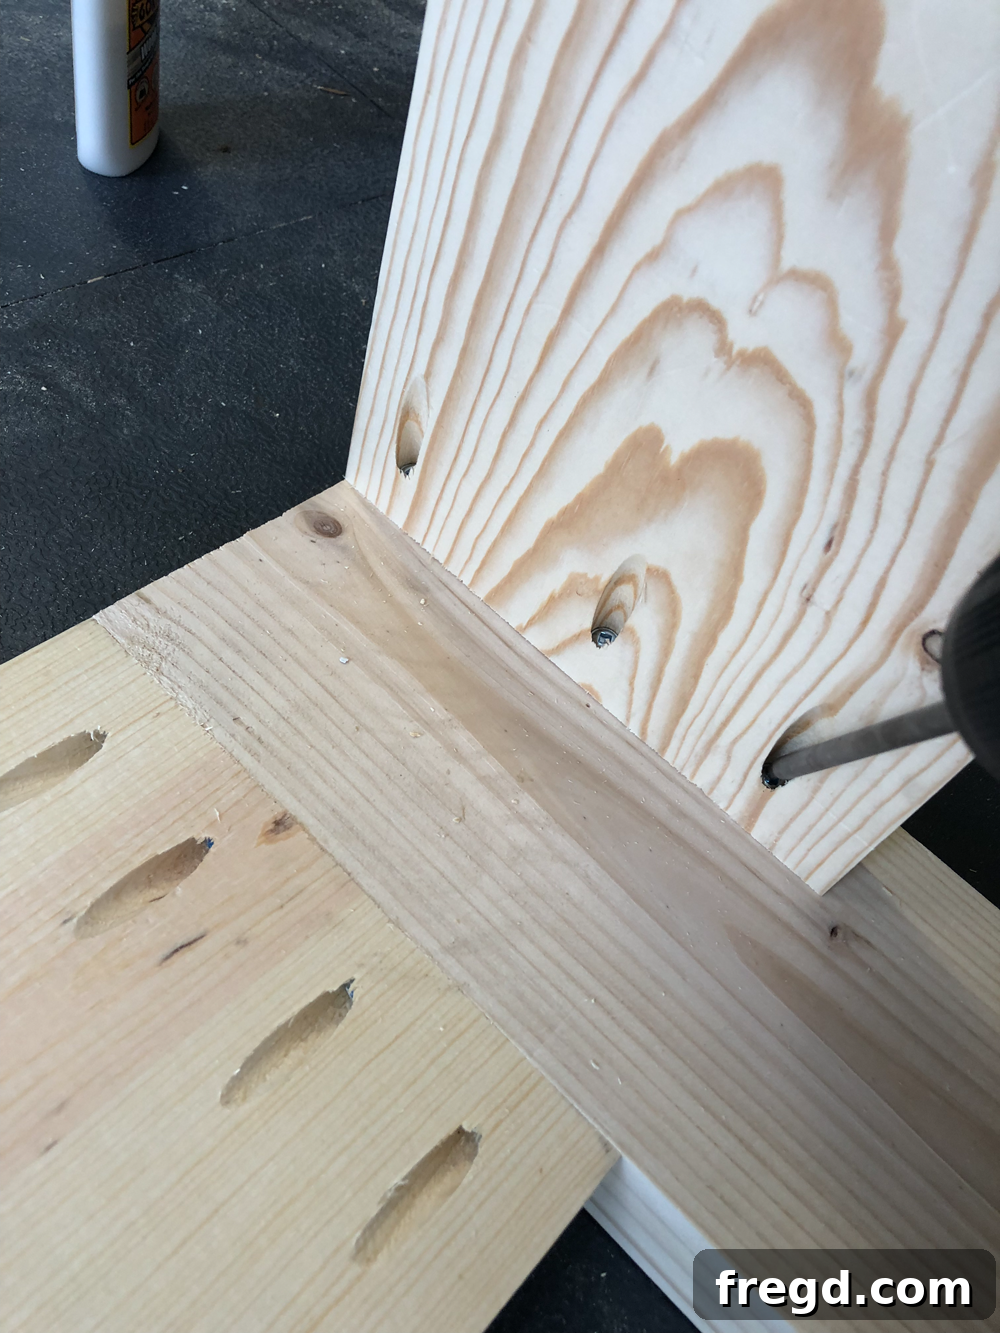
Apply a generous and even layer of wood glue to the mating surfaces where the aprons will meet the legs. This glue will provide a strong, permanent bond that complements the mechanical strength of the screws. Then, secure each leg firmly using 1.5” pocket hole screws. Drive these screws through the pre-drilled pocket holes in the aprons and into the solid wood of the legs. The combination of high-quality wood glue and robust pocket hole screws creates an incredibly strong, rigid joint that will withstand daily use and ensure the longevity of your console table.
Step 4: Attach Shelf Supports
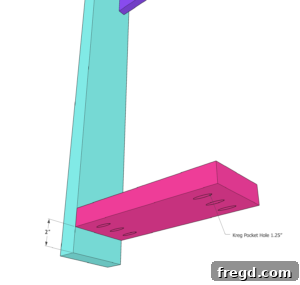
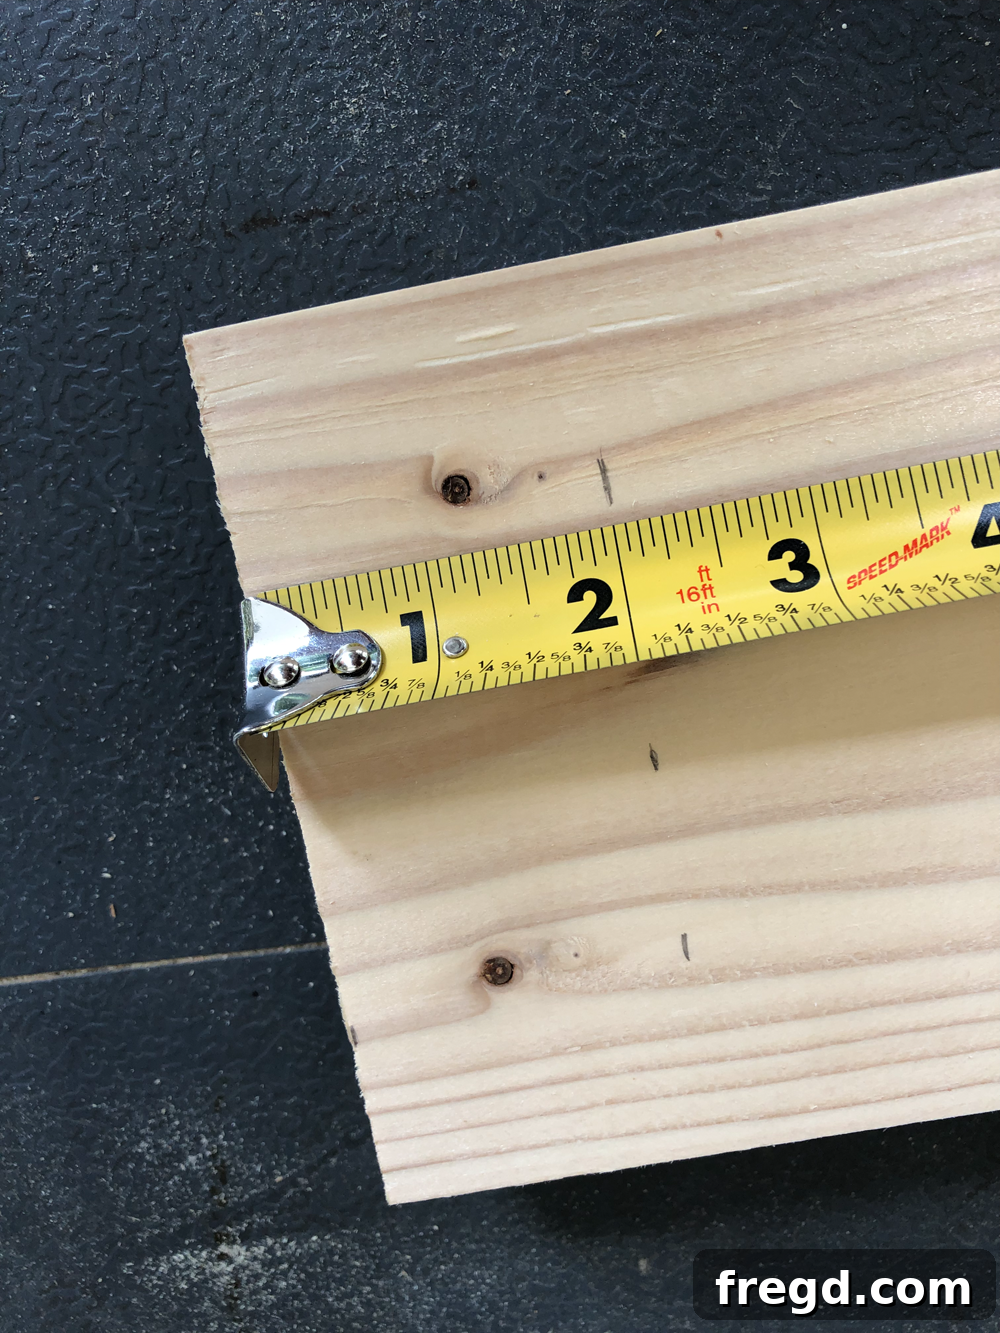
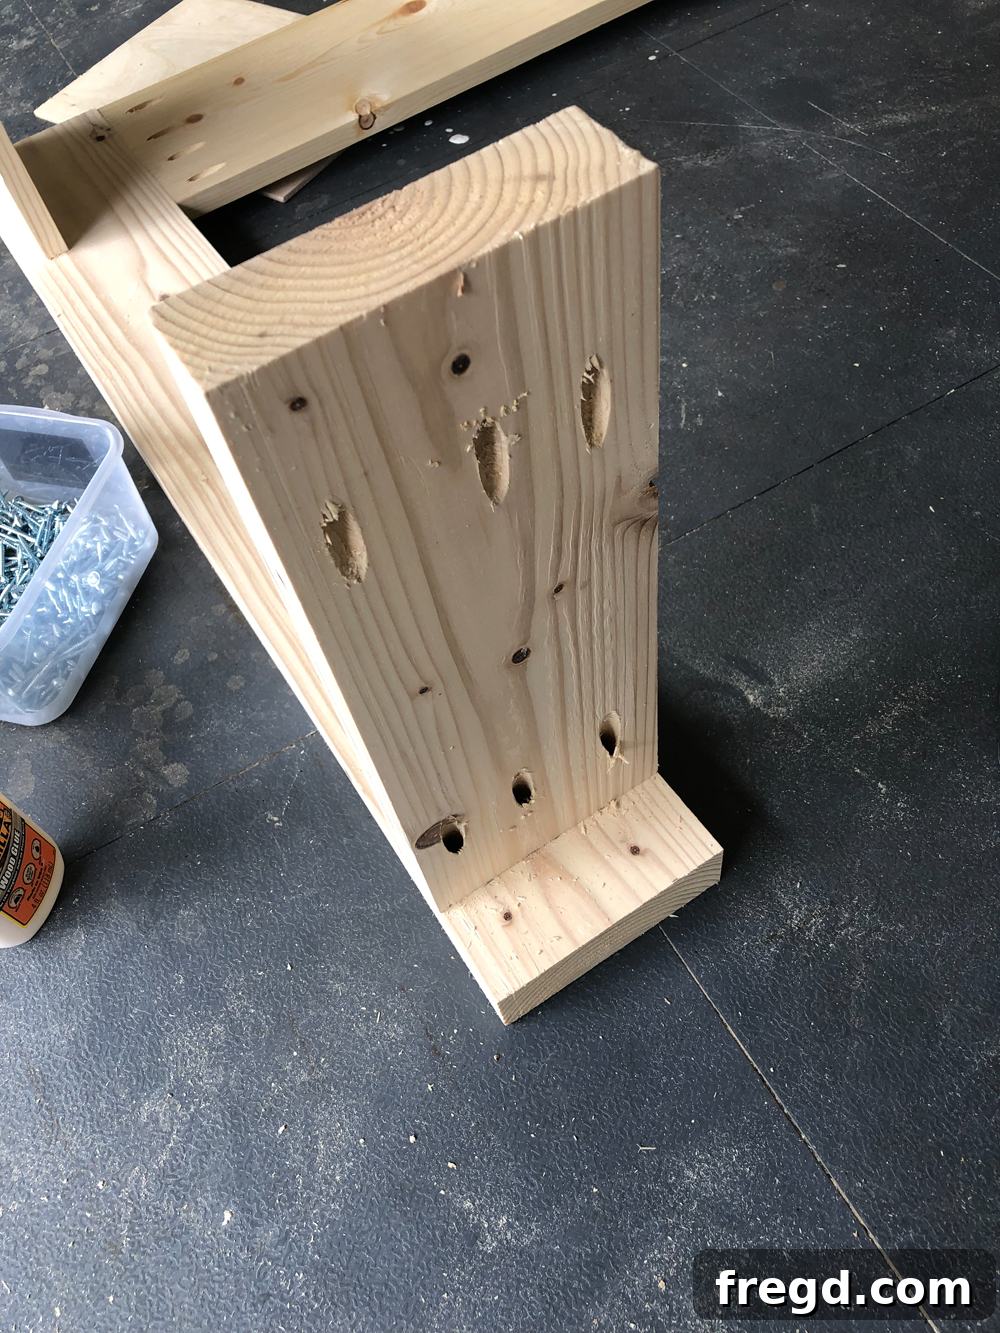
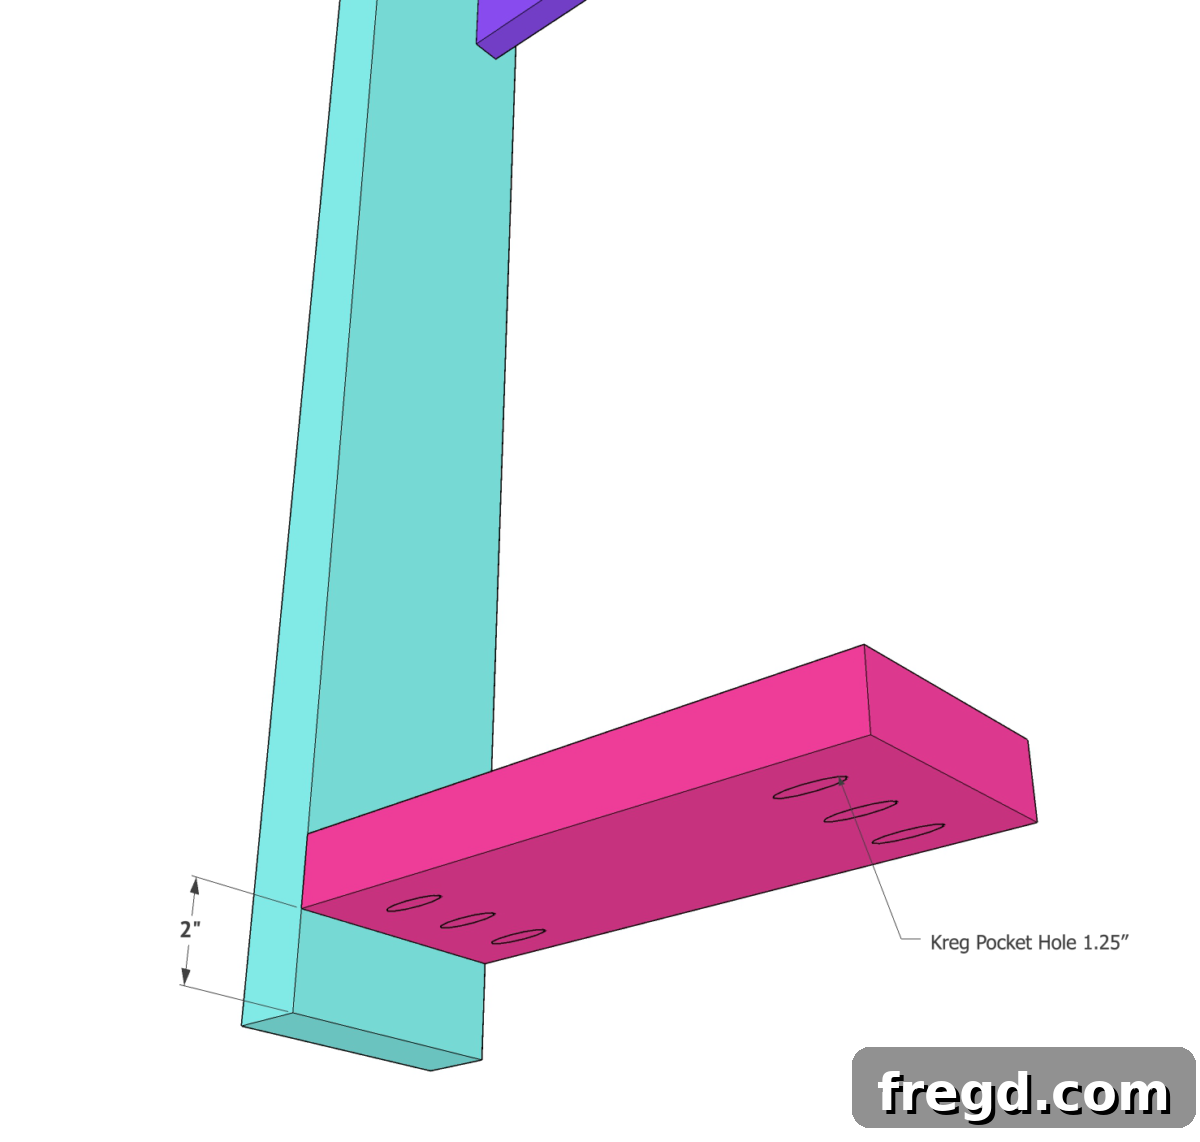
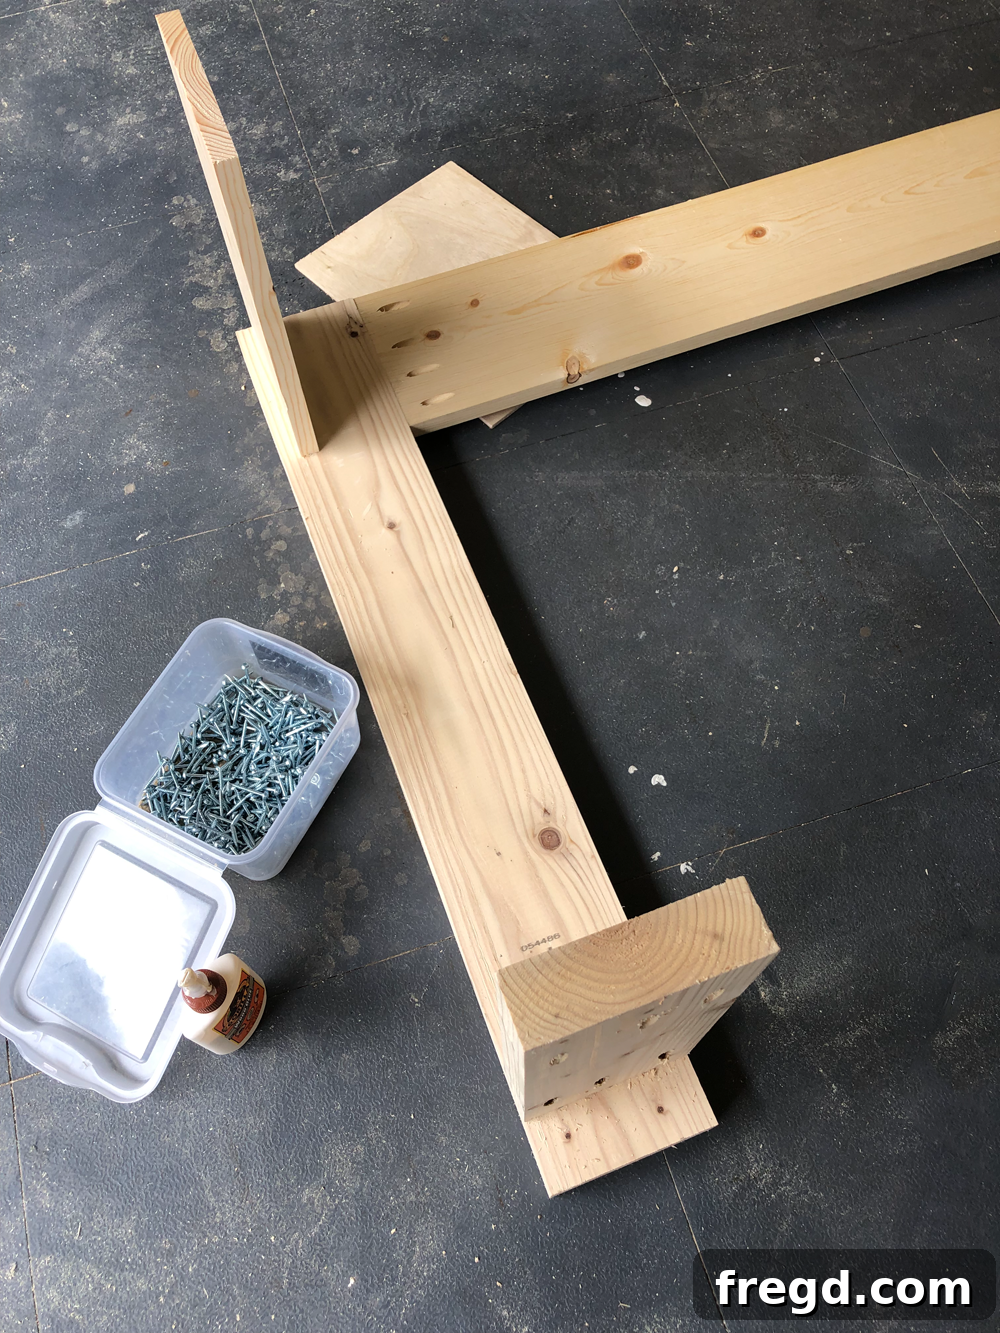
Now, focus on constructing the foundational framework for your bottom shelf, which will add both stability and practical storage to your console table. Begin by cutting your 2×6 boards (framing lumber) to the specified length for the shelf supports, then rip them down to 5” wide using your table saw, as detailed in the plans. These supports will be securely attached to the base section of one of your leg assemblies. To ensure perfect alignment, mark a clear line 2 inches up from the very base of both legs on the inside surface. This precise mark will serve as your consistent guide for aligning the top edge of the shelf supports.
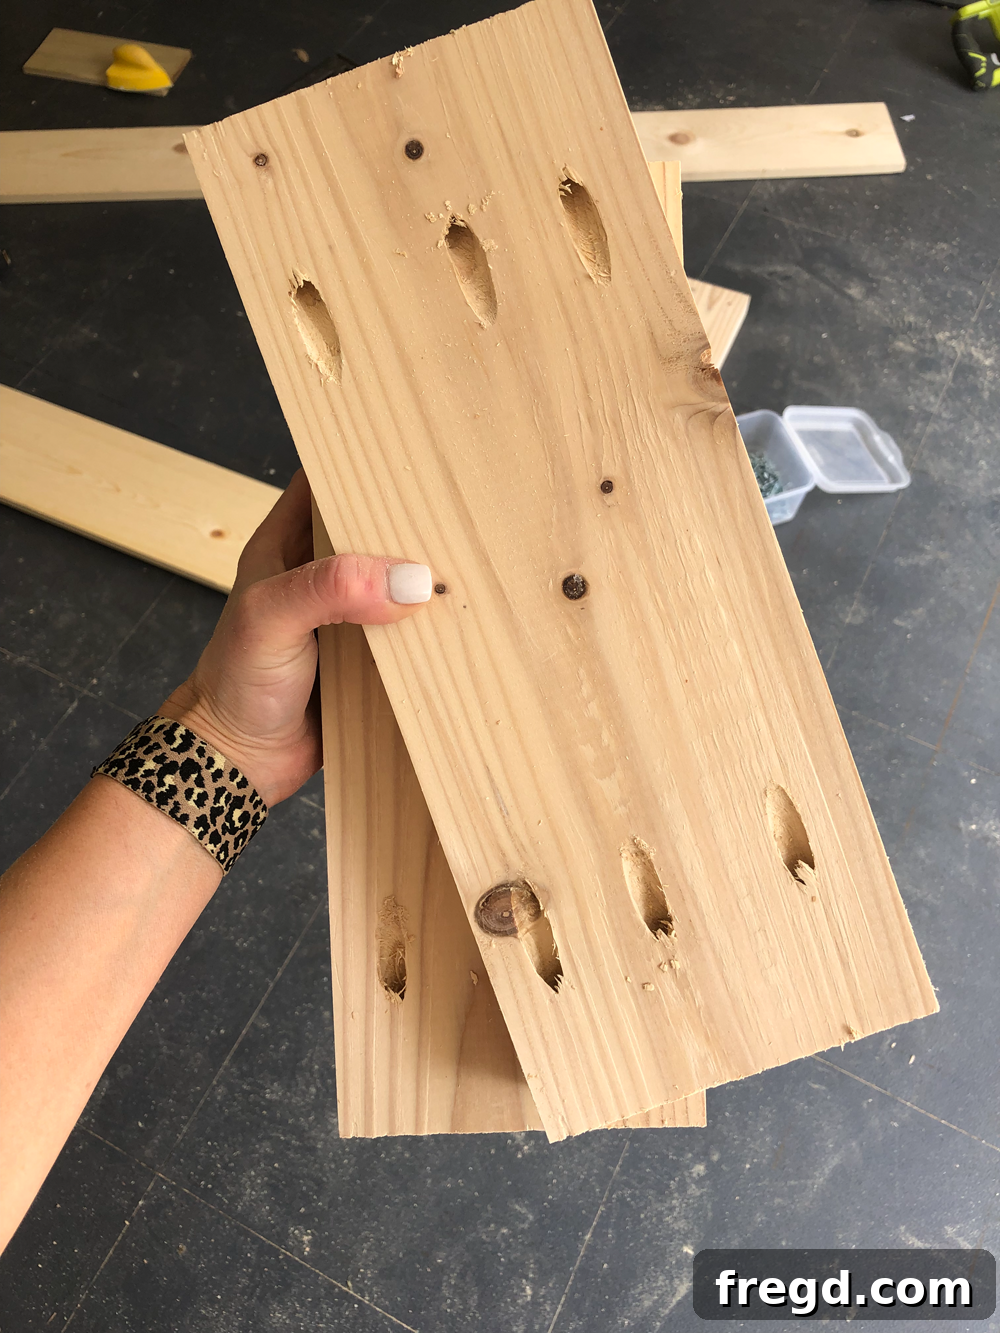
Apply a liberal amount of wood glue to the ends of the shelf supports where they will make contact with the legs. Wood glue is essential here for maximizing joint strength. Then, attach them using durable 2.5” pocket hole screws, driving them through the pre-drilled 1.5” pocket holes that you’ve created in the ends of the supports. The larger 1.5″ pocket holes and corresponding 2.5″ screws are specifically chosen for this section to provide maximum strength and rigidity, given their crucial role in supporting the console’s bottom shelf and overall stability. Using a Kreg K5 for creating these robust 1.5″ pocket holes is highly effective, yielding strong and reliable joints that are built to last.
Step 5: Connect Shorter Aprons to Leg Assembly
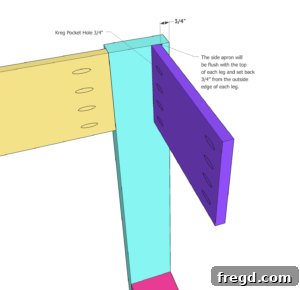
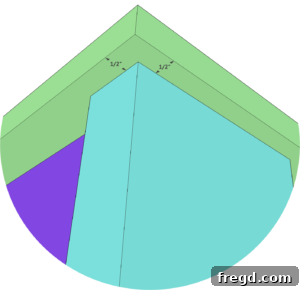
With the robust shelf supports securely in place, shift your attention to the shorter apron pieces. These components will effectively connect the ends of your leg assemblies, completing one side of the table’s upper frame. Attach both shorter aprons to the end of the existing leg assembly. It is critical to ensure two key alignments: first, they must be perfectly flush with the top surface of the legs; second, they should be set in precisely 3/4” from the outside edge of both legs. This specific inset creates a very clean, finished aesthetic and provides the necessary recess for the tabletop to rest upon later, giving it a built-in appearance.
Apply wood glue generously to the mating surfaces where the shorter aprons will join the legs. This adhesive bond is crucial for the long-term stability of the joint. Then, secure them firmly using 1.25” pocket hole screws. Drive these screws through the 3/4” pocket holes that you’ve carefully created in the aprons and into the legs. Accuracy and careful measurement in this particular step are absolutely essential for maintaining the overall symmetry, structural integrity, and visual balance of your console table. Take your time to align everything perfectly before fastening.
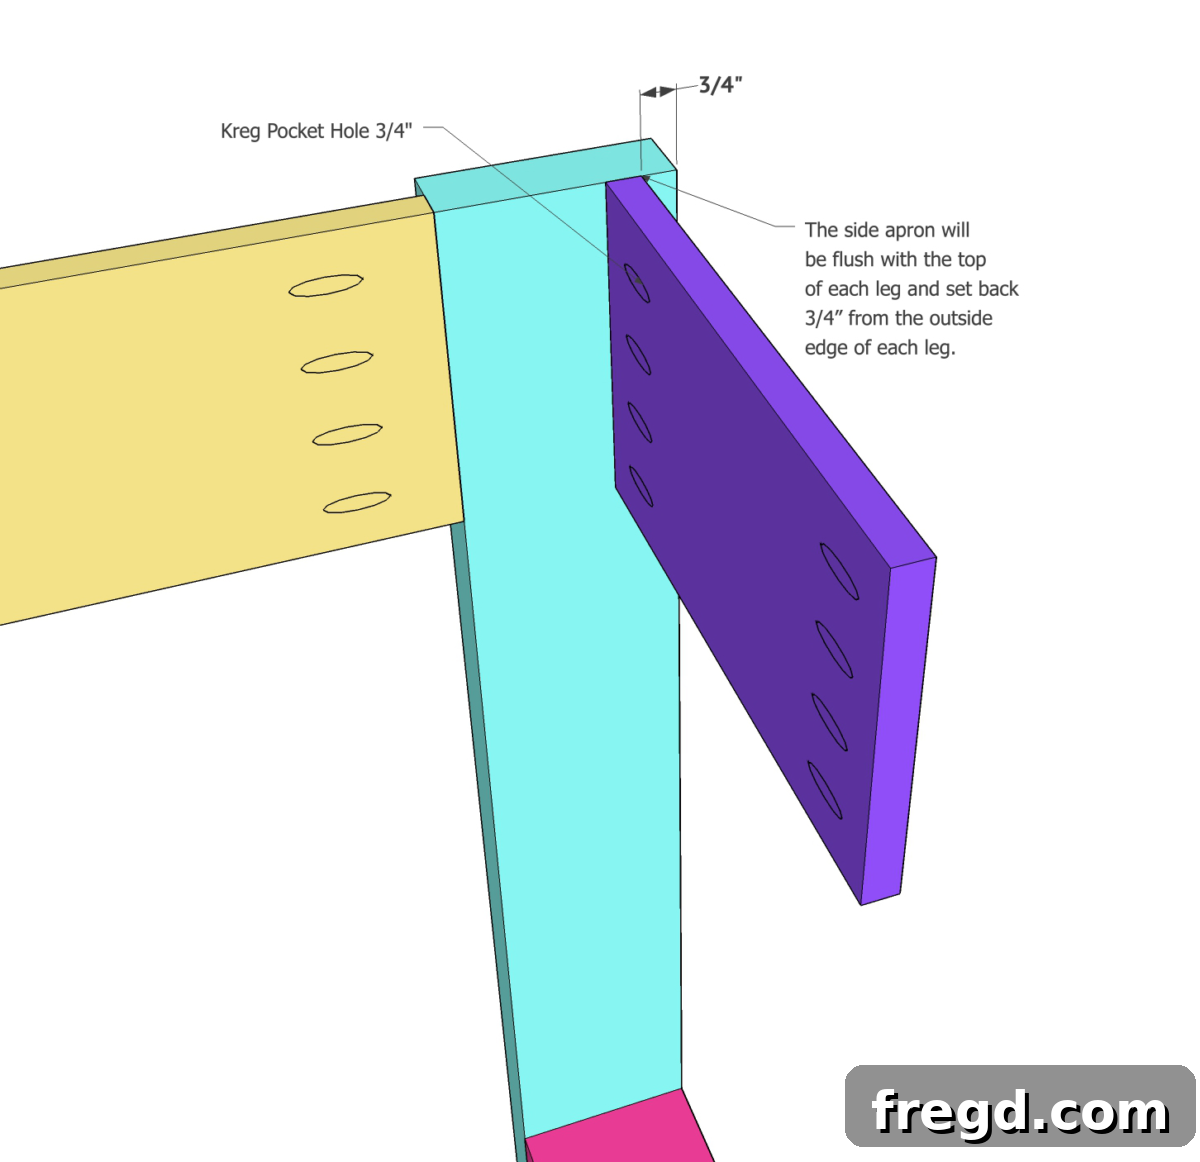
Step 6: Join the Leg Assemblies
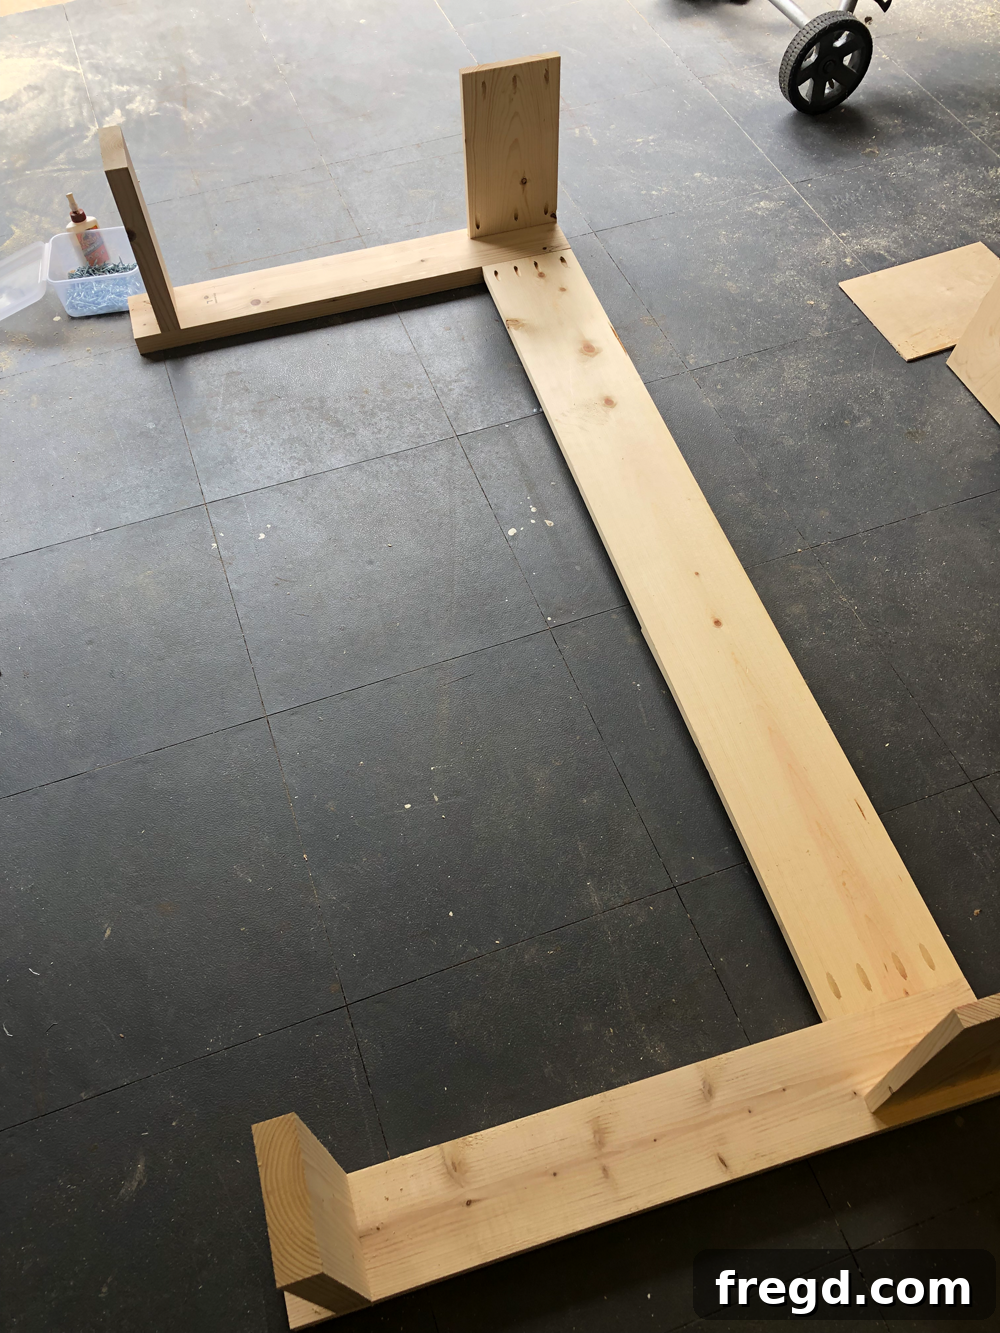
With both leg assemblies now fully constructed with their respective aprons and shelf supports, it’s time for a pivotal step: bringing them together to form the complete main frame of your console table. This action will define the overall dimensions and structural integrity of your piece. Carefully align both leg assemblies, ensuring they are perfectly parallel and at the correct distance from each other as specified in your plans. Precision here is key for a square and stable table.
Apply wood glue generously to all mating surfaces where the shelf supports from one assembly will meet the other, and where the top aprons will connect. This comprehensive application of glue will create strong bonds across all critical contact points. Then, secure them together by driving pocket hole screws through the pre-drilled pocket holes on the shelf supports and through the top aprons. Before the glue sets completely, double-check that all joints are tight, square, and flush. Using strong clamps during this process is highly recommended to hold everything firmly in place while you drive the screws and the glue begins to cure. This step effectively completes the primary base structure of your console table, providing a robust foundation and preparing it for the addition of the shelves.
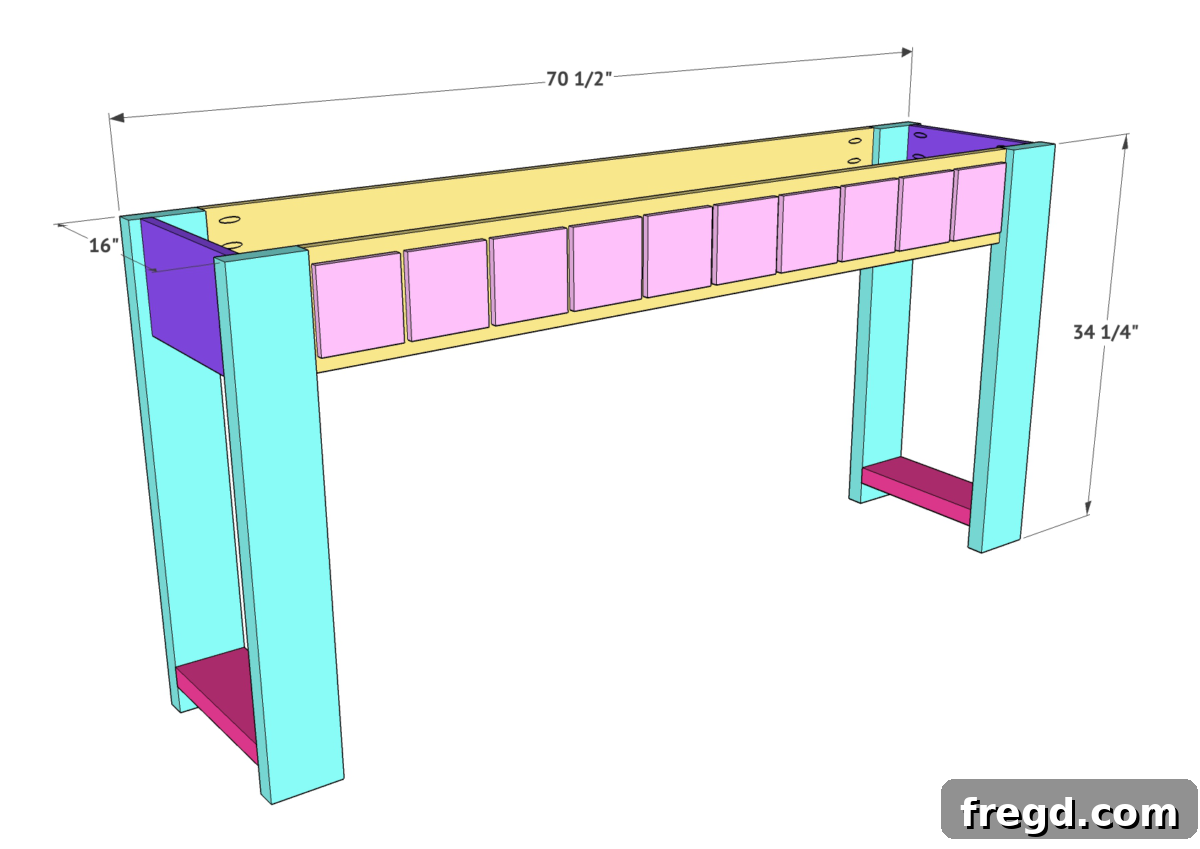
Step 7: Install the Bottom Shelf
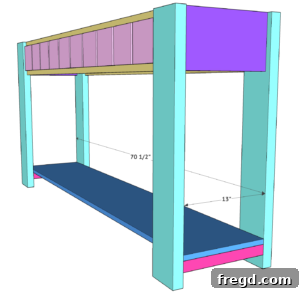
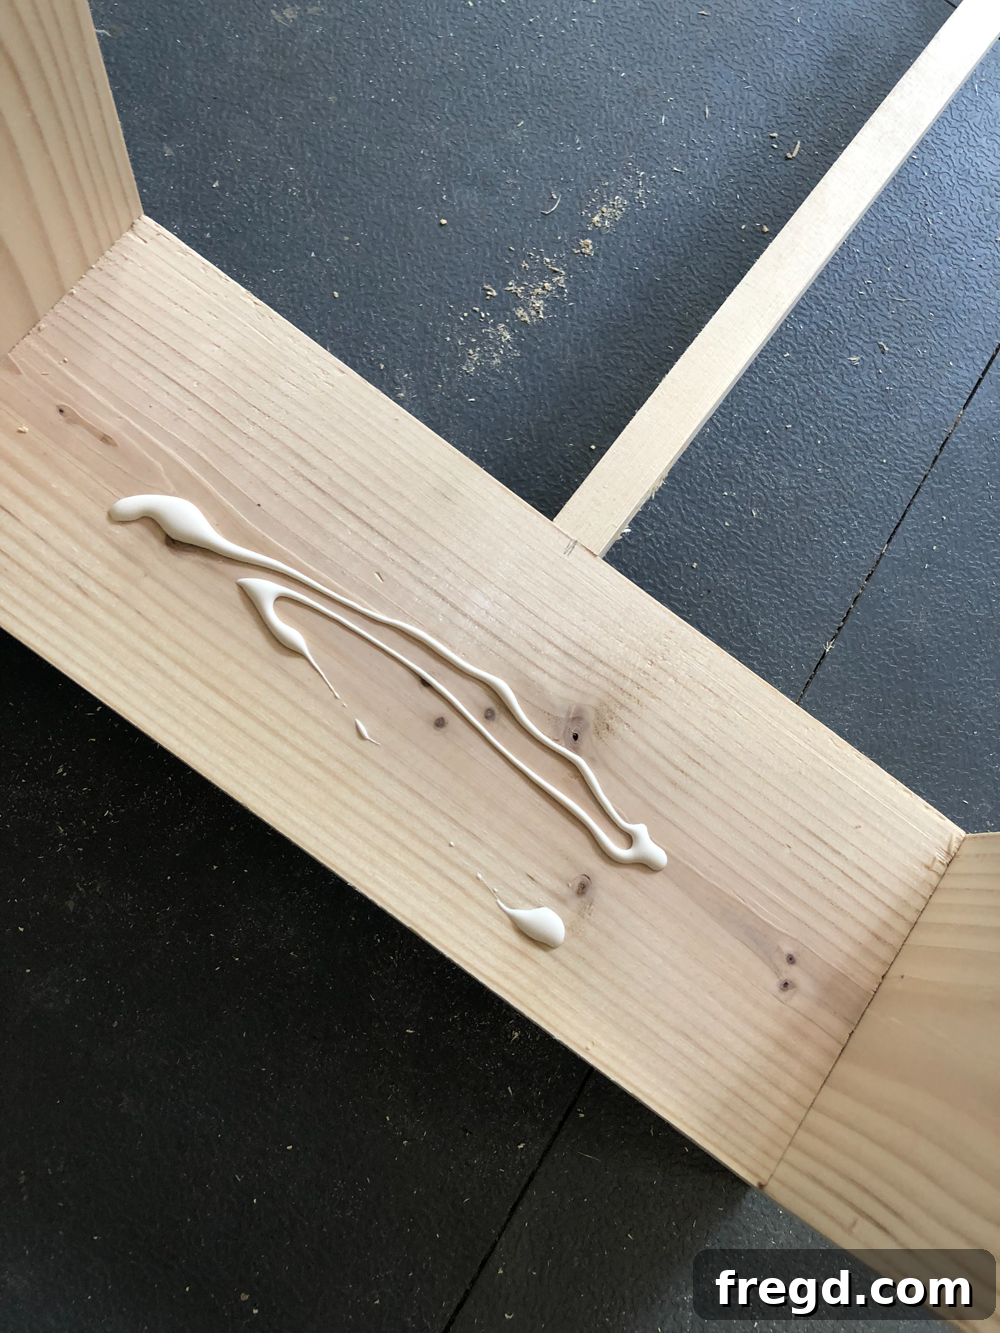
Now, let’s add the practical and aesthetic element of your console table: the bottom shelf. This will provide valuable storage or display space. For this, you’ll utilize a 3/4” thick laminated pine project panel. If you purchased a larger panel, such as a 16” x 72” one, now is the time to accurately cut it to the exact dimensions specified in your free plans. Using a table saw for this step is highly recommended to ensure perfectly clean, straight, and precise cuts that will fit snugly within your shelf supports.
Once your bottom shelf panel is cut to size, dry-fit it to ensure it fits perfectly within the framework of your shelf supports. Apply wood glue generously along the top edges of the shelf supports where the panel will rest. Carefully place the shelf panel onto these supports, ensuring it is properly aligned and centered. Secure it firmly in place using 1.25” brad nails, driving them through the shelf panel and into each support. Use enough nails to create a strong hold, but be mindful of their placement for a clean finish. This step creates a sturdy and functional storage surface that completes the lower section of your console table, adding both utility and structural integrity.
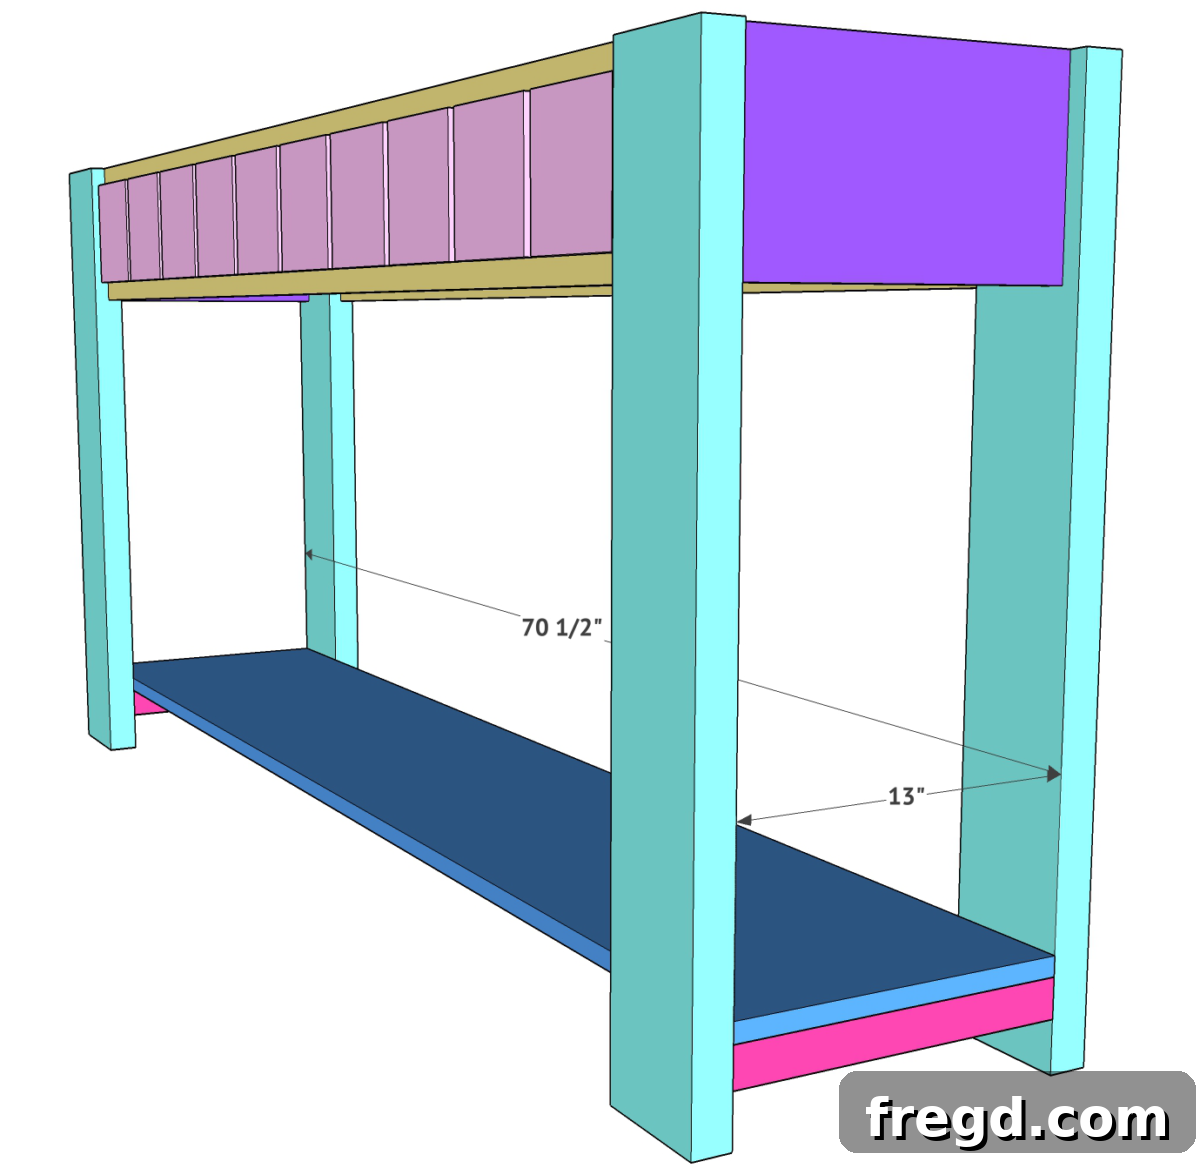
Step 8: Secure the Tabletop
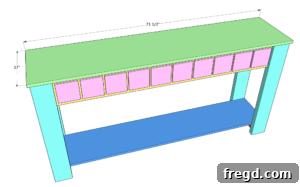
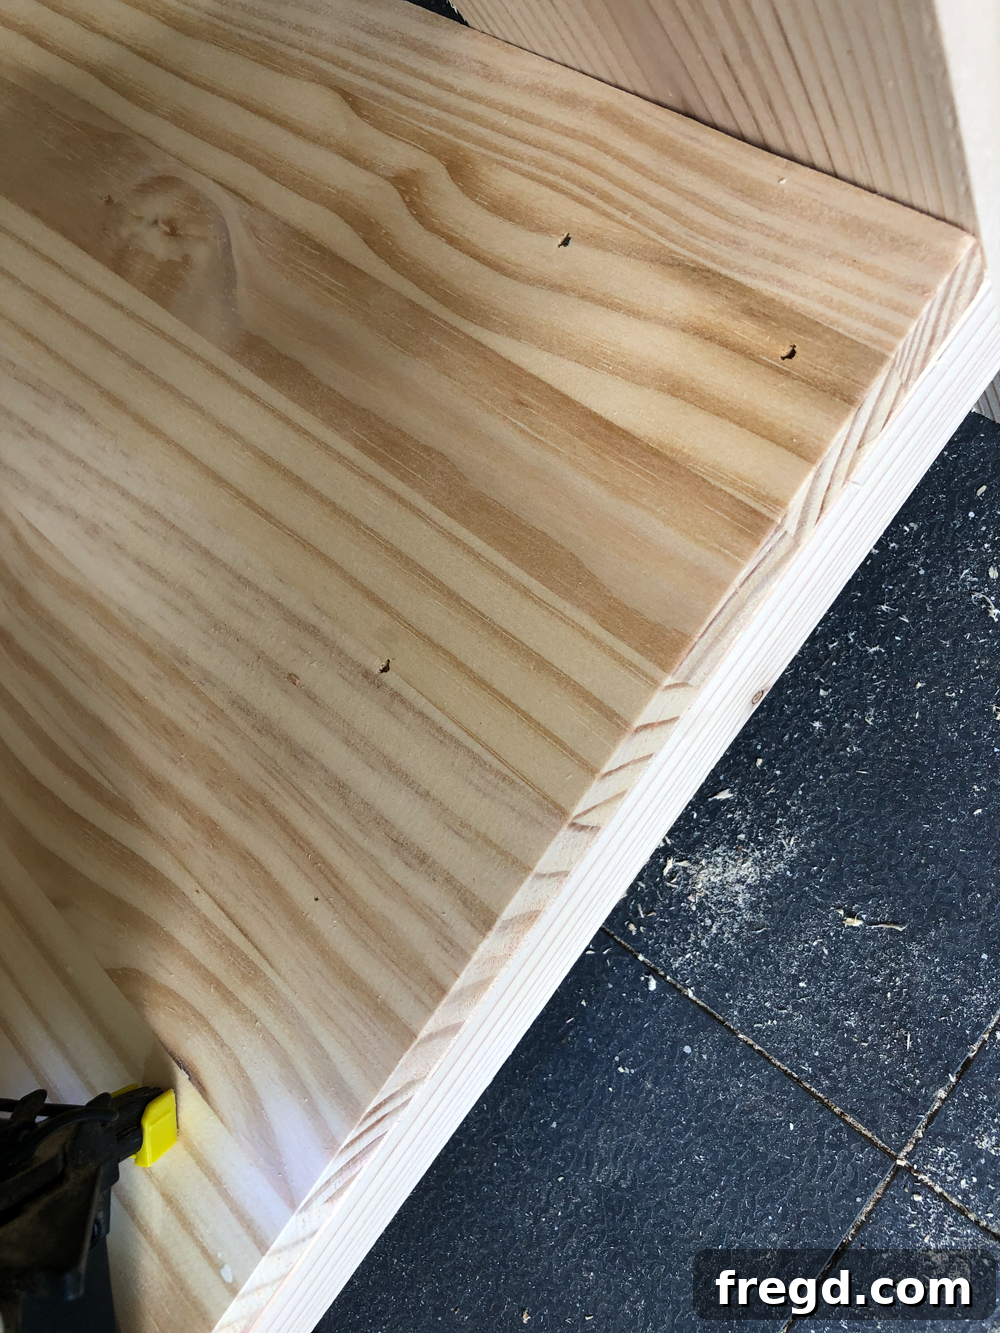
The final structural step in building your console table is attaching the tabletop. This is what provides the main display and functional surface for your finished piece. Like the bottom shelf, the tabletop will also be a 3/4” thick laminated pine project panel, cut precisely to the dimensions specified in your plans. Ensure the tabletop is perfectly centered and aligned with the base frame, allowing for an even overhang on all sides as desired. This symmetry is crucial for a balanced aesthetic.
Apply wood glue liberally and evenly to the entire top edges of all aprons where the tabletop will rest. This strong adhesive layer will bond the top securely to the base. Carefully position the tabletop onto the glued surfaces, double-checking its alignment. Then, secure it to the base using 1.25” brad nails, driving them through the top surface of the panel and into the aprons beneath. Work your way around the perimeter, ensuring even fastening. Using clamps if needed can help hold the top firmly in place and prevent any shifting while you drive the nails. Once securely attached, your console table structure is officially complete and now stands ready for its artistic transformation through finishing!
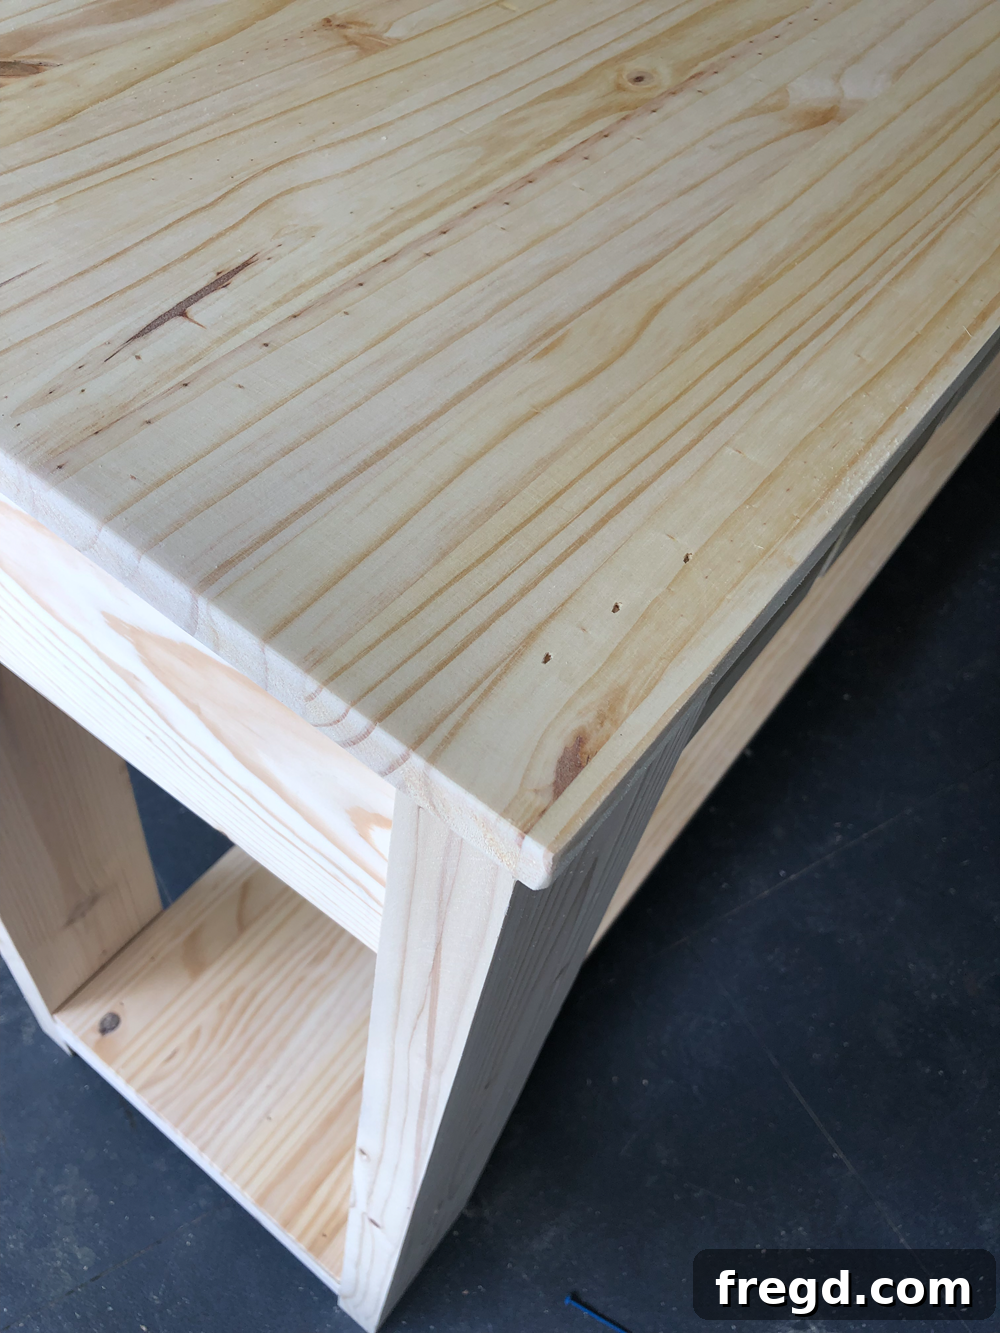
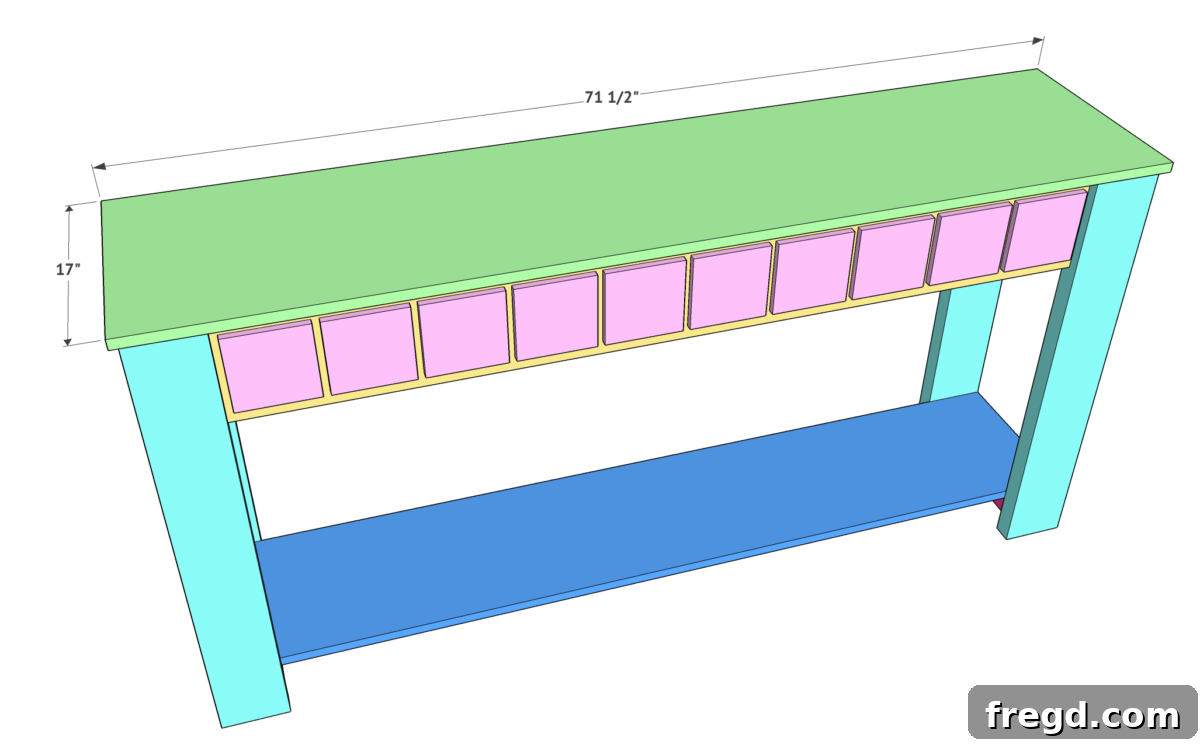
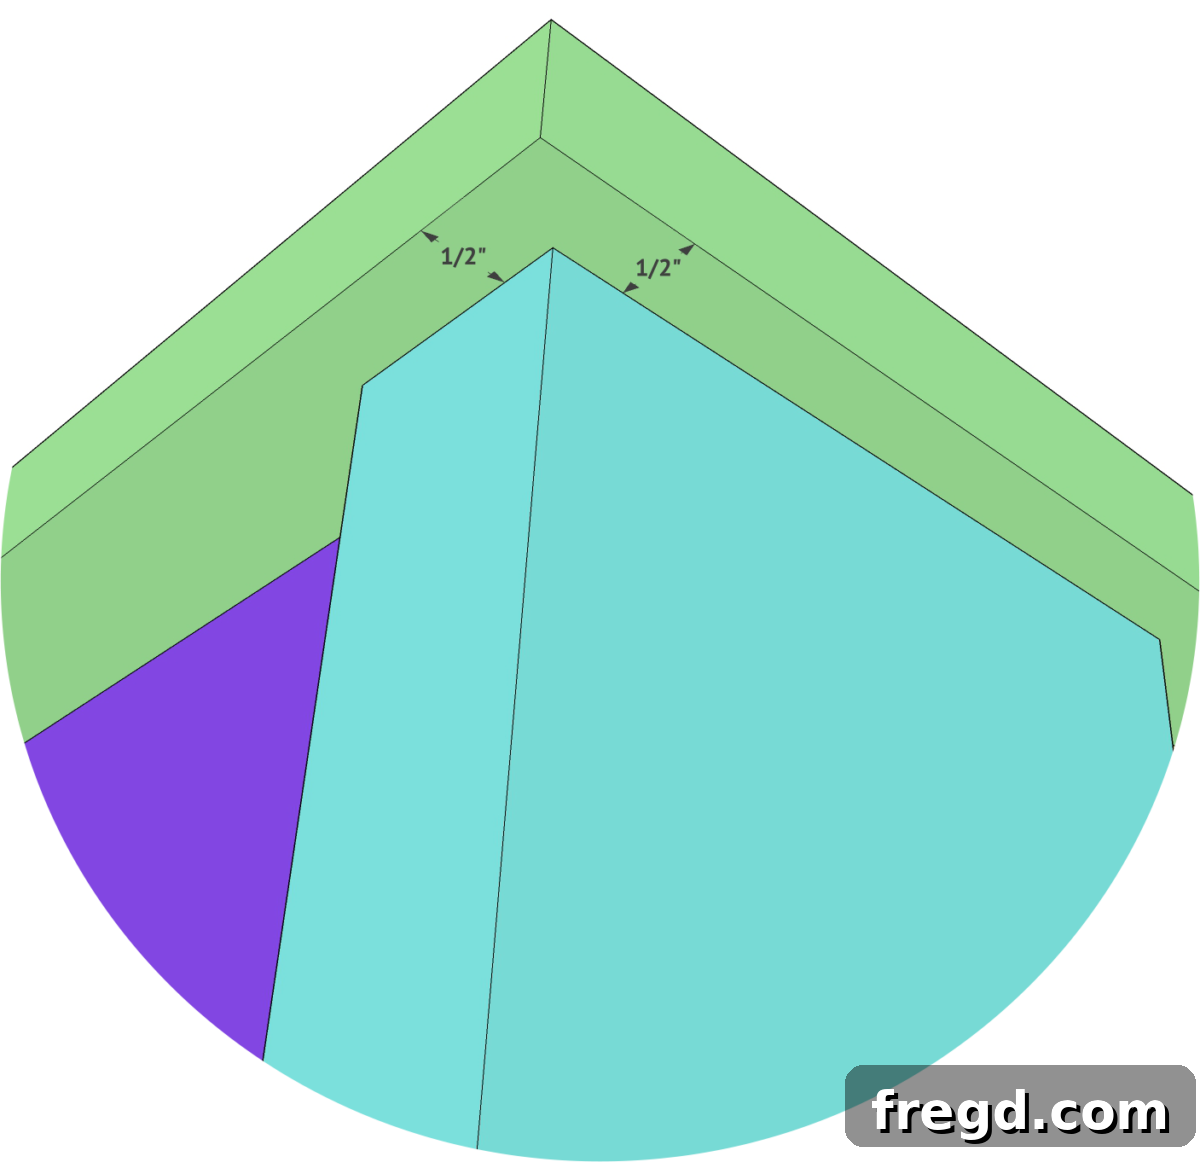
And there it is—your beautifully structured console table, ready for its artistic transformation with paint, stain, and hardware!
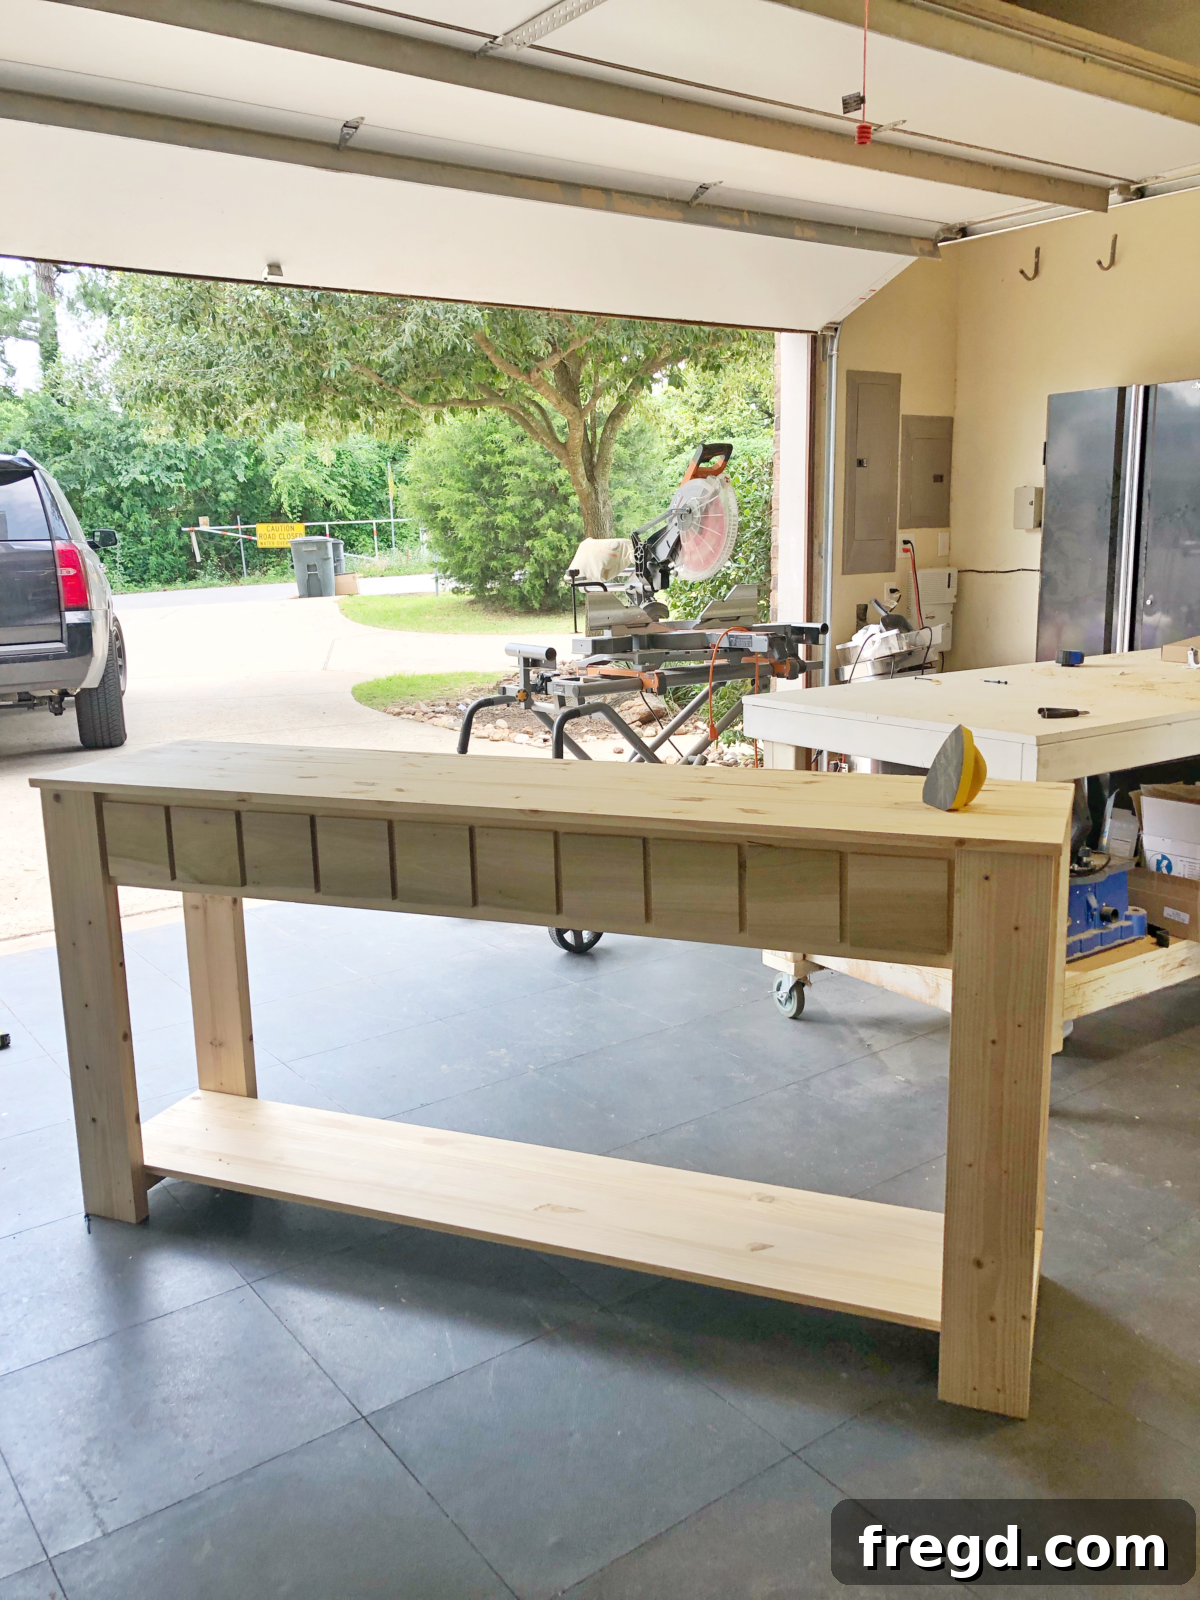
Finishing Touches & Customization
Once your console table is fully assembled and structurally sound, the exciting part of customization truly begins! This is where you can unleash your creativity and make the piece uniquely your own, perfectly matching your home’s decor style. Start by meticulously filling any visible nail holes or minor imperfections with wood filler. Allow the filler to dry completely, then sand all surfaces smooth with progressively finer grits of sandpaper (a good sequence is 120-grit for initial smoothing, then 180-grit, followed by 220-grit for a silky-smooth finish). This thorough preparation is absolutely crucial for achieving a professional, factory-like finish. After sanding, use a tack cloth or slightly damp rag to wipe down the entire table, removing all dust and debris.
You have a multitude of fantastic options for finishing: paint, stain, or even a combination of both. For a popular modern farmhouse or rustic chic look, consider a distressed paint finish, perhaps in a soft white, gray, or muted blue. If you prefer a more classic or traditional aesthetic, a rich wood stain with a clear coat sealant would be stunning, allowing the natural beauty of the wood grain to show through. Don’t forget the importance of protecting your masterpiece with a durable topcoat, such as polyurethane, lacquer, or a water-based clear coat. This protective layer is especially vital for a high-traffic area like an entryway, as it will guard against spills, scratches, and the inevitable wear and tear of daily use, ensuring your DIY console table remains beautiful and functional for many years to come.
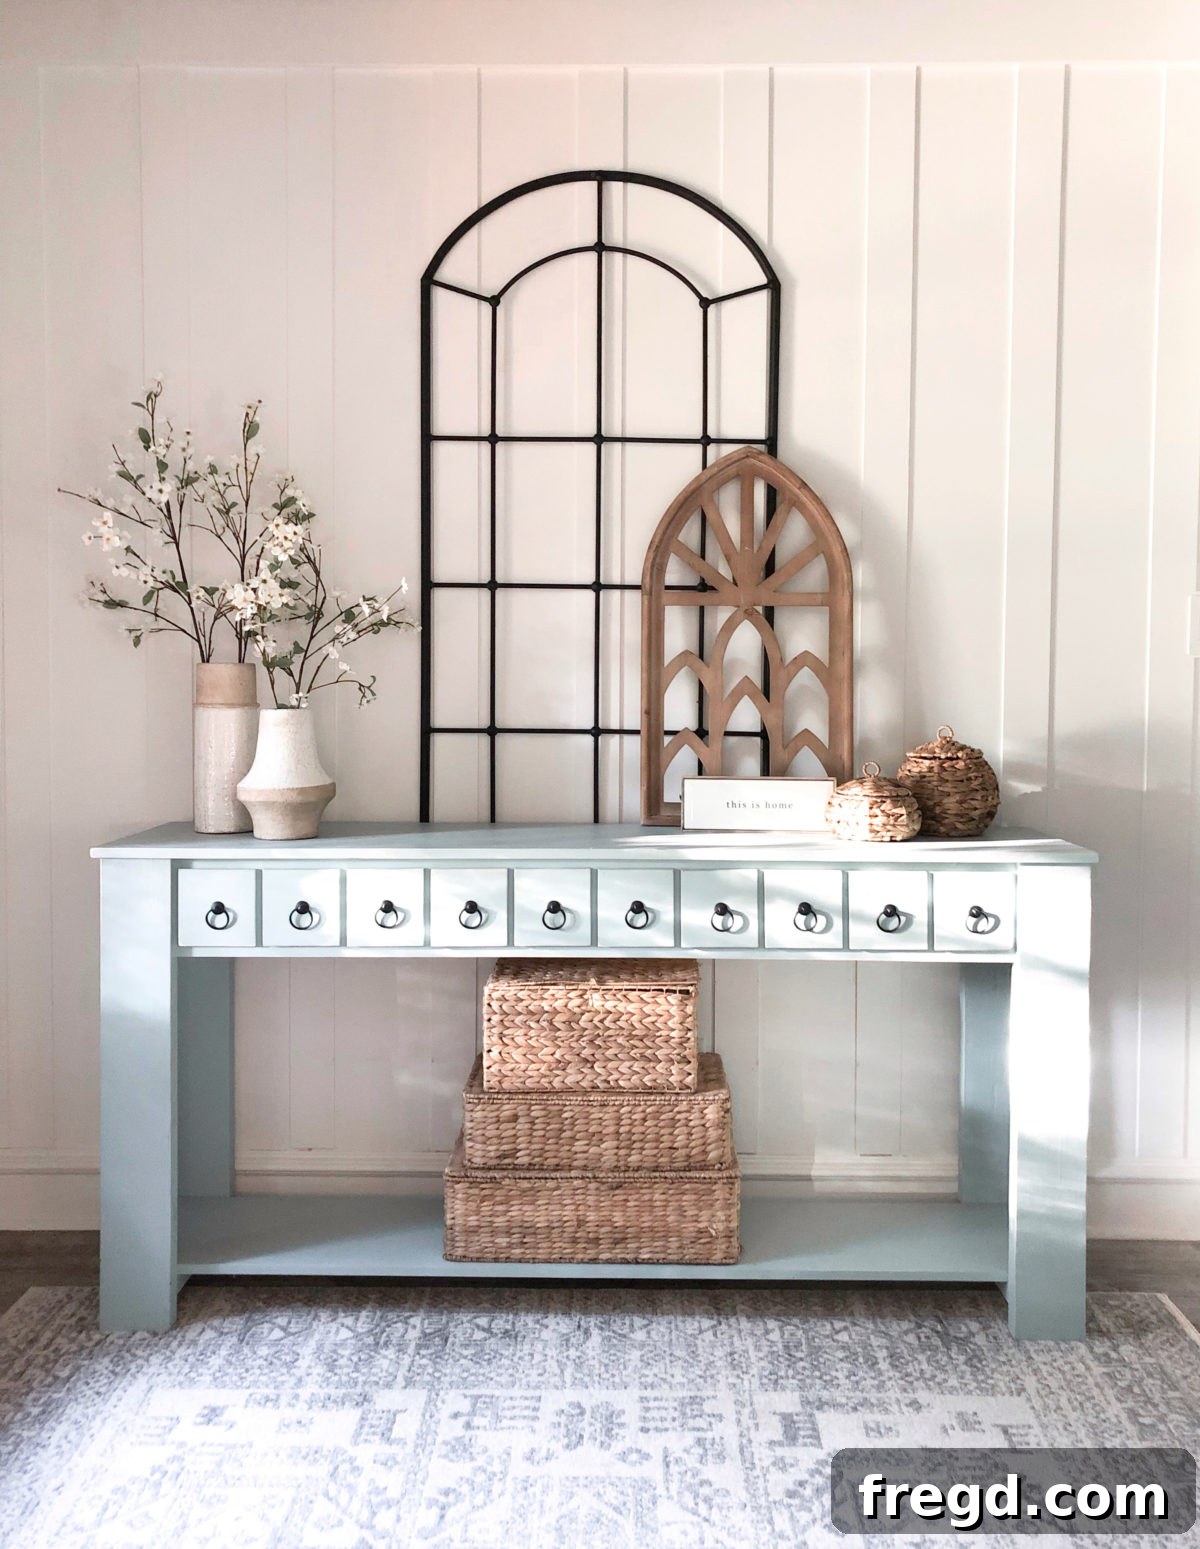
Remember, the faux drawers offer an excellent opportunity to add decorative hardware. Elegant knobs or pulls can dramatically elevate the table’s appearance, effectively mimicking the functionality of real drawers. Choose hardware that perfectly complements your home’s existing decor and the specific finish you’ve chosen for the table. This small detail can make a huge difference in the overall perceived value and style of your DIY creation.
Hardware & Decor Inspirations
The right hardware and thoughtfully curated decor can truly bring your console table to life, transforming it from a functional piece of furniture into a captivating design statement. For the faux drawers, selecting stylish pulls is key to enhancing the illusion and overall aesthetic. We found these particular charming hardware pieces that perfectly complement the console table’s design, and you can explore similar high-quality options HERE on Amazon. When choosing, consider the finish (matte black, brushed gold, antique bronze) and style (modern, rustic, vintage) that best aligns with your overall home aesthetic and the finish you’ve applied to the table.
Beyond hardware, styling your console table with a few well-chosen decor pieces will complete the look and reflect your personal taste. Think about incorporating elements that add varying heights, interesting textures, and a touch of natural beauty or personal flair. Here are a few ideas and examples to inspire you:
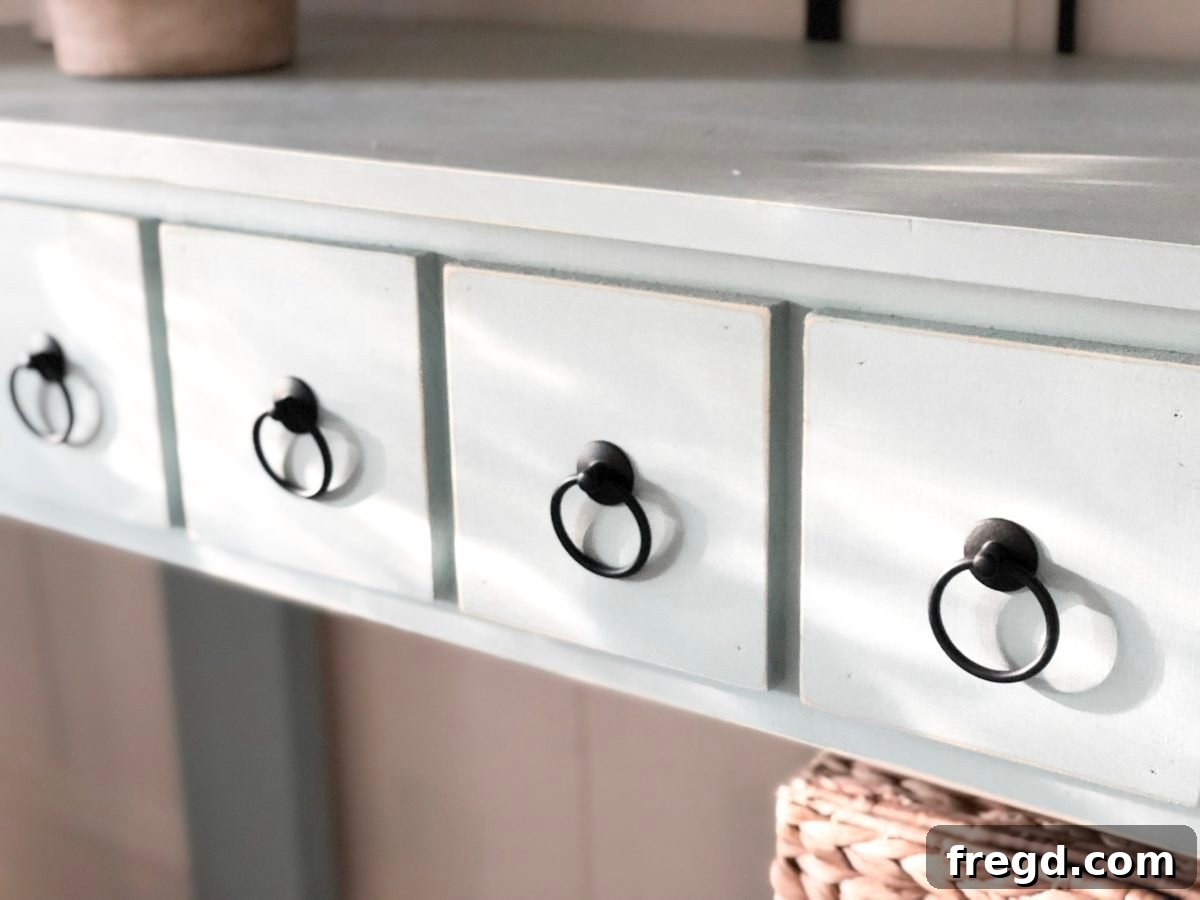
Witness how beautifully it integrates with the right accents, adding warmth and personality to the space!
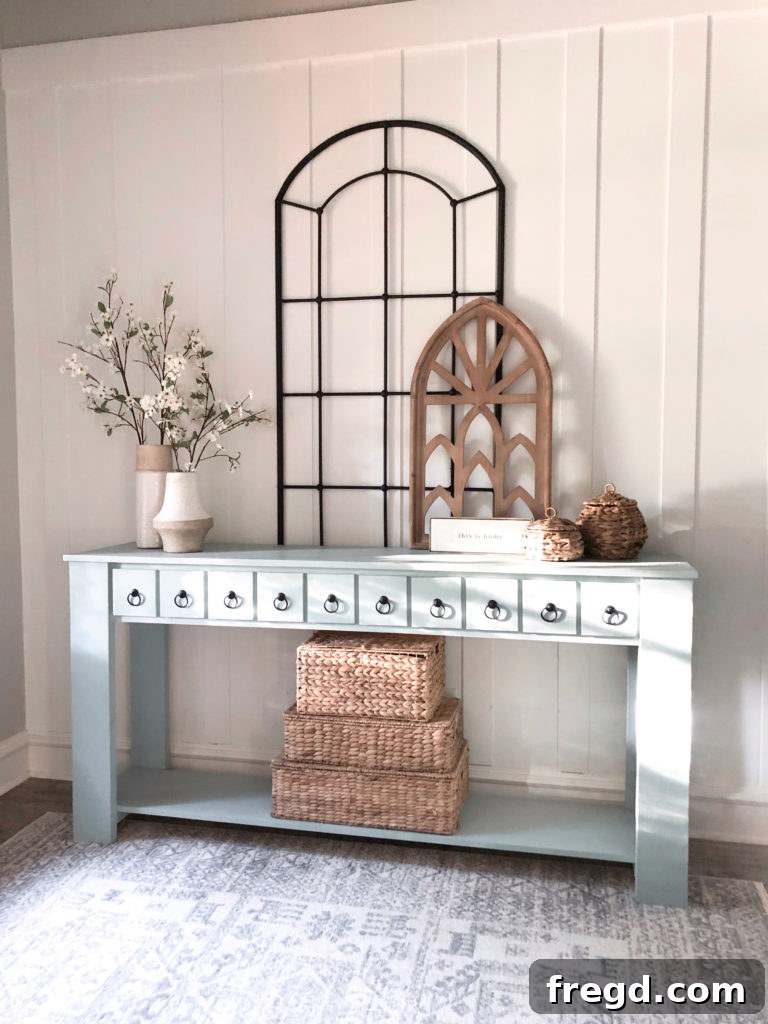
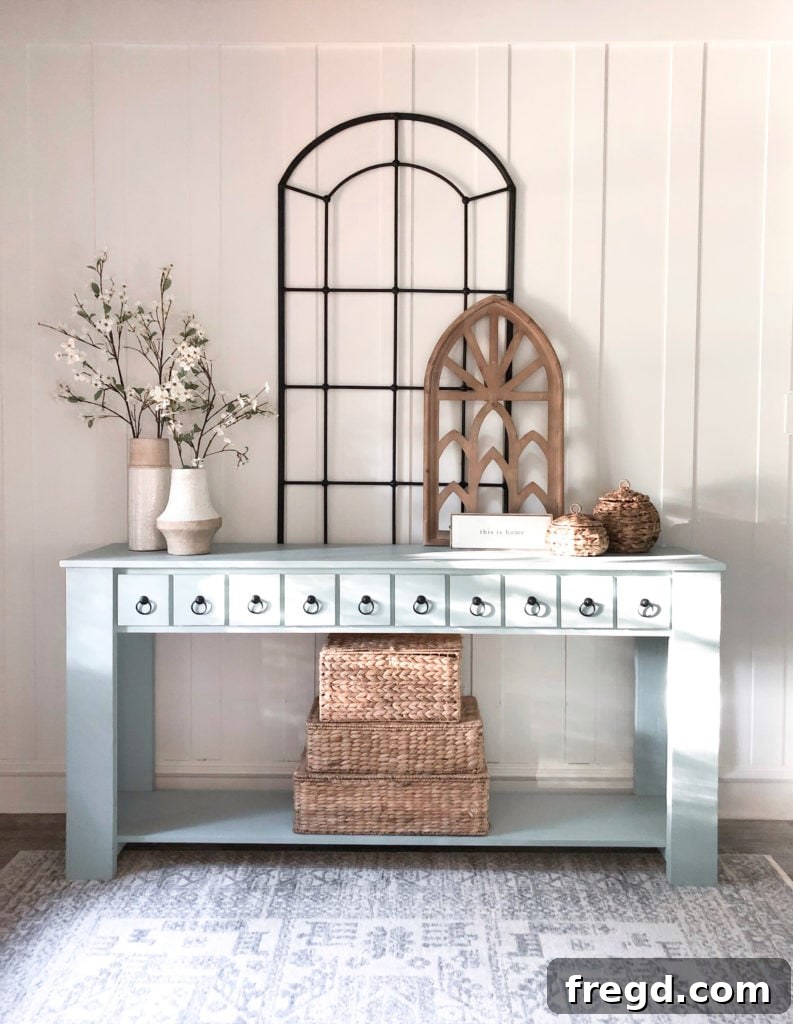
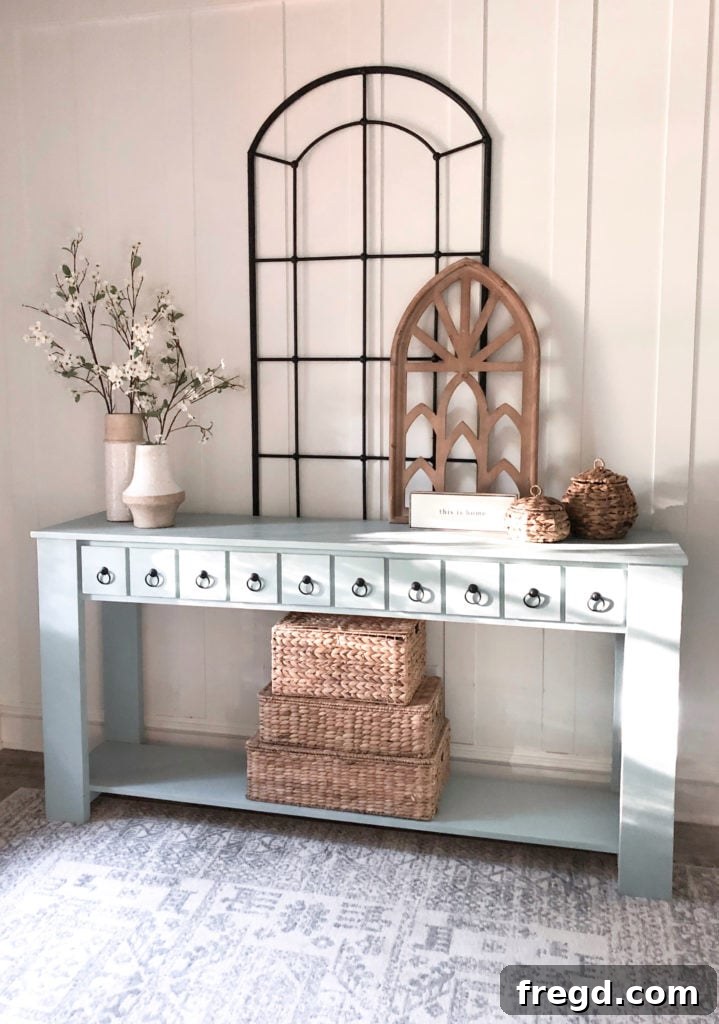
Links to DIY Faux Drawer Console Table Decor Inspirations:
- Black Plaque: A striking, minimalist accent piece that can add a touch of modern sophistication.
- Wood Plaque: Perfect for introducing warmth, natural texture, and a rustic or organic feel to your display.
- Stems: Introduce vibrant greenery or delicate floral elements to bring life, freshness, and a pop of color to your console table arrangement.
Don’t forget to check out our upcoming video tutorial! We provide a comprehensive walkthrough on the crucial steps of painting and finishing this table, offering expert tips, techniques, and product recommendations to help you achieve a truly flawless and professional-grade look. This video will be an invaluable resource for perfecting your console table’s final appearance!
Download Your Free Printable Plans
Ready to bring this stylish and functional DIY Faux Drawer Console Table to life in your own home? We’ve made it incredibly easy for you to get started with comprehensive, free printable plans. These meticulously detailed plans include precise cut lists, clear diagrams, and all the necessary measurements to guide you confidently through every single step of the project. Whether you’re a beginner or an experienced woodworker, these plans are designed to ensure a smooth, enjoyable, and successful building experience. Simply click the link below to download and print your plans, and begin crafting your stylish, budget-friendly console table today!
DOWNLOAD FREE DIY FAUX DRAWER CONSOLE TABLE PLANS HERE!
DIY Faux Drawer Console Table Project Summary
This project guides you through building a charming and highly functional faux drawer console table. Perfect for enhancing entryways, hallways, or living rooms, this table offers a high-end, custom look on a practical DIY budget. Detailed free plans are available to make your building experience seamless and enjoyable. The final product is a sturdy, stylish piece ready for your personal finishing touches.
Key Materials
- 2 x 6 x 8 Framing Lumber (2 pieces) for aprons and supports.
- 1 x 8 x 8 Pine or Whitewood (2 pieces) for legs.
- 1/2″ x 6″ x 48″ Poplar or Pine Craft Board (2 pieces) for faux drawer faces.
- Laminated Pine Project Panels (2 pieces, check plans for exact sizing) for tabletop and bottom shelf.
- Various pocket hole screws (1.5″, 1.25″, 2.5″) and 1″ brad/pin nails.
- Wood glue, sandpaper, desired finish (paint/stain), and decorative hardware.
Quick Instruction Overview
- Prepare Apron Pieces: Cut your longer apron pieces to size. Add 3/4” pocket holes to each end on the back of both pieces.

- Add Faux Drawer Faces: Cut 1/2” x 6” craft boards into 5.5” squares. Using a guide line 1″ from the top of the apron and 1/2″ spacers, evenly space and attach these faces to the front of one longer apron with wood glue and 1” brad or pin nails.
- Attach Aprons to Legs: Secure both long aprons to the table legs using wood glue and 1.5” pocket hole screws. Ensure they are flush with the back and top of each leg.
- Attach Shelf Supports: Rip 2×6 boards to 5” wide for the shelf supports. Mark 2” from the base of the legs and attach the supports at this line using wood glue and 2.5” pocket hole screws through 1.5” pocket holes.
- Connect Shorter Aprons: Attach both shorter aprons to the end and top of one leg assembly. They should be flush with the top of the legs and set in 3/4” from the outside edge. Use wood glue and 1.25” pocket hole screws through 3/4” pocket holes.
- Join Leg Assemblies: Bring both leg assemblies together and attach them through the pocket holes on the shelf supports and through the top aprons. Remember to apply wood glue between all connecting joints for maximum strength.
- Install Bottom Shelf: Cut a 3/4” thick laminated pine project panel to size for the bottom shelf. Attach it to the shelf supports using wood glue and 1.25” brad nails.
- Secure Tabletop: The final step is to attach the console table top (another 3/4” laminated pine project panel). Secure it to the base using wood glue and 1.25” brad nails, ensuring it’s centered and flush.
- Note Spacing: Pay close attention to the spacing and overhang of the tabletop to achieve the desired aesthetic and functionality.