
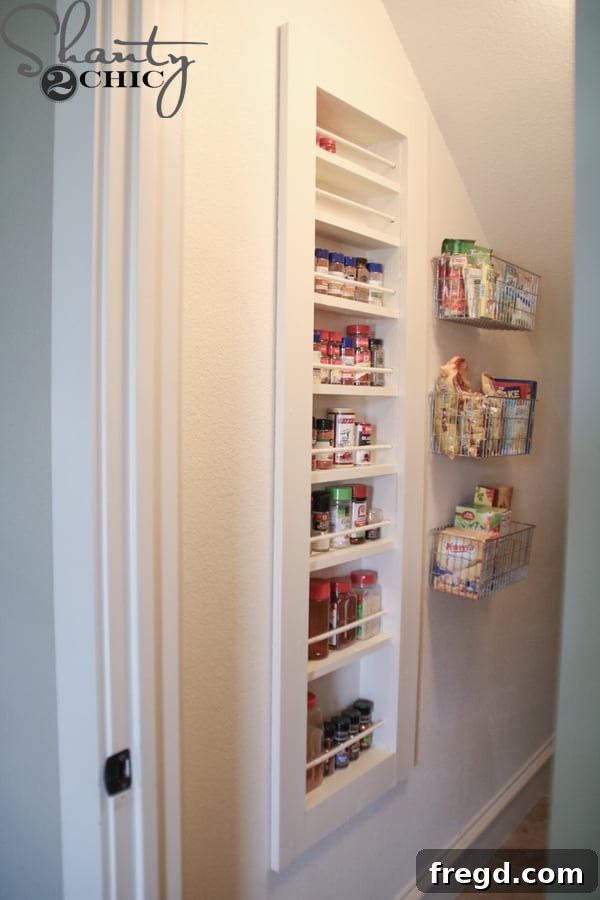
Hello fellow DIY enthusiasts! Today, I’m thrilled to share a project that has been on my wishlist since we first moved into our home: a custom-built, in-wall spice rack for my pantry. Like many home improvement ideas, this one was temporarily shelved as I tackled other furniture building projects. But I finally dedicated the time to bring it to life, and I couldn’t be happier with the results! It has truly transformed my pantry, making it more functional and aesthetically pleasing.
Reclaim Your Pantry: The Benefits of a Built-in Spice Rack
My pantry, while generously sized, presents a common challenge: it’s quite narrow. This configuration often makes efficient storage difficult, leading to cluttered shelves and lost items. I quickly realized that building a DIY spice rack directly into the wall would be the ultimate space-saving solution. This approach maximizes every available inch, utilizing the often-overlooked space between wall studs.
You might find the idea of cutting a large hole in your wall and constructing something to fit perfectly inside a bit intimidating. However, I assure you, this project is surprisingly straightforward and incredibly rewarding. The beauty of adding decorative trim to the front of the rack is that it provides a generous margin for error, neatly concealing any minor imperfections in your drywall cuts. This means even novice DIYers can achieve a professional-looking finish with confidence.
A built-in spice rack offers numerous advantages over traditional freestanding units. It eliminates clutter on shelves, provides a dedicated home for every spice jar, and creates a clean, streamlined look that integrates seamlessly with your pantry design. This isn’t just about organizing spices; it’s about optimizing your entire pantry for a more enjoyable and efficient cooking experience.
Essential Preparations: Measurements and Safety First
Before you embark on this exciting project, careful planning and stringent safety precautions are paramount. While I’ll provide my specific measurements as a reference, remember that every wall cavity is unique. The width between studs can vary, so it’s absolutely crucial that you measure your own space meticulously and cut your materials to fit accordingly.
***When cutting into any wall, your first and most critical step is to ascertain what lies behind it. In my case, having built the house, I was certain there were no plumbing pipes or electrical wiring in the chosen wall section. However, if you’re not absolutely sure, investing in a reliable MultiScanner is non-negotiable. This invaluable tool can detect metal, wooden studs, and live AC electrical wires, helping you avoid costly damage, potential injuries, or even electrocution. Such devices are readily available and can be found HERE on Amazon. Always prioritize safety over speed when undertaking any home renovation project.
DIY Built-in Spice Rack: Comprehensive Supplies & Tools List
Having a clear understanding of the materials and tools required will ensure a smooth and efficient building process. Gathering everything beforehand saves time and prevents interruptions. Here’s a detailed list of what you’ll need to create your own functional and beautiful built-in spice rack.
Supplies:
- 3 – 1×4 boards @ 10 ft length: These will form the main structural components, including the long side pieces and the majority of your shelves.
- 1 – 1×4 board @ 6 ft length: Useful for additional shelf pieces or the decorative trim.
- 1 – Scrap 1/4″ plywood to fit: This will serve as the back panel of your spice rack. My dimensions were 57″x14 3/4″, but yours will be custom to your wall opening.
- 3 – 3/8″ dowel rods @ 4 ft length: Essential for keeping your spice jars securely on their shelves.
- Wood Glue: Provides extra strength and durability to all joints, ensuring your rack stands the test of time.
- Wood Filler: For meticulously filling nail holes and imperfections, creating a smooth, paint-ready surface.
- 1 1/4″ Pocket Hole Screws: For assembling the main frame of the spice rack with strong, concealed joints.
- 2″ Wood Screws: To firmly secure the completed spice rack to the wall studs.
- 1 1/4″ Brad Nails: For attaching the decorative trim pieces with minimal visibility.
- 3/4″ Staples (or finishing nails): For securing the plywood back panel.
Tools:
- Miter Saw: Crucial for making precise and accurate cuts on your wood boards, ensuring everything fits perfectly.
- Drill: Essential for drilling dowel holes, pilot holes, and driving screws.
- Kreg Jig: An invaluable tool for creating strong, concealed pocket-hole joints, making assembly much cleaner and sturdier.
- Rotary Saw: Specifically designed for clean and efficient cuts in drywall. My Ryobi Rotary Cutter was perfect for this task.
- Nailer (Brad Nailer): Speeds up the trim attachment process significantly. Can be substituted with a hammer and finish nails for a more manual approach.
- Stapler (Manual or Powered): For quickly and securely attaching the plywood back. A hammer and finish nails can also be used here.
- Sander (Orbital or Block Sander): For smoothing any rough edges and preparing the wood filler for painting.
- Measuring Tape: For all critical measurements, ensuring accuracy at every stage.
- Level: To draw straight lines and ensure your rack is perfectly aligned.
- Stud Finder: Absolutely necessary for locating wall studs safely and accurately.
- Pencil: For marking all cuts and drilling locations.
- Rubber Mallet: Highly recommended for gently fitting the spice rack into a tight wall opening without damage.
- Forstner Bit: A specific drill bit used to create clean, flat-bottomed holes for the dowel rods. Match the bit size to your dowel rod diameter.
- Safety Glasses & Dust Mask: Always wear appropriate personal protective equipment when cutting, drilling, and sanding.
Step-by-Step Guide: Crafting Your Custom Built-in Spice Rack
Now that you’ve gathered your materials and tools, and performed the necessary safety checks, let’s get into the satisfying process of building your very own built-in spice rack. Follow these steps carefully for a successful project.
Step 1: Locate Wall Studs and Precisely Mark Your Opening
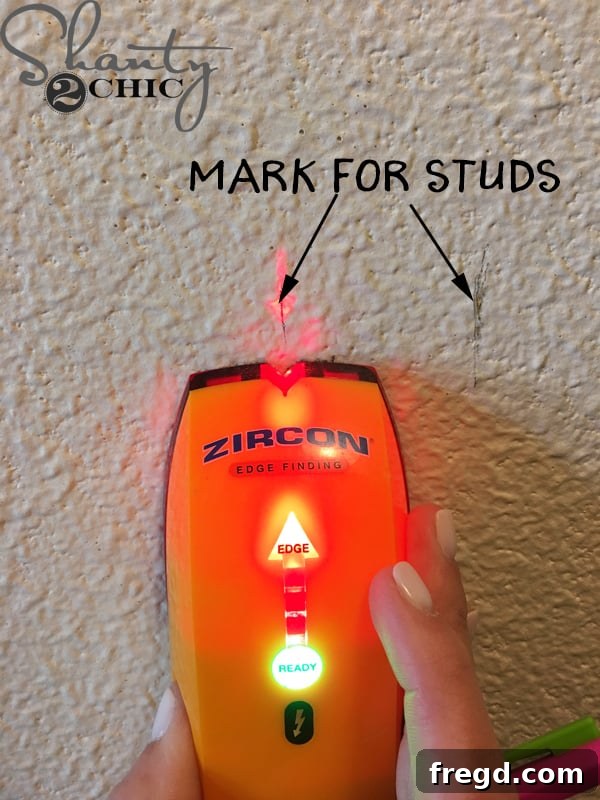
Your project begins with accurately locating the structural elements of your wall. Use your stud finder to pinpoint the exact positions of the two vertical studs that will flank your spice rack. These studs provide the necessary support for your built-in unit. I used this particular stud finder, which proved reliable in identifying the stud edges. Mark these locations clearly with a pencil.
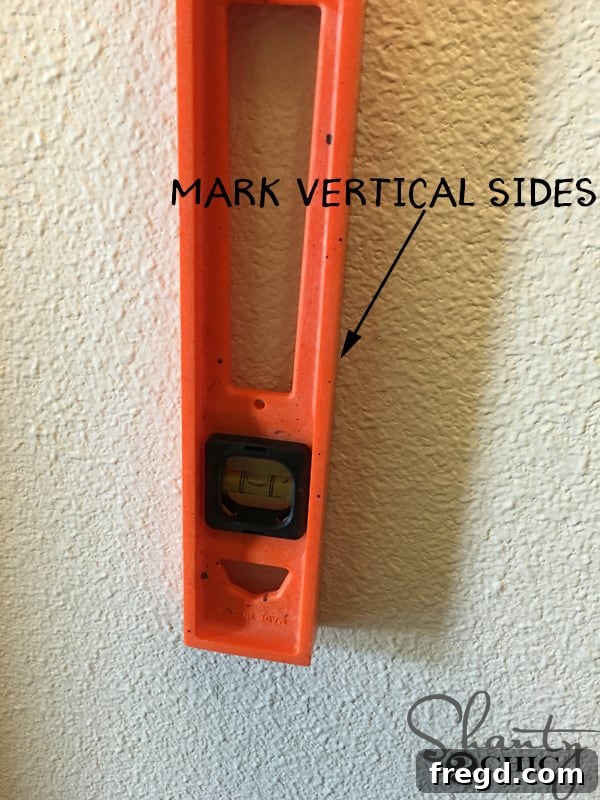
Once the studs are located, use a level to draw a perfectly straight vertical line along the inside edge of each stud. These lines will delineate the vertical boundaries of your spice rack opening. Decide on the desired height of your rack; for my pantry, a height of 57 inches was ideal for maximizing storage. Ensure these lines are crisp and accurate, as they guide your cuts.
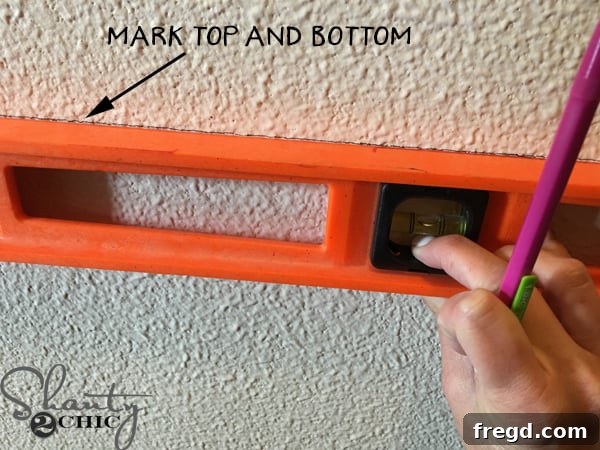
Next, complete your outline by marking the horizontal top and bottom lines that connect your vertical lines. These will define the upper and lower edges of your opening. Crucially, measure the exact distance between your studs – for me, it was precisely 14 3/4 inches. This measurement is vital, as it directly determines the internal width of your spice rack. Double-check this dimension to ensure a custom fit.
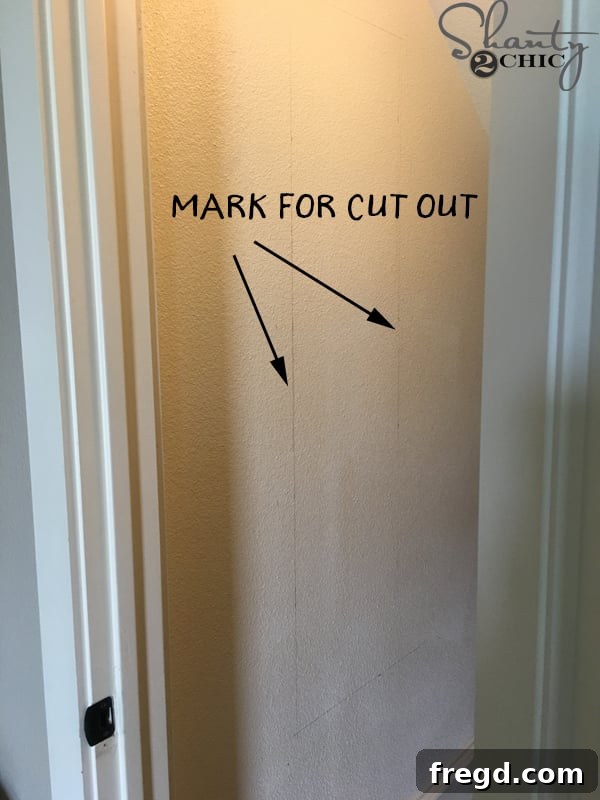
At this stage, you should have a neatly drawn rectangular box on your wall, representing the exact dimensions of the opening you are about to create. My final opening outline measured 57 inches in height by 14 3/4 inches in width. Taking the time to precisely mark and verify these dimensions will prevent headaches further down the line. Accuracy here is key to a professional outcome.
Step 2: Expertly Cut the Drywall Opening for Your Built-in Unit
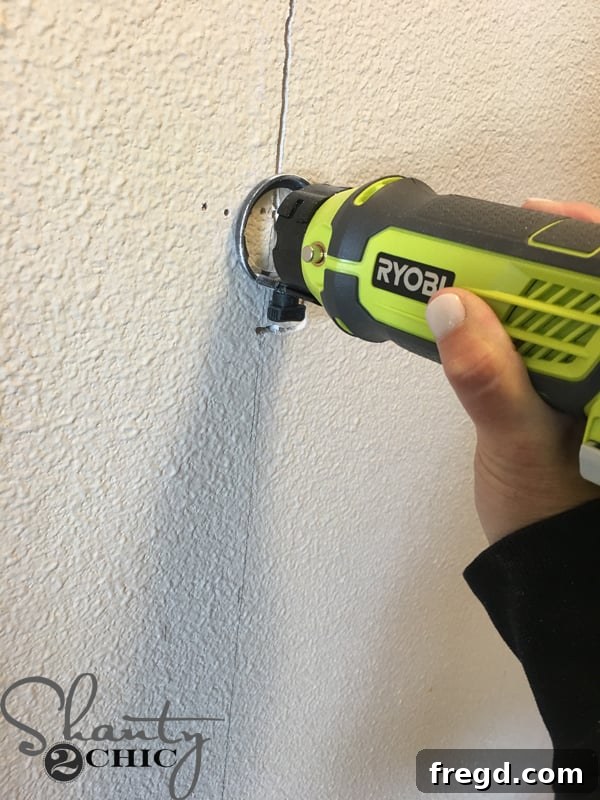
With your opening clearly marked, it’s time to make the cuts. I utilized my Ryobi Rotary Cutter for this, starting by cutting along the vertical lines first. The key is to guide the rotary saw blade precisely along the inside edge of your marked lines, ensuring it runs just alongside the stud. This specific tool is highly effective for drywall and is quite affordable, often found as a bare tool for about $40. You can purchase it HERE at Home Depot. Always wear safety glasses and a dust mask to protect yourself from airborne particles.
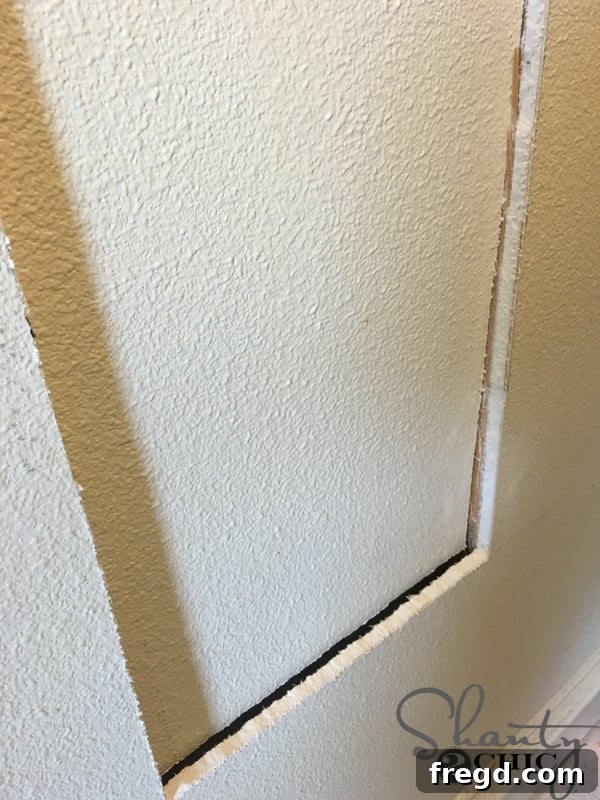
After completing the vertical cuts, proceed with the horizontal top and bottom lines. While striving for perfectly smooth cuts is always the goal, don’t fret over minor imperfections or slightly jagged edges. The trim you will install later is specifically designed to cover these areas, providing a forgiving border. Focus on keeping your cuts as level as possible to ensure the spice rack sits squarely within the opening. Once all cuts are made, carefully remove the rectangular piece of drywall.
A Quick DIY Detour: The Toilet Paper Holder Fail!
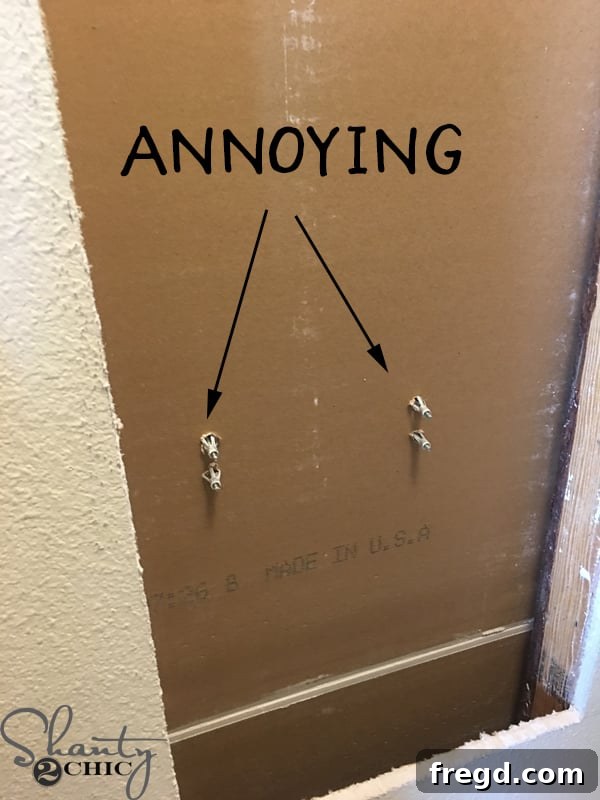
Every DIY project comes with its unique challenges and learning moments! As I triumphantly pulled the cut section of drywall from the wall, I was met with an unexpected discovery: the anchors for a toilet paper roll holder that I had previously installed on the opposite side of the wall! It was a minor, albeit annoying, oversight that halted my progress momentarily. This meant a quick pause to carefully remove and relocate the toilet paper holder to another wall in our half-bath. This unexpected hiccup serves as a perfect real-world reminder of why thorough wall inspection is so crucial, even when you think you know your home intimately. It’s all part of the problem-solving journey in DIY!
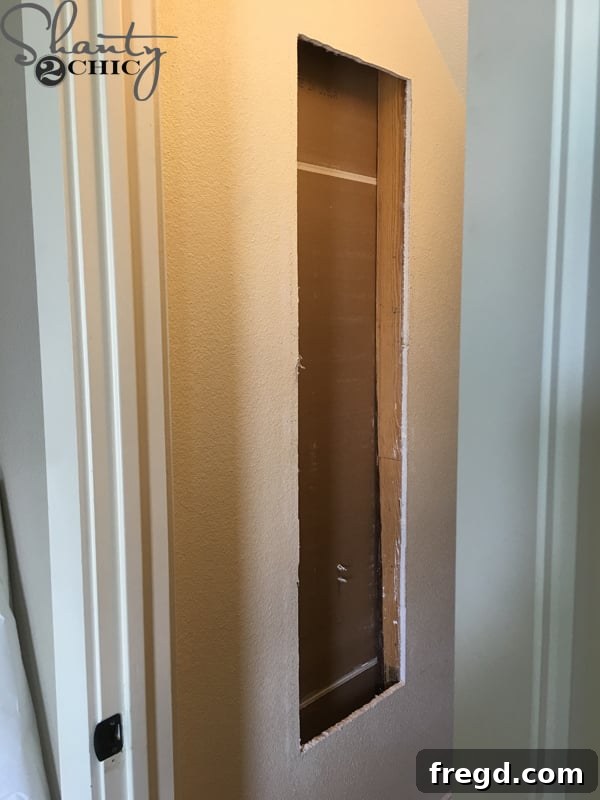
With the wall opening now perfectly clear and any unforeseen obstacles (like rogue toilet paper holders) addressed, it’s time to take your final, precise measurements of the internal cavity. Although you’ve already marked and cut, a final measurement of the actual opening will confirm the exact dimensions for your spice rack. This last check ensures that your custom unit will fit snugly and flawlessly within its new home, ready for assembly.
Step 3: Constructing the Frame and Shelves of Your Spice Rack
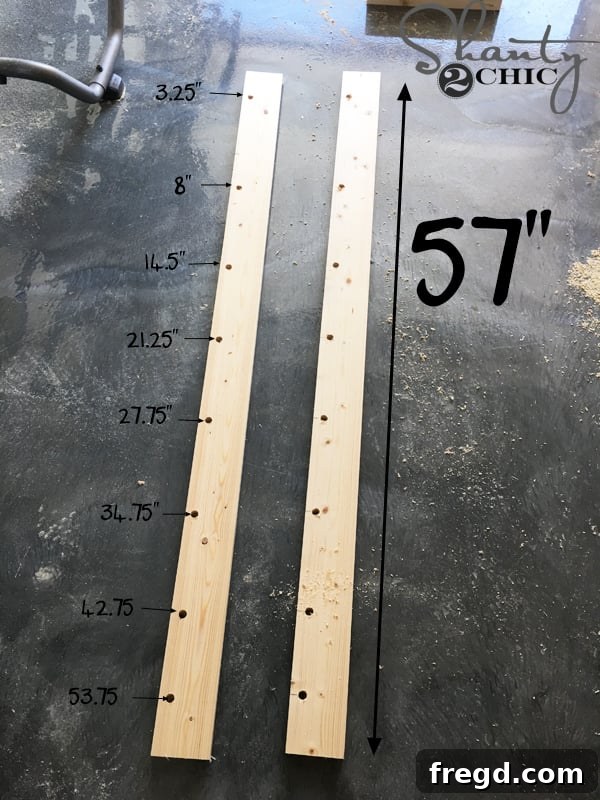
Begin the assembly by cutting two 1×4 pine boards to the exact height of your wall opening – 57 inches in my case. These boards will form the sturdy vertical sides of your spice rack. Next, using a Forstner bit, carefully drill holes into each of these side boards. These holes are designed to hold the dowel rods that will keep your spice jars from toppling off the shelves. I placed my holes approximately 3/4 inch from one edge of the board. The image above clearly illustrates the precise measurements from the top of each board where these holes were drilled, ensuring consistent spacing and functionality for your dowels.
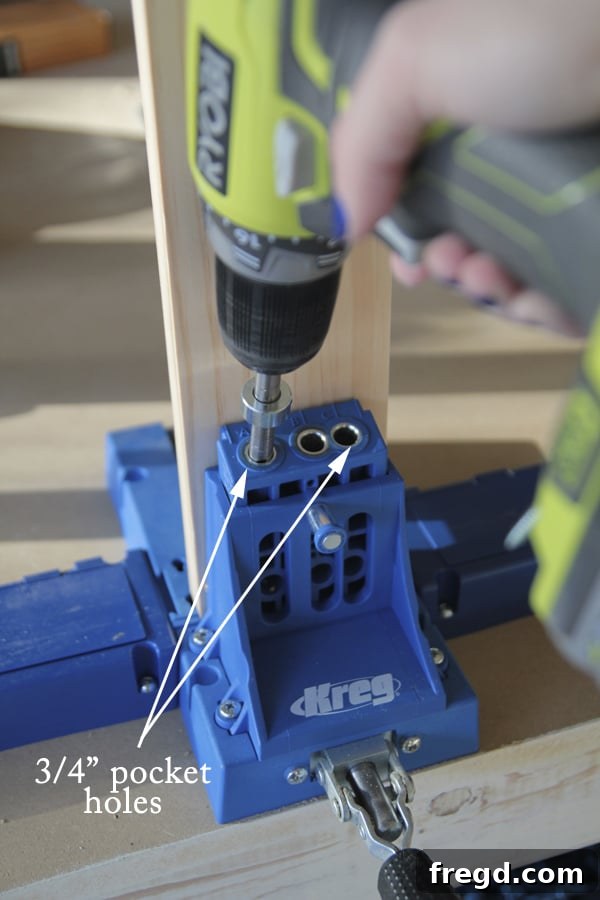
Now, prepare the horizontal shelf pieces. Cut nine 1×4 boards to 13 1/4 inches in length. This critical measurement is calculated by taking the exact width between your wall studs and subtracting 1 1/2 inches. This 1 1/2 inch accounts for the combined thickness of the two 3/4 inch side pieces of your spice rack frame. For robust and aesthetically pleasing joints, utilize your Kreg Jig K5 to drill 3/4 inch pocket holes into each end of these 13 1/4 inch shelf boards. The Kreg Jig is a fantastic tool for creating strong, concealed joints, making assembly much cleaner. If you’re new to using one, a helpful video tutorial can be found HERE.
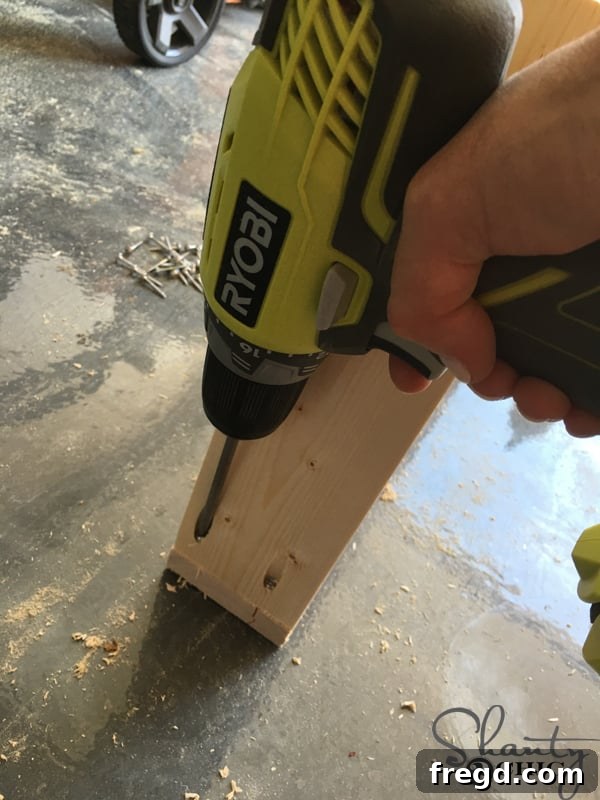
With your shelf boards prepped, begin assembling by attaching each short shelf piece to one of the long side boards using 1 1/4 inch pocket hole screws. Start at the top and work your way down, ensuring each shelf is securely fastened. Prior to permanent attachment, apply a small amount of wood glue to each joint for added strength.
***Pro Tip: Before drilling all pocket holes and permanently attaching the short boards, I highly recommend performing a “dry fit.” Temporarily position the side and shelf pieces together without screws. This allows you to verify that the overall width of the assembled unit will fit perfectly into your wall opening. It’s far easier to make adjustments and trim a board at this stage than to realize your assembled rack is too tight after it’s fully screwed together. You want a snug fit, but not one that requires excessive force.***
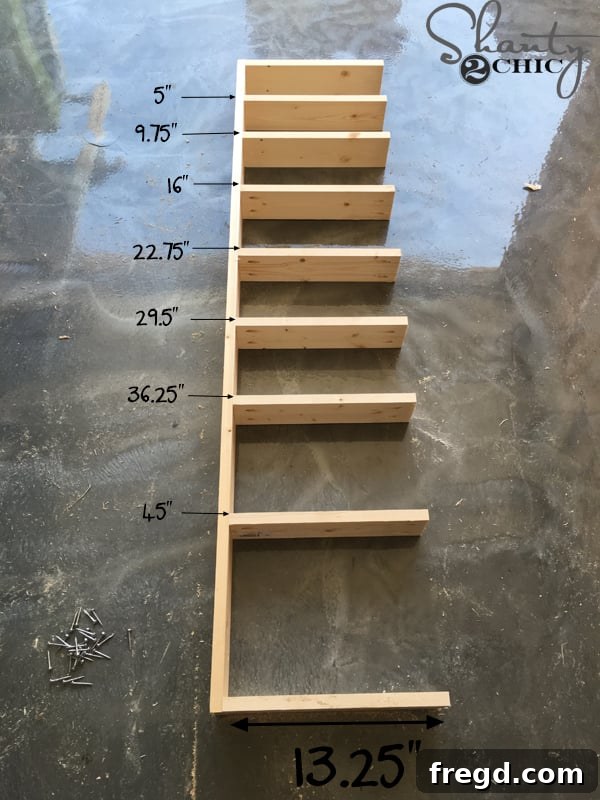
The image above provides a visual guide for the precise placement of each shelf board. I measured consistently from the top down for every shelf, ensuring even spacing. The top and bottom shelf boards should be flush with the ends of the long side piece, forming a robust and level framework for your spice rack. Secure each joint firmly with pocket hole screws after applying wood glue.
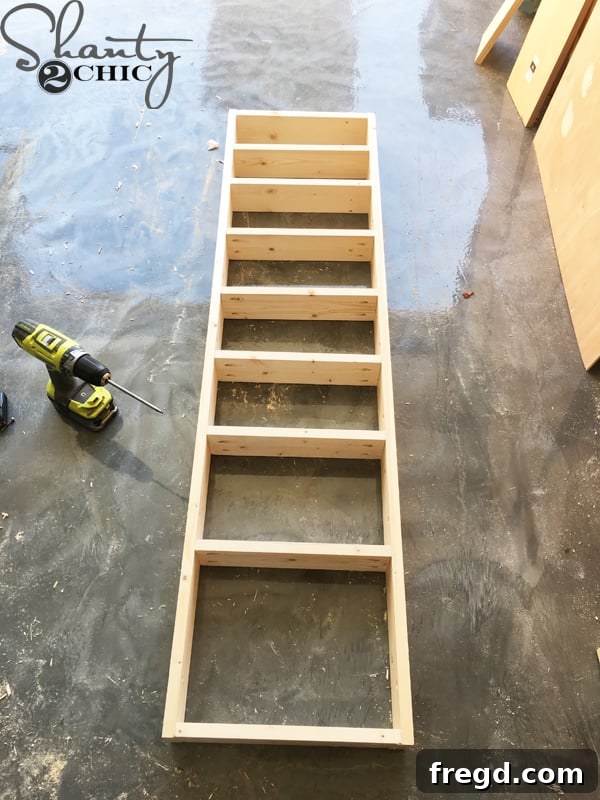
Now, carefully attach the second long side piece to the remaining ends of your shelf boards, mirroring the process you followed for the first side. This step requires particular attention: ensure that the second side piece is flipped and oriented correctly so that the pre-drilled dowel holes align perfectly with those on the first side. Trust me on this—a quick double-check here will save you considerable effort and frustration later if the holes don’t match up!
Step 4: Securing the Back Panel and Installing Dowel Rods
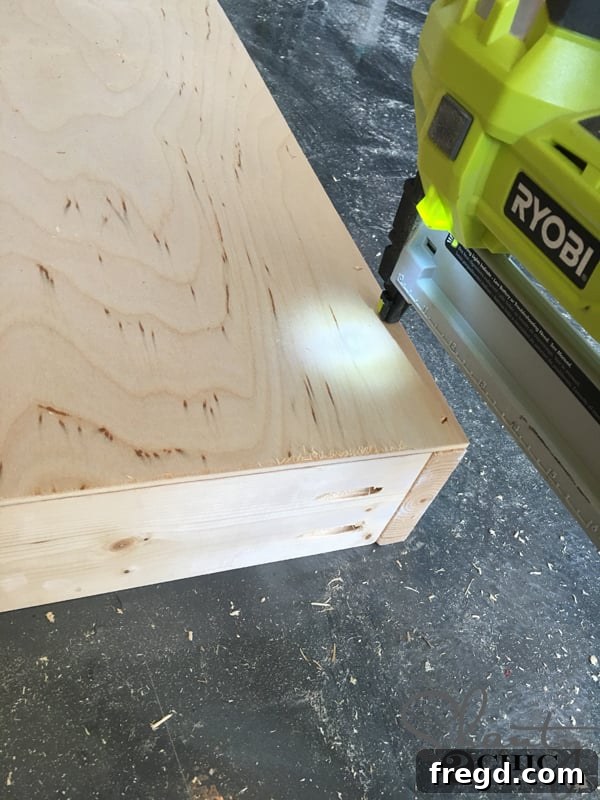
With the main frame of your spice rack assembled, carefully flip it over so that the dowel holes on the side pieces are closest to the ground, providing easy access to the back. Measure the exact dimensions of the back of your newly constructed frame. Cut a 1/4 inch sheet of plywood to these precise measurements. This plywood will serve as the crucial back panel, giving your rack a finished appearance and preventing any spices from falling through into the wall cavity. Apply a generous bead of wood glue around the perimeter of the frame where the plywood will sit, then carefully position and secure the plywood back panel. I used 3/4 inch staples with my Ryobi 18V stapler for quick and firm attachment, but you can also use a hammer and finishing nails.
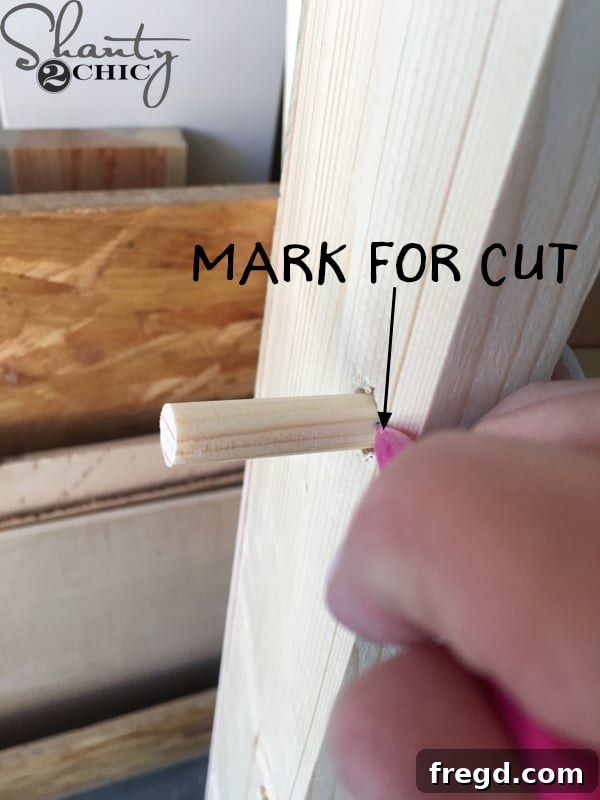
Once the back panel is secured, flip the spice rack back to its upright position. Now, it’s time to fit the dowel rods. Insert one dowel into each set of pre-drilled holes on the side pieces. Push one end of the dowel until it is flush with the outer edge of the side piece, then mark the other end where it meets the opposite side piece. Use your miter saw to cut the dowel rod at this mark. Repeat this exact process for every dowel rod, ensuring each is cut to the precise length needed for a snug fit. These dowels are vital for holding your spice jars securely in place.
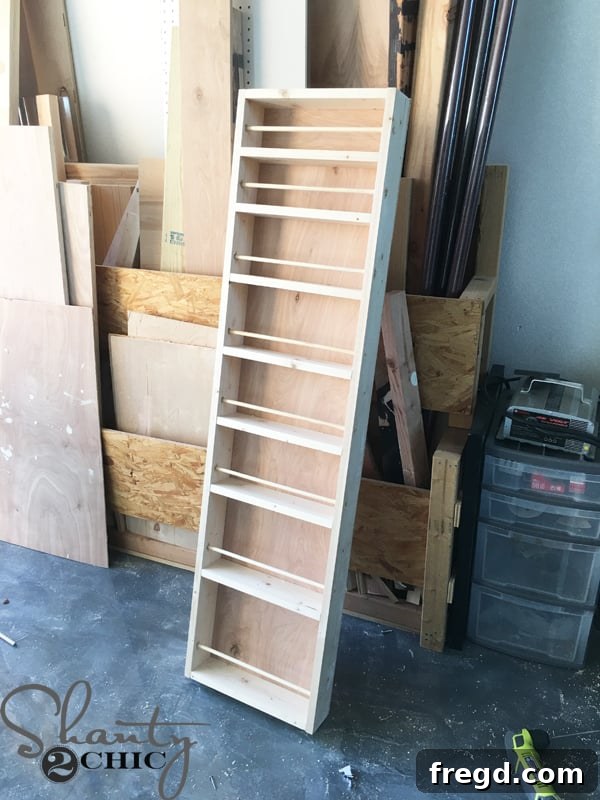
Congratulations! Your custom-built spice rack is now structurally complete and fully assembled. Take a moment to appreciate your craftsmanship. It’s now perfectly poised and ready for its installation into the wall, transforming your pantry storage with its sleek, integrated design. The most exciting part is just around the corner!
Step 5: Seamlessly Installing the Built-in Spice Rack into the Wall
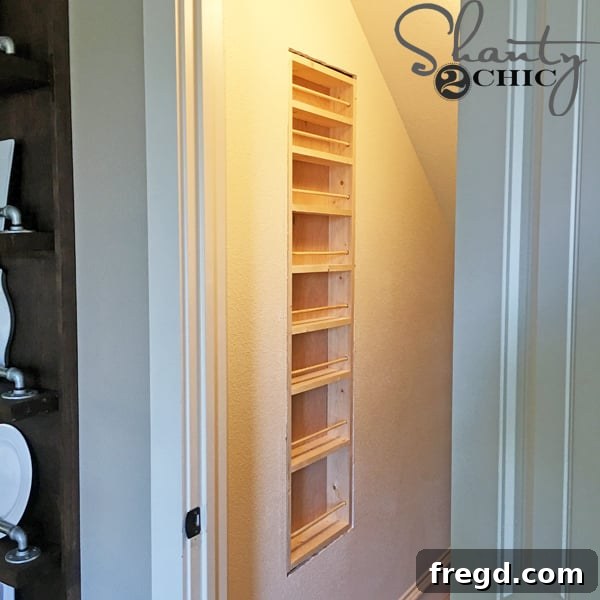
Carefully lift your assembled spice rack and gently guide it into the prepared opening in your wall. A tight fit indicates precise measurements and is ideal for a professional finish. If the fit is snug, which it ideally should be, a rubber mallet will be your best friend. Use it to gently tap the rack into position without causing damage to the wood or the surrounding drywall. Rubber mallets are incredibly handy tools in any workshop, and we use them constantly for various building projects. You can find a good quality one HERE on Amazon.
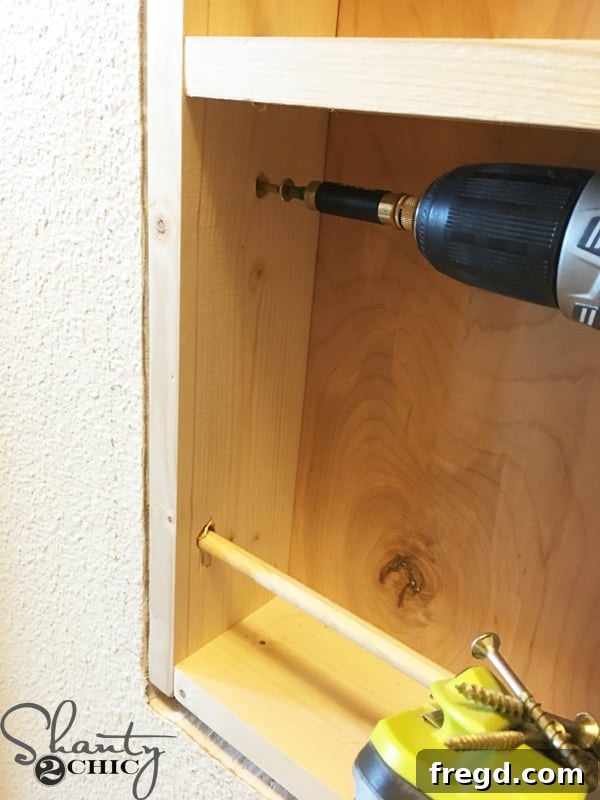
Once the spice rack is perfectly seated and level within the wall opening, it’s time to secure it permanently. Drive 2-inch wood screws directly through the sides of the spice rack frame and into the studs behind the drywall. For optimal stability and support, I recommend placing at least three screws on each side of the spice rack, ensuring they penetrate deeply into the studs. This crucial step guarantees that your built-in unit is firmly anchored and safe for long-term use.
Step 6: Adding the Decorative Trim for a Polished Finish
The trim pieces are what truly elevate your built-in spice rack, giving it a professional, custom-made appearance and artfully concealing any rough edges from your drywall cuts.
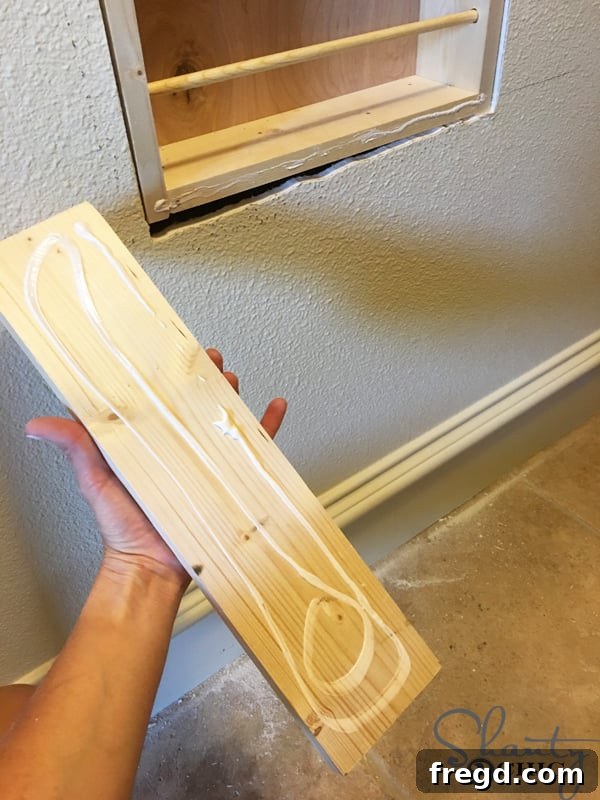
First, cut two 1×4 boards to the exact same length as your internal shelf pieces (13 1/4 inches for my project). These will serve as your top and bottom horizontal trim pieces. Apply a consistent bead of wood glue to the back surface of one of these boards.
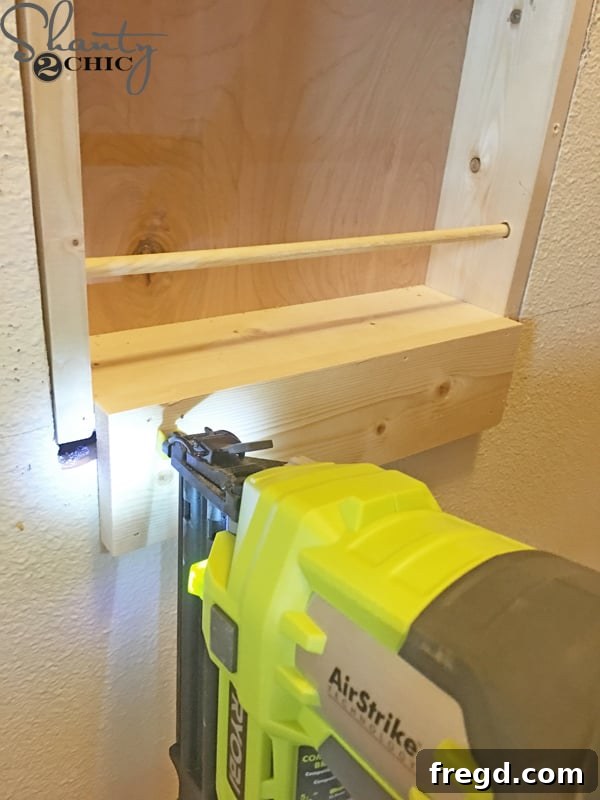
Carefully align and attach this glued trim piece to the bottom edge of your spice rack. Secure it firmly with 1 1/4 inch brad nails using your nailer (my Ryobi 18 gauge nailer worked perfectly here). Ensure that the nails not only penetrate the trim but also extend into the bottom shelf piece of the spice rack for a strong, integrated hold. You can add a few extra nails in the bottom corners for enhanced security.
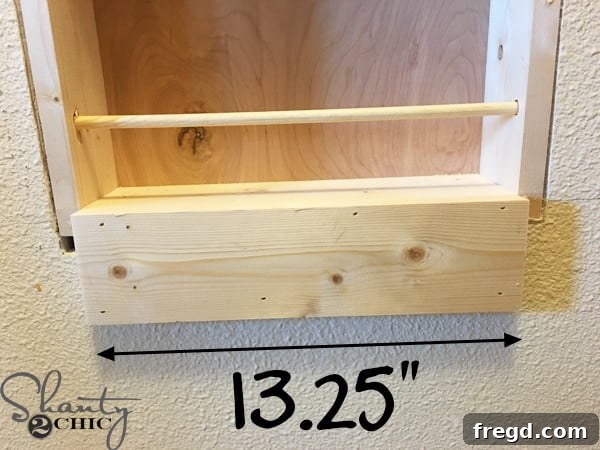
Repeat this same process for the top trim piece. The upper edge of this trim should be perfectly flush with the top of the uppermost shelf of the spice rack. This meticulous alignment effectively conceals the raw 3/4 inch edge of the spice rack frame, creating a clean, seamless transition and a truly integrated look with your wall.
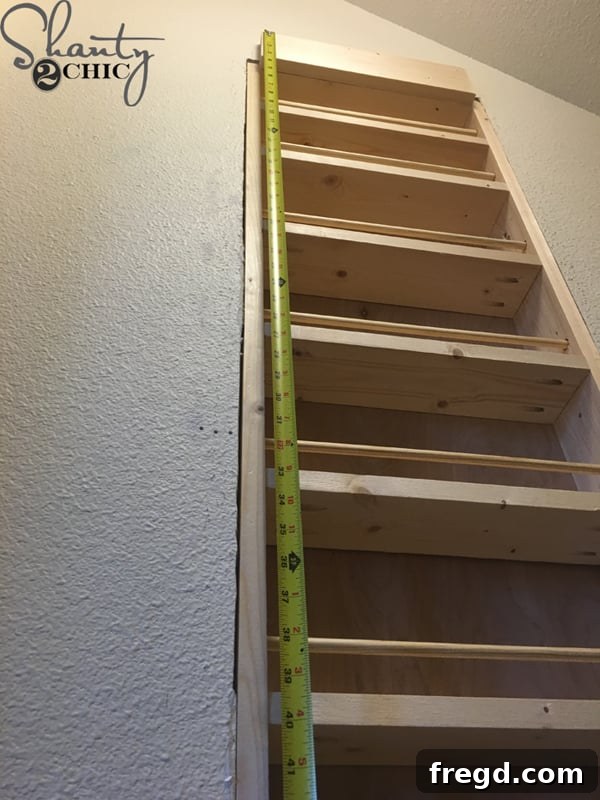
Now, measure the vertical distance from the top edge of your newly installed top trim piece down to the bottom edge of your bottom trim piece. Cut two 1×4 boards to this exact length to create your side trim pieces. Precision here ensures a tight, professional joint where all trim pieces meet.
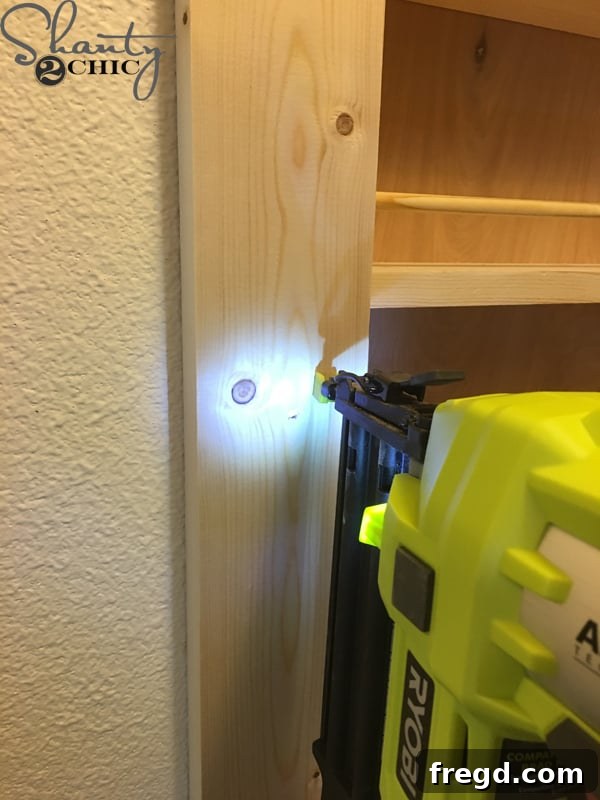
Apply wood glue to the back of each side trim piece and carefully position them along the vertical sides of your built-in spice rack. Secure them with 1 1/4 inch brad nails. Since there will be a wall stud directly behind these side trim pieces, you can confidently drive nails along the corners and edges, ensuring they are firmly attached to both the rack and the wall structure. The trim beautifully frames your new spice rack, completing its integrated appearance.
Step 7: Filling, Sanding, and Painting for a Flawless Finish
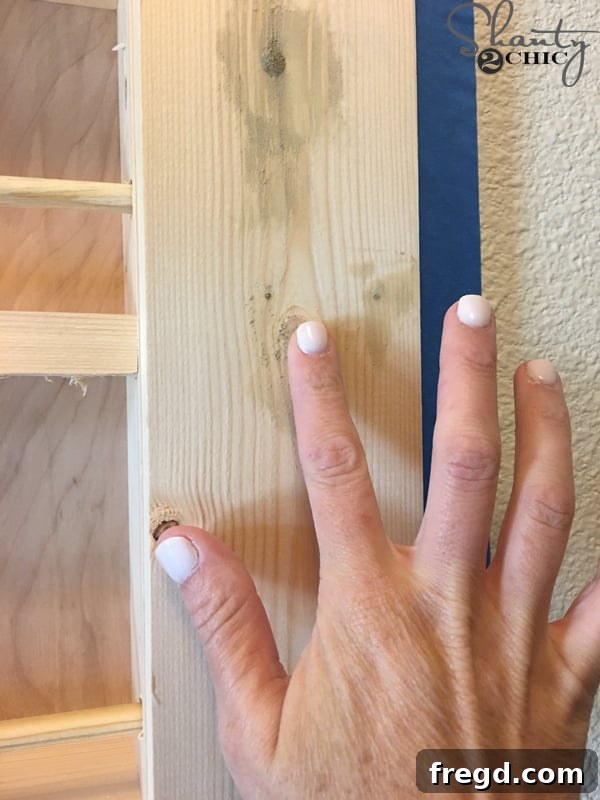
To achieve a truly seamless and professional finish, the next step is crucial: filling all visible nail holes, wood screw holes, and any exposed pocket holes (particularly those tucked away under the shelves) with wood filler. Apply the filler liberally, pushing it into each void, then smooth it carefully with a putty knife. This creates a perfectly even surface that will be virtually undetectable once painted. High-quality wood filler can be conveniently purchased on Amazon HERE.
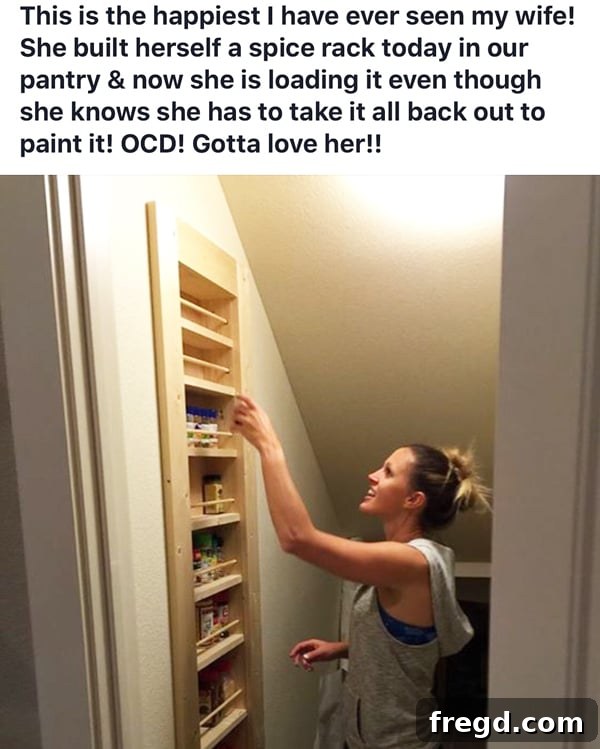
The sheer excitement of finally having an organized pantry was almost overwhelming! While eagerly waiting for the wood filler to completely dry, I couldn’t resist doing a preliminary test drive, gingerly placing some of my spice jars into their new, dedicated slots. My wonderful husband, knowing my passion for organized spaces, captured this moment of pure joy and shared it on his social media page – he truly understands that this efficient, beautiful setup is my ultimate #myhappyplace.
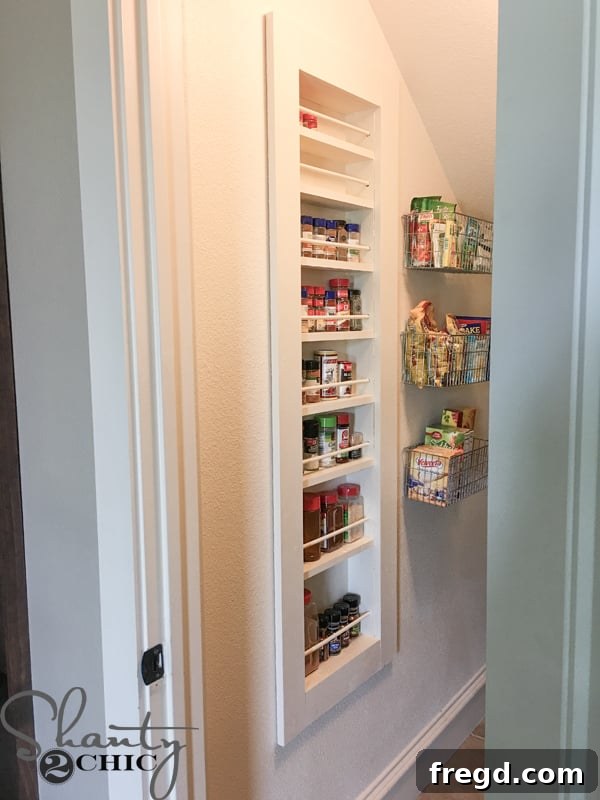
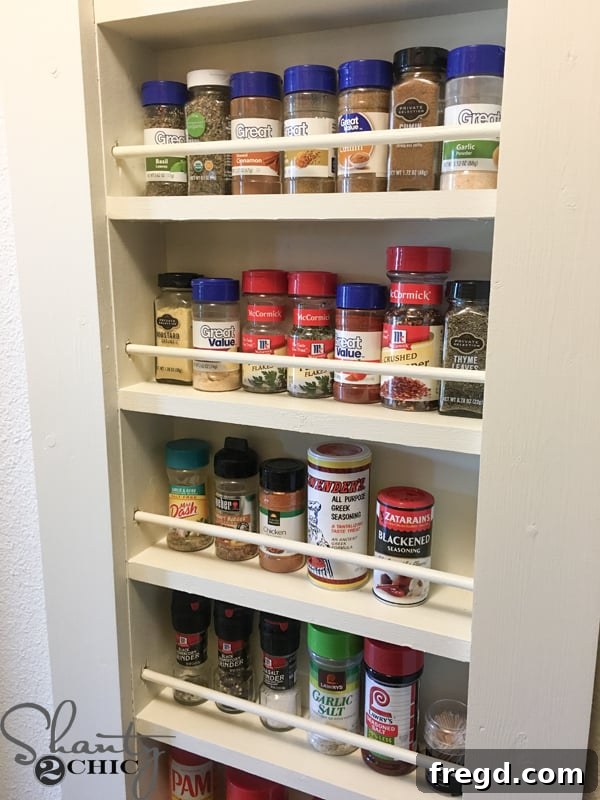
Once the wood filler was thoroughly dry and hardened, I gently sanded all the filled areas until they were perfectly smooth and flush with the surrounding wood. Then, I applied two generous coats of paint, meticulously matching the color to my existing pantry trim. I opted for “Ivory Lace” by Valspar, which blends beautifully and provides a fresh, clean look. After the paint had fully cured, it was time for the grand reintroduction: meticulously arranging all my spices back into their new, perfectly organized home. The transformation has been incredible; navigating my collection of herbs and spices is now an effortless and enjoyable task, and my pantry has truly never looked better!
The Transformed Pantry: A Showcase of Efficiency and Style
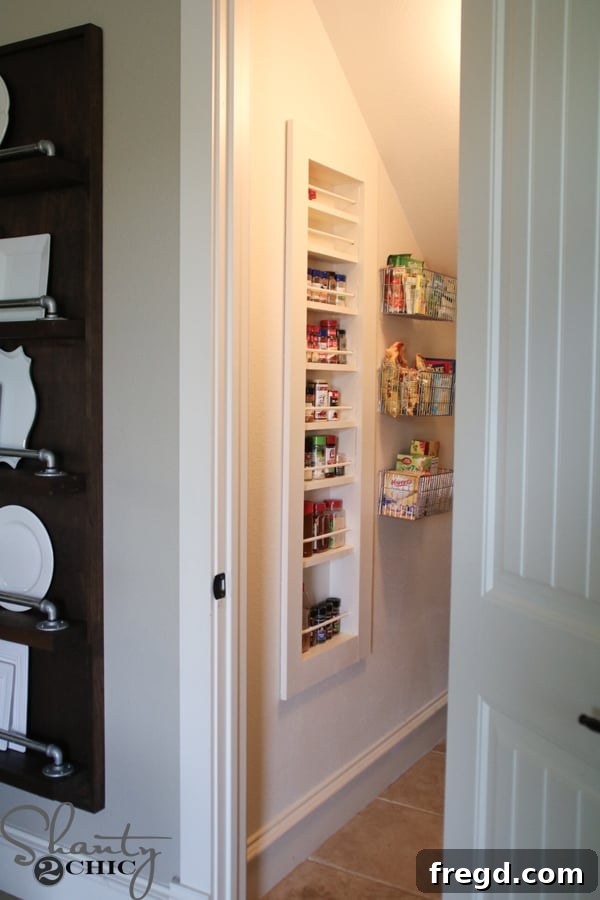
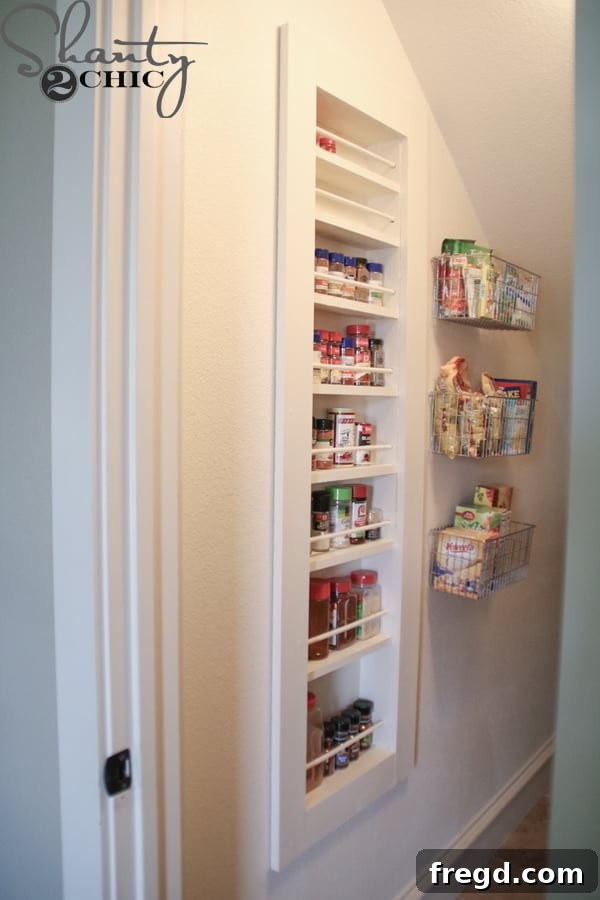
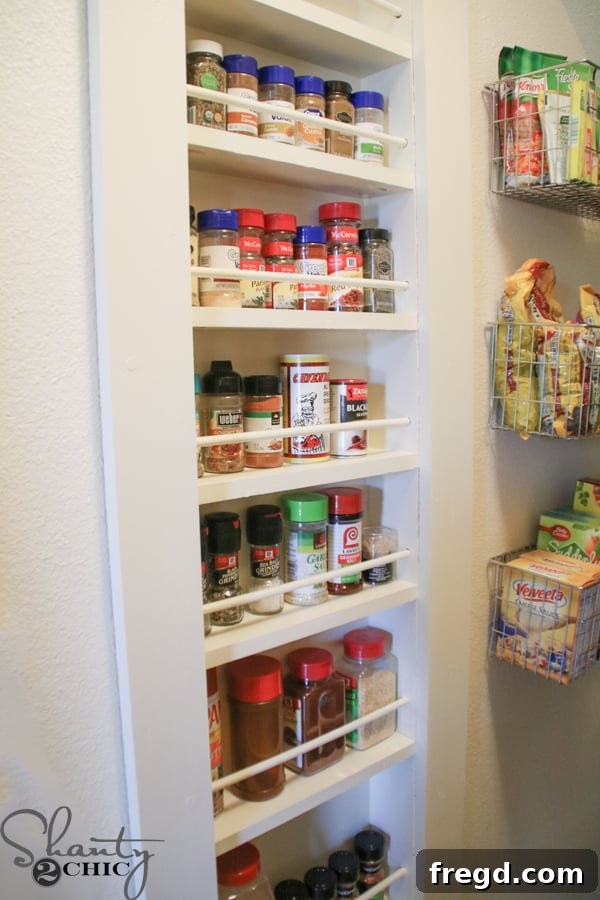
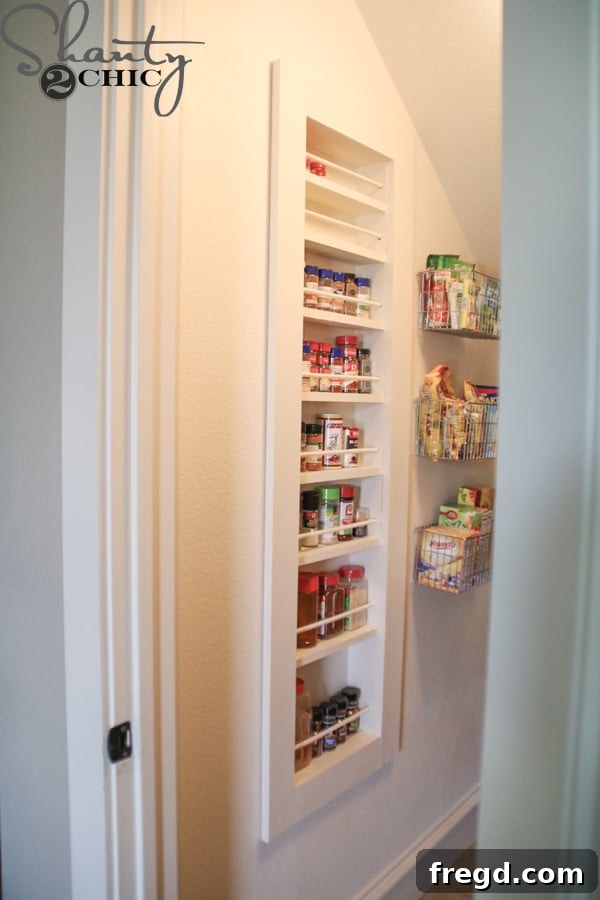
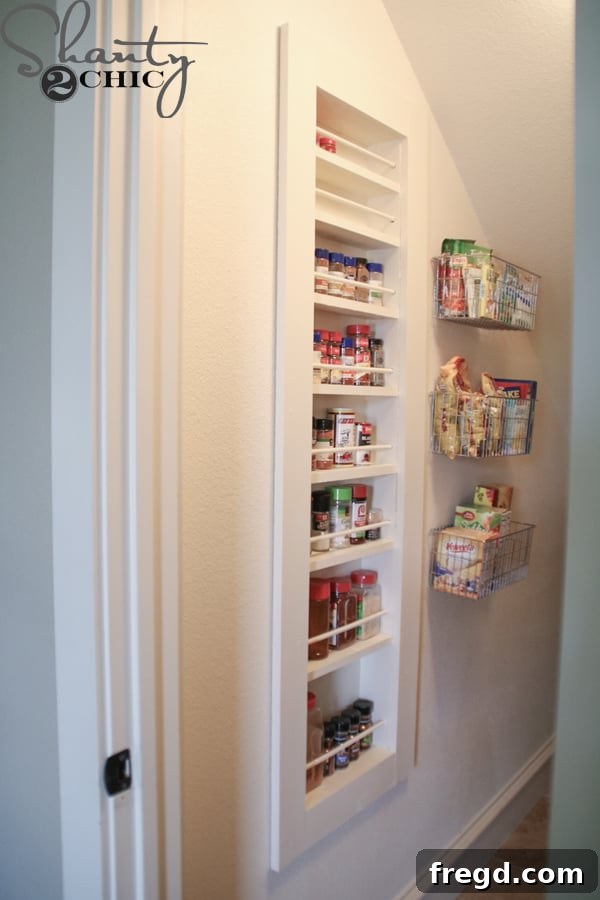
Witness the remarkable difference a custom-built, in-wall spice rack can make in a pantry that was once a source of clutter. This project transcends mere storage; it’s about ingeniously reclaiming valuable space, streamlining your daily cooking rituals, and imbuing your home with a touch of bespoke craftsmanship. Every jar is now visible and within easy reach, turning a mundane task into a delightful experience.
Unlock More Potential: Customization Ideas for Your Built-in Spice Rack
One of the most exciting aspects of any DIY project is the freedom to customize it to perfectly suit your individual needs and aesthetic preferences. This built-in spice rack design is incredibly versatile, offering endless possibilities for personalization. Consider these ideas to make your spice rack truly unique and even more functional:
- Sliding Door with a Chalkboard Front: Enhance functionality by adding a sliding door. The exterior could feature a chalkboard surface, perfect for jotting down grocery lists, meal plans, or even inspiring quotes. This not only conceals your spices but also adds an interactive element to your pantry.
- Elegant Hinged Door: For a more classic and discreet look, incorporate a hinged door. You could choose a solid panel, a glass insert, or even a lattice design, complementing your existing kitchen decor. Adding a small handle or knob that matches your cabinetry can create a cohesive design.
- Deeper Shelves for Versatility: If your wall cavity allows for it, consider building the rack with deeper shelves. This modification would provide ample space for larger spice containers, bottles of oils and vinegars, or other small pantry staples, significantly increasing your overall storage capacity.
- Adjustable Shelving System: For ultimate flexibility, integrate adjustable shelf pins during the construction phase. This allows you to easily reposition shelves at different heights, accommodating various sizes of jars, bottles, and containers as your needs evolve.
- Personalized Finishes: Beyond simply matching your trim, unleash your creativity with different finishes. Paint the interior a bold accent color to make your spices pop, stain the wood for a warm, rustic appeal, or even apply decorative wallpaper to the back panel for an unexpected pop of pattern and texture.
- Integrated LED Lighting: For a touch of modern luxury and enhanced visibility, consider installing small LED strip lights along the top or under each shelf. This subtle illumination will make it effortless to find exactly what you need, even in a dimly lit pantry.
While I initially considered adding a sleek sliding door to my own spice rack, I ultimately decided against it to preserve the valuable usable wall space adjacent to the unit. Instead, I discovered these incredibly practical and stylish hanging pantry baskets. They are absolutely fantastic for adding supplemental storage for smaller items, keeping everything tidy and accessible. In fact, I find them so indispensable, I’m already planning to add a few more to further optimize my pantry organization!
Empower Your Home: Embrace Smart DIY Solutions
I sincerely hope this comprehensive guide to building your own DIY built-in spice rack has not only inspired you but also equipped you with practical ideas and the confidence to tackle similar projects around your home. The satisfaction that comes from creating something functional and beautiful with your own hands is truly unparalleled. Transforming a simple, often-overlooked space into a beacon of efficiency and style can profoundly enhance your daily living.
Thank you so much for taking the time to stop by and join me on this building journey! Happy crafting, friends!
~Ashley