
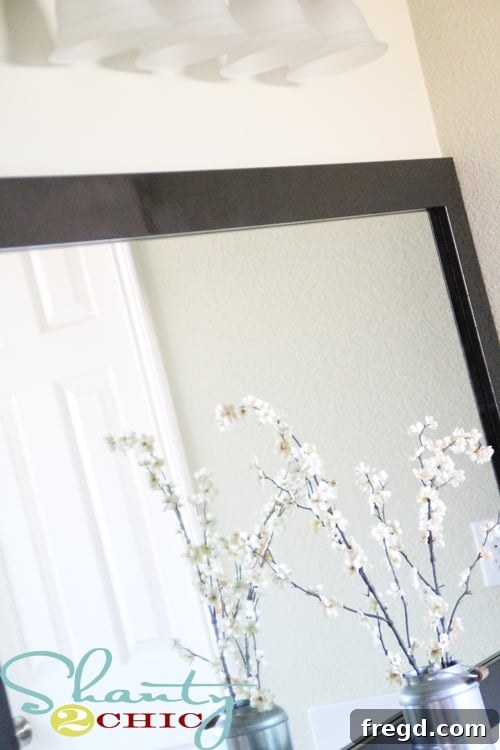
Welcome, fellow home improvement enthusiasts! Today, I am thrilled to share an exciting project that has brought a touch of elegance and a significant style upgrade to my master bathroom. If you’ve been seeking an affordable yet impactful way to transform your space, you’ve come to the right place. This week, I dove headfirst into giving my master bathroom a much-needed facelift, and the results are truly remarkable. The journey began with a fresh coat of paint, setting the stage for a cohesive and inviting atmosphere. I opted for a beautiful shade of green on the walls, specifically chosen to complement a gorgeous Waverly fabric I had selected for my master bedroom. This decision instantly tied the two spaces together, creating a harmonious flow throughout the private areas of my home. But the real star of this renovation, and the focus of today’s detailed guide, is the transformation of what was once a plain, builder-grade mirror into a stunning focal point with a custom-built frame. This DIY endeavor proves that you don’t need to break the bank to achieve a high-end look.
The initial steps of any home improvement project are crucial for establishing the desired aesthetic. For my master bathroom, the goal was to create a serene and sophisticated retreat. The green wall color wasn’t just a random choice; it was carefully selected to perfectly match the hues within the Waverly fabric that graces my master bedroom. This deliberate coordination helps to create a seamless transition and a sense of continuity between the rooms. A fresh coat of paint can instantly revitalize a space, offering a clean canvas for further enhancements. Once the walls were beautifully painted and dried, my attention turned to the next big challenge: tackling the enormous, frameless mirror that dominated one wall. This DIY bathroom mirror frame project was conceived to elevate the room’s design without incurring significant costs, proving that budget-friendly home decor can still deliver luxurious results. The inspiration for this master bathroom upgrade was rooted in the desire for a more custom, less generic feel, a common aspiration for many homeowners looking to personalize their living spaces.
The plain, unframed mirror, a common feature in many homes, often lacks personality and can make a bathroom feel rather sterile. While it served its basic function, it did little to enhance the overall decor. I was determined to transform this utilitarian piece into a stylish statement, adding depth and character to the room. My vision for this DIY bathroom mirror frame was clear: I wanted a chunkier, more substantial frame that would provide a visual anchor and a touch of modern elegance. The original mirror had a thin, almost negligible frame, which simply wasn’t cutting it for the sophisticated look I was aiming for. The “before” picture below vividly illustrates the stark contrast between the previous minimalist design and the robust, custom frame I envisioned. This project is a fantastic example of how a simple change can dramatically alter the perception and ambiance of a space, making it feel more intentional and luxurious. A custom bathroom mirror frame is an excellent way to achieve a high-end aesthetic without the hefty price tag associated with professional installations. It’s an accessible home improvement project that yields impressive results.
I originally had a thin frame around it but I wanted a new chunkier look. The quest for a more substantial and visually appealing frame led me to a simple yet highly effective material choice.
For this budget-friendly bathroom renovation, the material of choice was three 1×4 pre-primed MDF boards, each measuring 8 feet in length. These were a fantastic find at Home Depot, costing approximately $5 each, which kept the overall project cost incredibly low. MDF, or Medium-Density Fiberboard, is an ideal material for DIY mirror frames, especially in bathroom environments. Its smooth surface provides an excellent base for painting, ensuring a professional, flawless finish. Moreover, MDF is less prone to warping and cracking compared to solid wood in fluctuating humidity conditions, making it a durable choice for a bathroom mirror frame. The pre-primed aspect saved me an extra step, allowing me to move directly to cutting and painting. When selecting your MDF, always check for any dents or imperfections, especially on the edges, as these can be challenging to fix later. This smart material choice is key to achieving a high-impact upgrade without overspending on expensive lumber.
Once the materials were acquired, the next critical step for creating a professional-looking DIY mirror frame was precision cutting. Achieving crisp, seamless corners requires accurate 45-degree angle cuts on all four pieces of the frame. For this task, I relied on my compound miter saw, a powerful tool that makes quick work of angled cuts. If you don’t own a compound miter saw, don’t fret! A miter box and a hand saw can achieve the same results with a bit more manual effort and care. The key is to measure twice and cut once, ensuring that your cuts are perfectly aligned for a tight fit. Each piece must be cut precisely to the correct length, taking into account the angle, to create a perfect rectangular frame around your mirror. After cutting, it’s always a good idea to dry-fit the frame around the mirror to confirm that all corners meet perfectly and the dimensions are accurate. This step allows you to make any necessary minor adjustments before moving on to the finishing stages, guaranteeing a polished and custom look for your master bathroom mirror frame. Safety is paramount when using cutting tools, so always wear appropriate eye protection and follow manufacturer guidelines.
With the frame pieces perfectly cut, it was time to add the finishing touch that would truly define the aesthetic of this DIY bathroom mirror frame: paint. I opted for a sleek black gloss spray paint, applying two even coats to achieve a rich, durable finish. The choice of black gloss was deliberate; it provides a striking contrast against the newly painted green walls, adding a modern and sophisticated edge to the master bathroom. A gloss finish also has practical benefits in a bathroom setting, as it is generally more resistant to moisture and easier to clean than matte finishes. When spray painting, remember to work in a well-ventilated area and apply multiple thin coats rather than one thick coat. This technique prevents drips and runs, resulting in a smooth, professional-looking surface. Allow adequate drying time between coats and before handling the pieces to ensure the paint fully cures. The transformation after painting was incredible; the raw MDF pieces were now elegant components ready to frame my gigantic mirror, proving that an affordable mirror frame can look incredibly expensive with the right finish. This step is crucial for elevating the overall appearance and ensuring the longevity of your custom bathroom mirror frame.
During the planning phase of this budget bathroom renovation, an unforeseen challenge presented itself: the placement of an electrical outlet. As you can see from the image, the electrician had unfortunately installed the outlet too far into the wall, necessitating a cutout directly from the mirror itself. This “mess-up” was a remnant from when the house was built, and in hindsight, I wish I had insisted the builder rectify it before we moved in. It’s a classic case of “live and learn” in homeownership, but it certainly added an unexpected layer of complexity to my DIY mirror frame project. Staring at this unsightly cutout was a constant reminder of the oversight, and I was determined to find a creative and aesthetically pleasing solution. Rather than letting it detract from the overall beautiful transformation of the master bathroom, I saw it as an opportunity to innovate. This challenge highlighted the reality that not all DIY projects go perfectly according to plan, and often, the most creative solutions arise from unexpected problems. Overcoming such hurdles is part of the satisfying journey of home improvement, turning potential frustrations into unique design features. This setback actually fueled my determination to create an even more custom and tailored look for my affordable mirror frame.
The unsightly outlet issue prompted me to get really creative with my DIY mirror frame design. I was truly tired of looking at the exposed hole in the mirror, so I decided to integrate the outlet seamlessly into the new frame. My solution involved using my trusty router to precisely cut two holes in the MDF frame pieces, perfectly sized to accommodate the socket. Using a router requires careful handling and attention to detail, but it allows for clean, custom cuts that hand tools might struggle to achieve. I carefully measured the dimensions of the outlet and the spacing required to ensure the faceplate would fit snugly over it. This step transformed a glaring imperfection into a well-integrated design element. To complete this elegant solution, I stumbled upon a simple wooden faceplate at Wal-Mart for an incredible $2! This inexpensive find was the perfect canvas. I spray painted it with the same black gloss paint used for the rest of the frame, ensuring a cohesive and polished look. This clever trick demonstrates how inexpensive items can be customized to create a high-end, bespoke finish, further emphasizing the “budget bathroom remodel” theme of this project. The final result was a custom bathroom mirror frame that not only hid the problematic outlet but also enhanced the overall aesthetic, making it appear as if the frame was designed around the outlet from the very beginning.
My final step in this fulfilling DIY bathroom mirror frame project was to securely attach the newly crafted and painted frame to the mirror. For this, I utilized Liquid Nails, a heavy-duty construction adhesive renowned for its strong bond and versatility. I applied a continuous bead of Liquid Nails directly to the back surface of the MDF frame pieces, ensuring adequate coverage without over-applying. It’s important to apply the adhesive evenly to guarantee a firm and lasting bond across the entire frame. Once the adhesive was applied, I carefully positioned each frame piece onto the mirror, pressing firmly to ensure good contact. I held each piece in place for a few moments to allow the adhesive to begin setting. The beauty of using Liquid Nails for this application is its ability to adhere securely to both the mirror surface and the MDF, creating a seamless and sturdy custom bathroom mirror frame. The satisfaction of seeing the frame come together, transforming the plain mirror into a focal point, was immense. The total cost for this high-impact upgrade? An astonishing $15! This incredibly low price point for such a dramatic transformation is truly remarkable. I absolutely LOVE the new look it brings to my master bathroom, injecting a sense of style and sophistication that was previously missing. This project is a testament to how creative thinking and a few affordable materials can yield spectacular results in home decor.
Reflecting on this DIY bathroom mirror frame project, I truly feel like I got an incredible amount of “bang for my buck.” The total investment of approximately $15 transformed a bland, builder-grade mirror into a sophisticated, custom piece that instantly elevates the entire master bathroom. It was not only remarkably affordable but also surprisingly easy and quick to complete, making it an ideal weekend project for anyone looking to make a significant impact without extensive time or skill. This successful master bathroom upgrade has undoubtedly sparked my enthusiasm for more home improvement projects. I’m already envisioning framing the other mirrors throughout my house, bringing that same custom touch to different spaces. However, with the wisdom gained from past experiences, I understand the importance of focusing on one room at a time. My priority now is to fully complete the master bathroom, ensuring every detail aligns with the vision I’ve set. This means tying in other decorative elements, adding storage, and perhaps even tackling some smaller accents to truly make this space a serene oasis. I will definitely be back soon with more updates on the progress of my master bathroom remodel and other exciting DIY ventures. Stay tuned for more budget-friendly home decor ideas and inspiring transformations! This experience reinforces the joy and immense satisfaction that comes from personalizing your living space through creative and accessible DIY projects.
~Ashley