
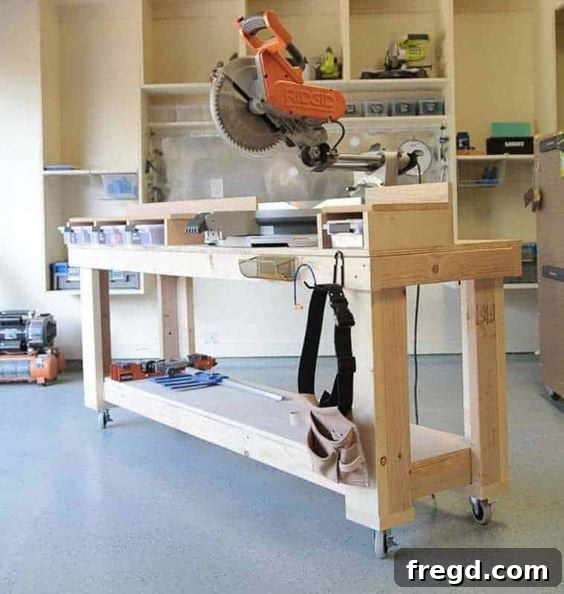
Welcome to the ultimate guide for constructing your very own miter saw stand! For many woodworking enthusiasts and DIYers, the miter saw is an indispensable tool, a true workhorse in the workshop. Its precision and versatility make it a go-to for countless projects, from framing to fine trim work. However, the true potential of this essential tool is often unlocked when it’s paired with a dedicated, well-designed miter saw station. This isn’t just about giving your saw a home; it’s about enhancing accuracy, improving workflow, optimizing space, and boosting overall workshop efficiency.
I’ve always considered my miter saw to be my favorite, most-used tool. For years, it sat on various makeshift setups, but I eventually built it a more permanent spot. Now, it’s time for an upgrade – a custom-built DIY miter saw stand that integrates seamlessly with a mobile workbench. This project is surprisingly straightforward, especially when you have the right tools and clear instructions. Whether you’re a seasoned woodworker or just starting your journey, this comprehensive guide will walk you through every step of building a sturdy, functional, and mobile miter saw stand, complete with free plans, detailed pictures, and easy-to-follow instructions.
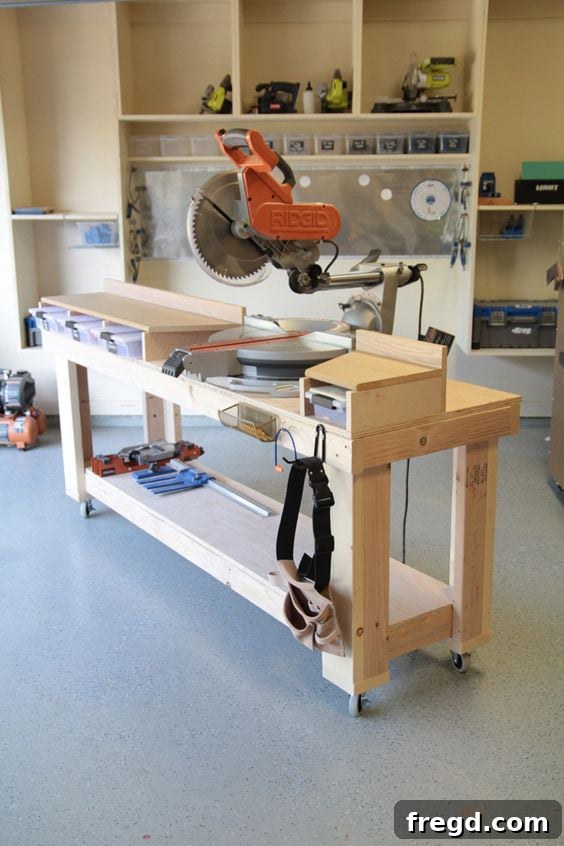
This project will not only provide a stable and level surface for your miter saw but also offer valuable storage solutions, keeping your workspace organized and clutter-free. We’ll cover everything from building the robust base workbench to custom-fitting the saw station itself. So, gather your materials, put on your safety glasses, and let’s get started on creating a professional-grade setup that will transform your woodworking experience.
Table of Contents
- Build the Miter Saw Stand Legs
- Build the Workbench Frames
- Attach Legs to Bottom Frame
- Attach Bottom Plywood Shelf
- Attach the Top Frame
- Attach the Top of the Workbench
- Attach the Casters
- Build the Miter Saw Station
- Build the Shelf Supports
- Attach the Top of the Miter Saw Stand
- Miter Saw Stand Free Plans
- Mobile Miter Station
You can construct this versatile miter saw station on any existing work surface you have, such as a sturdy table or a dedicated workbench. For this particular build, I opted to use a 2’ x 7’ mobile workbench as the foundation. This design is based on the robust Shanty-2-Chic workbench plans, with a slight modification to the length, making it 7 feet instead of the original 8 feet to better suit my workshop space. Remember, customization is key in DIY projects, so feel free to adjust dimensions to fit your specific needs and available space. The complete, free printable plans for both the workbench and the miter saw stand can be found at the very end of this article.
Build the Miter Saw Stand Legs
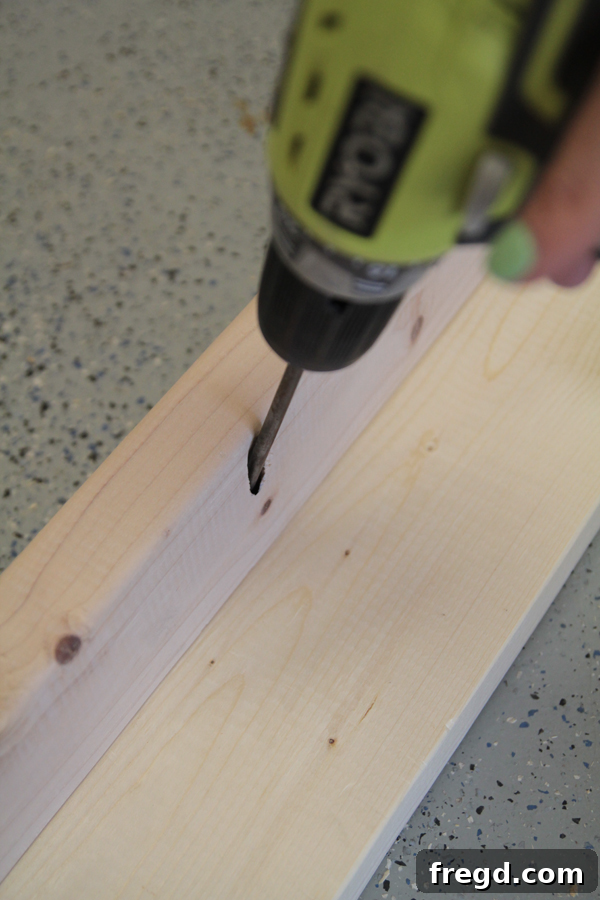
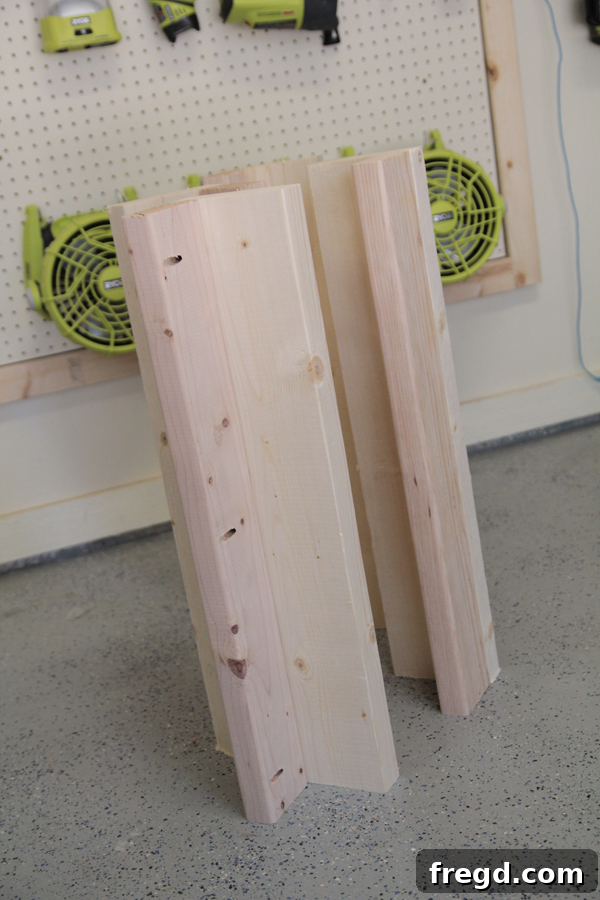
Our journey begins with constructing the four robust legs that will form the foundation of your mobile workbench. Each leg is designed for maximum stability, created by joining a 2×4 and a 2×6 piece of lumber. Precision is paramount here; cut each of these pieces to a precise length of 27 ½ inches. For strong and reliable joints, I highly recommend using a Kreg Pocket Hole Jig. On one side of each 2×4 piece, add three 1 ½-inch pocket holes. These holes will be used to securely fasten the 2×4 to its corresponding 2×6. Before driving the screws, apply a generous line of wood glue along the joining surface of the 2×4 and 2×6, then firmly attach them using 2 ½-inch pocket hole screws. The combination of glue and screws creates an incredibly durable and stable leg structure, ready to support the entire workbench.
Once all four legs are assembled, they should stand perfectly square and uniform, ready for the next phase of construction. Take a moment to inspect them; ensuring consistency at this stage will prevent headaches later on.
Build the Workbench Frames
With the legs prepared, the next crucial step is to construct the top and bottom frames of your workbench. These frames will provide the structural integrity and define the dimensions of your workstation. Careful measurement and cutting are essential for a perfectly square and stable workbench. Ensure your cuts are precise to guarantee all components fit together snugly.
Here are the detailed cut lists for each frame:
Cut List for Top Frame:
- 2 – 2×4 pieces, each cut to 84 inches (for the long sides)
- 3 – 2×4 pieces, each cut to 20 ½ inches (for the cross supports)
Cut List for Bottom Frame:
- 2 – 2×4 pieces, each cut to 78 inches (for the long sides)
- 3 – 2×4 pieces, each cut to 14 ½ inches (for the cross supports)
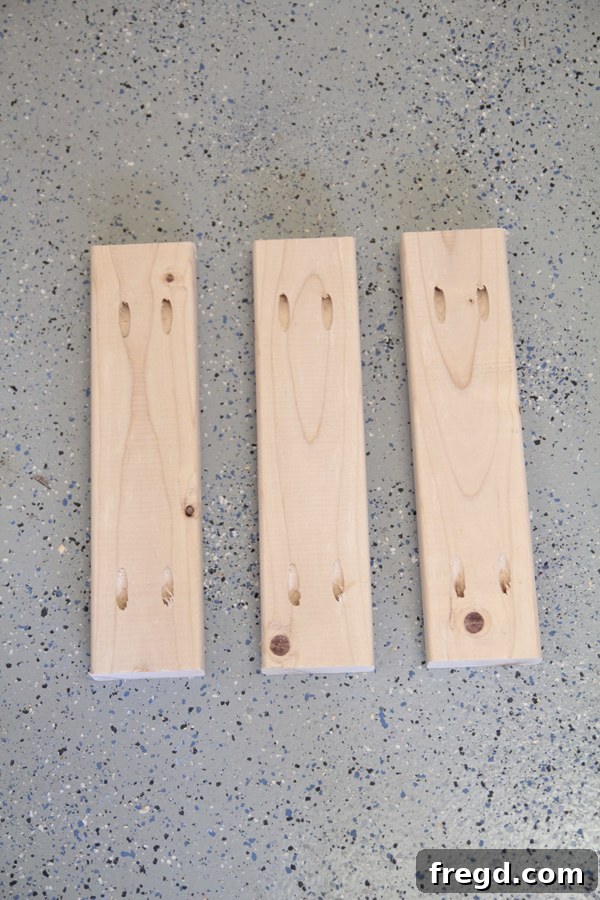
Just as with the legs, pocket holes will be our go-to for strong and hidden joinery. Add 1 ½-inch pocket holes to both ends of each of your 20 ½-inch cross pieces (for the top frame) and each of your 14 ½-inch cross pieces (for the bottom frame). These pocket holes will allow you to securely attach the shorter cross pieces between the longer frame pieces, creating a rigid rectangular structure. Your prepared pieces, ready for assembly, should resemble the image below.
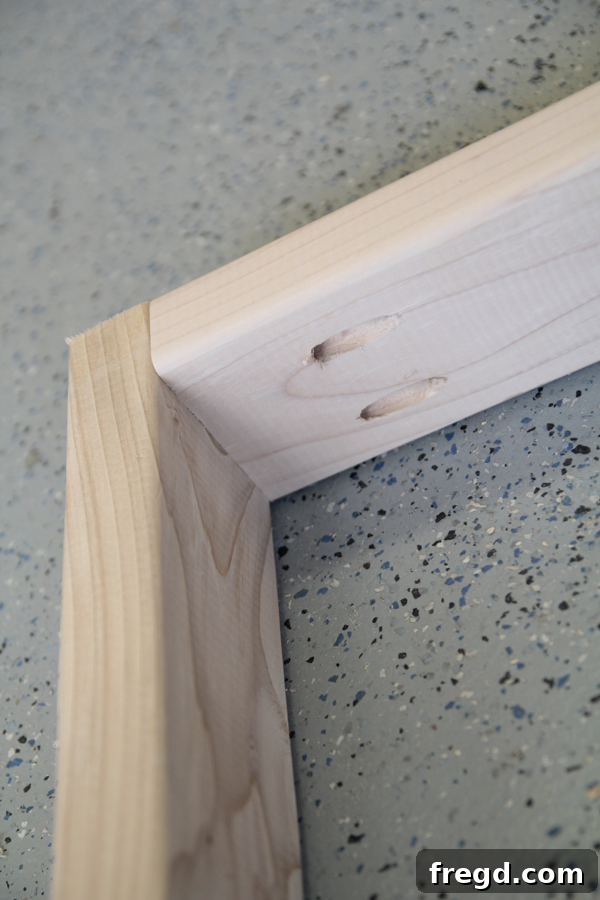
Now, connect the shorter cross pieces to the longer frame pieces. Apply wood glue to the ends of the cross pieces before securing them with 2.5-inch pocket hole screws. This process will create two distinct, sturdy rectangular frames: one for the top and one for the bottom of your workbench. Make sure to double-check for squareness as you assemble each frame to ensure a perfectly flat and stable workbench surface.
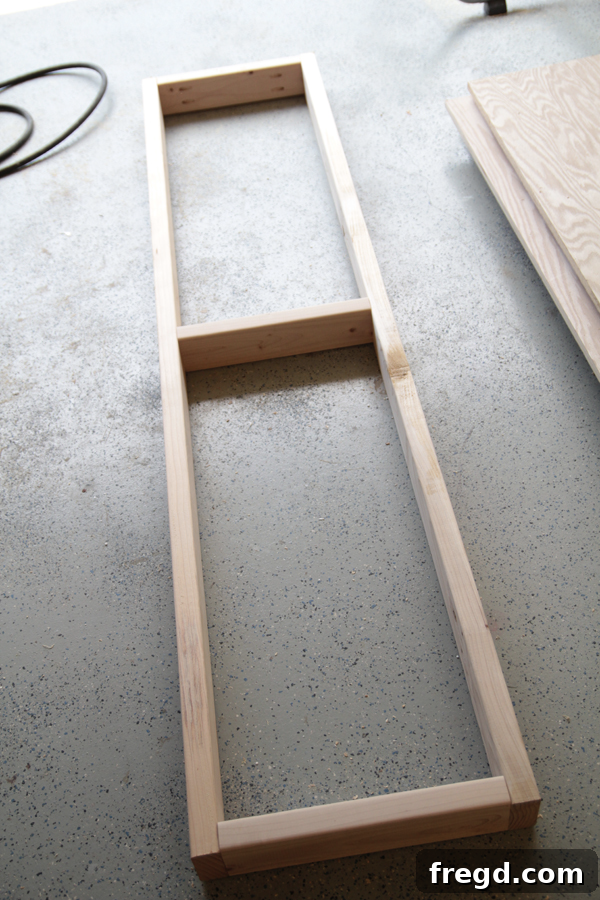
For both the top and bottom frames, you will have one shorter piece positioned at each end and one centered in the middle. This configuration provides optimal support and prevents any sagging. Both completed frames should mirror the structure shown in the image below, showcasing consistent construction and readiness for integration with the legs.
Attach Legs to Bottom Frame
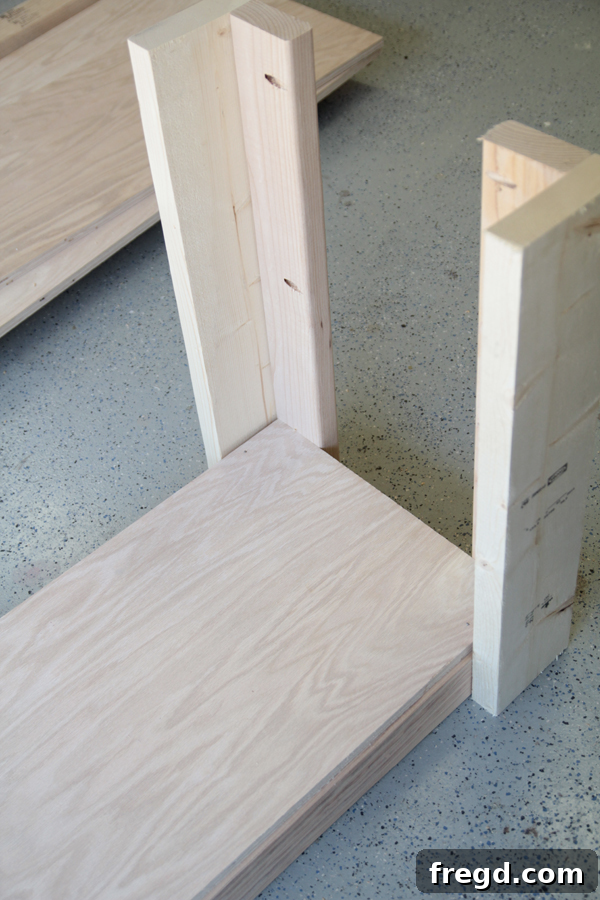
With your legs and frames ready, the next step is to begin assembling the main structure of your workbench by attaching the legs to the bottom frame. This is where your workbench starts to take its final shape. Position the bottom frame between the wide faces of your constructed legs. Ensure that the bottom edge of the frame is flush with the bottom end of each leg. This alignment is critical for maintaining a level working surface and for later attachment of the casters.
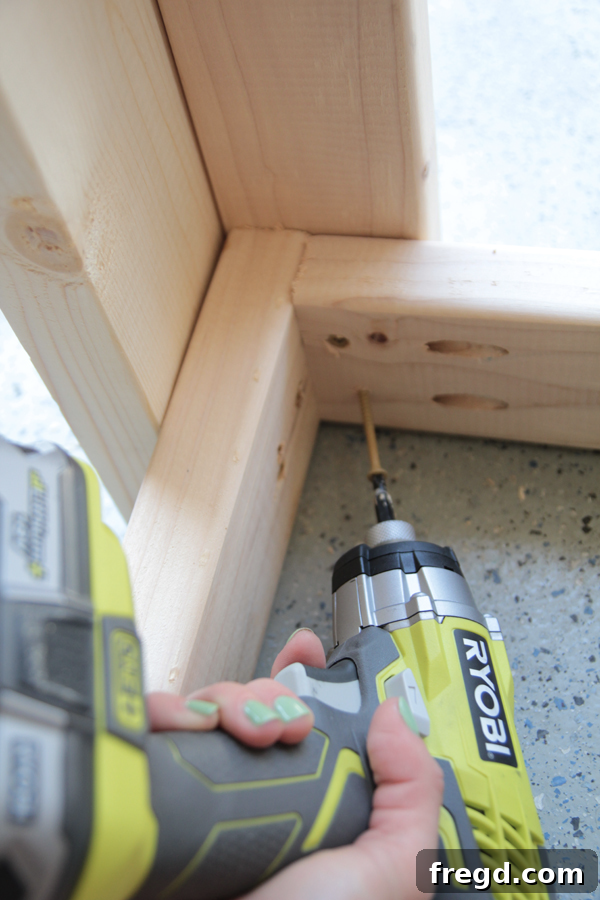
To secure the frame to the legs, drive 2 ½-inch wood screws through the back of the bottom frame and into each leg. Using screws from the back creates a clean finish on the exterior of your workbench. Take your time to ensure each leg is plumb and square relative to the frame before fully tightening the screws. A sturdy connection at this stage guarantees the stability of your entire miter saw station.
Attach Bottom Plywood Shelf
Once the four legs are securely attached to the bottom frame, it’s time to add a practical element to your workbench: the bottom plywood shelf. This shelf is invaluable for storing tools, lumber scraps, and other workshop necessities, helping to keep your work area tidy and organized. For precise and effortless cutting of your plywood, consider using a Kreg Rip-Cut guide with your circular saw – it makes achieving straight, accurate cuts incredibly simple.
Cut List for Plywood Tops:
- Top Piece – 24 inches x 84 inches
- Bottom Piece – 17 ½ inches x 78 inches
Carefully place the smaller plywood piece (17 ½” x 78”) onto the bottom frame, ensuring it sits flush with the frame’s edges. To hold it firmly in place, use 1 ¼-inch brad nails driven through the top of the plywood and into the underlying frame. Brad nails provide a strong hold with minimal visibility. While plywood is an excellent choice for its durability and cost-effectiveness, you have flexibility here. You could also opt for MDF (Medium-Density Fiberboard) or another type of board for this shelf, depending on your material preferences and the specific demands you anticipate for the storage space.
Attach the Top Frame
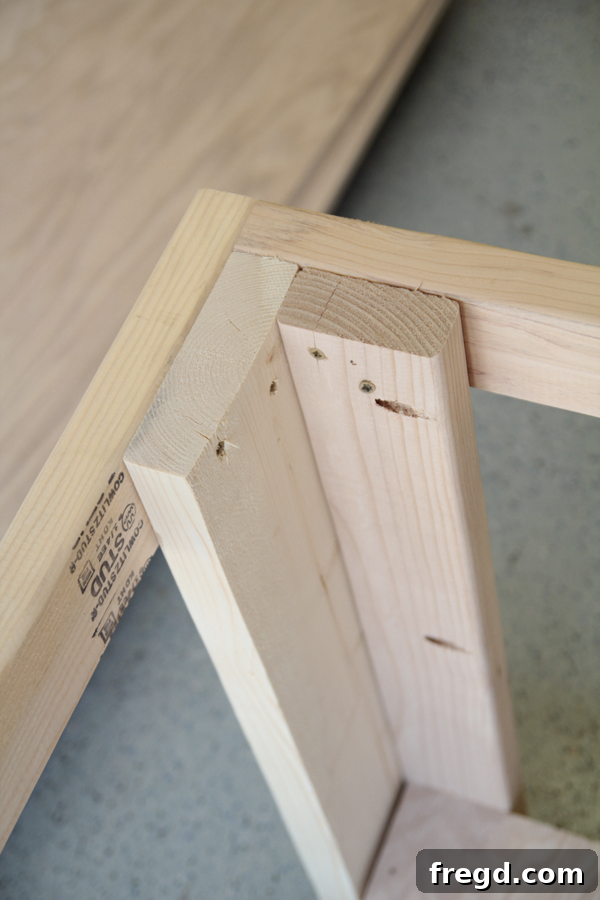
With the bottom section of your workbench taking shape, the next step is to secure the top frame. This will complete the skeletal structure of your mobile base, providing the necessary support for the main workbench surface and ultimately, your miter saw station. Carefully lift and position the top frame onto the legs. Just like with the bottom frame, it’s crucial to ensure proper alignment. The top of this frame should sit perfectly flush with the top ends of the legs. This flush fit is vital for creating a truly level and stable workbench surface.
To attach the top frame, utilize 2.5-inch wood screws. Drive these screws through the back side of the legs and into the top frame. This method of fastening from the legs into the frame ensures a strong, rigid connection while maintaining a clean aesthetic on the exterior of your workbench. Take your time during this step to verify that the frame is perfectly square and level before securing all connections. This careful attention to detail will ensure your entire workbench is solid and wobble-free, providing an ideal foundation for precise cuts with your miter saw.
Attach the Top of the Workbench
Now that the workbench frame is fully assembled and robust, it’s time to complete the main work surface by attaching the plywood panel to the top. This top surface will be where all your cutting and assembly magic happens, so ensuring it’s flat and securely fastened is key. Take the larger plywood piece (24” x 84”) from your cut list and carefully place it on top of the assembled frame, aligning all edges perfectly.
To secure this top piece, use brad nails. Drive these nails through the top piece of plywood and into the underlying top frame. Space your nails evenly to ensure consistent adhesion and to prevent any lifting or warping of the plywood. Brad nails offer a clean finish, leaving minimal holes that can be easily filled later if desired. As with the bottom shelf, you have the flexibility to choose your material for the workbench surface. While plywood is a common and excellent choice, you could also opt for MDF, laminated particle board, or even a solid wood slab if you prefer a different look, feel, or durability for your primary work surface. The goal is a smooth, stable, and durable top that can withstand the demands of your woodworking projects.
Attach the Casters
Before we transition to building the dedicated miter saw station on top, let’s add an incredibly useful feature to your workbench: mobility. Attaching casters will transform your stationary workbench into a versatile, rolling workstation, allowing you to easily move it around your shop, clear space, or bring your tools closer to your materials. This mobility is a game-changer for workshop organization and flexibility.
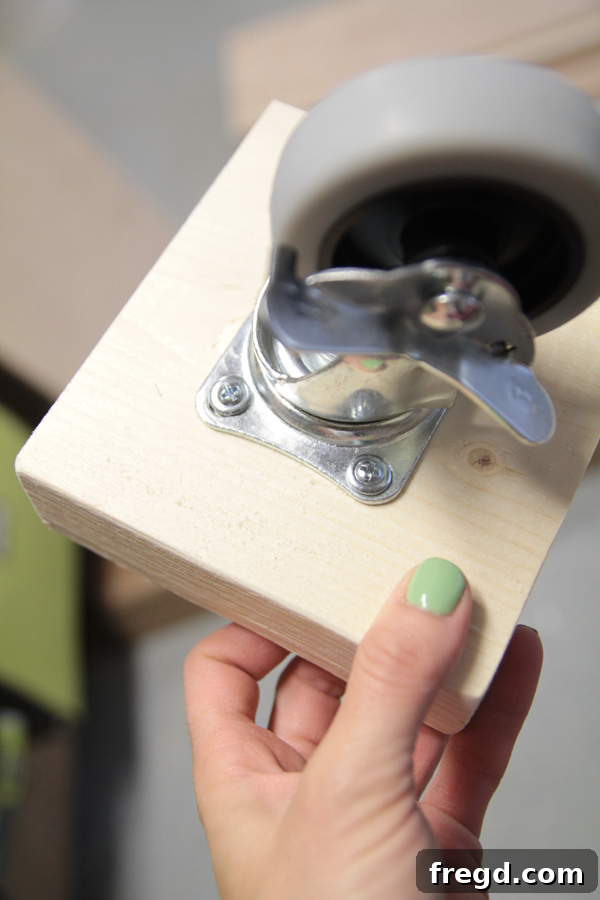
To ensure a strong and stable attachment point for the casters, begin by cutting four pieces of 2×6 lumber, each to a length of 5 inches. These blocks will serve as robust mounting plates for your casters. Attach each caster securely to one of these 2×6 blocks. Then, with the casters mounted, simply attach these wood blocks directly to the legs of your workbench using sturdy wood screws. Position them at the very bottom of each leg, ensuring they are flush with the bottom edges for optimal stability and movement.
Once all four casters are attached, give your workbench a gentle push. Voila! You now have a fully functional, mobile workbench that glides effortlessly across your workshop floor. This simple addition significantly enhances the utility of your workbench, making your workflow more efficient and adaptable.
Build the Miter Saw Station
Now for the heart of the project: building the custom miter saw station atop your newly mobile workbench. The design presented here is tailored to perfectly fit my Ridgid Sliding Miter Saw. However, one of the greatest advantages of DIY is customization! You can easily modify these dimensions to precisely fit your specific miter saw, ensuring a snug and functional setup.
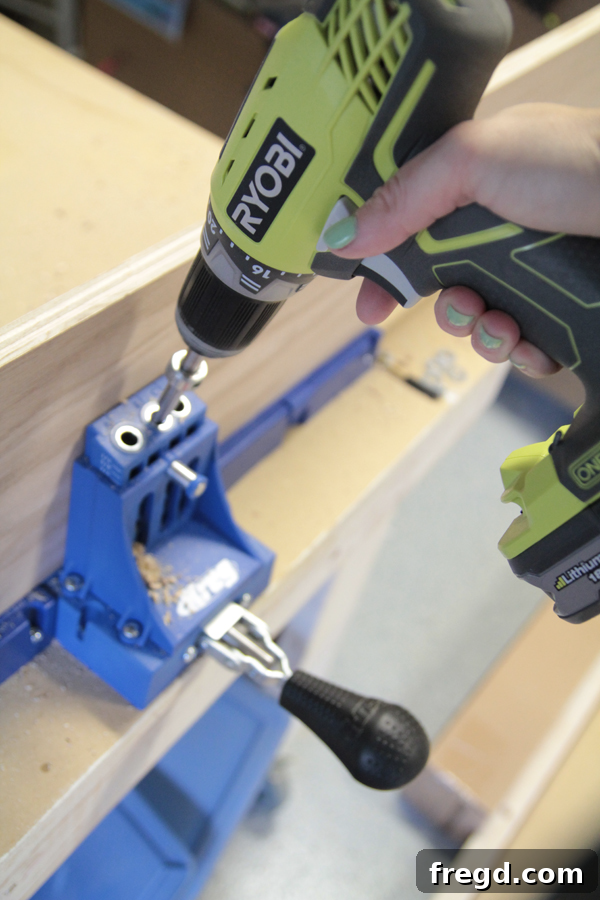
We’ll begin by constructing the fence, a critical component that provides support for your material during cuts. I used a piece of plywood ripped to 7.5 inches wide for my fence. Alternatively, you could use a 1×8 piece of lumber cut into two sections. My fence pieces were cut to 45 inches and 14 inches in length, designed to accommodate the width and movement of my saw. It’s important to measure your saw and its required clearance to determine the optimal lengths for your fence pieces. To prepare these boards for attachment, add ¾-inch pocket holes along one long side of each piece. These pocket holes will allow for a strong, hidden connection to your workbench surface.
With the fence pieces prepared, position them on the workbench top. Crucially, align both boards precisely with the existing fence of your miter saw. This alignment is vital for accurate and repeatable cuts, ensuring your material is supported evenly across the entire cutting surface. Once aligned, securely attach the fence pieces to the workbench tabletop using 1 ¼-inch pocket hole screws and a durable wood glue. The combination of screws and glue creates a robust and unyielding fence that will stand up to heavy use.
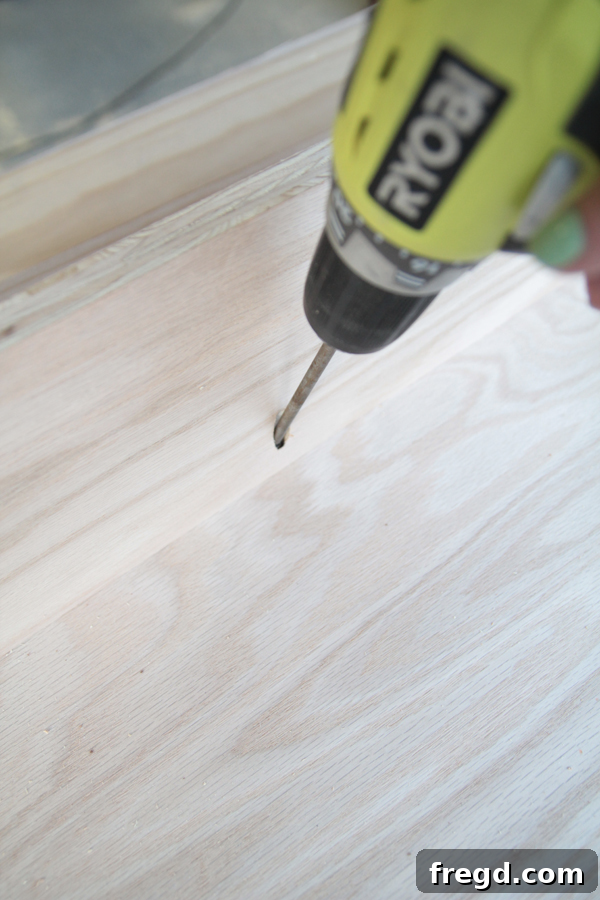
Take a moment to step back and observe how the newly installed fence perfectly lines up with the miter saw’s fence. This seamless transition is key to achieving straight, precise cuts and providing ample support for longer workpieces. The integrated setup creates a larger, more stable cutting platform, significantly enhancing the functionality of your miter saw.
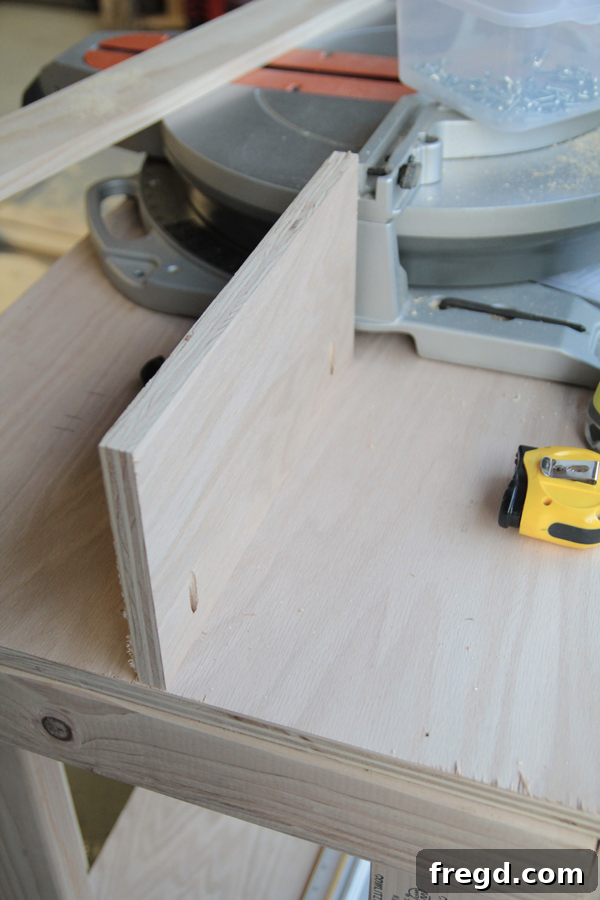
Build the Shelf Supports
This is arguably the most critical step for ensuring the functionality and accuracy of your miter saw station: building the shelf supports. The goal here is to create auxiliary support surfaces on either side of your miter saw that are perfectly level with the cutting table of the saw itself. This enables seamless handling of long workpieces and guarantees accurate cuts without material sagging or wobbling. The exact measurement will depend on your specific miter saw model, so measure with extreme precision.
For my saw, I measured the height from the top of the workbench to the cutting table of the miter saw, which came out to 4.625 inches. If you are building this for a different saw, this is the measurement you absolutely must verify. You want your new support surfaces to be precisely even with your saw’s cutting deck. I decided to use ¾-inch thick scrap wood for my shelf supports. Therefore, I subtracted this thickness from my initial measurement (4.625 inches – 0.75 inches = 3.875 inches), leaving me with a height of 3 ⅞ inches for the support pieces themselves. You have the flexibility to use any suitable wood material for your supports, whether it’s plywood, MDF, or solid lumber.
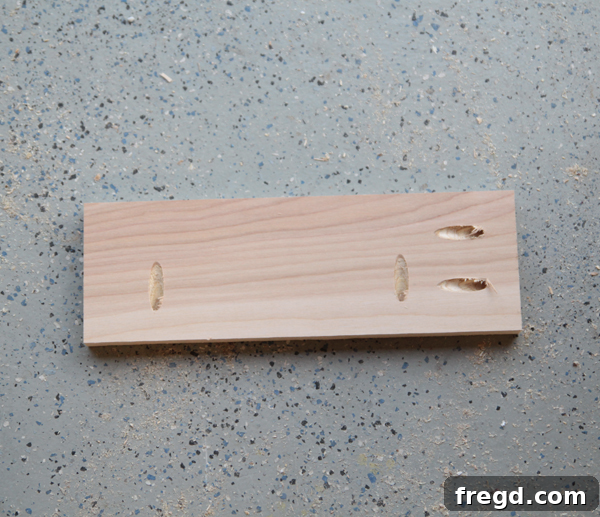
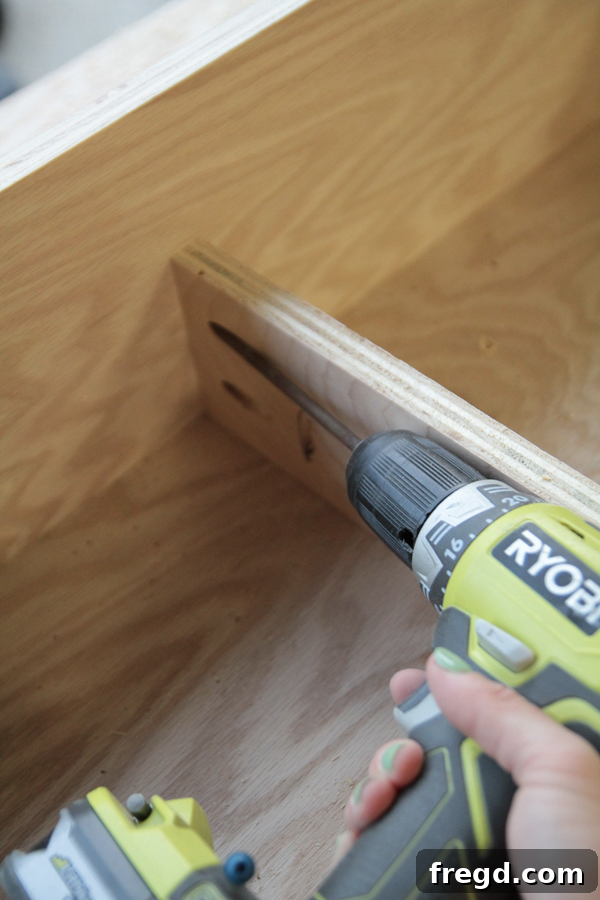
Using my table saw, I ripped a board of plywood to this precise thickness of 3 ⅞ inches. Then, I cut this long strip into several 12-inch pieces, which will serve as the individual shelf supports. To prepare these supports for attachment, add ¾-inch pocket holes to one side and one bottom edge of each piece. This will allow for robust and concealed connections to both the workbench top and the back fence, as depicted in the image below.
Now, position these scrap boards (your shelf supports) on the workbench top, carefully aligning them with the height required to be flush with your saw’s cutting surface. Securely attach them to the workbench top using 1.25-inch pocket hole screws. Ensure they are plumb and firmly anchored before moving on.
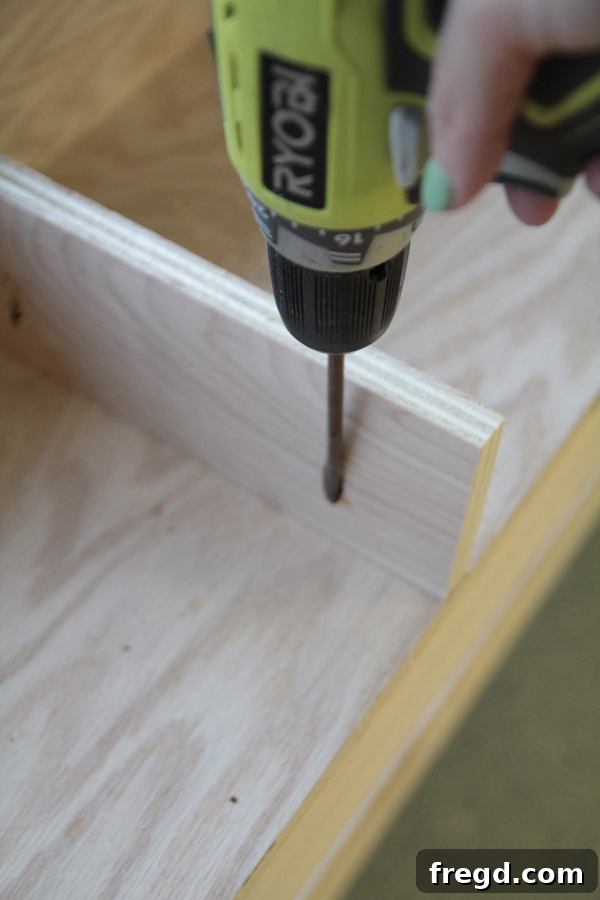
For maximum rigidity and stability, each scrap board support should also be attached to the back fence you previously installed. Use 1.25-inch pocket hole screws and a strong wood glue to make this connection. This dual attachment point creates an exceptionally sturdy structure that will not flex or shift during use, ensuring consistent and accurate cuts.
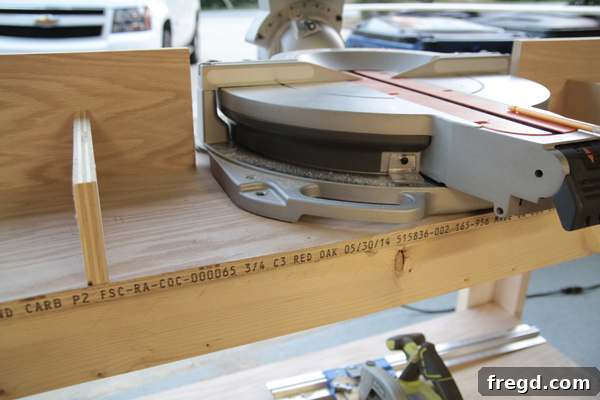
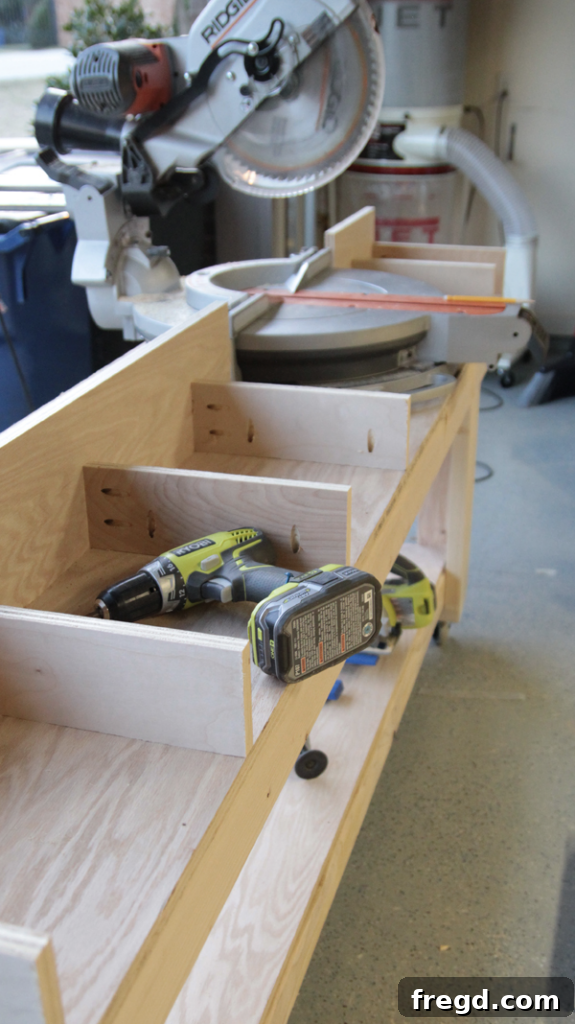
On the left side of the miter saw, where the longer shelf will be, I spaced the scrap board supports evenly apart, approximately every 12 inches. This provides consistent support for longer materials. On the right side of the saw, the two support pieces are spaced 8 inches apart. This strategic spacing leaves convenient openings between the supports, which are perfect for extra storage. I utilize these spaces to house plastic boxes, keeping various screws, nails, and other small tools and hardware neatly organized and within easy reach. This integrated storage is a fantastic way to maximize the utility of your miter saw station.
Attach the Top of the Miter Saw Stand
We’re almost at the finish line! The very final step in completing your custom miter saw stand is to add the top panels that will create your expanded and level work surfaces. For this, I chose MDF (Medium-Density Fiberboard) due to its smooth surface and stability, but you could also use plywood or another sheet good. These top pieces will rest on the shelf supports you just installed, creating a continuous, flush surface with your miter saw’s cutting table.
Measure and cut your MDF boards to the following dimensions: the left side MDF panel is cut at 40 inches from its longest point, and the right side panel is cut at 8 inches from its longest point. A thoughtful design choice I made was to cut the edges of these top boards at a 45-degree angle where they meet the miter saw. This angled cut is incredibly practical as it provides ample space to comfortably rotate my sliding miter saw to its full range of motion without obstruction. This small detail greatly enhances the functionality of the station, especially for making angled or bevel cuts.
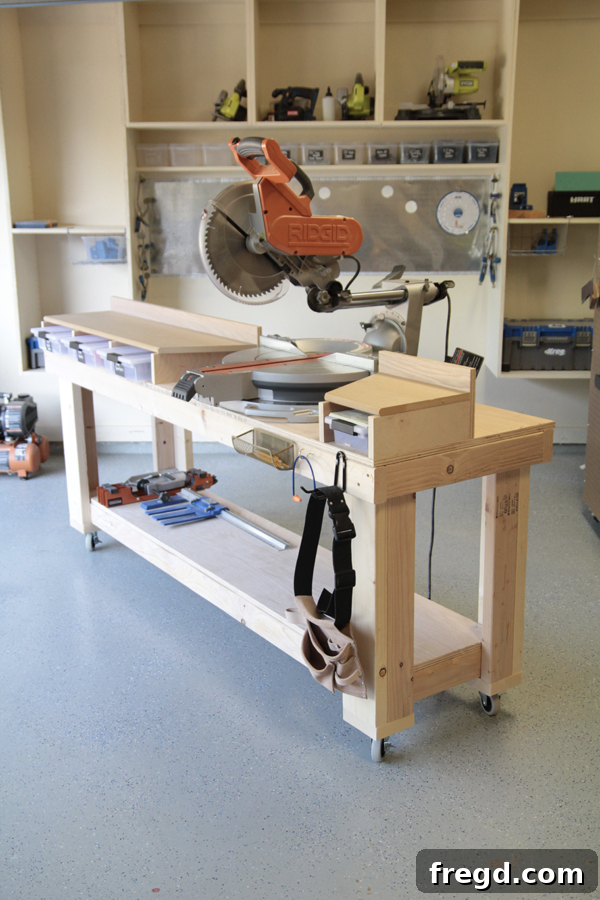
Once your top MDF pieces are cut and positioned, secure them in place using brad nails. Drive the brad nails through the MDF panels and into the underlying shelf supports and the back fence. This will firmly hold the panels, preventing any movement during use and ensuring a perfectly stable and level extension to your miter saw’s cutting surface. And with that, your custom-built miter saw stand is complete! Congratulations on building a professional-grade, highly functional addition to your workshop.
Miter Saw Stand Free Plans
To help you embark on this rewarding DIY project, we’re providing all the necessary plans free of charge. You can easily get the FREE plans for the mobile workbench, which served as the sturdy base for this project, right HERE. As a reminder, I customized my workbench to be 7 feet long instead of the original 8 feet, but both dimensions will work perfectly for your needs!
Additionally, you can download and print the comprehensive FREE PLANS for the mobile miter saw stand top HERE! These plans include all the detailed measurements and instructions you’ll need to build the custom saw station that sits atop your workbench.
Mobile Miter Station
While I chose to permanently attach my miter station to the mobile workbench for a unified, heavy-duty setup, the beauty of these plans lies in their versatility. The free miter saw stand plans provided below are designed such that you can build just the top station component. This allows you the flexibility to use it on various existing work surfaces, like your current workbench, or even to take it with you to different jobsites. It’s an incredibly adaptable design that makes for an excellent mobile miter saw station, providing stability and extended support wherever your work takes you.
You can download and print these FREE plans HERE.
We absolutely love seeing your creations! Once you’ve built your miter saw stand, be sure to follow Shanty on Facebook, Pinterest, and Instagram, and share your impressive builds with us. Happy woodworking!