
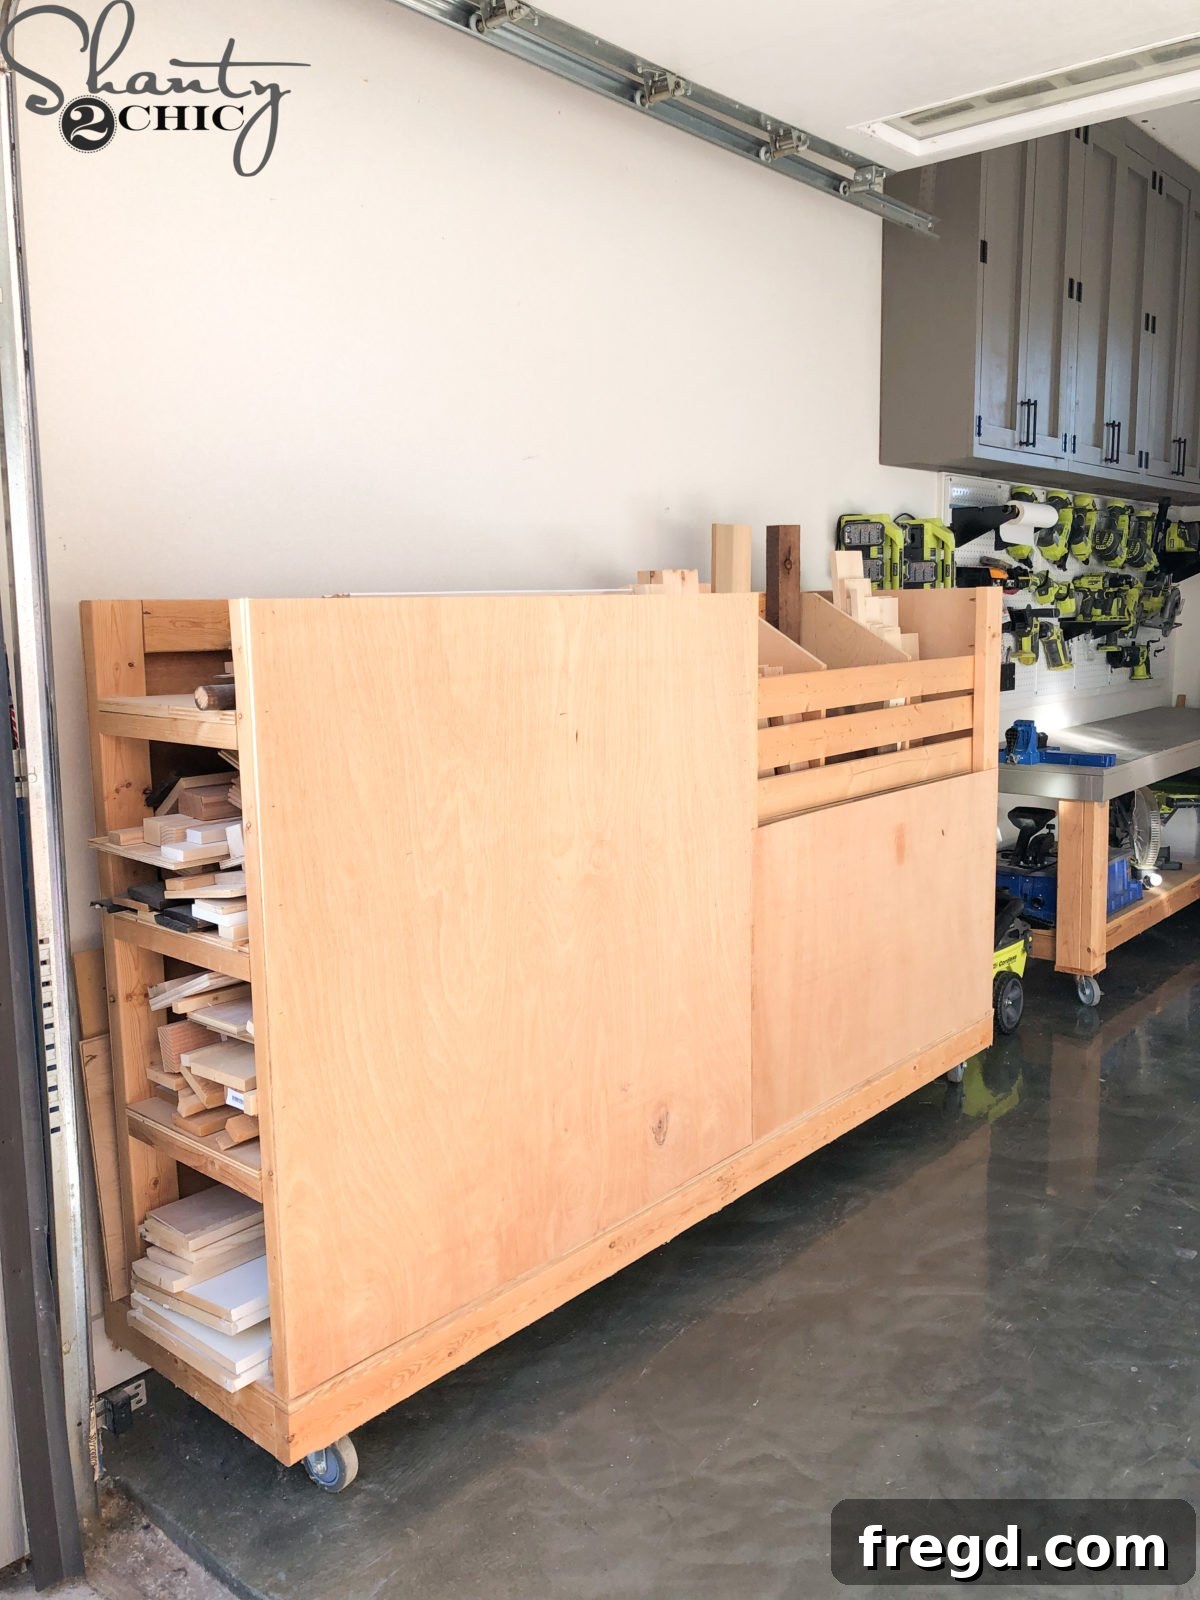
Happy New Year, fellow DIY enthusiasts and makers! We are absolutely thrilled to kick off the year by finally sharing the comprehensive guide for our latest and most anticipated shop addition: the DIY Lumber Cart! While this incredible organization tool has been a staple in our workshop for some time now, providing unparalleled functionality, we’re beyond excited to finally release the free printable plans and walk you through every step of its construction. We can confidently say that we still genuinely LOVE this cart and utilize it constantly, making it an indispensable asset for any serious woodworker or hobbyist!
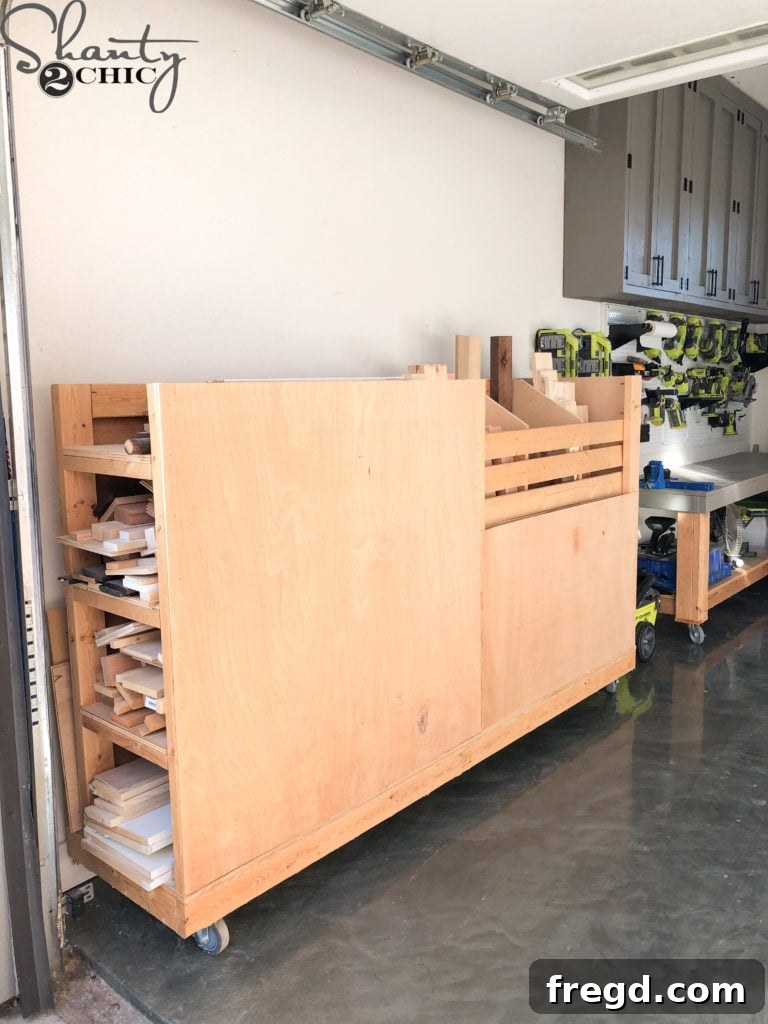
Are you ready to revolutionize your workshop storage and say goodbye to cluttered lumber piles? Then let’s dive straight into building this game-changing project! First things first, make sure you download the FREE Printable Plans HERE. These detailed plans are your essential companion for a smooth build. Once you have them in hand, follow along with our step-by-step how-to guide below, packed with insights and tips to make your DIY journey a success and your workshop a paragon of organization!
For an even more immersive experience and a peek into how this cart seamlessly integrates into a functional workshop, you can also check out the rest of our shop in our complete shop tour on Youtube! Click HERE to watch and get inspired by a truly organized and efficient creative space!
Table of Contents
Why You Need a DIY Lumber Cart for Ultimate Workshop Organization
Every serious woodworker or DIY enthusiast eventually confronts the perennial challenge of a cluttered workshop. Lumber, plywood sheets, and various scraps often end up leaning precariously against walls, stacked in unruly piles in corners, or simply consuming valuable floor space, making the entire area feel cramped, inefficient, and even hazardous. This isn’t just an aesthetic inconvenience; it significantly impacts productivity, as precious time is wasted searching for the right piece of wood, and safety is compromised by tripping hazards.
This is precisely where a dedicated, mobile lumber cart transitions from a luxury to an absolute necessity. Our meticulously designed DIY Lumber Cart project is engineered to tackle these pervasive workshop challenges head-on. Envision a compact, yet surprisingly spacious, unit that expertly stores all your essential wood stock – from full 4×8 plywood sheets and long 8-foot dimensional lumber to those invaluable smaller scraps that are always worth keeping. With this cart, every single piece of lumber finds its designated, easily accessible home, instantly transforming a chaotic environment into a highly organized, streamlined, and profoundly productive workspace.
Beyond its exceptional storage capacity, the inherent mobility of this cart is a true game-changer. Equipped with heavy-duty casters, it allows you to effortlessly transport your entire material inventory directly to your workbench, cutting station, or assembly area. This dramatically reduces unnecessary trips across the shop, minimizes heavy lifting, and significantly improves your overall workflow. It effectively reclaims precious floor space, enhances safety by keeping materials off the ground, and most importantly, cultivates a more enjoyable and efficient woodworking experience. Building this ultimate DIY Lumber Cart isn’t merely about constructing a piece of shop furniture; it’s about making a strategic investment in a more efficient, safer, and ultimately more satisfying creative journey. So, let’s gather our tools and materials, and begin constructing this essential cornerstone of workshop organization!
Tools and Materials for Your Ultimate DIY Lumber Cart
Before embarking on any woodworking project, a meticulous preparation of all your tools and materials is paramount for a smooth, efficient, and successful build. For this robust and highly functional DIY Lumber Cart, you’ll require a thoughtful combination of common woodworking tools alongside specific fasteners and components to ensure maximum durability and long-term functionality. Always consult the free printable plans for precise cut lists, detailed dimensions, and exact material quantities before making any purchases or cuts.
Essential Tools You’ll Need:
- Miter Saw or Circular Saw: Absolutely indispensable for making accurate and clean crosscuts on your lumber and paneling.
- Kreg Jig Pocket Hole System: A fundamental tool for this project, enabling the creation of incredibly strong, secure, and aesthetically pleasing hidden joints. Our preferred model is highly recommended for its versatility, speed, and ease of use in diverse woodworking applications.
- Drill/Driver: Essential for pre-drilling pilot holes, driving pocket hole screws, and securing other fasteners. A cordless model offers maximum convenience.
- Brad Nailer or Stapler: Perfect for quickly and accurately attaching plywood panels, shelves, and retaining slats. This tool drastically speeds up assembly of sheet goods.
- Measuring Tape, Square & Pencil: Precision is key in woodworking; accurate measurements and clear markings prevent errors and ensure snug fits.
- Wood Clamps: Various sizes of clamps are invaluable for holding pieces securely in alignment during assembly, gluing, and fastening, ensuring square and strong joints.
- Safety Glasses & Hearing Protection: Non-negotiable for any woodworking activity. Always prioritize your personal safety by wearing appropriate protective gear.
- Sanding Supplies: (Optional, but highly recommended) Assorted grit sandpaper or a power sander for smoothing rough edges, splinter-prone surfaces, and preparing your cart for an optional finish.
Comprehensive Materials List:
- Lumber (2x4s, 1x4s): These form the primary structural framework and the rungs of your cart. Refer meticulously to the plans for exact lengths and required quantities of each dimension.
- Plywood (e.g., 3/4″ and 1/4″ sheets): Used for the robust base, the interior shelves, the scrap bin panels, and the exterior paneling. Check the plans for specific thicknesses and sheet dimensions.
- Wood Glue: An absolute must-have. Wood glue significantly reinforces all joints, creating a bond that is often stronger than the wood itself, ensuring maximum strength and longevity for your cart. A good quality glue bottle dispenser makes application much easier and less messy.
- Pocket Hole Screws (1 1/4″, 2 1/2″): Specifically engineered for pocket hole joinery, these screws create strong, self-tapping connections without pre-drilling in the mating piece.
- Wood Screws (2″, 2 1/2″): Used for attaching the sturdy shelves and the critical wheel blocks to the base.
- Brad Nails (1 1/4″) or Staples (1″): For efficiently securing plywood sheets and retaining slats to the frame. Staples can often offer a faster application for larger panels.
- 5″ Locking Casters (x4): Heavy-duty, durable wheels are absolutely crucial for providing effortless mobility. Ensure they feature a reliable locking mechanism to prevent unwanted movement while the cart is in use or being loaded/unloaded.
Having all your tools and materials meticulously organized and at hand before you begin will make the building process infinitely more enjoyable, efficient, and ultimately lead to a superior finished product. Double-check your cut list against the plans one last time, and ensure all your tools are in perfect working order. With everything ready, let’s get building your ultimate DIY Lumber Cart!
1. Building the Foundation: Constructing the Sturdy Base
The base is undeniably the bedrock of your DIY Lumber Cart, providing both foundational stability and essential mobility. A meticulously constructed base ensures that your entire cart can reliably handle the substantial weight of various lumber types without any compromise to its structural integrity, preventing wobbling or premature failure. Precision and strength are paramount in this initial step, as they dictate the success of the entire project.
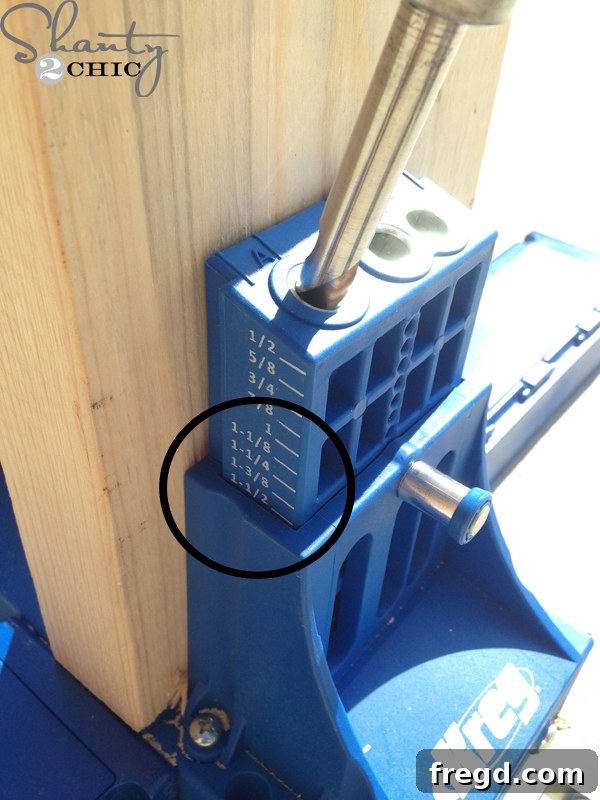
Our initial and most critical step involved accurately cutting all the base frame pieces to their specified sizes. Consult your free printable plans meticulously for the exact dimensions of each component. Once your lumber is precisely cut, we proceeded to drill 1 1/2″ pocket holes into both ends of the shorter, cross pieces. These strategically placed pocket holes are absolutely vital for creating robust, hidden joints that will securely connect the primary frame components. If you’re new to the world of pocket hole joinery or are contemplating an upgrade to your existing system, you can find our favorite Kreg Jig model HERE – it truly makes the process remarkably simple, efficient, and consistently accurate!
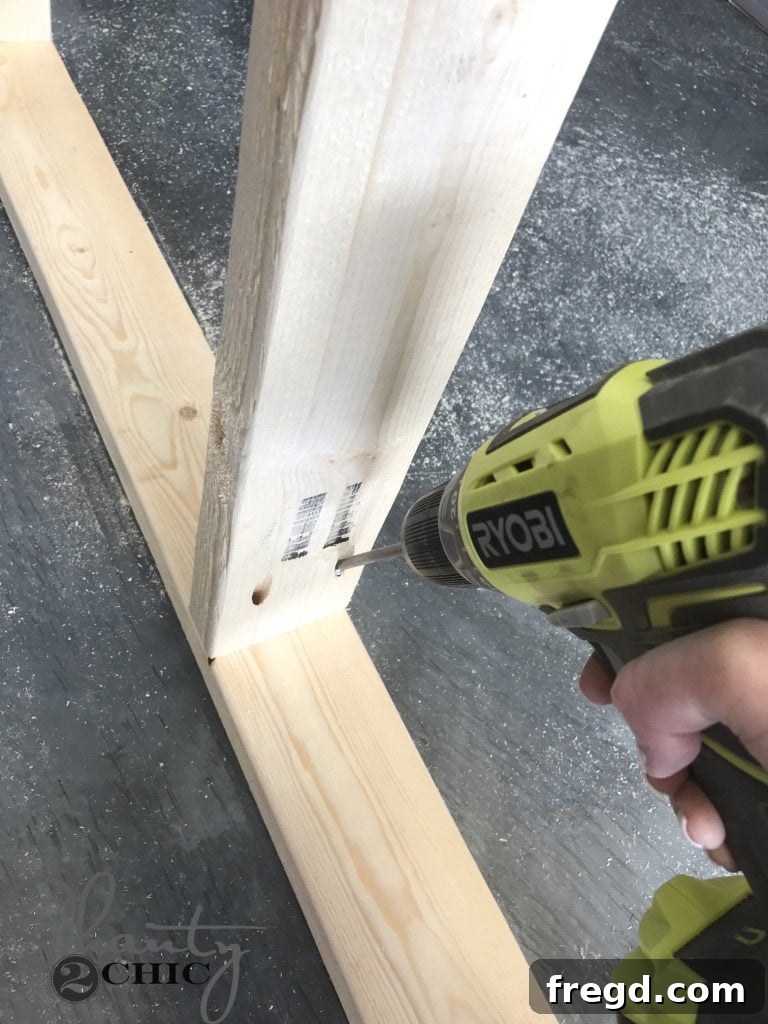
With all the necessary pocket holes expertly drilled, the next crucial phase was the careful assembly of the base frame. We applied a generous and even amount of high-quality wood glue to all the mating surfaces of the cross pieces and the longer frame pieces. This is a critical step, as the glue, in conjunction with the fasteners, creates an incredibly strong, monolithic bond. We then secured these components with 2 1/2″ pocket hole screws. The combination of glue and screws forms a joint that is exceptionally strong and resilient, which is absolutely essential for a cart designed to bear significant and often shifting weight. During this assembly, ensure your pieces remain perfectly square; using woodworking clamps can be invaluable here to hold everything firmly in place while you drive the screws and the glue begins to set.
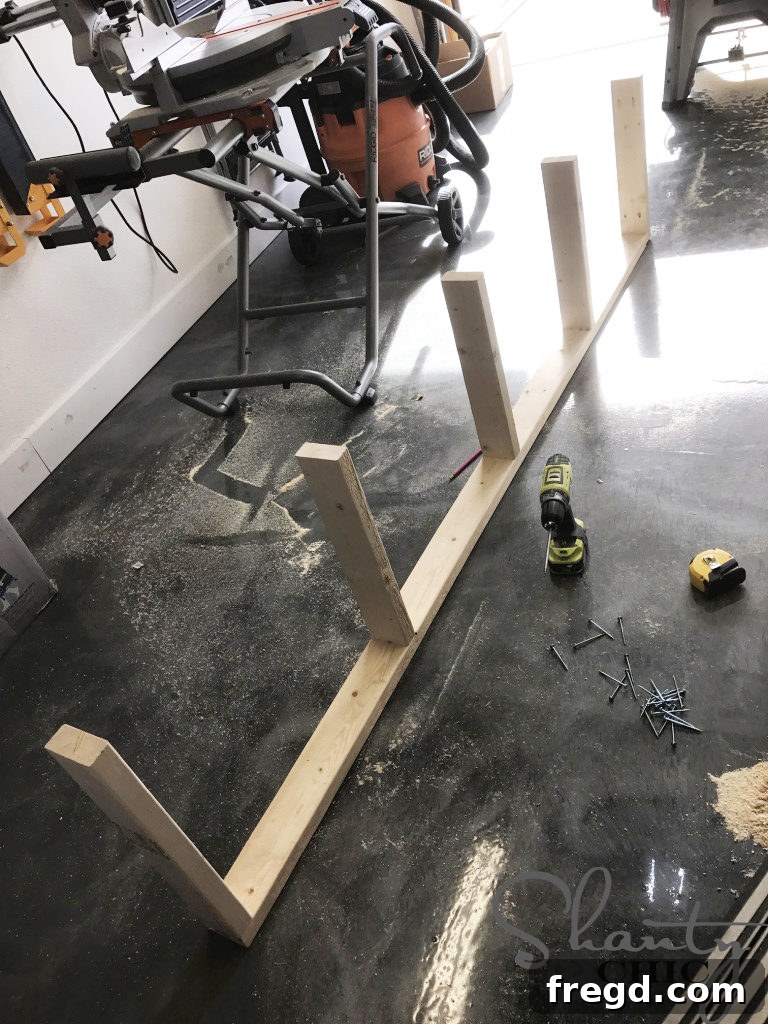
Here’s a clear visual representation of the base taking shape, with one long frame piece securely attached. This image provides a precise idea of the structural progression. It’s highly advisable to take your time to align everything perfectly and check for squareness before fully tightening all fasteners. Any misalignment at this foundational stage can ripple through the entire build, affecting subsequent component fits and overall cart performance.
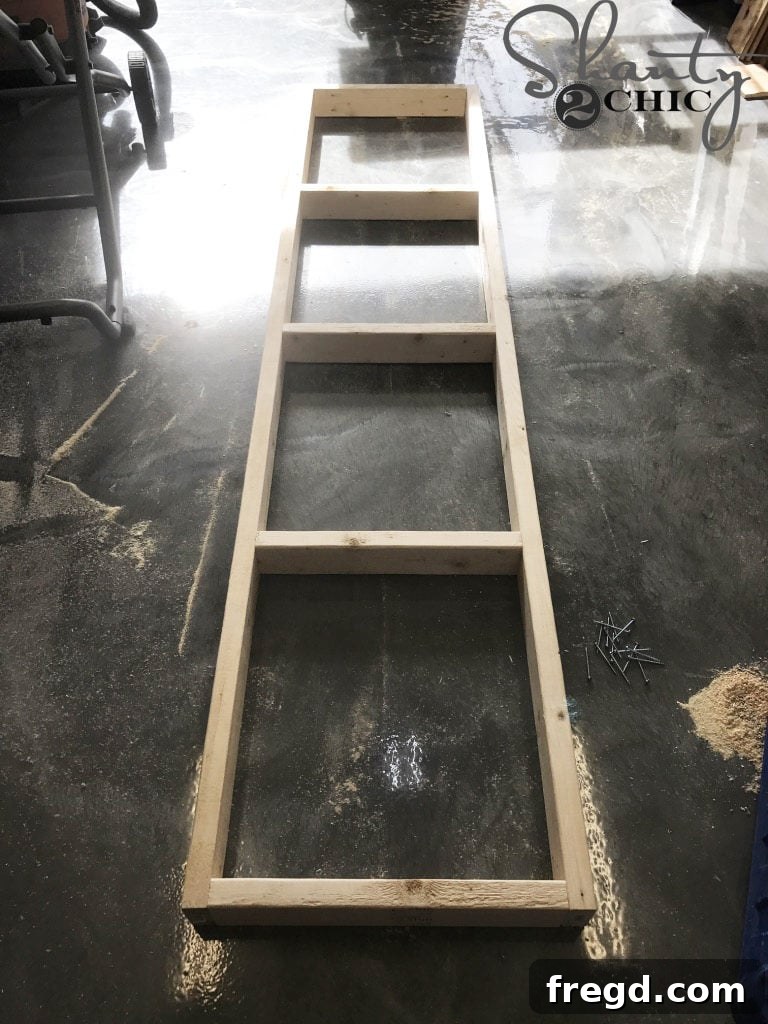
Upon completion of this phase, this is precisely what your assembled base frame should resemble. Achieving a perfectly flat and square frame at this juncture is paramount, as the integrity and alignment of all subsequent cart components, such as the ladders and shelves, will directly depend on this foundation. We recommend a final double-check of all measurements and connections to ensure everything is solid and square.
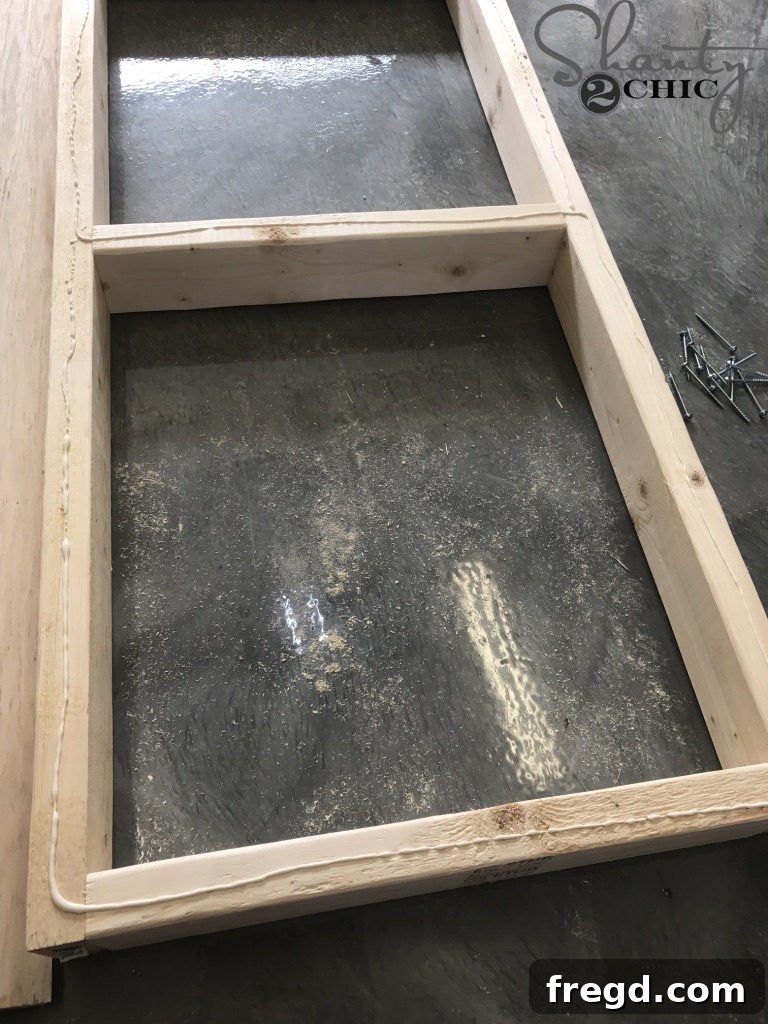
To meticulously prepare for the attachment of the bottom plywood sheet, we applied a thin, continuous, and even line of wood glue along the entire top perimeter edges of the constructed base frame. This application serves a dual purpose: it not only dramatically strengthens the adhesion of the plywood to the frame but also effectively helps to prevent any unwanted rattling or movement of the plywood over years of heavy use.
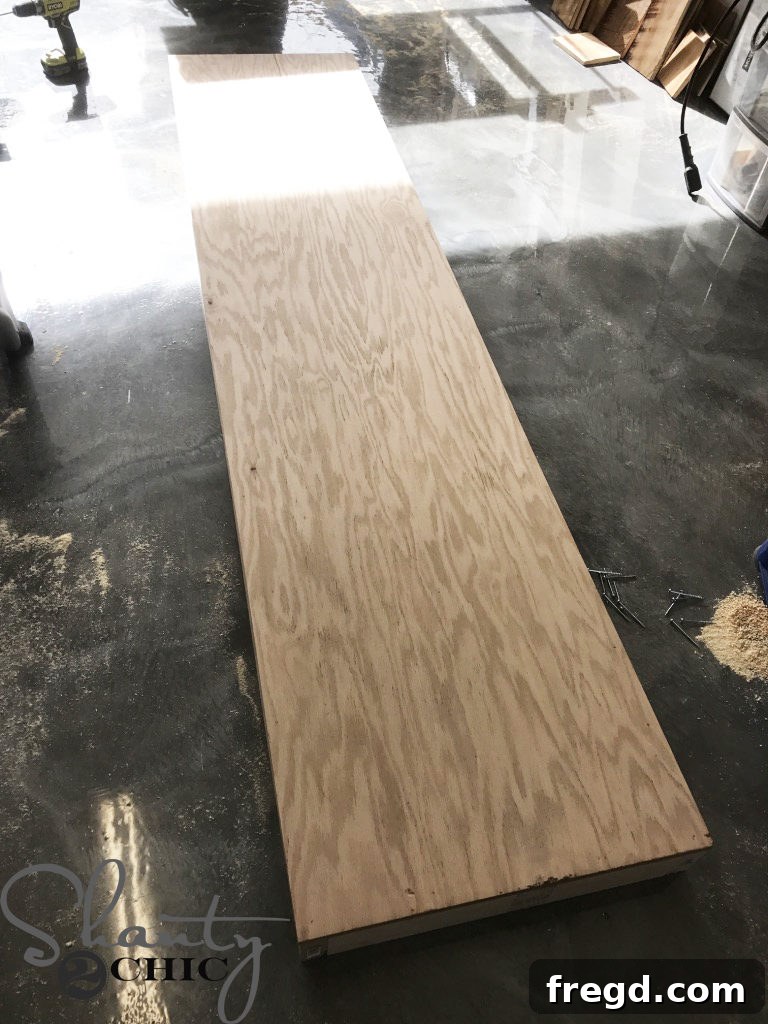
Next, we precisely cut the bottom sheet of plywood to the exact size specified in your detailed plans. With the glue applied, we carefully positioned this plywood sheet onto the base frame, ensuring perfect alignment. It was then securely attached using a combination of 1 1/4″ brad nails and additional wood glue. The brad nails provide immediate mechanical hold, preventing movement while the glue cures, thus guaranteeing a long-lasting, rigid, and incredibly strong connection. Space your brad nails approximately every 6-8 inches around the entire perimeter and along any internal frame supports.

Now, we move to the crucial element that grants your cart its invaluable mobility: the wheels! We carefully flipped the completed base upside down to provide optimal access to its underside. We then cut the robust wheel block pieces to their specified sizes – these blocks are engineered to provide a supremely solid and reinforced mounting point for the heavy-duty casters. We first attached the initial set of blocks to the bottom of the base frame, securing them firmly with 2 1/2″ wood screws and a generous application of wood glue. Following this, for significantly enhanced height, load-bearing capacity, and overall reinforcement, we attached the second set of blocks directly on top of the first set, again utilizing 2 1/2″ wood screws and wood glue. For easy, precise, and mess-free glue application throughout your project, you can find our favorite glue bottle dispenser HERE!
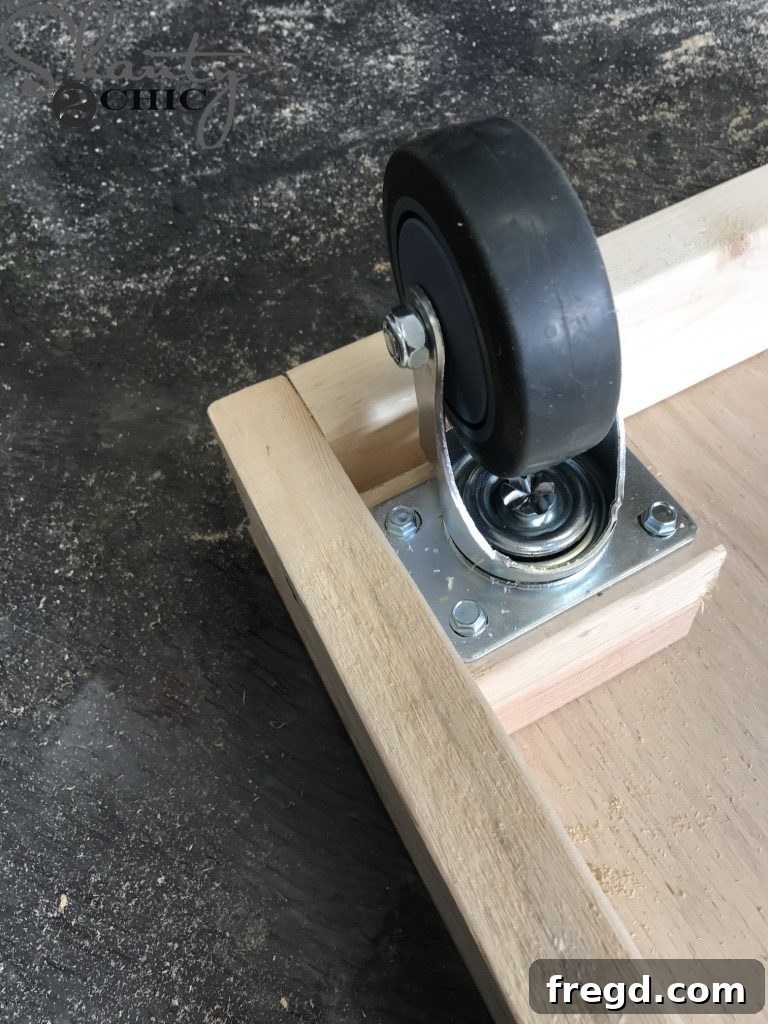
The absolute final step for the base assembly is the critical attachment of the casters. We secured one heavy-duty caster to each wheel block, ensuring they are oriented for optimal maneuverability. **An extremely important note:** Before proceeding with any further construction of the cart, it is imperative that you ensure all casters are engaged in the *locked position*. This vital safety measure prevents the cart from unexpectedly rolling away while you are actively working on it, thereby ensuring your safety and the stability of the entire build. We unequivocally recommend using robust 5″ casters for their superior smooth rolling capability and impressive heavy load capacity; you can find the exact 5″ locking casters we use HERE. With the base now fully complete, incredibly mobile, and safely locked, you have successfully established a rock-solid and transportable foundation for your ultimate lumber storage solution!
2. Assembling the Vertical Framework: Constructing the Ladders
The “ladders” constitute the essential vertical framework of your DIY Lumber Cart, providing the indispensable structure upon which your shelves and various dividers will be securely mounted. These crucial components are specifically engineered to hold an array of lumber lengths with utmost security and stability, making their accurate assembly absolutely paramount for a functional, balanced, and durable cart. Precise measurements and careful construction at this stage are key to the cart’s overall success.
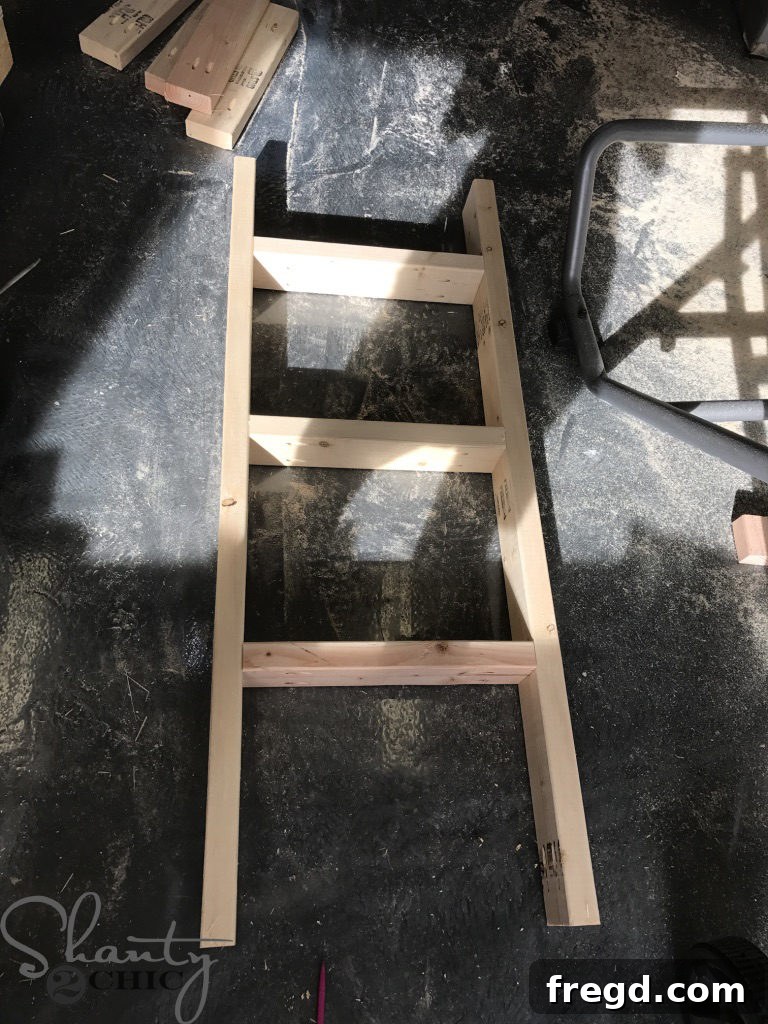
Begin this phase by meticulously cutting all the individual ladder pieces – encompassing both the vertical rails and the horizontal rungs – to their precise dimensions as thoroughly detailed in your free printable plans. This thoughtfully designed project intelligently utilizes a combination of 2×4 and 1×4 lumber for different rung requirements, so it is imperative to pay close attention to the specific dimensions and lumber types designated for each. Next, drill all the necessary pocket holes: 1 1/2″ pocket holes into the ends of the more robust 2×4 rungs, 3/4″ pocket holes into the ends of the narrower 1×4 rung, and 1 1/2″ pocket holes into *one end* of each of the primary ladder rail pieces. The intentional variation in pocket hole depths ensures optimal screw grip and structural integrity for the different material thicknesses. Once all holes are accurately drilled, carefully attach the rungs to the ladder rail pieces, utilizing the appropriate pocket hole screws (2 1/2″ for 2×4 rungs and 1 1/4″ for the 1×4 rung) and a generous application of high-quality wood glue for maximum, enduring strength.
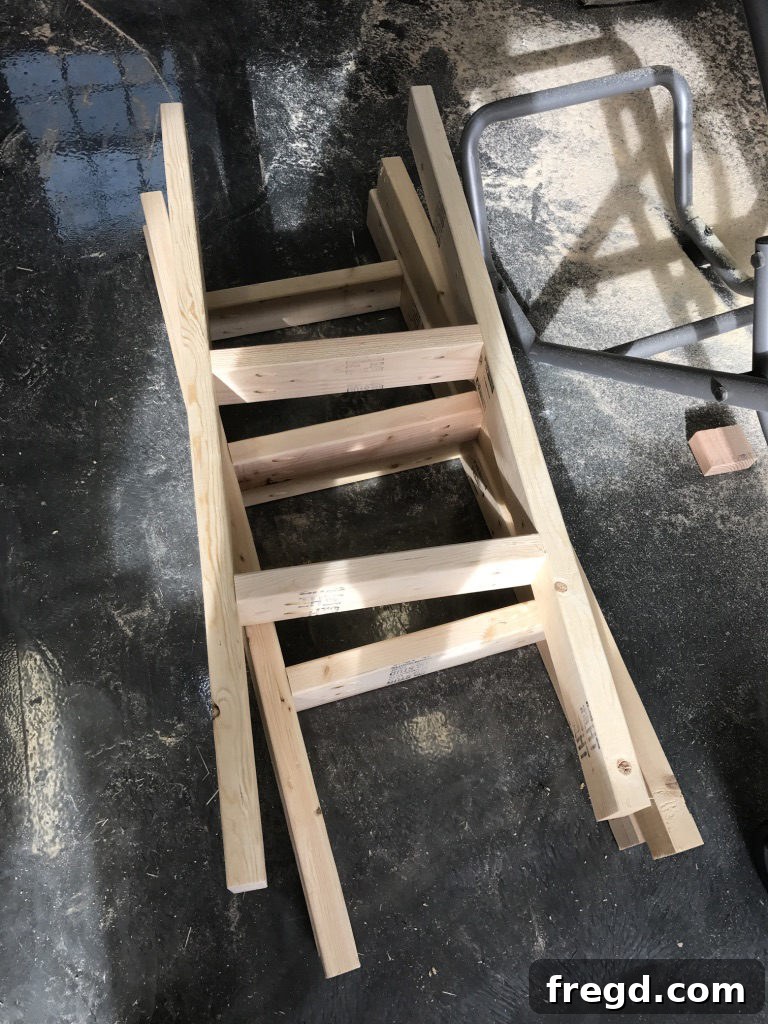
It is critically important to understand and note that all three ladders designed for this particular cart will feature slightly different configurations in terms of both rung placement and even the specific types of rungs utilized. This bespoke design is meticulously optimized for storing various lumber lengths and dimensions with maximum efficiency and accessibility. Therefore, we cannot overstate the importance of **meticulously referring to your free printable plans for the precise details and the correct assembly sequence for each individual ladder.** Do not make the assumption that they are identical; careful and diligent attention to the plans at this stage will undoubtedly save you considerable time, frustration, and potential rework later in the building process.
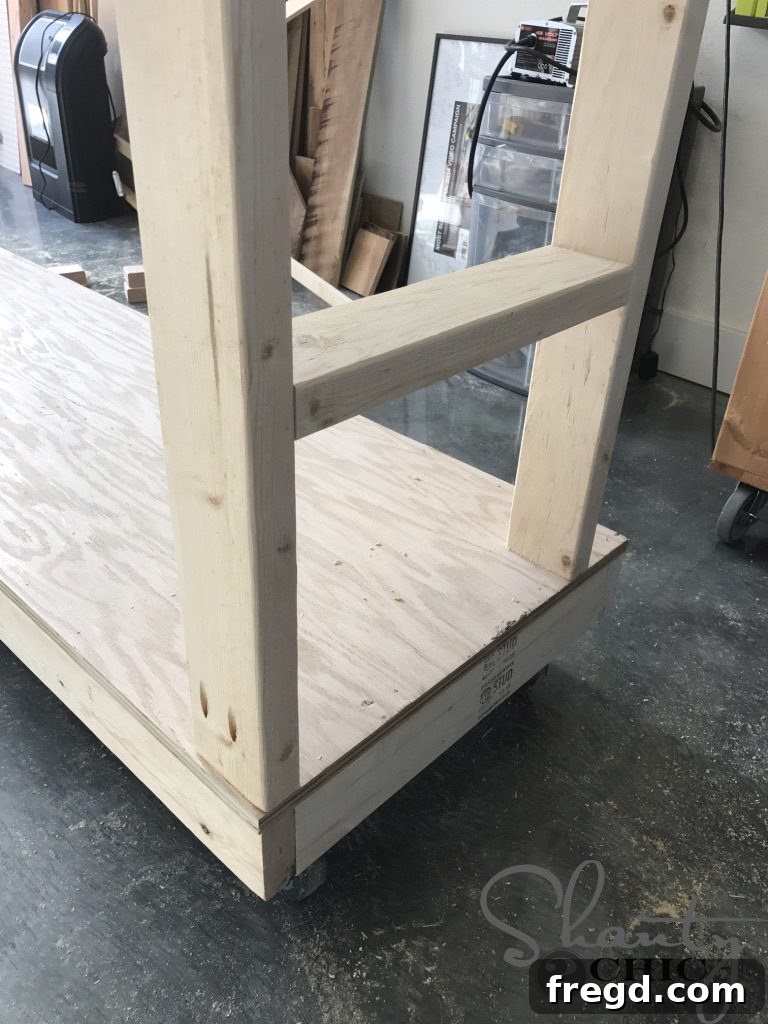
Once your ladders are meticulously assembled and double-checked for accuracy, the next significant step is to securely connect them to the robust base you so carefully constructed. Carefully position each ladder onto the base frame, ensuring proper orientation as per the plans. We then securely attached each ladder to the base frame, utilizing 2 1/2″ pocket hole screws and a strong wood glue. Drive these screws precisely through the pre-drilled pocket holes on the ladder rails and firmly into the top surface of the base frame. Before fully tightening the screws, ensure each ladder is perfectly plumb (vertical) using a level. This crucial step firmly establishes the primary vertical structure of your lumber cart, providing the necessary framework for all subsequent storage elements.
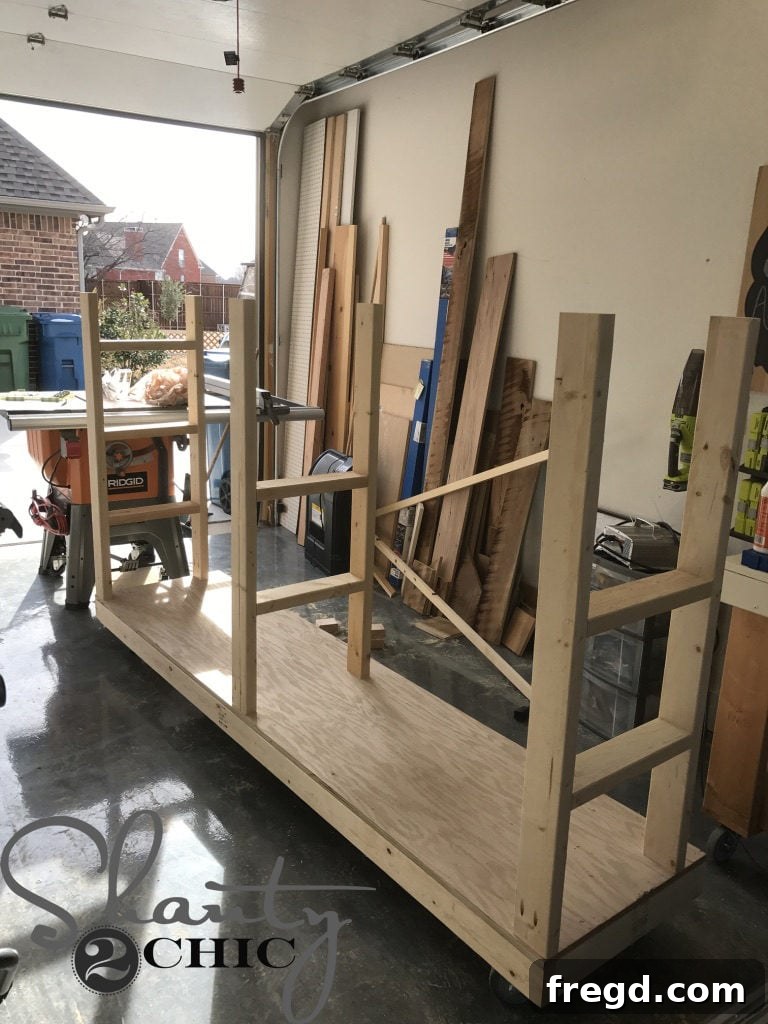
At this pivotal point, your DIY lumber cart should visibly begin to take its definitive shape, looking strikingly similar to the image provided above, with all the ladders firmly attached to the base. You should now clearly observe the distinct spacing and height variations of the rungs across the different ladders, which are designed for specialized storage. (A minor note: In this specific reference photo, the 1×4 rung was attached shortly after, so please ensure yours is meticulously in place according to your plans). The sturdy, integrated framework is now impeccably prepared to support the upcoming shelves and specialized storage compartments, bringing you closer to a fully organized workshop.
3. Installing the Storage Levels: Attaching the Shelves
With the robust base and the meticulously assembled ladder structures firmly in place, the next crucial step in building your DIY Lumber Cart is the precise installation of the horizontal shelves. These shelves are not merely flat surfaces; they are thoughtfully designed to create distinct, individual compartments specifically optimized for organizing your diverse lumber inventory. This strategic arrangement allows for effortless access and the most efficient utilization of every inch of space within the cart. The design ensures varying depths and heights of shelves to accommodate a wide spectrum of lumber lengths and dimensions.
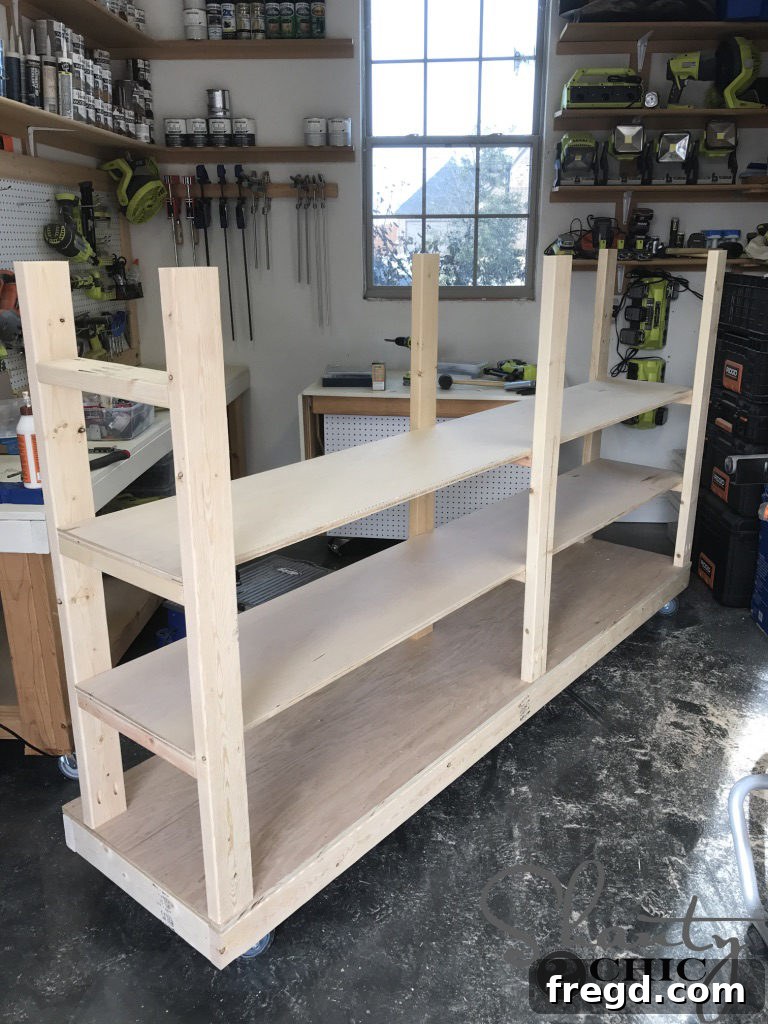
Begin this phase by meticulously cutting all your individual shelf pieces to the precise dimensions specified in your free printable plans. Accuracy in these cuts is paramount to ensure clean, square edges that will allow for a snug and professional-looking fit within the ladder framework. Once all pieces are expertly cut, the shelves are ingeniously designed to be easily slid into their designated positions, working methodically from bottom to top. They should fit snugly between the corresponding rungs of the ladders. This intelligent installation method not only ensures accurate alignment but also significantly simplifies the entire assembly process, making it less cumbersome and more efficient.
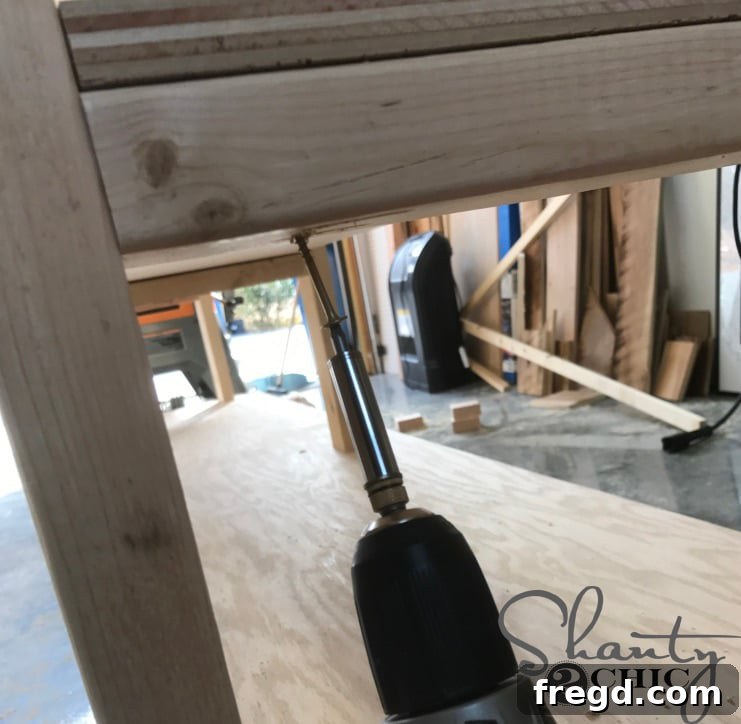
After each shelf is carefully placed into its correct position, it’s imperative to secure it permanently to ensure the cart’s structural integrity. We attached the longer shelves to the sturdy ladder rungs using robust 2″ wood screws, reinforced with a liberal and continuous application of high-quality wood glue. Drive these screws firmly from the underside of each rung, directly into the shelf material itself. This precise fastening technique provides an incredibly strong, clean, and durable connection capable of bearing significant weight. For the shorter shelf, which aligns with the narrower 1×4 rung, we opted for 1 1/4″ brad nails in conjunction with wood glue. Brad nails are exceptionally well-suited here for smaller, lighter connections, providing ample holding power without the risk of splitting the narrower rung. Throughout this step, ensure all shelves are perfectly level and immovably attached to maximize their weight-bearing capacity and contribute to the overall stability of your organized lumber storage system.
4. Maximizing Space: Building the Integrated Scrap Storage
One of the most innovative and truly valuable features of this DIY Lumber Cart is its brilliantly integrated scrap wood storage system. This thoughtfully designed section masterfully transforms what would otherwise often be wasted or overlooked space into highly functional and easily accessible bins. These bins are perfect for organizing all those invaluable smaller pieces of wood that are invariably too good to discard, yet frequently get lost in the chaotic shuffle of a busy workshop. Efficient scrap management is not just about tidiness; it is a critical practice for maintaining a tidy, resource-conscious, and economically savvy woodworking environment.
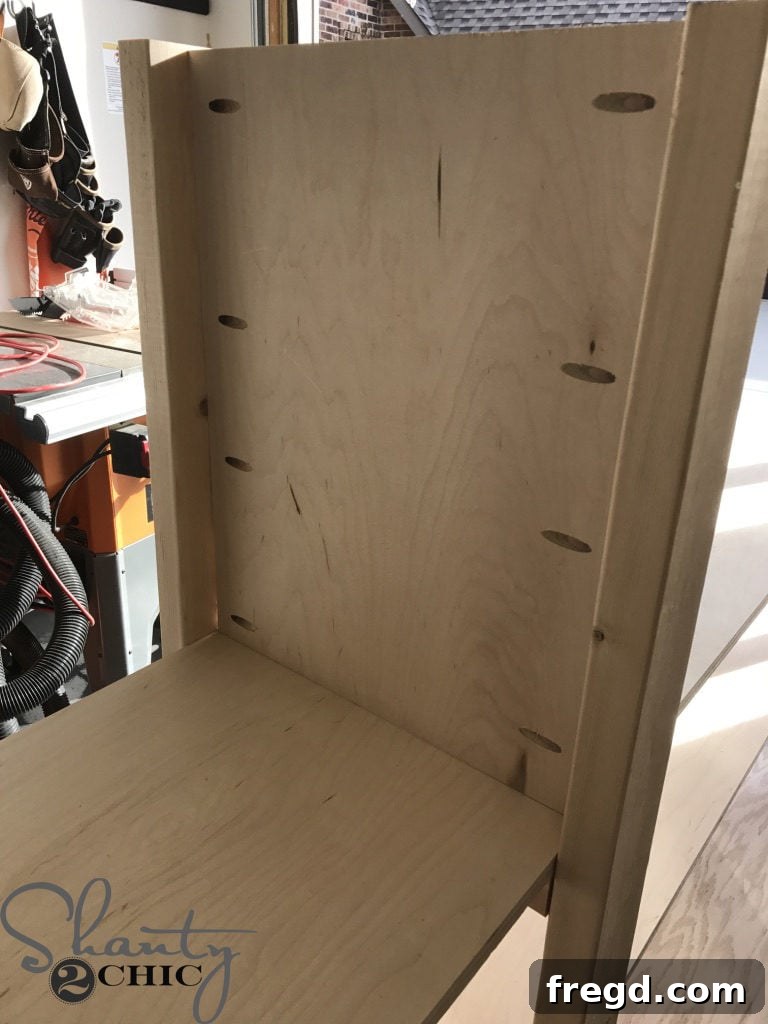
To commence the construction of this intelligent scrap assembly, first meticulously cut the scrap side panels to their precise sizes as dictated by your comprehensive plans. These panels are the foundational elements that will form the structural sides of your dedicated scrap bins. Next, drill 3/4″ pocket holes strategically along the vertical edges of these panels. This shallower pocket hole depth is ideally suited for the thinner plywood typically specified for these panel components, ensuring optimal screw grip without breakthrough. Once drilled, carefully position and attach them to the second and third ladders of your cart using 2 1/2″ pocket hole screws and a generous application of wood glue. Ensure they are perfectly plumb and securely fastened, as these panels will reliably bear the accumulated weight of your valuable scrap wood.
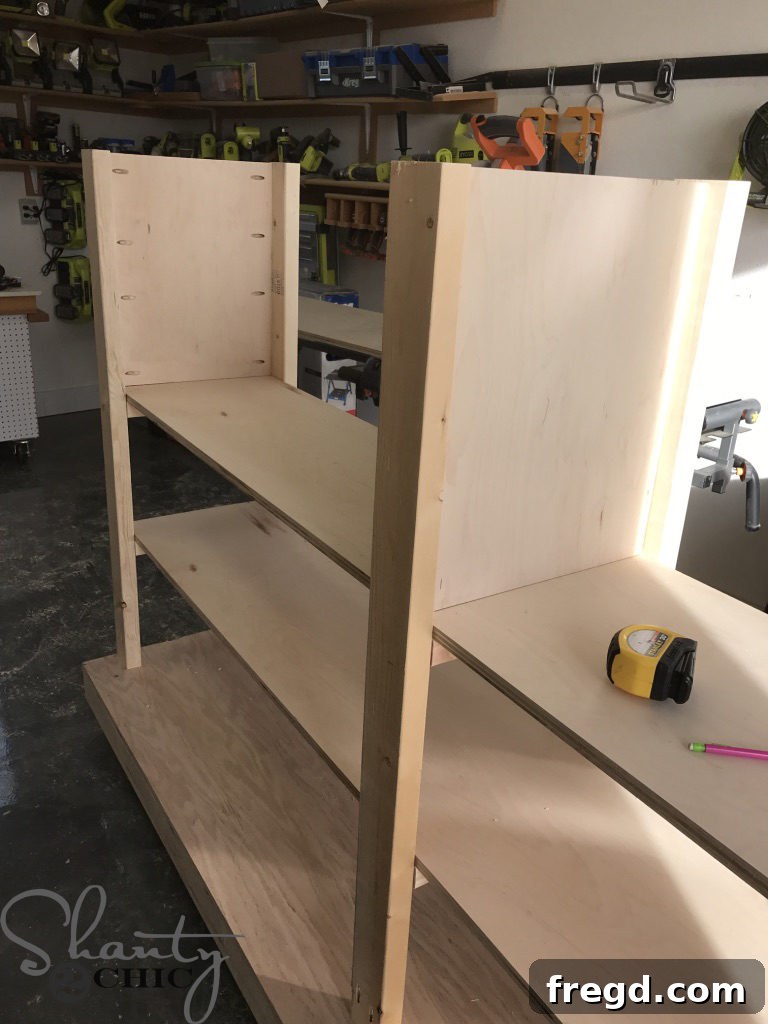
It’s critically important to comprehend and adhere to the fact that both scrap side panels will be attached at distinct, different points along the ladders. This intentional design creates the staggered, multi-level scrap bins, maximizing the utilization of vertical space. Therefore, **always refer diligently to your free printable plans for the exact placement, measurements, and orientation for each individual panel.** This precise positioning is fundamental to ensuring optimal use of the available space and to creating appropriately sized compartments tailored for various scrap lengths and dimensions. Double-check all your measurements and dry-fit the panels before committing to any permanent attachments.
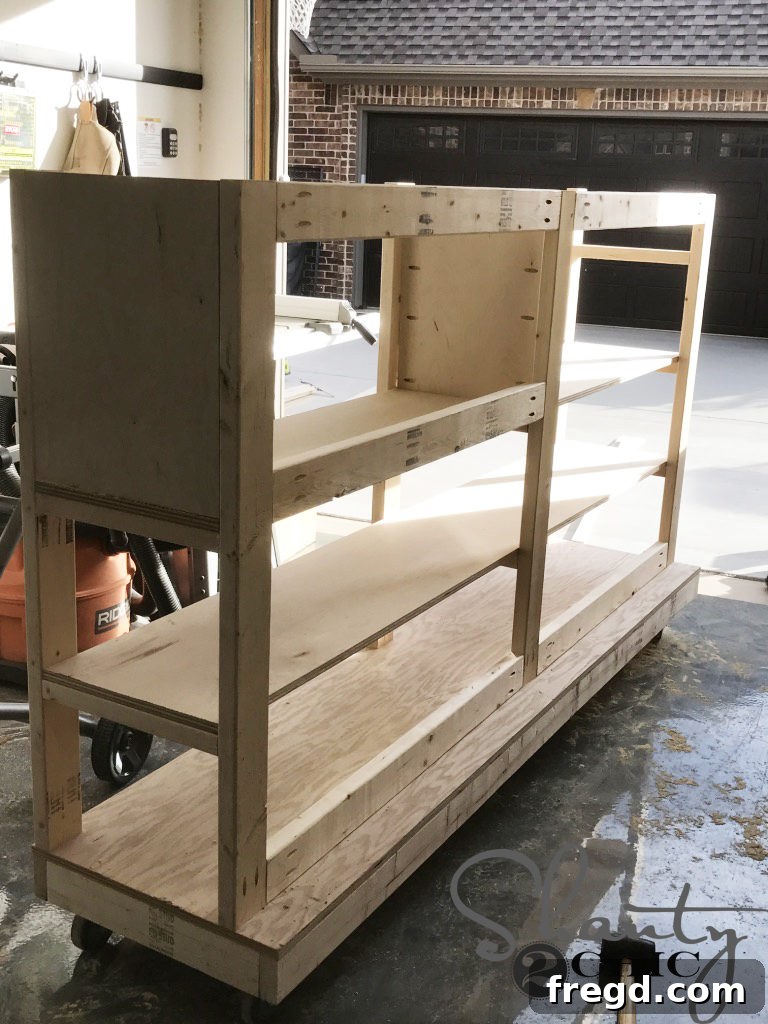
Now, carefully rotate or flip the lumber cart to access its back side. Here, you will install the crucial back support pieces, which serve to add significant rigidity to the overall structure and form the essential rear framework for your integrated scrap storage area. Cut these back support pieces to their precise sizes and drill 1 1/2″ pocket holes into both ends of each piece. Then, attach them horizontally across the back of the ladders, securing them firmly with 2 1/2″ pocket hole screws and wood glue. These robust supports are vital for the cart’s overarching strength and play a key role in ensuring the long-term stability and containment of the scrap bins.
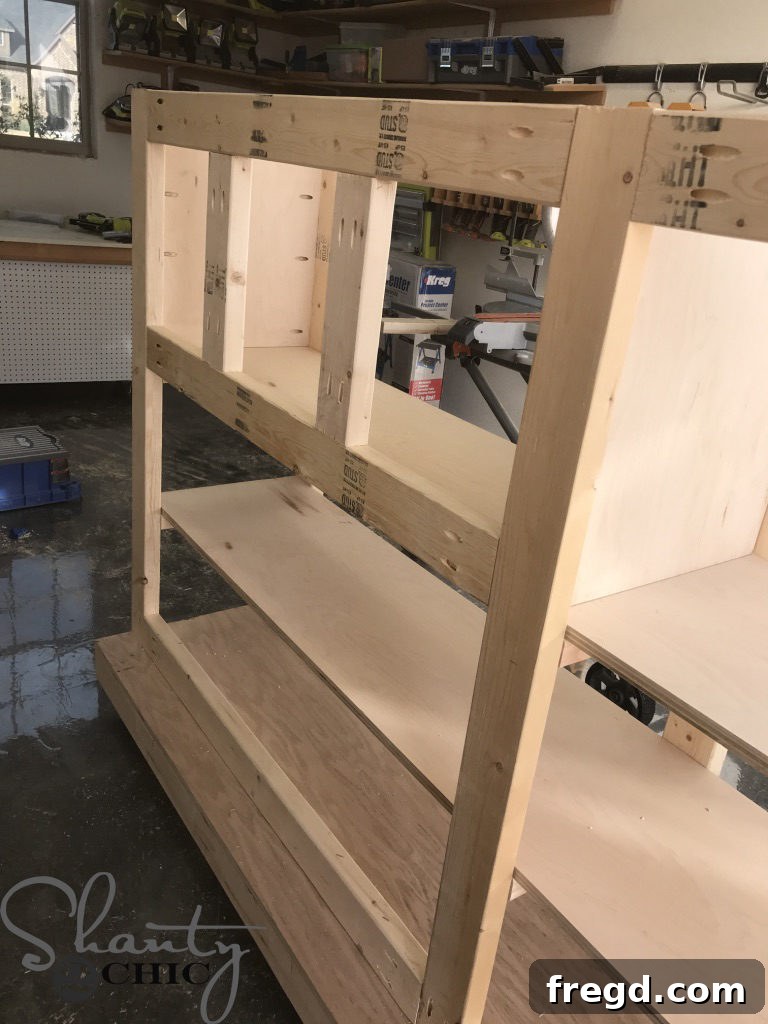
Following the installation of the horizontal back supports, proceed to cut the vertical support pieces to their specified dimensions and drill 1 1/2″ pocket holes into their respective ends. These vertical supports will intricately connect the horizontal back supports, further compartmentalizing and defining the internal structure of the scrap storage area. Attach them securely to the cross support pieces using 2 1/2″ pocket hole screws and wood glue. This meticulous construction creates a robust, grid-like framework at the back of your cart, perfectly prepared to house and organize the individual scrap dividers.
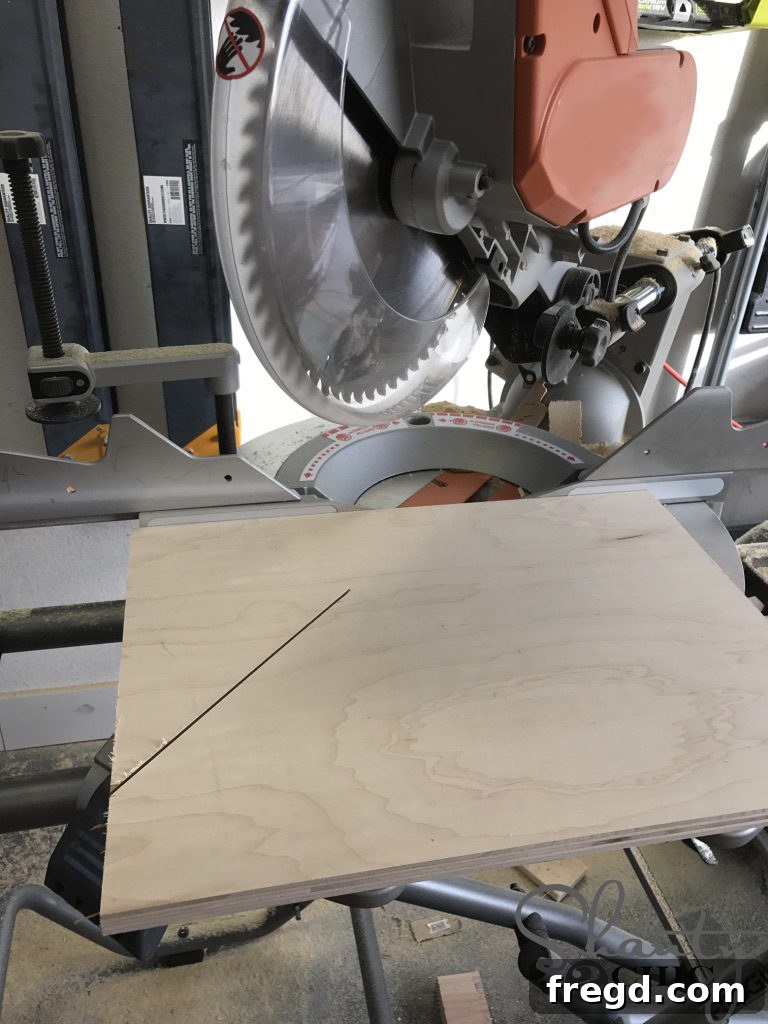
With the primary back supports thoroughly completed and reinforced, shift your focus to the individual scrap dividers themselves. Cut these dividers to the precise dimensions meticulously specified in your comprehensive plans. Drill 3/4″ pocket holes into the back vertical side of each divider piece. These carefully placed dividers will create the individual, dedicated slots for efficiently organizing various lengths and types of scrap wood, ensuring that every piece, no matter how small, has its designated, easily identifiable place.
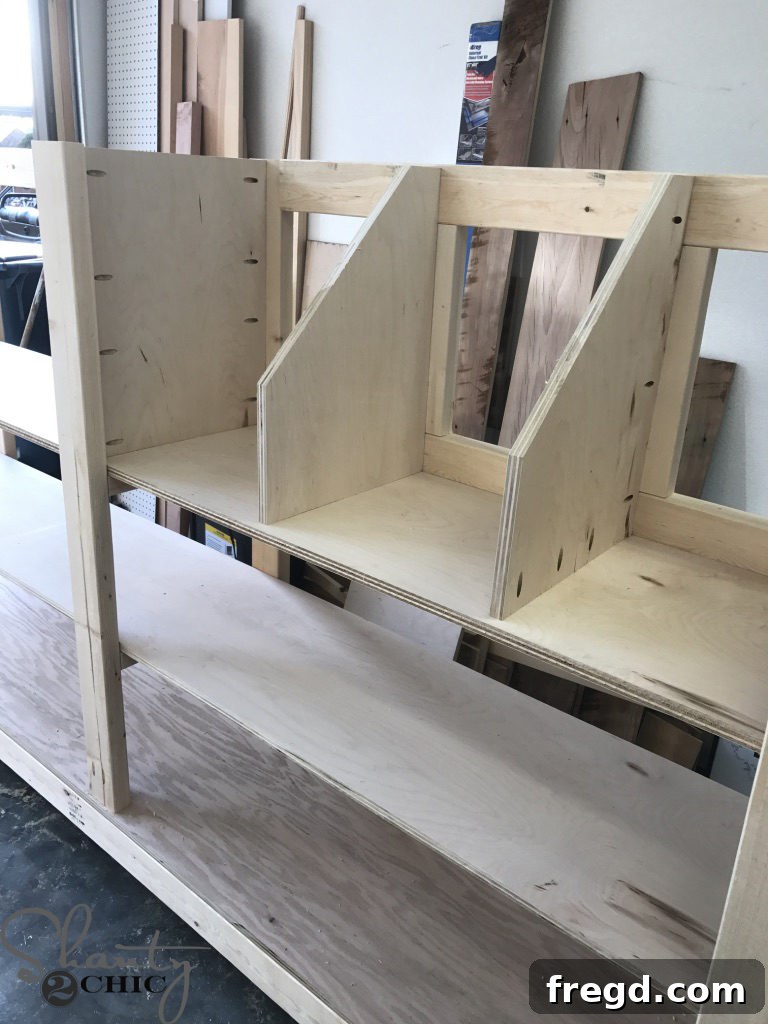
Now, meticulously attach the scrap dividers to the back, vertical supports. Utilize 1 1/4″ pocket hole screws and wood glue for a strong, enduring, and reliable connection. As you attach them, ensure that the dividers are evenly spaced and perfectly plumb, thereby creating neat, functional, and aesthetically pleasing compartments for your scraps. This is the stage where your scrap wood organization truly comes to life, turning potential clutter into a highly functional resource.
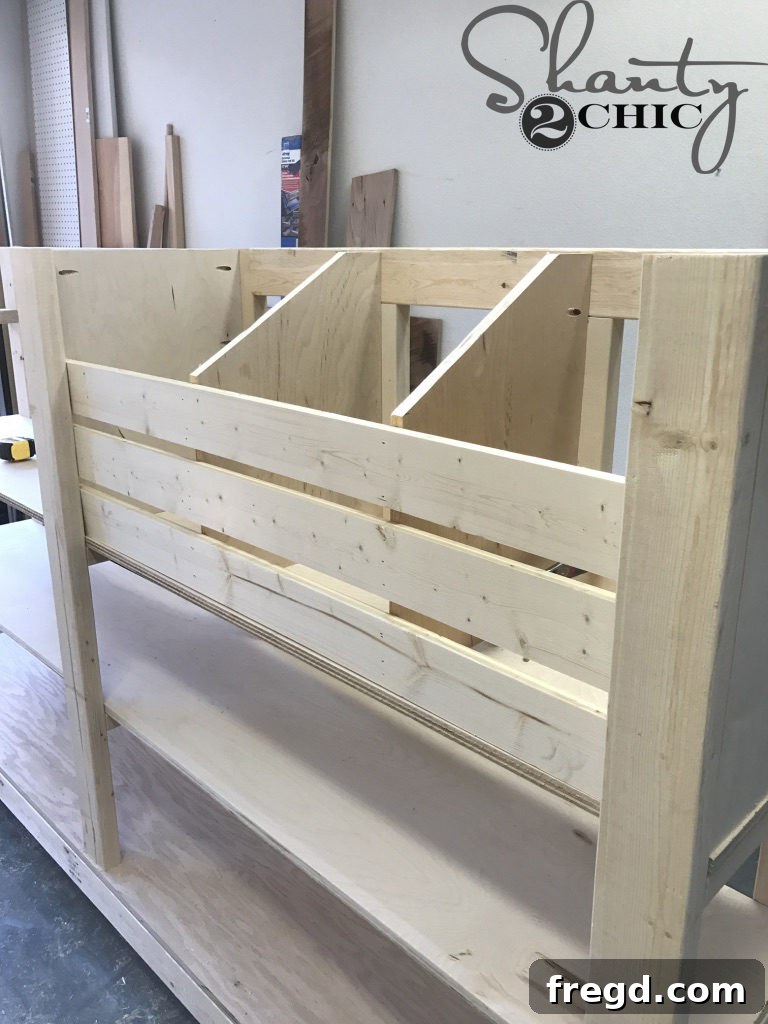
To ensure that your valuable scraps remain securely contained within their respective bins, preventing any accidental spills or falls, we will now attach retaining slats to the front of the scrap storage area. These strategically placed slats not only secure smaller pieces but also maintain excellent visibility, allowing for quick identification and easy access without compromising containment.
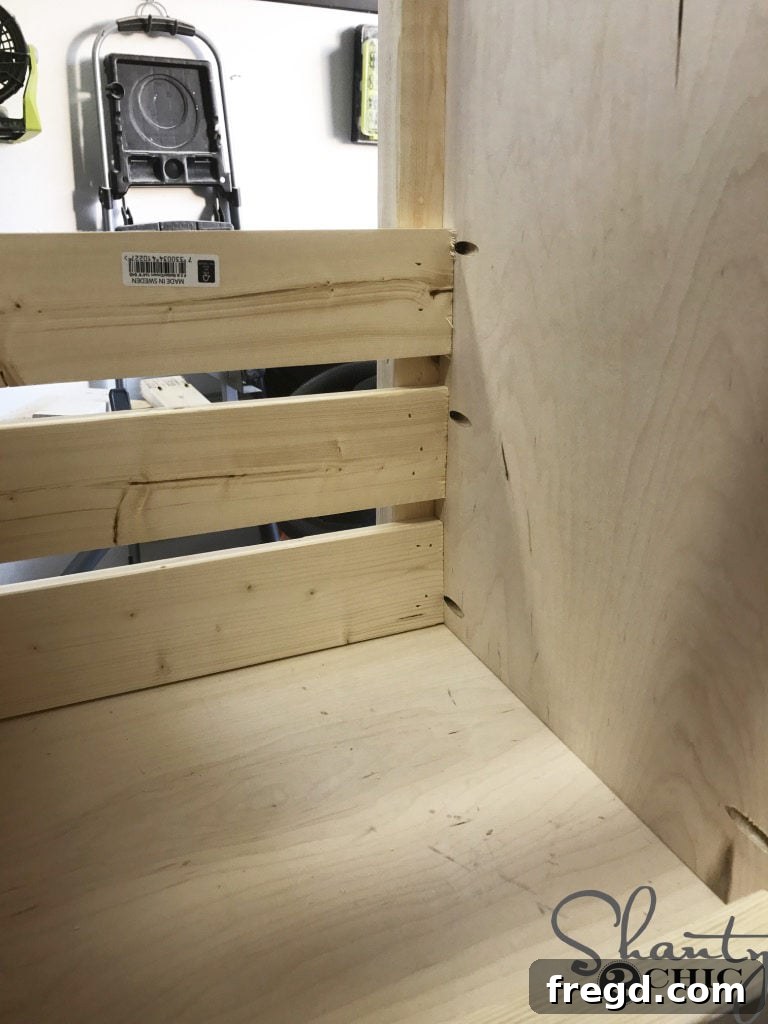
Carefully cut the slats to their designated sizes as per your plans. Then, attach them to the inside edges of the ladder rails using 1 1/4″ brad nails and a strong wood glue. Additionally, it is crucial to attach the front slats into the scrap dividers themselves, which further strengthens the entire structure of the bins and ensures they are robust enough to reliably hold a substantial amount of wood. With the integrated scrap storage system now fully complete, you have successfully added an incredible, highly efficient layer of organization to your workshop!
5. Enhancing Aesthetics and Structure: Attaching the Plywood Fronts and Back
With the intricate internal framework of your DIY Lumber Cart now fully complete and all the specialized storage compartments in place, the final structural elements involve meticulously enclosing the main body with plywood panels. This crucial step serves a dual purpose: it significantly enhances the overall aesthetic appeal of your mobile lumber cart, giving it a professional and finished look, and it also adds substantial rigidity and protection to your valuable stored lumber, creating a more professional and streamlined workshop organization solution.
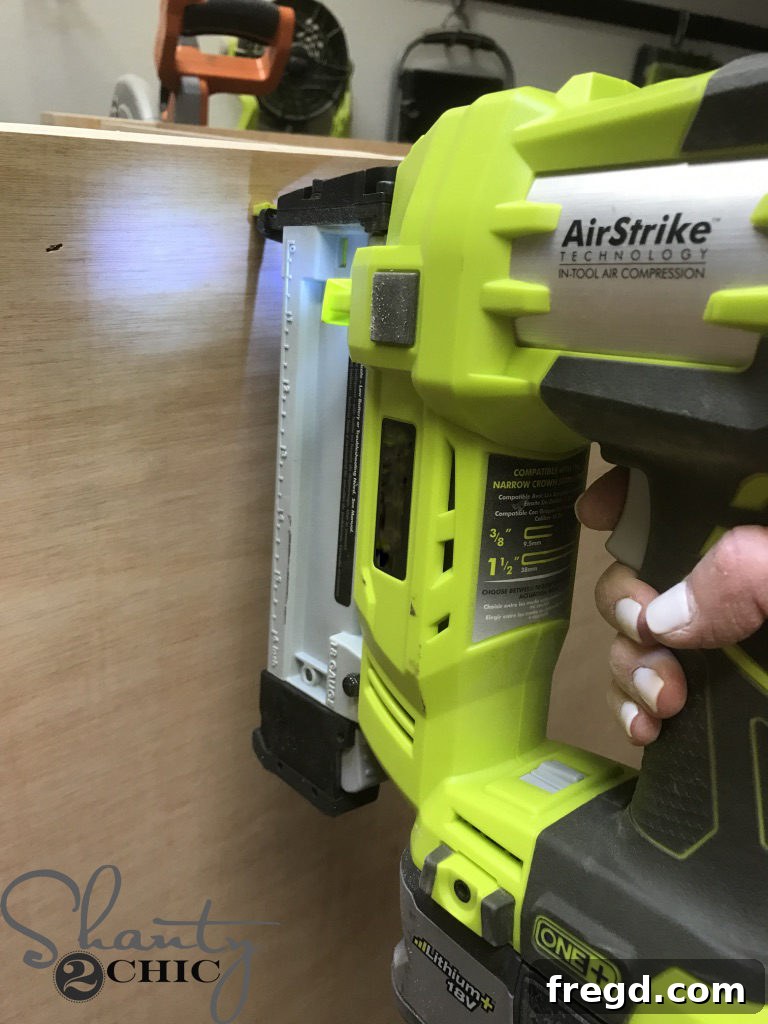
Carefully measure and precisely cut the two distinct front pieces of plywood and the single large back piece to their exact dimensions as meticulously indicated in your free printable plans. It is paramount to ensure that your cuts are perfectly square to guarantee a seamless and flush fit against the ladder rails and other structural components. Once all plywood pieces are expertly cut, apply a continuous and even bead of high-quality wood glue along all the mating surfaces of the ladder rails and internal framework where the plywood panels will be positioned. Then, carefully align and position each plywood panel. We effectively used 1″ staples to attach them to the ladder rails, which provides quick adhesion and strong mechanical fastening. As an equally excellent and widely used alternative, you can also opt to use 1 1/4″ brad nails, spacing them approximately every 4-6 inches along all the edges to ensure robust attachment. The synergistic combination of strong wood glue and mechanical fasteners will collectively create a durable, attractive, and protective exterior for your DIY lumber cart, giving it a clean, polished appearance while simultaneously safeguarding your valuable wood inventory from dust, bumps, and other workshop elements.
6. The Smart Storage Solution: Creating the Plywood Sheet Holder Ledge
One of the most innovative, space-efficient, and highly praised features of this comprehensive DIY Lumber Cart design is its brilliantly integrated holder for full sheets of plywood. Large, unwieldy sheets of plywood are notoriously challenging to store neatly within a workshop without consuming excessive floor space, leaning precariously against walls, or becoming prone to warping and damage. This thoughtfully designed, dedicated ledge provides an incredibly safe, easily accessible, and perfectly upright storage solution, effectively freeing up invaluable real estate in your workshop and simplifying material handling.
The final and perhaps most satisfying structural step in the main assembly of your lumber cart is to attach this absolutely essential plywood sheet holder ledge to the back of the cart. This strategically placed component will precisely create a perfect, narrow slot, allowing you to effortlessly slide and store full 4×8 sheets of plywood vertically. This ingenious method not only maximizes your workshop’s storage density but also makes it remarkably simple and convenient to retrieve sheets when you need them, entirely eliminating the need to move or disrupt piles of other materials.
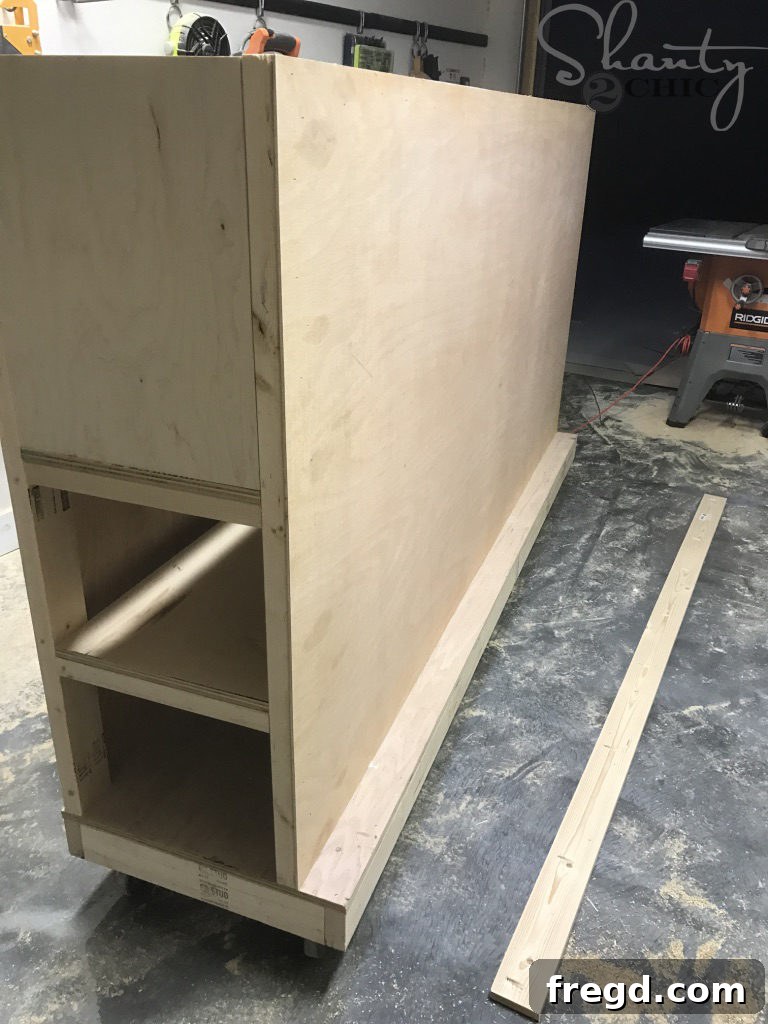
To meticulously construct this indispensable plywood sheet holder ledge, first cut your 1×4 lumber piece to the exact length specified in your detailed plans. Next, drill 3/4″ pocket holes strategically along one long edge of this 1×4 piece. These pocket holes are engineered to allow you to securely fasten the ledge from the back of the cart, thereby creating a strong, discreet, and aesthetically clean connection. Once the pocket holes are accurately drilled, apply a generous and continuous amount of high-quality wood glue along the mating surface on the back of the lumber cart where the ledge will be precisely positioned. Then, carefully attach the 1×4 piece to the back of the cart using 1 1/4″ pocket hole screws, driving them firmly through the pocket holes and into the cart’s robust back frame. It is crucial to ensure the ledge is perfectly level and immovably attached, as it will be reliably supporting the significant weight of large plywood sheets. With this final, smart structural piece meticulously in place, your ultimate DIY Lumber Cart is not just complete, but fully optimized and ready for immediate action!
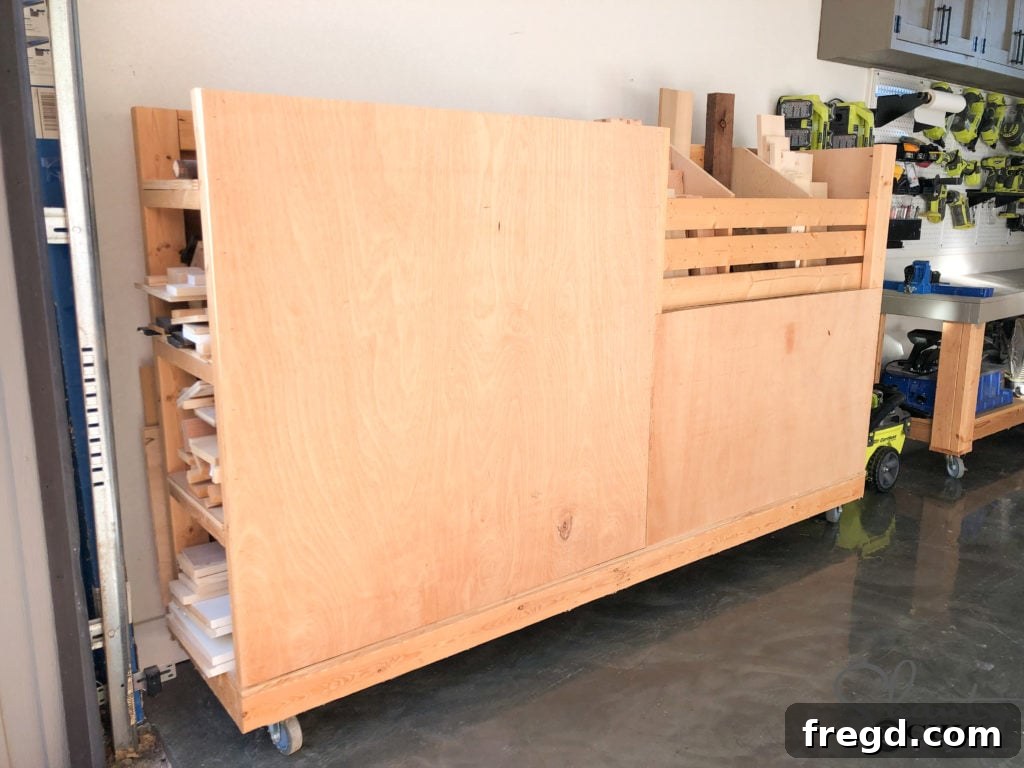
And just like that, the meticulous construction process is complete! We wasted absolutely no time in loading our new DIY Lumber Cart up with all our accumulated scraps, various lengths of dimensional lumber, and full plywood sheets. The transformation in our workshop was not just immediate, but profoundly satisfying. Gone are the days of tripping over disheveled wood piles or losing track of valuable pieces – now, everything has its designated, easily accessible, and perfectly organized home!
The Finished DIY Lumber Cart: Features & Benefits for Your Workshop
Stepping back and admiring your newly built DIY Lumber Cart reveals far more than just a piece of workshop furniture; it’s a powerful asset that transcends simple storage. This cart stands as a testament to smart design, efficient space utilization, and thoughtful organization, packed with an array of features that will profoundly enhance your woodworking and DIY projects. Let’s recap some of the incredible benefits and highlights that make this mobile lumber storage solution an absolute must-have:
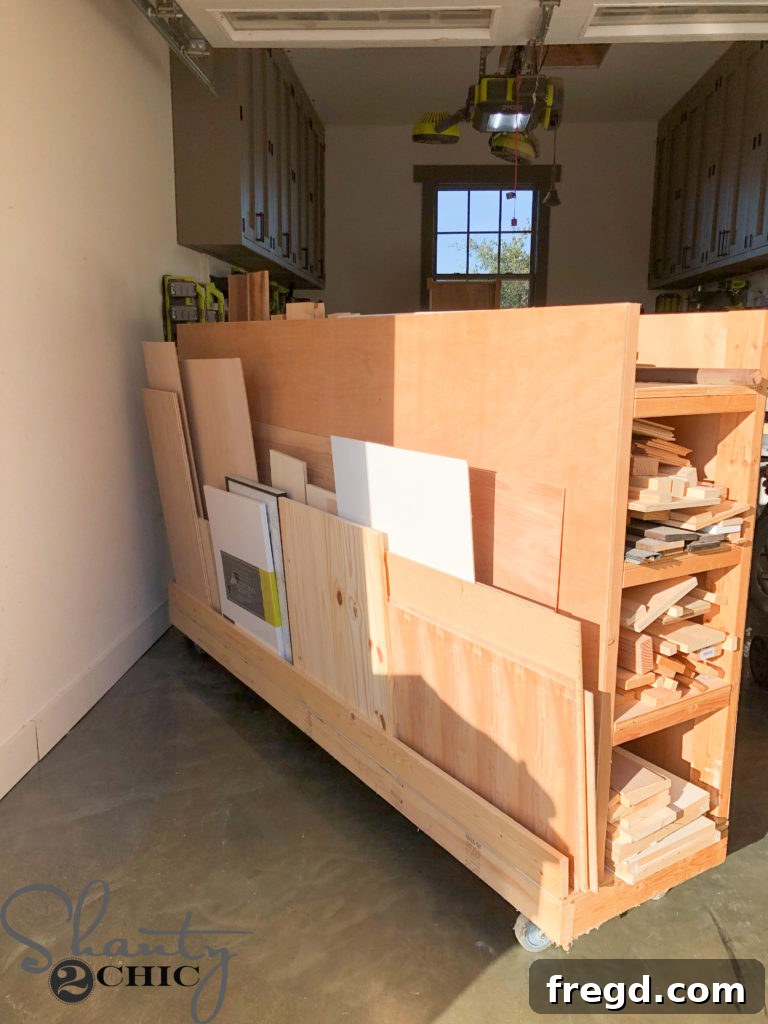
Optimized Plywood Sheet Storage:
Without a shadow of a doubt, one of our absolute favorite and most functional features is the dedicated plywood storage integrated seamlessly into the back of the cart. This ingeniously designed spot can comfortably and securely hold multiple full 4×8 sheets of plywood vertically. This means no more leaning expensive and prone-to-warp sheets against walls, where they risk damage or warping, and no more wrestling heavy sheets out from under a cumbersome stack. It’s a safe, incredibly space-efficient, and remarkably convenient solution that will save you both time and material.
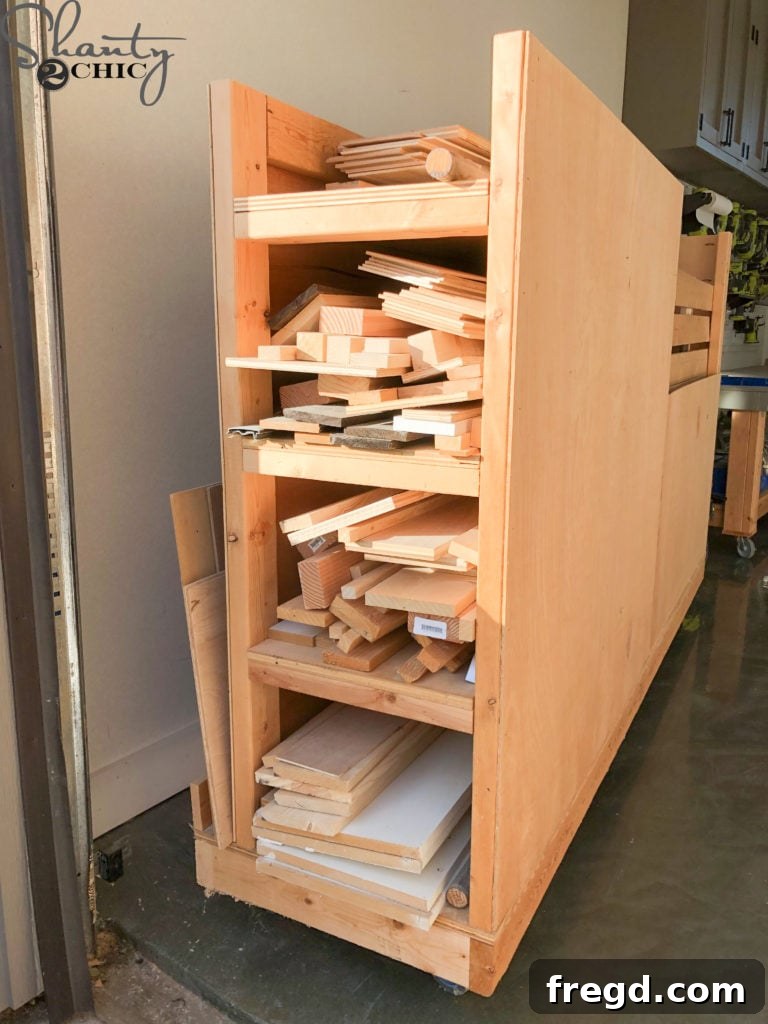
Versatile Lumber Cubbies:
The main body of the cart is intelligently organized into multiple, distinct cubbies, each meticulously designed to accommodate different common lumber lengths with ease. You’ll discover two generous cubbies perfectly sized for your longer 8-foot boards, keeping them neatly separated, straight, and effortlessly easy to retrieve. Additionally, there are two more cubbies ideally suited for 4-foot boards or other medium-length stock, providing adaptable storage options. This segmented and accessible storage system prevents tangles, minimizes searching, and makes inventory management an absolute breeze.
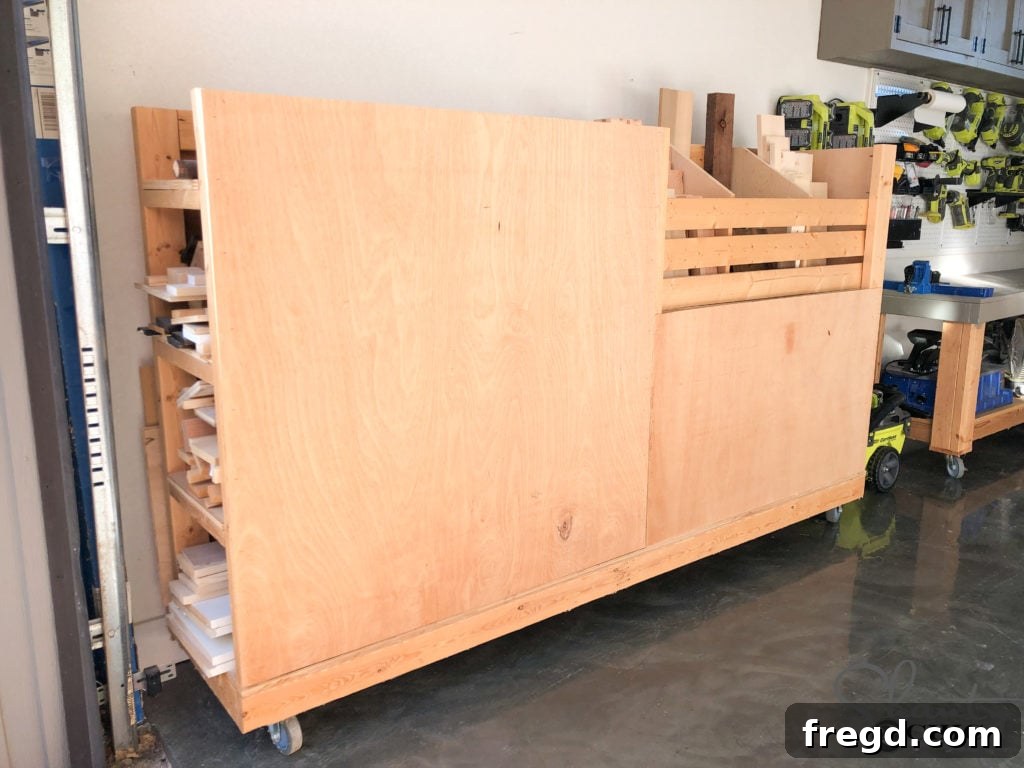
Integrated Scrap Wood Bins:
With this cart, truly no piece of wood goes to waste, thanks to the cleverly integrated scrap bins! Located conveniently within the cart’s sturdy structure, these bins are absolutely perfect for neatly stashing away all those smaller, often overlooked, yet incredibly valuable pieces that are simply too good to discard. Keeping your scraps impeccably organized, sorted, and highly visible means you are significantly more likely to utilize them in future projects, thereby saving money, reducing waste, and fostering a more sustainable workshop. They are genuinely a workshop essential for the thrifty and organized woodworker.
Unbeatable Mobility:
Equipped with robust, heavy-duty locking casters, this DIY lumber cart is far more than just a stationary storage unit. Its inherent mobility allows you to effortlessly maneuver your entire lumber inventory precisely wherever you need it most – whether that’s right next to your miter saw, directly at your tablesaw, or conveniently beside your workbench for assembly. When your task is complete, simply roll it back into its designated storage spot. The crucial locking feature ensures it remains firmly put and perfectly stable when you need it stationary for safe loading, unloading, or working.
Durability and Longevity:
Meticulously constructed with robust dimensional lumber, rigorously reinforced with strong pocket hole joinery, and further secured with high-quality wood glue and appropriate screws, this cart is explicitly built to last. It’s engineered to withstand the rigorous demands of a busy workshop environment and designed to reliably hold substantial weight, promising to serve you faithfully and efficiently for many years to come.
This DIY Lumber Cart isn’t just a fun project; it represents a significant upgrade to your entire woodworking setup. Embrace the newfound organization, boosted efficiency, and profound peace of mind it brings to your creative space, allowing you to focus more on crafting and less on clutter!
Curious to see how this incredible cart integrates into a fully organized creative space? You can check out the rest of my shop in our comprehensive shop tour! Just click HERE to watch and gather even more invaluable inspiration for your next workshop improvement project!
Share Your Incredible DIY Lumber Cart Builds!
We absolutely love seeing your creativity and hard work come to life! Once you’ve successfully built your very own ultimate DIY Lumber Cart, we wholeheartedly encourage you to share your awesome creations with our vibrant community. Post photos and videos of your magnificent finished cart, or even snippets of your building process, on all your favorite social media platforms. Make sure to tag us and use the official hashtag **#shanty2chic** so we can easily discover and proudly share your fantastic builds with our extensive network of followers too! Your projects not only inspire others to take on their own DIY challenges but also actively help grow and strengthen our amazing DIY community. We genuinely can’t wait to see what incredible solutions you create!
Happy Building, and here’s to a beautifully organized, efficient, and inspiring workshop!