
DIY Industrial Farmhouse Table: Build Your Dream Dining Space
Are you dreaming of a robust, stylish, and budget-friendly dining table that perfectly blends rustic charm with modern industrial flair? Look no further! This comprehensive guide will walk you through building your very own DIY Industrial Farmhouse Table using readily available framing materials and just a handful of essential tools. Imagine a stunning centerpiece for your dining room or kitchen nook, crafted by your own hands, without breaking the bank.
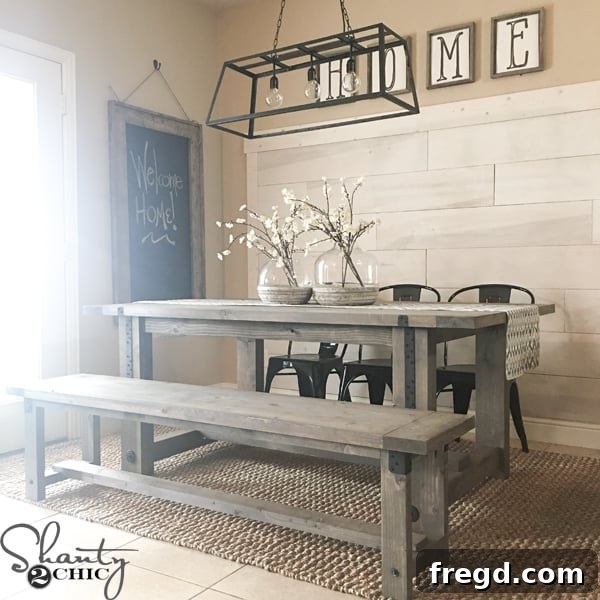
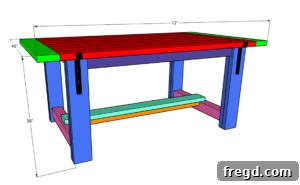
We embarked on this exciting project for our dear friend Rachel, who desired a durable, chic, and economical table for her bustling kitchen nook, a space frequently used by her three active boys. The challenge was to create a piece that could withstand daily wear and tear while exuding a timeless aesthetic. The result? A magnificent 6-foot industrial-style farmhouse table, constructed for an astonishingly low cost, primarily from framing lumber.
This project is not just about building a table; it’s about creating a functional piece of art that reflects your personal style. The industrial farmhouse aesthetic, characterized by its combination of warm wood tones and strong metal accents, offers a versatile look that complements a wide range of interior designs, from modern minimalist to traditional country.
Before we dive into the step-by-step instructions, get a visual overview of the entire process by watching our detailed how-to video. It breaks down each stage of construction, making it easier to follow along. Just click the Play Button below to watch!
Ready to get started? We’ve prepared a comprehensive set of free printable plans to guide you through every cut and joint. These plans are meticulously designed to ensure accuracy and ease of assembly. They include detailed diagrams, cut lists, and pocket hole placement, making this project accessible even for novice woodworkers.
CLICK HERE TO JUMP TO THE FREE PRINTABLE PLANS
Follow along with the detailed how-to below to transform simple lumber into a stunning piece of furniture!
Getting Started: Preparing Your Lumber
The foundation of any great woodworking project lies in careful preparation. For this industrial farmhouse table, we start by ensuring our lumber is perfectly suited for the task. This involves a crucial step that enhances both the aesthetic and structural integrity of your finished table.
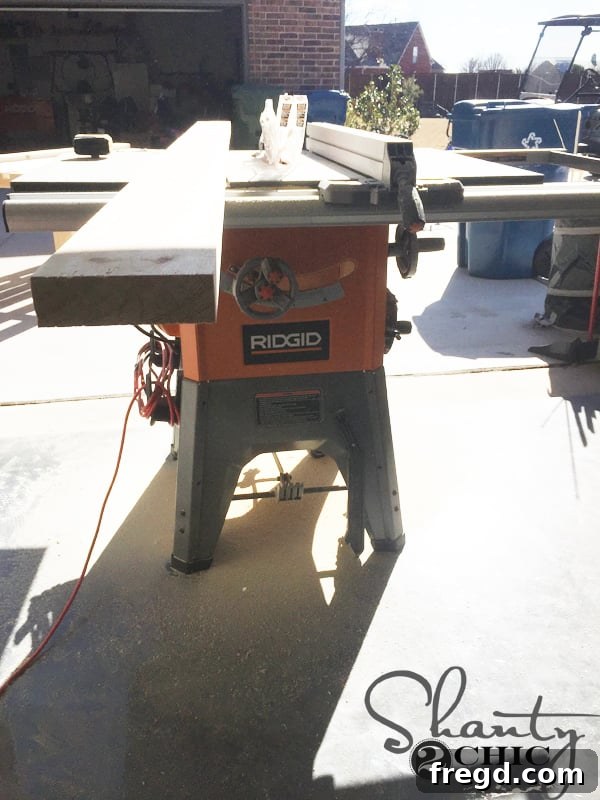
We began by ripping all of the 2×6 boards down to a precise 5 inches and the 2x4s to 3 inches. While this step isn’t strictly necessary for the table’s structural function, it offers significant advantages. Ripping the boards creates perfectly straight, clean edges, which are essential for achieving tight, seamless joints. This precision allows us to effectively hide the seams on the chunky table legs, contributing to a more professional and finished look. It’s a detail that elevates a good DIY project to a great one. Our free plans are based on these ripped dimensions, so if you opt not to rip your boards, remember to adjust all subsequent measurements accordingly to ensure everything fits together perfectly.
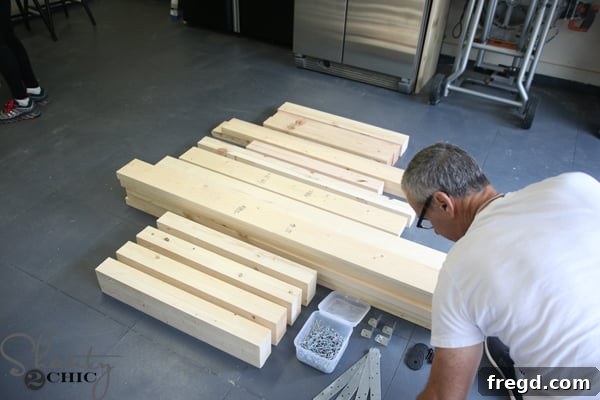
Next, with our boards prepared, we moved on to making all the necessary cuts for the table components. Accuracy here is paramount. A valuable tip for achieving perfectly fitted breadboards—the end pieces of the tabletop—is to wait until the main planks are already attached. This allows you to measure and cut the breadboards precisely to fit the assembled width, ensuring a snug and flush connection. For those new to using a miter saw, or for anyone needing a refresher on achieving perfect cuts, we have an excellent tutorial available: How to Use a Miter Saw video HERE!
Precision Joinery: Utilizing Pocket Holes
Pocket hole joinery is a game-changer for DIY furniture builders, offering strong, hidden joints with relative ease. This technique is central to the construction of our industrial farmhouse table, ensuring both durability and a clean aesthetic.
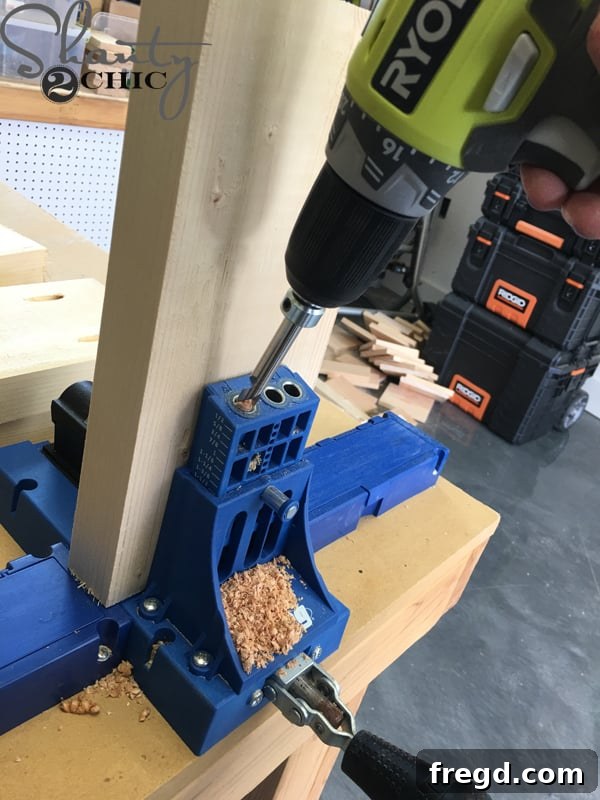
Once all the cuts were made, the next critical step was to drill all the 1 1/2-inch pocket holes. We highly recommend using a Kreg Jig K5 for this task. The Kreg Jig system simplifies the process of creating strong, accurate pocket holes, making it a favorite tool for both beginners and experienced woodworkers. The K5 model offers a robust clamping mechanism and a straightforward setup, ensuring consistent results. Refer to the detailed printable plans for the precise placement of each pocket hole, as correct placement is key to the table’s structural integrity. You can find the Kreg Jig K5 HERE on Amazon. If you’re unfamiliar with this fantastic tool, be sure to Watch our How to Use a Kreg Jig video HERE! for a comprehensive tutorial.
Building the Tabletop and Chunky Legs
With our lumber cut and pocket holes drilled, it’s time to begin assembling the core components of our table: the robust legs and the spacious planked tabletop.
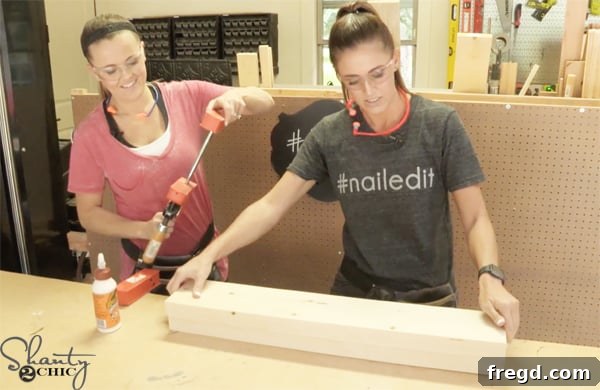
First, let’s create those impressive chunky legs. This involves a laminating process, where two boards are joined together to create a thicker, more substantial piece. We applied a generous amount of wood glue to one 2×6 board, then carefully layered another 2×6 on top, aligning the edges perfectly.
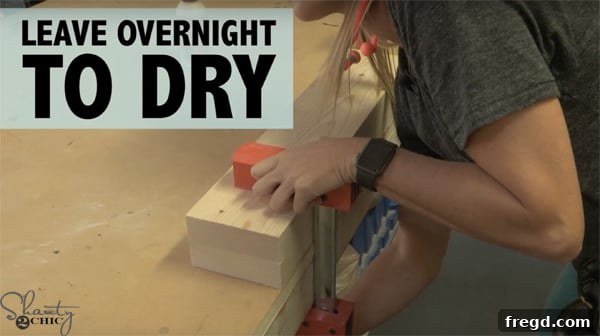
To ensure a strong bond, we used a series of clamps to firmly hold the boards together while the glue dried. It’s crucial to apply even pressure across the entire surface. Repeat this process for all four legs, and then allow the wood glue to dry completely overnight. This extended drying time is essential for maximum strength and durability.
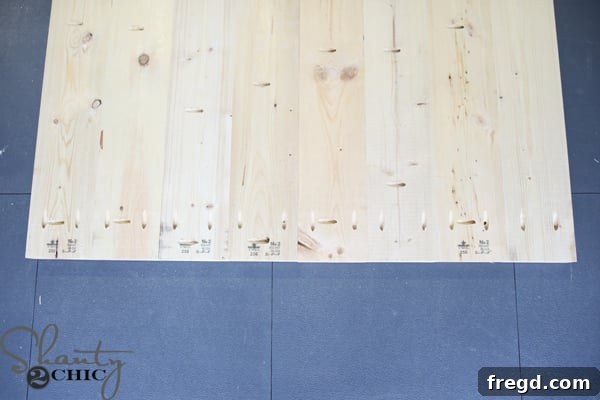
While the laminated leg pieces are drying, you can efficiently use your time by beginning the construction of the planked tabletop. This involves joining the individual planks together to form the wide surface of your table.
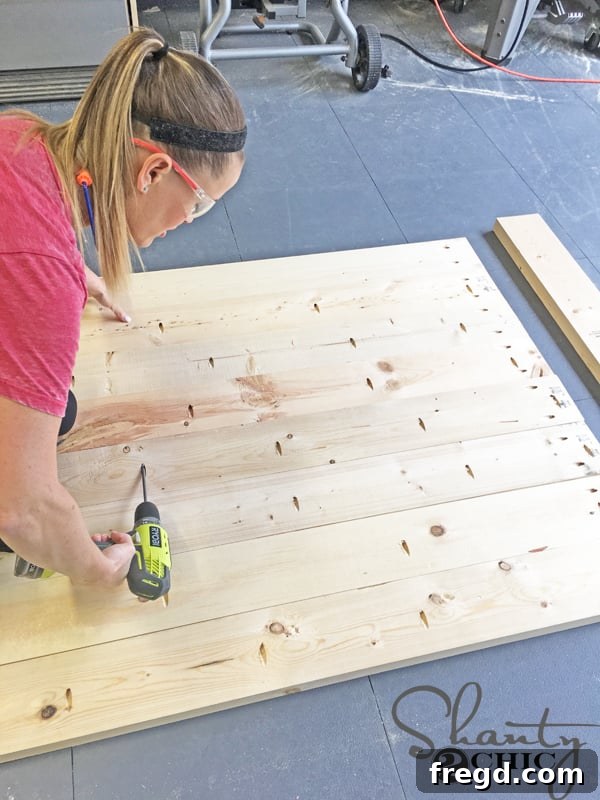
Carefully align all the tabletop planks and attach them securely using 2 1/2-inch pocket hole screws. Ensure the pocket holes are on the underside of the tabletop where they will be out of sight. A small amount of wood glue between the plank edges will also contribute to a stronger, gap-free joint.
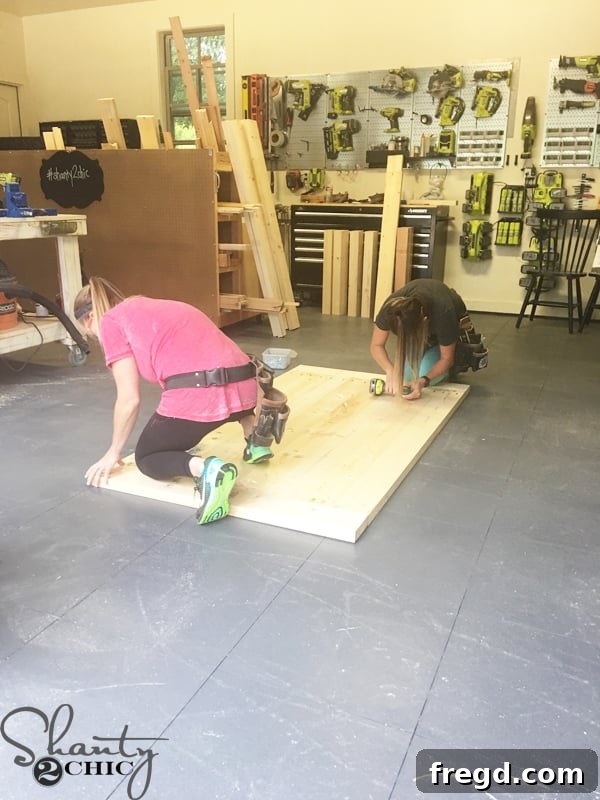
Once the main planks are joined, it’s time to integrate the breadboards. As mentioned earlier, measure the exact width of your assembled plank top and cut your breadboard pieces to fit precisely. Attach these end pieces using 2 1/2-inch pocket hole screws. The breadboards not only add to the aesthetic appeal, giving the table a classic farmhouse look, but also provide additional structural stability to the tabletop.
Constructing the Sturdy Table Frame
With the legs fully dried and the tabletop assembled, the next phase involves building the robust undercarriage – the table frame. This intricate structure provides the necessary support and stability for your entire dining table.
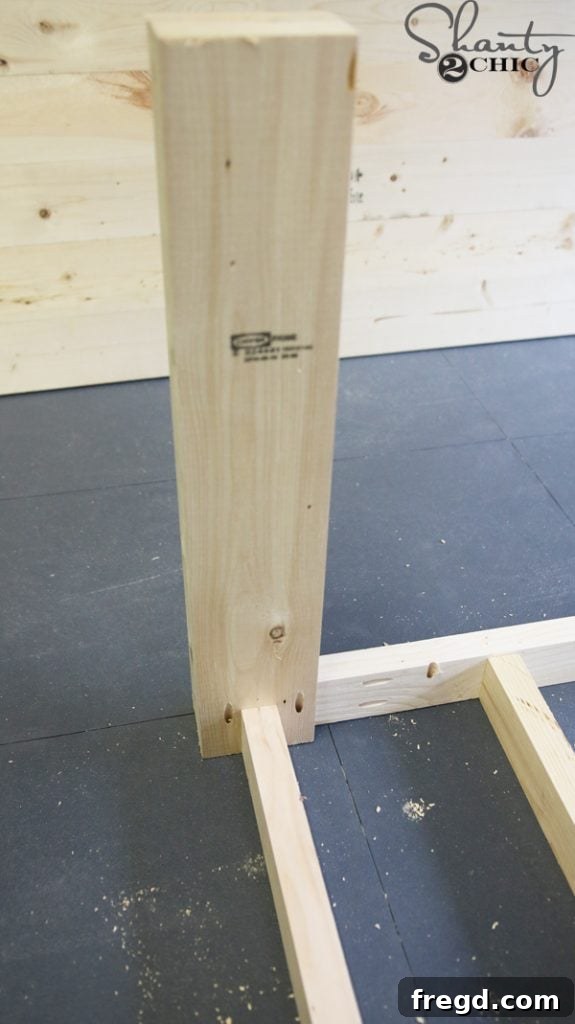
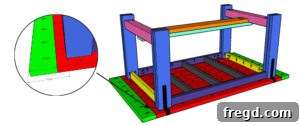
Once the laminated leg pieces are completely dry and cured, you can begin assembling the main table frame. Start by attaching the short and long aprons to the legs. These apron pieces are crucial for connecting the legs and providing perimeter support. Ensure that the aprons are flush with the top edge of the legs and perfectly centered on the wider face of each leg. Secure these connections with a strong wood glue and 2 1/2-inch pocket hole screws, ensuring a rigid and lasting bond.
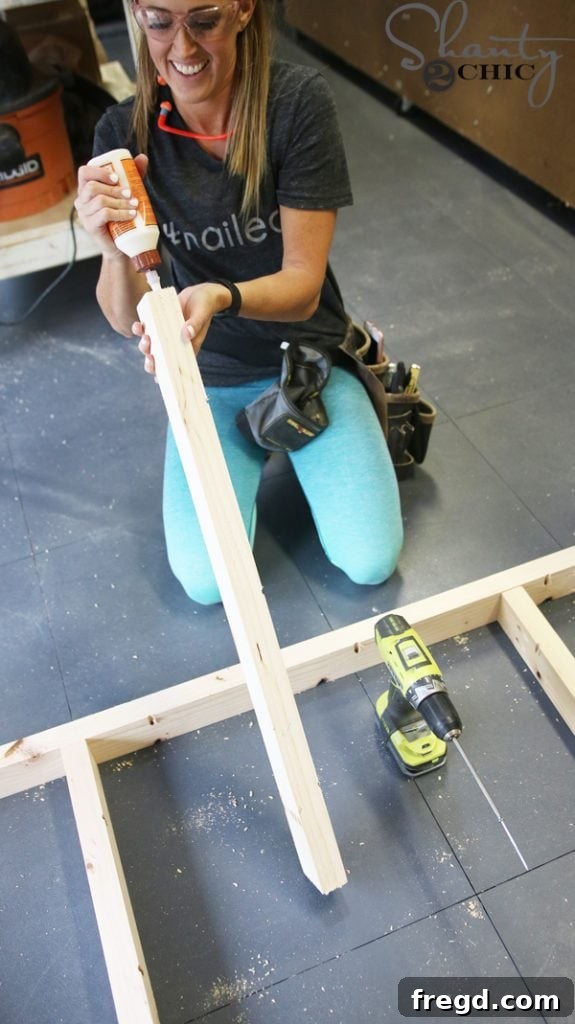
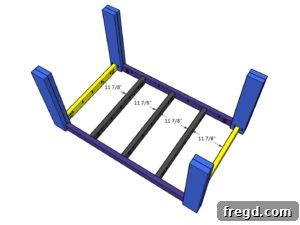
Next, we move on to adding the internal supports. These pieces run between the long aprons, providing additional strength and preventing the tabletop from sagging over time. Apply a liberal amount of wood glue to each end of the support pieces before positioning them.
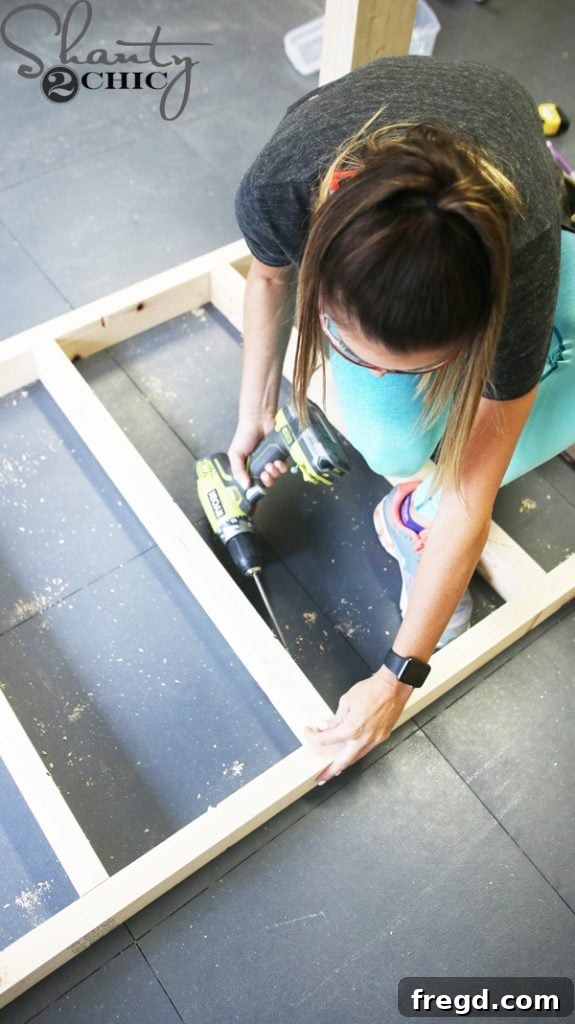
Securely attach these supports to the inside faces of the long aprons using 2 1/2-inch pocket hole screws. The combination of wood glue and pocket hole screws creates a highly durable connection that will stand the test of time and heavy use.
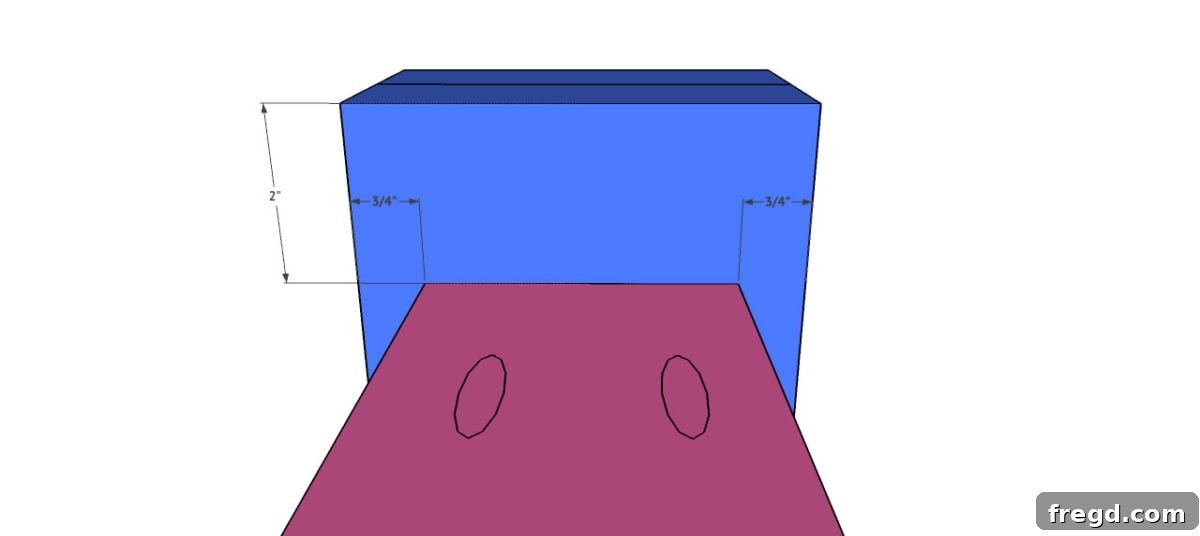
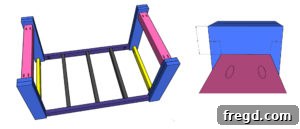
Once the supports are firmly in place, it’s time to attach the robust 4×4 leg runners. These runners add to the industrial aesthetic and provide significant structural stability at the base of the table. You have a couple of options for attachment here: if you possess a Kreg HD (Heavy-Duty) Jig, you can drill 3 1/2-inch pocket holes into the 4x4s for a hidden connection. Alternatively, if a Kreg HD Jig isn’t available, you can attach them directly using 3 1/2-inch Spax screws driven from the front faces of the legs into the runners. Don’t worry about the visible screw heads; we’ll show you how to elegantly conceal them with decorative hardware later, maintaining that clean, industrial look.
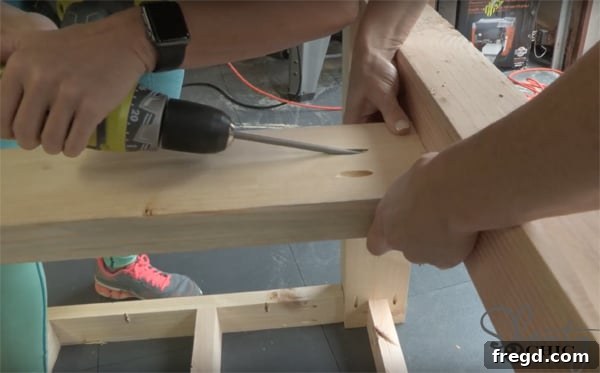
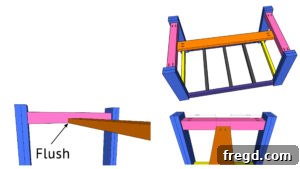
With the leg runners in position, proceed to attach the short runner, which connects the two leg runners. Apply wood glue to the ends of the short runner and secure it with 2 1/2-inch pocket hole screws. The top edge of this short runner should be perfectly flush with the top of the adjacent leg runners, ensuring a level and stable base structure.
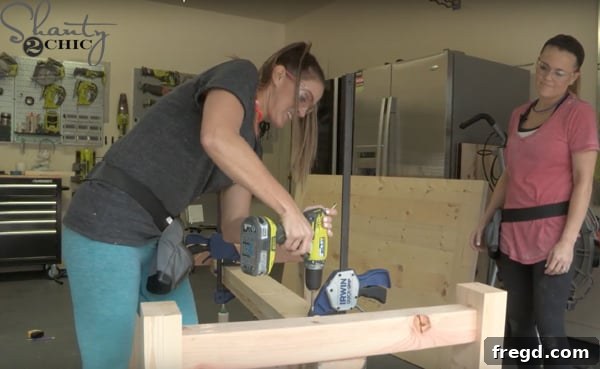
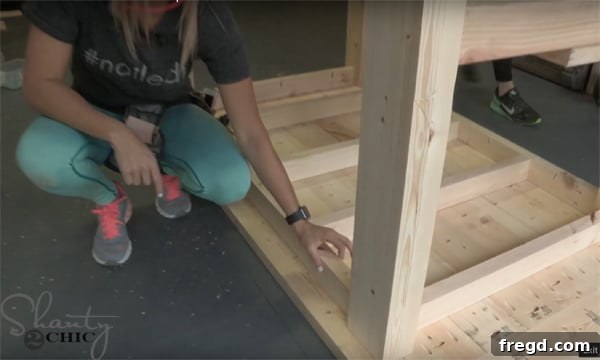
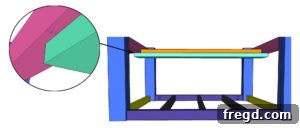
Finally, to complete the base, attach the long runner. Apply wood glue to the bottom surface of the long runner. Carefully position it directly underneath the short runner, ensuring proper alignment, and clamp it firmly in place. Then, secure it by driving 2-inch Spax screws from the bottom of the short runner directly into the long runner. This technique effectively conceals the screw heads, contributing to the clean aesthetic of your industrial farmhouse table.
Final Assembly and Finishing Touches
With both the tabletop and the frame meticulously constructed, it’s time for the grand unification – bringing these two major components together. This stage also includes applying the protective finish and adding the distinctive industrial hardware.
Carefully position the assembled table frame over the planked tabletop. Align it centrally and ensure an even overhang on all sides. Once perfectly aligned, attach the frame to the tabletop using 2 1/2-inch pocket hole screws. Drive these screws from the aprons and the internal supports directly into the underside of the tabletop. This creates an incredibly strong connection, securing the entire structure together. Now, with the table fully assembled, it’s time to flip it upright and admire its foundational strength!
Staining and Protection
The choice of finish significantly impacts the table’s final appearance and durability. For our industrial farmhouse table, we selected a stain that enhances the wood’s natural grain while providing a warm, inviting tone.
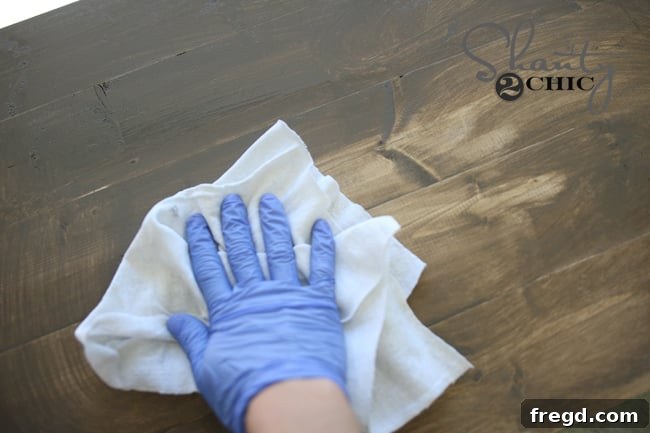
We chose the beautiful Briarsmoke stain by Varathane to give our table its rich, deep character. To apply, simply wipe on a single, even coat with a clean, lint-free cloth. Allow the stain to penetrate the wood for about 5 minutes, then, using a fresh, clean cloth, wipe away any excess stain. This method ensures an even color distribution and prevents blotchiness. Always work in a well-ventilated area and follow the manufacturer’s instructions for drying times.
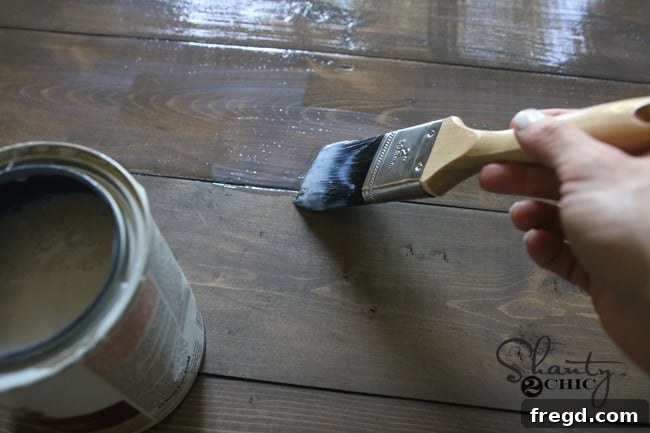
To protect this beautiful finish from daily spills, scratches, and general wear and tear, we applied one coat of Varathane Triple Thick Poly in a Matte finish. This product offers exceptional durability with just a single application, making it perfect for a high-traffic dining table. Simply brush it on evenly with a good quality bristle brush. Don’t be alarmed if it looks milky or like glue when wet; it will dry to a clear, matte finish, providing robust protection without adding an overly glossy sheen, which would detract from the rustic aesthetic. Allow adequate drying time as per product instructions before moving to the next step.
Adding the Industrial Flair: Decorative Hardware
Now, for the “industrial” part of our industrial farmhouse table! This is where we add those distinctive metal accents that truly define the style and give the table its unique character.
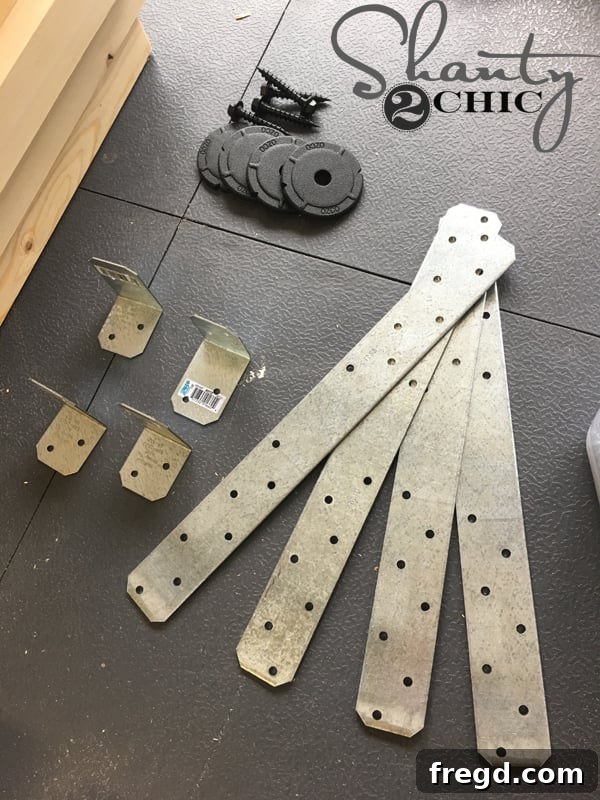
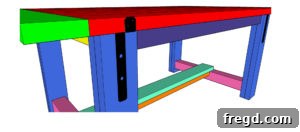
To achieve the desired industrial look, we carefully selected specific hardware pieces. Our choice included four Simpson Strong-tie angles, four Simpson Strong-tie straps, four Simpson Strong-tie Outdoor Accents Washers, and four Simpson Strong-ties Outdoor Accents hex screws. These pieces, typically used for structural reinforcement, are repurposed here for their aesthetic appeal. To unify their appearance and enhance the industrial feel, we spray painted all the silver pieces with a flat, black spray paint. This simple step makes a huge difference in achieving a cohesive and professional industrial finish.
You can find the metal angle pieces HERE and the straight piece HERE on Amazon. The Outdoor Accents are Home Depot finds.
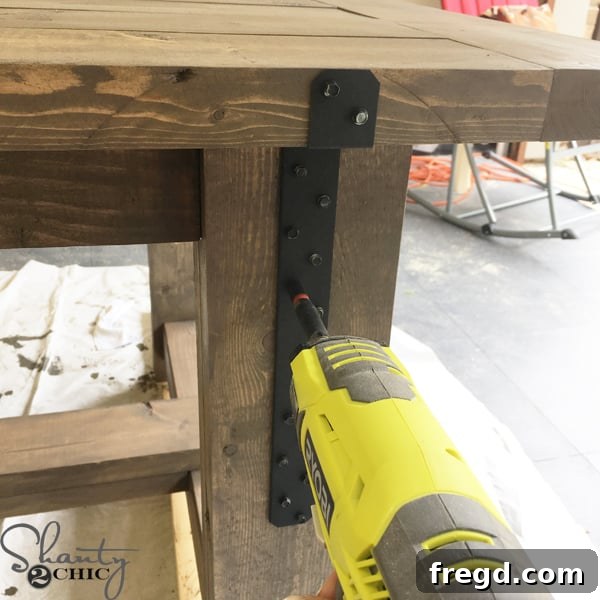
We then attached the decorative straps and angles to strategic points on the table. The precise placement can be found in the detailed plans, but generally, they are positioned to accent the joinery and give the impression of rugged construction. We used small hex screws, also painted black, to secure these pieces firmly to the wood. This attention to detail with the black screws ensures that the hardware blends seamlessly and contributes to the overall industrial aesthetic.
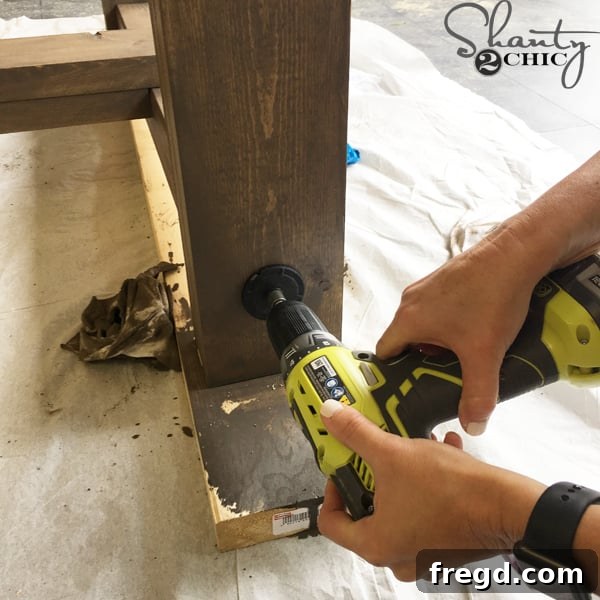
A clever design element of this table involves using the larger washers and hex screws on the legs, specifically at the points where the leg runners attach. This serves a dual purpose: it adds another layer of industrial character and, more importantly, it provides an ideal way to hide any visible screw holes if you opted not to use the Kreg HD Jig for attaching the runners. This ensures a clean and polished look, even if you used a simpler fastening method.
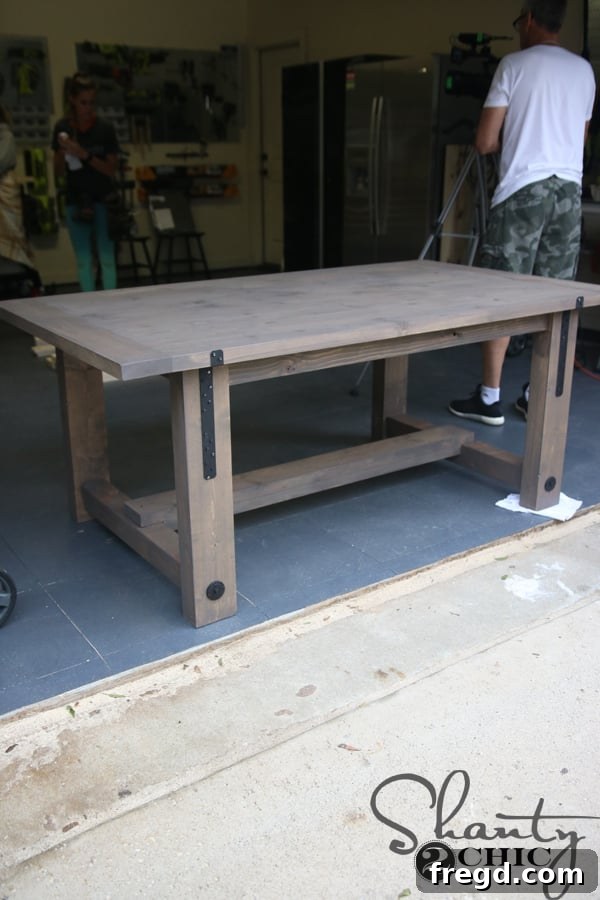
And just like that, it was complete! The transformation from raw lumber to this stunning, durable, and chic industrial farmhouse table is truly rewarding. We are absolutely thrilled with how it turned out, and we hope you are too!
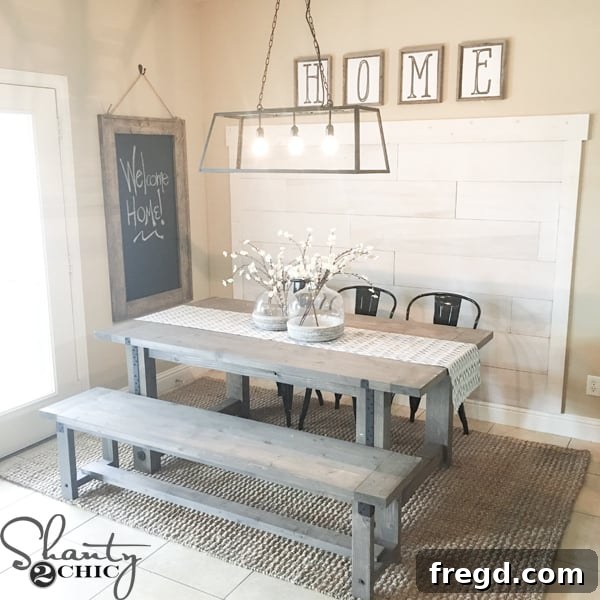
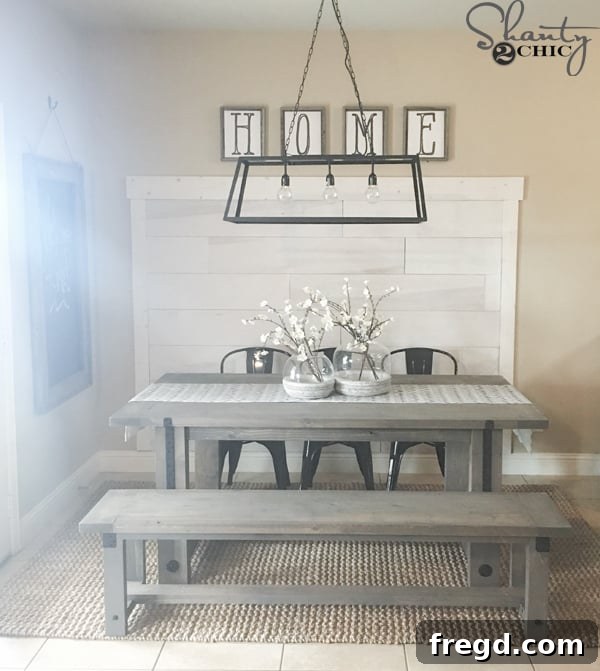
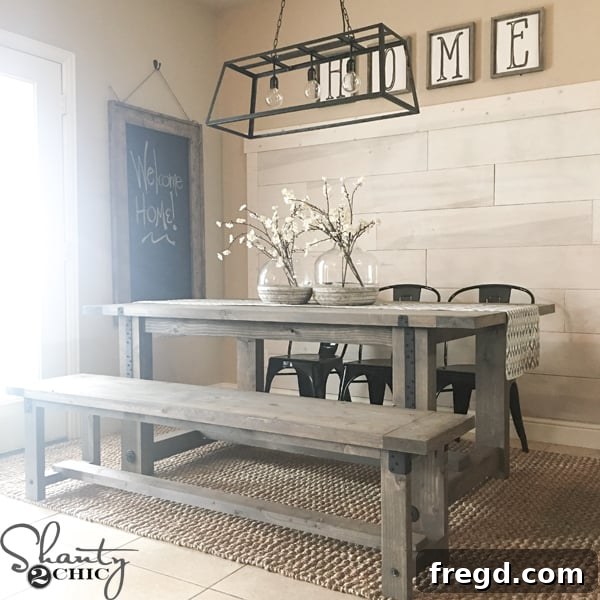
Rachel absolutely adored her new dining table, and it has quickly become the heart of her kitchen nook. The blend of robust construction and stylish details makes it perfect for both everyday family meals and special gatherings. We are incredibly proud of this project and the joy it brought.
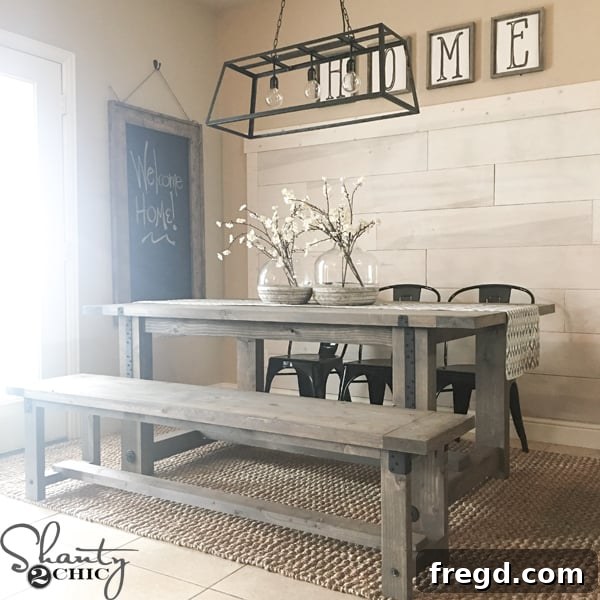
To help you create a cohesive look in your own dining space, here are the details for the other beautiful pieces that complete Rachel’s new industrial farmhouse kitchen nook:
Planked Wall: How-to Video HERE!
Bench: HERE
Terrariums (on table): HERE
Stems: HERE
Table Runner: HERE
Chandelier: HERE
Chairs: HERE
Rug: HERE
Frames: Hobby Lobby
HOME Printable: HERE
Chalkboard: HERE
DIY Industrial Farmhouse Dining Table
CLICK HERE TO PRINT THE FULL SET OF PLANS
Supply List
- 9 2x6x8 Pine or Framing Lumber
- 1 2x6x10 Pine or Framing Lumber
- 3 2x4x8 Pine or Framing Lumber
- 1 4x4x8 Pine or Framing Lumber
- 2 1/2″ Pocket Hole Screws
- Spax Screws (various lengths, e.g., 2″ and 3.5″)
- Wood Glue
- Decorative Metal Pieces (e.g., Simpson Strong-tie angles, straps, washers, hex screws)
- Wood Stain (e.g., Varathane Briarsmoke)
- Protective Topcoat (e.g., Varathane Triple Thick Poly in Matte)
- Flat Black Spray Paint
- Safety Glasses
- Ear Protection
- Measuring Tape
- Pencil
- Miter Saw
- Table Saw (optional, for ripping boards)
- Kreg Jig K5 (or similar pocket hole jig)
- Kreg HD Jig (optional, for 4×4 runners)
- Cordless Drill
- Clamps (variety of sizes)
- Clean Cloths for staining
- Bristle Brush for topcoat
Instructions
-
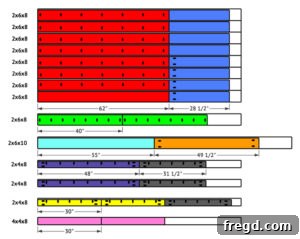
Refer to the free printable plans for a detailed cut list. Precisely cut all your lumber according to the specified dimensions for the tabletop planks, breadboards, legs, aprons, and runners. Remember to wear safety glasses and hearing protection when operating power tools.

-
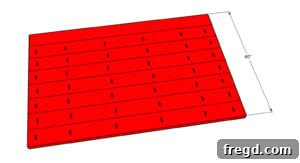
Take the cut boards for the tabletop planks. Drill 1 1/2-inch pocket holes into 7 of these planks as indicated in the plans. Once pocket holes are drilled, apply wood glue to the edges and attach the planks together using 2 1/2-inch pocket hole screws to form the main tabletop. Ensure the planks are tightly joined for a smooth surface.
-
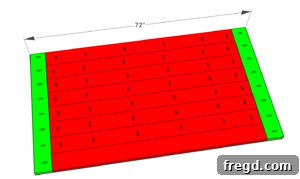
Now that the main tabletop is assembled, measure its exact width. Cut the breadboard pieces to fit perfectly. Drill 1 1/2-inch pocket holes into the breadboards. Apply wood glue along the edges and attach them to the ends of the planked tabletop using 2 1/2-inch pocket hole screws. This creates a visually appealing and structurally sound tabletop.
-
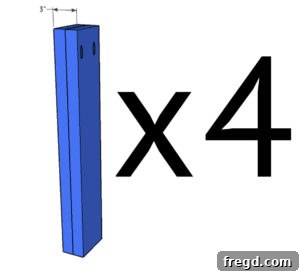
To create the chunky table legs, take the boards you cut to size for the legs. Drill 1 1/2-inch pocket holes into 4 of these pieces (these will be the inner faces of the laminated legs). Then, apply wood glue generously to one board and laminate it with another board (one with pocket holes, one without). Clamp the two pieces together firmly and allow the wood glue to cure for a full 24 hours to ensure maximum strength. Repeat for all four legs.
-
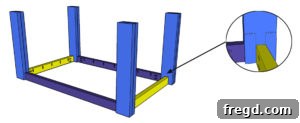
Cut the long apron pieces to size and drill 1 1/2-inch pocket holes as per the plans. Attach these long aprons to the laminated legs using 2 1/2-inch pocket hole screws and wood glue. The aprons should be centered on the face of the legs where the laminated pieces join and flush with the top of the legs, providing a strong frame for the table.
-
Cut the short apron pieces to size. Drill 1 1/2-inch pocket holes into each end. Attach them to the legs with 2 1/2-inch pocket hole screws and wood glue. Ensure these short aprons are centered on the wide side of the legs, completing the top perimeter of the table frame.
-
Cut the support pieces to size and drill 1 1/2-inch pocket holes into each board. These supports provide extra strength to the tabletop. Attach them to the inside faces of the long aprons using 2 1/2-inch pocket hole screws and wood glue, spacing them evenly as shown in the plans.
-
Now, cut the 4×4 pieces that will serve as the leg runners at the base of the table. These run between the legs. For attachment, you can either use 3.5-inch Spax screws driven from the outside of the legs into the runners (which can be hidden later with hardware) or use a Kreg HD Jig to drill 1 1/2-inch pocket holes for a hidden connection. Regardless of the method, ensure you use wood glue for a strong bond.
-
Next, cut the short runner piece that connects the two 4×4 leg runners. Drill 1 1/2-inch pocket holes into each end of this short runner. Apply wood glue to the ends and attach it securely to the 4×4 runners using 2 1/2-inch pocket hole screws. The top of this short runner should be flush with the top of the leg runners.
-
Keep the table base upside down for this step. Cut the long runner to size. Apply wood glue to the bottom of the long runner and clamp it firmly underneath the short runner you just installed. Secure it from the bottom of the short runner into the long runner using 2 1/2-inch Spax screws (or brad nails for smaller holes), ensuring the fasteners are hidden. Position the long runner approximately 3/4-inch from the end of the leg runners as detailed in the plans.
-
Carefully set the assembled table base on top of the planked tabletop, ensuring it’s centered with an even overhang on all sides. Secure the base to the tabletop by driving 2 1/2-inch pocket hole screws from the aprons and internal supports into the underside of the tabletop. This finalizes the main structural assembly.
-
Flip the table over to its upright position. Now, it’s time for the decorative hardware! Take your chosen framing brackets (like Simpson Strong-tie angles and straps) that you previously spray-painted black. Position them according to the plans to enhance the industrial aesthetic and attach them with small black hex screws.
-
All finished! You’ve successfully built a stunning DIY Industrial Farmhouse Table. Now, you can further customize it with your choice of paint or stain to achieve your desired look. Consider experimenting with different decorative hardware options to truly make it your own unique piece. Be sure to share your amazing creations with us on social media using #shanty2chic so we can celebrate and share your craftsmanship too! Happy Building!

Don’t forget to check out our entire list of DIY dining table plans! We offer a wide variety of styles and designs, ensuring you’ll find plenty of inspiration to create the exact table you’re looking for to complete your home.