
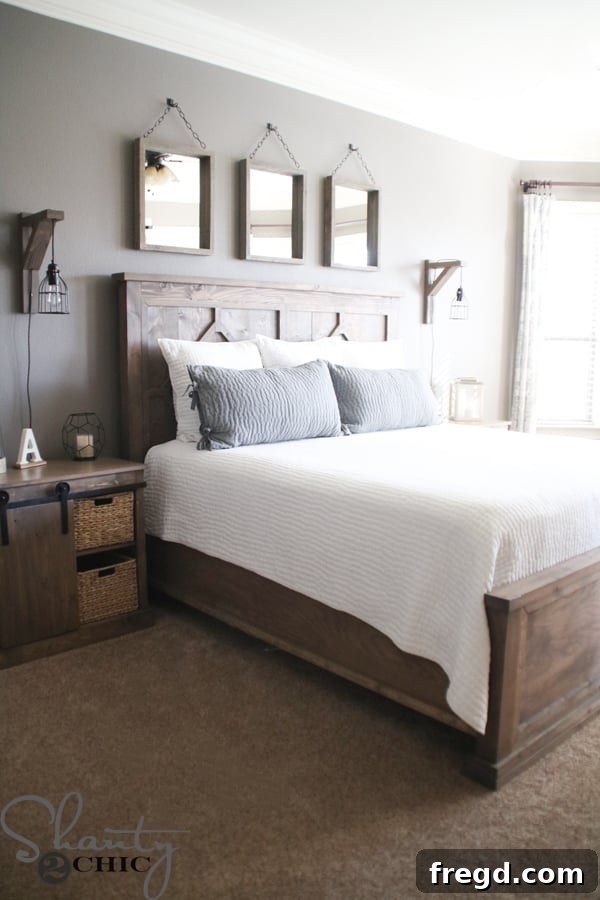
Building your own furniture is a deeply rewarding experience, and this DIY Rustic Modern King Bed stands as a testament to that satisfaction. Without a doubt, it’s my absolute favorite bed I’ve ever constructed, and I’ve certainly built my fair share of them! This project brings together the warmth and charm of rustic design with the clean lines and functionality of modern aesthetics, creating a stunning centerpiece for any bedroom.
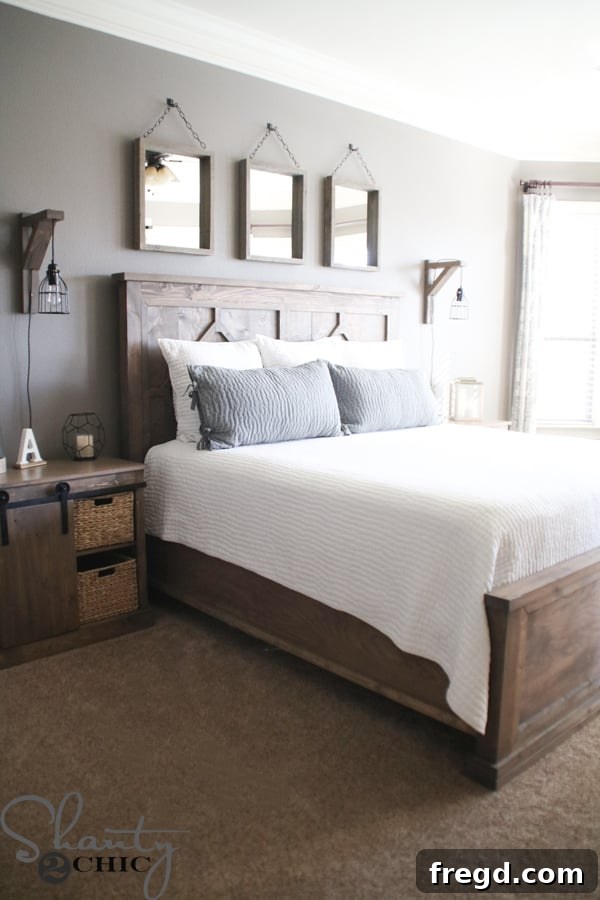
Craft Your Dream Bed: The DIY Rustic Modern King Bed
The journey to creating this magnificent king bed began with a simple desire for change and an upgrade. After a complete refresh of my Sliding Barn Door Media Cabinet, which included repainting and staining the new barn doors in a beautiful Briarsmoke finish, my old queen-sized bed, stained in Early American, suddenly felt out of place. Given my newfound love for the rich tones of Briarsmoke and our long-standing wish to upgrade to a king mattress, the decision was obvious: it was time to build a new bed that perfectly matched our evolving style and comfort needs. With a clear vision in mind, I dove into designing the plans for the bed that had taken root in my imagination.
If you’re eager to embark on this rewarding project, you’re in luck! Detailed, step-by-step instructions are available to guide you through every phase of construction. You can download the FREE PLANS HERE to get started today!
This comprehensive project is divided into four main components: the headboard, footboard, side rails, and the inner frame. While the plans may appear to have numerous steps, don’t be intimidated! Each individual step is remarkably straightforward and manageable. The secret to success lies in tackling one piece at a time. Before you know it, you’ll witness a stunning king bed taking shape in your workshop. Be sure to have the free plans handy as you follow along with this detailed tutorial.
Preparing Your Lumber: Essential Steps and Cost-Saving Tips
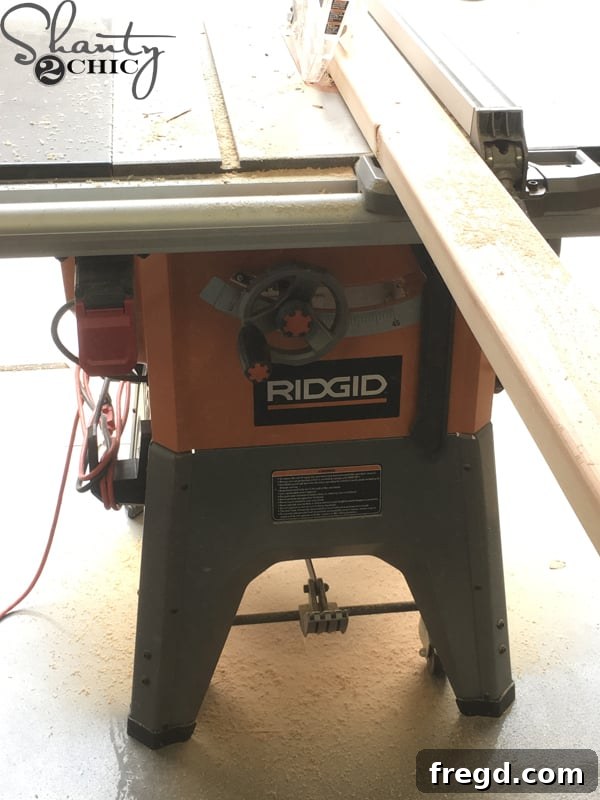
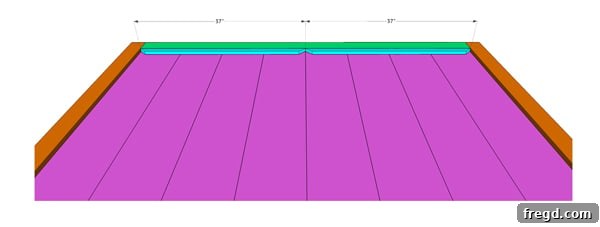
Before diving into the actual construction, an important preliminary step is to rip the rounded edges off all 2x boards. While not strictly essential for structural integrity, this step is crucial if you desire perfectly smooth, seamless laminated sides for your headboard and footboard. Skipping this will result in a small groove where the boards meet, which might detract from the clean, modern aesthetic. Using a table saw for this task ensures precise, straight edges that fit together beautifully. Always prioritize safety when operating power tools, wearing appropriate eye and ear protection.
To further maximize savings on lumber costs, I also chose to rip my own 1x2s and 2x2s from larger boards. Had I purchased these specific dimensions directly from the lumber yard, based on the supply list, the estimated cost would have been around $342. However, by strategically ripping 1x2s from 1×4 boards (effectively getting two 1x2s for the price of one 1×4) and 2x2s from 2x4s (transforming an approximate $3 2×4 into two 2x2s, saving significantly over purchasing prime 2x2s at about $8 each), my total lumber expense was reduced to an impressive $287. This savvy approach saved me $55 on this project alone, a technique I consistently apply to all my builds to keep costs down. It’s important to remember that lumber prices can fluctuate based on your geographical location and market conditions. For an accurate estimate tailored to your area, I recommend using the provided supply list to price out materials at your local hardware stores.
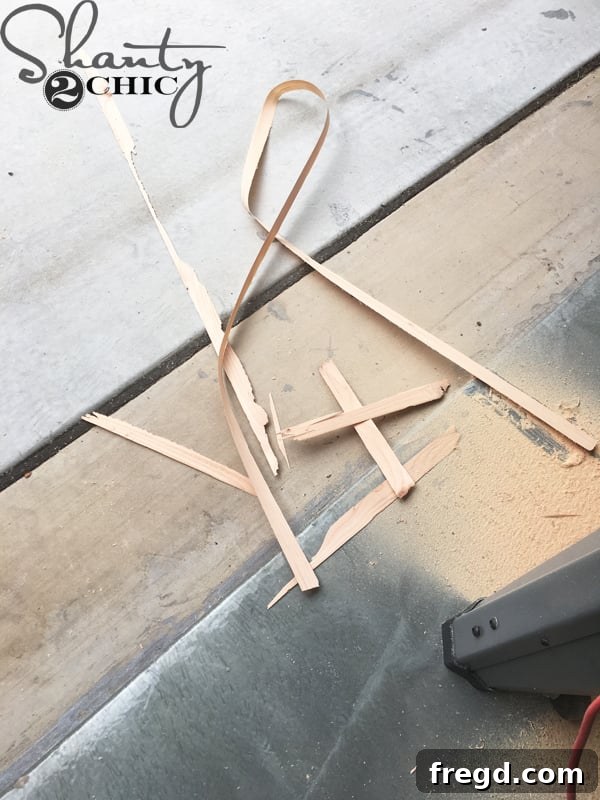
The image above illustrates the precise, clean edges you’ll achieve after ripping off the rounded edges. The plans will specify the exact width to which you should rip these boards for a perfect fit and finish.
Laminating Boards for Robust and Chunky Components
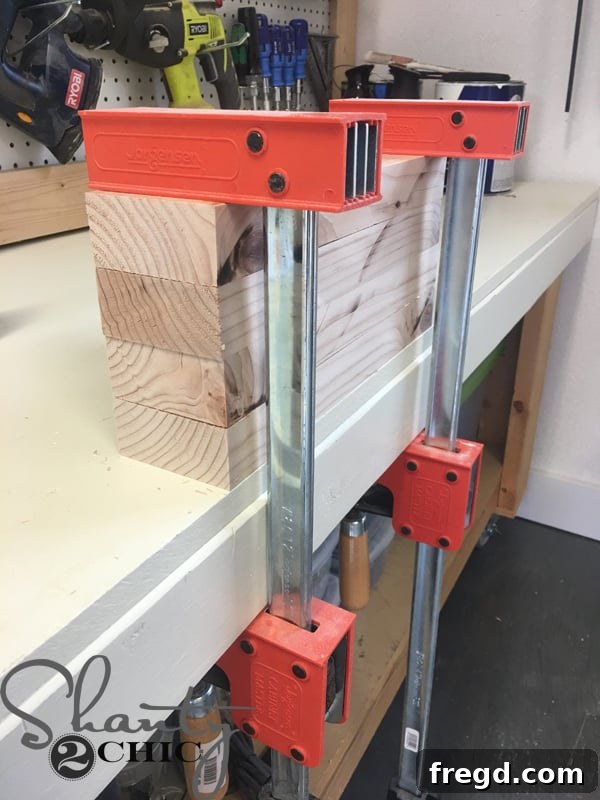
Before commencing the primary construction, cut the side pieces for both the headboard and footboard to their specified sizes. The next critical step involves laminating these boards. Apply a generous, even layer of wood glue to one piece, then carefully stack the corresponding piece directly on top, aligning all edges perfectly. Once stacked, firmly clamp the boards together. This process, known as laminating, allows the glue to cure under pressure, creating exceptionally strong and thick, “chunky” side pieces for your bed, which are vital for both structural integrity and the desired aesthetic. Allow ample time for the glue to dry completely according to the manufacturer’s instructions before proceeding.
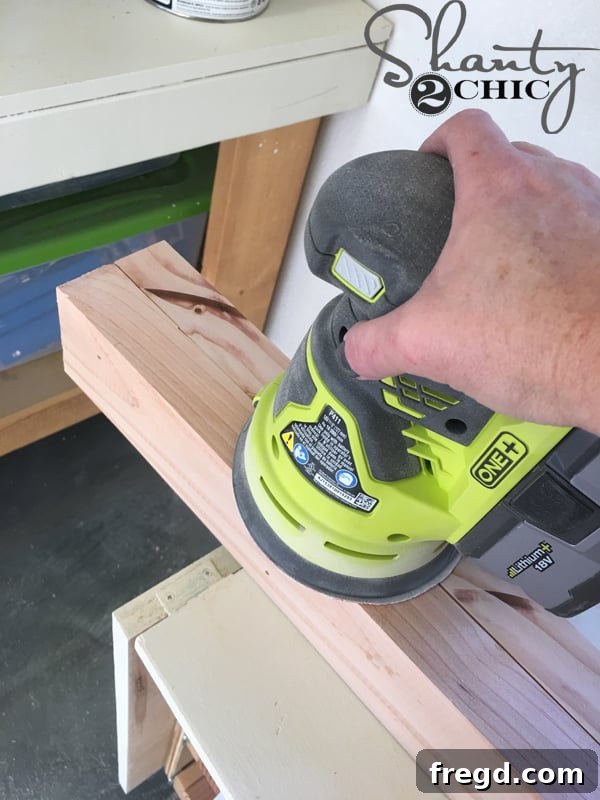
Once the glue has fully cured and the laminated pieces are dry and solid, use a sander to smooth all the exposed sides. This ensures a flawless surface, preparing them for staining and enhancing the overall feel of the finished bed.
Building the Headboard: A Detailed Guide
Assembling the Headboard Planks with Pocket Holes
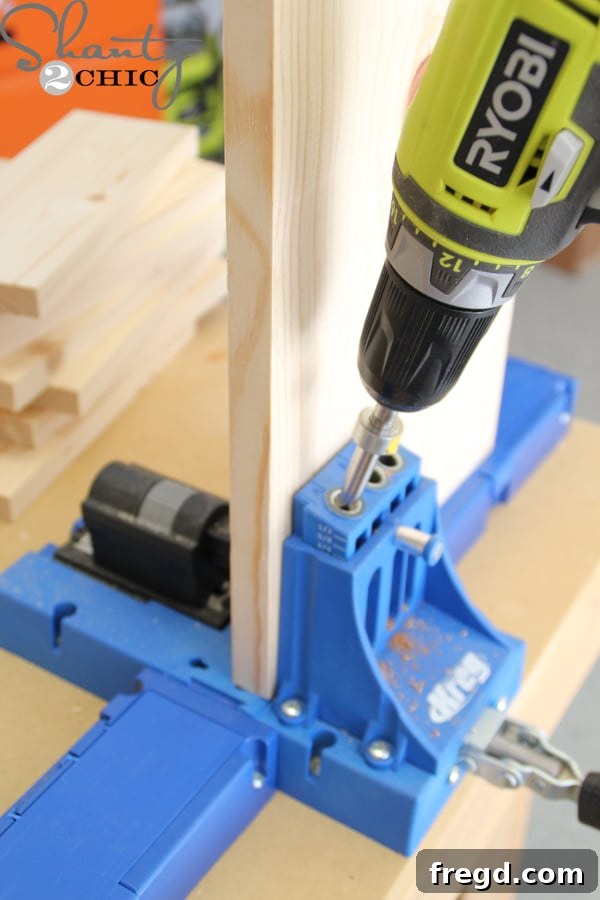
Begin the headboard construction by cutting the 1×10 headboard planks to the precise sizes indicated in your plans. Next, using your Kreg Jig, drill 3/4″ pocket holes into these planks as specified in the blueprints. Pocket holes are an excellent choice for joining these planks as they create incredibly strong, hidden joints that contribute to the clean aesthetic of the modern rustic design. For those new to this technique, our favorite model of Kreg Jig can be found HERE on Amazon, and a helpful tutorial is available: Watch our How to Use a Kreg Jig video HERE!
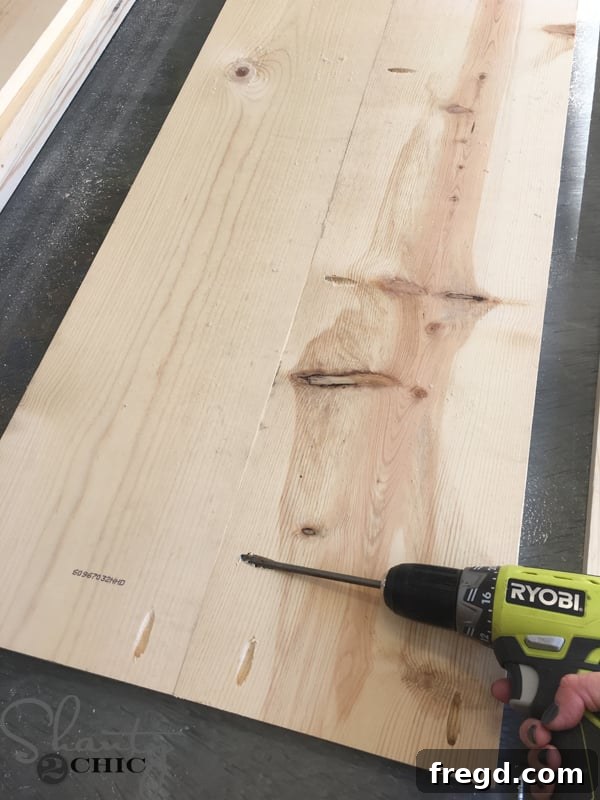
Once the pocket holes are drilled, you can begin the straightforward process of attaching the planks together. Use 1 1/4″ pocket hole screws to create a strong, seamless panel for your headboard. Ensure each plank is aligned perfectly before fastening.
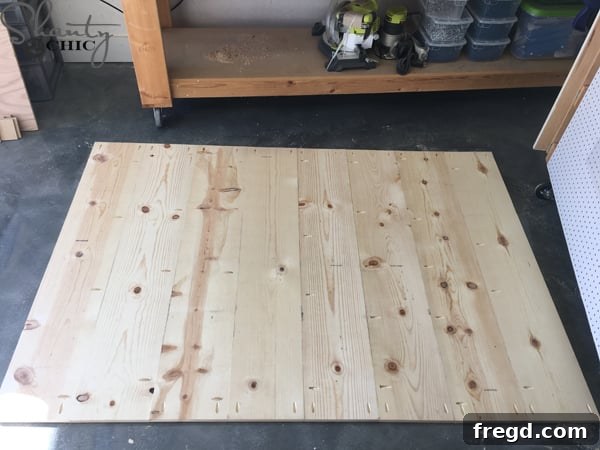
This image illustrates the assembled headboard panel once all the individual planks have been securely attached, forming a robust foundation for the headboard.
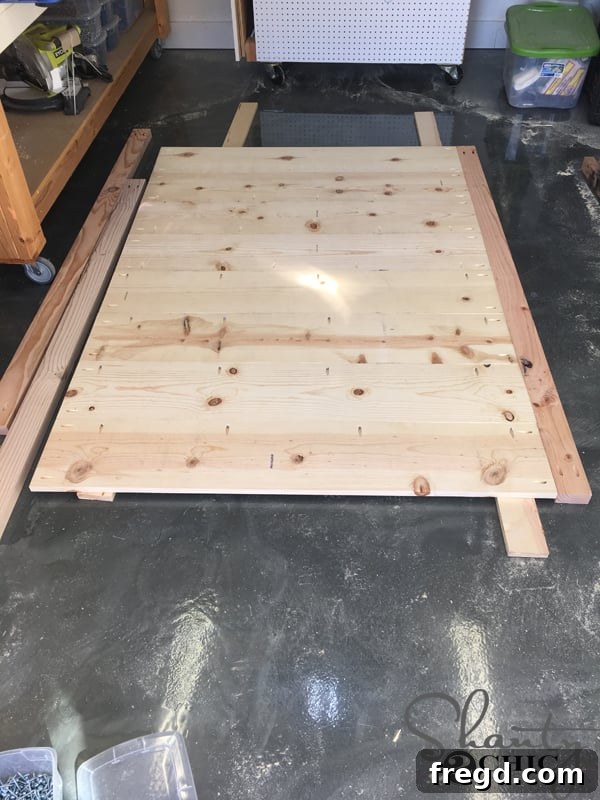
Adding Support and Stability to the Headboard
Next, cut the 2×4 supports to the dimensions specified in the plans. Drill 1 1/2″ pocket holes into the ends of each support. To ensure proper alignment and a secure attachment, prop the headboard planks up on two 3/4″ scrap boards (you can easily use 1×4 offcuts for this purpose). Then, attach one support to each end of the headboard panel using 1 1/4″ pocket hole screws. This creates a solid backing for the headboard structure.
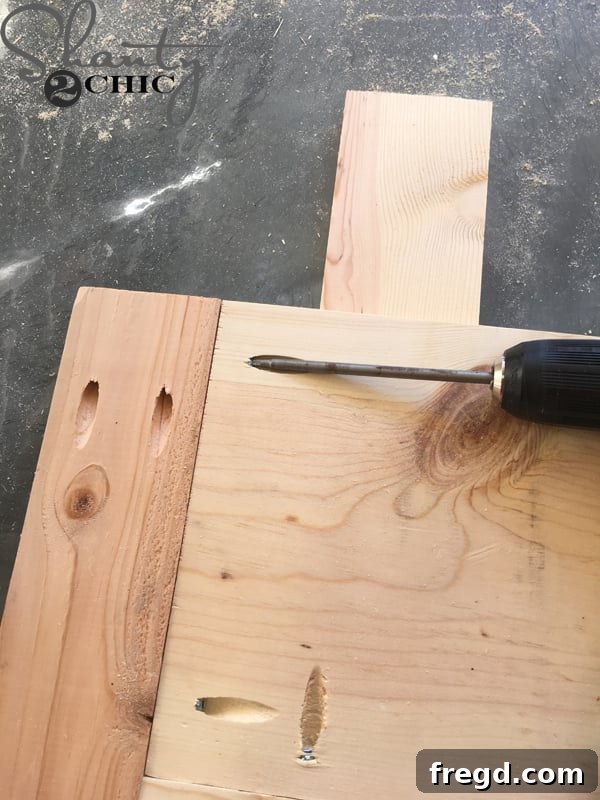
Utilizing Pocket Holes for Support Attachment
Crucially, you will use the pocket holes that were previously drilled into the ends of each individual headboard plank to securely attach these 2×4 supports. This technique creates a strong, concealed joint that firmly binds the planks and supports together, reinforcing the headboard’s structure.
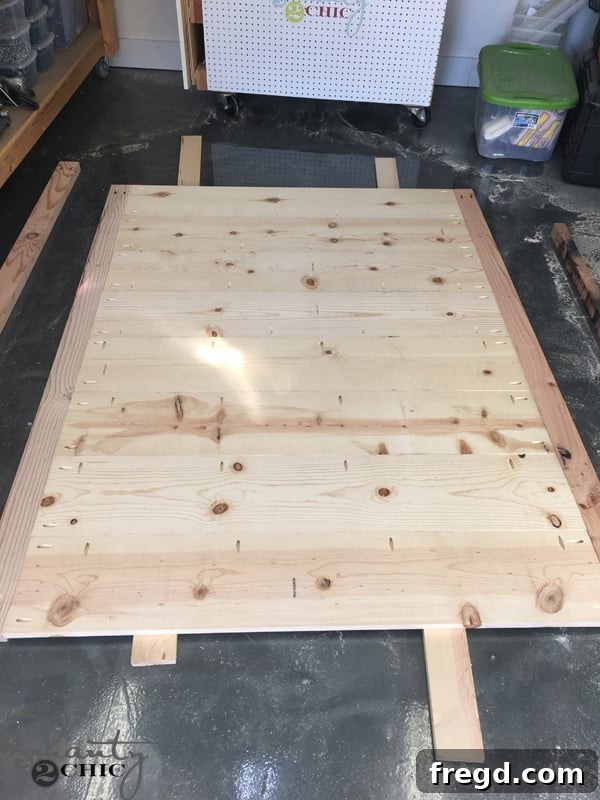
With both end supports attached, your headboard will now possess significantly increased rigidity and stability, forming a robust framework ready for the next stages of construction.
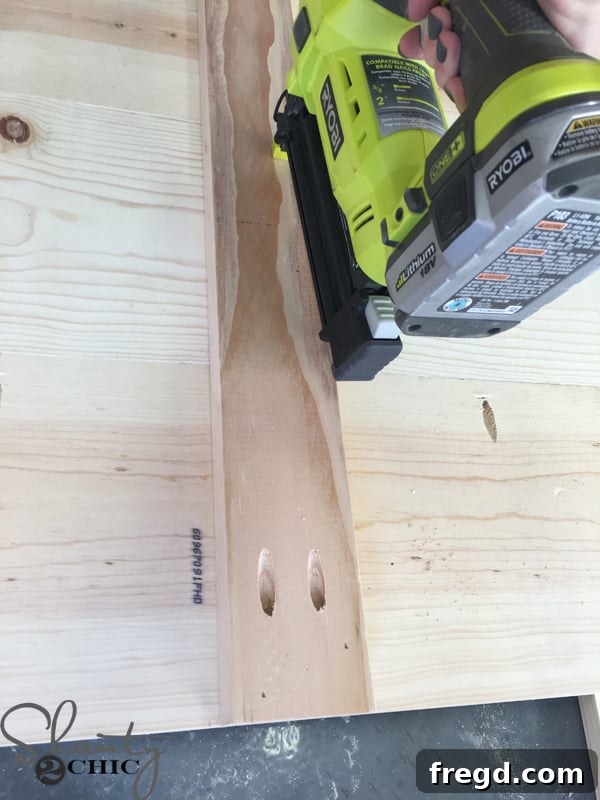
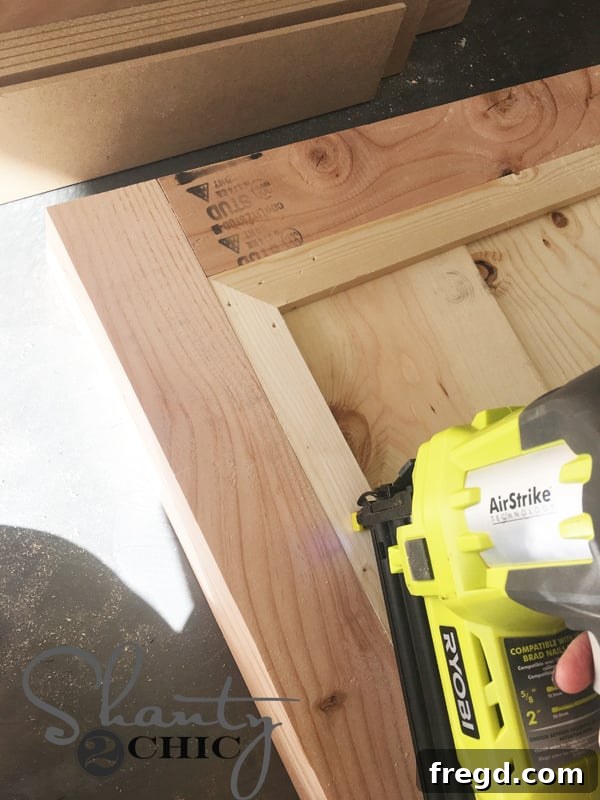
To further enhance structural integrity, attach the third support down the precise center of the headboard. Refer to your plans for the exact placement to ensure it’s perfectly centered. Secure this support using 2″ brad nails and a strong wood glue. For efficiency and ease, I personally used my reliable 18-volt Ryobi Airstrike Brad nailer for this step, which quickly and neatly sets the nails.
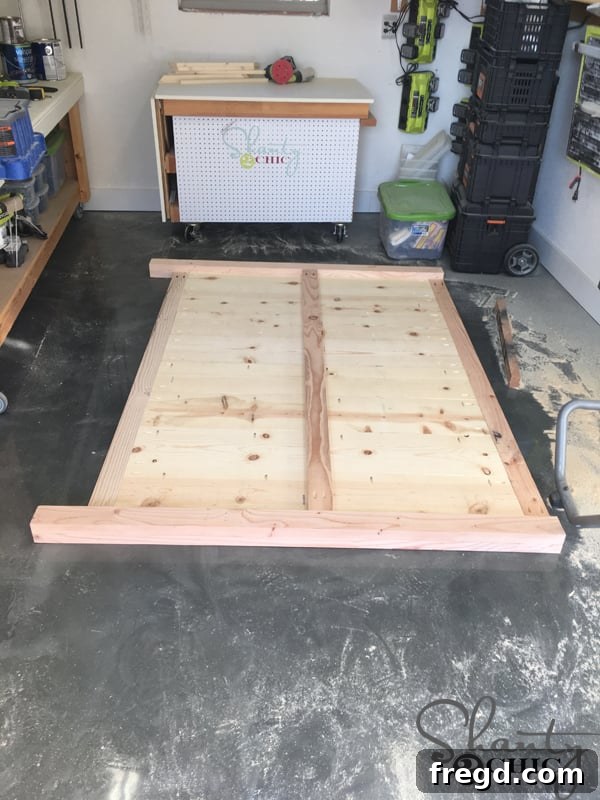
Integrating Laminated Sides and Ensuring Flush Alignment
The next step is to attach the prepared laminated side pieces to the headboard planks and supports. Use a combination of 3/4″ pocket hole screws (driven from the headboard planks into the laminated sides) and 2 1/2″ pocket hole screws (driven from the supports into the laminated sides), along with a generous application of wood glue. This multi-fastening approach ensures an incredibly strong and durable bond. Crucially, the side pieces should be flush with the very top of the headboard, extending 5″ past the bottom edge. This extension will serve as the connection point for the side rails and contributes to the bed’s overall sturdy appearance.
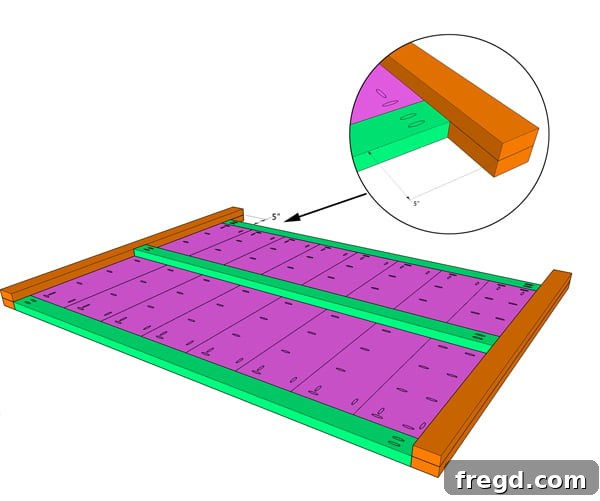
The image above clearly shows how the side pieces should align perfectly flush with the top of the headboard, while extending significantly below it to create the foundational structure for the bed frame.
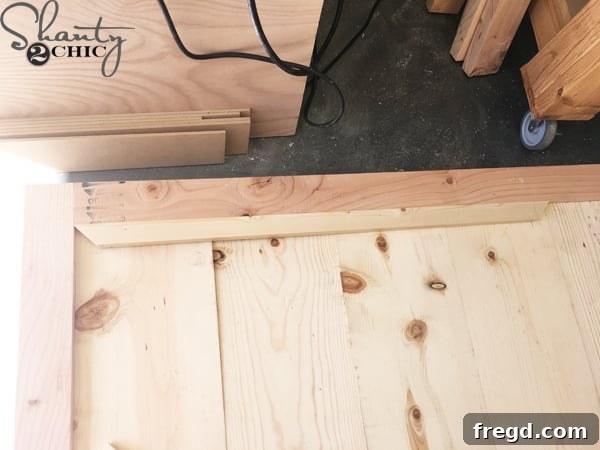
Adding Decorative Trim to the Headboard
Now, it’s time to add the elegant trim that defines the rustic modern aesthetic. Begin with the top trim pieces. Both ends of these pieces will require a precise 45° miter cut. One end of the trim will snugly fit into the top corner of the headboard, while the other end will stop exactly at the center. This trim should fit directly underneath the top support of the headboard, creating a clean, architectural line. Securely attach it with wood glue and 1 1/4″ brad nails. A useful tip for accuracy: make your first 45° miter cut, then hold the piece in place on the headboard and mark precisely where the second miter cut should be made. This ensures a perfect fit every time.
Following the same meticulous process, continue with the remaining top trim pieces, ensuring all mitered corners align perfectly to create a cohesive and professional finish.
Once the top trim is in place, cut the vertical trim pieces to their specified lengths. Attach these pieces with 1 1/4″ brad nails and a strong wood glue, maintaining straight lines and consistent spacing as guided by your plans.
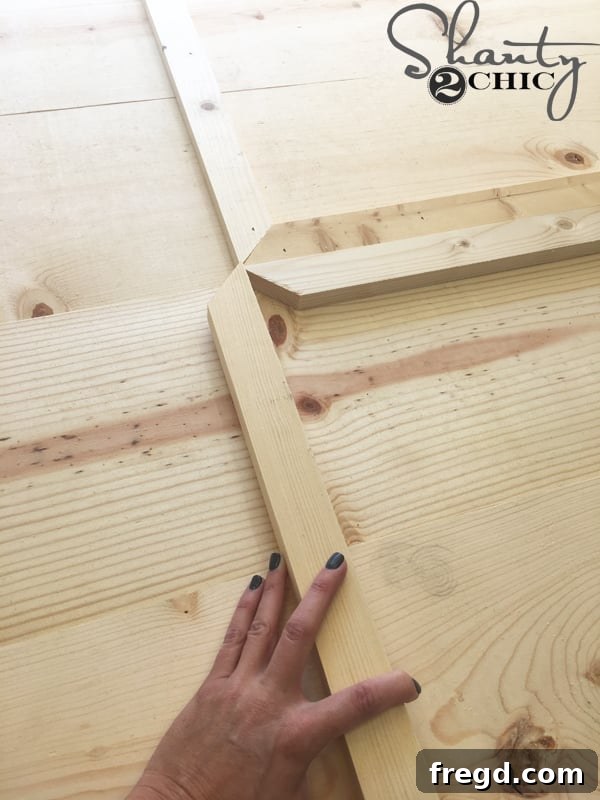
For cutting the bottom trim to fit perfectly, employ a clever technique: make your initial 45° miter cut, then flip the board upside down. Hold it in position on the headboard and mark the precise location for the subsequent cut. This method helps account for any slight variations and ensures a tight, flush joint.
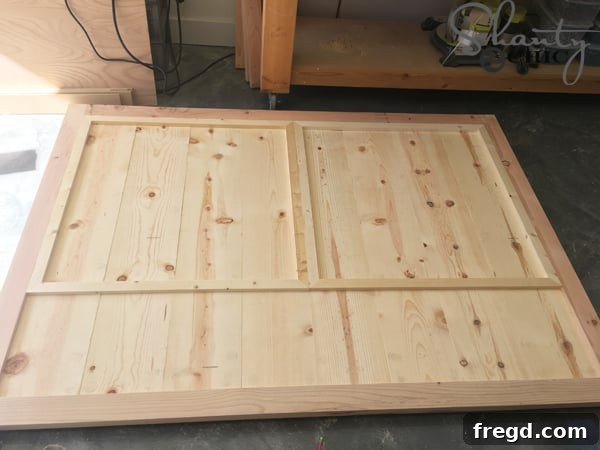
Headboard Trimmed and Ready for Diamond Accents
At this stage, your headboard should proudly display its beautifully defined trim. The geometric lines are beginning to take shape, setting the stage for the decorative elements to follow.
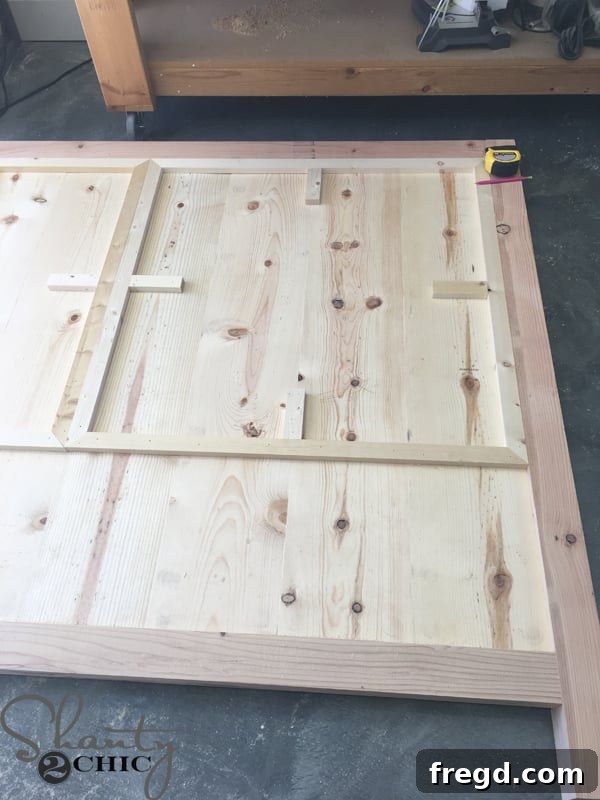
Next, cut the short trim pieces and attach one to each side of the “squares” formed by the main trim. These smaller pieces should be perfectly centered on each trim segment. Secure each piece with 1 1/4″ brad nails and wood glue, referring to the plans for their exact measurements and precise placement to maintain symmetry and balance.
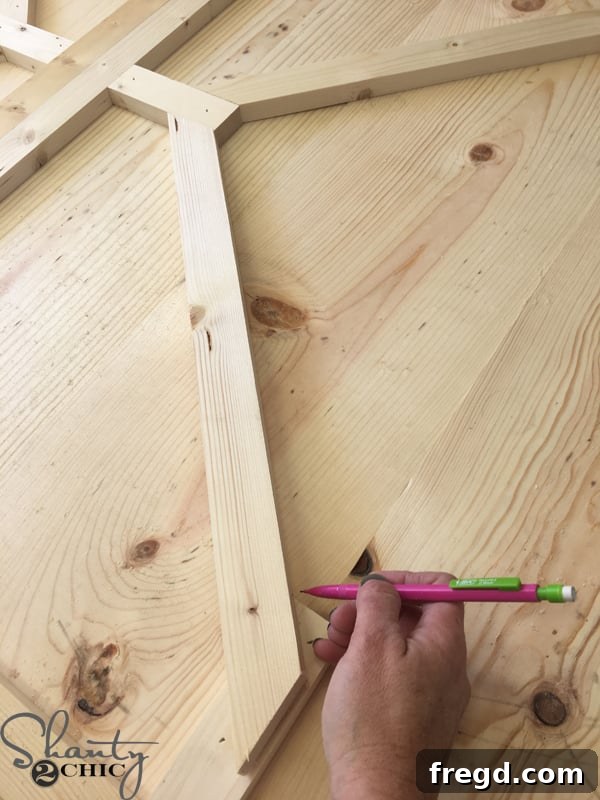
Adding the Distinctive Diamond Trim
Now, to introduce the unique diamond trim accents that elevate the rustic modern aesthetic. For these pieces, employ the same precise measurement technique used for previous miter cuts: make your first 45° miter cut, then carefully hold the trim piece in its intended position on the headboard. Mark the exact spot for the second cut. This ensures a snug and accurate fit for each segment of the diamond pattern.
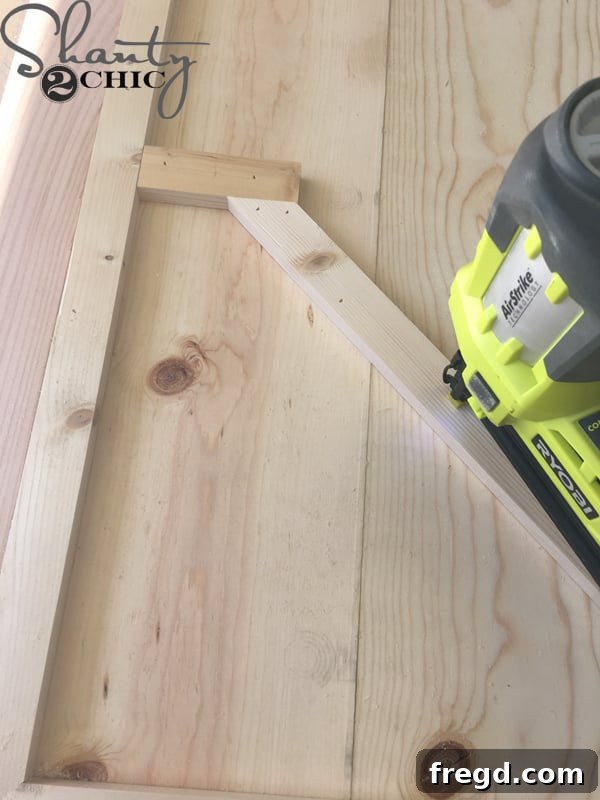
Once perfectly cut, attach each diamond trim piece with 1 1/4″ brad nails and a strong wood glue. The combination of fasteners and adhesive ensures these decorative elements are firmly secured and won’t shift over time.
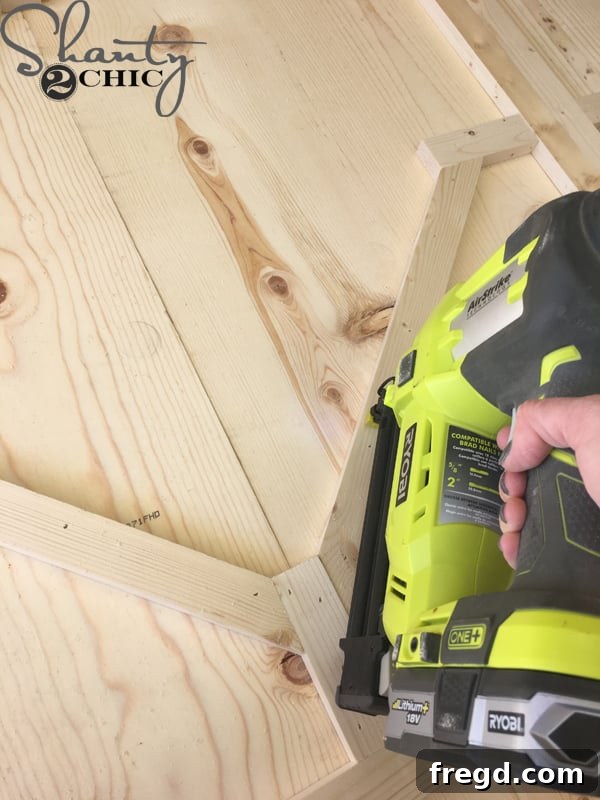
Continue this process for all remaining diamond trim pieces, meticulously cutting and attaching them to complete the intricate pattern across the headboard.
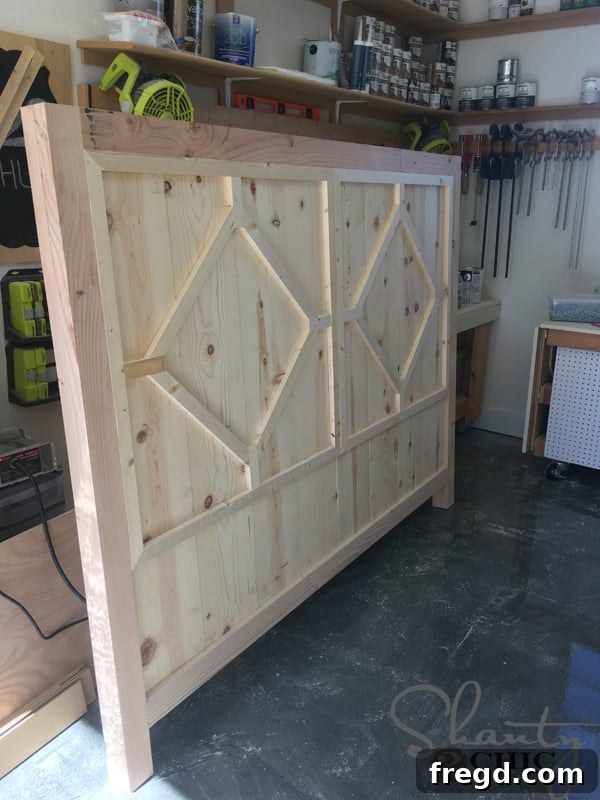
At this point, your headboard should truly shine with its completed trim work. It may seem like a lot of measuring, cutting, and nailing, but the intricate details and robust structure are a testament to your hard work and precision!
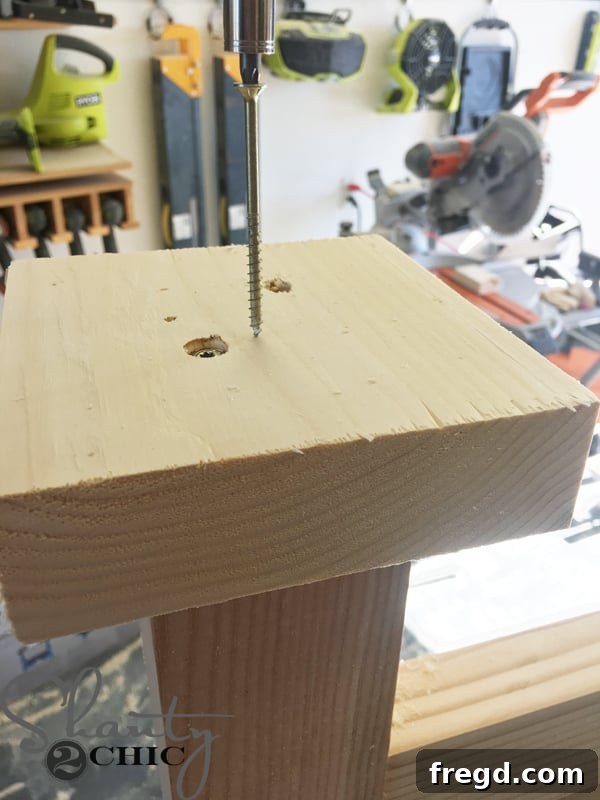
Finishing Touches: Foot Pads and Beveled Trim
To provide a solid base and finished look, attach one foot pad to each headboard leg. These pads should be perfectly centered on the leg, ensuring a consistent 1″ overhang on all sides. Secure them firmly with wood glue and a couple of 2 1/2″ wood screws, which will provide ample strength for these weight-bearing components.
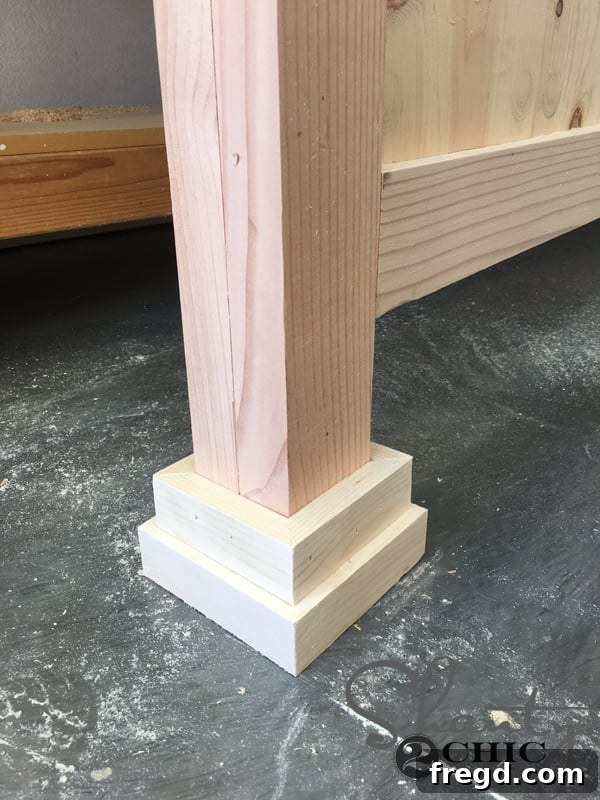
Now, to further enhance the aesthetic of the foot pad, we will add a layer of decorative trim around its edges.
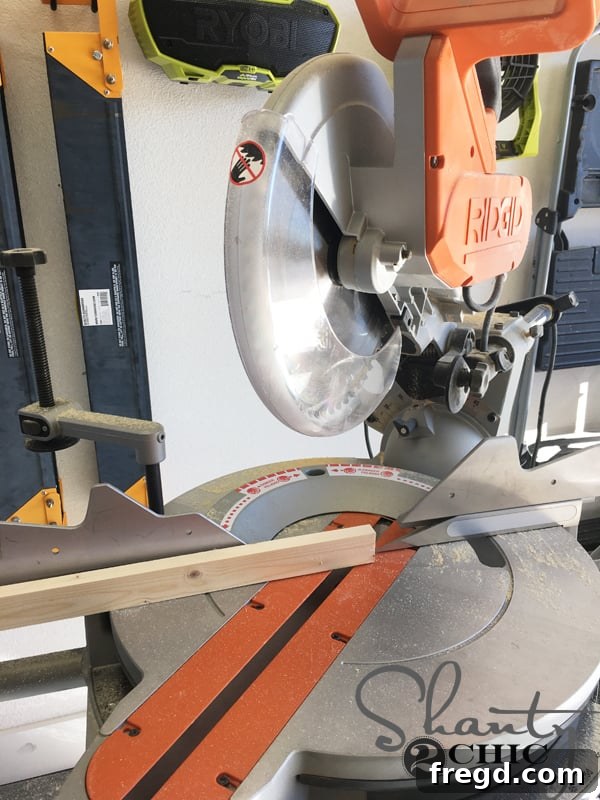
These trim pieces will require precise 45° bevel cuts on each end. To achieve a bevel cut on your miter saw, simply flip the board so its face rests against the fence of the saw, then make your 45° cut. This technique differs from a miter cut, which angles the board horizontally. For a comprehensive guide on this tool, Check out our How to Use a Miter Saw video HERE!
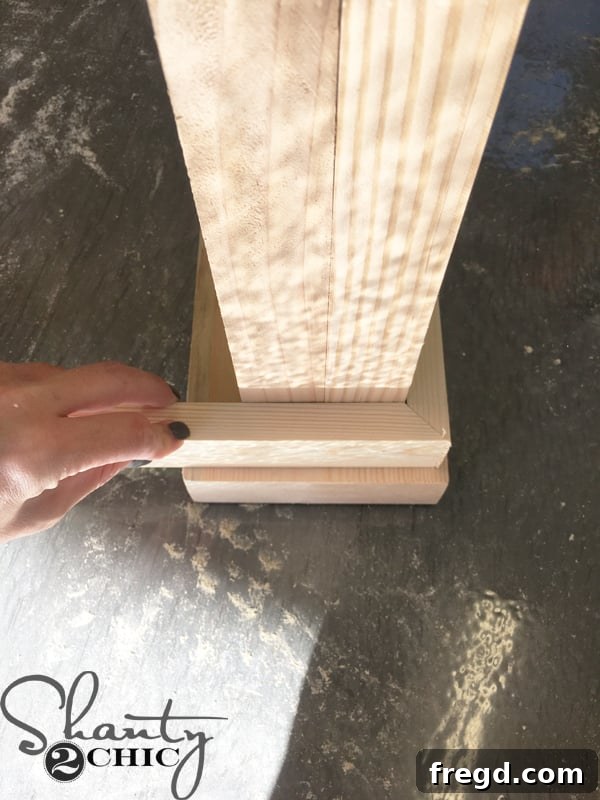
Employ the same tried-and-true technique for perfect fit that we used on the headboard trim: make your initial bevel cut, then hold the piece up in place against the foot pad and carefully mark for the second bevel cut. This ensures each piece aligns flawlessly.
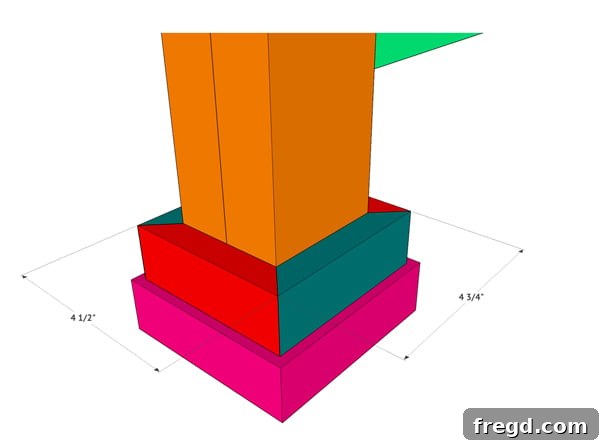
Carefully work your way around each leg of the headboard, attaching these precisely cut bevel-trimmed pieces with 1 1/4″ brad nails and a robust wood glue. This creates a refined and robust base for the headboard.
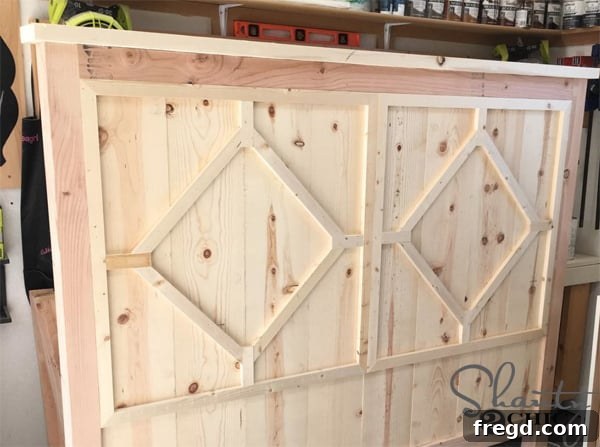
The final step in completing the headboard structure is to attach the top 2×6 cap. This 2×6 board has been precisely ripped down to a 5″ width to achieve the desired proportion and overhang.
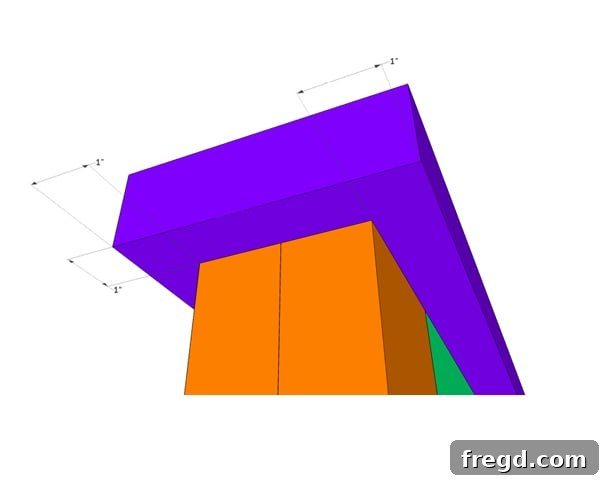
Ensure there is a consistent 1″ overhang around the entire perimeter of the headboard when attaching the cap. Secure this cap firmly with 2″ brad nails and a generous application of wood glue, creating a durable and visually appealing top surface.
Building the Footboard: Mirroring Headboard Quality
Constructing the Footboard Panel with Plywood and Laminated Sides
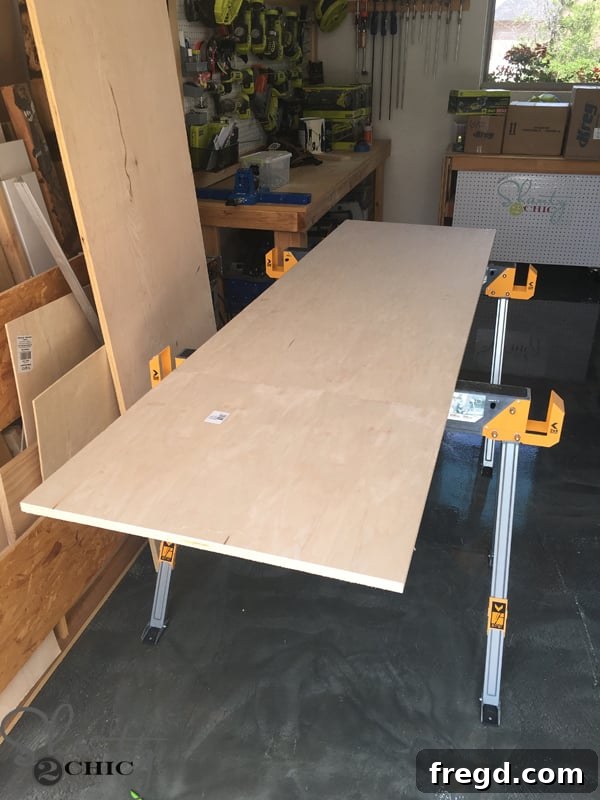
Begin the footboard construction with the plywood piece, accurately cut to its specified size. If you’re wondering about the best way to cut plywood sheets, our How to Rip Plywood Video HERE offers excellent guidance. Once cut, drill 3/4″ pocket holes along each side of the plywood. Refer to your plans for the precise placement of these pocket holes, which are crucial for strong, concealed joints.
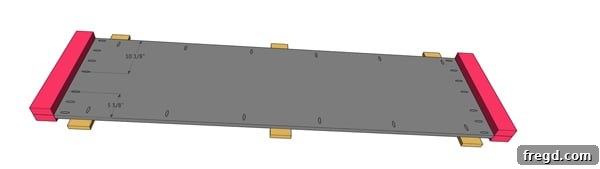
To facilitate assembly and maintain proper alignment, prop the plywood panel up on 3/4″ scrap boards. Then, carefully attach the two prepared laminated side pieces to the plywood. Use 1 1/4″ pocket hole screws, driven through the plywood’s pocket holes, and strong wood glue to ensure a robust and lasting bond.
Securing the Footboard Support and Initial Trim
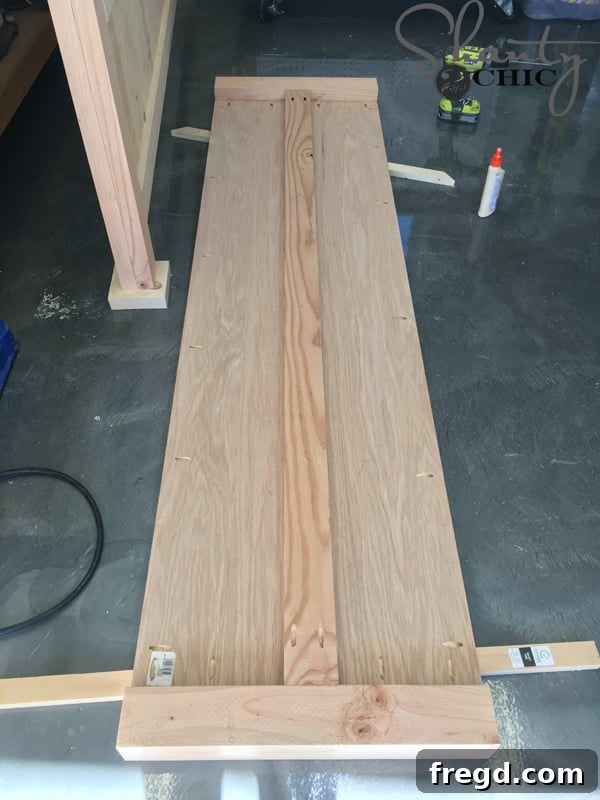
Next, cut the footboard support to the exact dimensions required. Drill 1 1/2″ pocket holes into each end of this support piece. Attach it firmly to the laminated side pieces using wood glue and 2 1/2″ pocket hole screws. Following this, further secure the support to the plywood panel itself with wood glue and 2″ brad nails, creating a truly solid and stable footboard structure.
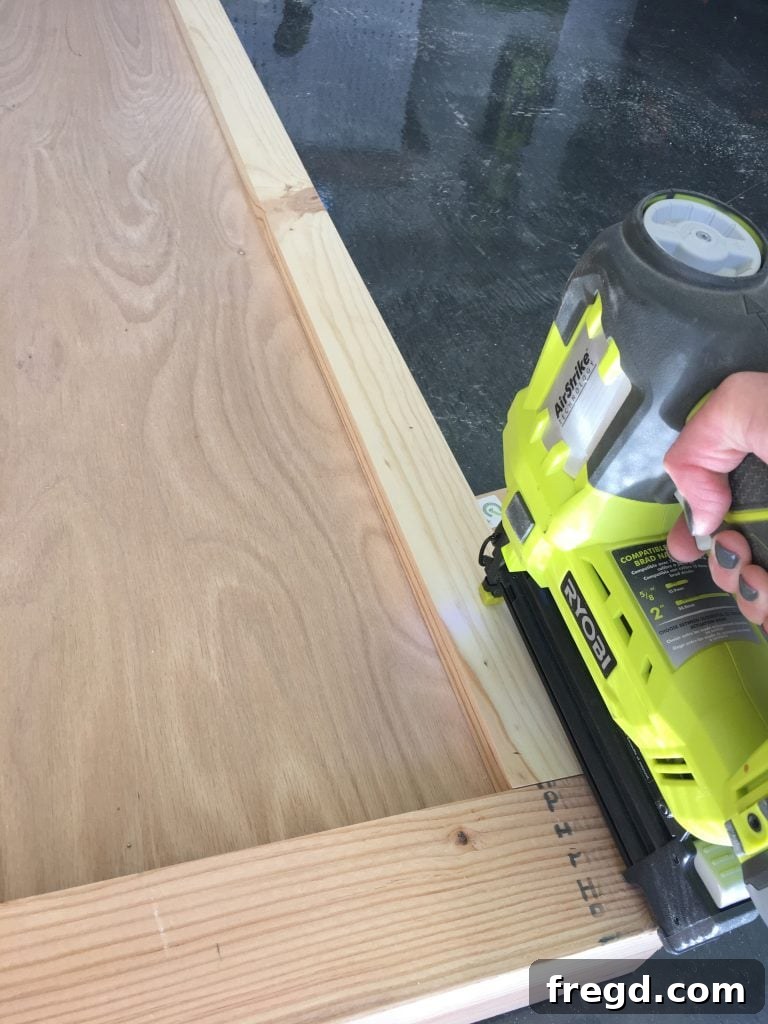
Flip the footboard over to its front side. Then, cut the bottom 1×3 trim piece to size and attach it along the lower edge of the footboard. Use 1 1/4″ brad nails and wood glue to secure it, ensuring a clean and even application for a seamless finish.
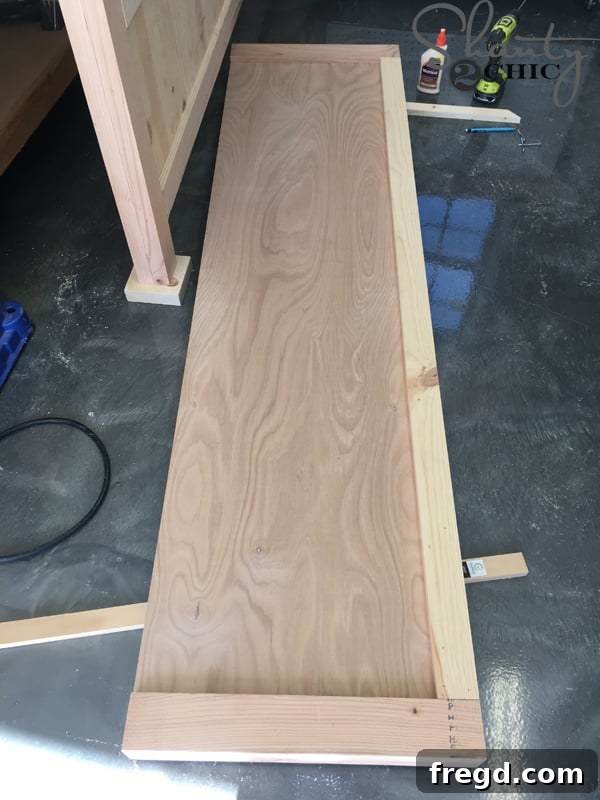
With the initial trim in place, your footboard should now visibly begin to take its distinctive shape, mirroring the quality and design of the headboard.
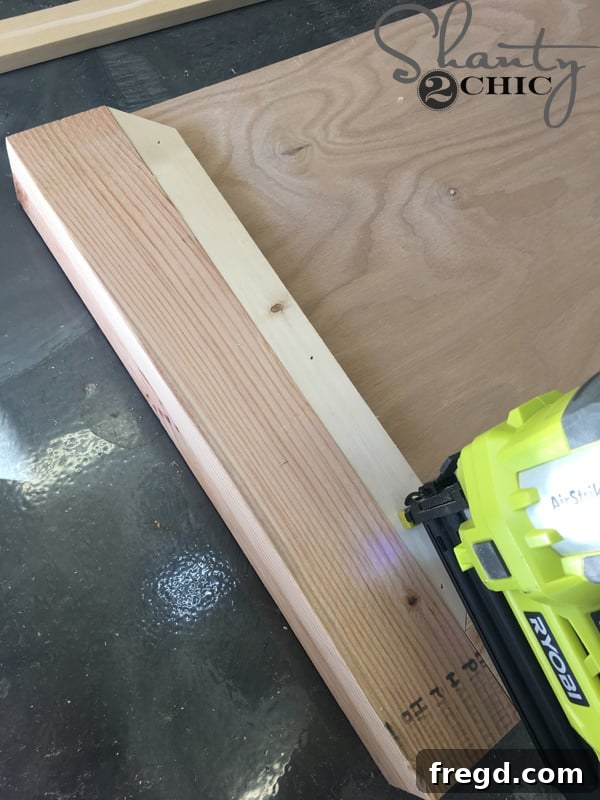
Adding Horizontal Trim and Base Details
Time to enhance the footboard with more trim! Carefully measure and cut the horizontal trim pieces to their required lengths. The ends of these trim pieces will be miter cut at precise 45° angles to ensure a clean corner. This trim will butt up snugly against the laminated side pieces, creating a continuous, elegant line. Attach these pieces with 1 1/4″ brad nails and a generous amount of wood glue for a strong, lasting bond.
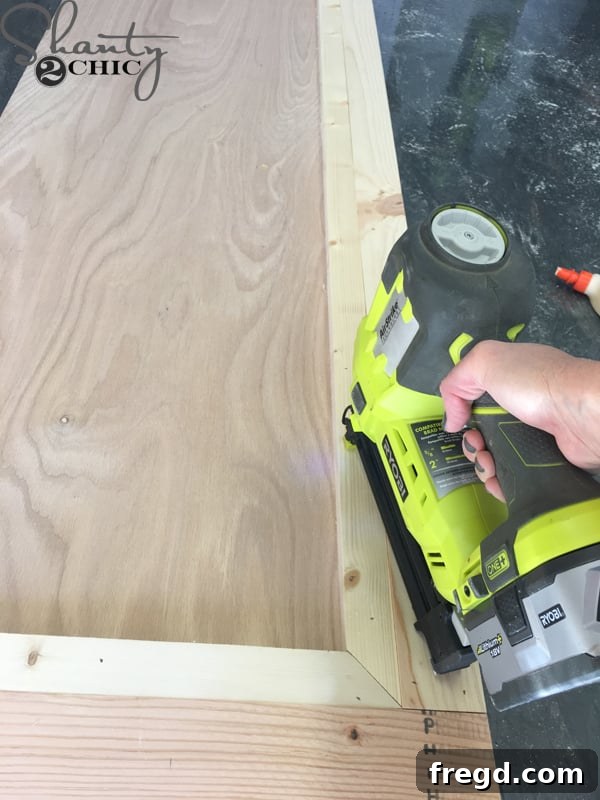
Continue by measuring and cutting the remaining horizontal trim. These pieces will also feature 45° mitered ends. This trim will sit perfectly against the 1×3 bottom trim piece, while the other horizontal piece will be flush with the top edge of the plywood sheet, completing the geometric pattern.
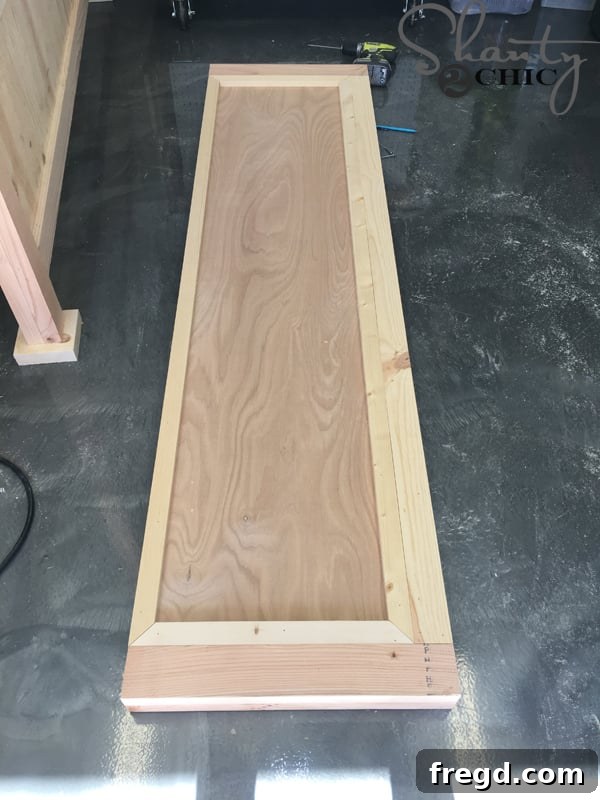
At this stage, your footboard should look like this, with all its horizontal trim elements carefully applied, demonstrating a harmonious and structured appearance.
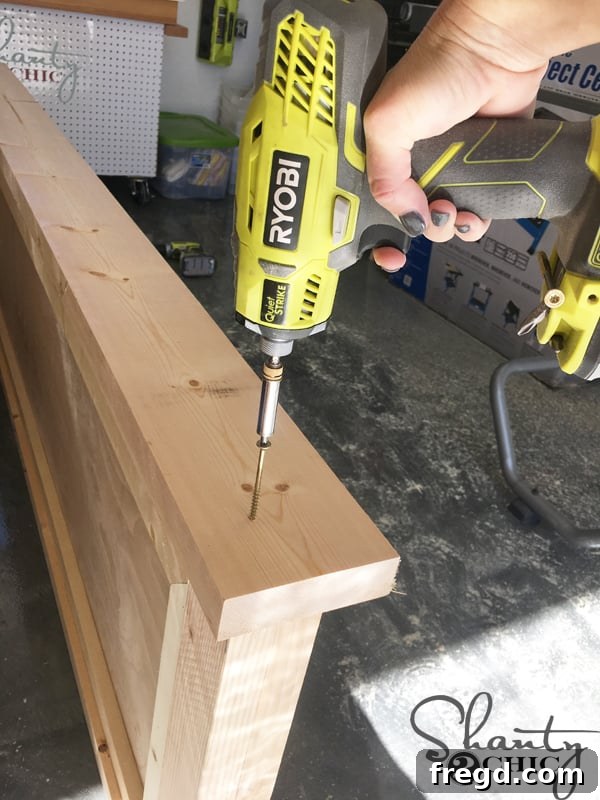
Flip the footboard upside down. Now, attach the base 2×6 to the very bottom of the footboard using 2 1/2″ wood screws and wood glue. This 2×6 piece has been specifically ripped to a 5″ width to create a substantial and sturdy foundation for the footboard.
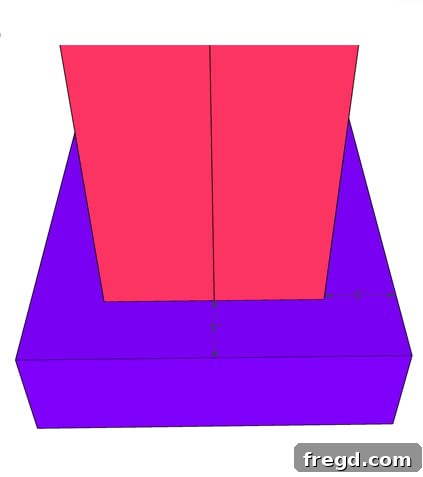
Adding Base Trim to the Footboard for a Polished Look
With the base secured, it’s time to apply the trim around the base of the footboard, completing its aesthetic.
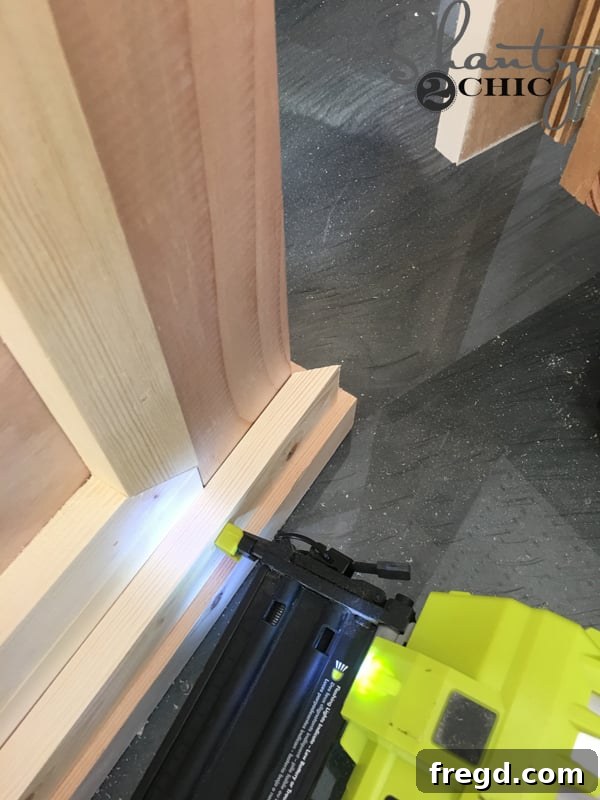
Start with the long front pieces of trim. Both ends will require a precise 45° bevel cut. To achieve a flawless fit, utilize the same technique employed for the headboard foot pad trim: make your initial bevel cut, then hold the piece firmly in place against the footboard base, and accurately mark the location for the second bevel cut. Attach this trim piece directly on top of the footboard base, securing it with 1 1/4″ brad nails and wood glue, driving the fasteners into the underlying 1×3 base trim.
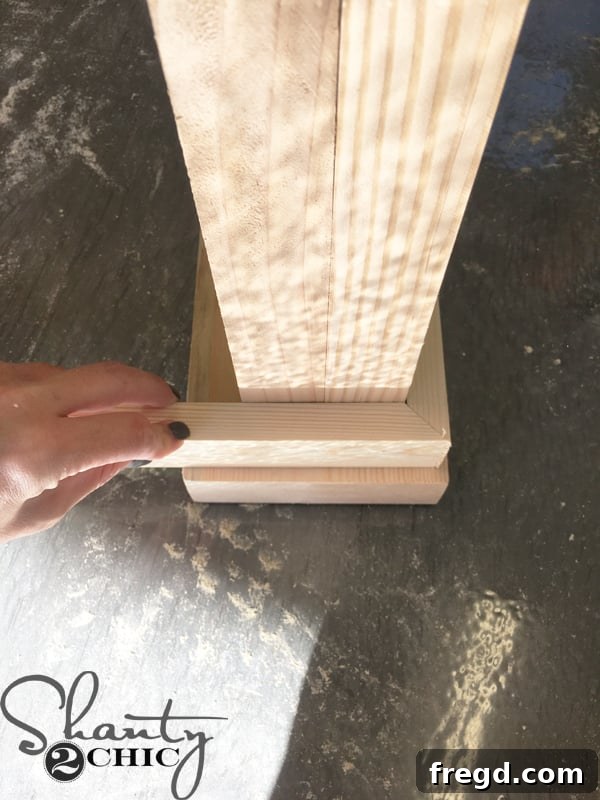
Next, move to the side pieces of the base trim. Make your first 45° bevel cut, then hold the piece securely in its intended position and carefully mark for the second bevel cut. This meticulous approach guarantees tight, professional-looking joints.
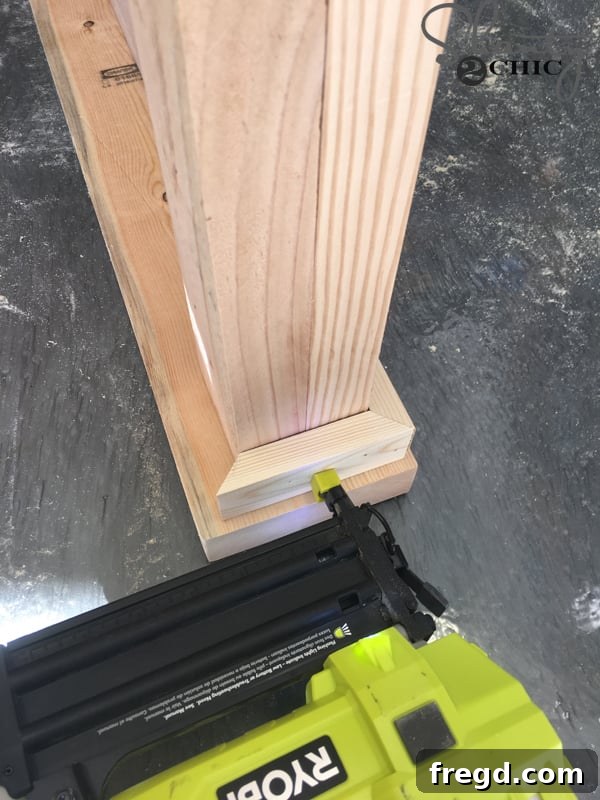
Attach these side trim pieces firmly using 1 1/4″ brad nails and a generous application of wood glue, ensuring they are flush and stable.
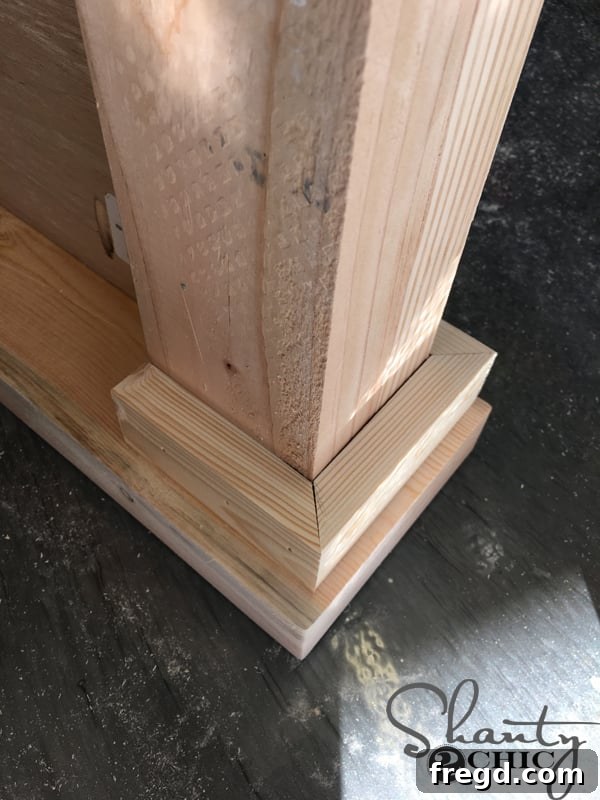
For the back trim, you’ll need one bevel cut on one side and a straight cut on the other. There’s no need to continue the full trim profile around the back, as this section will not be visible once the bed is fully assembled and pushed against a wall. Attach this piece securely with 1 1/4″ brad nails and wood glue.
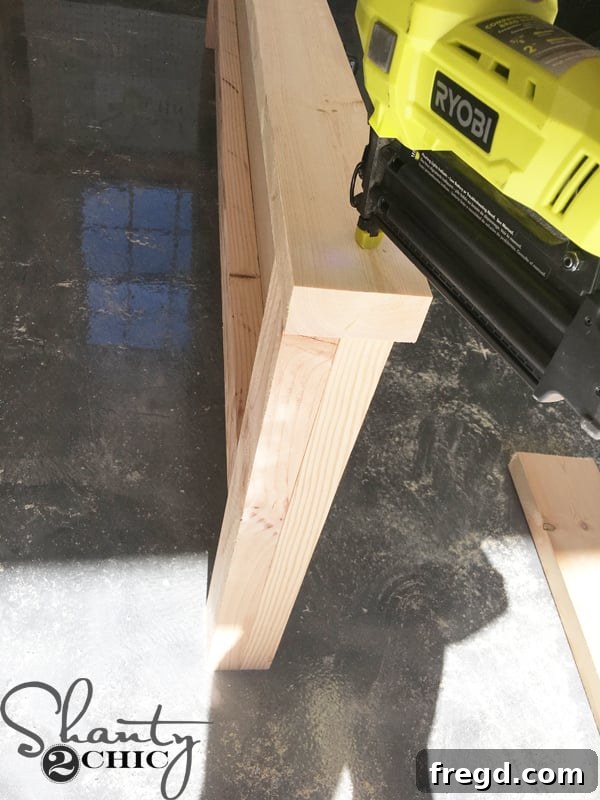
Finally, flip the footboard right-side-up and attach the 2×4 cap. Use 2″ brad nails and wood glue to secure it. This cap should have a 1/4″ overhang on the sides and a 1/2″ overhang on the front, providing a substantial and finished top edge. Note: My 2×4 measured 3 1/2″ wide as I ripped it from a 2×6. If you use a standard 2×4 ripped to 3 1/4″ wide, you will have a 1/4″ overhang on the front of the footboard, which is also perfectly acceptable and within the design parameters.
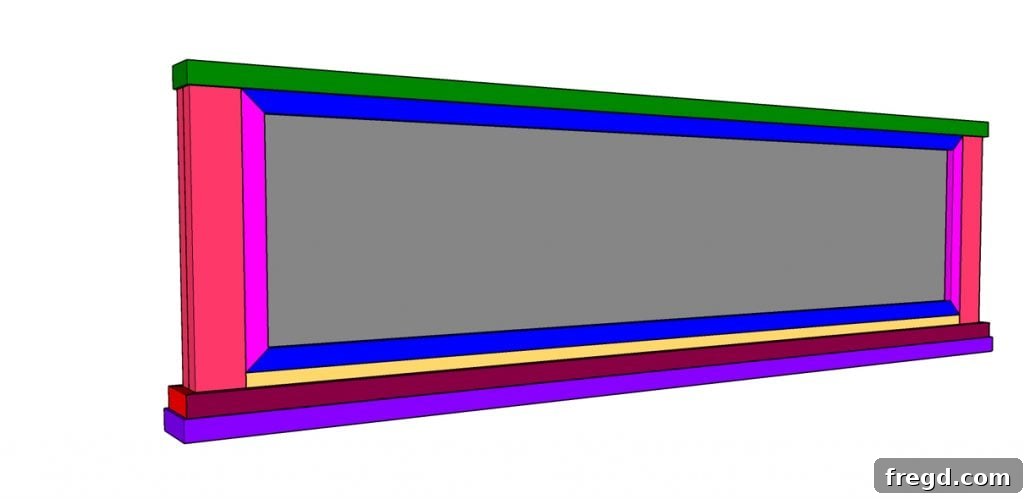
Here it is: the completed footboard! With its sturdy construction and detailed trim, it perfectly complements the headboard and sets the stage for the rest of the bed frame.
Building the Side Rails: Connecting Elements
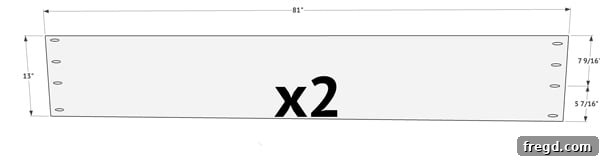
Preparing Side Rails and Applying Trim
For the side rails, begin by drilling 3/4″ pocket holes into both ends of each rail. These holes are essential for securely attaching the side rails to the headboard and footboard during final assembly. Consult your plans for the precise and correct placement of these pocket holes, ensuring they align perfectly for a strong connection.
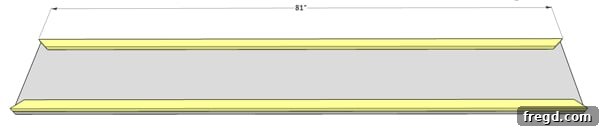
Flip the side rails over to expose their front side. Carefully measure and cut the top and bottom trim pieces to ensure a snug fit along the length of the rails. The ends of these trim pieces will be miter cut at 45° angles for a clean, professional finish. Attach them securely with 1 1/4″ brad nails and a strong wood glue. It’s crucial that the edges of these trim pieces are perfectly flush with the edges of the side rails, contributing to the bed’s sleek appearance.

Next, cut the side trim pieces to size. These, too, will feature 45° miter cuts on their ends and should be attached with 1 1/4″ brad nails and wood glue. Ensure the edges of these trim pieces are also flush with the side rail edges, maintaining a consistent and polished look across the entire bed frame.
Adding Side Rail Cleats and Finishing Edges
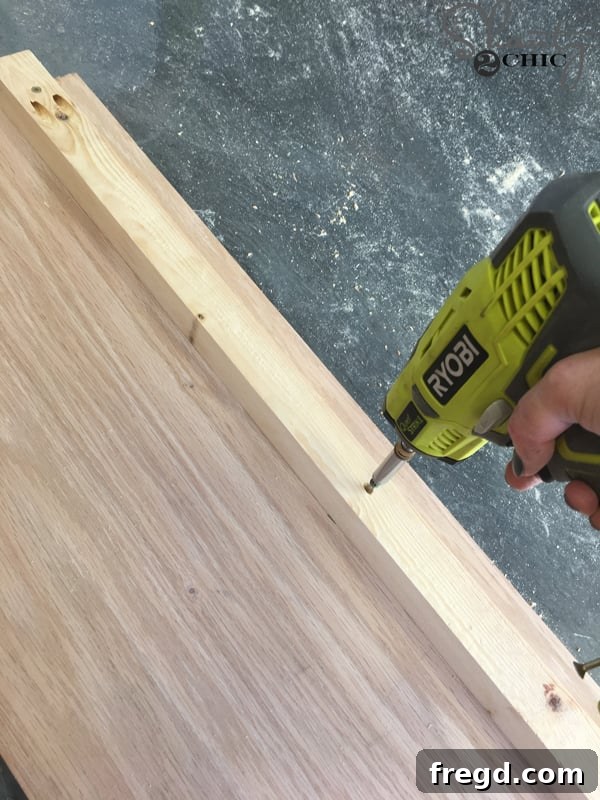
Measure and cut the side rail cleats to their specified dimensions. Drill 1 1/2″ pocket holes into each end of these cleats. These cleats are vital as they will support the bed slats. Attach each cleat to the back of its respective side rail using 2″ wood screws and a generous amount of wood glue. Ensure they are positioned correctly according to the plans for proper mattress support.
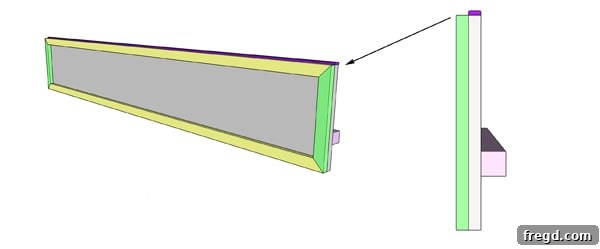
The final crucial step for the side rails is to measure and cut the screen molding to fit precisely. This screen molding will be attached directly on top of the exposed plywood edge of the side rail. Its purpose is purely aesthetic, providing a beautifully finished edge that conceals the rough plywood and elevates the overall look of the bed frame. Secure the molding with 1 1/4″ brad nails and wood glue.
Finishing Touches: Staining and Drying
***NOW IS A CRUCIAL TIME TO ADD YOUR CHOSEN FINISH TO ALL THE INDIVIDUAL PIECES. ALLOW THEM TO DRY COMPLETELY AND THOROUGHLY ACCORDING TO THE STAIN MANUFACTURER’S INSTRUCTIONS BEFORE BRINGING THEM INDOORS FOR FINAL ASSEMBLY.***
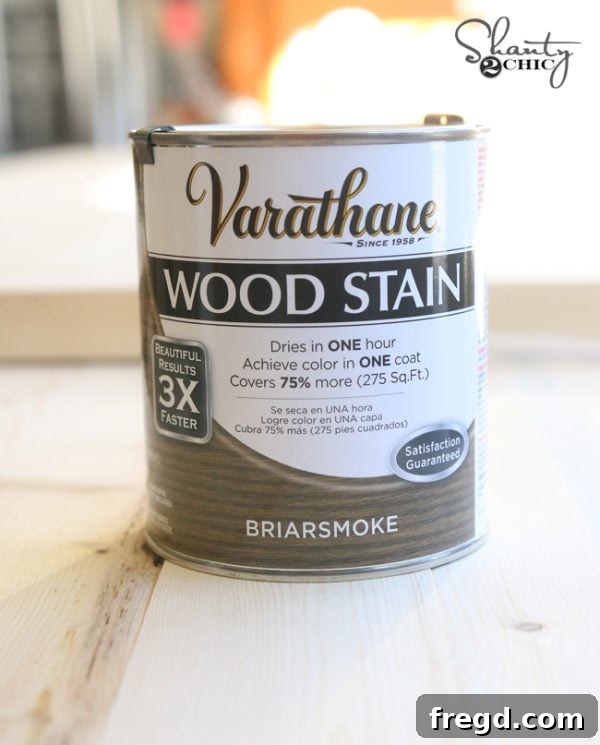
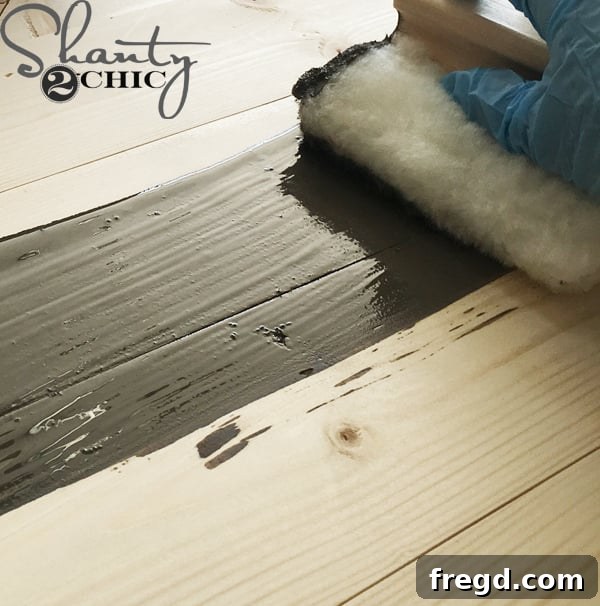
For this bed, I chose to apply a single coat of Varathane’s “Briarsmoke” stain on every piece. This particular shade offers a rich, deep hue that perfectly complements the rustic modern aesthetic, adding warmth and character to the wood grain. You can find Briarsmoke stain HERE on Amazon! For efficient and even application on large surfaces, I highly recommend using a Lamb’s Wool Applicator; it distributes the stain smoothly and minimizes streaks. If you’re new to staining or want to refine your technique, make sure to check out our helpful How to Stain Wood video HERE!
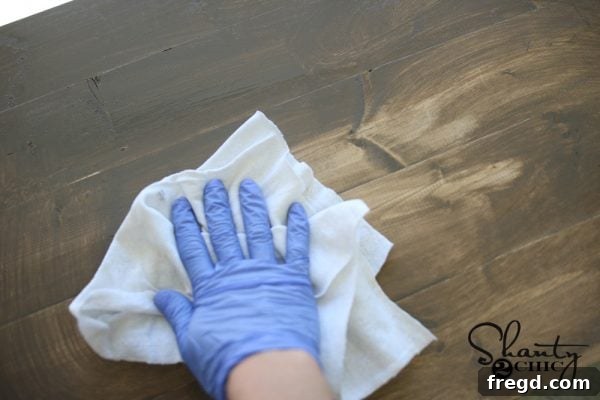
After applying the stain, allow it to sit for approximately 5 minutes to penetrate the wood fibers. Then, using a clean, lint-free cloth, carefully wipe off any excess stain. This process ensures an even finish and prevents the stain from becoming too dark or unevenly absorbed. Ensure adequate ventilation during staining and drying.
Assembling Your Masterpiece: The DIY Rustic Modern King Bed
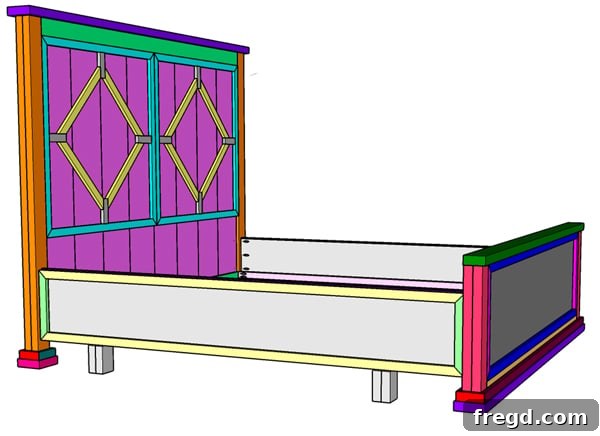
Connecting Side Rails to Headboard and Footboard
When it comes time to assemble the bed, utilize scrap blocks (as indicated in your cut list) to prop up the side rails. This ensures they are at the correct height and perfectly level, making the attachment process much easier and more accurate.
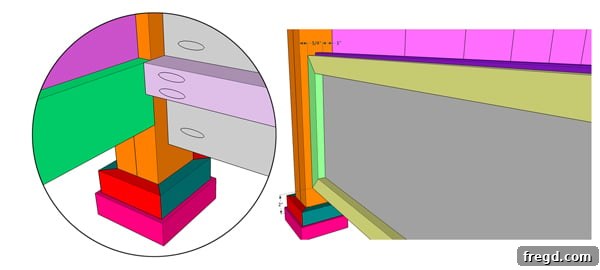
Attach the side rail to the headboard using 1 1/4″ pocket hole screws, driven through the plywood pocket holes, and 2 1/2″ pocket hole screws from the pocket holes in the cleats. A critical instruction here: **do not use wood glue** for these connections. Omitting glue ensures that you can disassemble the bed if it ever needs to be moved or transported, preventing permanent bonding. Refer to your plans for the precise placement of the side rails on the headboard, ensuring they are perfectly level and aligned.
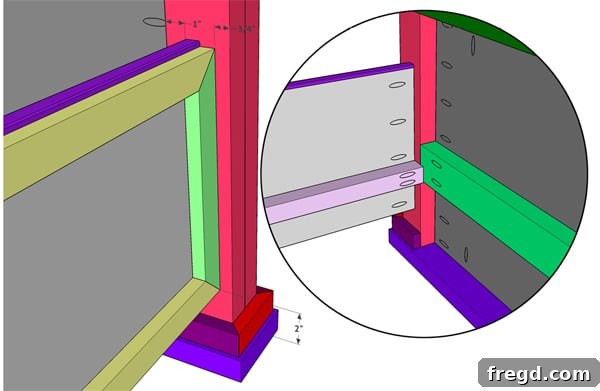
Next, connect the side rails to the footboard, mirroring the attachment process used for the headboard. Again, use 1 1/4″ pocket hole screws for the plywood connections and 2 1/2″ pocket hole screws for the cleat connections, deliberately avoiding wood glue to maintain the bed’s ability to be disassembled. Consult the plans to ensure the side rails are positioned correctly and securely on the footboard, completing the main frame of your new bed.
Installing Bed Slats for Mattress Support
Cut all the bed slats to their specified size. Once cut, evenly lay them out across the side rail cleats. Ensure there is consistent spacing between each slat to provide optimal support for your mattress and even weight distribution.
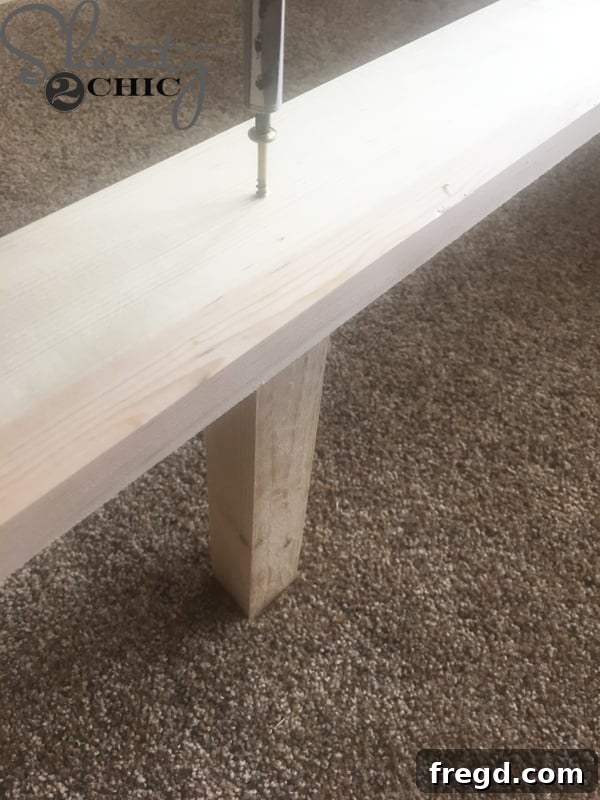
If you haven’t already attached the slat supports to the slats, now is the time to do so. Center each support on its respective slat and firmly attach it using 1 1/4″ wood screws and wood glue. This additional support is crucial for enhancing the longevity and stability of your mattress foundation.
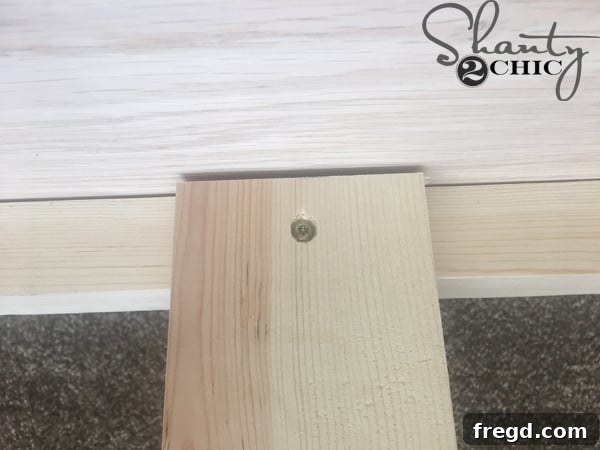
Finally, secure each individual slat to the cleats with a single 1 1/4″ wood screw. Again, for ease of potential future disassembly and relocation, **do not use wood glue** at this step. This completes the structural assembly of your magnificent DIY Rustic Modern King Bed!
That’s it! Your incredible new DIY Rustic Modern King Bed is now fully constructed and ready to be enjoyed!
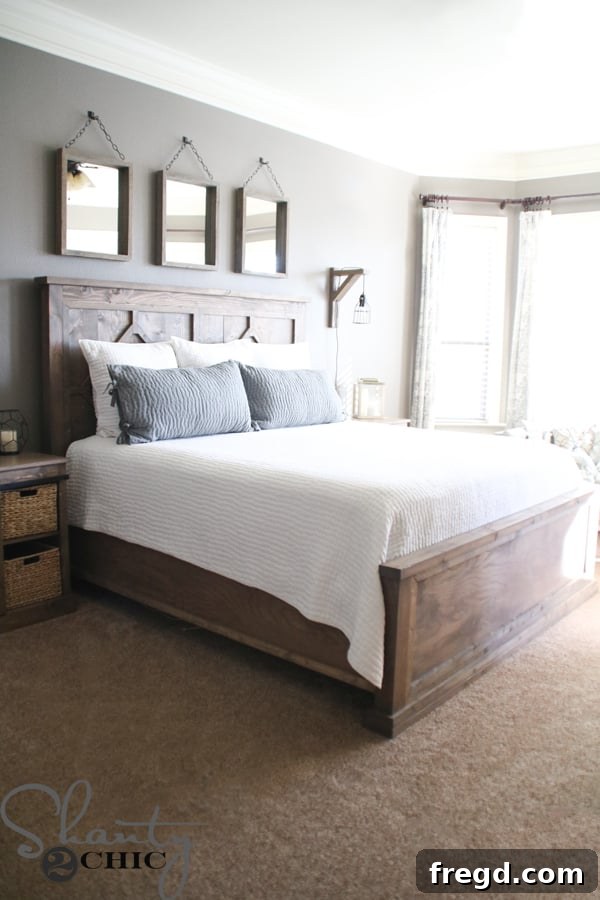
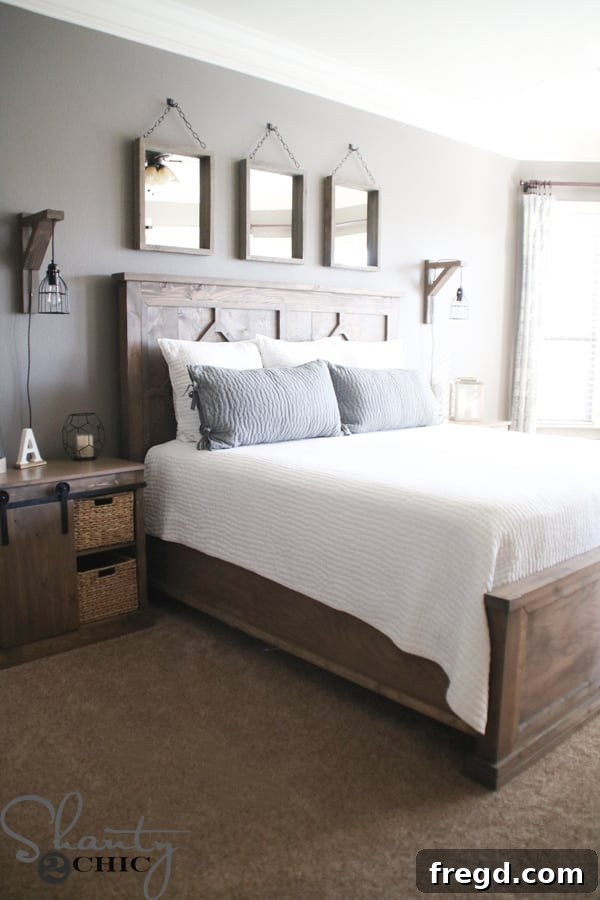
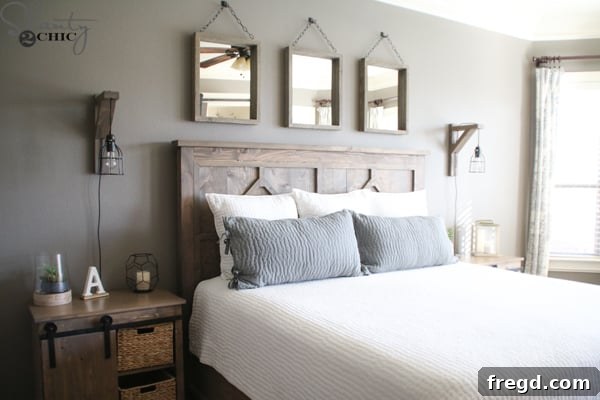
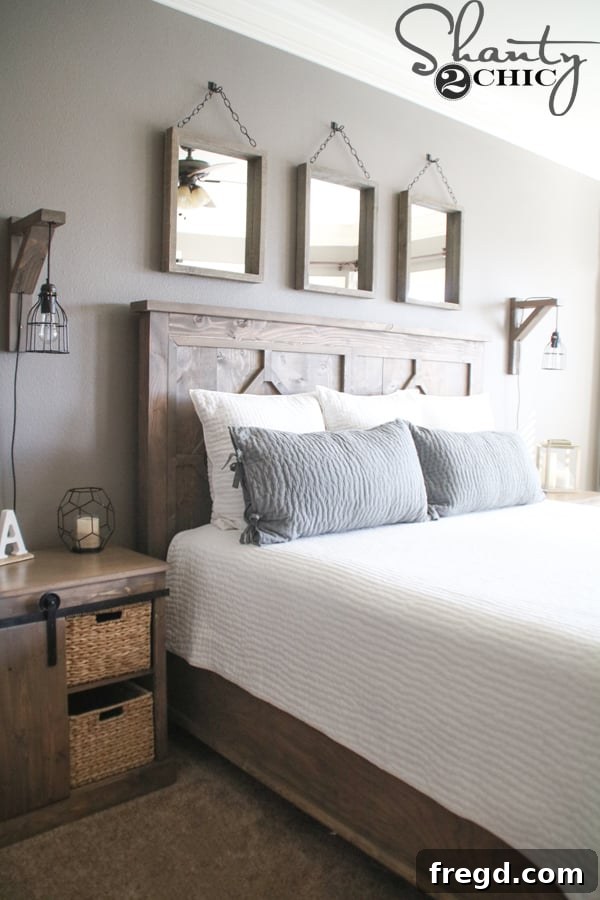
I am absolutely thrilled with my new DIY Rustic Modern King Bed! It truly transforms the entire bedroom space, bringing together comfort, style, and the immense satisfaction of a handmade piece. Now that the bed is complete, you might be curious about the other elements that bring this room together. Below, you’ll find details about the complementary pieces and where you can find them or learn how to make them yourself!
Discover More Room Details and DIY Inspiration:
- Sliding Barn Door Nightstand with $20 Hardware: Get ready to build your own! Free Plans and a How-to Video are coming in just two weeks. Don’t miss out on this fantastic project – Subscribe HERE to our YouTube channel to be notified the moment it drops!
- Corbel Sconce Light: Add a touch of elegant lighting to your space. Free Plans and a How-to Video will be released soon! Again, make sure you’re subscribed: Subscribe HERE to our YouTube channel so you don’t miss the tutorial!
- Bedding: The cozy and stylish bedding shown in the images can be found HERE from Pottery Barn.
- Mirrors: These beautiful mirrors were a lucky clearance find at Hobby Lobby. We customized them by removing the original brass anchors and rope, replacing them with more fitting eye hooks and decorative chain for a rustic touch.
- Hooks for Mirrors: The sturdy hooks used to hang the mirrors are available HERE on Amazon.
- Decorative Chain for Mirrors: The charming decorative chain that completes the look of the mirrors can be purchased HERE on Amazon.
- Baskets in Nightstands: Perfect for storage and adding texture, these baskets were sourced from AtHome.
- Letter A on Nightstand: A personalized touch, this decorative letter was found at HomeGoods.
- Candle Holder: The elegant candle holder is from Target, available HERE.
- Large Lantern: This striking large lantern adds a focal point and can be found HERE from Target.
- Curtains: The beautiful curtains that complete the room’s ambiance are available Here from Pottery Barn.
- Wall Color: The soothing wall color used in this room is “Seine” by Valspar.
- Trim Color: The trim is painted with an oil-based paint that was custom-matched to “Ivory Lace” by Valspar.
Customizing Your Bed: Adjusting Dimensions for Any Mattress Size
The beauty of building your own bed is the ability to customize it to your specific needs. If you wish to modify this bed to accommodate a different mattress size, here’s a guide along with standard mattress dimensions:
- To adjust the width of the bed: You will need to modify the length of the headboard planks and the length of the plywood footboard accordingly. Once these core components are adjusted, simply measure and cut all the associated trim pieces to fit the new dimensions. After the bed is assembled, measure the required length for your bed slats based on your new width.
- To adjust the length of the bed: Begin by modifying the length of the plywood side rails. Once these are adjusted, measure and cut all other pieces (such as the side rail cleats and slat length) accordingly to match the new overall bed length.
Standard Mattress Dimensions for Your Reference:
- Twin: 38″ x 74″
- Twin XL: 38″ x 80″
- Full: 54″ x 74″
- Queen: 60″ x 80″
- King: 76″ x 80″
- California King: 72″ x 84″
Happy building, and enjoy the unparalleled satisfaction of sleeping on a bed you crafted with your own hands!