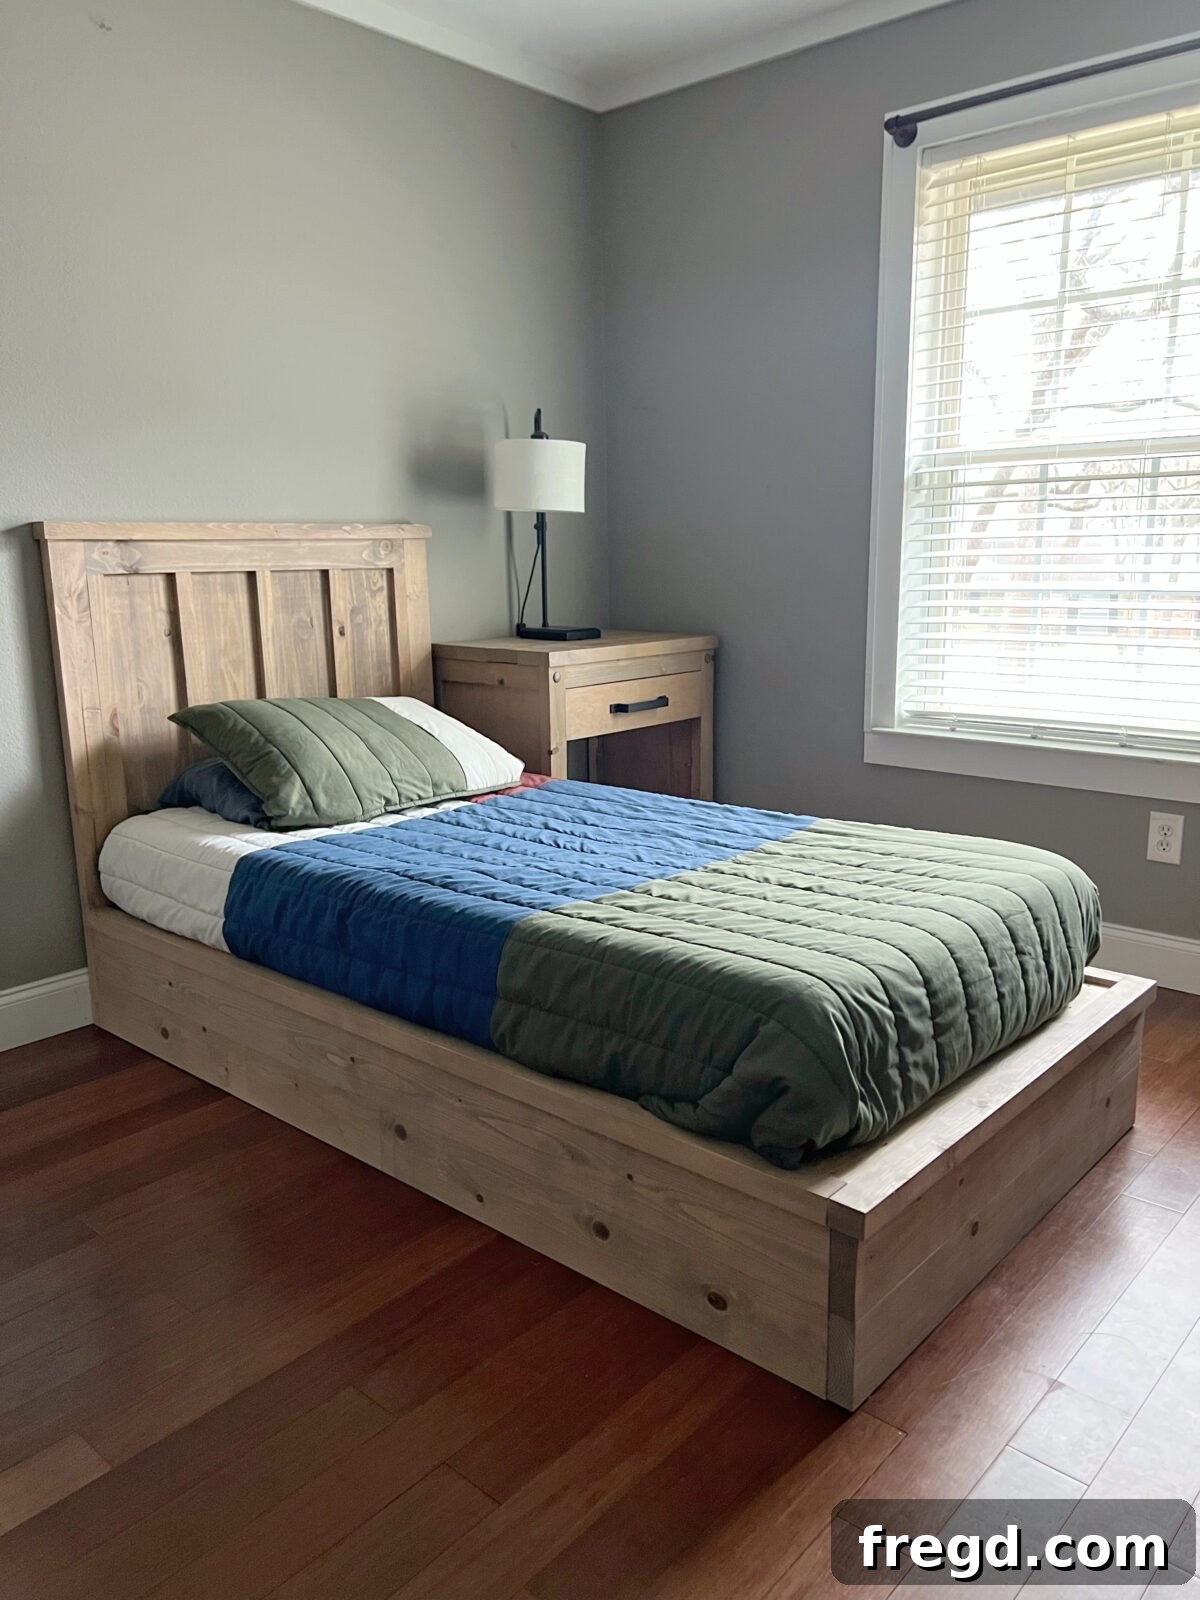
Embarking on a DIY project like building a twin platform bed is an incredibly rewarding experience, perfectly blending practicality with the satisfaction of creating something with your own hands. This comprehensive guide will walk you through the process of constructing a sturdy and stylish twin platform bed, suitable for any bedroom. Whether you’re a seasoned woodworker or just starting, our detailed instructions, complete with essential tips and design considerations, will ensure a successful build. This design is not only simple to execute but also highly adaptable, allowing for easy modification to accommodate different bed sizes or seamless integration with a custom headboard.
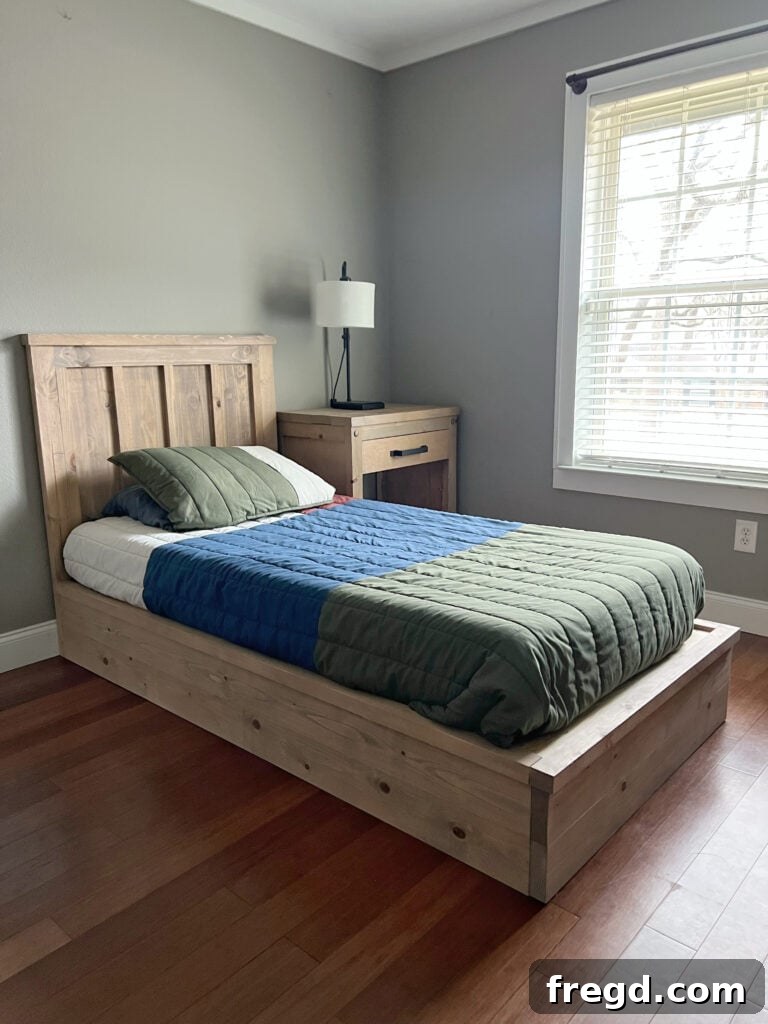
Life often brings changes, and for my family, this year included a big move to a new home. One of my primary tasks was to personalize each child’s bedroom, making it a comfortable and unique space. Today, I’m thrilled to share the plans for the twin platform bed we constructed for one of my boys. This robust bed frame is specifically designed for a twin mattress, but its modular nature makes it exceptionally easy to customize for full, queen, or even king-size mattresses with minor adjustments to measurements. Additionally, I encourage you to explore the free plans for the matching headboard, which complement this platform bed design perfectly. You’ll find links to download and print the complete free plans, including detailed dimensions, a cut list, and step-by-step instructions, at the bottom of this article.
Why Build Your Own Twin Platform Bed?
Building your own platform bed offers numerous advantages over purchasing a pre-made one. Firstly, it provides significant cost savings, as raw materials are generally more affordable than finished furniture. Secondly, DIY allows for unparalleled customization. You can choose the exact type of wood, adjust dimensions to fit unique spaces, and select a finish that perfectly matches your decor. Beyond the practical benefits, there’s immense satisfaction in crafting a functional and beautiful piece of furniture with your own hands. This project is not just about saving money; it’s about creating a personal, durable, and truly unique bed frame that reflects your style and craftsmanship.
Essential Tools for This Project
Before diving into the build, gathering the right tools is crucial for efficiency and safety. For this twin platform bed project, you’ll primarily need basic woodworking equipment. A miter saw is essential for making precise cross-cuts, while a table saw will be invaluable for ripping boards to custom widths and ensuring straight edges. A drill/driver for screws, a measuring tape, and safety glasses are also non-negotiable. And, as we’ll discuss in detail, a Kreg Jig will be your best friend for creating incredibly strong and clean joints, making the assembly process much smoother and the final product much more durable.
Kreg Jig: The Heart of Strong Joinery
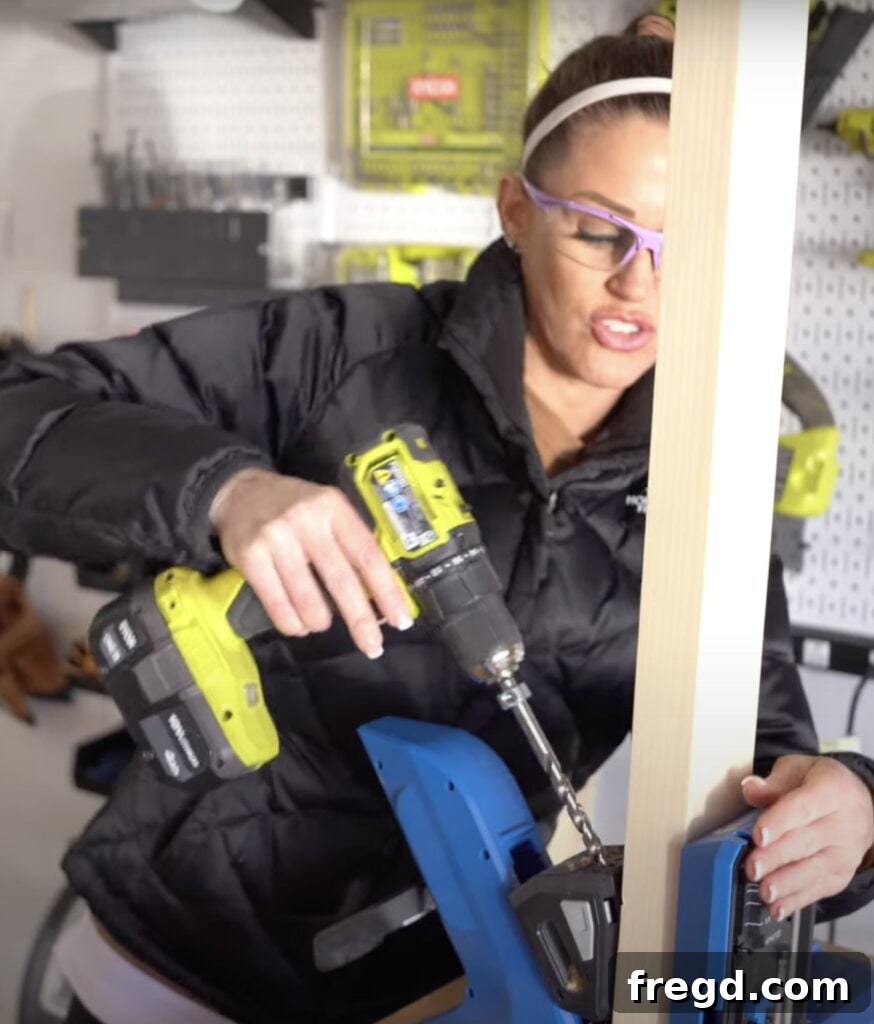
One of the most frequent questions we receive in our DIY community is, “What exactly is a Kreg Jig, and why do I need one?” A Kreg Jig is a pocket hole jig—an ingenious tool designed to create angled pilot holes, known as pocket holes, into a workpiece. These holes allow you to drive specialized screws at an angle, pulling two pieces of wood tightly together to form incredibly strong and clean joints. This method is significantly faster, stronger, and more aesthetically pleasing than traditional countersinking or other common joinery techniques for furniture building.
Discovering the Kreg Jig was a monumental turning point in our furniture-building journey. Its user-friendliness and the robust joints it consistently delivers truly impressed us. For this specific DIY Twin Platform Bed, I relied on my Kreg Jig 720 PRO, and I cannot recommend it highly enough! It’s a fantastic upgrade for anyone already familiar with pocket hole joinery and an excellent investment for beginners looking for efficiency and superior results. You can easily find the Kreg 720 Pro on Amazon. If you’re new to this fantastic tool, be sure to check out our comprehensive “How to Use a Kreg Jig” video for a step-by-step tutorial.
Ripping Boards: Achieving a Professional Finish
Before you begin drilling any pocket holes, an optional but highly recommended step is to “rip” your lumber. For this project, I ripped my 2×4 boards down to a precise 3-inch width. The process typically involves making cross-cuts first with a miter saw to get your pieces to the desired length, and then using a table saw to rip these pieces to their final width. We consistently use our table saw to remove the rounded edges characteristic of standard framing lumber. While not strictly necessary for structural integrity, this extra step significantly elevates the aesthetic appeal of the finished furniture, making it look much more expensive and professionally crafted than something built with raw framing materials. It gives stacked boards a solid, clean, and seamless appearance, as if they were originally milled as one piece. To see this technique in action and understand how to transform ordinary framing lumber into high-quality components, watch our video: How to Give Framing Lumber a Straight Edge.
Step-by-Step Guide to Building Your Twin Platform Bed
Step 1: Assembling the Side Frames
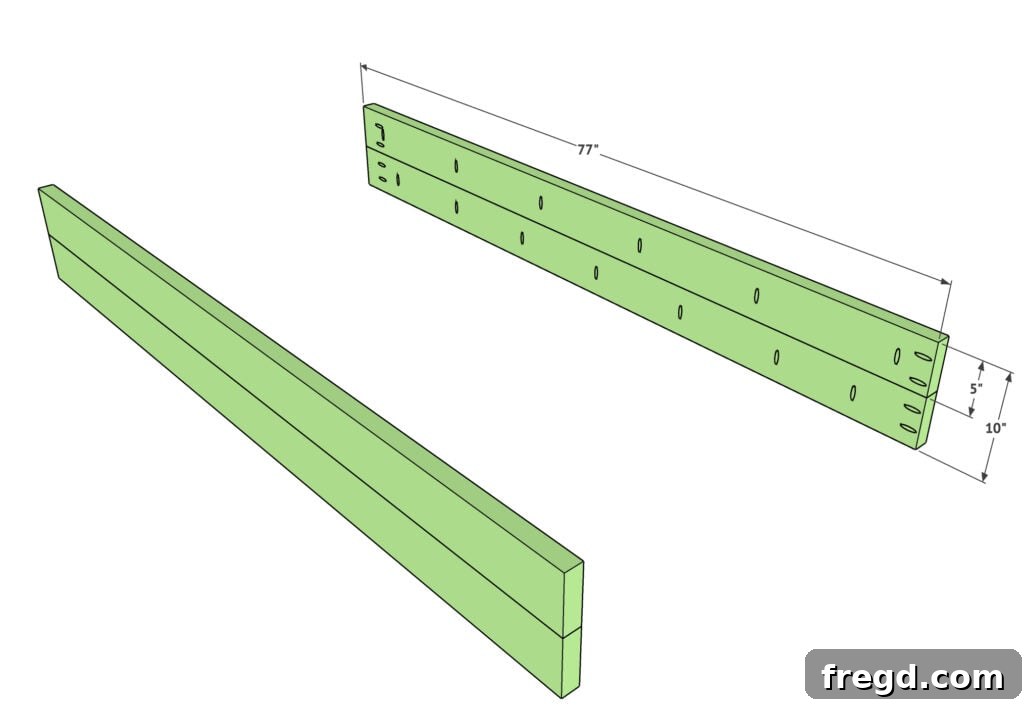
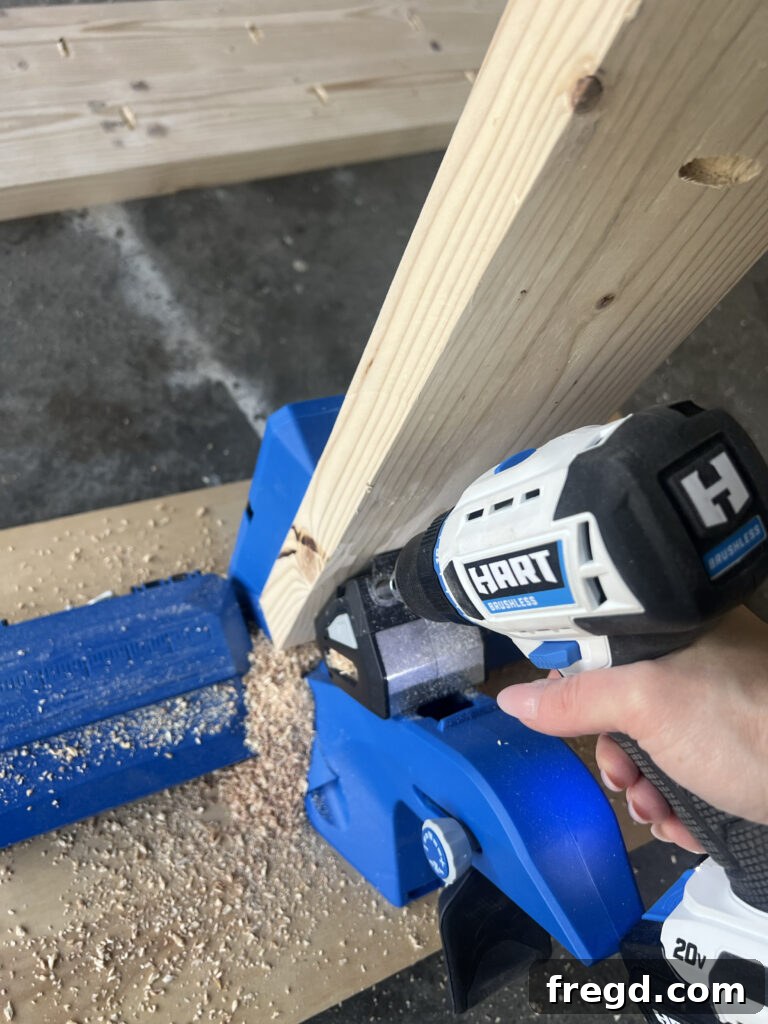
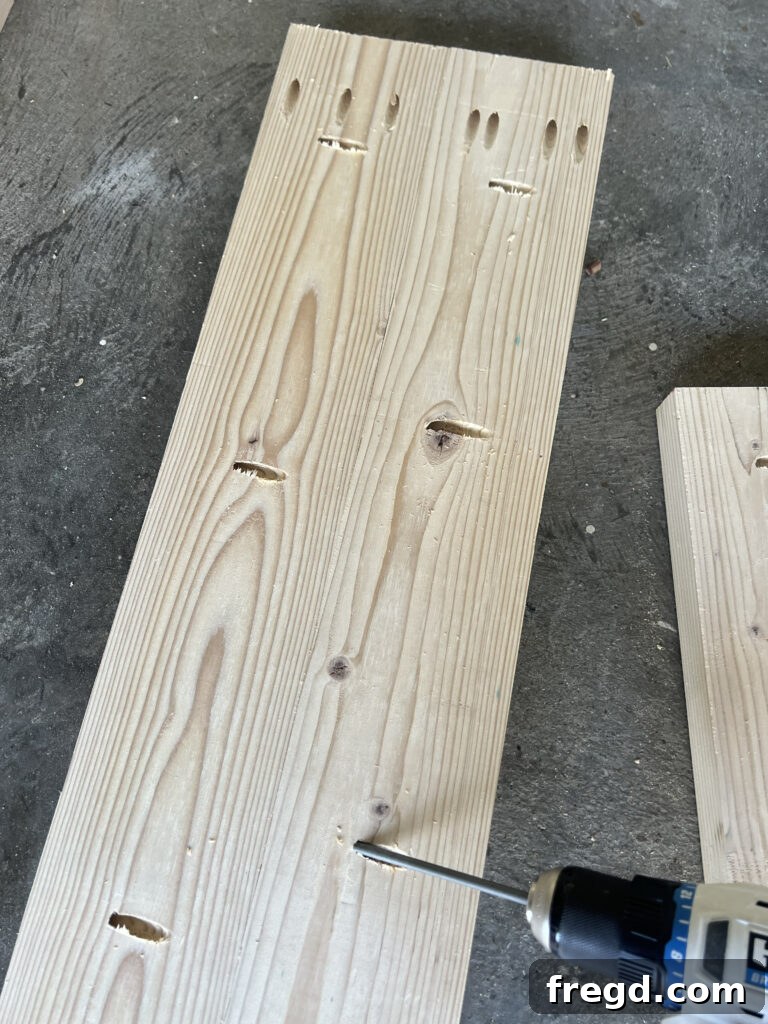
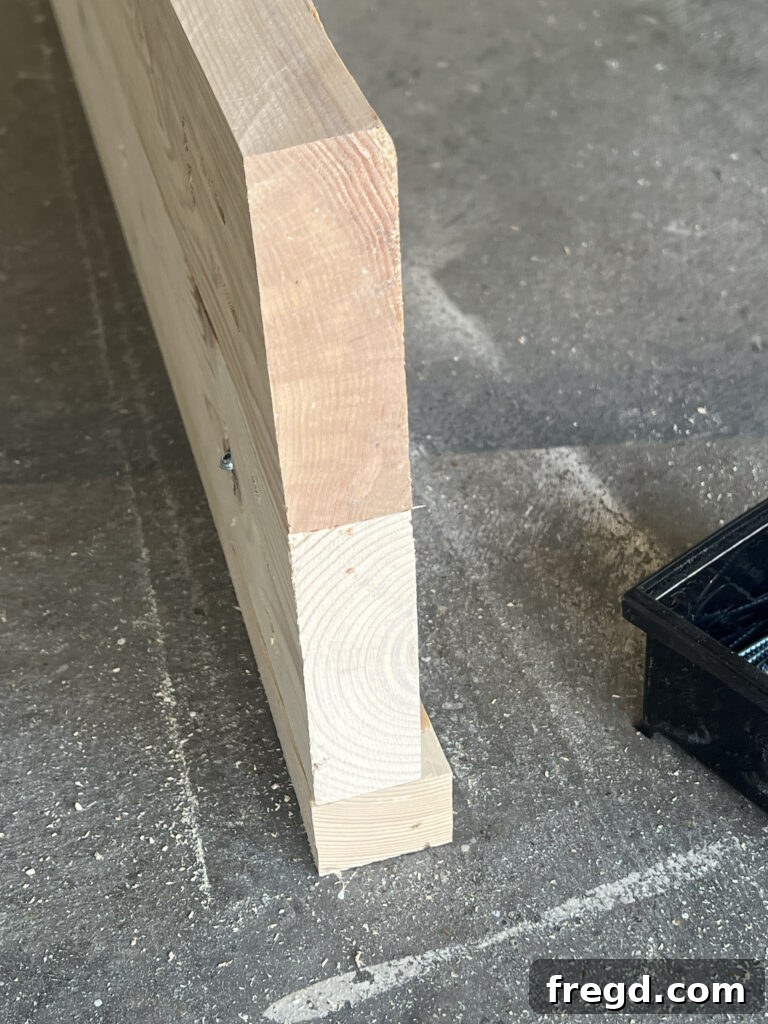
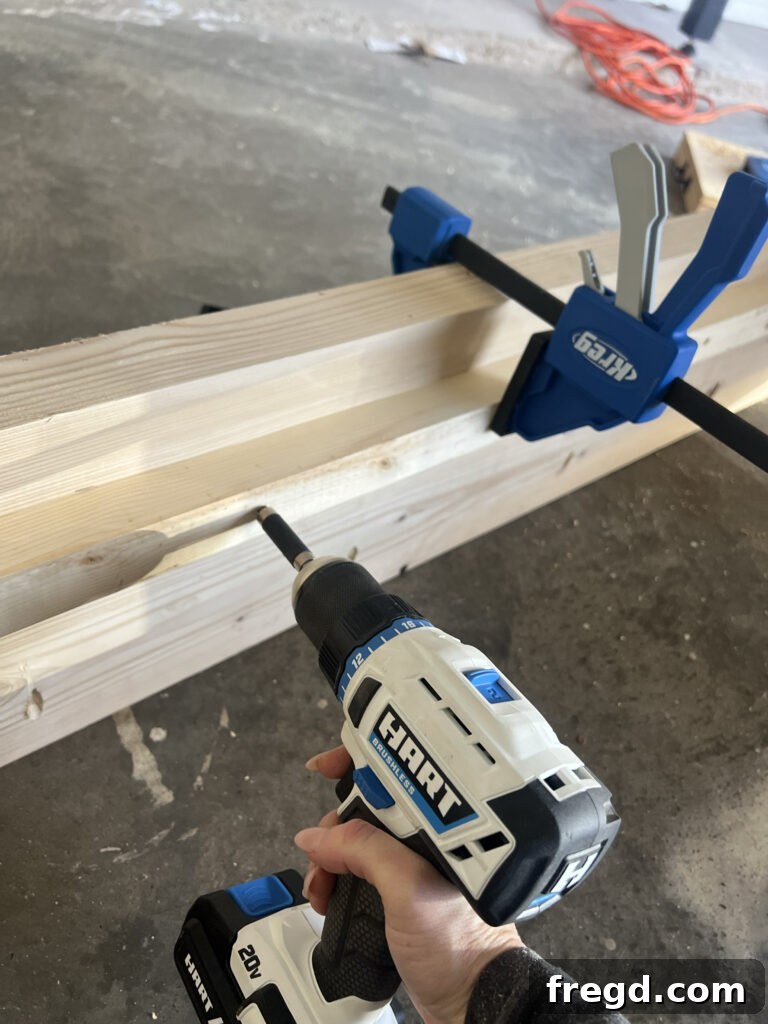
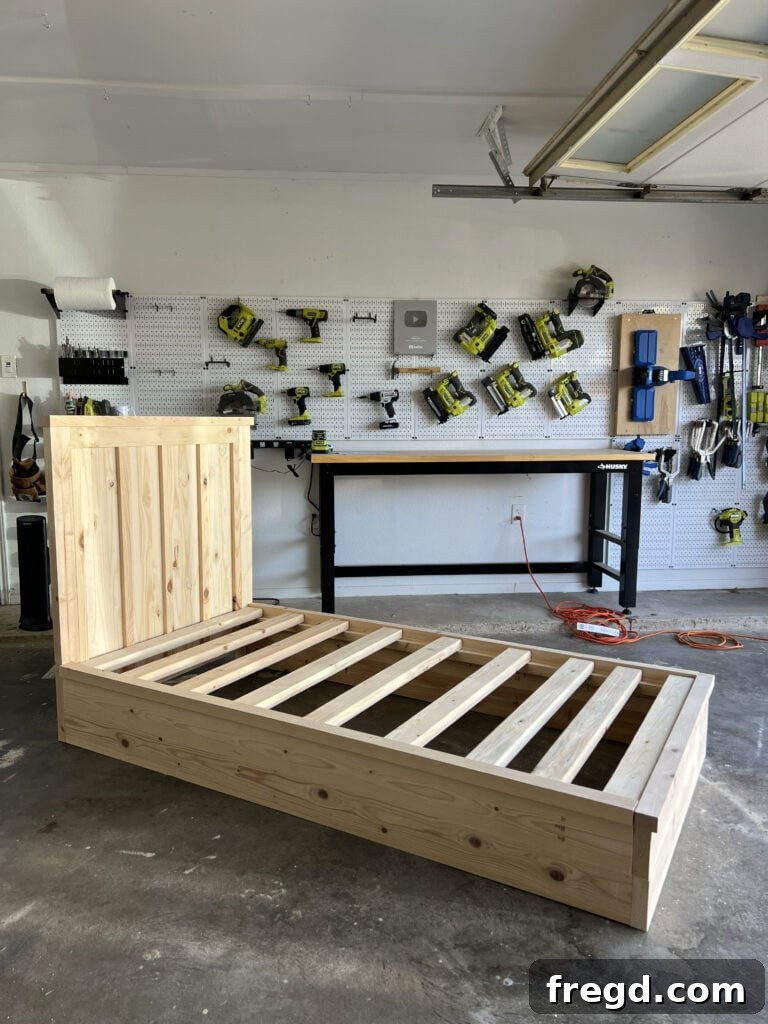
The foundation of your platform bed begins with constructing the two long side frames. For this, you’ll use 2×6 boards, which we have meticulously ripped down to a 5-inch width each. Begin by using your miter saw to make all the necessary cross-cuts for the length of your side pieces, then fine-tune their width on the table saw. Now, it’s time to incorporate pocket holes: drill 1.5-inch pocket holes along one long edge of each board, and also on both ends of these same boards. When joining these boards, ensure the pocket holes are facing upwards, as this orientation is crucial for attaching the decorative trim pieces later on. Use 2.5-inch pocket hole wood screws to securely fasten the boards together, making sure that both boards are perfectly flush at each end to create a smooth, continuous surface.
Step 2: Attaching Trim to the Side Pieces
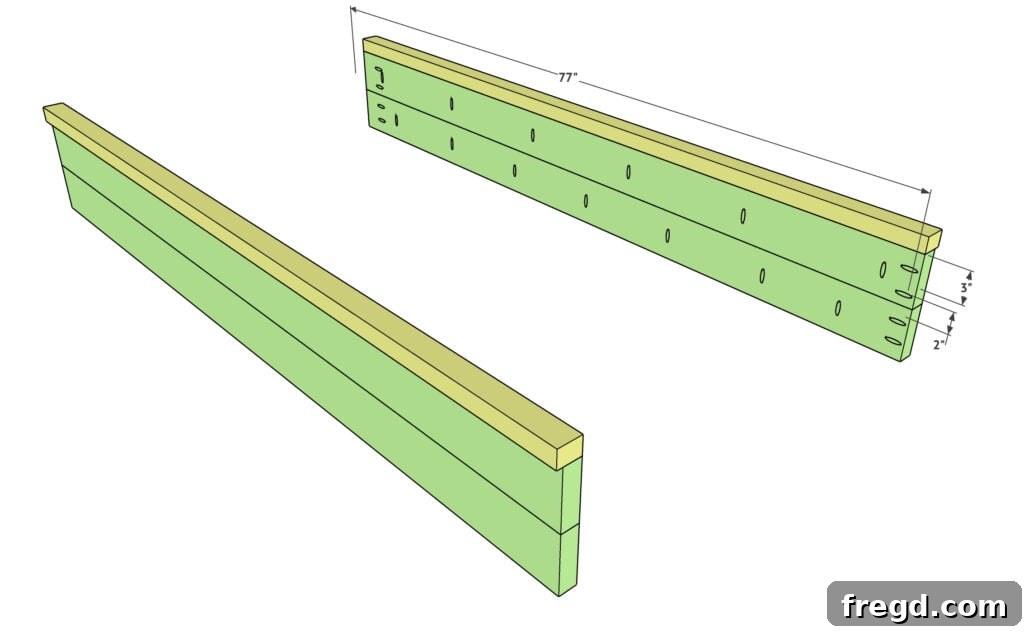
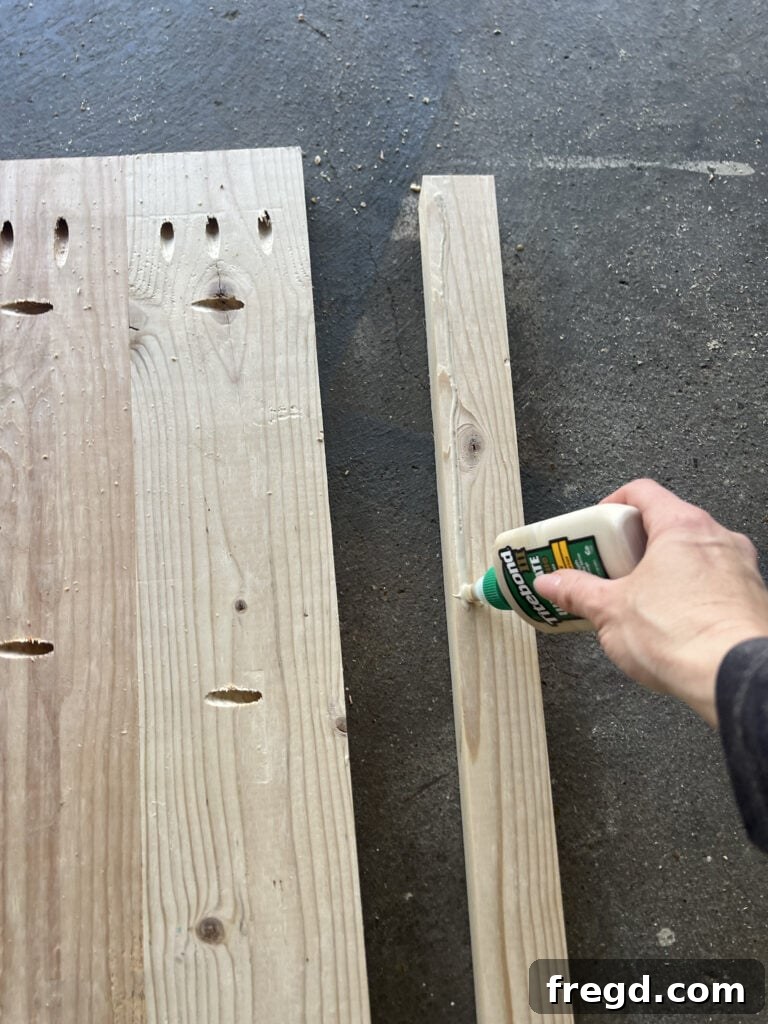
With the main side frames assembled, the next step is to add the decorative trim that will cap the top edge, providing a finished look. This trim piece is a 2×6 board, expertly ripped down to a 2-inch width. Carefully align this trim piece evenly along the top of each assembled side frame. To ensure a strong and lasting bond, use both 2.5-inch pocket hole screws and a generous application of wood glue. The glue provides immediate adhesion and prevents any shifting, while the screws secure the trim permanently, creating a seamless and sturdy edge for your bed frame.
Step 3: Attaching Cleats to the Sides
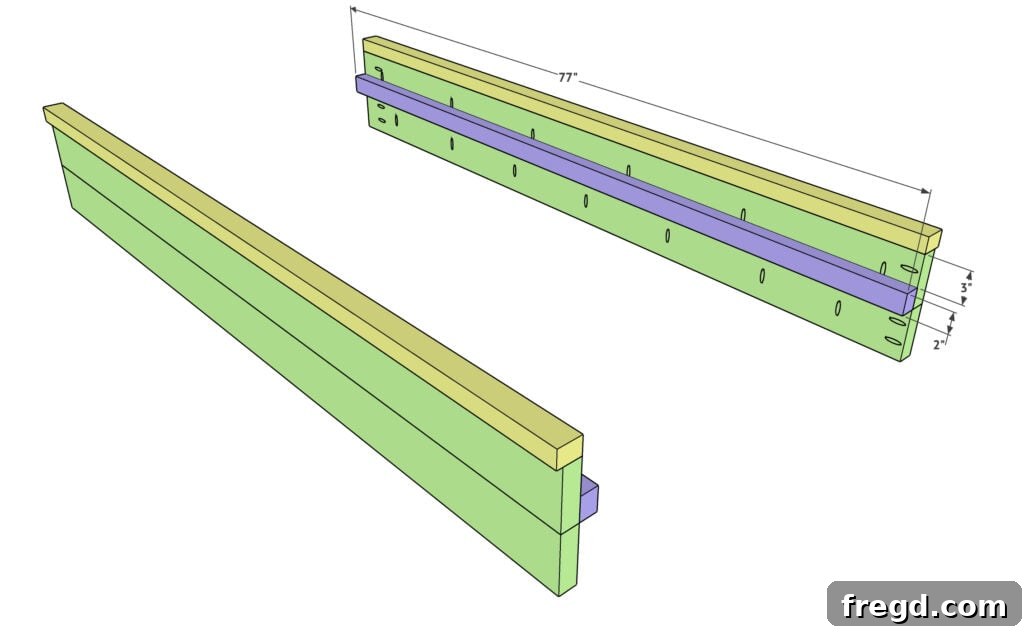
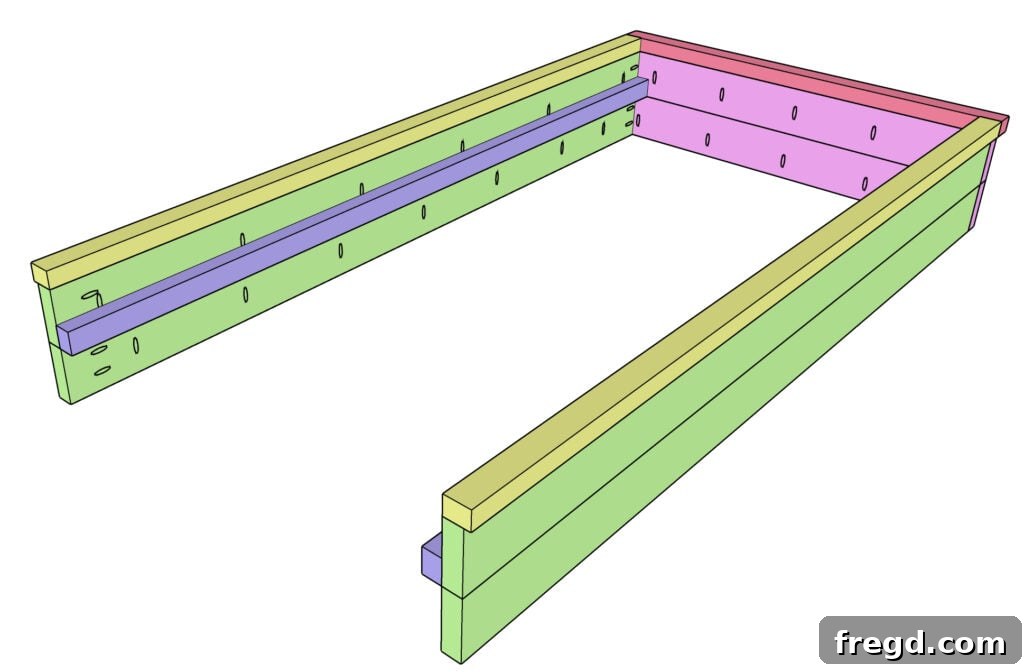
Now, it’s time to install the cleats, which will serve as the essential support for your mattress slats. These cleats are also crafted from 2×6 boards, ripped to a 2-inch width, just like your trim pieces. Precisely position and attach these cleats 3.5 inches down from the very top edge of the trim piece you just installed. This measurement ensures that your mattress will sit at an ideal height, neither too low nor too high within the bed frame. Secure the cleats using a combination of wood glue for superior adhesion and 2-inch wood screws driven through the cleat and into the interior side of the bed frame. Remember, this placement is adjustable; you can modify the cleat height to perfectly customize how high or low your mattress ultimately sits within the frame.
Step 4: Constructing the Footboard
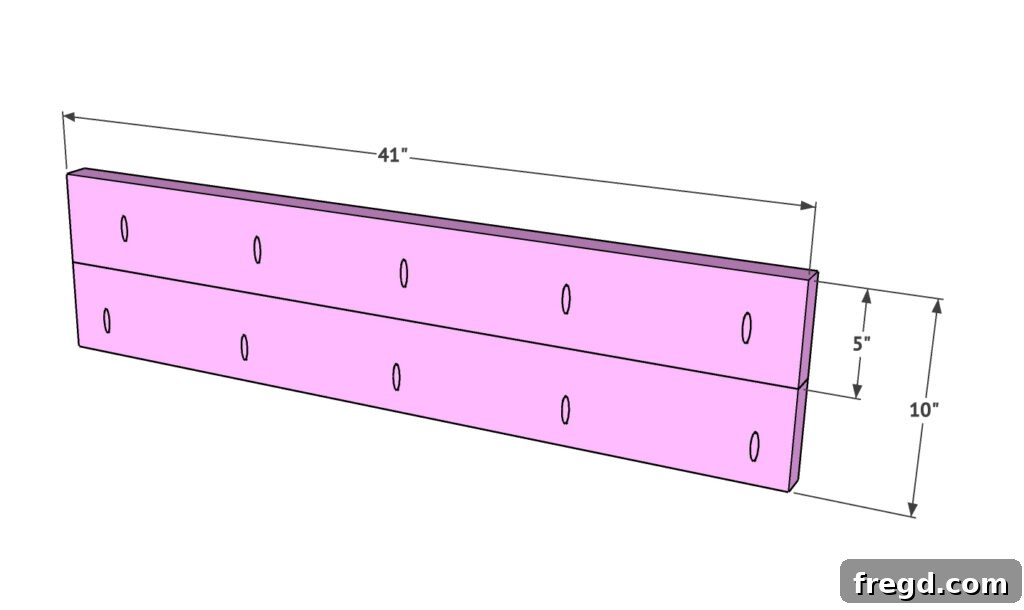
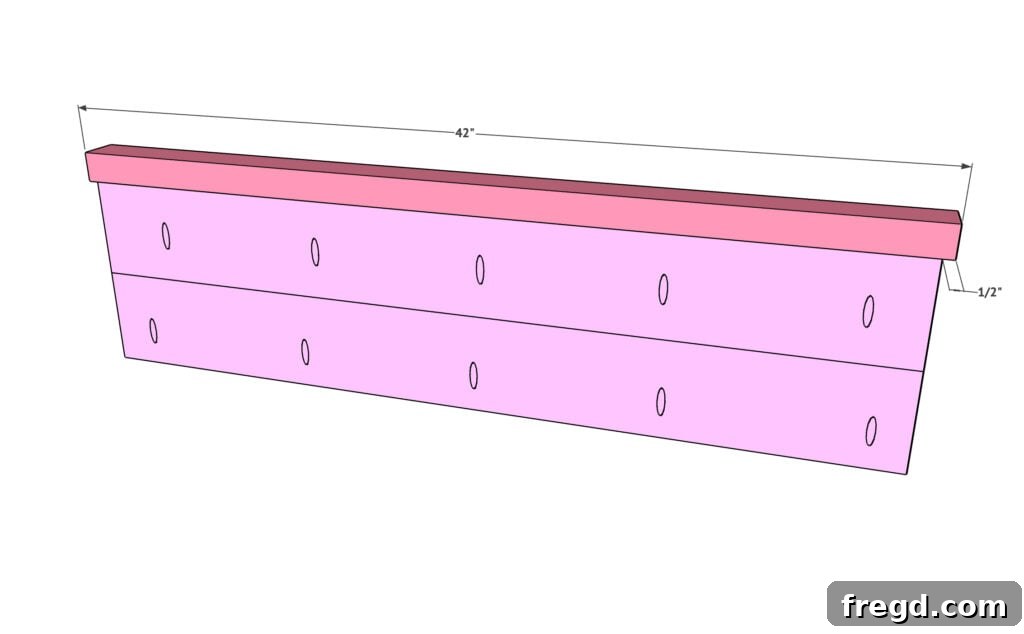
The footboard assembly mirrors the construction of your side pieces, utilizing 2×6 boards ripped to 5 inches wide. The main distinction for the footboard is that you will not drill pocket holes on the very ends of the boards, as these will butt directly against the side frames during final assembly. However, you will still drill 1.5-inch pocket holes along one long edge of each board to join them face-to-face. Use 2.5-inch pocket hole wood screws to attach these boards, making sure they are flush at each end. As with the side pieces, ensure the pocket holes you just created are facing upwards, ready for the trim piece in the next step.
Step 5: Attaching Trim to the Footboard
Just as you did with the side frames, the next crucial step is to attach the matching trim piece to the top of your newly assembled footboard. This trim is, again, a 2×6 board ripped to a 2-inch width. Carefully position and secure this trim evenly along the top edge of the footboard. Employ both 2.5-inch pocket hole screws and a durable wood glue to create a strong, lasting bond. This consistent application of trim across all visible edges of the bed frame contributes significantly to the cohesive and high-quality look of the final product.
Pre-Assembly Finishing: Stain or Paint
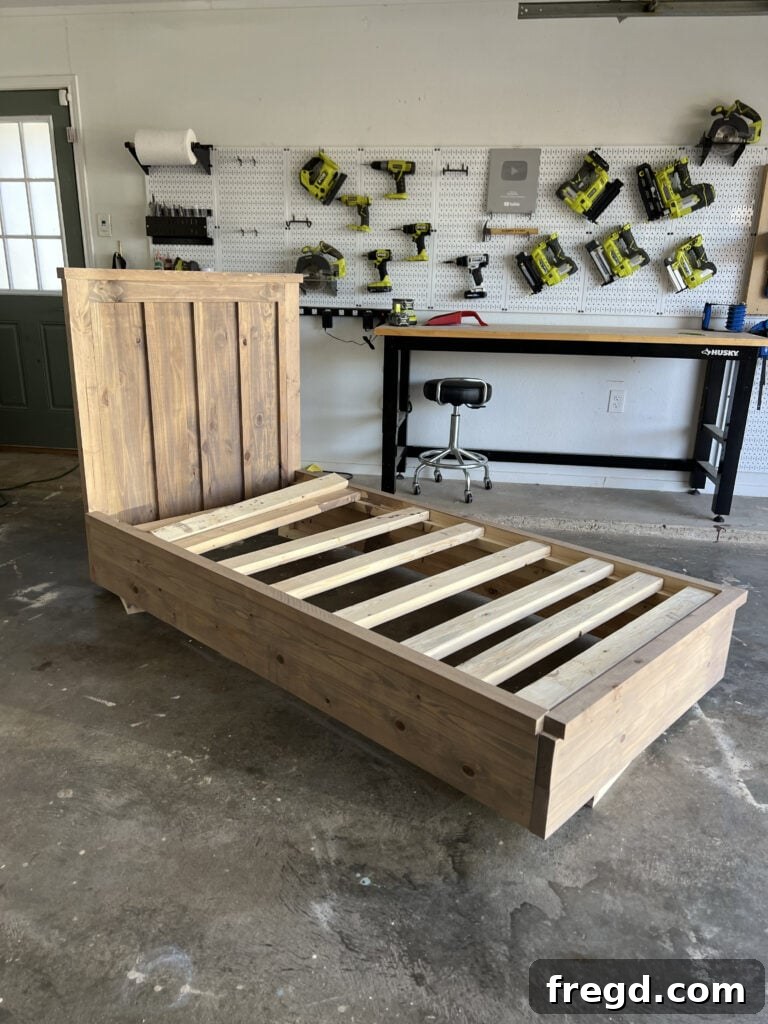
At this stage, before moving the components into the room for final assembly, it is highly recommended to apply your chosen stain or paint finish. Finishing the individual pieces now, rather than the fully assembled bed, allows for easier access to all surfaces, ensuring a more even and professional application. It also prevents awkward angles and potential drips or missed spots once the bed frame is fully constructed. I will share the details of my staining process later in this post. While you’ll complete the finishing now, remember that the final assembly of the bed frame itself should definitely wait until all components are brought into the desired room.
Step 6: Attaching the Sides to the Footboard
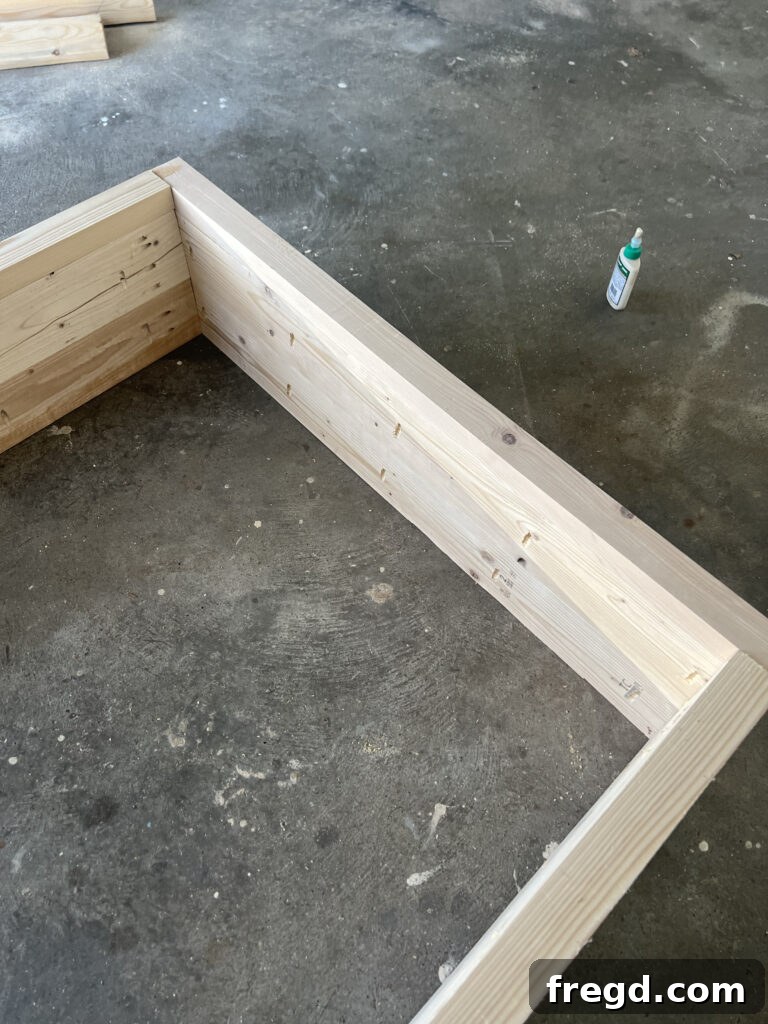
Once your individual bed frame components are finished and dry, it’s time for the final assembly within the room where the bed will reside. To assemble the bed frame, carefully align both side pieces with the footboard. Securely attach them using 2.5-inch Kreg screws. It is crucial to avoid using wood glue during this step. The absence of glue allows for easy disassembly, should you ever need to move the bed to a different room or a new home. This thoughtful design ensures both structural integrity and future flexibility.
Step 7: Installing the Mattress Slats
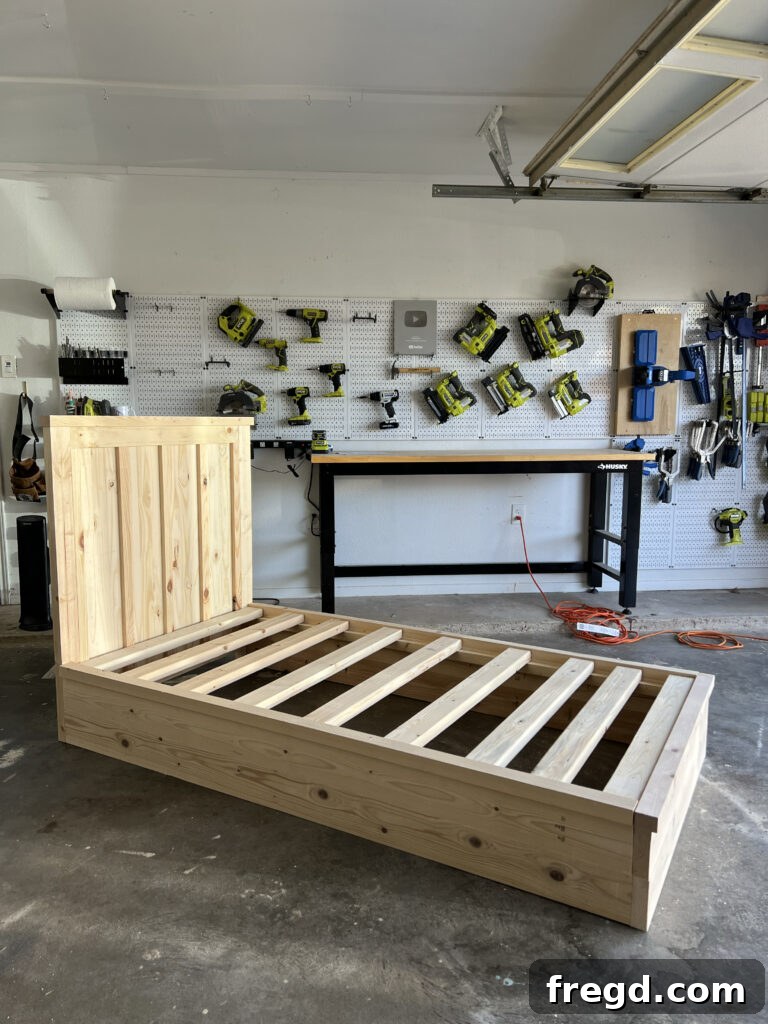
With the main bed frame now assembled, the final structural step is to install the mattress slats. These wooden slats will rest directly on the cleats you previously installed, providing essential support for your mattress. Carefully place the slats evenly across the width of the bed, ensuring consistent spacing to distribute the mattress weight effectively. Attach each slat to the top of the cleats using 2-inch wood screws. Similar to the main frame assembly, it’s advisable to omit wood glue for the slats. This allows for easier removal or replacement if needed in the future. You have the flexibility to add as many slats as necessary to achieve the desired level of sturdiness and mattress support, making sure they are spaced appropriately for your mattress type.
Complement Your Bed with a Matching Headboard
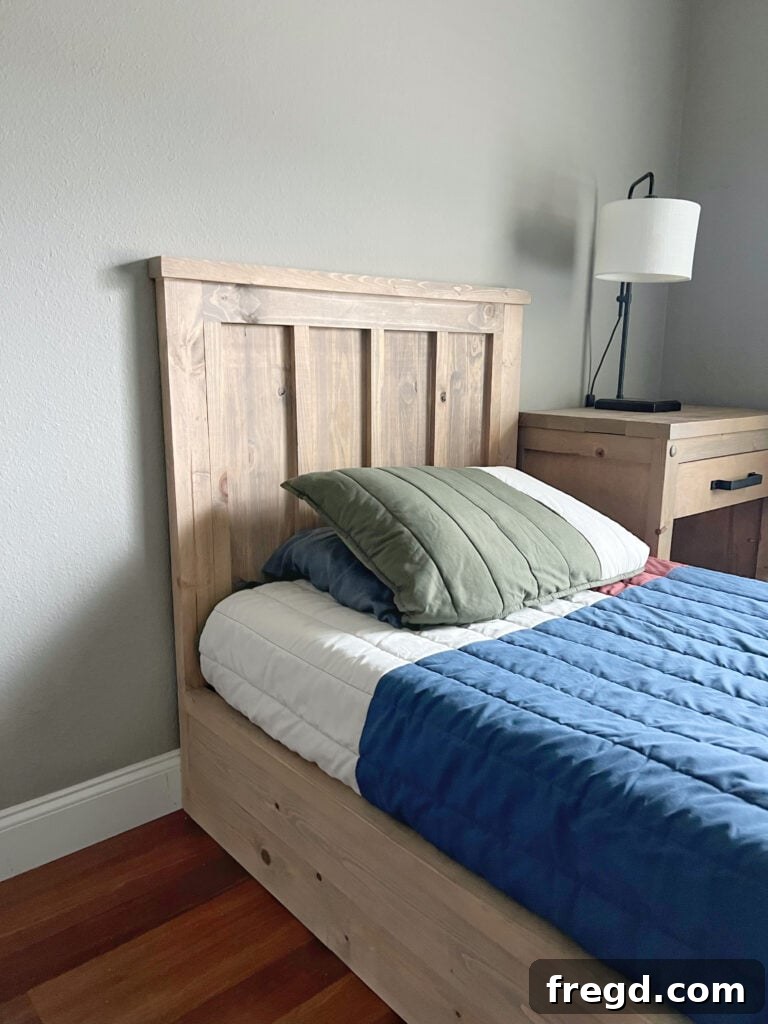
To truly complete the look of your new DIY twin platform bed, consider adding a beautifully crafted headboard. A matching headboard can elevate the entire bedroom aesthetic, providing both comfort and a touch of personalized style. We’ve designed a coordinating headboard that perfectly complements this platform bed frame. You can find the comprehensive free plans and a detailed video tutorial on how to build the DIY twin headboard by clicking HERE! Don’t miss out on this excellent opportunity to enhance your bed with a stylish and functional addition.
The Finishing Touches: Sanding and Staining
Once your bed frame is fully assembled (or even better, after the individual components are built and before final assembly, as discussed), it’s time to focus on the finish. A high-quality finish not only enhances the beauty of the wood but also protects it for years to come. Begin by thoroughly sanding the entire bed frame. I typically start with 120-grit sandpaper to smooth out any imperfections, then progress to 220-grit sandpaper for a silky-smooth, touchable surface. My Ryobi Corner Cat sander is excellent for reaching tight spots, but an orbital sander works equally well for larger surfaces.
For the stain, I aimed for a unique, custom blend that provides depth and character. This particular finish was achieved by mixing three different Varathane stain colors. You’ll need an empty container from a hardware store (they’re very inexpensive) or any clean, empty bucket you have at home. My winning combination involved two parts of Natural stain, one part of Golden Oak, and just a splash of Weathered Gray. Simply combine these in your bucket and stir gently until thoroughly mixed. This custom blend delivers a rich, complex color that I absolutely adore. Apply the stain evenly, following the wood grain, and allow it to dry completely according to the product instructions.
Finally, to protect your beautiful new finish and ensure durability, apply a high-quality protective topcoat. This step is crucial for shielding the wood from daily wear, moisture, and scratches. I consistently recommend my favorite polyurethane for its excellent protection and ease of application. A clear topcoat will allow the rich, custom stain color to shine through while providing a long-lasting, resilient surface.
Download Your Free Twin Platform Bed Plans
Congratulations on taking the first step towards building your very own DIY Twin Platform Bed! We understand the importance of clear, detailed instructions, which is why we’ve prepared a comprehensive set of free plans just for you. These plans include precise dimensions, a full cut list for all lumber, and step-by-step assembly instructions to guide you through every stage of the project. Building this bed is a straightforward and immensely rewarding endeavor that requires only basic woodworking skills and tools. Ready to get started?
Download and print your free plans HERE!