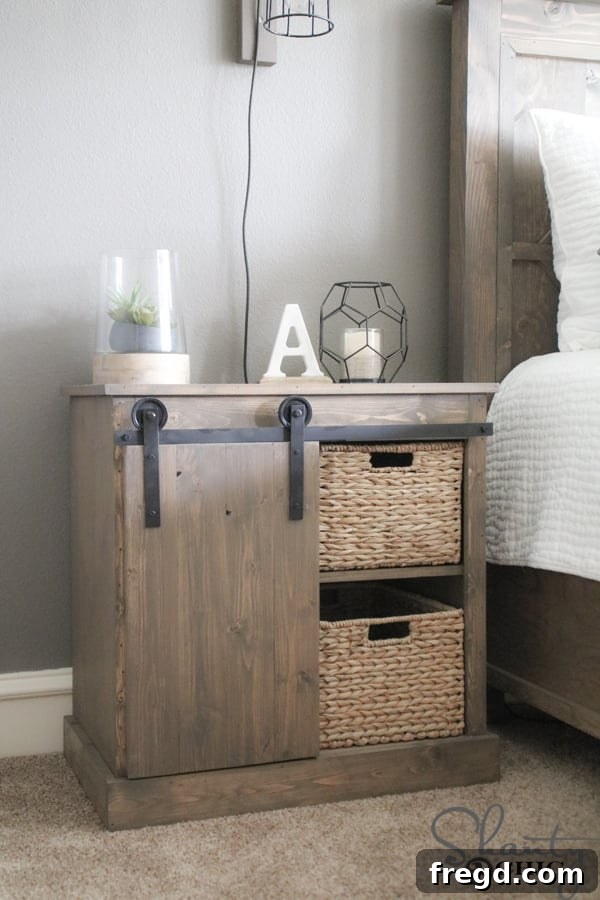
Welcome back to our workshop! We’re thrilled to share the comprehensive free plans for building your very own DIY Sliding Barn Door Nightstand. This project is not just about creating functional bedroom furniture; it’s about adding a touch of rustic modern charm to your space, all while utilizing our incredibly cost-effective $20 DIY Barn Door Hardware. Get ready to transform your bedroom with a unique, handcrafted piece that combines style and practicality.
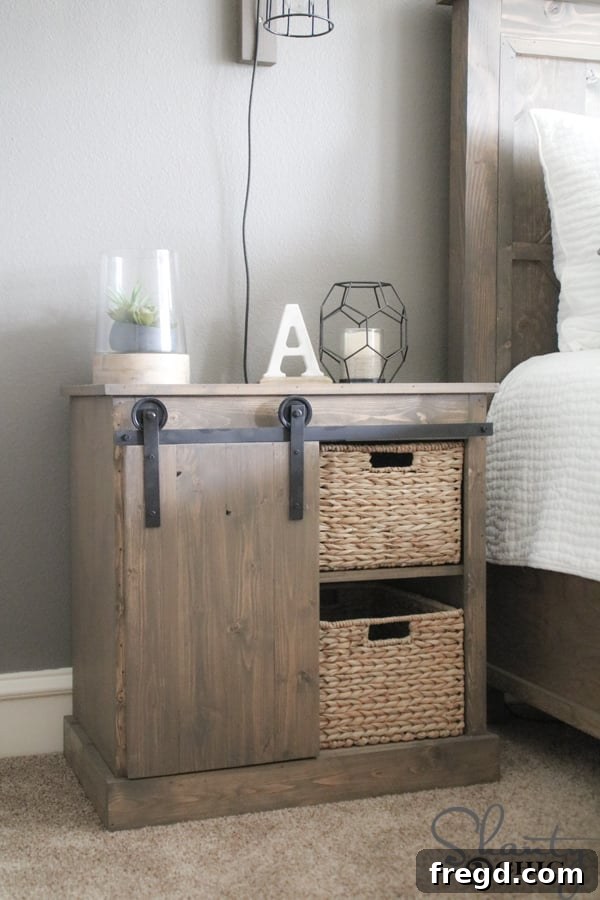
After completing our new Rustic Modern King Bed, we envisioned a pair of nightstands that would perfectly complement its unique aesthetic. The idea sparked from our popular DIY Barn Door Bathroom Cabinet, which we always thought would make a fantastic nightstand. We decided to bring that vision to life, and the results have exceeded all our expectations! These nightstands instantly became a focal point in the bedroom, garnering countless requests for a detailed how-to video and plans. So, we’ve put together everything you need to know, from precise measurements to essential tips, to guide you through building your own. You can join us in the shop by clicking HERE or on the image below to watch the full tutorial.
The process is more straightforward than you might imagine, especially with our detailed instructions and video guidance. To ensure you have all the information at your fingertips, make sure to grab the FREE PRINTABLE PLANS! Simply click HERE to download them instantly. These plans will serve as your blueprint, allowing you to follow along with us step-by-step as we construct this beautiful piece in the images provided below.
And don’t forget, a key element of this project is the eye-catching sliding barn door hardware. We have a dedicated guide for creating your own $20 Barn Door Hardware here, proving that custom, high-quality accents don’t have to break the bank!
Table of Contents
Building a Sliding Barn Door Nightstand: Your Complete Guide
Embarking on a DIY project like building a sliding barn door nightstand is not only rewarding but also an excellent way to personalize your living space. This guide will walk you through each critical step, ensuring that even intermediate woodworkers can achieve professional-looking results. From making precise cuts to applying the final finish, we’ll cover everything needed to craft a durable and stylish nightstand that serves as a charming addition to any bedroom.
Assembling the Nightstand Frame: The Foundation of Your Project
Step 1: Making the Initial Cuts for Precision
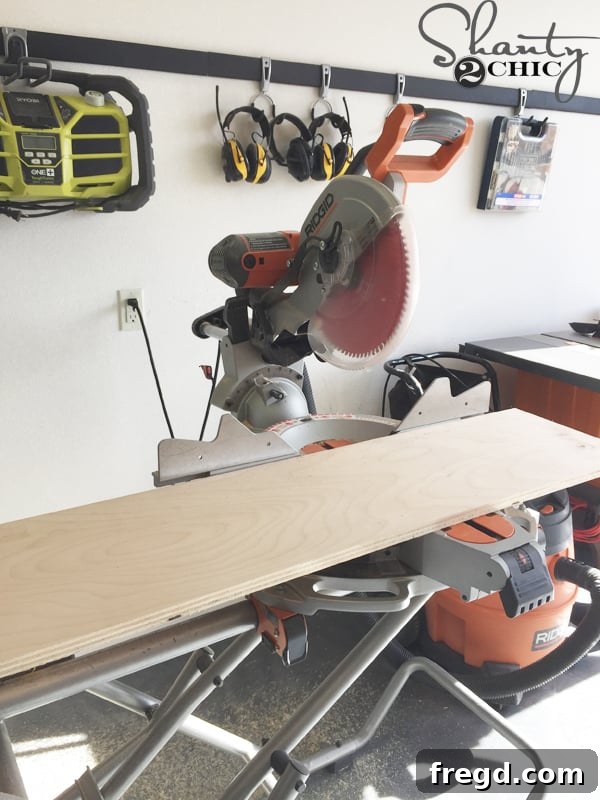
The journey to a perfect nightstand begins with accurate cuts. We recommend starting by having your local hardware store rip your hardwood plywood to the correct widths. This service often ensures straighter, more consistent cuts than can be achieved at home, especially with larger sheets. Once the plywood is ripped, you’ll use a miter saw to make the necessary cross-cuts on each sheet. Precision here is paramount for a square and sturdy frame. Always double-check your measurements before cutting. For those new to these tools, we have helpful tutorials: check out our How to Rip Plywood and How to Use a Miter Saw videos. These resources offer valuable tips to ensure your cuts are clean, accurate, and safe.
Step 2: Drilling Pocket Holes for Strong Joinery
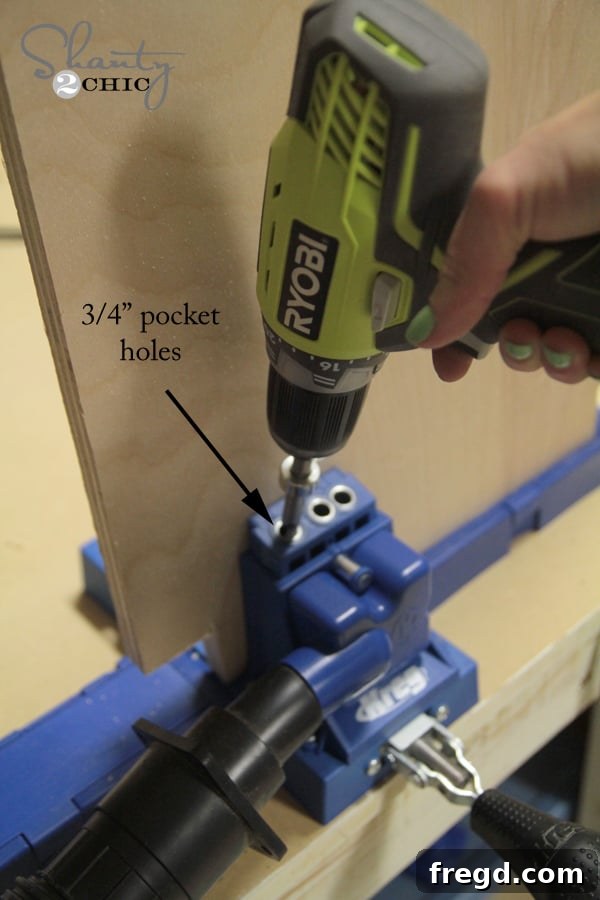
Pocket holes are a fantastic method for creating strong, concealed joints, perfect for furniture construction. For this project, we’ll be using our Kreg Jig to drill 3/4″ pocket holes. Refer to your printable plans for the exact placement of these holes, as correct positioning is crucial for both strength and aesthetics. The beauty of pocket hole joinery lies in its ability to securely fasten pieces together without visible screws on the exterior. If you’re looking for the right tool, you can find our favorite Kreg Jig model HERE on Amazon. And for a comprehensive guide on how to effectively use this tool, be sure to watch our How to Use a Kreg Jig Video HERE. This step prepares the individual components for assembly, ensuring they fit together seamlessly.
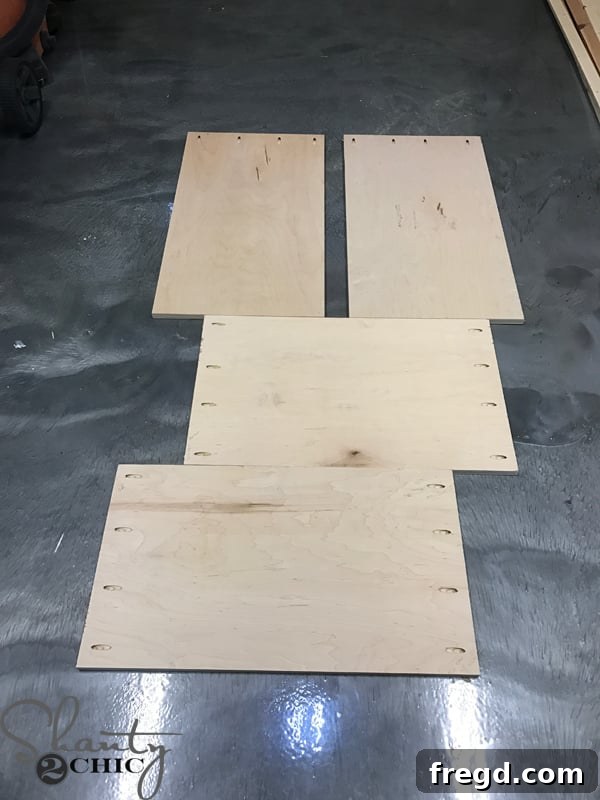
At this stage, you should have all the primary components ready: the side panels, the top and bottom pieces, and the interior shelf of your future nightstand. Each piece should be accurately cut and drilled with pocket holes where indicated in the plans, setting the stage for the structural assembly.
Step 3: Attaching the Side and Bottom Pieces to Form the Base
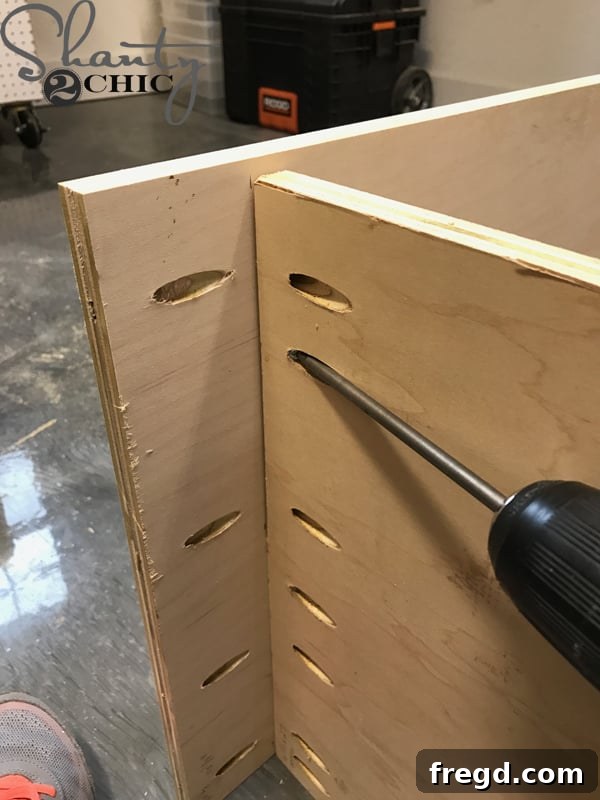
Now, let’s begin building the fundamental structure of your nightstand. Start by attaching the bottom piece to the side panels. Use 1 1/4″ pocket hole screws along with a strong wood glue for maximum durability. It’s crucial to ensure that the pocket holes on the bottom piece are facing downwards, and the pocket holes on the side pieces are facing inwards. This strategic placement ensures that the screws are hidden once the nightstand is complete, maintaining a clean and professional appearance. Apply a generous, but not excessive, amount of wood glue to the mating surfaces before fastening with screws. Clamping the pieces together during this process can help achieve a tighter joint and prevent movement as you drive the screws.
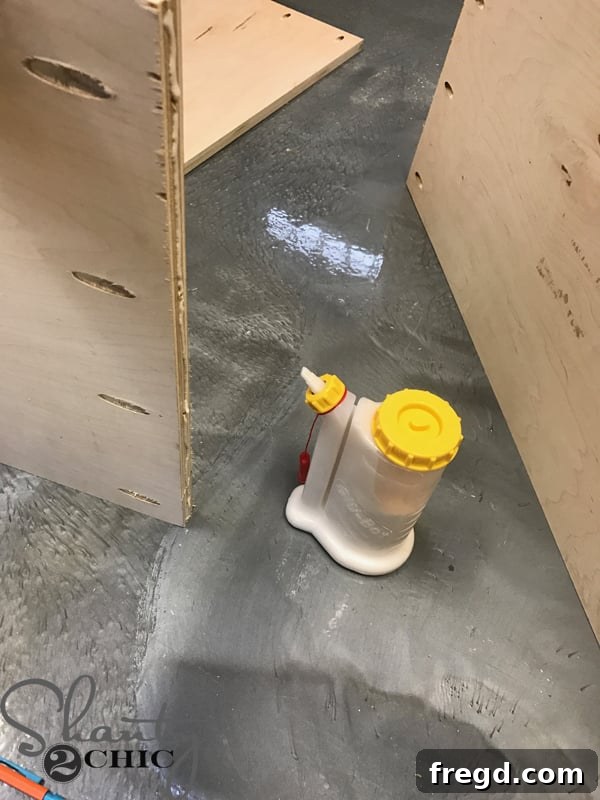
Speaking of wood glue, we’ve discovered a fantastic tool that makes this step much easier and cleaner! This Glue Bot, found on Amazon, has become an indispensable part of our workshop. It allows you to apply glue precisely with the bottle upright, and it resists clogging, ensuring a smooth workflow. No more struggling with messy glue bottles or uneven application. If you want to make your gluing process hassle-free, you can find the GlueBot HERE on Amazon.
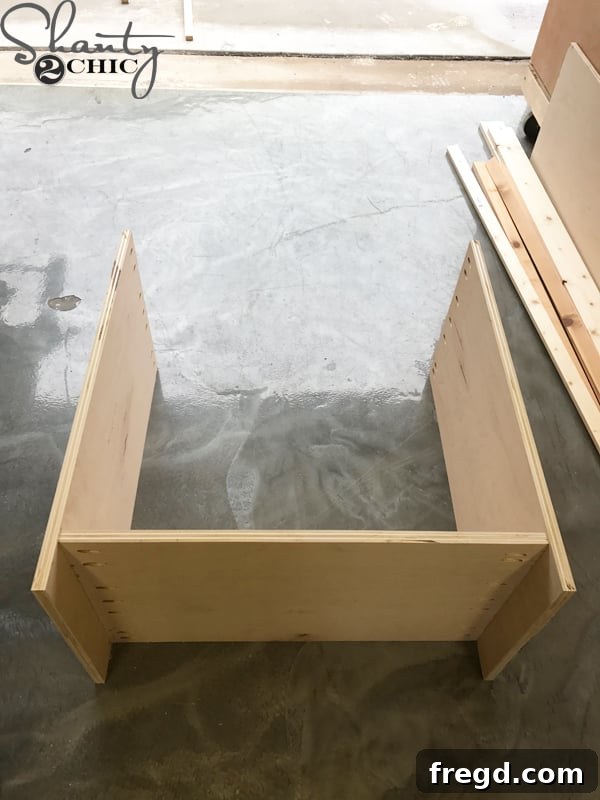
Once you’ve successfully attached the bottom piece to both side panels, your cabinet should begin to take shape, resembling a U-shaped structure. Take a moment to ensure all joints are tight and square before moving on, as a solid foundation is key to the overall integrity of the nightstand.
Step 4: Adding the Interior Shelf for Storage and Stability
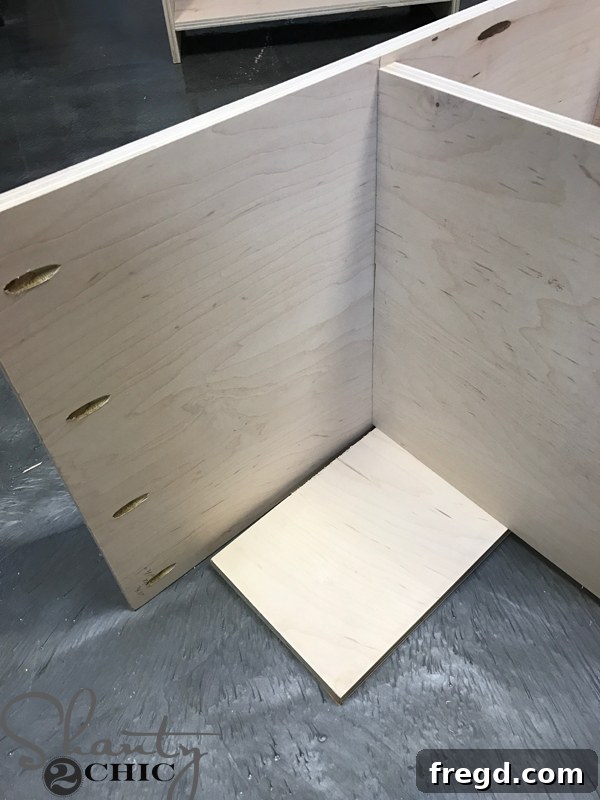
Next, it’s time to integrate the interior shelf, which adds both storage functionality and structural rigidity to the nightstand. To achieve the correct spacing for the upcoming trim and back panel, place a scrap piece of 3/4″ plywood under the front edge of the shelf. This will create the necessary 3/4″ gap at the front for your trim piece and a 1/4″ gap at the back for the backing panel. With the pocket holes on the shelf piece facing downwards, secure the shelf to the side panels using 1 1/4″ pocket hole screws and wood glue. The precise placement of the shelf is somewhat flexible and can be adjusted to suit your specific storage needs. For instance, I centered mine to accommodate two storage baskets perfectly. Always ensure the shelf is level before fastening it permanently.
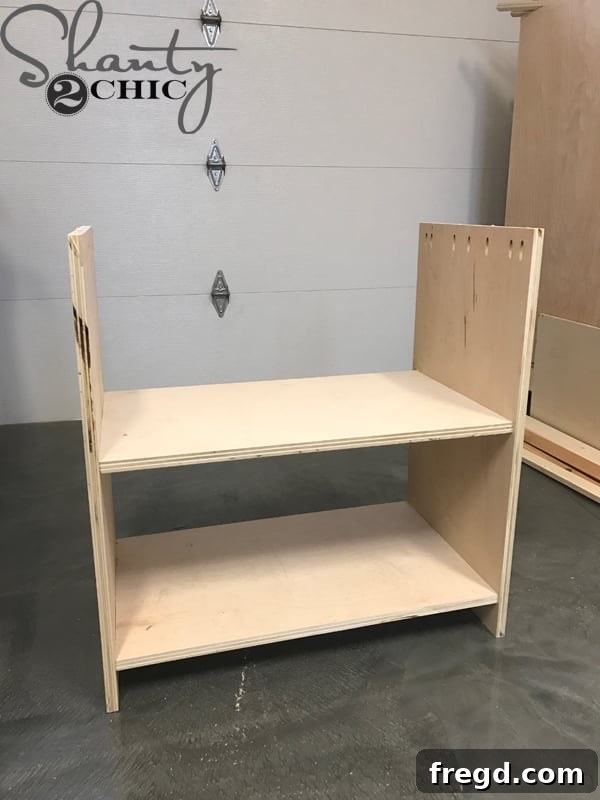
With the shelf now in place, your nightstand’s internal structure is complete. From the front, you should clearly see the defined compartments that will offer convenient storage for your bedside essentials.
Step 5: Attaching the Front Trim Piece to Refine Edges
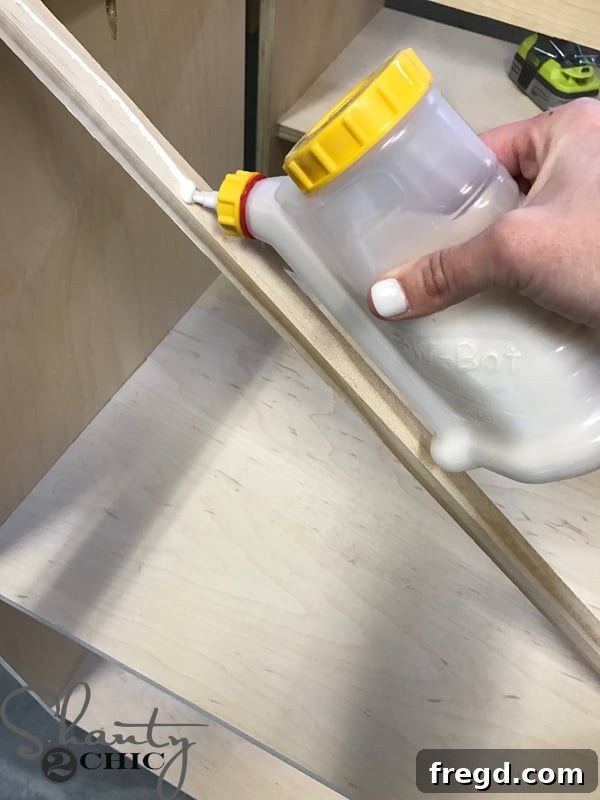
To give your nightstand a polished and finished look, it’s time to attach the front trim piece to the shelf. This trim serves a dual purpose: it covers the often-rough exposed edge of the plywood and adds a decorative element. We used a 1/2″ x 3/4″ stick of trim, but you can easily rip your own from a 1x board if you prefer. Begin by applying a thin, even line of wood glue to the back of the trim piece. This ensures a strong bond without excess squeeze-out that would require extra cleanup.
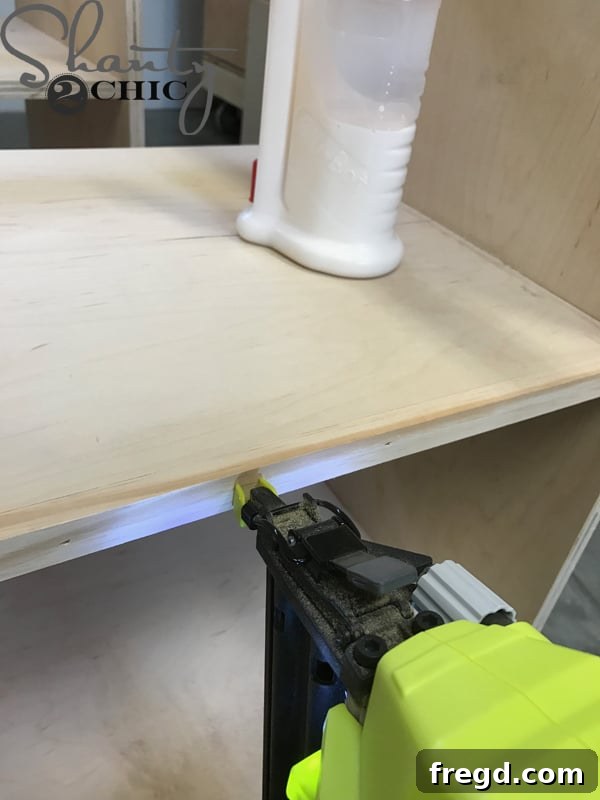
Once the glue is applied, carefully align the trim piece with the front edge of the shelf. Secure it in place using 1 1/4″ brad nails. For quick and efficient work, we relied on our Ryobi 18V Airstrike brad nailer, but any brad nailer will do the job. Make sure the trim is flush and level, creating a clean, professional edge.
Step 6: Installing the Back Support Piece for Structural Integrity
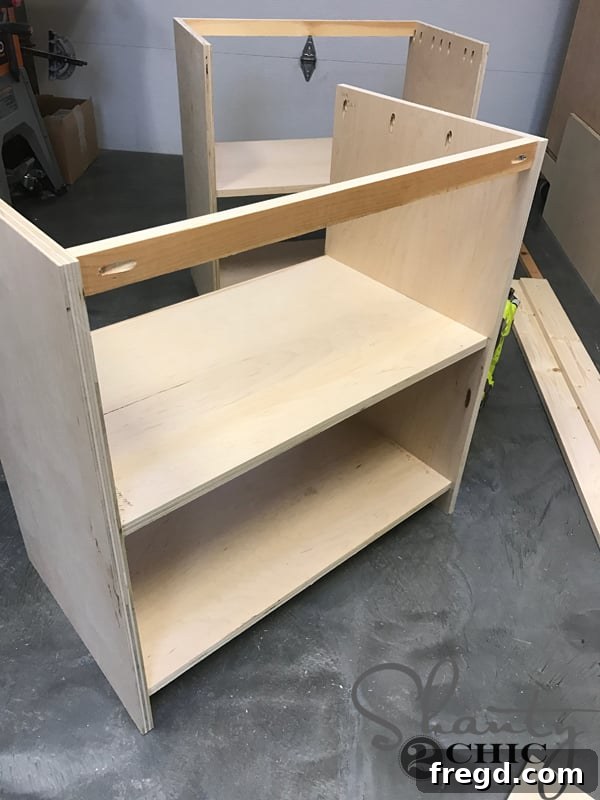
To enhance the stability of your nightstand and provide a solid attachment point for the eventual back panel, you’ll now install a top back support piece. Flip the nightstand around to access the rear. Apply wood glue to the edges of the support piece that will contact the nightstand frame, then attach it securely with 1 1/4″ brad nails. Remember to leave a precise 1/4″ gap at the very back of the nightstand. This gap is crucial as it provides the necessary space for the thin plywood back panel that will be added later, ensuring a flush and professional finish.
Crafting the Face Frame: The Aesthetic Frontage
Step 7: Assembling the Face Frame for a Clean Look
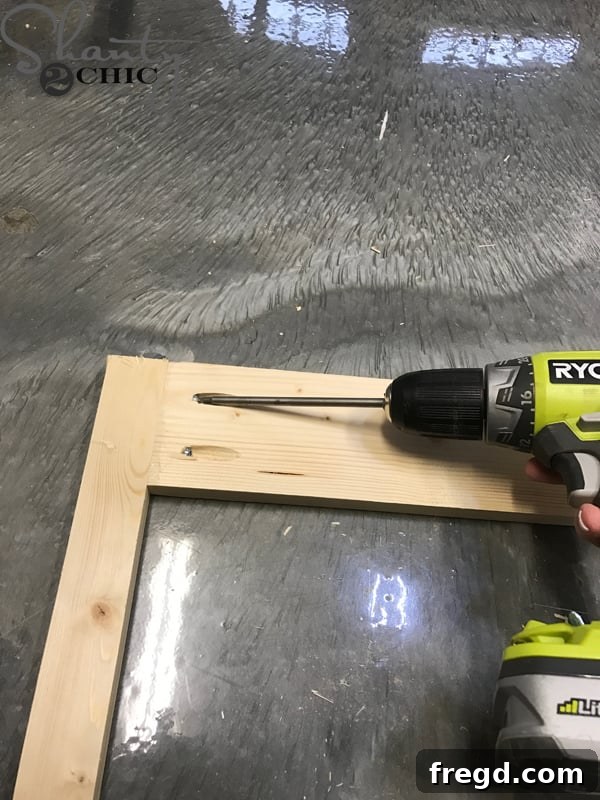
The face frame is a vital component that not only provides structural integrity to the front of the nightstand but also significantly contributes to its finished appearance. Begin by accurately measuring and cutting your face frame pieces to size according to your plans. Drill 3/4″ pocket holes into the ends and the top edge of the top face frame board, and into the ends of the bottom face frame board. These strategically placed pocket holes will allow you to attach the top and bottom pieces to the vertical side pieces of the face frame. Use 1 1/4″ pocket hole screws to create strong, secure joints. Carefully refer to your plans for the precise placement of these pocket holes to ensure proper alignment and a professional finish.
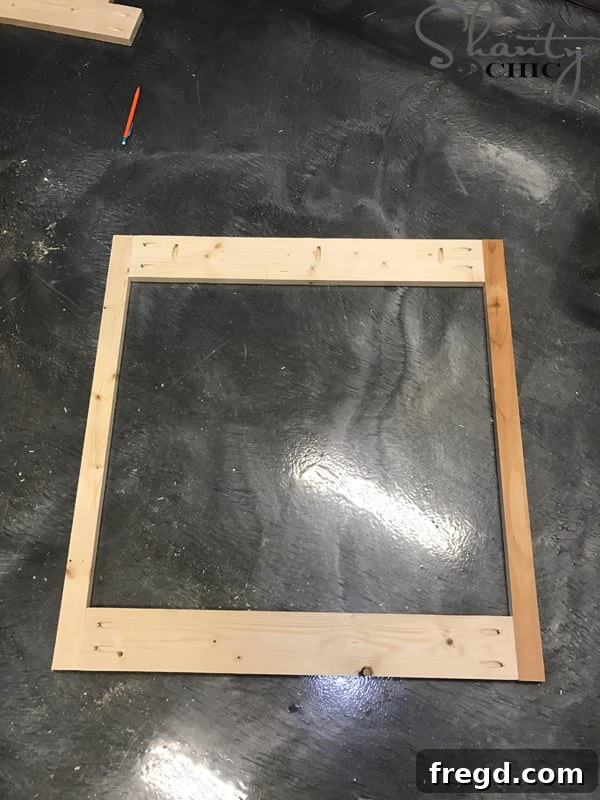
Once assembled, inspect the back of your face frame. You should observe the pocket holes on the top board facing upwards. This orientation is essential for attaching the face frame to the main nightstand cabinet later, allowing for hidden fasteners from the top. A well-assembled face frame will be square and rigid, ready to enhance the overall aesthetic of your nightstand.
Step 8: Attaching the Face Frame to the Nightstand Cabinet
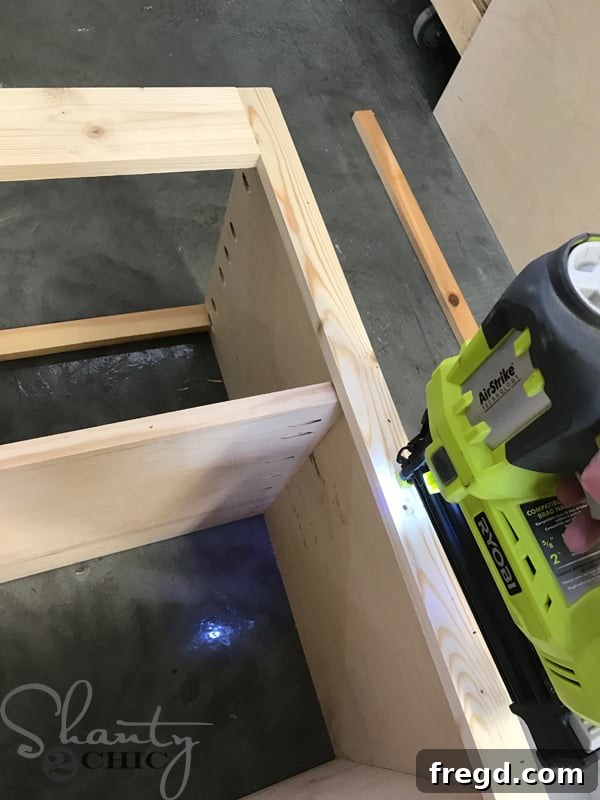
With your face frame fully assembled, it’s time to attach it to the main nightstand cabinet. This step is critical for defining the front opening and providing a clean, finished edge. Apply wood glue sparingly to the back surface of the face frame where it will meet the nightstand cabinet. Carefully align the face frame, ensuring it is perfectly flush with the exterior edges of the nightstand. Secure it in place using 1 1/4″ brad nails, spacing them evenly to create a strong, durable bond. Ensure that the face frame is square and level before the glue sets, as this will greatly impact the appearance and functionality of the sliding barn door.
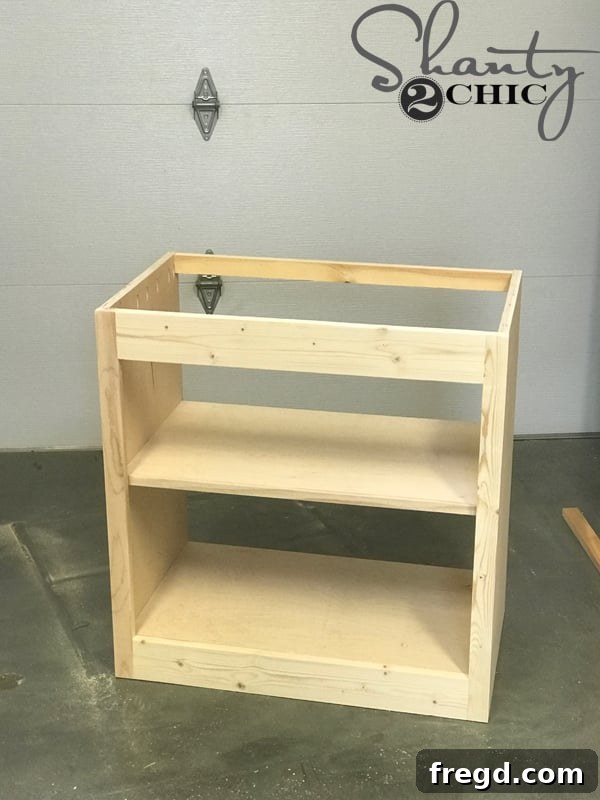
After successfully attaching the face frame, your nightstand should now present a much more complete and refined appearance. The face frame provides a clear opening for the barn door mechanism and solidifies the front of the cabinet. Take a moment to admire the progress – the hard lines and structural integrity are truly starting to shine through.
Adding the Base Trim: The Finishing Touch to the Foundation
Step 9: Attaching the Side Base Trim Pieces
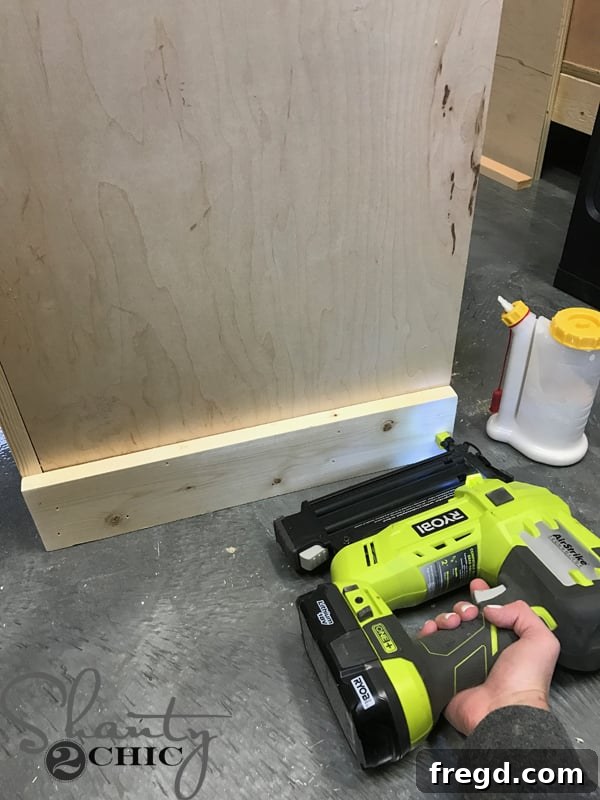
Base trim provides a crucial decorative and protective element, giving your nightstand a more substantial and elegant appearance. Start with the side pieces of the base trim. Measure and cut them to fit precisely along the bottom edges of the nightstand’s sides. For a seamless look, consider cutting the ends at a 45-degree miter to create clean corners where they meet the front trim piece. Apply a thin bead of wood glue to the back of each trim piece and then secure them firmly with 1 1/4″ brad nails. Ensure the trim is flush with the bottom edge and evenly aligned along the sides.
Step 10: Completing the Front Base Trim
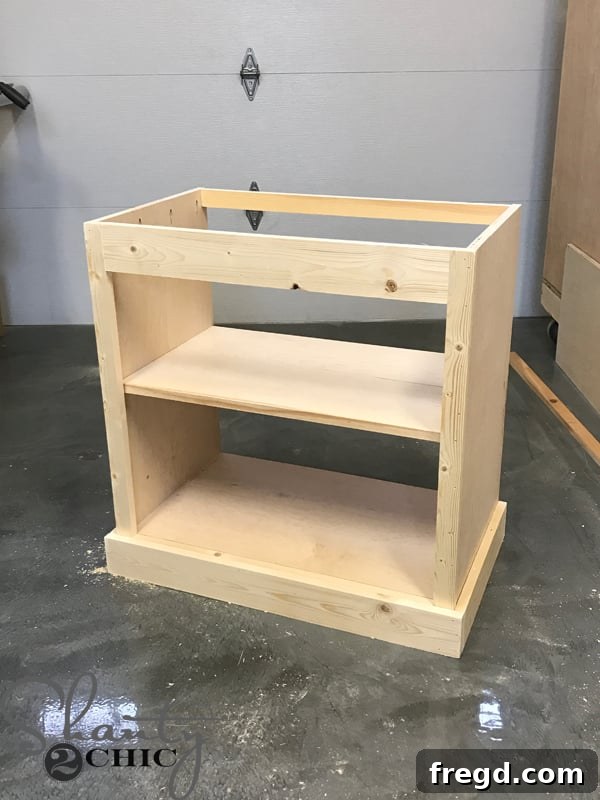
Once the side base trim pieces are in place, measure and cut the front base trim piece. This piece will span the entire width of the nightstand’s front, connecting seamlessly with the side trim pieces if you opted for mitered corners. Apply wood glue to the back and attach it with 1 1/4″ brad nails, just as you did with the side pieces. The base trim not only adds a decorative touch but also protects the bottom edges of the nightstand from wear and tear, giving it a more robust and finished profile.
Securing the Nightstand Top: A Solid Surface
Step 11: Attaching the Top to the Cabinet Base
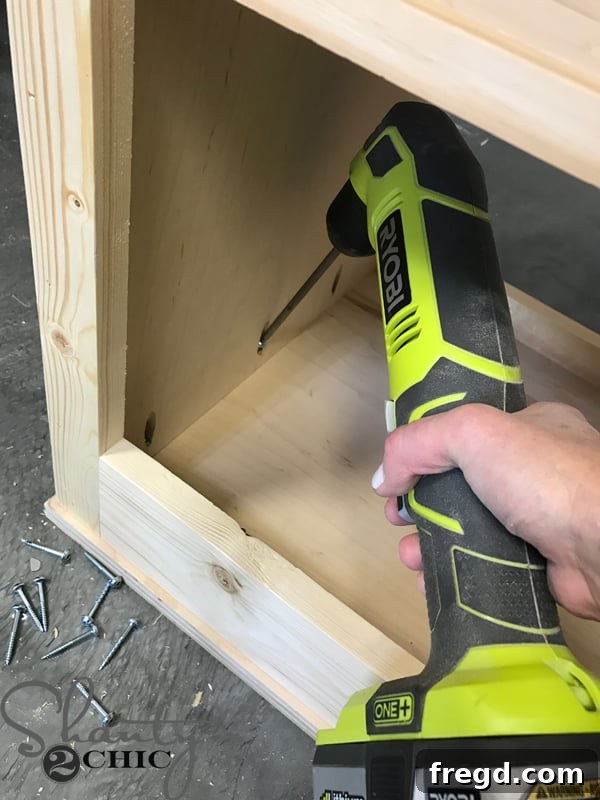
Now, let’s attach the crucial top piece that will serve as the primary surface of your nightstand. Carefully flip the entire nightstand cabinet upside down and position it precisely on top of the pre-cut top piece. This allows you to attach the top from underneath, keeping all fasteners completely hidden for a clean aesthetic. When positioning, ensure there is an even 1/4″ overhang on the front and both sides of the nightstand. The back edge of the top piece should be flush with the back of the nightstand frame, aligning with the space created earlier for the back panel. Once perfectly aligned, attach the nightstand to the top piece using 1 1/4″ pocket hole screws, driven through the pocket holes previously drilled into the top edges of the side and front pieces of the nightstand frame. This method creates a very strong and invisible connection.
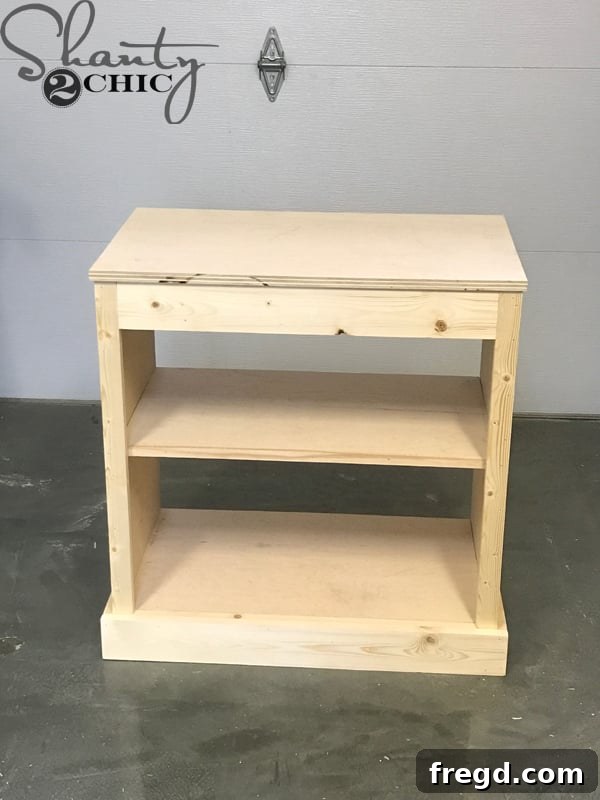
Once the top is securely attached, gently flip the nightstand back over. You should now have a complete, sturdy cabinet with a solid top. The next step is to add the top trim, which will further refine the appearance and conceal the raw edges of the plywood top.
Finishing with Top Trim: Refining the Edges
Step 12: Applying the Side Top Trim
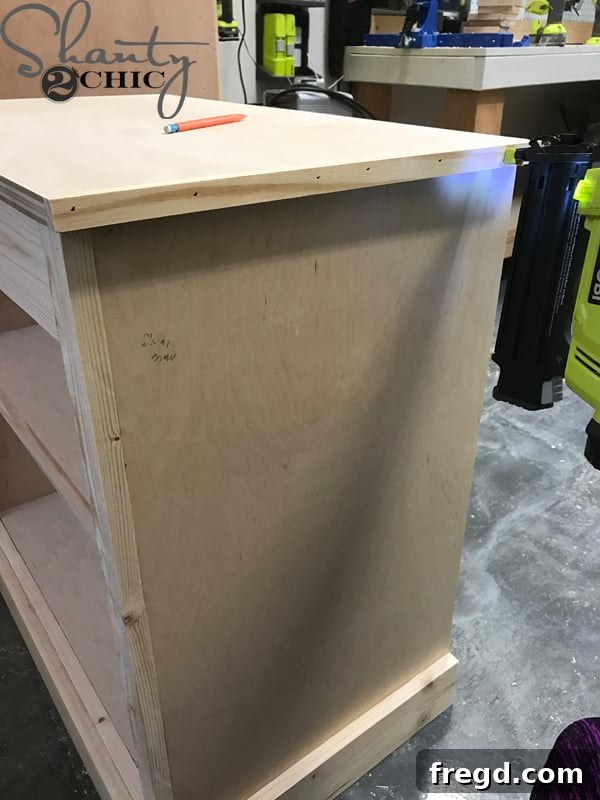
Just like the shelf and base, the nightstand top benefits greatly from a finishing trim. Using the same type of trim (1/2″ x 3/4″ or custom-ripped) that you used for the interior shelf, measure and cut the side pieces for the top. These pieces will run along the side edges of the nightstand top, flush with its surface. Apply a thin, even layer of wood glue to the back of each trim piece and then secure them with 1 1/4″ brad nails. Ensure the trim is perfectly aligned with the top surface and the side edges to create a clean, intentional look.
Step 13: Completing the Front Top Trim
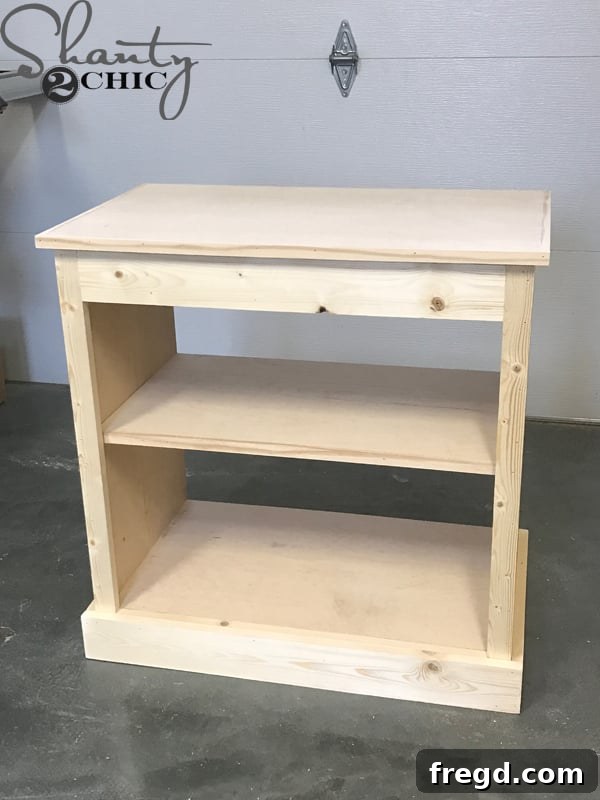
Finally, measure and cut the front piece of the top trim to fit snugly between the two side pieces. Apply wood glue and attach it using 1 1/4″ brad nails. This final piece of trim effectively covers all the rough, exposed plywood edges of the nightstand top, transforming it into a polished and aesthetically pleasing surface. The consistent use of trim throughout the project ties all the elements together, giving your DIY nightstand a professional and custom-built feel.
Installing the Back Panel: Completing the Enclosure
Step 14: Adding the Plywood Backing to the Nightstand
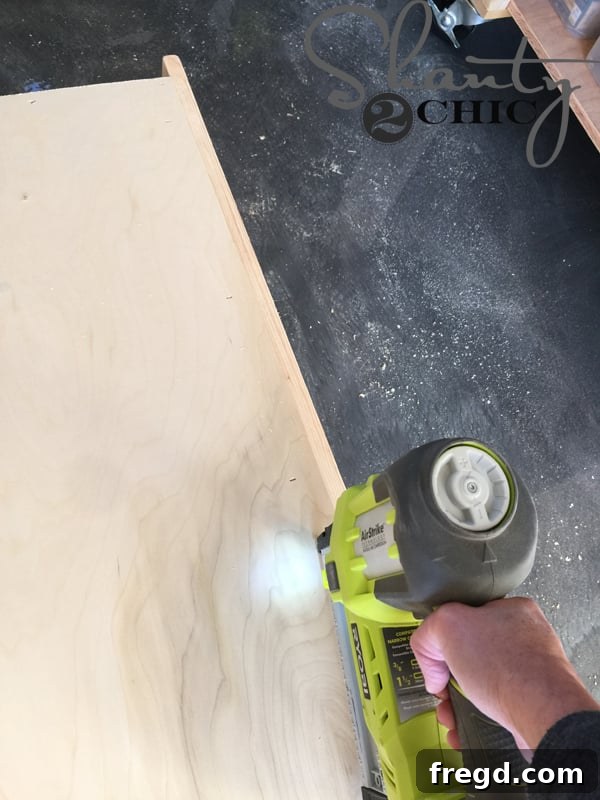
The back panel not only encloses the nightstand, preventing items from falling out the back, but also adds significant rigidity to the entire structure. Measure and cut a piece of 1/4″ plywood to fit precisely into the 1/4″ recess you created at the back of the nightstand. Apply a continuous bead of wood glue along all the mating surfaces of the back frame and support pieces. Then, carefully align the plywood backing. We prefer using a stapler for this step, specifically our Ryobi Airstrike Stapler, as the staples provide an excellent grip on the thinner 1/4″ plywood, preventing it from pulling away over time. However, if you don’t have a stapler, you can also use small brad nails (5/8″ or 3/4″) to secure the backing. Ensure the backing is square and flat before fastening it completely.
Constructing the Sliding Barn Door: The Signature Feature
Step 15: Assembling the Plank-Style Sliding Door
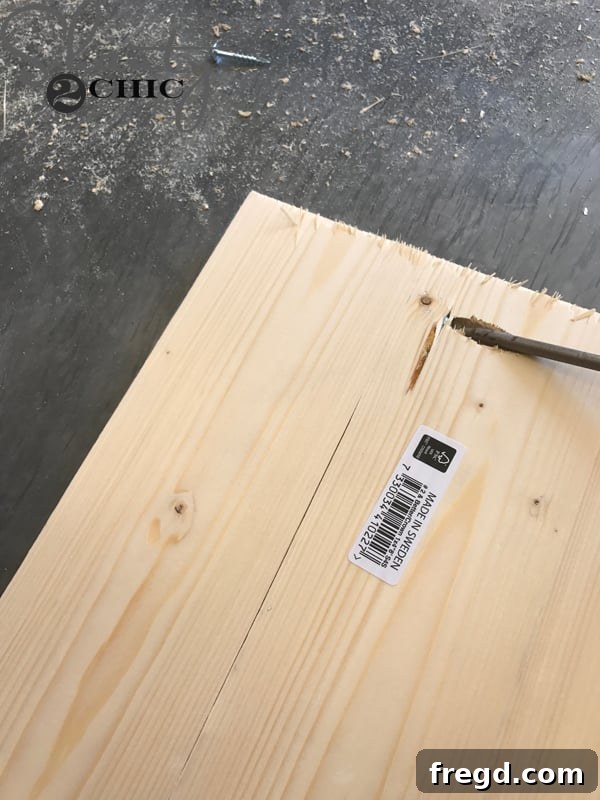
The sliding barn door is the defining feature of this nightstand, adding character and functionality. To construct it, start by cutting your individual planks to the desired length according to your plans. For strong, concealed joints, drill 3/4″ pocket holes into three of the planks, making sure to position them strategically so they will be hidden once the door is assembled. Then, apply wood glue to the long edges of the planks and attach them together using 1 1/4″ pocket hole screws. Work carefully to ensure the planks are perfectly aligned and create a flat, seamless panel. Clamping the planks together during assembly can help maintain flatness and tight joints.
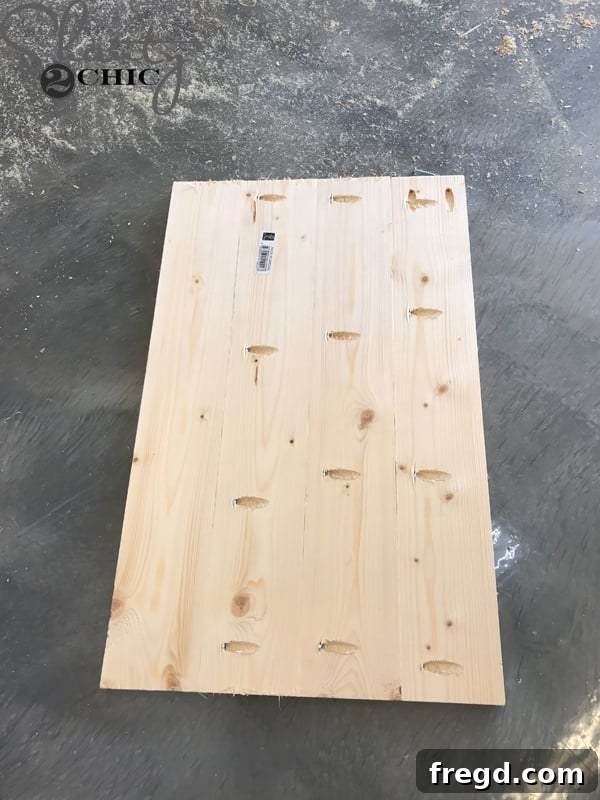
With all the planks joined and the glue cured, your barn door panel is now complete! Take a moment to inspect its flatness and squareness. Any minor imperfections can often be addressed with a bit of sanding. This beautifully crafted door is now ready for its finishing touches and the installation of the unique sliding hardware.
Applying the Perfect Finish: Enhancing and Protecting Your Nightstand
Step 16: Staining and Sealing Your Custom Nightstand
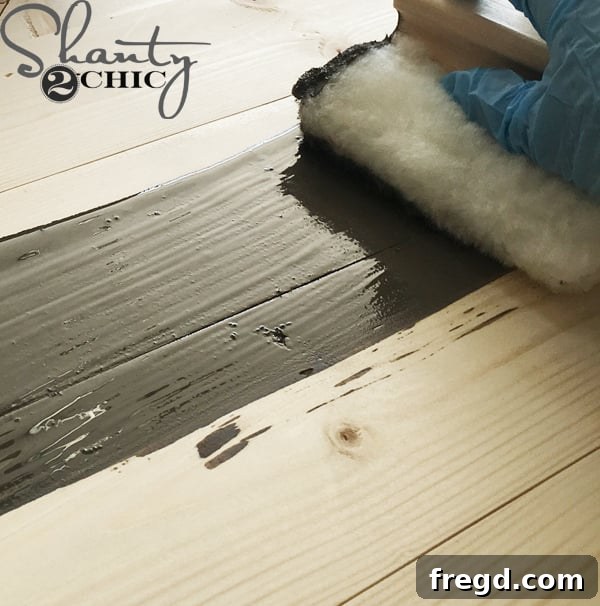
The finish you choose can dramatically transform the look of your nightstand, bringing out the natural beauty of the wood and protecting it for years to come. For this project, we opted for the rich, warm tones of Briarsmoke stain by Varathane, which perfectly complements the rustic modern aesthetic. Before applying any finish, ensure your nightstand is thoroughly sanded smooth, starting with a coarser grit and progressing to a finer grit sandpaper (e.g., 120, 180, 220) to achieve a silky-smooth surface. Clean off all sanding dust before staining. For expert tips on achieving a flawless stain, be sure to check out our How to Stain Wood video HERE! Apply the stain evenly, wiping off any excess according to the product instructions. Once the stain is completely dry, apply several coats of a protective topcoat, such as polyurethane or a clear coat, to guard against moisture and wear, giving your nightstand a durable and lasting finish.
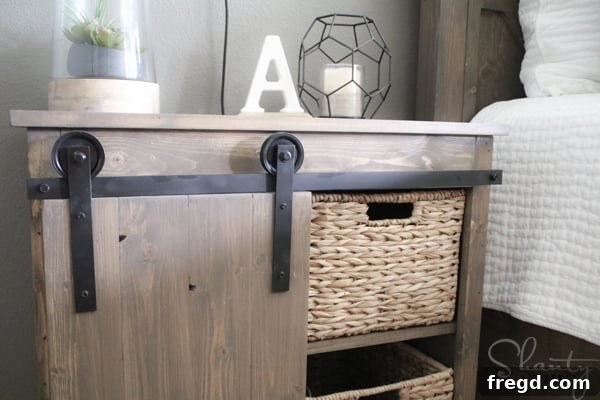
After the stain and protective topcoat had ample time to dry and cure, the final exciting step was to attach our signature $20 DIY Barn Door Hardware. This custom hardware not only provides the smooth sliding action but also adds an authentic industrial-chic touch that perfectly marries with the rustic design. The installation process is straightforward, and with our dedicated plans, you’ll have your door sliding effortlessly in no time. For a detailed walkthrough on how we crafted this unique hardware, be sure to click HERE. Once the hardware was in place, the nightstand was officially complete, and we couldn’t be happier with the results!
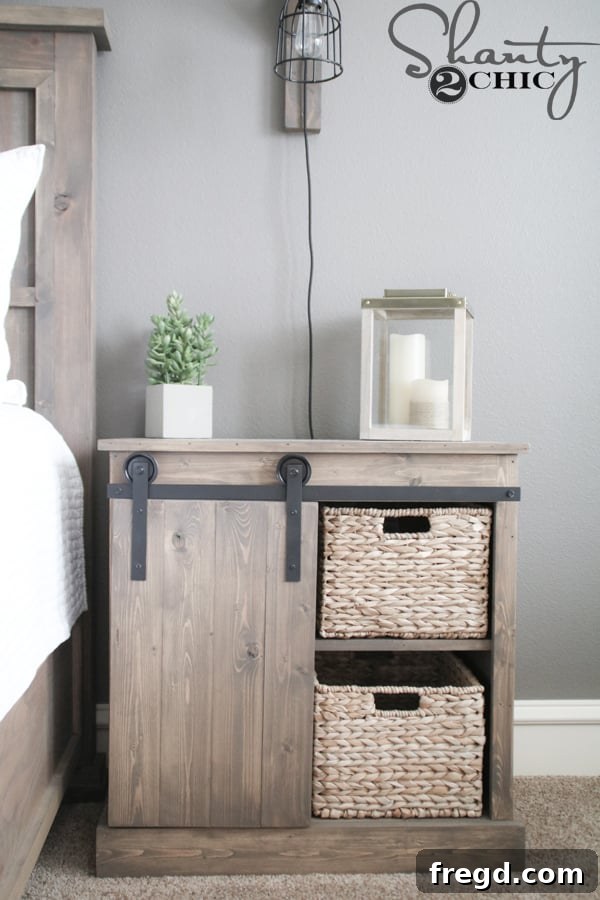
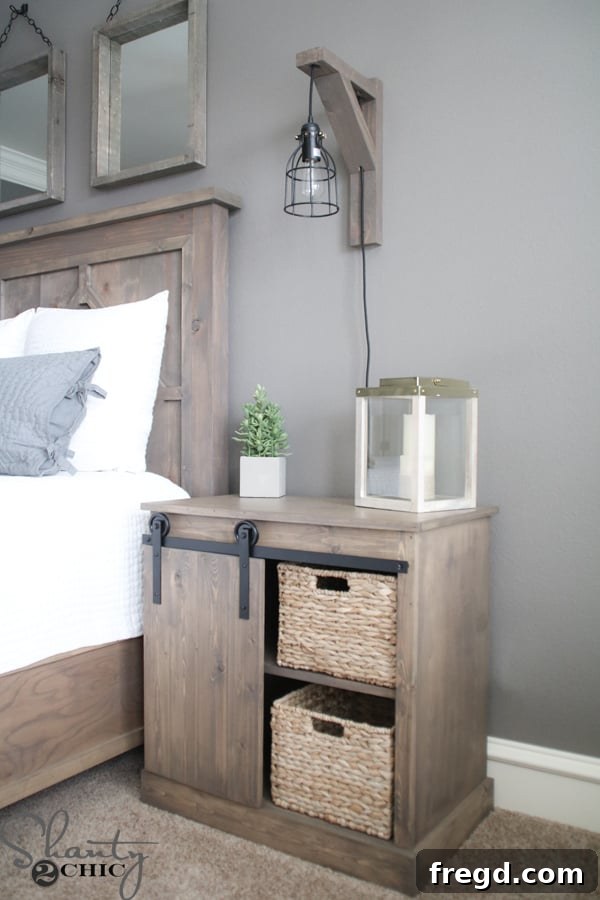
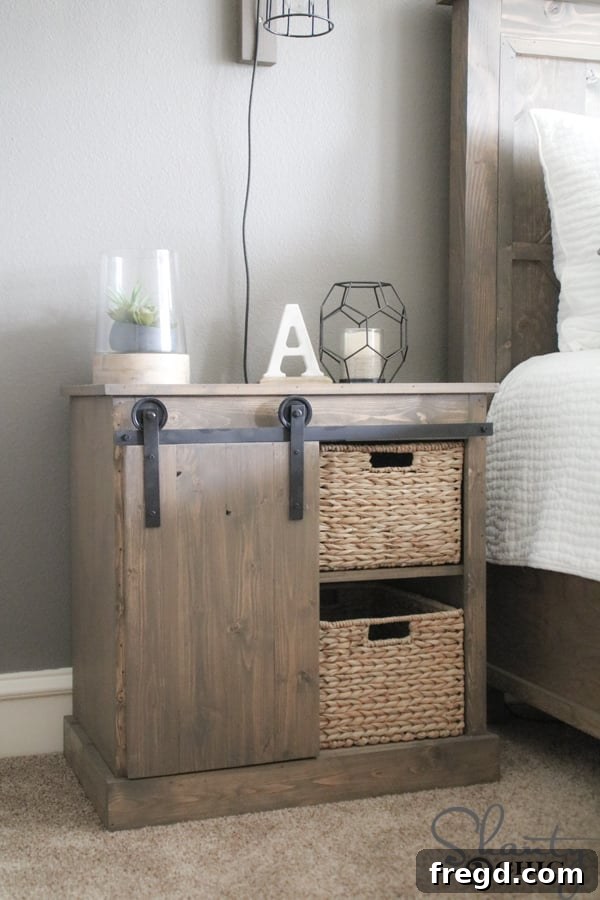
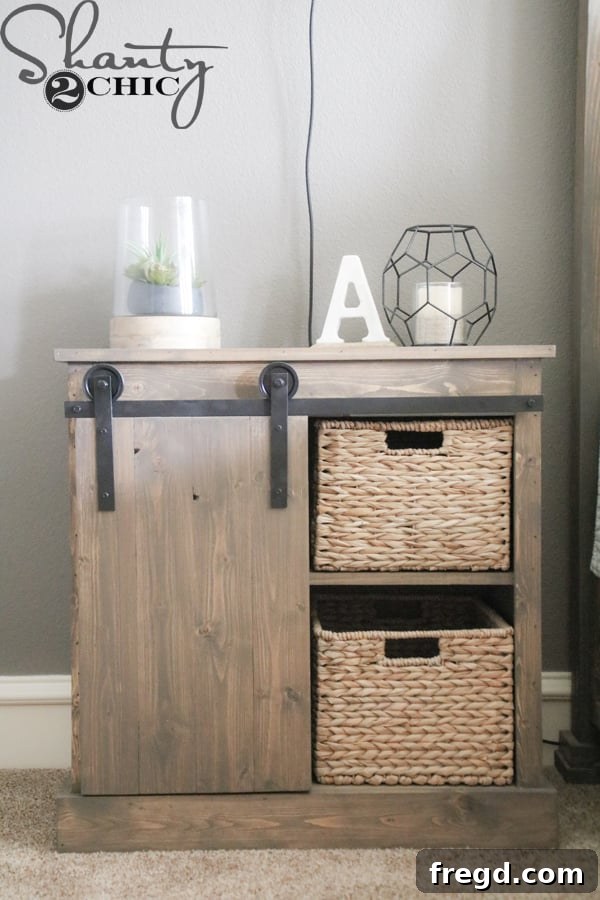
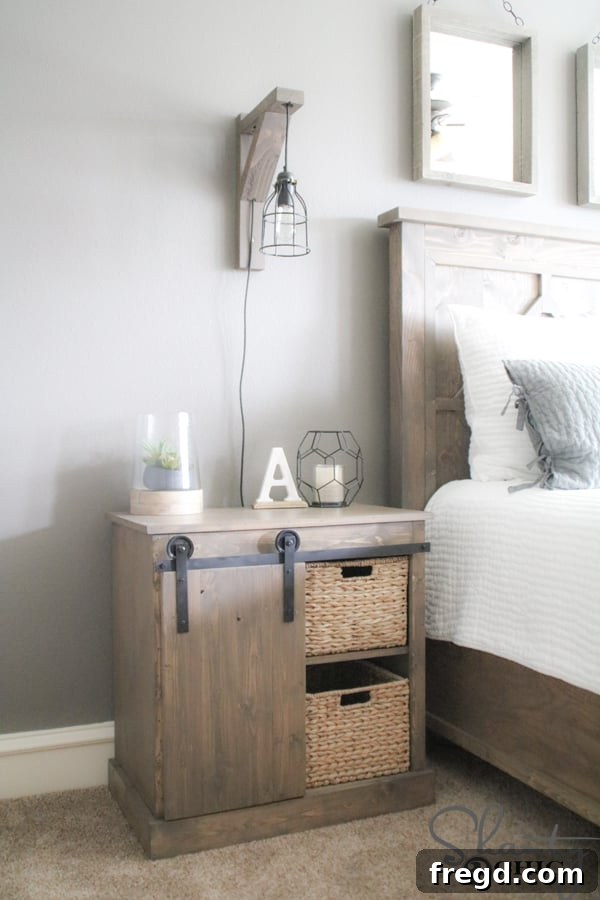
We truly couldn’t be more delighted with our new DIY Sliding Barn Door Nightstands! They offer the perfect blend of style and utility. I love how they provide ample storage: all my everyday clutter and essentials neatly tuck away in the baskets on the shelf, while magazines, my tablet, laptop, and other personal items are perfectly concealed behind the charming sliding barn door. These nightstands have transformed our bedroom into a more organized and aesthetically pleasing retreat.
Curious about other elements you see in our bedroom space? We’ve linked some of our favorite items and other DIY projects below:
- Storage Baskets: Found at AtHome
- Light Sconce: Video tutorial and plans coming soon – be sure to subscribe HERE to our YouTube channel for updates!
- $20 DIY Barn Door Hardware: Learn how we built it HERE
- DIY Rustic Modern King Bed: Get the full plans and tutorial HERE
- Bedding: Find similar styles HERE
- “A” Figurine: A lucky find from HomeGoods
- Candle Holder: Discover similar options HERE
Thank you so much for stopping by and taking the time to explore this project with us! We hope this detailed guide empowers you to tackle your own DIY Sliding Barn Door Nightstand. Remember, the satisfaction of building something with your own hands is truly unparalleled.
Happy Building!
Other Inspiring DIY Nightstand Builds!
If you loved this project and are looking for more nightstand inspiration, check out some of our other popular designs: