
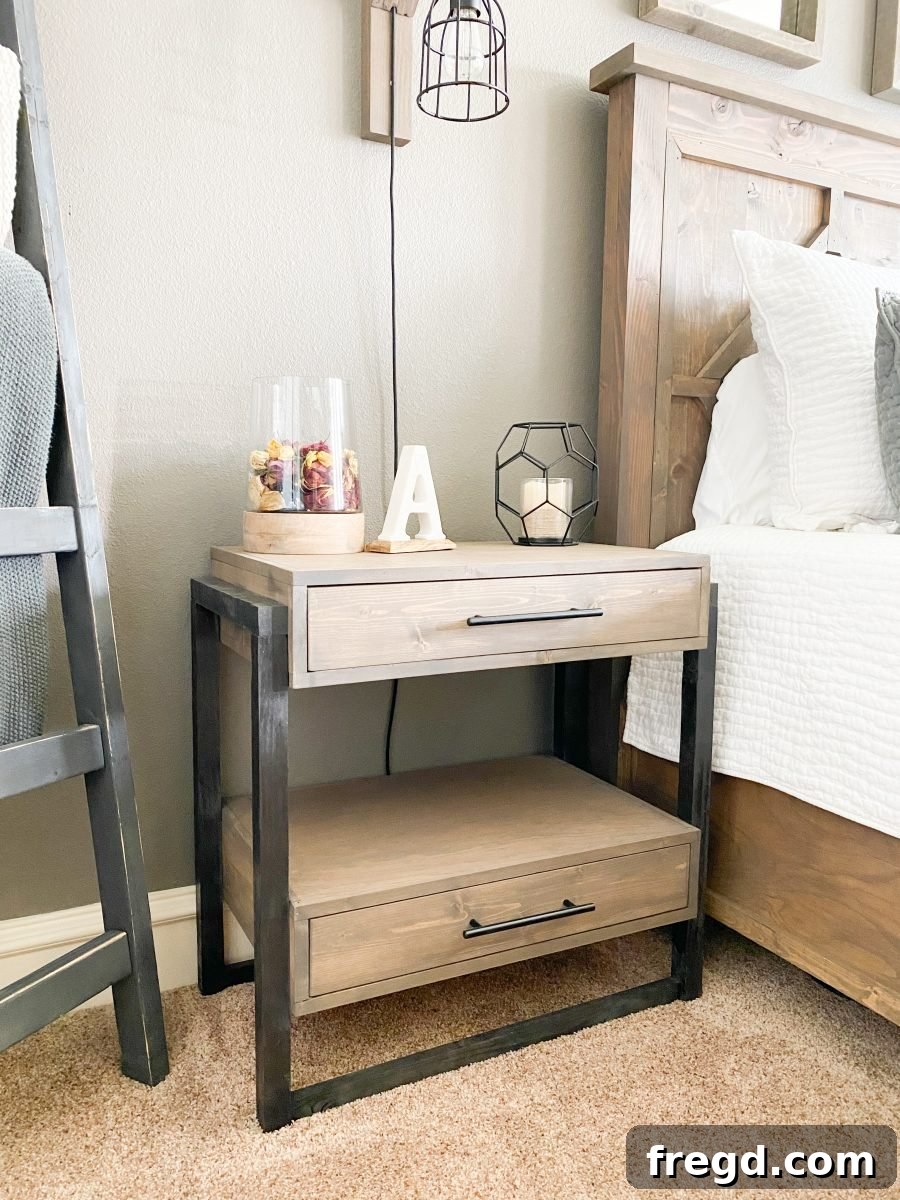
Unlock the potential of your bedroom with a stunning, custom-built nightstand. Learn how to craft this elegant DIY Nightstand with Drawers, featuring captivating floating shelves and sleek modern lines, using our comprehensive plans and expert guidance from Shanty2Chic.
Build Your Own Modern Nightstand with Floating Shelves and Drawers
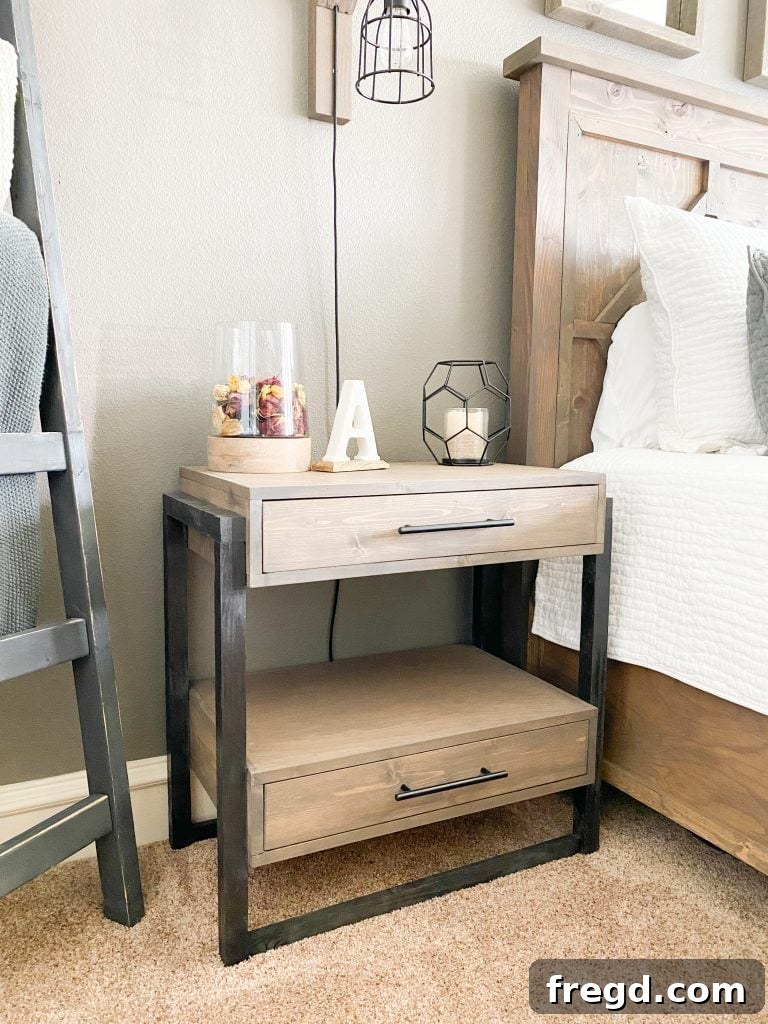
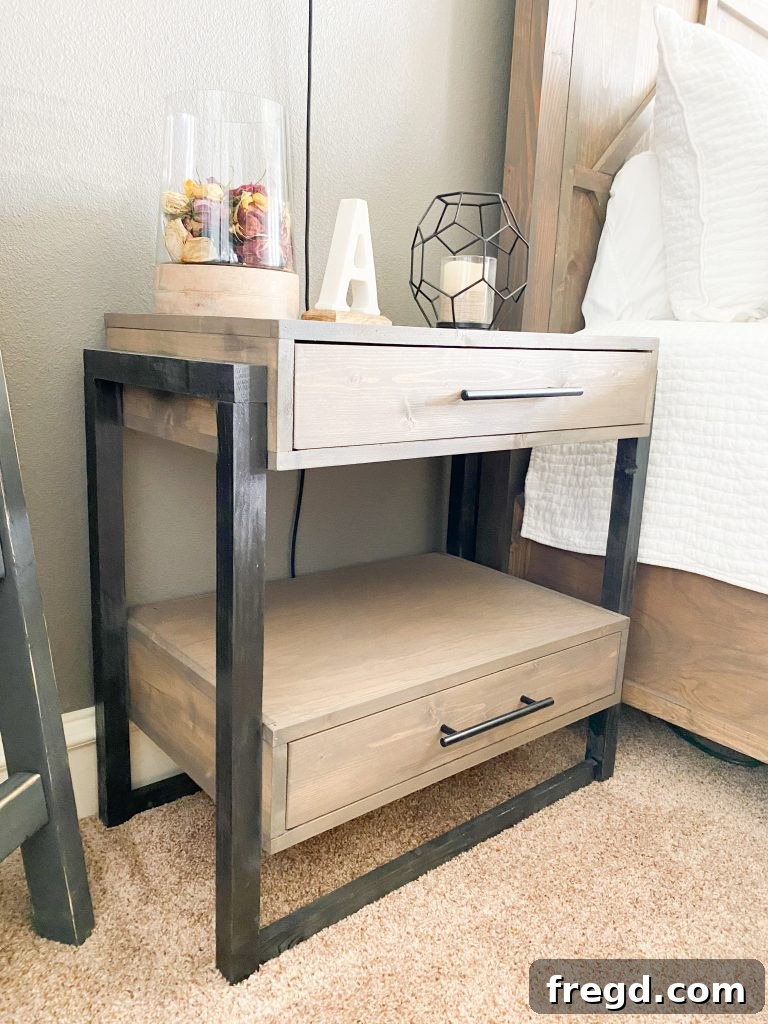
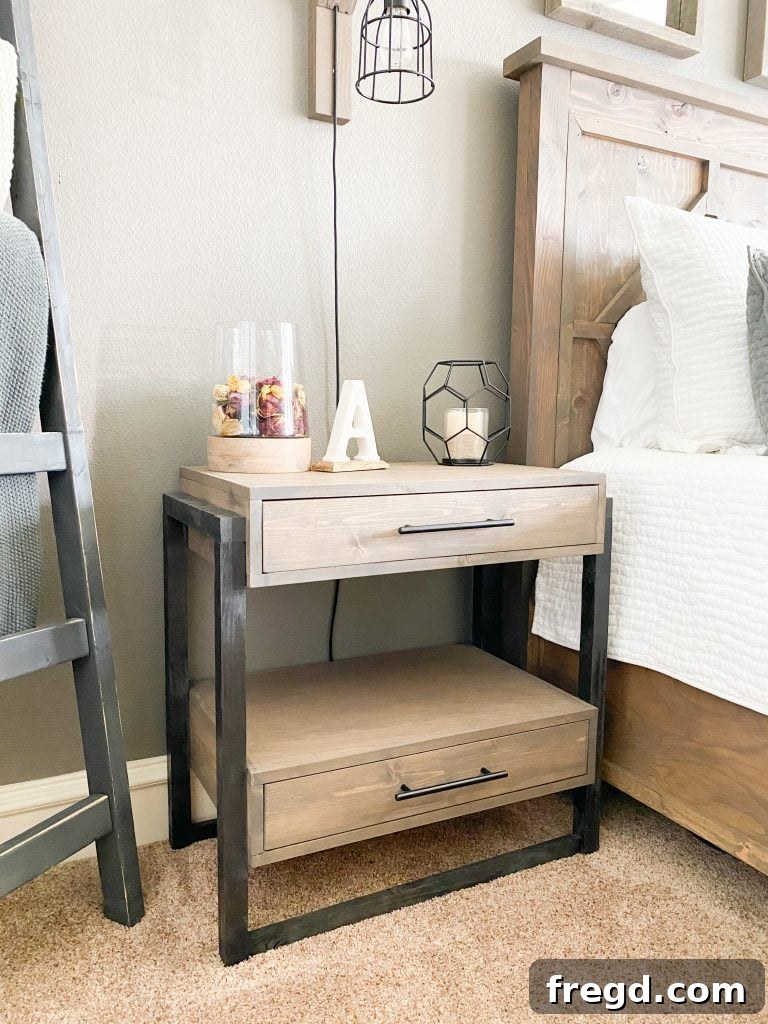
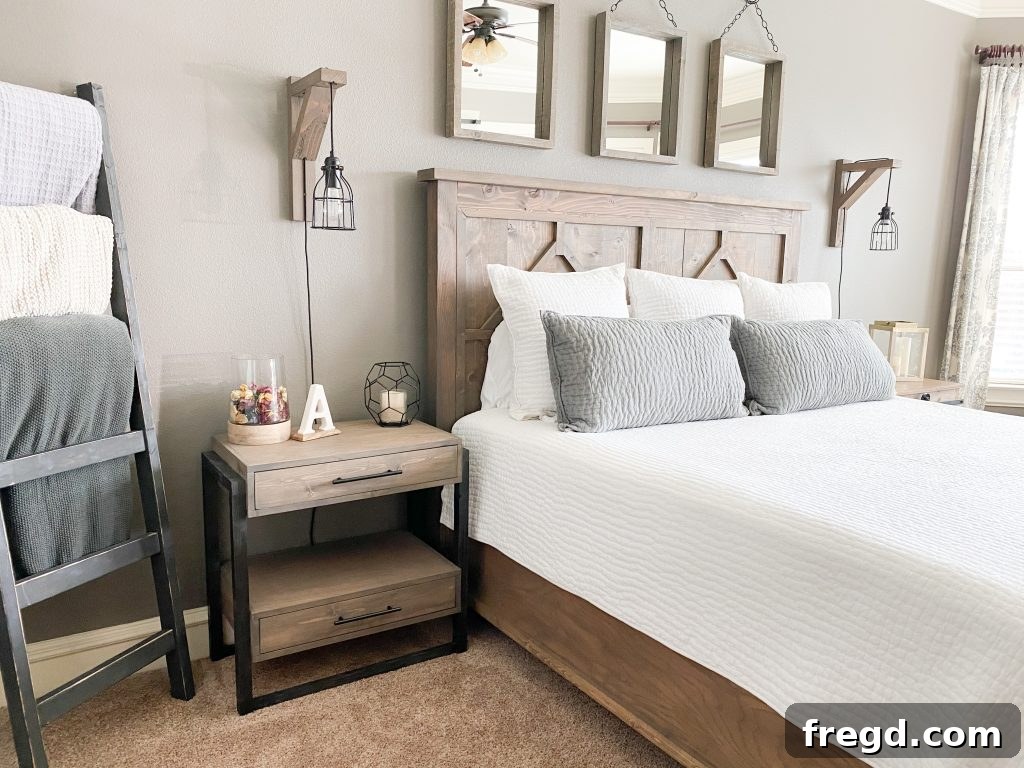
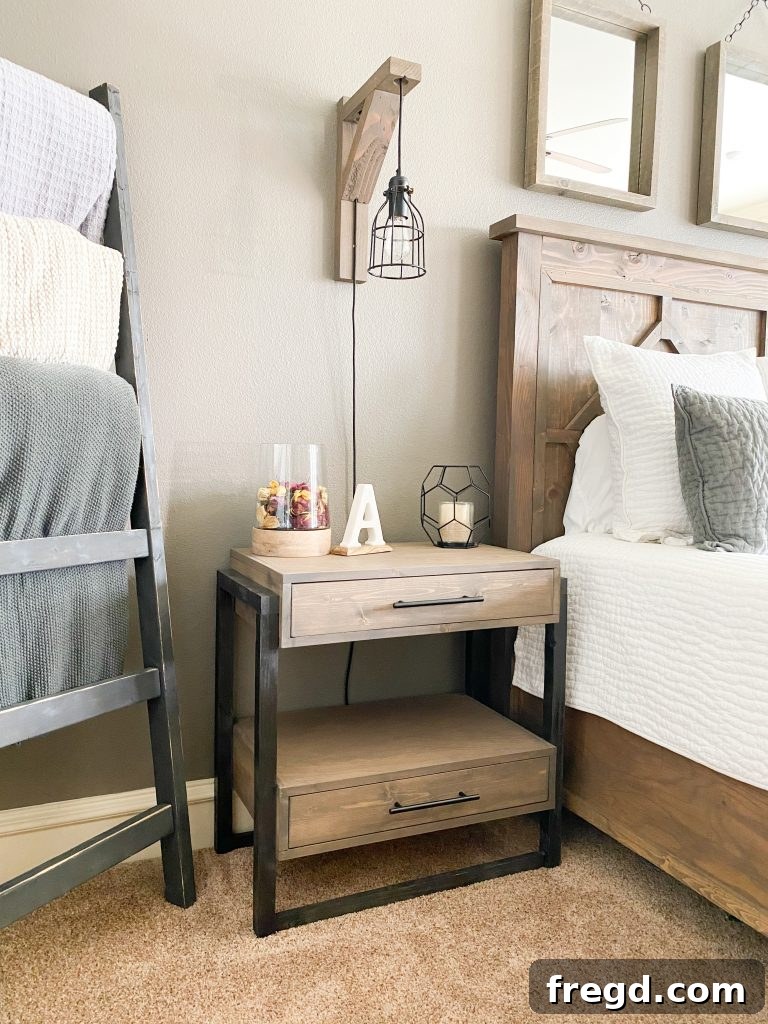
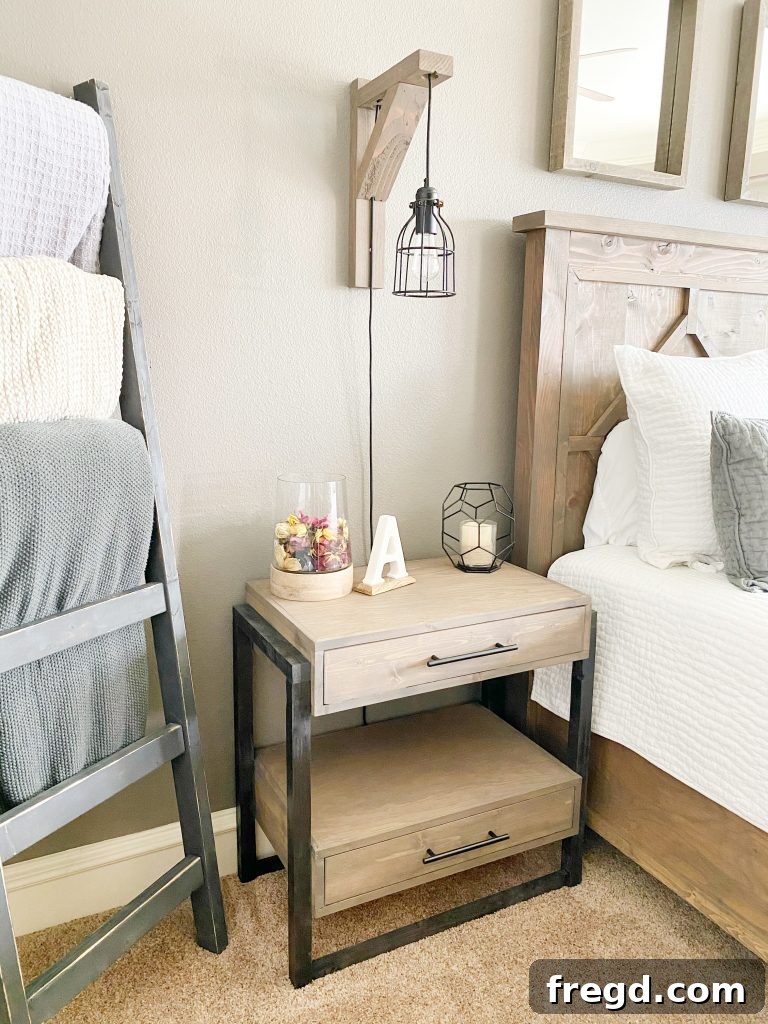
We are absolutely thrilled to share this nightstand project with you! It’s designed to be a standout piece, seamlessly blending modern aesthetics with incredible functionality. The distinctive black frame creates sharp, clean lines that immediately catch the eye, while the spacious shelves appear to float effortlessly, adding a touch of contemporary elegance to any bedroom. But it’s not just about sophisticated looks – these nightstands also boast practical drawers, perfect for neatly stowing away all your bedside essentials, making them incredibly versatile and a true space-saving solution.
Imagine a piece of furniture that combines all your favorite features: sophisticated design, smart storage, and a unique visual appeal. That’s precisely what this DIY nightstand delivers! Crafted with precision and a keen eye for modern design, it promises to elevate your bedroom decor. Best of all, it’s a surprisingly straightforward build that won’t strain your budget, allowing you to create high-end furniture at a fraction of the cost. Ready to transform your bedroom with a piece you’ll be proud to say you built yourself? Let’s dive into the details and get building!
CLICK HERE TO ACCESS THE FREE PRINTABLE PLANS!
Table of Contents
Project Overview: Why Build a DIY Nightstand?
Embarking on a DIY furniture project like building your own nightstand offers immense satisfaction, not to mention significant savings compared to store-bought alternatives. This specific design from Shanty2Chic is tailored for those who appreciate a modern aesthetic combined with practical functionality. The beauty of these nightstands lies in their clever design, which creates the illusion of floating shelves – a sophisticated touch that adds visual lightness and an open, airy feel to your bedroom decor. With two spacious drawers, you’ll have ample room to keep your bedside essentials neatly tucked away, maintaining a clutter-free environment and promoting a sense of calm and order. Furthermore, the robust frame provides excellent stability, ensuring your new custom nightstand is not only beautiful but also built to last for years to come, becoming a cherished part of your home.
Before you begin any cutting or assembly, it is crucial to thoroughly review the entire plan, including all cut lists and instructions. Understanding each step comprehensively will make the building process smoother, more efficient, and ultimately more enjoyable. Remember, precision in measurements and cuts is the absolute key to achieving a professional, high-quality finish. Don’t be afraid to take your time, double-check your work, and truly enjoy the rewarding process of bringing your woodworking vision to life. Safety should always be your top priority; ensure you are wearing appropriate personal protective equipment (PPE) like safety glasses and hearing protection when operating power tools.
Getting Started: Tools & Supplies for Your Build
Every successful woodworking project, especially one as rewarding as building your own modern nightstand, begins with the right materials and equipment. For this DIY nightstand with drawers, we’ve carefully curated a list of essential supplies and tools that will empower you to achieve outstanding results. While some tools are optional, they can significantly enhance efficiency, precision, and overall ease of construction. Investing in good quality tools will not only make this project more enjoyable but also serve you well for future DIY endeavors. Always prioritize safety by wearing appropriate personal protective equipment (PPE) such as safety glasses and hearing protection when operating any power tools.
Essential Supplies List
Gathering all your materials beforehand will ensure a seamless and uninterrupted building process. The following list includes all the lumber, hardware, and adhesives you’ll need to construct one nightstand. If you’re planning to build a pair for a cohesive bedroom look, remember to double the quantities for most items. We recommend checking local hardware stores or lumber yards for the best quality wood and competitive pricing. High-quality materials contribute significantly to the durability and finish of your project.
- Framing Lumber: 2 – 2x2x8. These pieces form the core structural frame of your nightstand, providing strength and stability. For superior straightness and consistency, these can often be accurately ripped from larger 2x4s using a table saw.
- Pine or Common Boards: 1 – 1x2x8. This versatile board is utilized for various trim and minor structural elements, contributing to the refined appearance.
- Pine or Common Boards: 2 – 1x5x8. These boards are ideal for the main shelf components, providing a clean, solid surface for your floating shelves.
- Hardwood Plywood (1/2″ thick): 2 – 1/2″x3.75″x8′. Crucial for the construction of your sturdy drawer boxes and specific shelf elements. For ultimate precision, these can be carefully ripped from a larger 3/4″ plywood sheet if a pre-cut size isn’t readily available.
- Trim Stock: 5 – 1/2″x3/4″x8′. These slender pieces are vital for creating the elegant floating shelf illusion and adding subtle accents to the drawer fronts. Ripping these from larger 1x boards using a table saw can also be a cost-effective and precise option.
- Hardwood Plywood (1/4″ thick): 1 – 1/4″x48″x96″. This lighter plywood is typically used for the drawer bottoms and the back paneling, offering lightweight yet robust support.
- Hardwood Plywood (3/4″ thick): 1 – 3/4″x48″x96″. This thicker plywood forms the primary surface for the main shelves and other robust sections, ensuring exceptional durability and a solid feel.
- Pocket Hole Screws: A selection of 1 1/4″ and 2 1/2″ screws. These are absolutely essential for creating strong, concealed joints with your Kreg Jig, maintaining the nightstand’s clean aesthetic.
- Brad Nails: 1 1/4″. Used for attaching trim and light assemblies with minimal visible fasteners, providing quick and secure holds while glue dries.
- Pin Nails: 1″. Even finer than brad nails, these are perfect for very delicate trim work where discretion is paramount, leaving virtually invisible holes.
- Wood Screws: 1 1/2″. General-purpose screws primarily used for securely attaching the shelf units to the main frame from the inside, ensuring hidden fasteners.
- Wood Glue: High-quality wood glue is indispensable for robust and lasting joints. Always use it in conjunction with mechanical fasteners like screws and nails for maximum strength.
- Drawer Pulls: Select a style and finish that perfectly complements your desired aesthetic and the overall design of your nightstand.
- Drawer Slides: While not explicitly listed in the original, these are crucial for the smooth operation of your drawers. Choose full-extension ball-bearing slides for the best experience.
Recommended Tools for Precision and Ease
Having the right tools at your disposal will not only make the building process significantly more efficient but also contribute immensely to the overall quality and precision of your DIY nightstand. Here are the essential and recommended tools you’ll need, along with a brief explanation of their primary role in this project:
- Miter Saw: This powerful tool is indispensable for making highly accurate crosscuts on your lumber, ensuring that all your pieces are cut to the exact length specified in the plans. Precision cuts are fundamental for tight, professional-looking joints.
- Kreg Jig: A must-have tool for creating strong and hidden pocket hole joints. These concealed joints are fundamental to achieving the clean, modern aesthetic of this nightstand design. Both the robust Kreg Foreman and smaller, more portable Kreg Jig models are perfectly suitable for this project.
- Drill: An essential multi-purpose tool for woodworking. It’s used for pre-drilling pilot holes (to prevent wood splitting), driving screws efficiently, and operating effectively with your Kreg Jig.
- Brad Nailer: This tool significantly speeds up the process of attaching trim and various lighter components. It drives small brad nails, leaving minimal, easily concealable holes, which is ideal for a clean finish.
- Table Saw (Optional but Highly Recommended): An excellent tool for ripping wider boards into narrower strips with exceptional precision. This is particularly useful for creating the custom trim pieces mentioned in the supply list, ensuring perfectly straight and consistent edges.
- Pin Nailer (Optional): For the most delicate trim work, where even smaller and less visible holes than those left by a brad nailer are desired. It’s perfect for a truly flawless finish.
- Stapler (Optional): A useful tool for quickly and securely attaching drawer bottoms or other backing materials, providing strong, rapid bonds. A heavy-duty staple gun can also suffice if a pneumatic stapler isn’t available.
- Measuring Tape & Pencil: Fundamental for all your precise measurements, marking cut lines, and laying out components. Always use a good quality, locking tape measure.
- Clamps: Crucial for holding pieces together firmly and accurately while wood glue dries or screws are driven. Parallel clamps and bar clamps are especially useful for ensuring square and tight assemblies.
- Try Square or Speed Square: Essential for checking and ensuring all your corners and joints are perfectly square during assembly, which is critical for functional drawers and a professional look.
- Safety Glasses & Hearing Protection: Absolutely non-negotiable. Always wear these when operating any power tools to protect your eyes and ears from debris and noise.
Understanding the Cut Lists
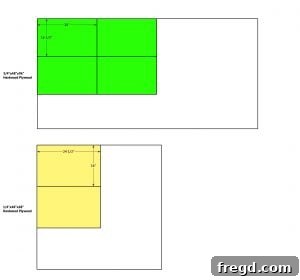
Before making any cuts, it is imperative to thoroughly review the provided cut lists. These detailed diagrams specify the exact dimensions (length, width, and thickness) for every single piece of lumber you’ll need for this project. Accuracy here is paramount; precise cuts ensure all components fit together perfectly, leading to a strong, stable, and visually appealing final product. Remember the age-old woodworking adage: “Measure twice, cut once.” This simple rule will save you time, material, and frustration. Pay close attention to the direction of wood grain for aesthetic consistency, especially on visible surfaces.

Building the Elegant Floating Shelves
The floating shelves are a key design element of this modern nightstand, creating an airy and sophisticated look that sets it apart. This section guides you through the precise process of constructing these visually striking components. Each shelf will be assembled with careful attention to detail, ensuring both structural integrity and aesthetic appeal. The illusion of depth created by the trim will make these shelves appear as if they are effortlessly suspended within the frame, adding a touch of contemporary artistry to your bedroom.
Step 1: Crafting the Top and Bottom Shelves
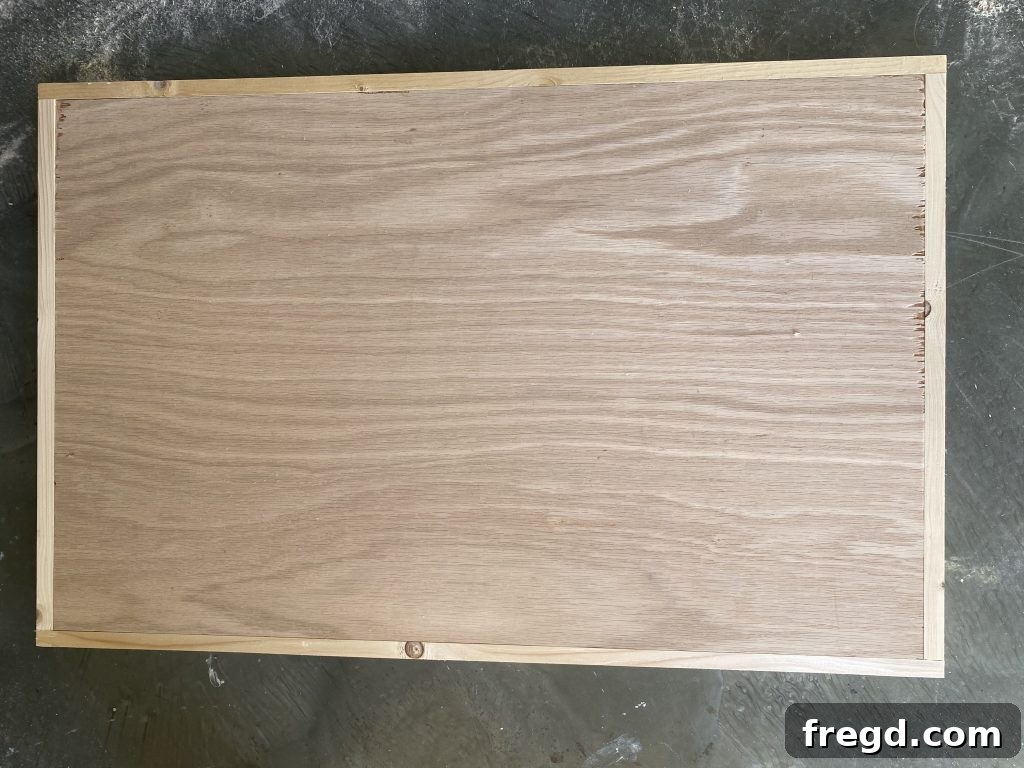
Begin by cutting your main shelf pieces to the exact dimensions specified in your comprehensive cut list. Precision here is paramount for a professional, seamless finish, so take your time and use your miter saw accurately. Once the main shelf panels are cut, prepare the trim pieces. Measure and cut the side trim pieces to match the length of the shelf sides. Apply a thin, even layer of high-quality wood glue along the edges of the main shelf where the trim will attach, then carefully position the side trim pieces. Secure them firmly in place using 1-inch pin nails. Pin nails are ideal for this task as they provide a strong, immediate hold while the glue dries, leaving minimal, almost invisible holes that are easy to conceal. Repeat this precise process for the front and back trim pieces, ensuring they are perfectly flush with the sides and evenly spaced. You will need to build a total of four such identical shelf units: two designated for the top sections of your nightstand and two for housing the drawers in the bottom sections.
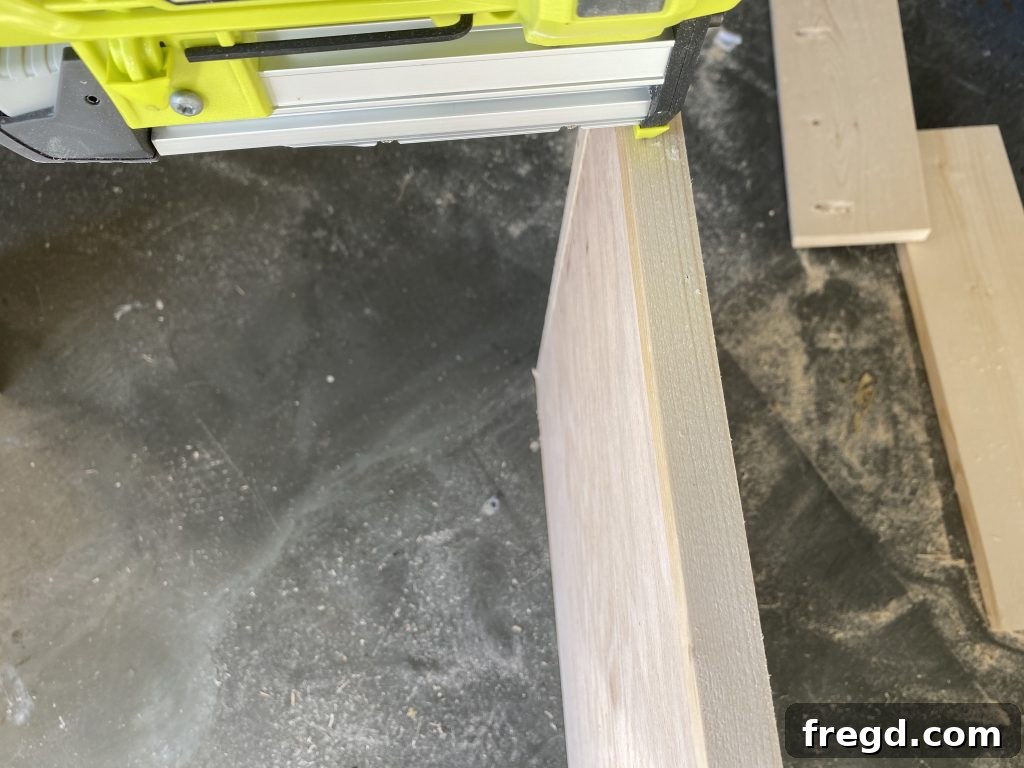
Once all the trim is meticulously attached, you’ll immediately begin to see the elegant floating effect take shape. The trim not only adds perceived depth but also provides a beautifully finished edge to your shelves, effectively concealing the raw plywood edges and giving them a more substantial, custom-built appearance. Before the glue sets completely, take a moment to ensure all joints are tight, flush, and square. Any minor adjustments are much easier to make at this stage. Allow adequate drying time for the glue to achieve maximum bond strength before proceeding to the next step, as this ensures the durability of your shelves.
Step 2: Assembling the Shelf Sides
Now, shift your focus to the side pieces that will form the enclosed structure for your drawers within the shelves. Begin by cutting these side shelf pieces to the precise dimensions outlined in your cut list. As with all cuts, accuracy is vital for a snug fit. Using your Kreg Jig, drill 3/4-inch pocket holes strategically along one edge of each of these boards. Pocket holes are an excellent choice for this application because they create strong, concealed joints, which is absolutely essential for maintaining the clean, minimalist look of these modern nightstands. If you have a Kreg Foreman, it’s perfect for high-volume, repetitive drilling, but any Kreg Jig model will work just as effectively to create these robust joints. Always ensure your drill bit depth is set correctly for the material thickness.
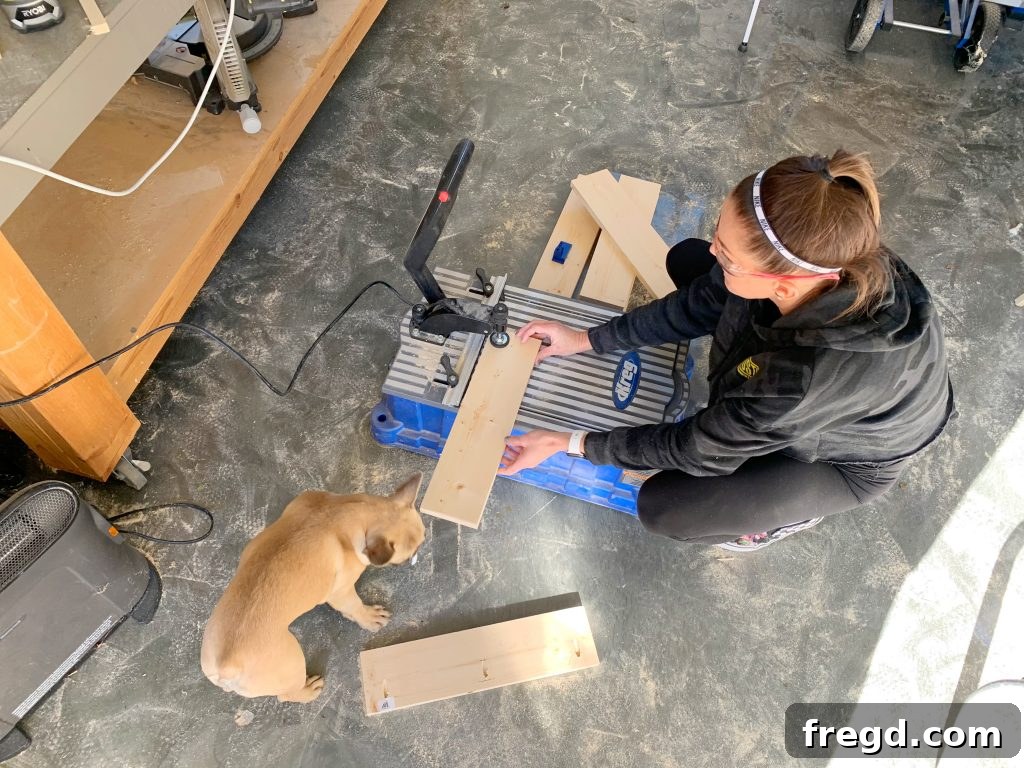
With the pocket holes now expertly drilled, it’s time to attach these side pieces to the bottom shelf units. Apply a thin, even bead of wood glue to the edges that will meet the bottom shelf panel, then carefully position them accurately on the sides of one of your pre-built bottom shelf units. Ensure they are flush with the front and back edges. Secure them firmly with 1 1/4-inch pocket hole screws, driving them steadily but carefully to avoid overtightening and stripping the wood. This process creates a strong, precise L-shaped assembly, forming the initial structure of your drawer cavity. Repeat this identical process for both of your bottom shelf units, as each nightstand will ultimately house one drawer. Double-check for squareness after assembly to ensure smooth drawer operation later.
Step 3: Securing the Shelf Back
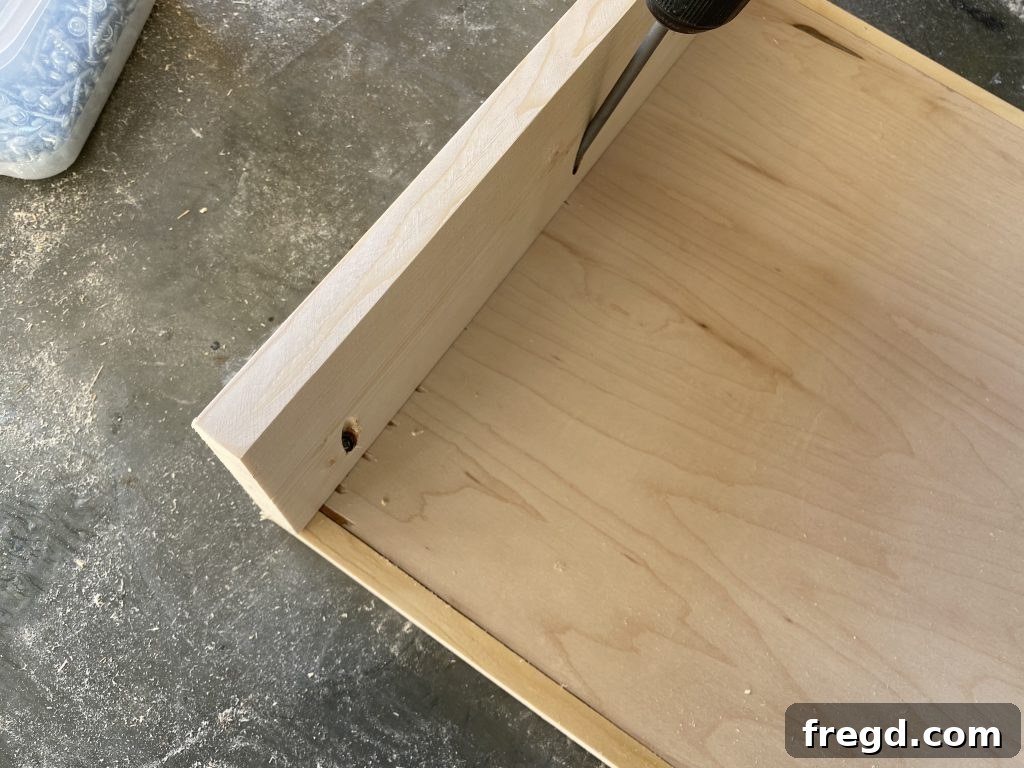
The final crucial component for each shelf unit is the back piece. This element not only provides significant structural integrity to the drawer cavity but also completes the enclosed space, making it ready for drawer installation. Begin by accurately measuring and cutting the back shelf piece according to the dimensions provided in your plans. Using your Kreg Jig once more, drill 3/4-inch pocket holes along one long edge and on both ends of this board. These strategically placed pocket holes will allow you to firmly attach the back piece to both the side pieces and the bottom shelf, creating a very robust and stable enclosure.
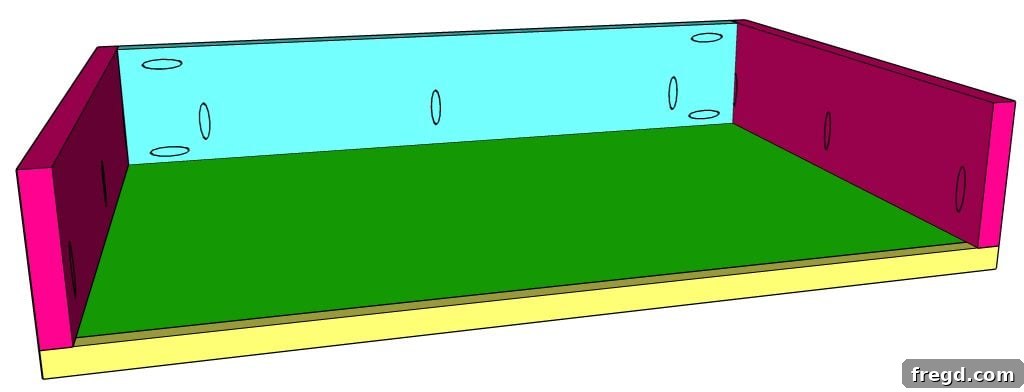
Apply a thin, continuous bead of wood glue to all the edges where the back piece will connect. Then, carefully fit it precisely between the previously attached side pieces and against the back edge of the bottom shelf. Ensure it’s perfectly flush and square within the assembly. Secure it firmly in place using 1 1/4-inch pocket hole screws, driving them carefully until snug. This completes the foundational box for your drawer, forming a robust and fully integrated part of the overall nightstand design. Before moving on, take a critical moment to check that your entire shelf unit is perfectly square; this is absolutely vital for ensuring the smooth and effortless operation of your drawers in subsequent steps. Squareness at this stage will prevent headaches later!
Constructing the Sturdy Nightstand Frame
The nightstand’s frame is its backbone, providing essential stability and defining its striking modern silhouette. This section details the precise steps for constructing the strong, elegant frame that will proudly house your beautifully crafted shelves and drawers. The use of robust 2×2 lumber for the frame offers a substantial, quality feel while maintaining sleek, contemporary lines, especially when painted in a contrasting color like a deep matte black. Careful assembly here ensures a rock-solid foundation for your entire project.
Step 1: Attaching the Side Frame Pieces
Start by meticulously cutting the side frame and top frame pieces from your 2×2 lumber, adhering strictly to the precise dimensions provided in your cut list. These pieces will form the vertical and horizontal elements of each side panel of your nightstand. On the top end of each vertical side frame piece, drill 1 1/2-inch pocket holes. These slightly larger pocket holes are intentionally used here to create an exceptionally strong joint that can withstand the rigors of daily use and provide long-term stability for the entire structure. Ensure your Kreg Jig is set for the correct material thickness (1.5 inches for 2x2s) for optimal screw engagement.
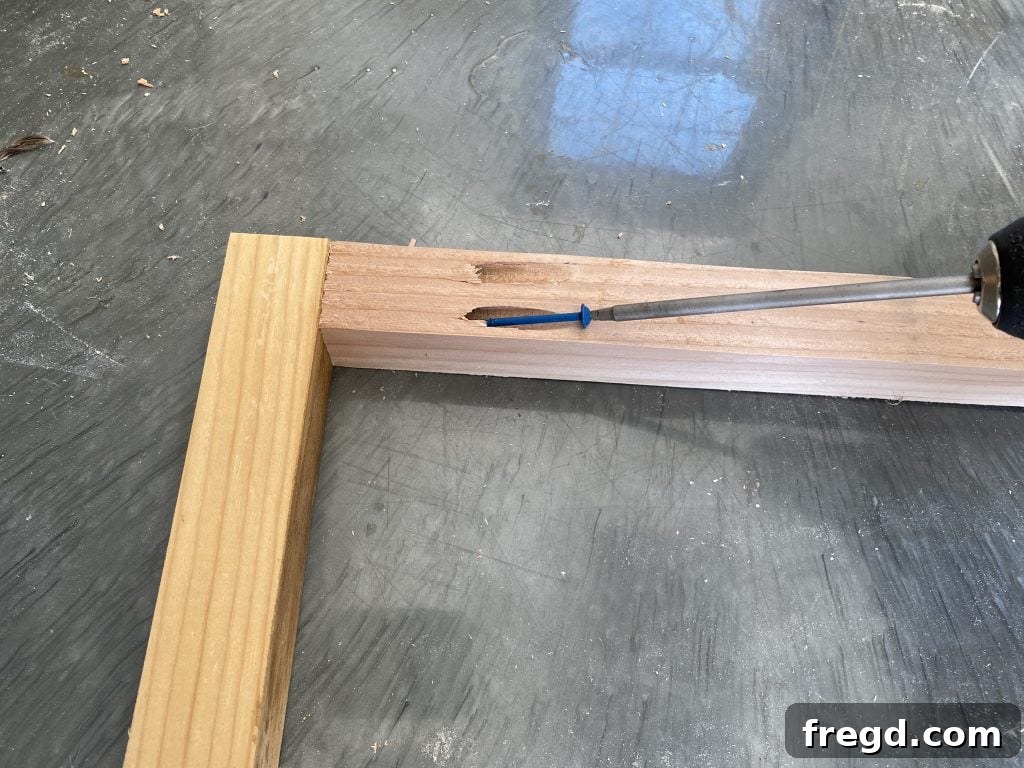
Apply a thin, continuous bead of high-quality wood glue to the joining surfaces, then carefully align the vertical side frame pieces with the horizontal top frame piece. Ensure they form a perfect ‘L’ shape and are flush on all edges. Secure them together using 2 1/2-inch pocket hole screws, driving them firmly but cautiously to create a tight and perfectly square joint. This assembly completes one full side frame. You will need to build two identical frames for your nightstand, one for each side. Take time to verify that both frames are perfectly square before the glue fully cures, as this directly impacts the overall stability and appearance of your finished piece.
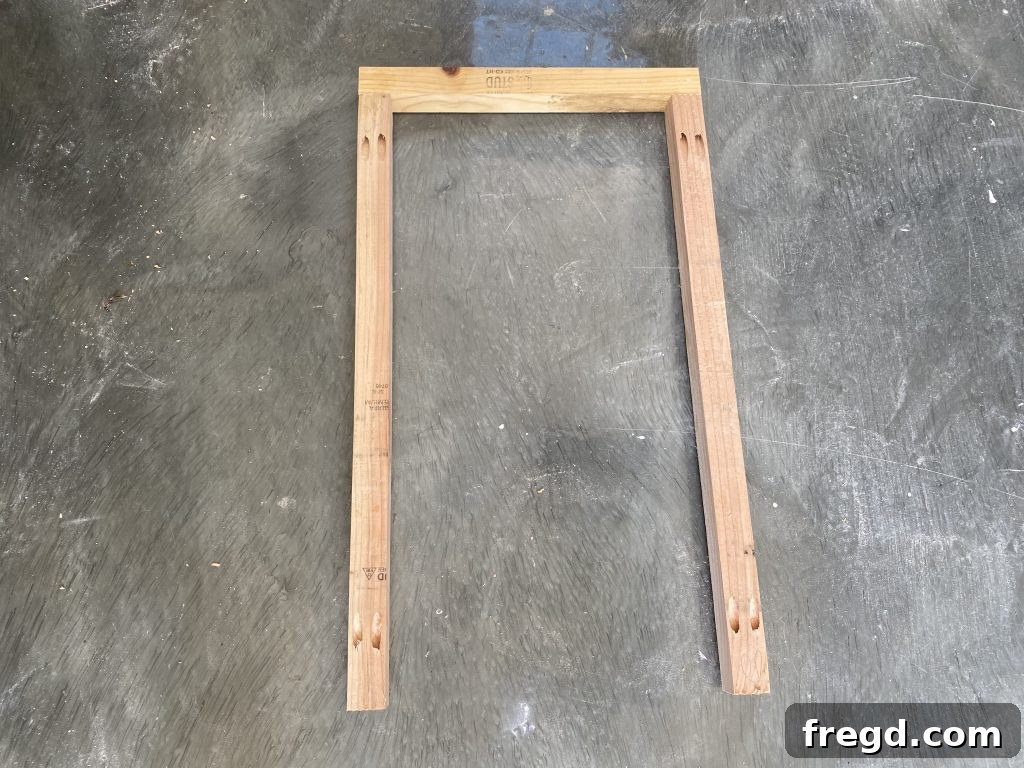
Step 2: Bringing the Frames Together with Bottom Rails
With both side frames meticulously constructed, it’s now time to connect them and form the full, robust structure of the nightstand. Begin by cutting the bottom rails to size as per your detailed cut list. These crucial rails will bridge the two side frames at the base, providing essential stability, rigidity, and support for the entire piece. Drill 3/4-inch pocket holes at both ends of each bottom rail. These smaller pocket holes are adequate for this connection, as the bottom rails are under compression and work in conjunction with the glue to create a very strong bond.
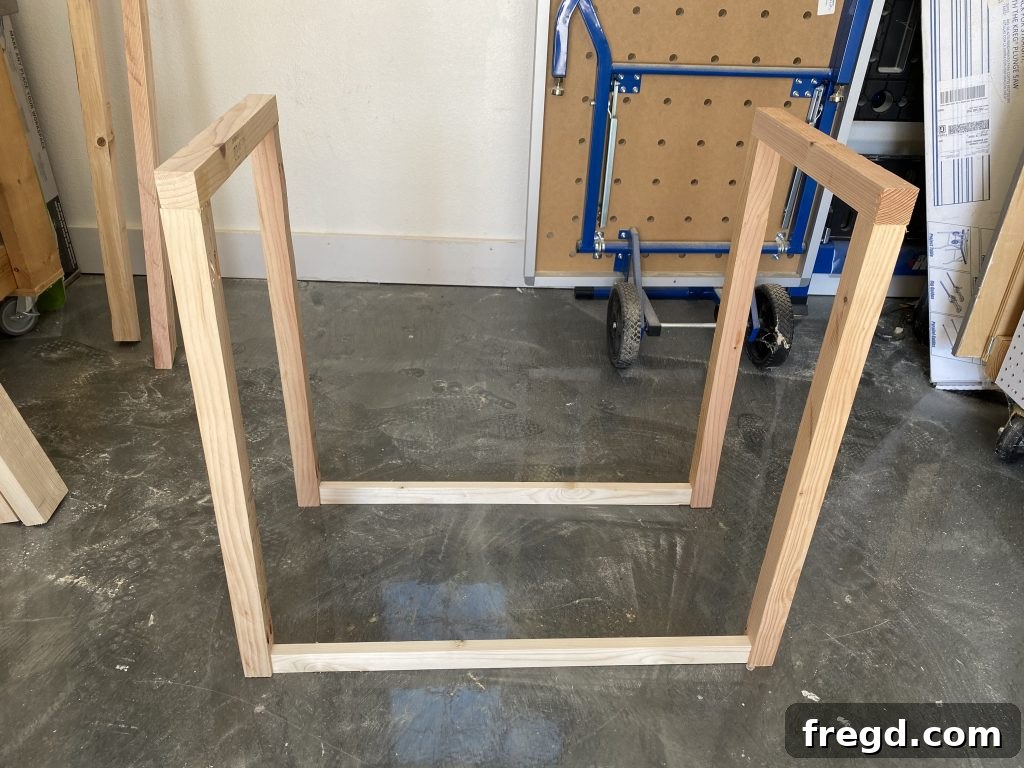
Position the bottom rails carefully, centering them precisely on the inside faces of the two assembled side frames. Ensure they are level and spaced correctly. Apply a generous, even layer of wood glue to the ends of the rails where they meet the frame. Secure them firmly with 1 1/4-inch pocket hole screws. This process creates a solid, rectangular base for your nightstand, eliminating any wobble and ensuring long-term durability. Now is an excellent and opportune time to consider applying paint or stain to the frame if you envision it having a different finish from your shelves and drawers. Applying finish at this stage can often be significantly easier and yield a cleaner result than after the shelves are permanently attached, as it allows for better access to all surfaces.
Integrating the Shelves into the Frame
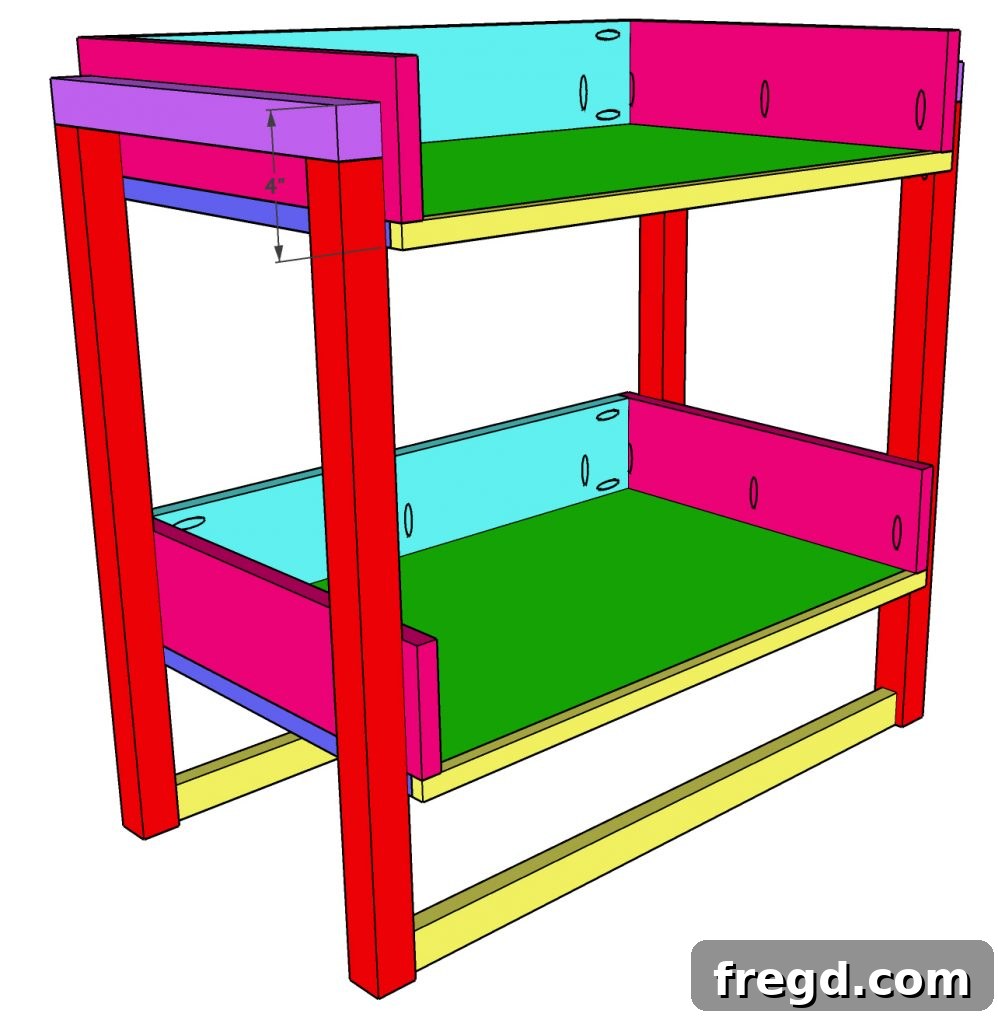
Now that the robust frame is fully assembled and the individual shelf units are meticulously built, it’s time for the crucial step of marrying these components. The method of attachment is specifically designed to create an exceptionally strong bond while preserving the refined aesthetic appeal, particularly the distinctive and elegant overhang of the floating shelves. This careful integration brings the vision of your modern nightstand to life, providing both structure and design flair.
Step 1: Attaching the Bottom Shelf
Carefully position one of your completed bottom shelf units onto the lower section of the assembled nightstand frame. This step requires a keen eye for detail. The shelf should be precisely centered such that it overhangs the frame by exactly 3/4 inch on both the front and the back. This deliberate overhang is a critical design choice that significantly enhances the floating appearance of the shelves and provides a subtle yet impactful visual break between the solid frame and the lighter shelf unit. Once properly aligned and confirmed with a measuring tape, securely fasten the bottom shelf to the frame using 1 1/2-inch wood screws. It is essential to drive these screws from the inside of the shelf unit, through the shelf material, and into the frame. This technique ensures that all fasteners are completely hidden from the outside, thereby maintaining the impeccably clean lines and minimalist aesthetic of the modern design.
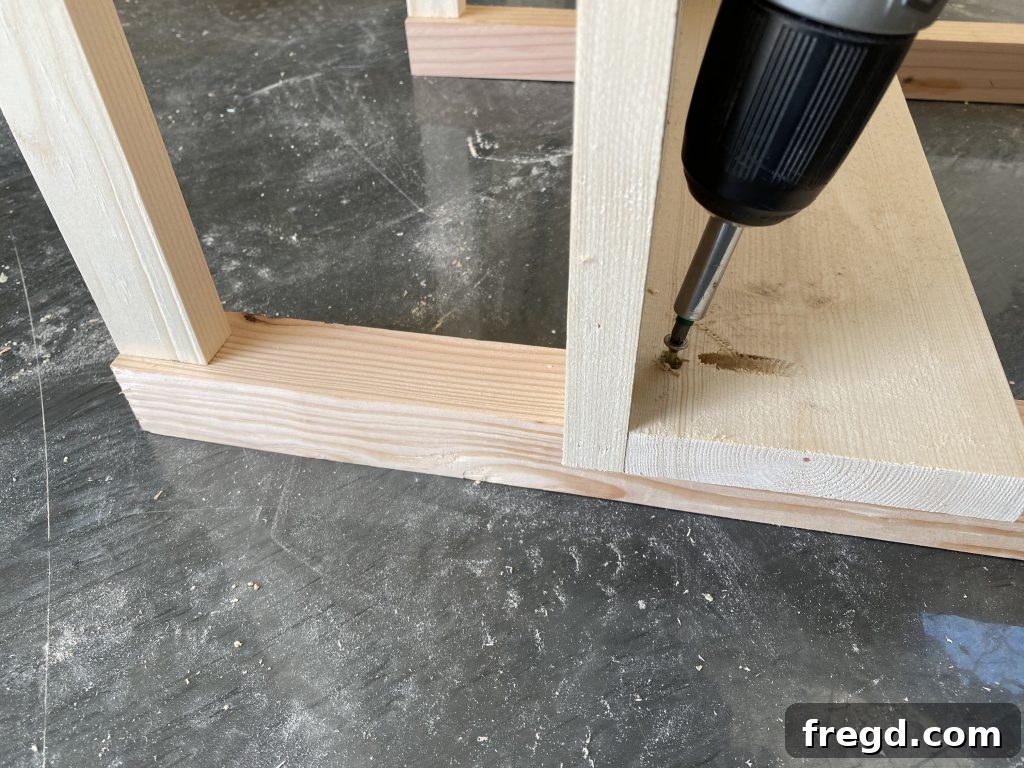
Step 2: Attaching the Top Shelf
The process for attaching the top shelf is identical in precision and technique to that of the bottom shelf. Take your second meticulously completed top shelf unit and carefully position it onto the upper part of the nightstand frame. Again, it is paramount to ensure that the 3/4-inch overhang on both the front and back is perfectly consistent with the bottom shelf. This meticulous attention to detail across both shelves creates a harmonious and beautifully balanced look for your entire nightstand. Secure the top shelf to the frame from the inside using 1 1/2-inch wood screws, mirroring the method used for the bottom shelf. Before fully tightening the screws, double-check your alignment and overhang one last time to ensure perfect symmetry and achieve that professional, custom-built finish that truly stands out. Consistency in these details makes all the difference in the final aesthetic.
Crafting Functional Drawers for Storage
Drawers are an invaluable addition to your nightstand, providing discreet, accessible storage for all your personal items, from books and reading glasses to electronic devices and other bedside essentials. Building sturdy, smoothly operating drawers is a critical step, ensuring your nightstand is as practical and user-friendly as it is beautiful. This section details the precise construction of the drawer boxes and the secure attachment of their bottoms, laying the groundwork for flawless functionality.
Step 1: Building the Drawer Frame
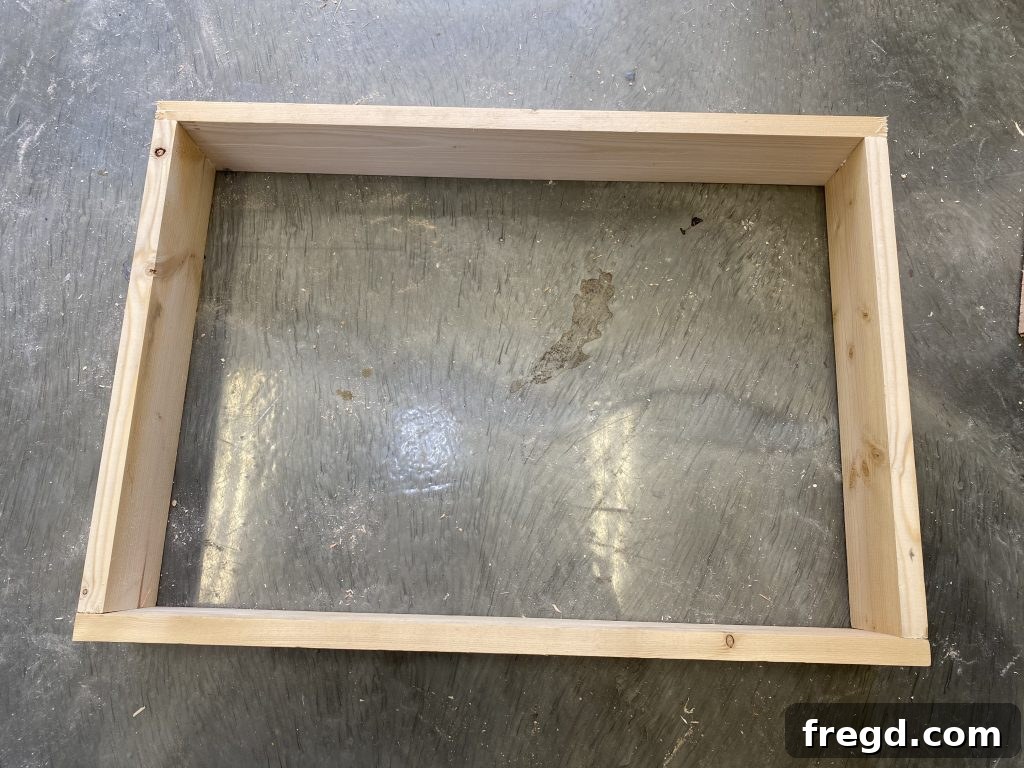
Begin by meticulously cutting all the individual drawer frame pieces – specifically, the two short sides and two long sides – to the precise dimensions specified in your cut list. Accurate cuts at this stage are absolutely paramount for drawers that will slide smoothly, fit snugly within their openings, and operate without binding. Apply a thin, even bead of high-quality wood glue to the ends of the short side pieces. Carefully join these short side pieces to the long pieces, forming a perfect rectangular box. Secure these joints immediately using 1 1/4-inch brad nails. The brad nails will effectively hold the pieces firmly in place while the wood glue sets and cures, creating an exceptionally strong and durable drawer box that will withstand years of use. It is crucial to ensure all corners are perfectly square during assembly; use a try square to verify this before the glue begins to set. Any deviation from squareness at this stage can lead to significant issues with drawer operation later on. You will need to build two identical drawer frames for your nightstand, one for each side.
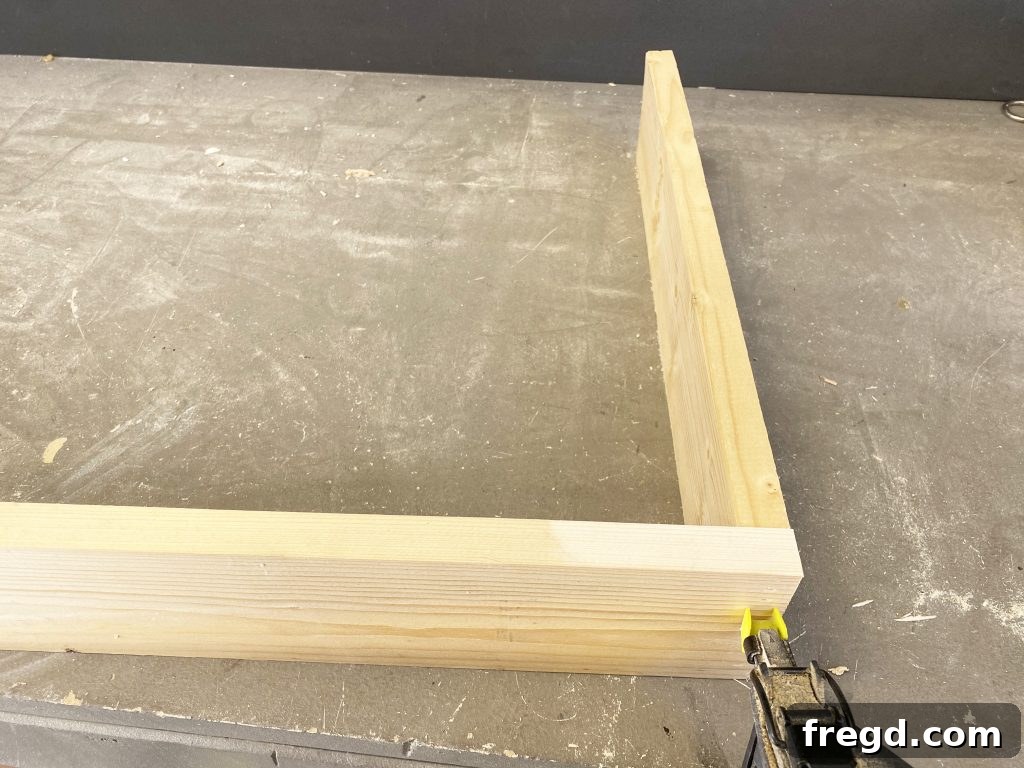
Once assembled, your drawer frame should be a rigid, perfectly square box, exhibiting no wobble or flex, and ready for its bottom panel. Take a moment to re-check for squareness using your try square to ensure your drawers will operate flawlessly and without resistance within their designated openings. This attention to detail now will save you time and frustration during the drawer installation phase. Allow ample time for the wood glue to fully cure, preferably overnight, before handling the drawer boxes extensively or moving to the next step, as this ensures maximum joint strength.
Step 2: Attaching the Drawer Bottom
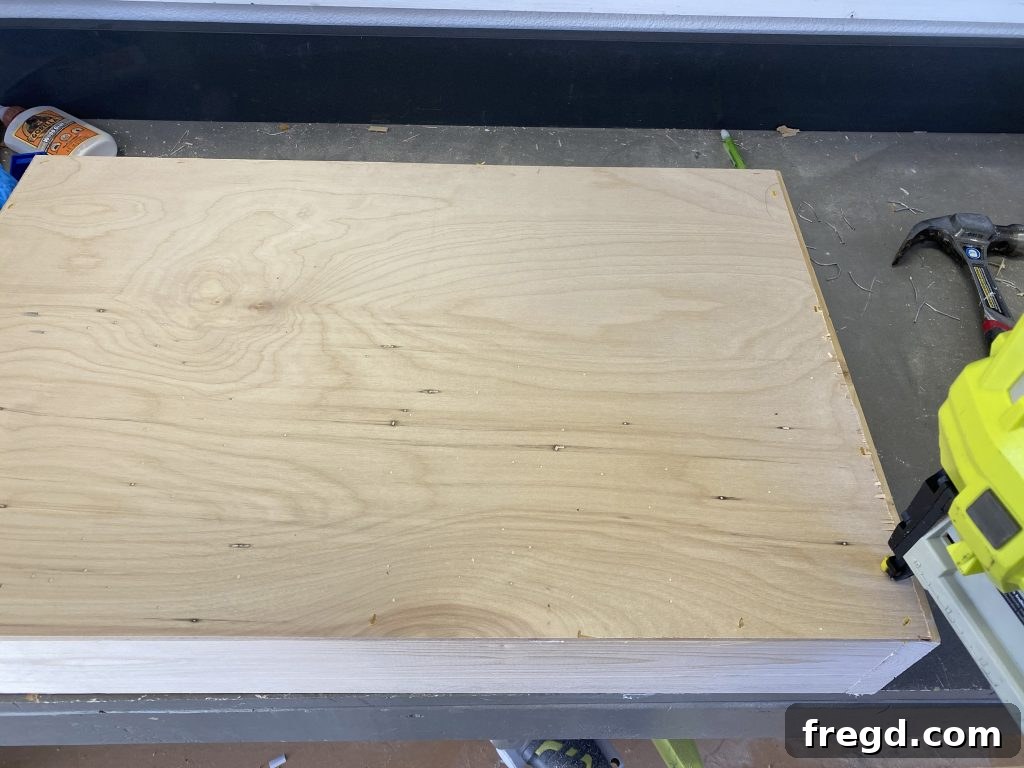
With the drawer frame expertly built, it’s now time to add the crucial bottom panel. Begin by accurately cutting the 1/4-inch hardwood plywood designated for the drawer bottom to the precise dimensions specified in your cut list. This thinner plywood provides a lightweight yet remarkably durable base for the drawer, capable of holding various items without sagging. Apply wood glue generously and evenly around all the bottom edges of the assembled drawer frame. This ensures a strong, continuous bond between the frame and the bottom panel. Position the plywood bottom squarely onto the frame, taking care to ensure it is perfectly flush with all exterior edges. Secure the drawer bottom firmly to the frame using 3/4-inch staples. The staples provide a quick and exceptionally strong mechanical fastener, working synergistically with the wood glue to create a very robust and stable drawer box. If you do not have access to a stapler, small brad nails or even short wood screws can also be effectively used for this application, although staples are generally faster and provide a very clean finish.
Installing the Drawers & Finishing Touches
With the main structural components of your modern nightstand now expertly constructed, the final steps involve integrating the drawers seamlessly and applying the aesthetic elements that truly bring your furniture project to life. This stage requires careful attention to detail for both optimal functionality and impeccable appearance. From smooth drawer operation to a flawless finish and elegant hardware, these final touches will define the character and utility of your DIY masterpiece.
Step 1: Installing the Drawers Properly
This is a crucial step that often requires a bit of finesse and patience. It is generally recommended practice to install the drawer slides and the drawer boxes into the shelf units *before* permanently attaching the very top shelf piece of the nightstand. This strategic order provides significantly better access for mounting the slides accurately and making any necessary adjustments. Always refer to your chosen drawer slides’ specific instructions for the most precise and recommended installation method. Typically, this process involves mounting one part of the slide mechanism to the inside wall of the nightstand’s shelf opening and the corresponding part to the side of your completed drawer box. It is absolutely essential to ensure both slides are perfectly level, parallel to each other, and flush with the front opening to guarantee smooth, effortless drawer operation. If you find yourself needing a more detailed guide on installing drawer slides, numerous excellent resources and specific tutorials are widely available online, including potentially from Shanty2Chic or your slide manufacturer.
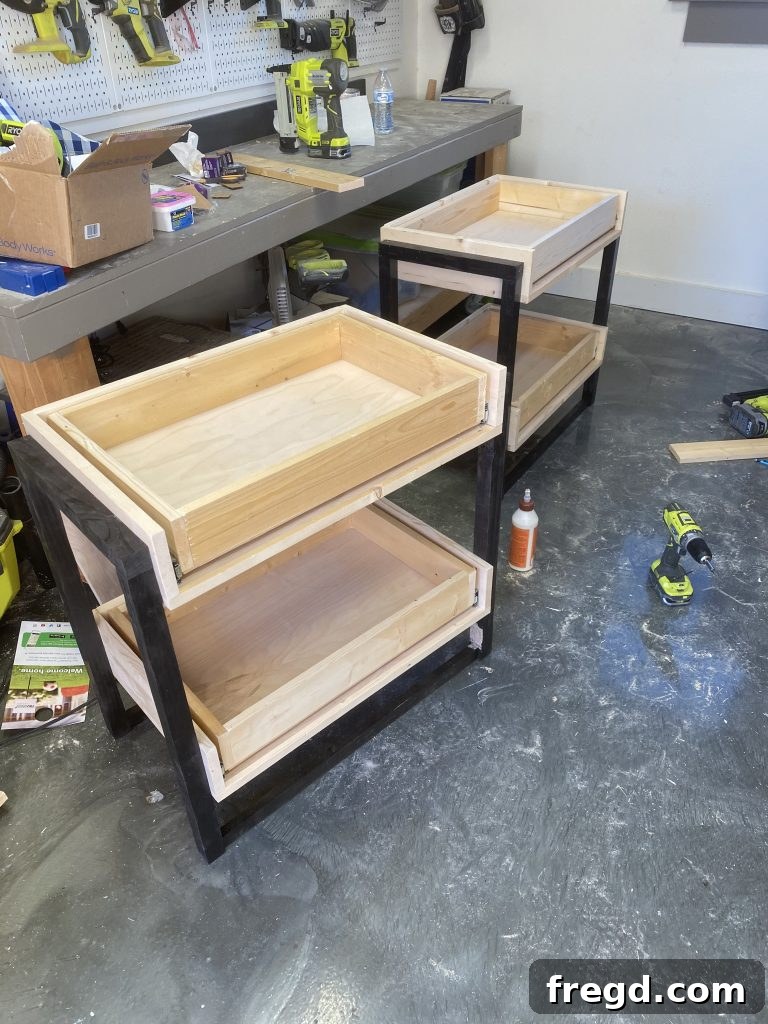
Properly installed drawer slides are the absolute key to the functionality, longevity, and overall user experience of your nightstand. Take your time during this step; make precise measurements, pre-drill pilot holes where necessary, and test the drawer action frequently throughout the installation process. The goal is to ensure each drawer glides effortlessly, silently, and without any binding or sticking, in and out of its new home. Patience and precision here will be richly rewarded with a perfectly operating drawer system.
Step 2: Final Shelf Attachments
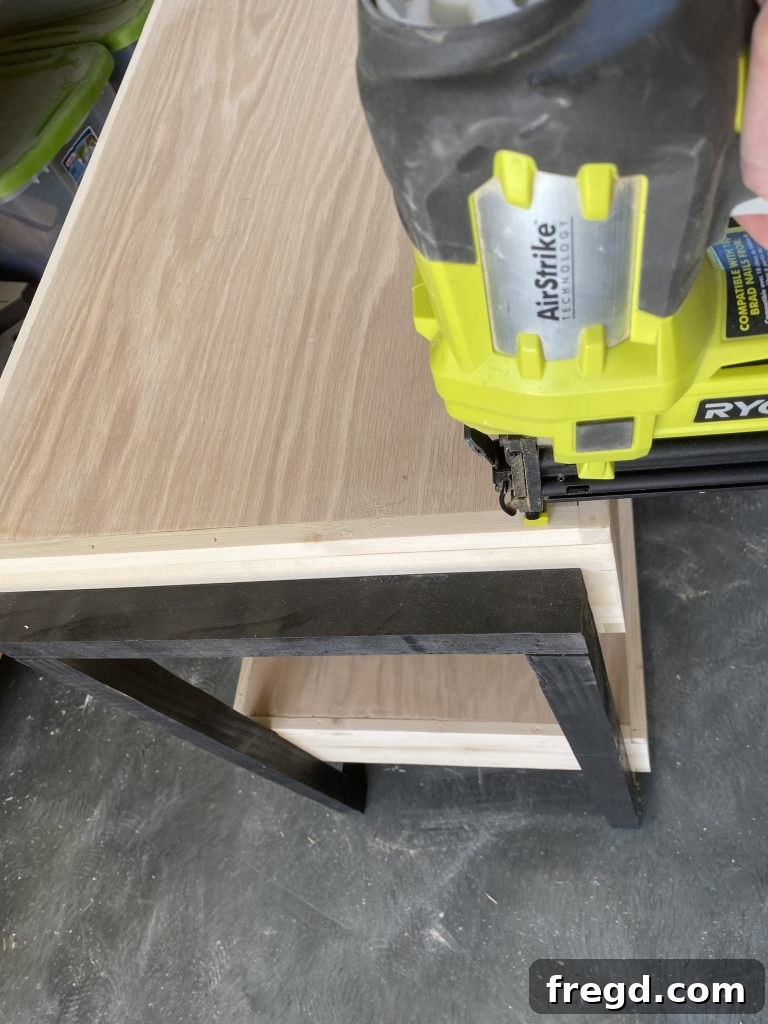
Once the drawers and their slides are meticulously installed and verified for smooth operation, you can now proceed with attaching the remaining top shelf pieces (these are the panels that cover the top of the drawer boxes within the frame). Apply a continuous, thin bead of wood glue to the contact surfaces where these shelves will meet the nightstand’s structure. Secure these pieces firmly to the top edges of the shelf units using 1 1/4-inch brad nails. These final shelves create the upper surface of your drawer cavity, further enhancing the robust and finished look of the nightstand. The brad nails will hold everything securely in place while the wood glue dries and cures, resulting in an exceptionally strong and virtually seamless joint that adds to the overall integrity and refined appearance of your custom-built furniture piece.
Step 3: Adding the Drawer Faces
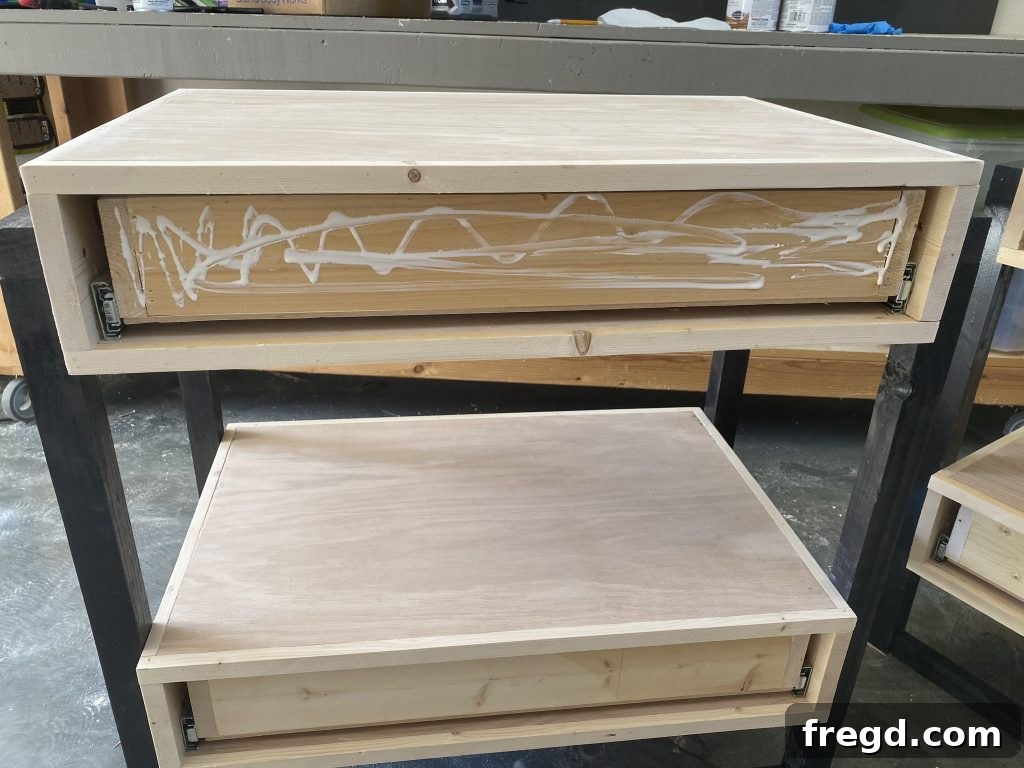
The drawer faces are the visible front panels that give your nightstand its polished, finished appearance and provide the surface for attaching your chosen hardware. Begin by meticulously cutting your drawer faces to the specified size in your plans, ensuring they are perfectly square and precisely sized to fit your drawer openings with even and consistent gaps around all edges. Achieving uniform gaps is crucial for a professional look. A highly effective tip for attachment is to first position the drawer face on the closed drawer box, carefully achieving your desired alignment and consistent spacing (you can use spacers or coins for this). Once it’s perfectly situated, hold it firmly in place with a couple of temporary 1 1/4-inch brad nails – these will leave minimal holes that are easy to fill later. Then, from *inside* the drawer box, drive 1 1/4-inch wood screws through the drawer box material and securely into the back of the drawer face. Always use wood glue in addition to screws for an extra strong, lasting bond. This ingenious method ensures that no unsightly screw heads are visible on the beautiful exterior of your custom-built nightstand, maintaining its clean and modern aesthetic.
Step 4: Applying Finish and Hardware
Congratulations, the structural build of your DIY modern nightstand is now complete! Now comes the incredibly exciting and transformative part: customizing your nightstand with a beautiful, durable finish and installing the perfect hardware. This is where your personal style truly shines through, making the piece uniquely yours. Begin by sanding all surfaces thoroughly, systematically working your way up through various grits of sandpaper (e.g., 120, 180, 220) until everything is impeccably smooth to the touch. Ensure all dust is completely removed before applying any finish, as dust can compromise adhesion and finish quality. For the frame, if you opted for a contrasting color, apply your chosen paint (e.g., a rich matte black for that sleek, modern contrast). For the shelves and drawer faces, a high-quality wood stain can beautifully highlight the natural wood grain, or paint can provide a cohesive, monochromatic look if that’s your preference. Apply according to manufacturer instructions, allowing proper drying and curing times.
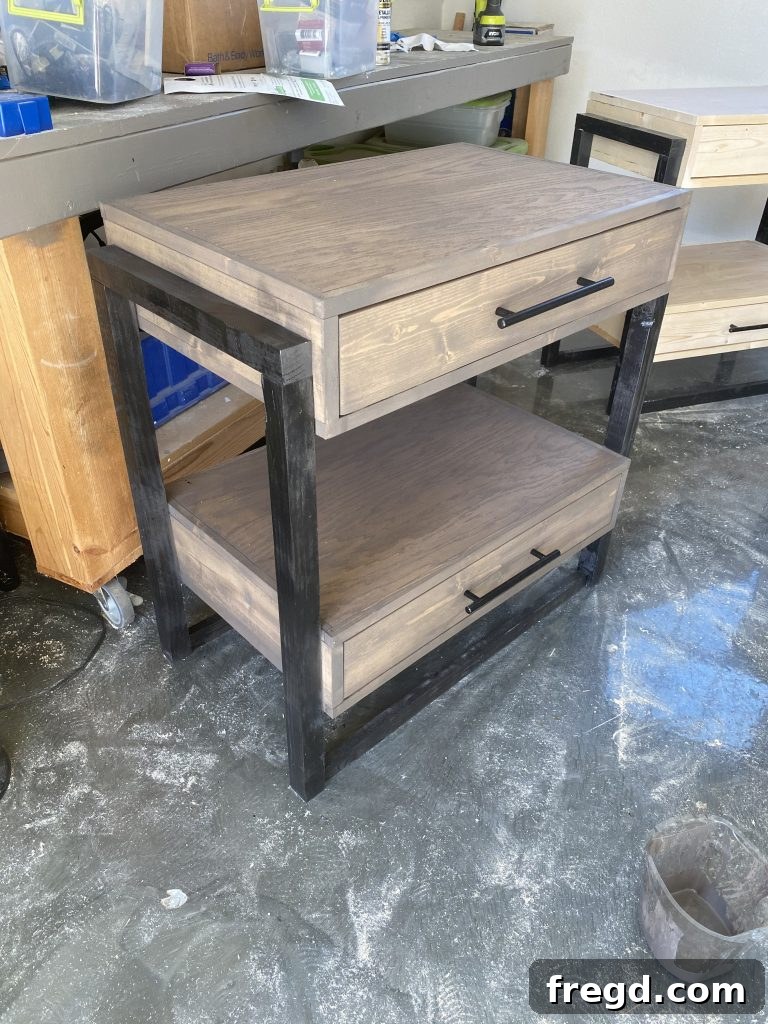
Once the finish is completely dry and fully cured, it’s time to install your chosen drawer pulls. Measure carefully to ensure the pulls are perfectly centered and level on each drawer face for a polished appearance. Drill pilot holes slightly smaller than your hardware screws to prevent splitting the wood. The choice of finish and hardware can dramatically alter the final look and feel of your nightstand. Whether you prefer a bold, dark frame with natural wood-stained shelves or a light, airy monochromatic design, these final touches will define your nightstand’s unique character. Here are some of the specific finishes and hardware used in the original Shanty2Chic project, which you can use for inspiration:
- Paint for Frame: Link to specific paint used (e.g., a classic matte black for high contrast).
- Stain for Wood: Link to specific stain used (e.g., a warm walnut or light oak for a natural, inviting feel).
- Drawer Pulls: Link to specific pulls used (e.g., minimalist bar pulls or elegant classic knobs).
That’s it! Your custom-built modern nightstand with floating shelves and functional drawers is now complete. Stand back and proudly admire your handiwork. You’ve created a beautiful, durable, and practical piece of furniture with your own hands!
Share Your Shanty2Chic Creation!
We absolutely love seeing your completed projects come to life! There’s nothing more rewarding for us than witnessing our plans materialize through your dedication, creativity, and craftsmanship. Once your stunning new DIY modern nightstand is finished and perfectly placed in your bedroom, we enthusiastically encourage you to share it with the world! Post photos on your favorite social media platforms like Instagram, Facebook, or Pinterest, and make sure to prominently use the hashtag #shanty2chic. By doing so, you’ll not only inspire countless other DIY enthusiasts within our vibrant community but also give us the wonderful opportunity to admire and proudly share your incredible work with our followers. Your unique take on our design could be the next feature! Happy building, and we genuinely can’t wait to see the amazing custom nightstands you create!
Free Printable Plans and Cut Lists
For your ultimate convenience and to ensure a smooth building experience, we’ve compiled a comprehensive set of free printable plans for this DIY Modern Nightstand with Floating Shelves and Drawers. These meticulously detailed plans include all the necessary cut lists, diagrams, and step-by-step illustrations to guide you through every phase of the construction process. Download them, print them out, and keep them handy in your workshop for easy and constant reference. Having physical copies will allow you to make notes, check off steps, and refer to measurements without needing a screen.
CLICK HERE TO DOWNLOAD THE FULL SET OF FREE PRINTABLE PLANS!