
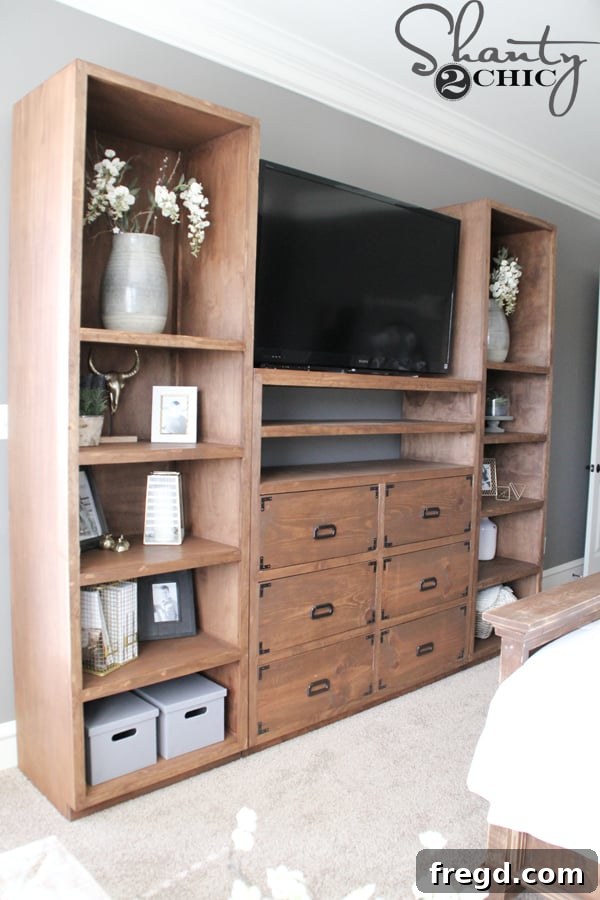
After a period of dedicated sourcing and careful planning, I am absolutely thrilled to finally share the comprehensive plans for our latest DIY project: a stunning media storage system featuring elegant bookshelves. Crafting this piece involved finding the perfect balance of aesthetics and functionality, which, as many DIY enthusiasts know, isn’t always a quick or inexpensive endeavor. I committed time over the past month to hand-pick quality materials and secure the best deals, ensuring every component contributed to a durable and beautiful finished product. The anticipation has been building, and now that it’s complete, I can’t wait for you to see it!
Behold the transformation! What began as a vision has materialized into a cornerstone of our living space. While I still have exciting plans to integrate a custom bridge and barn doors to complete the ensemble, I believe this media storage system stands proudly on its own for now, offering both style and ample storage. The foundation of this setup, the magnificent dresser positioned directly beneath the TV, is a project in itself. If you’re inspired to build that versatile piece, you can find the detailed plans and guide right HERE.
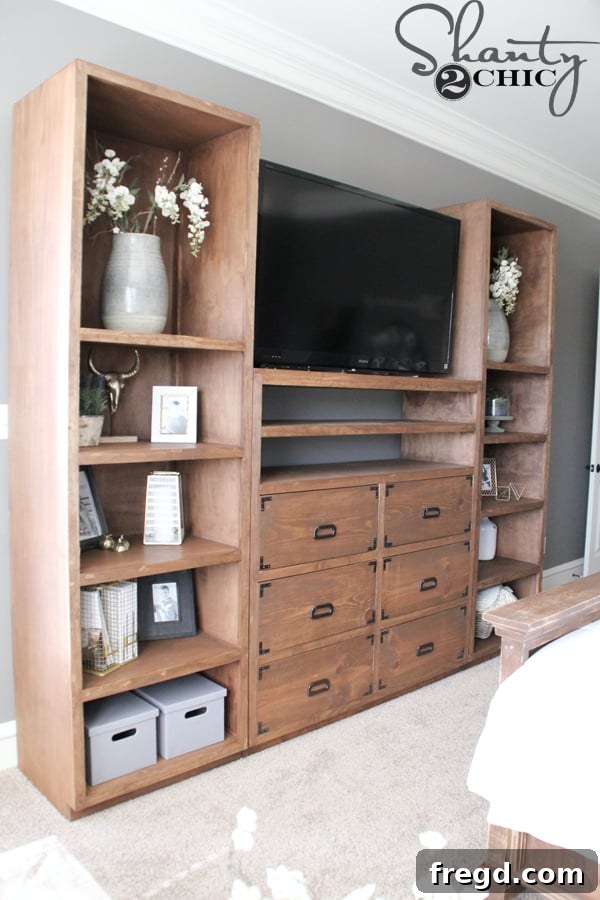
Unlock Your DIY Potential: Free Media Tower Plans & Tutorial
As always, my friends, we are delighted to provide you with FREE printable plans and a comprehensive, step-by-step tutorial for building these impressive media towers. We believe that everyone should have the opportunity to create beautiful, custom furniture for their homes, and our detailed guides are designed to make the process as smooth and enjoyable as possible, regardless of your experience level. These plans will walk you through every cut, every joint, and every assembly step, ensuring you achieve a professional-looking result. To download your free plans and start building your dream media center, simply click HERE or on the image below.
Getting Started: Essential Cuts for Your Media Tower
The journey to building sturdy and stylish DIY media storage towers begins with precise cuts and quality materials. For this project, I chose Purebond Plywood, a decision rooted in its exceptional quality, durability, and formaldehyde-free composition, making it a healthier choice for any home environment. If you’re interested in learning more about why Purebond is our preferred plywood brand and its benefits for woodworking projects, you can delve deeper into our experience HERE. To kick things off, I took my full sheets of Purebond Plywood to Home Depot and had them ripped into the primary panels according to the dimensions outlined in the provided plans. This service is a fantastic time-saver and ensures perfectly straight cuts, which are crucial for accurate assembly.
Precision Plywood Cutting: A Foundation for Success
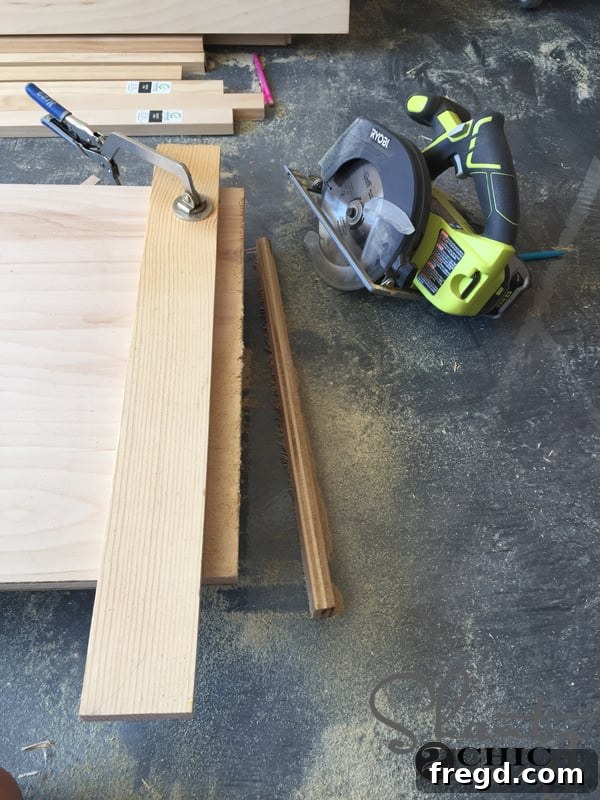
Once the main panels were expertly ripped and transported back to my workshop, the next critical step involved cross-cutting the side panels to their final lengths. While a table saw is often the go-to tool for this, I utilized my trusty circular saw for this task, demonstrating that you don’t always need specialized equipment to achieve precise results. The key to making straight cross-cuts with a circular saw lies in employing a guide. Simply clamp a straight scrap board firmly across your plywood panel, aligning it perfectly with your cut line. This creates a reliable fence for your circular saw, allowing it to glide smoothly and accurately across the material. This method is not only effective but also a great technique for DIYers who might not have access to a full suite of power tools.
Crafting the Toe Kick Notches: Adding Detail to Your Design
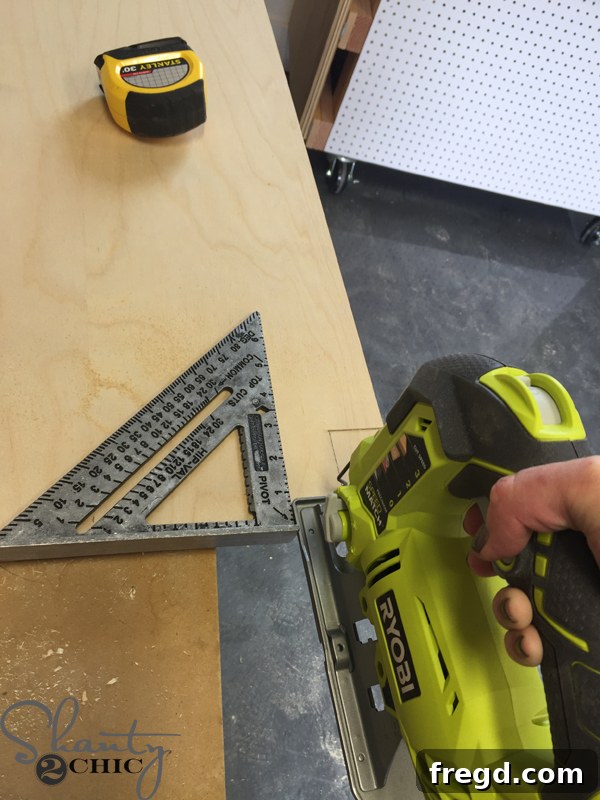
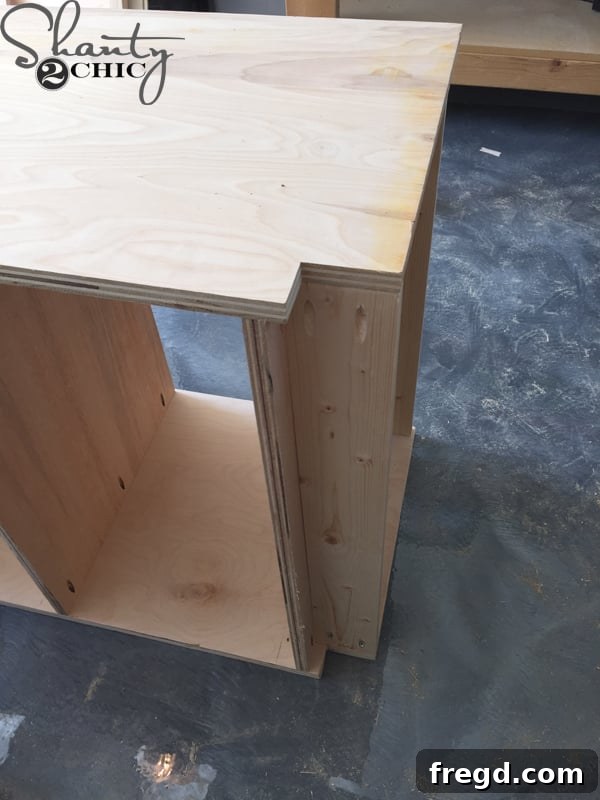
With the primary panel cuts complete, it was time to introduce one of the functional and aesthetic details: the toe kick notches. These cutouts provide space at the bottom of the cabinet, allowing your feet to comfortably approach the piece, preventing scuffs, and giving the furniture a more built-in, polished look. To execute these precise notches, I grabbed my essential speed square (a versatile tool you can find HERE) to mark the exact dimensions for the cutouts. Then, using my reliable Ryobi 18 Volt Jigsaw, I carefully cut out the notches from each panel. The jigsaw’s maneuverability makes it ideal for these types of interior cuts, ensuring clean lines and accurate results.
Smoothing Rough Edges: The Mark of Quality Craftsmanship
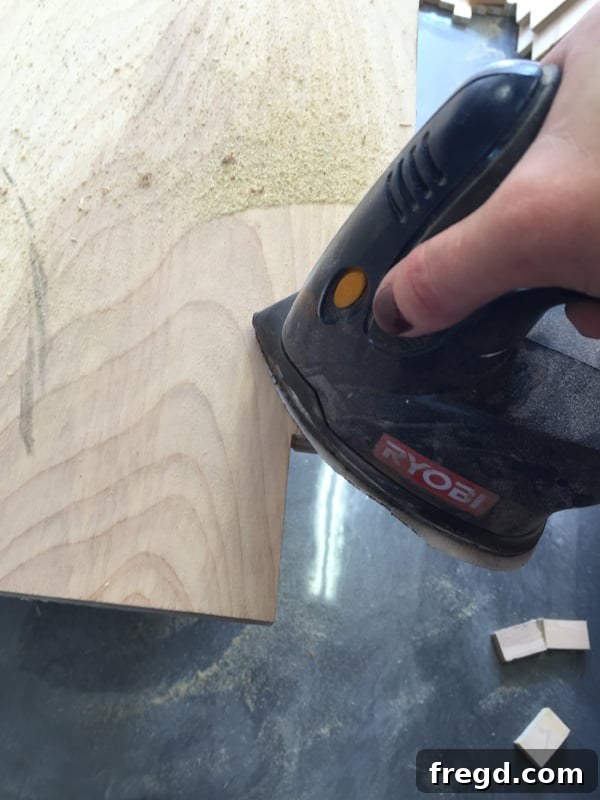
After any cutting process, especially with plywood, you’ll inevitably encounter rough or slightly splintered edges. Addressing these imperfections is crucial for both the aesthetics and durability of your finished project. Smooth edges not only look better but also prevent splinters during handling and provide a better surface for finishing. For this step, I utilized my Corner Cat sander, a fantastic tool for reaching tight corners and smoothing out irregular edges. If you have any rough spots, a quick pass with the sander will refine them beautifully. The goal here is to achieve a silky-smooth surface that’s ready for assembly and finishing. This meticulous attention to detail at every stage elevates the overall quality of your DIY furniture.
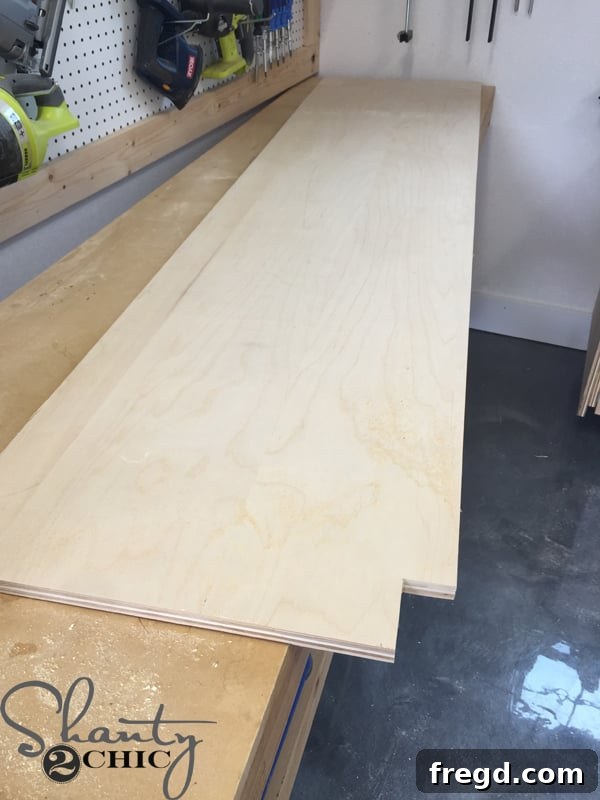
Above, you can clearly see a side panel with the toe kick corner perfectly notched out, ready for the next stages of assembly. This small detail significantly enhances the final appearance and functionality of the media tower.
Preparing the Shelves: Cutting for Optimal Storage
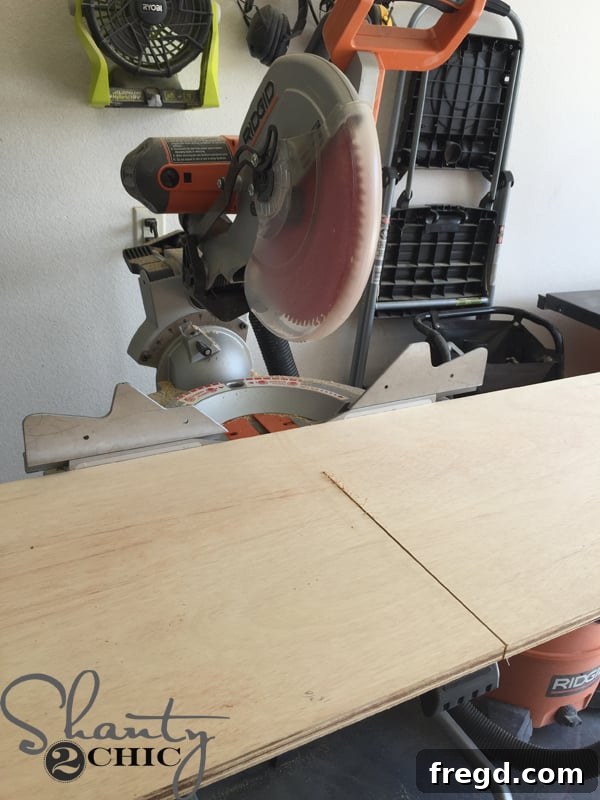
With the side panels prepared, the focus shifted to creating the shelves, the very heart of the bookshelf’s storage capacity. I cut all the individual shelf pieces to their precise lengths using my miter saw. A miter saw is excellent for repetitive, accurate cross-cuts, ensuring all your shelves are uniform. For those without a miter saw, the circular saw with a clamped scrap board guide, as used for the main panels, works equally well. Alternatively, you can make the longest cut your miter saw allows, then flip the board and complete the cut, a common technique for wider pieces. Consistency in these cuts is paramount, as it directly impacts the stability and aesthetics of your finished shelves.
Mastering Joinery: Drilling Pocket Holes for Strength
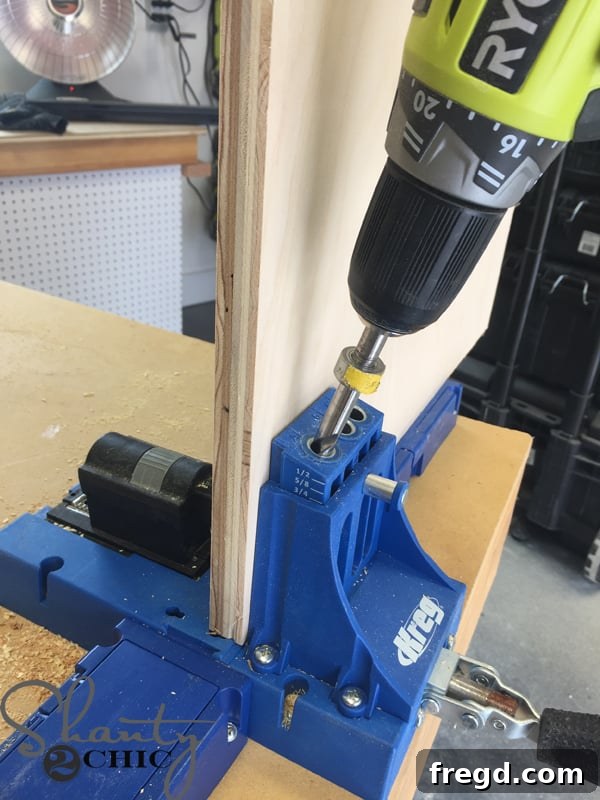
Once all the shelf pieces were cut, it was time to prepare them for assembly using pocket hole joinery, a robust and hidden fastening method favored by many DIY woodworkers. I drilled 3/4-inch pocket holes into each shelf board using my Kreg Jig K5 (model HERE). The Kreg Jig system simplifies creating strong, concealed joints, making your projects look seamless and professional. It’s a tool that pays for itself in time and quality results. For precise pocket hole placement, always refer to the detailed plans. While perfect exactness isn’t always necessary, we typically eyeball the general locations to ensure good distribution and strong connections, usually aiming for three evenly spaced holes per shelf end.
Assembling the Cabinet Frame: Bringing Your Vision to Life
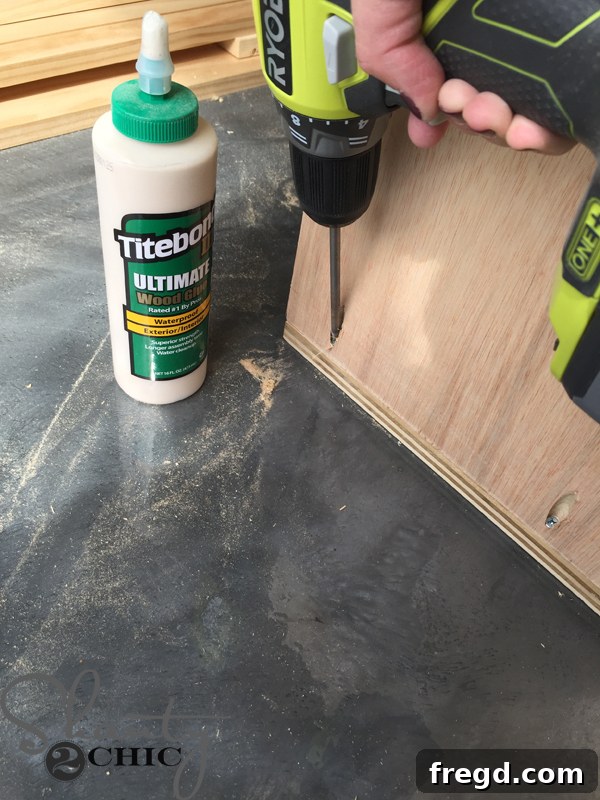
With the shelves prepped, the exciting phase of assembly began. I started by attaching the top shelf and systematically worked my way down the first side panel. This methodical approach ensures proper alignment and simplifies the process. Each shelf piece was secured using 1 1/4-inch pocket hole screws, complemented by a generous application of Titebond wood glue. The combination of screws and glue creates an incredibly strong and durable bond, crucial for furniture that will bear significant weight. A critical detail to remember: always flush the front edge of the shelf piece with the front of the side panel. This creates a deliberate 1/4-inch recess on the back side of the panel. This recess is intentionally designed to allow the back panel to fit snugly inside the side panels, making it invisible from a side view and giving the piece a clean, finished appearance. Additionally, confirm that the toe kick notch is positioned at the front of the cabinet during this stage.
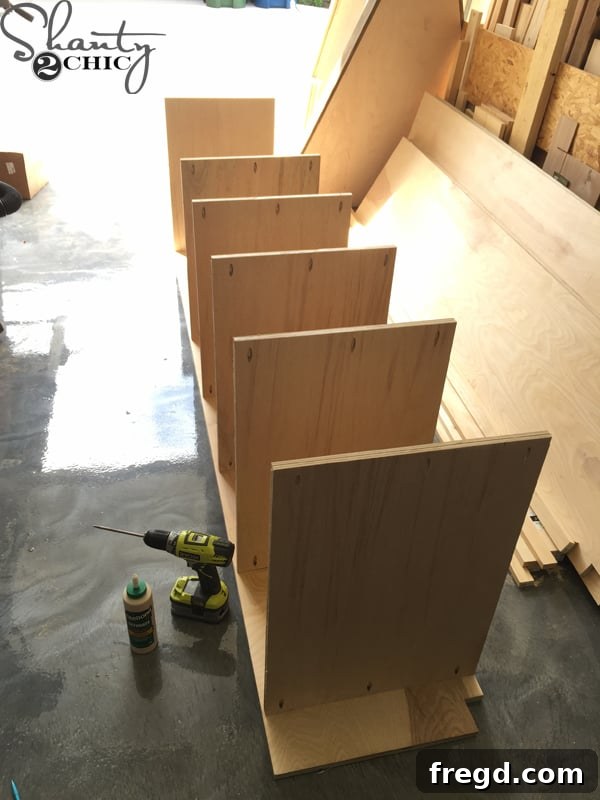
Here, you can see the initial structure taking shape: the cabinet with all the shelf pieces securely attached to one side panel, illustrating the precise alignment and sturdy construction.
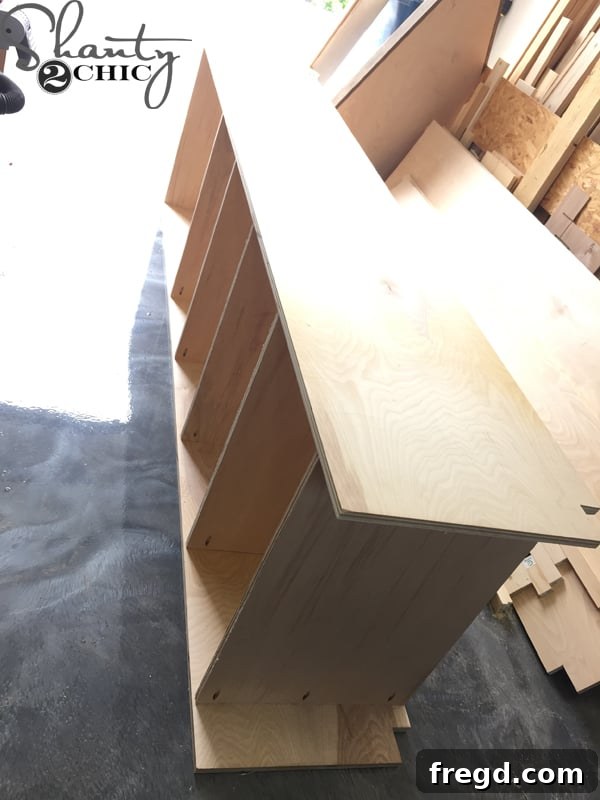
Attaching the second side panel followed the exact same process, ensuring symmetry and structural integrity. Carefully align each shelf to the corresponding pocket holes and secure them with screws and glue, working from top to bottom. This ensures a balanced and robust cabinet frame.
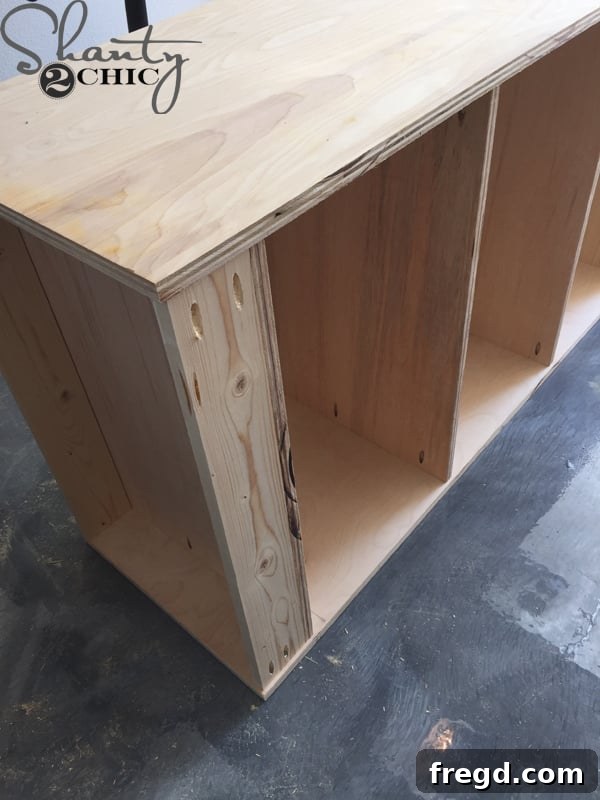
Next, I attached the bottom supports, strategically placed on both the front and back of the cabinet. These supports are essential for providing additional stability and rigidity to the base of the structure. The image above shows a view of the cabinet’s back, where these crucial supports are clearly visible, contributing to the overall strength of the media tower.
This image provides a clearer view of the front of the cabinet, highlighting the bottom supports that tie the entire structure together, ready for the toe kick cover.
Finishing the Base: Crafting and Attaching the Toe Kick Cover
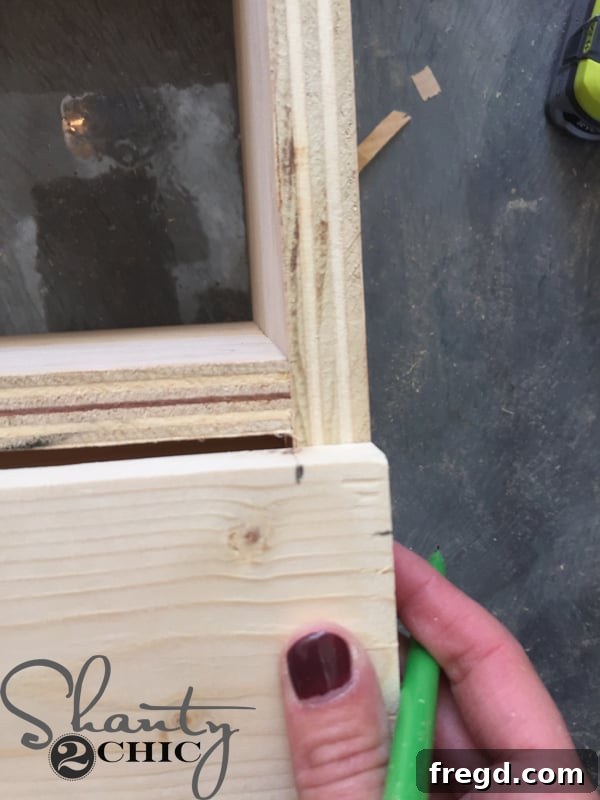
Now, to complete the base of the media tower, it’s time to create and attach the toe kick cover. This piece not only conceals the lower structural elements but also contributes significantly to the finished look, giving the cabinet a cohesive, built-in appearance. I meticulously marked out the areas for notching out the top corners, ensuring they would align perfectly with the cabinet’s existing toe kick cutouts. Precision in marking is key here to achieve a seamless fit.
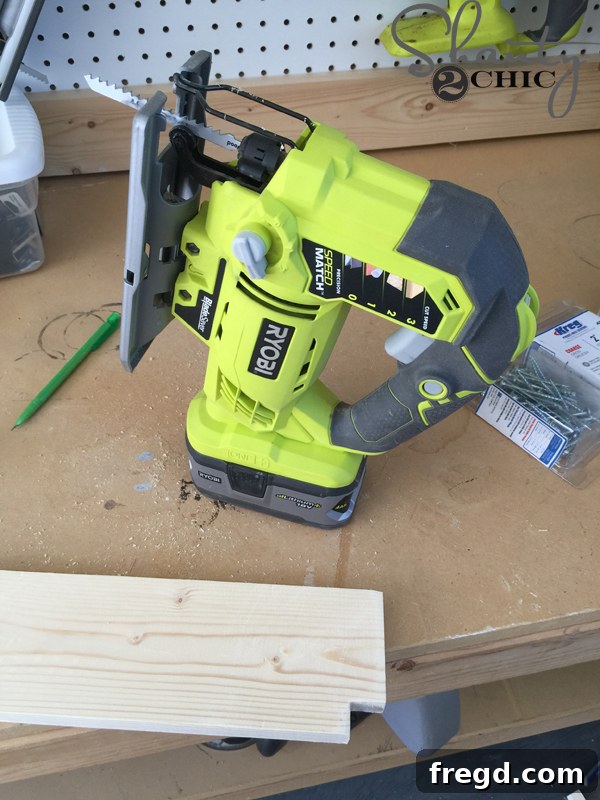
After marking, I securely clamped the toe kick cover piece to my workbench. This prevents any movement during cutting, ensuring accuracy and safety. Then, using my jigsaw, I carefully cut out the marked notches. The jigsaw’s fine blade and maneuverability are ideal for these internal corner cuts, allowing for clean and precise results that will make the toe kick cover fit snugly into its designated space.
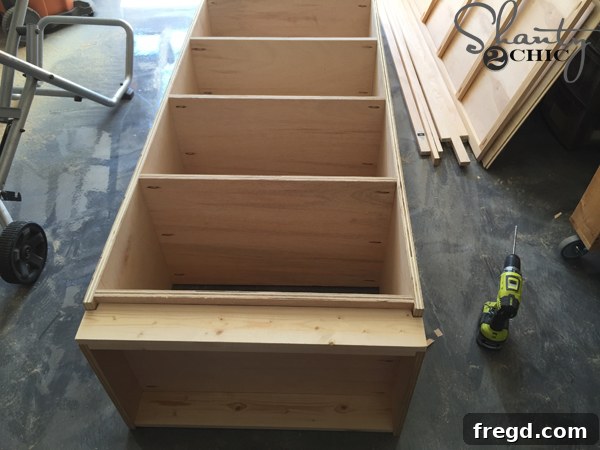
Once the toe kick cover was perfectly cut, I test-fitted it to ensure a flush and accurate placement. With a satisfactory fit, I applied wood glue to the contact surfaces and secured it to the cabinet using 1 1/4-inch brad nails. The combination of glue and brad nails provides a strong, lasting bond, while the brad nails are small enough to be easily concealed later, maintaining the clean aesthetic of the piece.
Elevating the Design: Constructing and Attaching the Face Frame
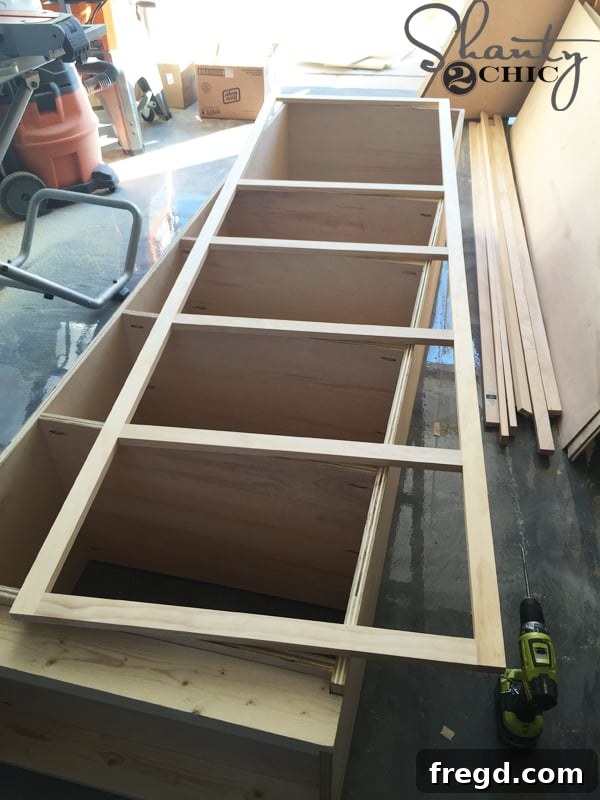
The face frame is a critical component that elevates the aesthetic appeal of any cabinet, providing a finished, professional look while also adding structural rigidity. I meticulously built the face frame according to the specifications in the plans, paying close attention to every detail. It’s imperative to measure precisely where your shelves sit within the cabinet, as this dictates the exact dimensions and placement of the face frame. The goal is for the face frame to be perfectly flush with the front edges of the shelves, creating a seamless and high-end appearance. This attention to detail ensures that the face frame not only looks great but also integrates perfectly with the internal structure.
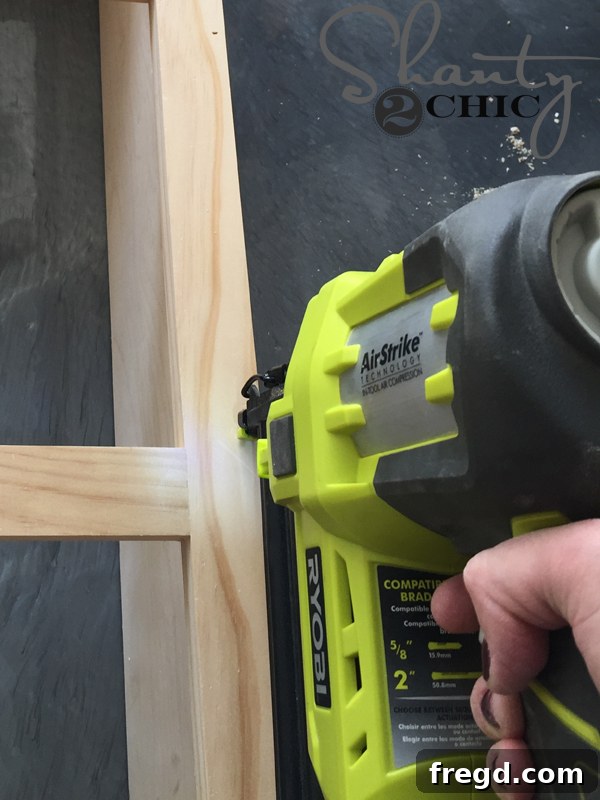
To securely attach the face frame, I used my 18 gauge brad nailer with 1 1/4-inch brad nails, along with a strong application of wood glue. The brad nailer makes quick work of this task, providing excellent holding power with minimal visual impact, as the small nail holes are easy to fill later. If you don’t have a brad nailer, don’t worry! You can achieve equally strong results using a hammer and finish nails. Simply pre-drill pilot holes to prevent splitting, apply glue, and carefully nail the face frame into place. Always ensure the face frame is flush with the cabinet edges before securing it, using clamps if necessary to hold it in position.
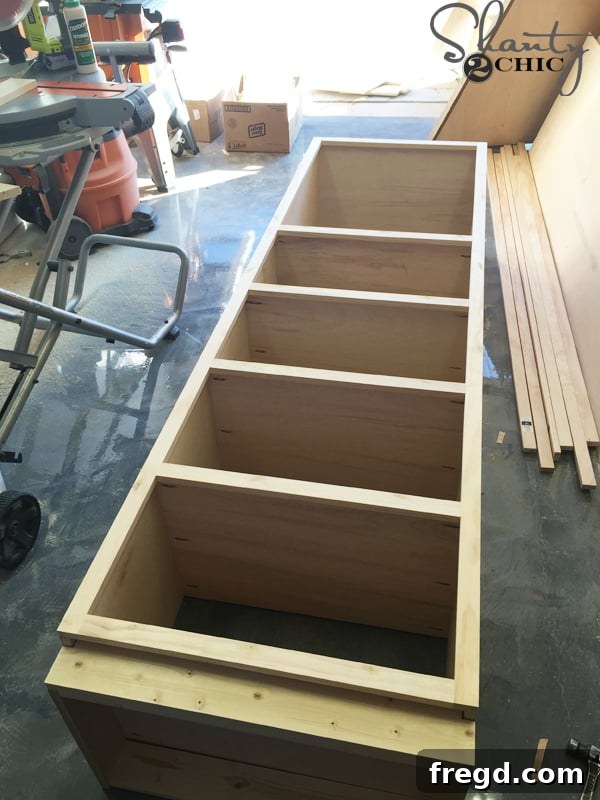
With the face frame expertly attached, the bookshelf truly begins to take on its intended character. The clean lines and robust structure are now beautifully defined, giving a strong indication of the finished elegance. Looking good indeed!
Securing the Back Panel: The Final Structural Element
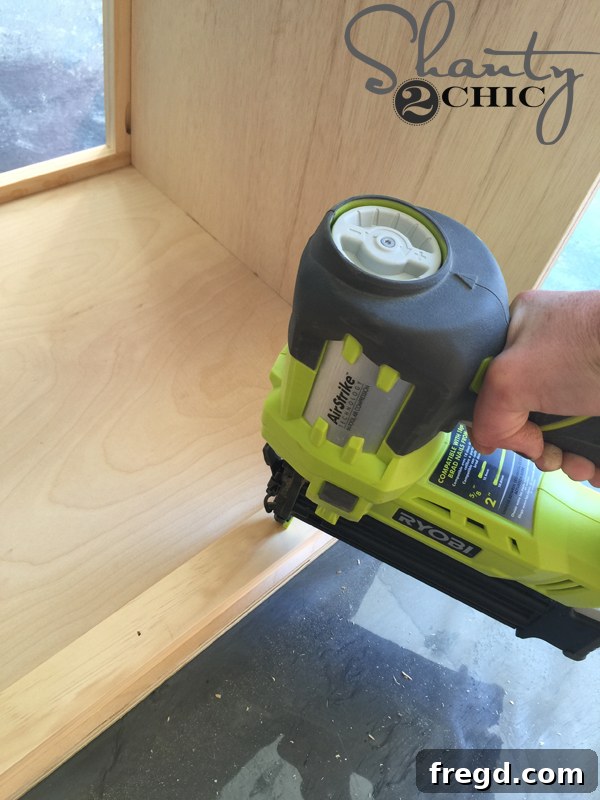
To prepare for the back panel, I first attached cleats to the inside perimeter of the cabinet. These cleats serve a crucial purpose: they provide a solid surface for the back panel to be securely fastened to, ensuring it stays firmly in place and adds significant structural stability to the entire unit. I secured these cleats using my brad nailer and wood glue, creating a strong and lasting bond. Proper placement of these cleats, as indicated in the plans, is vital for a snug and flush fit of the back panel.
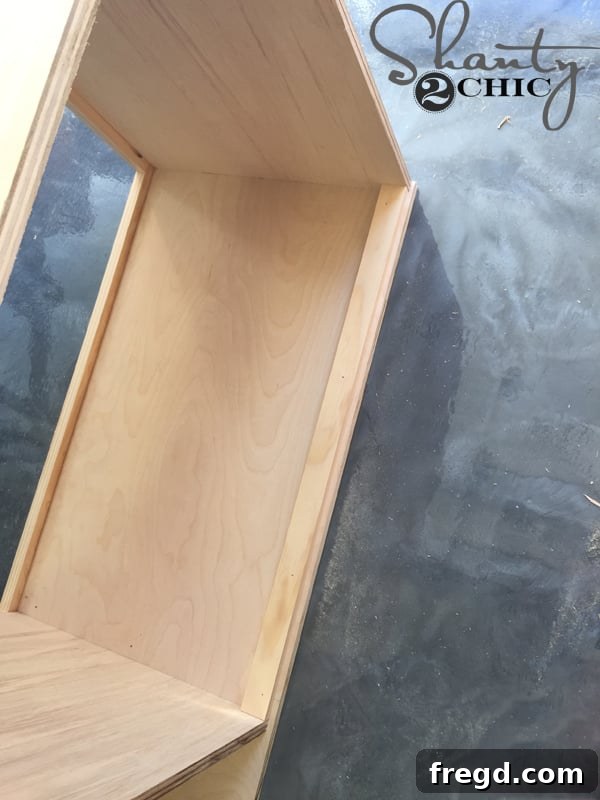
These strategically placed cleats are now ready, offering the ideal anchoring points to securely attach the back panel, reinforcing the cabinet’s structure and completing its enclosed design.
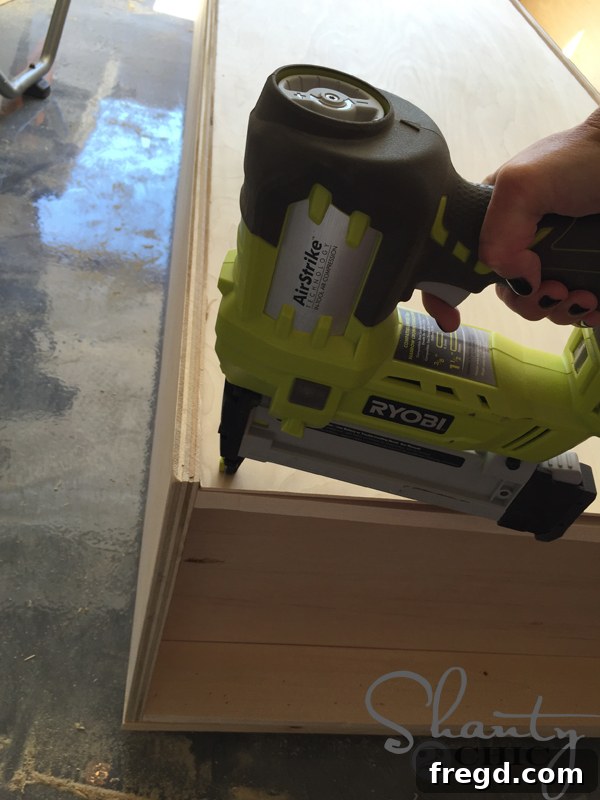
And speaking of the back panel, it was time to attach it once the cleats were firmly in place. For this, I used wood glue along with my 18 gauge stapler and 3/4-inch staples. Staples are particularly effective when attaching thinner materials like 1/4-inch back panels because they have a wider crown than brad nails, providing a larger surface area for holding the boards together more securely while the glue dries. If you don’t have a stapler, a brad nailer or even finish nails with a hammer will work perfectly well. Just be sure to apply ample wood glue for maximum hold, and consider clamping the panel in place while the glue sets to ensure a tight bond. This step completes the structural build of your media tower, making it sturdy and ready for finishing.
The Art of Finishing: Preparing for Stain and Enhancing Natural Beauty
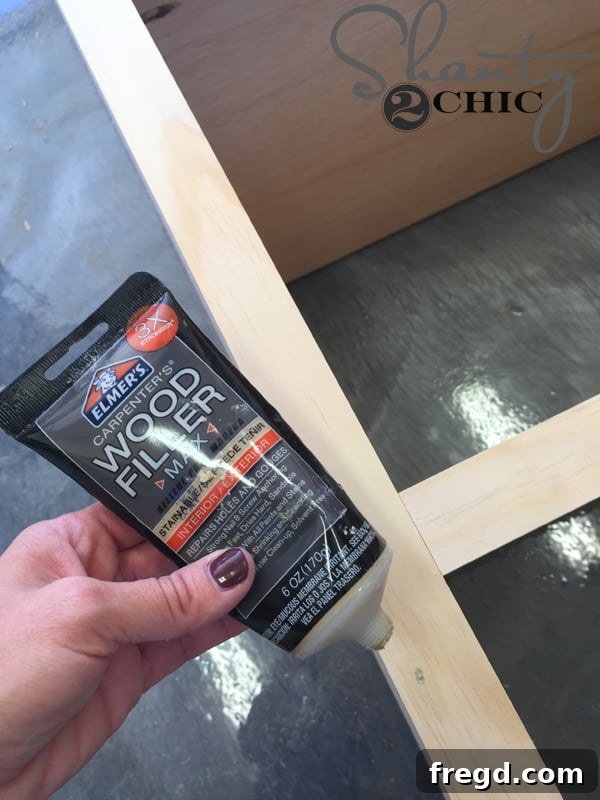
The finishing stage is where your meticulous craftsmanship truly shines. It begins with addressing all nail holes, minor imperfections, and seams. I meticulously filled every nail hole with wood filler, ensuring a smooth and seamless surface. After allowing the wood filler to dry completely—a crucial step for a flawless finish—I gently sanded these areas with 220-grit sandpaper. This fine-grit sandpaper ensures that the filled spots blend seamlessly with the surrounding wood, creating an incredibly smooth, uniform texture that’s perfect for receiving stain. Proper preparation at this stage is the secret to a professional-looking finished product.
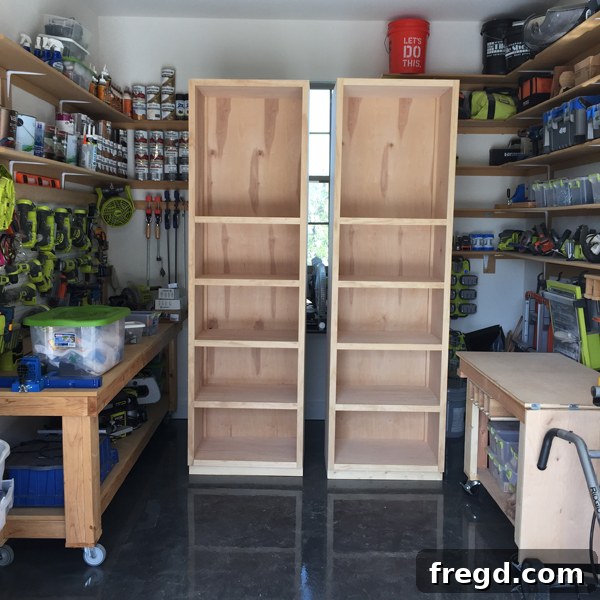
With all the holes filled and the surfaces thoroughly sanded and smoothed, the media towers are now perfectly primed and ready for their protective and enhancing stain. This is a moment of anticipation, as the wood’s natural grain is about to be beautifully revealed.
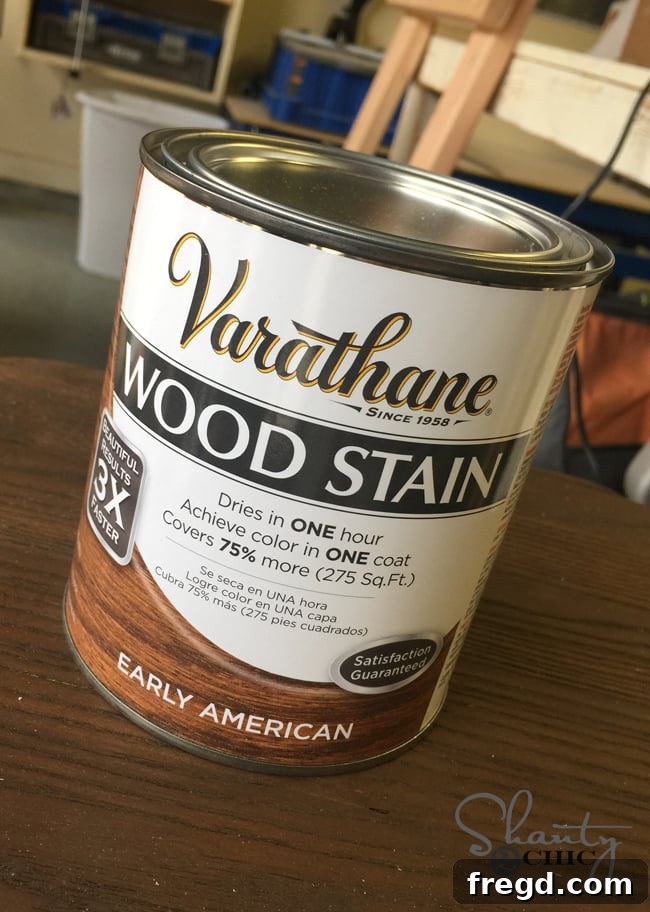
For the final touch, I applied a single coat of Varathane Early American wood stain. This particular shade imparts a warm, classic look that beautifully enhances the wood grain without overpowering it. My application technique involves wiping the stain onto the surface with a clean cloth, allowing it to penetrate the wood for about five minutes. This dwell time allows the stain to achieve its full depth of color. After five minutes, I gently wipe the stain again, not to remove it, but to blend it evenly across the piece, ensuring no streaks or excessive buildup. This technique creates a rich, consistent finish. I opted not to apply a polyurethane topcoat to these media towers. While I typically use poly for high-traffic surfaces like table tops or pieces that will see a lot of wear, these towers will primarily hold decorative items and books, so the stain alone provides sufficient protection and the desired matte finish. And with that, the woodworking phase was complete!
Styling Your New Media Center: Decor Inspiration
The most challenging part of this entire project wasn’t the building, but rather maneuvering these substantial pieces into their final positions within the house—a task for which I am immensely grateful to my wonderful hubby! Once in place, the real fun began: dressing them up and personalizing the space. It’s incredibly satisfying to see months of planning and hard work culminate in such a beautiful and functional addition to our home.
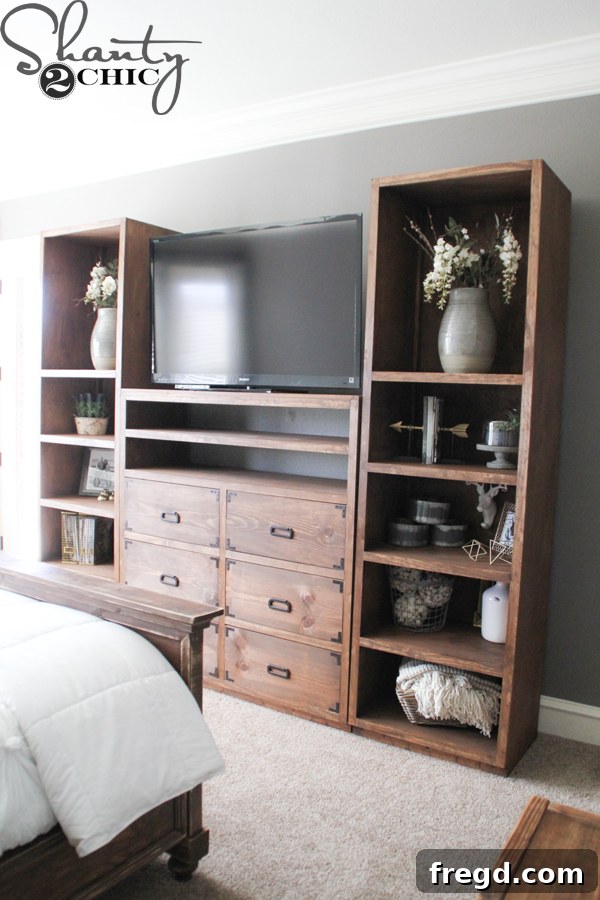
I had such a fantastic time styling these media towers, turning them into a cohesive display that reflects our personal taste and enhances the room’s overall aesthetic. Each shelf became an opportunity to showcase unique decorative items.
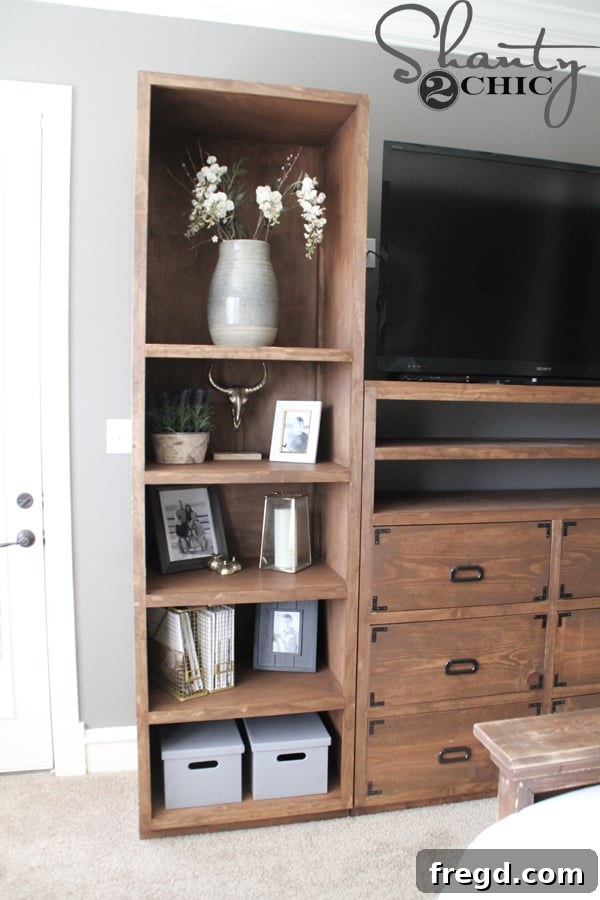
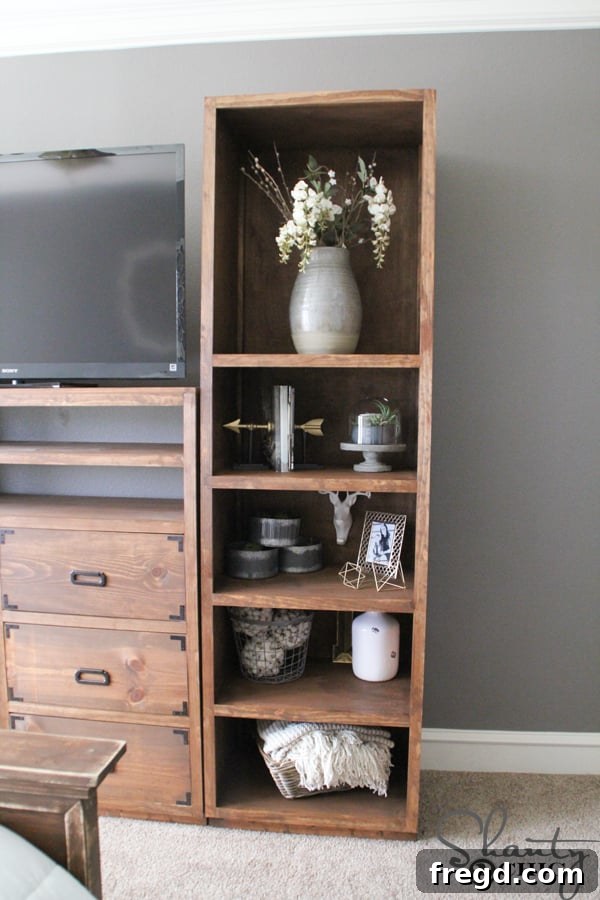
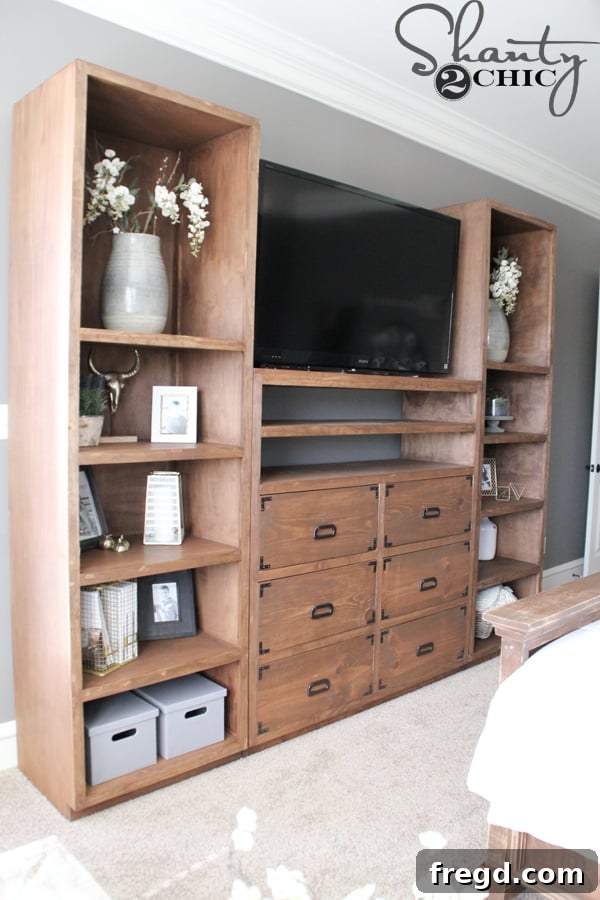
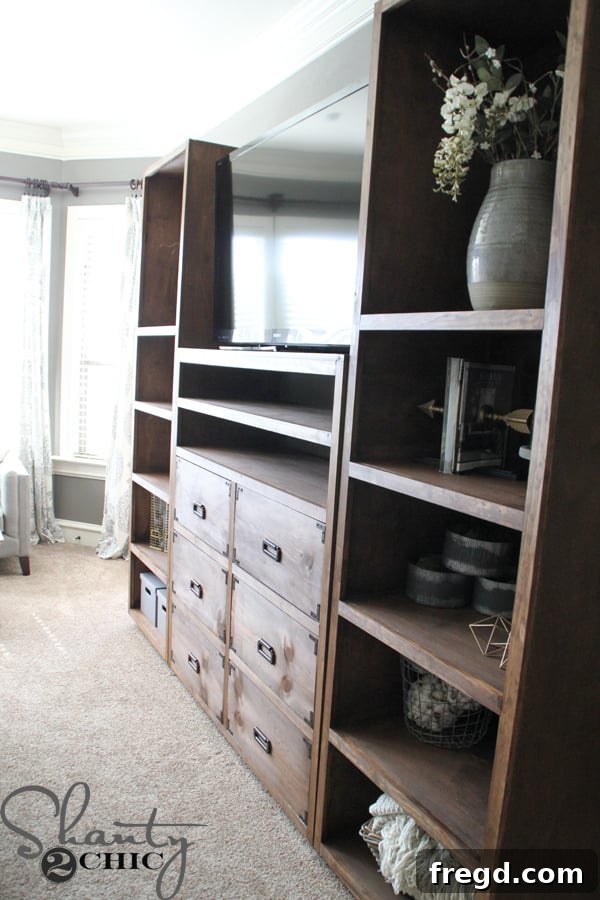
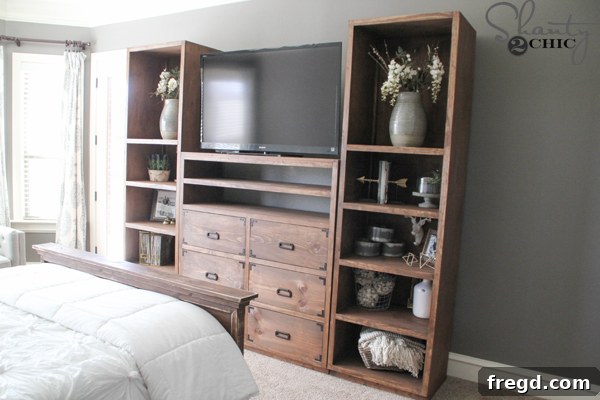
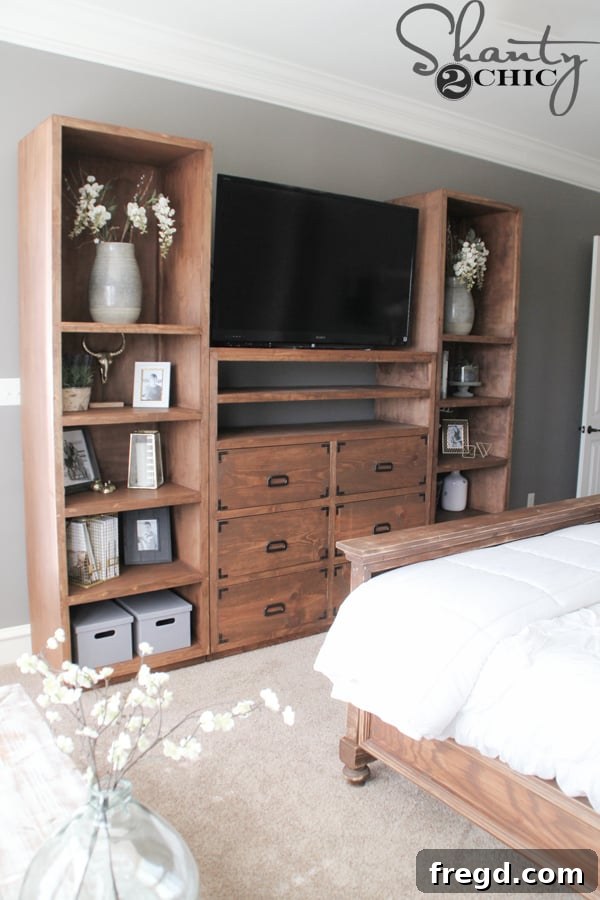
I’m already envisioning the next phase of this project—building the custom bridge and stylish barn doors to complete the ultimate media console look. But for now, I couldn’t be happier with how the media towers stand on their own. They are exactly what I imagined, bringing both functionality and a personalized touch to our home decor.
Curated Decor: Where to Find the Perfect Accents
For those looking to replicate or find inspiration for styling their own DIY bookshelves, here’s a detailed breakdown of the decorative items I used and where I found them:
- Vases at the Top: These elegant, tall vases provide a commanding presence, perfect for vertical styling. (Source: Target)
- Stems for the Vases: Delicate and airy, these stems add a touch of nature and softness to the rigid lines of the bookshelves. (Source: Hobby Lobby)
- Gold Steer Head: A striking and modern piece, this adds a touch of rustic chic and a focal point. (Source: Target)
- Lavender Arrangement: The calming purple hues and organic texture of lavender bring a serene, natural element. (Source: Save On Crafts)
- Gold Lantern: Offering a hint of industrial glam, this lantern can also hold candles for ambient lighting. (Source: Target)
- Small Gold Paper Weights: These subtle, metallic accents catch the light and add a sophisticated touch without clutter. (Source: Target)
- Magazine Holders: Functional yet stylish, these keep magazines tidy while contributing to the aesthetic. (Source: Target)
- Canvas Storage Boxes: Perfect for concealing clutter, these boxes combine practicality with a clean look. (Source: Target)
- Cloche: A glass cloche adds a touch of elegance, perfect for showcasing small treasures. (Source: Save On Crafts)
- Succulent in Cloche: A low-maintenance succulent protected by the cloche offers a fresh, green accent. (Source: Target)
- Galvanized Canisters: These bring a charming farmhouse-industrial vibe, ideal for small storage. (Source: Save On Crafts)
- Arrow Book Ends: Unique and artistic, these bookends add character and keep your books neatly organized. (Source: HomeGoods)
- Deer Head Hook: A whimsical and functional piece, great for hanging small items or simply as decor. (Source: Hobby Lobby)
- Gold Geometric Shapes: Modern and minimalist, these shapes add an interesting, contemporary dimension. (Source: Target)
- White Vase: A simple, versatile vase that brightens any shelf and complements various floral arrangements. (Source: Save On Crafts)
- Metal Basket and Cotton Balls: A rustic metal basket filled with soft cotton balls creates a textural contrast. (Source: Save On Crafts)
- Basket with Blanket: This cozy element adds warmth and texture, perfect for a relaxed living space. (Source: At Home)
This comprehensive list should cover all the styling elements you see! It’s worth noting that I also built several other pieces for my room, creating a cohesive and custom-designed space. These DIY projects complement the media towers beautifully.
Expand Your DIY Journey: More Projects to Explore
If you’ve enjoyed building these media towers, you’re likely to find inspiration in some of my other popular woodworking projects, all designed with the same commitment to free plans and detailed tutorials. Each piece offers a rewarding building experience and a beautiful addition to your home. Click on the images or links below to access the free plans for these fantastic DIY creations:
DIY Queen Bed: Build a sturdy and elegant queen-sized bed frame that will transform your bedroom into a cozy sanctuary.
DIY Nightstand with Bun Feet: Add charm and functionality to your bedside with these stylish nightstands featuring classic bun feet.
DIY Bench or Coffee Table: A versatile piece that can serve as a rustic coffee table or extra seating, perfect for any living space.
DIY Media Dresser: The foundational piece to our media center, offering ample storage and a sturdy base for your television and media devices.
Conclusion: Your Next DIY Adventure Awaits!
Whether you’re tackling your first large-scale project or adding another masterpiece to your home, building these DIY media storage towers is a rewarding endeavor. With our free, detailed plans and comprehensive tutorial, you have everything you need to create a truly impressive and functional piece of furniture. The satisfaction of crafting something beautiful with your own hands is unmatched, and the custom touch it brings to your home is invaluable. We hope this guide inspires you to pick up your tools and embark on your next woodworking adventure.
Happy Building!!!