
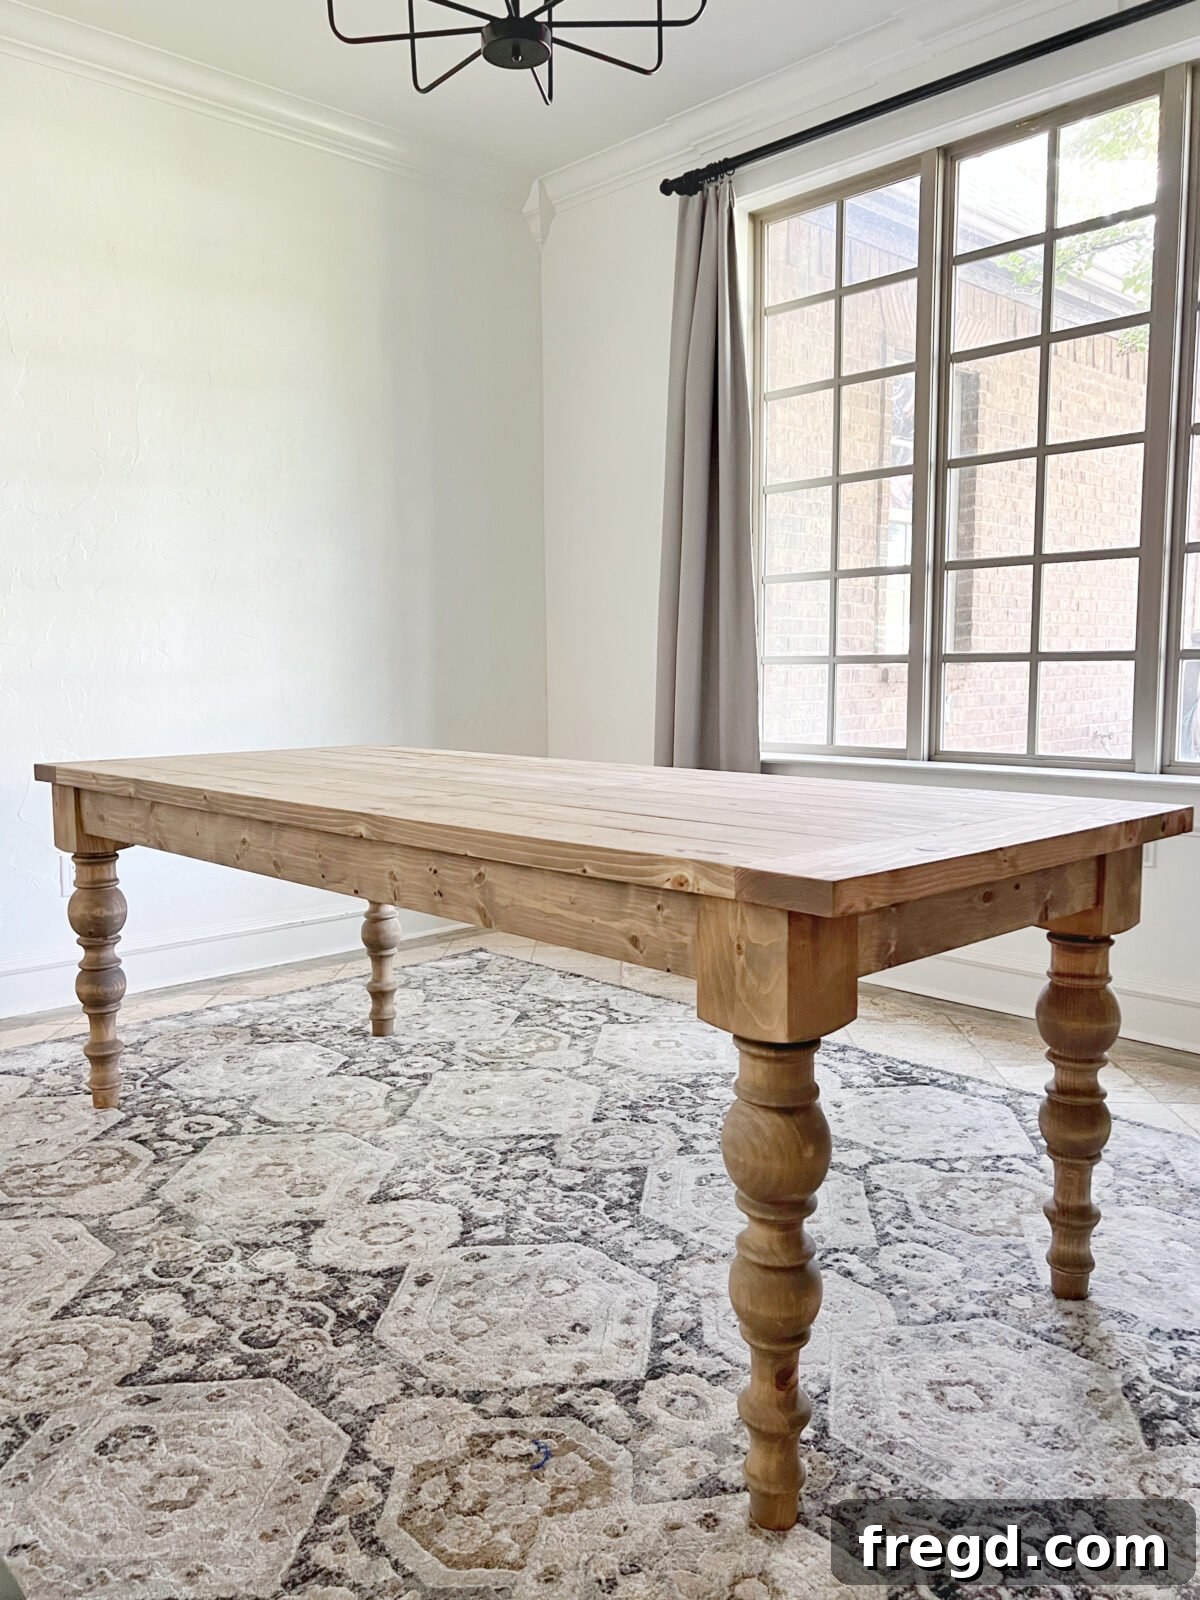
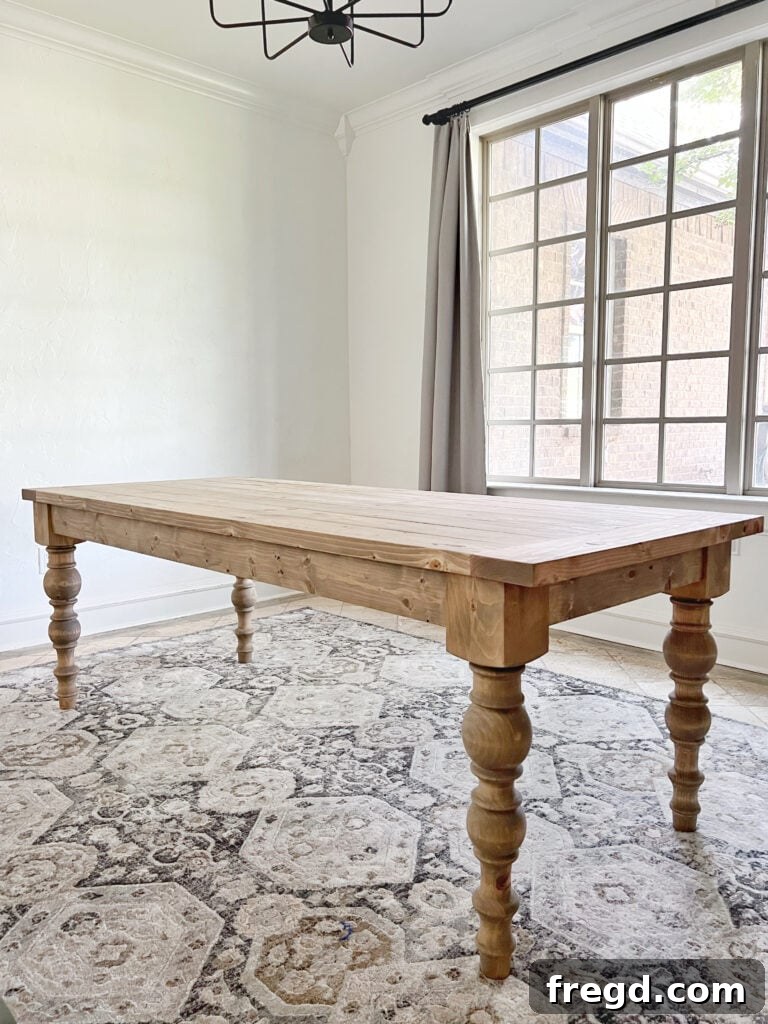
Are you dreaming of a beautiful, sturdy dining table that perfectly captures the modern farmhouse aesthetic, but don’t want to break the bank? Look no further! We’re thrilled to share our complete guide and free woodworking plans for building an exquisite DIY Modern Farmhouse Turned Leg Dining Table. This project is not only incredibly rewarding, allowing you to create a piece of furniture tailored to your home, but it’s also surprisingly affordable – you can construct this stunning table for under $250!
Whether you’re a seasoned woodworker or just starting your DIY journey, our detailed instructions and free plans will walk you through every step, from selecting your lumber to applying the perfect finish. Get ready to transform your dining space with a handmade table that will become the centerpiece of countless memories and gatherings.
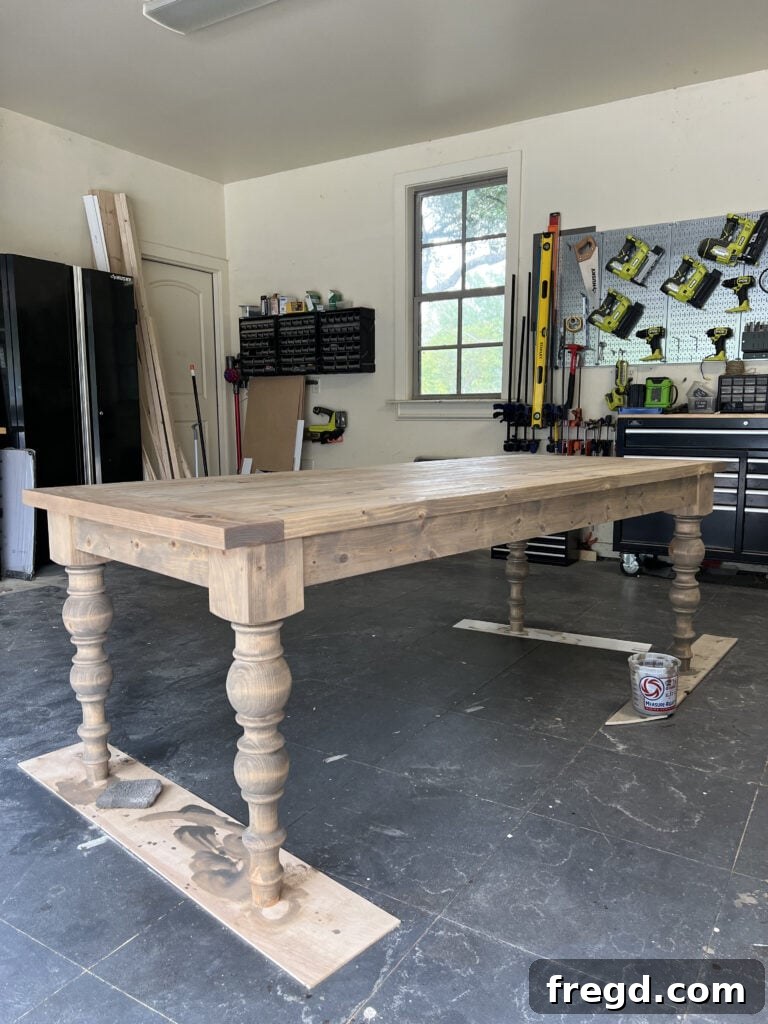
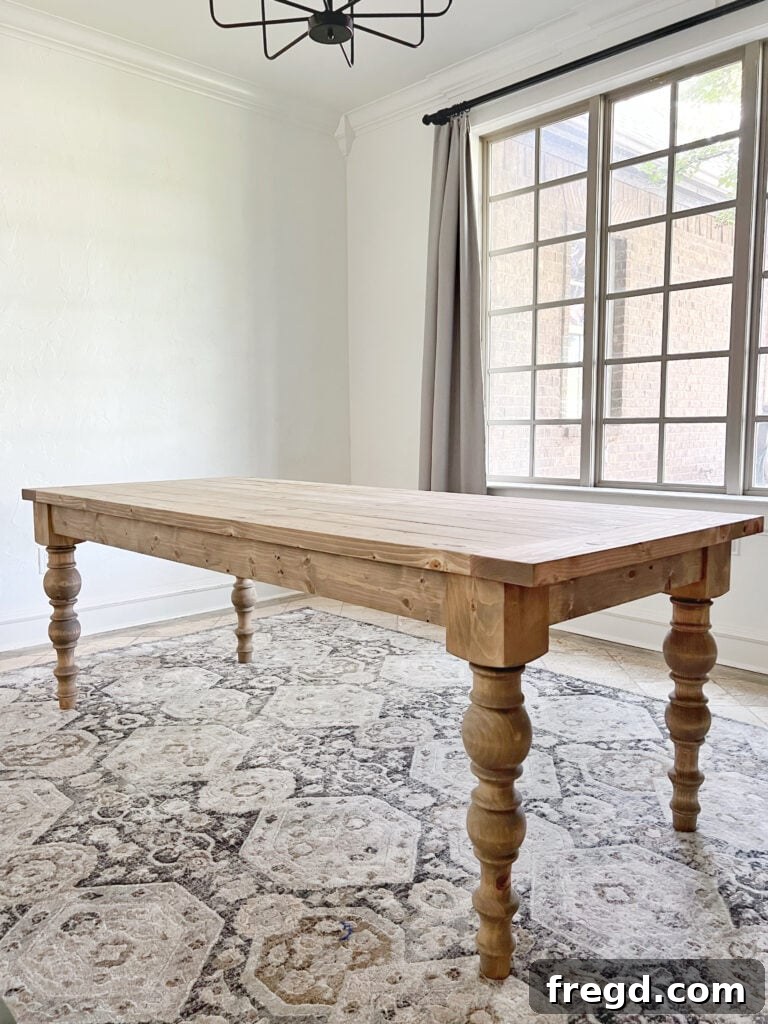
Why Build Your Own Modern Farmhouse Table?
There’s an undeniable charm and personal satisfaction that comes with building your own furniture. A DIY dining table, especially one as beautiful and functional as this modern farmhouse design, offers numerous benefits. Firstly, you gain complete control over the dimensions, materials, and finish, ensuring it perfectly matches your home’s aesthetic and space requirements. No more compromising on size or style when shopping for mass-produced furniture!
Secondly, the cost savings are significant. By sourcing your own materials and investing a bit of time and effort, you can create a high-quality, durable piece for a fraction of the price of a store-bought equivalent. Our design utilizes readily available and affordable 2×6 framing lumber, keeping your budget firmly in check. Lastly, the pride of inviting friends and family to gather around a table you crafted with your own hands is truly immeasurable. It’s more than just furniture; it’s a legacy piece, built with love and personal touch.
The Heart of the Build: Essential Materials and Tools
Before diving into the assembly, it’s crucial to understand the core components and tools that will bring this beautiful table to life. This section will guide you through selecting the right lumber and legs, which are fundamental to achieving the desired modern farmhouse look and durability.
Choosing Your Lumber: The 2×6 Advantage
For this modern farmhouse dining table, we deliberately chose 2×6 framing lumber. This choice offers several compelling benefits that make it ideal for DIY furniture projects. Primarily, it’s incredibly cost-effective compared to hardwoods or premium lumber, allowing you to stay well within our sub-$250 budget. Beyond the savings, we absolutely adore the way this particular wood finishes. When prepped and stained correctly, it takes on a rustic yet refined character that perfectly complements the farmhouse style.
While you certainly have the option to use other wood types, such as pine or even hardwoods for a more luxurious feel, we highly recommend trying the 2×6 framing lumber. Its availability, affordability, and beautiful finished look make it our top pick for projects like this. Remember, the key to a professional finish starts with carefully selected, straight boards, so take your time picking out your lumber at the hardware store.
The Distinctive Feature: Dining Table Turned Legs
The turned legs are undoubtedly the star of this modern farmhouse dining table, lending it that classic, elegant appeal. Our quest for the perfect, yet affordable, turned dining table legs led us to Amazon, where we quickly discovered the exceptional craftsmanship of the Carolina Leg Company. They offer a fantastic selection, and we were particularly drawn to their Modern Chunky Farmhouse Legs.
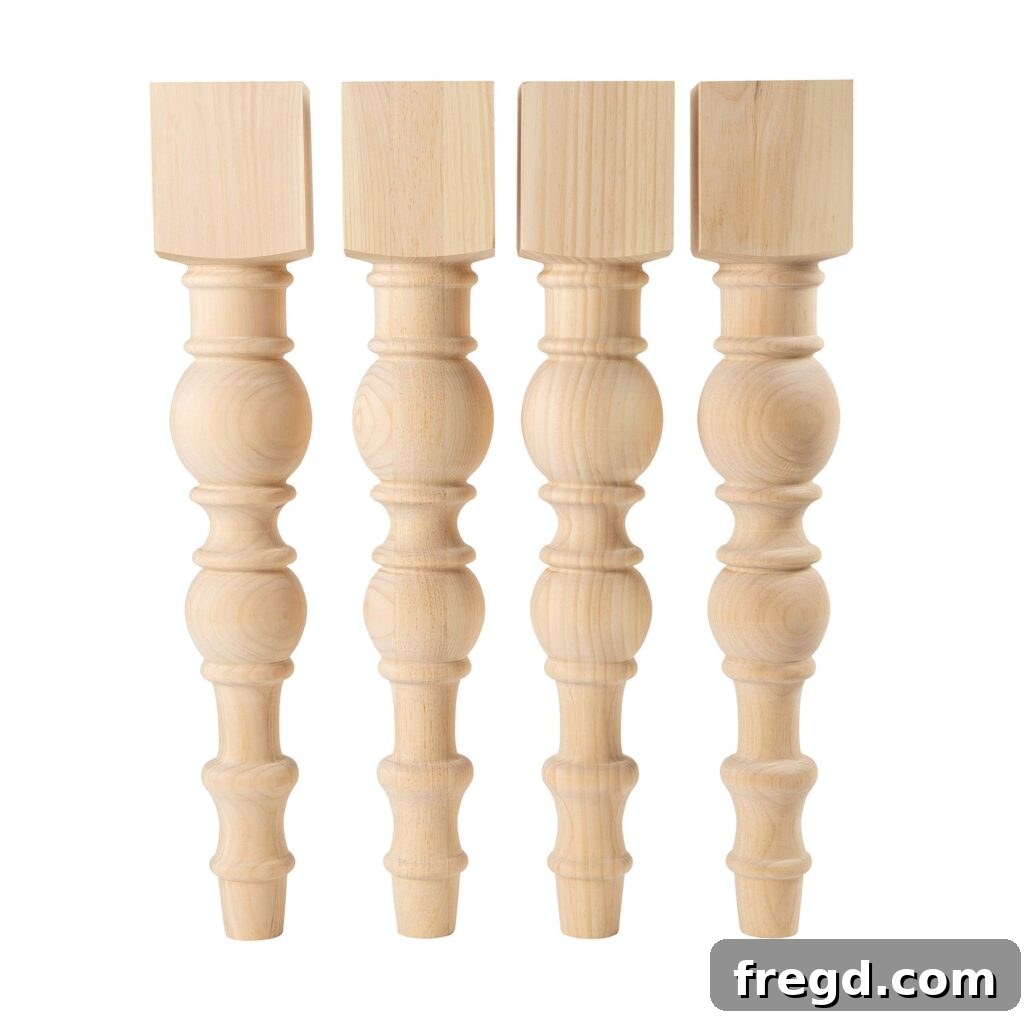
These legs are not only stunning but also remarkably affordable. Their classic, timeless style is complemented by a substantial 5-inch wide top, which provides a robust and “beefy” look that truly grounds the table. This generous width also offers excellent stability for the table base. Carolina Leg Company also offers matching bench legs, allowing you to create a cohesive dining set. We highly recommend exploring their collection to find the perfect legs for your project!
You can check out these specific Modern Chunky Farmhouse Legs on their website here!
Preparing Your Wood: Ripping the Boards
Once you’ve selected your lumber, the first crucial step in construction is precise cutting. Before any assembly begins, all 2×6 boards need to be ripped down to their specified sizes. This project requires two main sizes after ripping: the boards forming the table apron should be ripped to a consistent 4 inches in width, while the boards destined for the table top should be ripped to 5 inches wide. This careful preparation ensures uniformity and a professional finish for your table.
We’ve found that the most efficient way to handle these cuts is to make your shorter cross-cuts first. This reduces the overall length of the boards, making them much easier and safer to guide through a table saw for the subsequent ripping process. Shorter pieces are more manageable, allowing for greater control and accuracy, which is essential for achieving perfectly straight edges for strong, gap-free joints.
Mastering Pocket Hole Joinery with Kreg Jigs
A common question from aspiring furniture builders is, “What tools do I need to get started?” Our consistent recommendation for beginners includes three fundamental tools: a miter saw for precise cross-cuts, a drill for driving screws, and crucially, a Kreg Jig. A Kreg Jig is a revolutionary tool that allows you to drill strong, concealed pocket-hole joints, making furniture assembly faster, cleaner, and significantly stronger than traditional methods like countersinking wood screws.
Whitney and I discovered Kreg Jigs early in our furniture-building journey, and it was an absolute game-changer. We were incredibly impressed by how user-friendly they are and the robust, reliable joints they create. For this dining table project, we utilized two different Kreg Jig models – the Kreg 720Pro and the Kreg Foreman – to demonstrate their unique strengths and capabilities.
The Ultimate DIY Companion: Kreg 720Pro
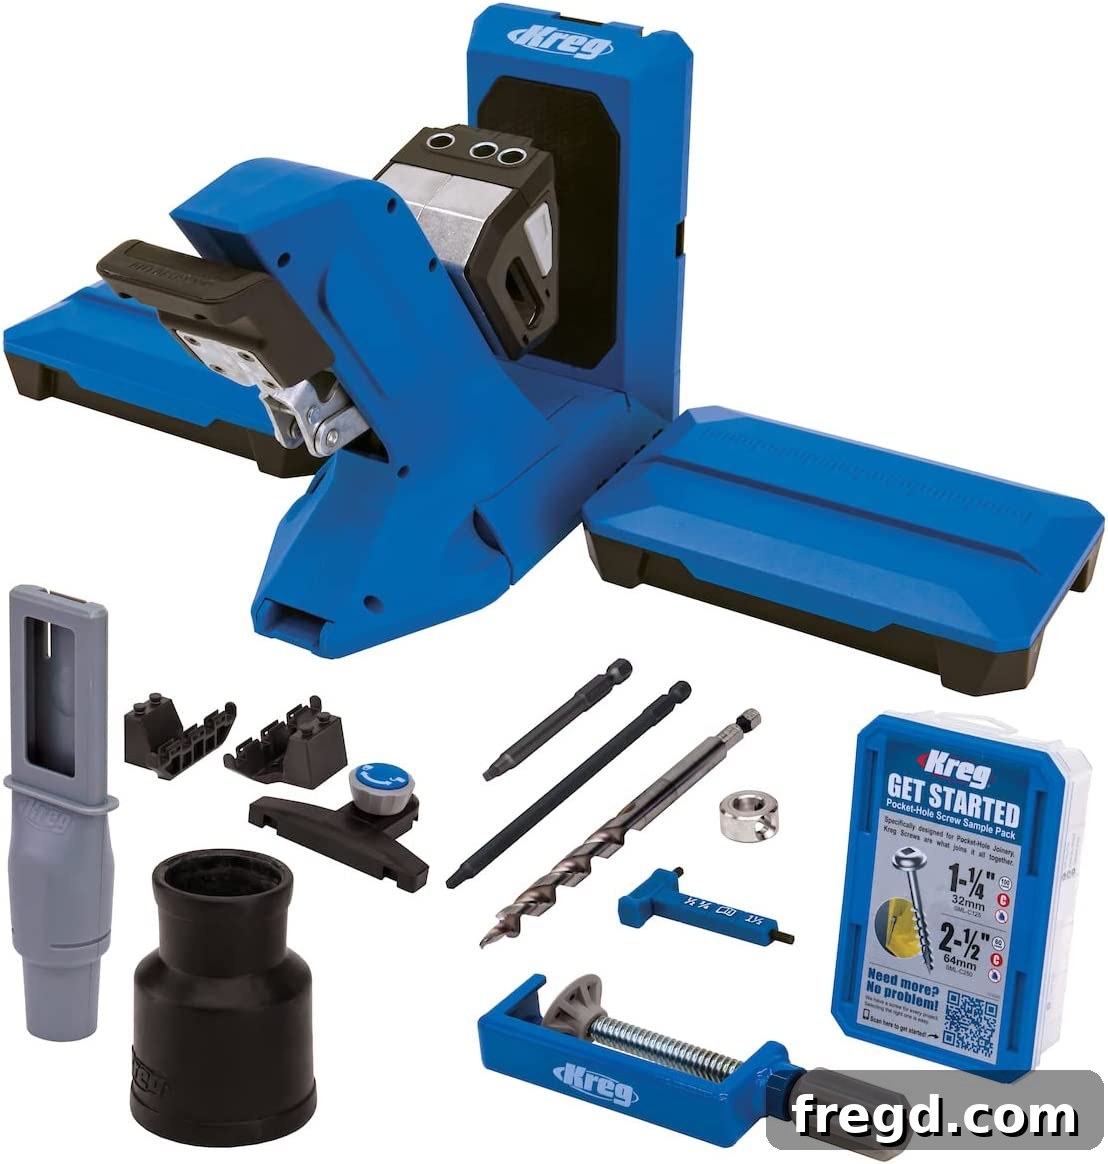
The Kreg Jig 720Pro is, without a doubt, our top recommendation for a pocket hole jig. Its standout feature is the Automaxx dual clamp, which self-adjusts to match the thickness of your material. This innovation makes furniture building incredibly fast and efficient, eliminating the need for manual adjustments and ensuring consistent clamping pressure.
Designed for convenience and versatility, the 720Pro docking station includes built-in material support wings, perfect for handling larger panels like plywood with ease. It also boasts abundant storage features for bits and accessories, and comes with a clamp to securely fasten it to your workbench. Additional accessories such as a dust port with a vacuum adaptor and a starter pack of 160 pocket-hole screws enhance its functionality. Furthermore, its compact, foldable design makes it an excellent choice for smaller workshops or those with limited space.
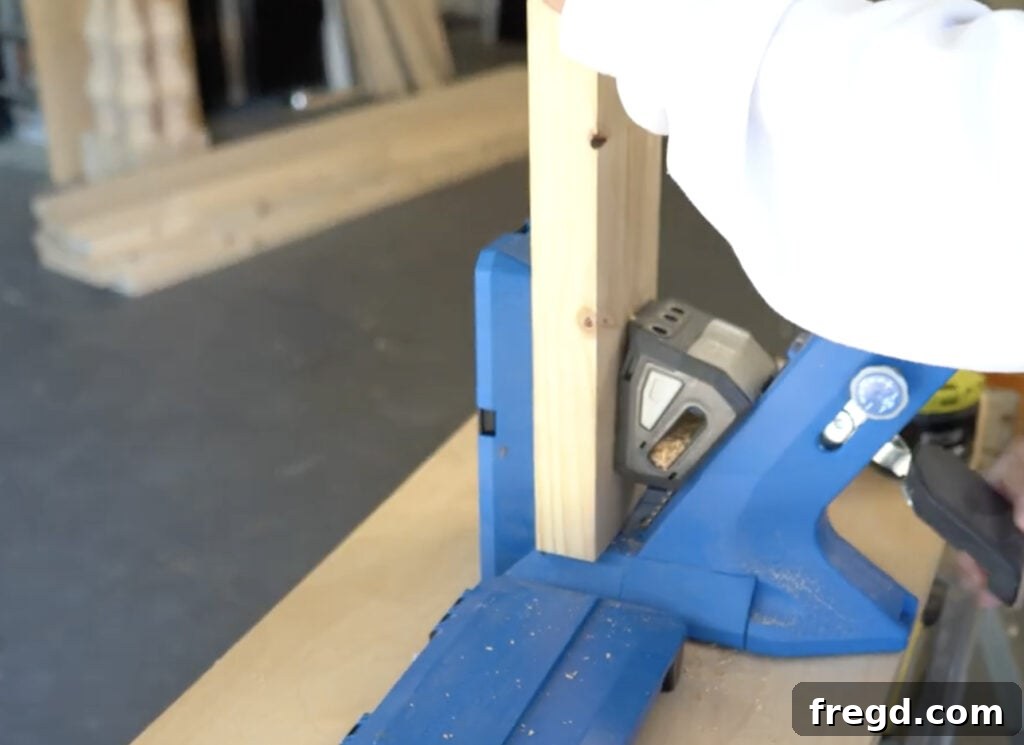
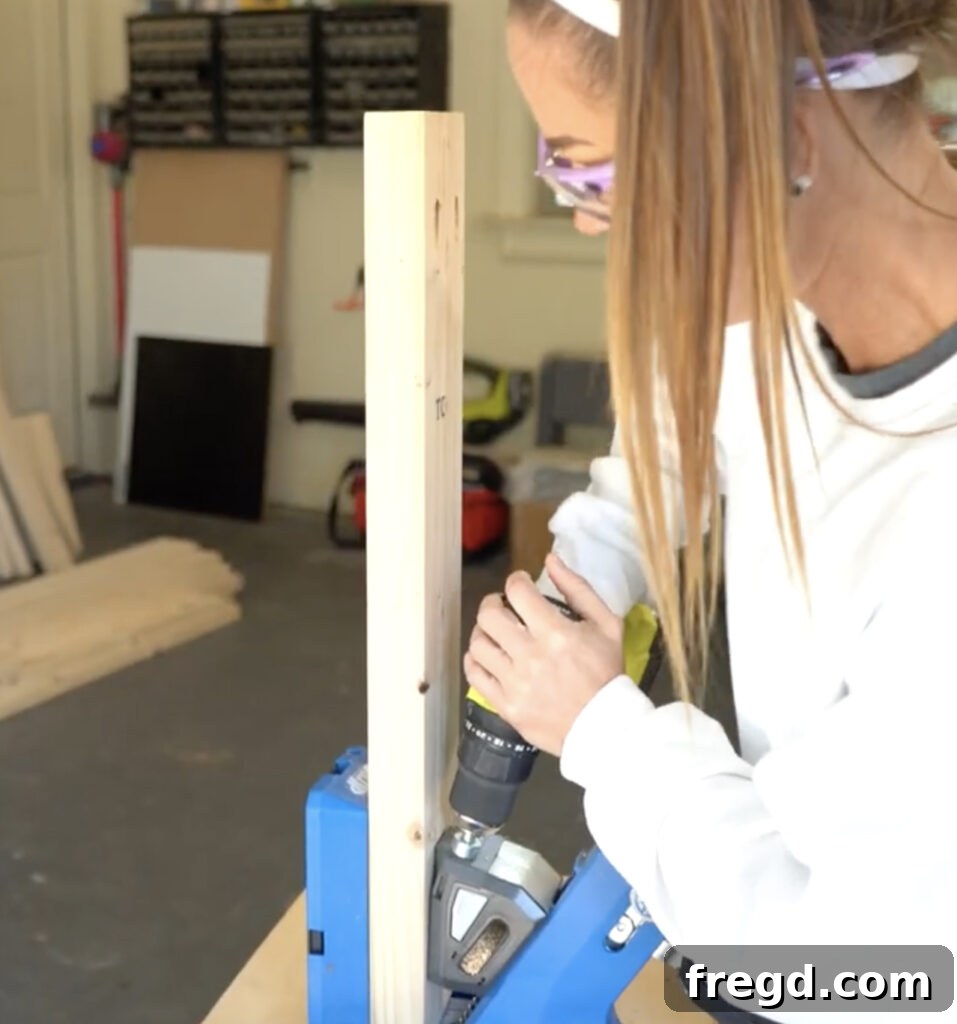
What’s Included with the 720Pro?
- Easy-Set Drill Bit
- 3″ #2 Driver Bit
- 6″ #2 Driver Bit
- Easy-Set Drill Bit Collar
- Material Thickness Gauge
- Dust Collection Vacuum Adapter
- Kreg Docking Station with Material Support Wings
- Kreg Pocket-Hole Jig Clamp
- 1 Downloadable Plan
- 160 Kreg Pocket-Hole Screws
The Kreg Jig 720Pro is often on sale. Find it on Amazon here!
Boosting Efficiency for High Volume: Kreg Foreman
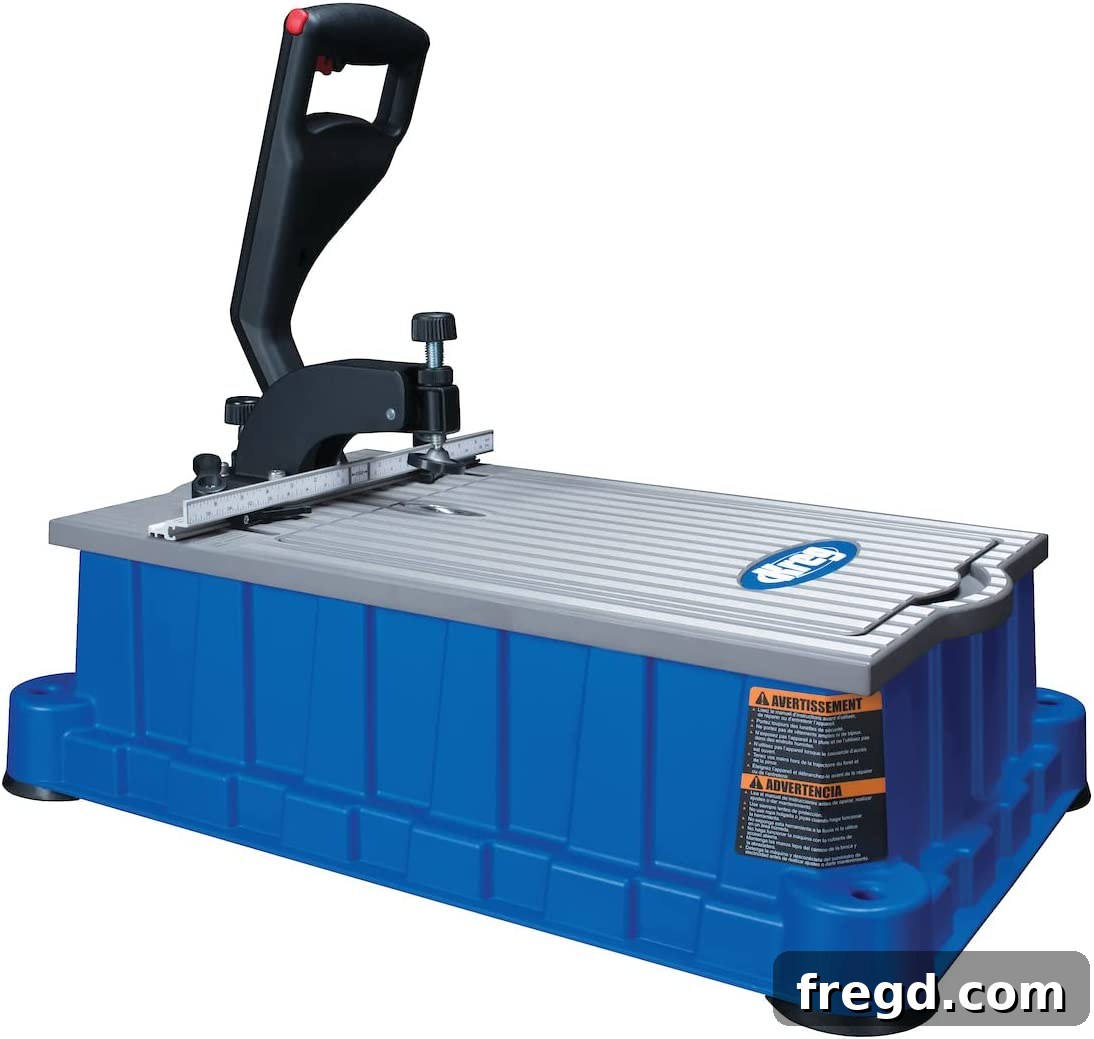
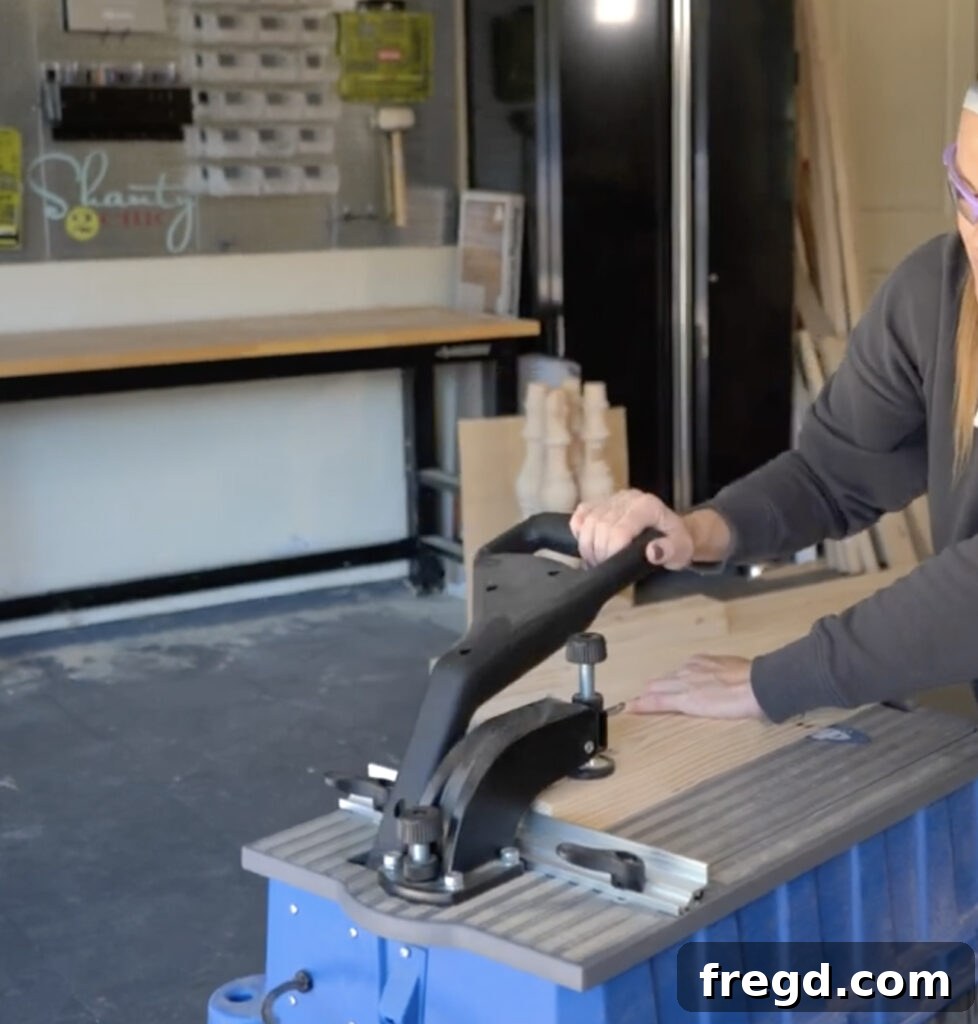
For those who frequently drill a high volume of pocket holes, whether for selling custom pieces or furnishing an entire home, the Kreg Foreman is an outstanding investment. This powerful tool functions similarly to a drill press, allowing you to drill pocket holes with incredible speed and minimal effort. It dramatically streamlines the process, making repetitive tasks far less strenuous.
We routinely use our Kreg Foreman for projects requiring numerous pocket holes, such as planked tabletops or large cabinet builds. Its efficiency ensures consistent hole placement and depth, saving valuable time and reducing fatigue. If your woodworking ambitions include producing many pieces, the Foreman will quickly become an indispensable part of your workshop.
What’s Included with the Foreman?
- 1 Dust-collection attachment
- 1 Standard Quick-Change Drill Bit and Drill Guide
- 1 Drill Bit Setting Block
- 1 Hex wrench
Keep an eye out for sales on the Foreman! Check it out on Amazon here!
Assembling the Sturdy Table Base
With your boards ripped and your Kreg Jig ready, it’s time to construct the robust base of your dining table. This foundational step is critical for ensuring the stability and longevity of your finished piece. Pay close attention to the placement and attachment details for a seamless build.
Attaching the Short Apron Boards
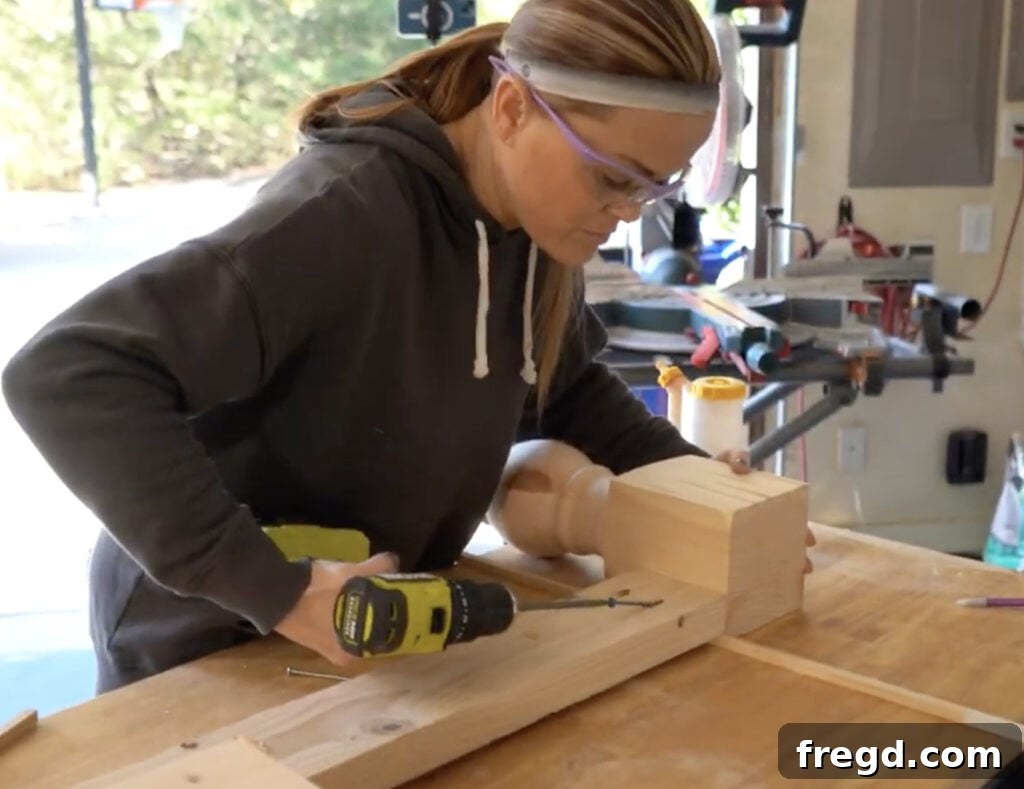
Begin by preparing your apron pieces for attachment. Using your Kreg Jig, drill 1.5-inch pocket holes along the long edges of each apron board. Additionally, add two 1.5-inch pocket holes to each short end of these boards. These holes are essential for creating strong, concealed joints. Now, align the shorter apron boards with the table legs. They should be flush with the top of each leg, and positioned with a 1/2-inch inset from the outer sides of the legs. This inset creates a subtle, refined edge.
Secure these short apron boards to the legs using 2.5-inch pocket hole screws, reinforced with a high-quality wood glue for maximum strength and durability. Ensure a tight fit and clean joints before moving on.
Connecting the Long Apron Boards
Next, it’s time to connect the long apron boards to your two leg assemblies. Similar to the short apron boards, these longer pieces should also be positioned flush with the top of the legs and set in 1/2 inch from the sides. This consistent inset maintains a clean and symmetrical appearance around the entire perimeter of the table base.
When attaching the long apron boards, be mindful of the orientation of the pocket holes you previously drilled along their length. These specific pocket holes must face upwards, as they will be used later to securely attach the tabletop to the base. This forward-thinking placement ensures that your tabletop will be firmly fastened from underneath, leaving a smooth, unblemished surface.
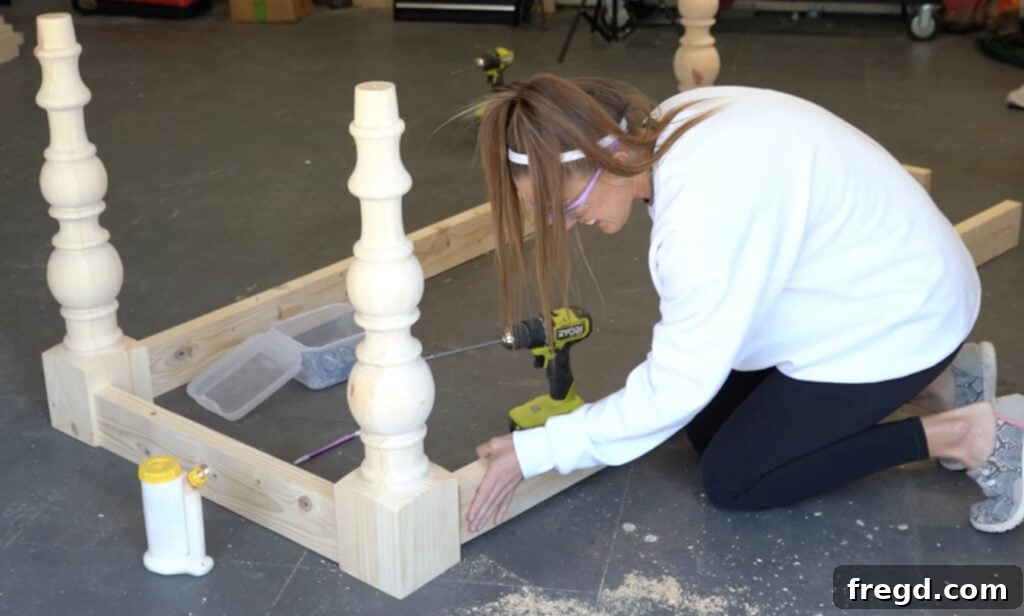
Note on Leg Placement: Double-check that the top edges of all apron boards are perfectly flush with the top of the legs, and that each apron board is consistently set in by 1/2 inch from the outer face of the legs. This precision is key for a professional-looking and structurally sound table base.
Reinforcing with the Middle Support Board
The final step in assembling your table’s base involves adding a crucial 2×4 middle support board. This board runs parallel to your shorter apron boards and is perfectly centered along the length of your long apron boards. This central support significantly enhances the rigidity of the table base and provides additional anchor points for the tabletop.
Secure this middle support board using wood glue and 2.5-inch pocket hole screws. Just as with the long apron boards, ensure that any pocket holes drilled along the length of this middle support face upwards. These strategically placed holes will be vital for attaching the tabletop in a later stage, contributing to a robust and stable dining surface.
Crafting the Beautiful Planked Tabletop
The tabletop is where the beauty of your modern farmhouse design truly shines. This planked top is constructed from eight 2×6 boards, all meticulously ripped down to 5 inches wide each. While our original design opted for a slightly narrower table (using seven boards) to better fit a specific dining room layout, you can easily incorporate the eighth board for a more traditional, wider dining surface to suit your needs.
Begin by drilling 2.5-inch pocket holes down six of your seven (or eight, if wider) longer tabletop boards. Additionally, drill two pocket holes on each short end of all seven (or eight) long boards; these end holes are specifically for attaching your “breadboards” later. Now, plank all your long boards together, creating the main body of the tabletop, using 2.5-inch pocket hole screws. Apply a thin, even bead of wood glue along the edges before screwing for extra strength and to minimize gaps.
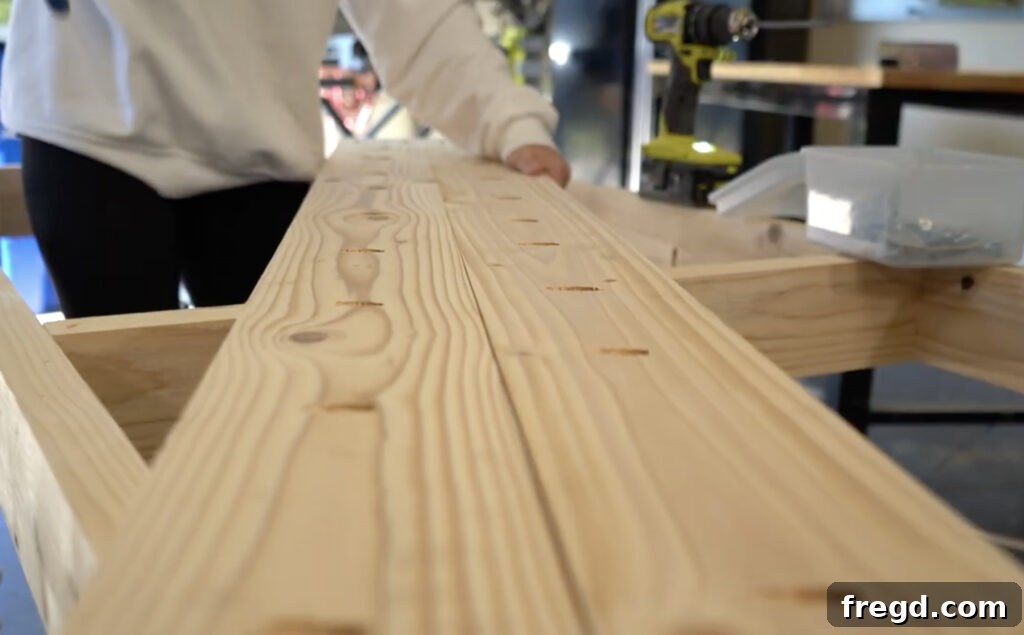
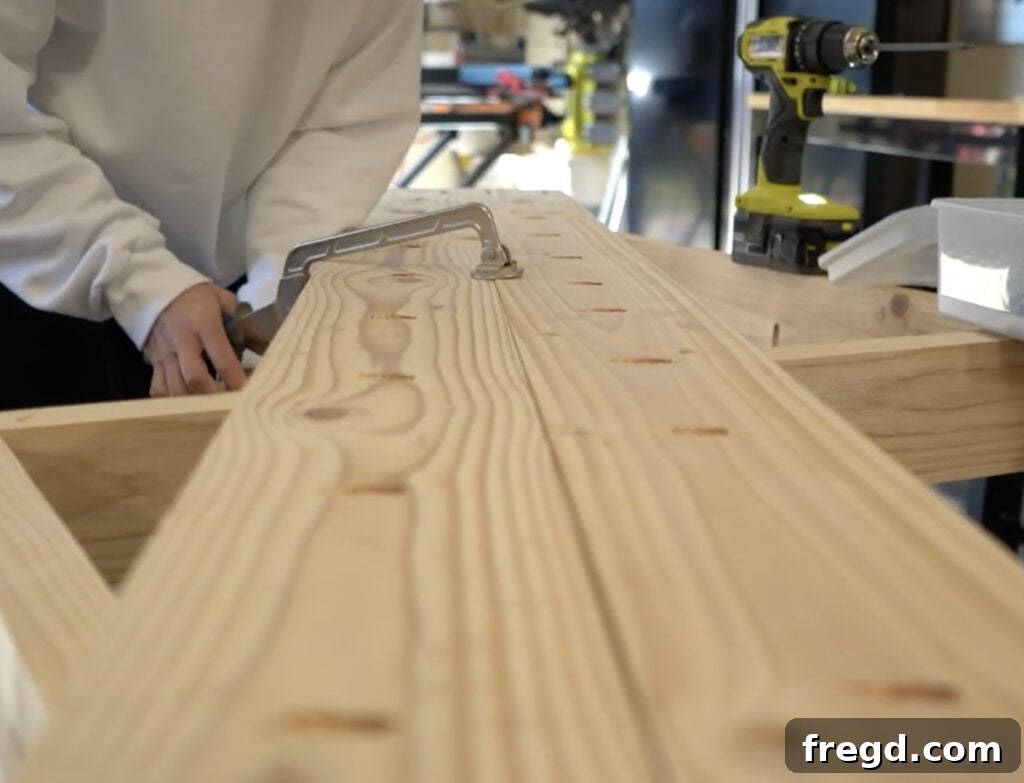
Once the main planks are joined, measure and cut your breadboards to the exact width of your assembled tabletop. Attach these breadboards to the ends of the longer planks through the pre-drilled pocket holes on the short ends, again using 2.5-inch pocket hole screws. For this crucial step, we highly recommend using a Kreg Face Clamp. This invaluable tool helps hold the boards perfectly flush during assembly, acting like an extra set of hands to ensure a smooth, level joint. It makes a significant difference in achieving a professional finish!
You can find this indispensable Kreg Face Clamp HERE ON AMAZON!
Final Assembly: Attaching the Tabletop to the Base
The penultimate step in completing your modern farmhouse dining table is attaching the beautifully planked tabletop to the sturdy base you’ve constructed. We typically reserve this step until the table base is moved into its final room. This allows for easier maneuvering of two lighter pieces and provides an ideal opportunity to stain or apply your chosen finish to both components before their permanent union.
To securely attach the tabletop, align it carefully over the base. You’ll want a 2.5-inch overhang on each short end of the table and a 1/2-inch overhang on the longer sides. Once positioned, drive 2.5-inch pocket hole screws through all the upward-facing pocket holes on the apron boards and the middle support board, directly into the underside of the tabletop. This method creates a strong, hidden connection that ensures your table is robust and ready for years of use.
The Art of Finishing: Staining Your Dining Table
The finish is what truly brings out the character of your wood and completes the modern farmhouse aesthetic of your dining table. Choosing the right stain and applying it correctly can elevate your project from functional to fabulous, highlighting the beautiful turned legs and the natural grain of the wood.
For this table, we opted for a custom stain color to perfectly complement our decor. The turned legs are particularly striking, and a well-chosen stain truly allows their intricate details to shine, making them a focal point of the design.
Creating Your Custom Stain Color
One of the joys of DIY is the ability to customize every aspect, including your stain color. Mixing different stain shades is a fantastic and surprisingly simple way to achieve a unique, custom look that you won’t find in a can. You can watch our reel on how we created this specific color here for a visual guide!
To create our custom shade, we used three different Varathane stain colors. Start with an inexpensive, empty tub from the hardware store, or any clean container you have at home. We mixed two parts of Natural stain, one part of Golden Oak, and a generous splash of Weathered Gray. Simply combine these in your bucket and stir thoroughly until you achieve a consistent color. This blend resulted in the perfect finish we envisioned.
Before applying any stain, proper surface preparation is key. Ensure all surfaces of your table are meticulously sanded with medium-grit sandpaper, followed by fine-grit sandpaper. This smooths out any imperfections, opens the wood grain evenly, and allows the stain to penetrate uniformly for a beautiful, streak-free finish. For sanding, we often use our Ryobi Corner Cat for detailed areas, but a random orbital sander is also excellent for larger flat surfaces.

The Perfect Protective Coat
After staining, a durable protective coat is essential to safeguard your beautiful new dining table from spills, scratches, and daily wear and tear. This not only preserves the wood but also enhances its natural beauty and depth of color. Our go-to choice for a protective finish is this particular polyurethane. It provides excellent resistance and a long-lasting, clear finish that truly makes your table shine while offering superior protection.
Applying polyurethane correctly involves thin, even coats with light sanding in between, following the manufacturer’s instructions. This creates a hard, resilient surface that will keep your modern farmhouse dining table looking fantastic for years to come. Investing time in this final step ensures your hard work stands the test of time.
My absolute favorite polyurethane is THIS ONE!
Complementing Your Table: Choosing the Right Chairs
With your stunning new modern farmhouse dining table complete, the next exciting step is selecting the perfect chairs to complement its style and functionality. The right dining chairs can truly complete the look and feel of your dining space, tying together your decor and ensuring comfortable seating for all your guests.
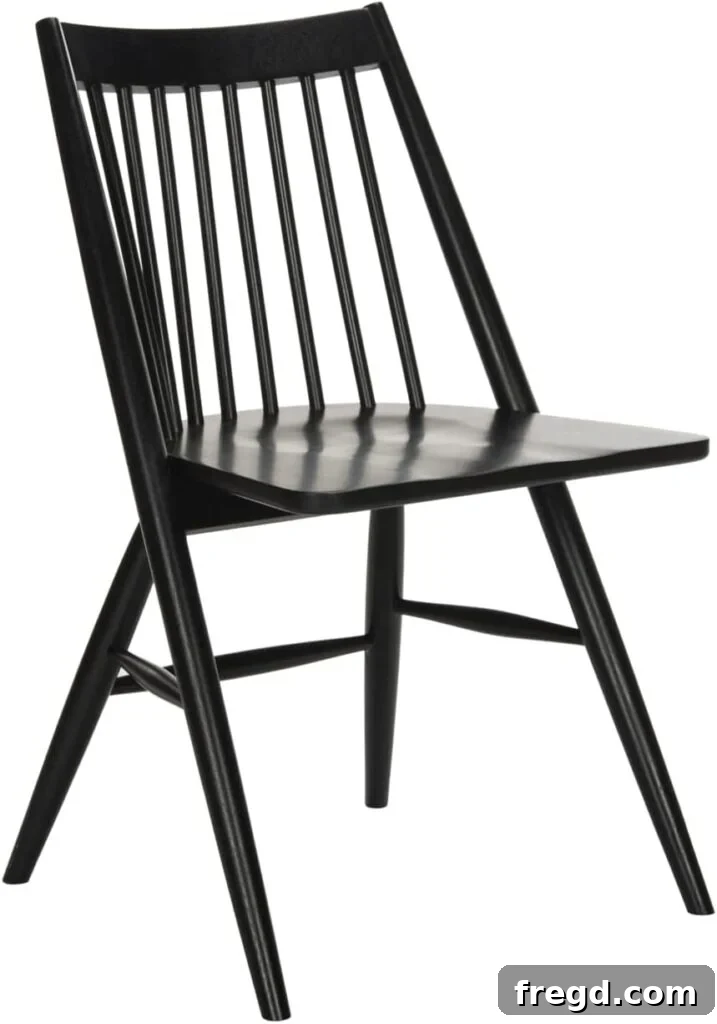
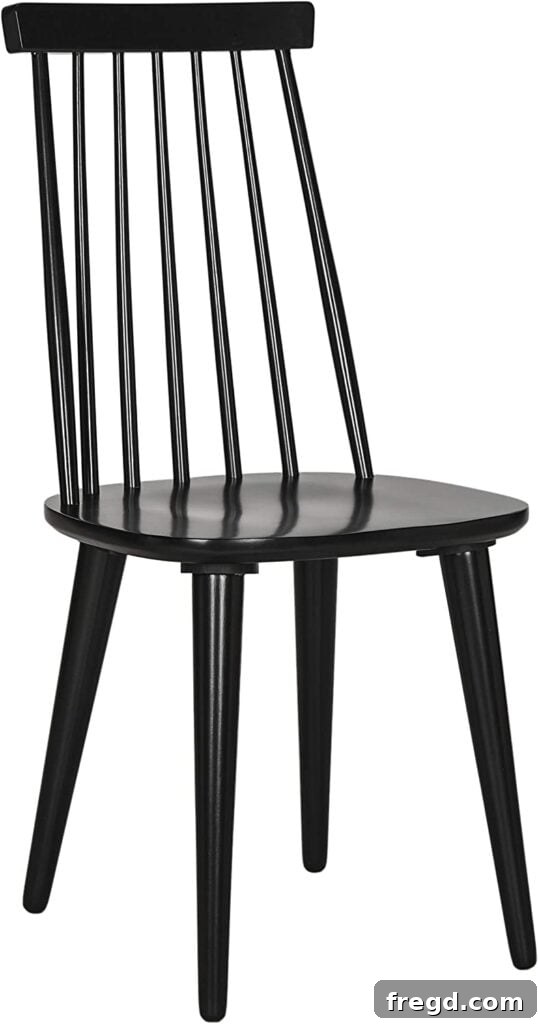
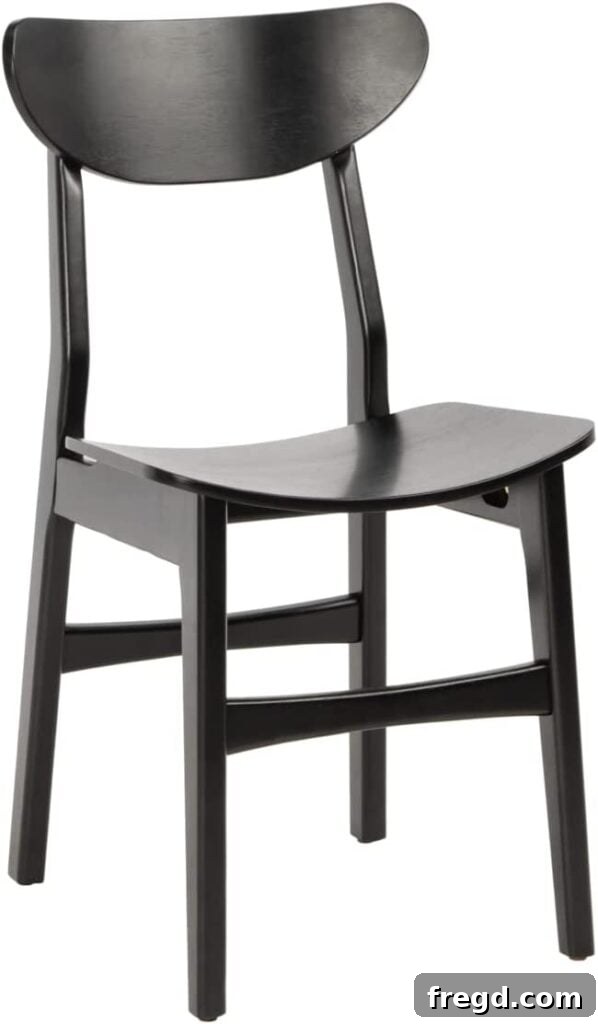
We are still in the process of narrowing down the ideal chairs for our table, considering factors like style, comfort, and how well they integrate with the overall modern farmhouse aesthetic. Here are three options we’re currently considering, each offering a unique touch to the dining room. We’d love to hear your thoughts on which you think would be the best fit!
Wren Side Chair
Burris Side Chair
Lucca Side Chair
When selecting chairs, consider factors such as material (wood, metal, upholstered), color, and overall silhouette. Do you prefer chairs with backs that echo the turned leg design, or something more minimalist to provide a contrast? The goal is to create a harmonious and inviting dining area that reflects your personal style.
Get Your Free Modern Farmhouse Table Plans!
We are absolutely thrilled with how our new modern farmhouse dining table turned out! It’s truly a labor of love that adds warmth, character, and a touch of bespoke elegance to our home. Now, it’s your turn to experience the joy of building your own. You don’t have to navigate this exciting project alone!
To help you on your journey, we’re providing the comprehensive, step-by-step FREE PLANS for this very dining table. These plans include detailed measurements, cut lists, and diagrams to guide you through every stage of construction, ensuring a smooth and successful build. Embark on your next woodworking adventure and create a piece that will be cherished for years to come!
You can grab the FREE PLANS for this dining table HERE!
Explore More DIY Dining Table Designs
If this project has sparked your passion for woodworking or if you’re looking for different styles to tackle next, you’re in luck! We have a treasure trove of other table designs, complete with step-by-step instructions and free plans, to inspire your next build. Whether you prefer a different aesthetic or a unique configuration, our collection has something for everyone.
Check out some of our other popular table designs below:
- DIY Round Dining Table
- DIY Modern Farmhouse Dining table (different design)
- DIY Outdoor Dining Table
- Full List of our Free DIY Dining Table Plans
For an even wider selection, explore our comprehensive list of over 25 free DIY Dining Table Plans. From beginner-friendly projects to more advanced builds, you’re sure to find the perfect plan to create the dining table of your dreams.
Thank you for joining us on this build! We hope you enjoy crafting your own Modern Farmhouse Turned Leg Dining Table and that it brings joy and warmth to your home for many years to come.