
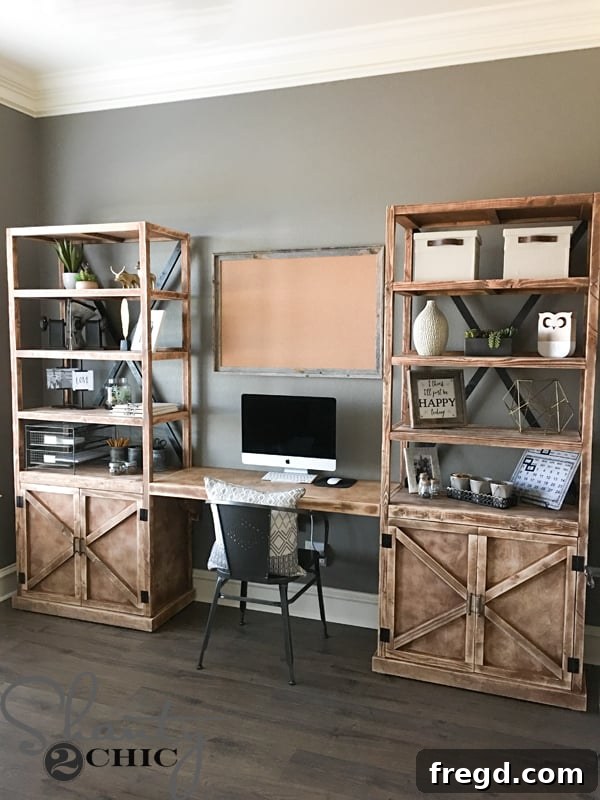
Transforming our home office into a functional, inviting, and beautifully organized space has been a long-awaited project, and I’m absolutely thrilled to finally share the cornerstone of my ambitious DIY Office Desk System: these incredible office storage towers! For too long, this room remained untouched, serving as a catch-all rather than a productive workspace. My vision was clear: create a comfortable haven for my husband, a dedicated area for the kids’ schoolwork, and a space so aesthetically pleasing and well-organized that I would never again feel the need to hide it behind closed doors when guests arrived. Achieving this meant striking a perfect balance between elegant open shelving for display and accessible items, and ingenious hidden storage solutions to neatly tuck away all the inevitable office clutter and essentials.
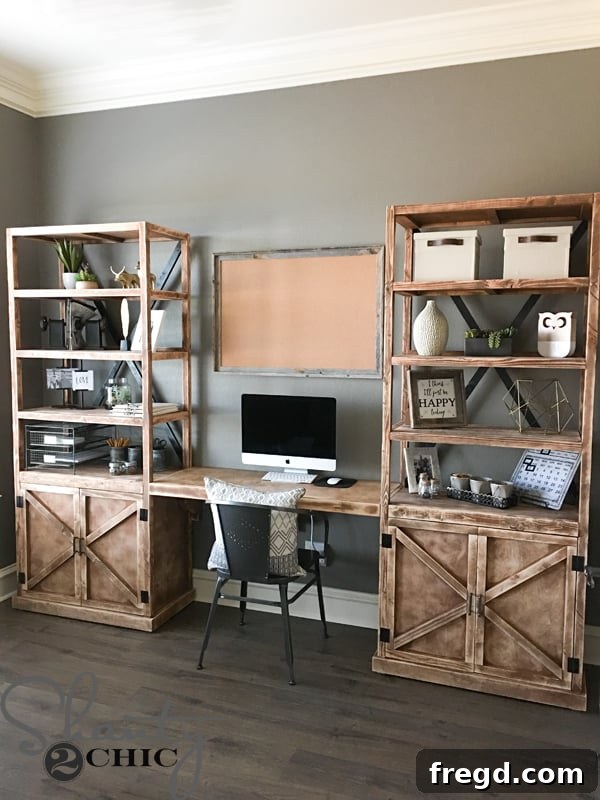
With a comprehensive understanding of these needs, I meticulously designed a custom office furniture system. The heart of this design involved two robust storage towers, each incorporating clever hidden compartments perfect for our printer, important files, and various office supplies. Above these, I integrated open shelves, ideal for showcasing decorative pieces, books, or frequently used items. A crucial element of my design was to make the accompanying desk appear as a seamless extension of these towers, creating one long, integrated workspace that feels both cohesive and custom-built. While this tutorial focuses specifically on the construction of these versatile office storage towers, you can find the detailed plans for the integrated floating desk that connects them right HERE, allowing you to replicate the entire system for a truly unified home office transformation.
This comprehensive guide will walk you through every step of building your own office storage towers. While the project involves several stages and some specific cuts, don’t be intimidated! I’ve broken down each process into clear, manageable instructions, and as always, I’m providing free, printable plans to guide you. These plans offer detailed measurements, pocket hole placements, and visual aids to ensure your success, even if you’re relatively new to woodworking. Simply click HERE or on the image below to download and print your complimentary plans and embark on your journey to a more organized and stylish workspace.
One aspect that might initially seem daunting is the inclusion of a few angle cuts, particularly for the decorative “X” elements. However, please don’t let this deter you! I’ll demonstrate a simple, foolproof method for making these cuts that eliminates guesswork and ensures a fantastic result, even if they aren’t absolutely flawless. Remember, the charm of DIY projects often lies in their unique, handcrafted character. So, gather your tools, roll up your sleeves, and let’s dive into building these incredible custom office storage towers!
Phase 1: Constructing the Core Cabinet Bases for Your Storage Towers
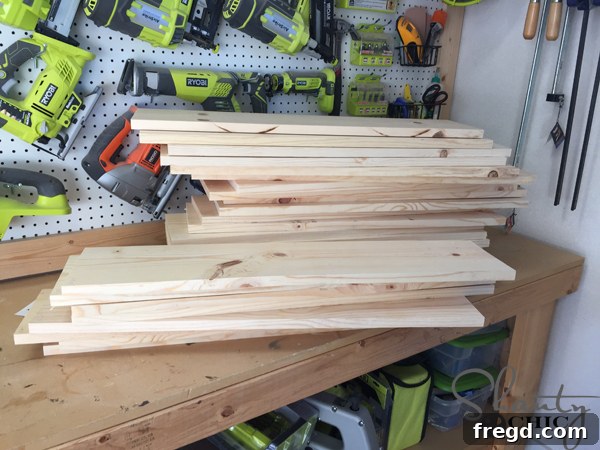
Our journey begins with the meticulous preparation of all the individual shelf pieces that will form the internal structure of your office towers. Accuracy at this stage is crucial for a professional-looking finish. Use your miter saw or circular saw to cut the boards precisely to the dimensions specified in the free printable plans. Double-check all measurements before making your cuts to avoid costly errors and ensure a perfect fit for each component.
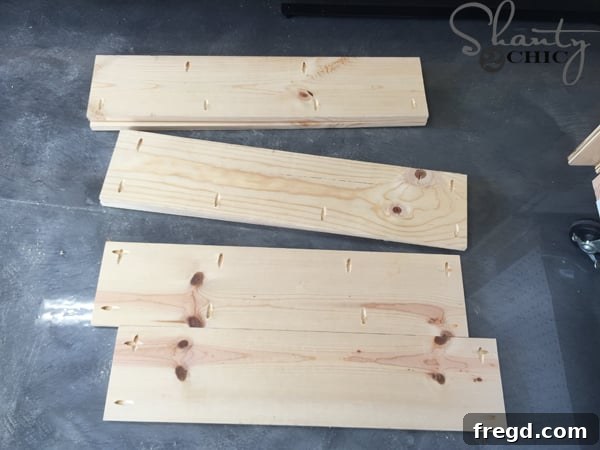
Next, we’ll utilize the power of pocket hole joinery for strong, concealed connections. Using my trusty Kreg K5 jig, I drilled 3/4-inch pocket holes into the designated shelf pieces. Refer to your detailed plans for the precise placement of these pocket holes, ensuring they are strategically located for maximum strength and hidden from view. If you’re new to using a Kreg Jig, it’s an incredibly versatile tool for DIY furniture. You can click HERE for an excellent video tutorial on how to use a Kreg Jig effectively, and if you’re ready to invest in one, click HERE to purchase a Kreg Jig K5 on Amazon.
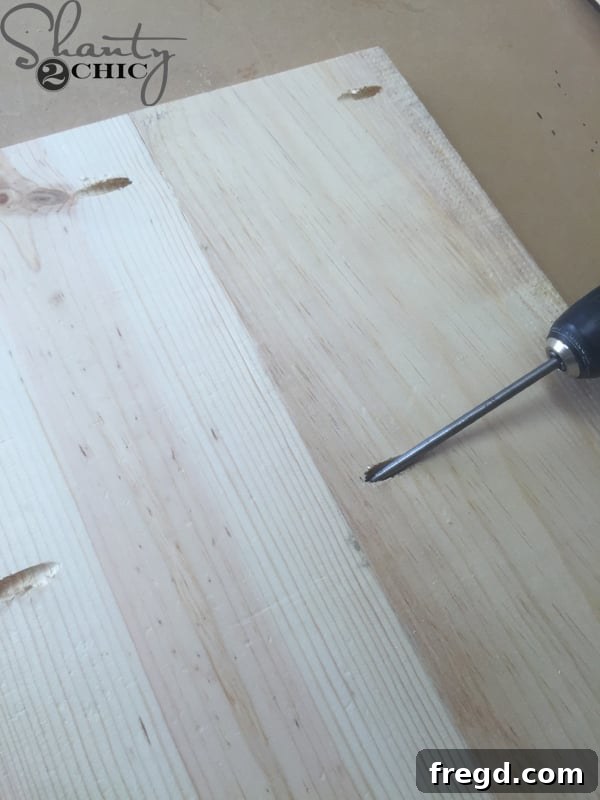
With the pocket holes drilled, it’s time to assemble the individual shelf units. Apply a small amount of wood glue to the mating surfaces, then secure the pieces together using 1 1/4-inch pocket hole screws. Ensure the joints are tight and square as you work, creating robust and stable shelf components for your custom office storage.
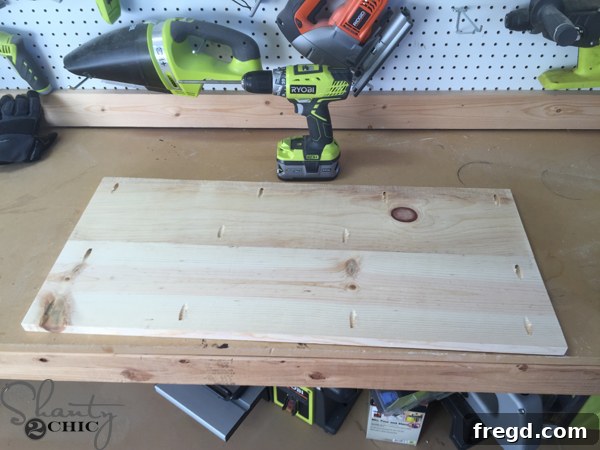
Here you can see one completed shelf piece, meticulously assembled and ready to be integrated into the main cabinet structure. The combination of wood glue and pocket hole screws creates a surprisingly strong and durable joint, perfect for supporting books, decor, and other office essentials.
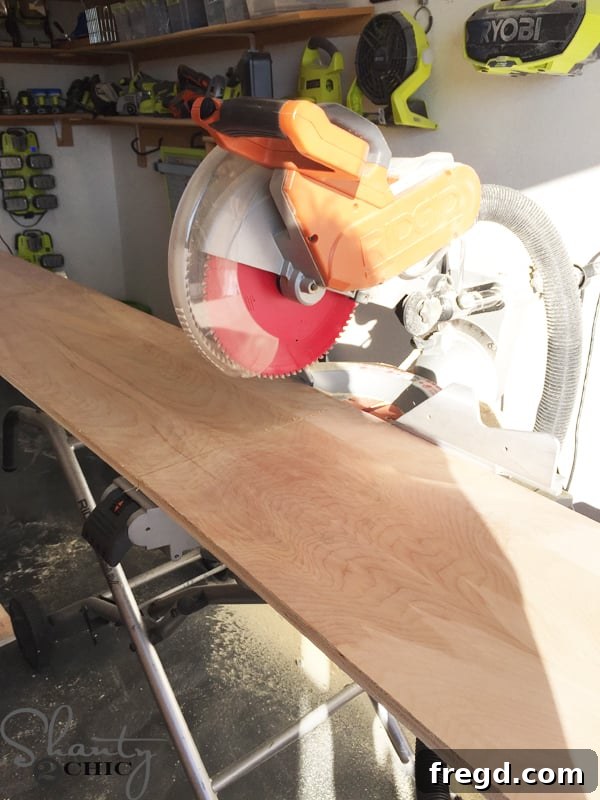
For the large side panels of the cabinet, I opted for Purebond Plywood, known for its quality and eco-friendliness. To make transport easier and fit them into my car, I had the large sheets ripped down to more manageable widths at Home Depot. Once home, I used my miter saw to precisely cross-cut these plywood pieces to their final dimensions, ensuring they perfectly align with the overall design of the office storage towers.
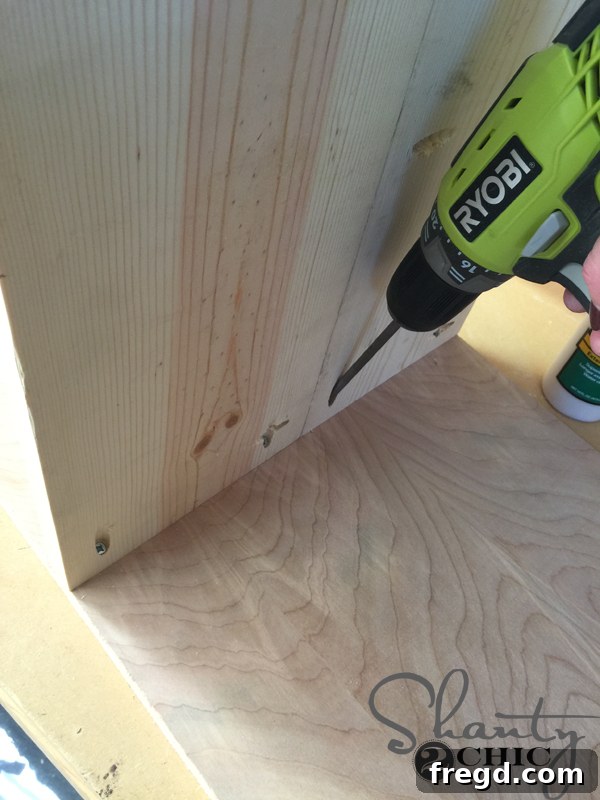
Now, we’ll attach the previously assembled shelf pieces to the plywood side panels. Carefully align each shelf according to the exact placement indicated in your plans. Apply wood glue, then secure them firmly with 1 1/4-inch pocket hole screws. This step begins to form the foundational structure of your storage tower’s base cabinet, bringing your custom office furniture design to life.
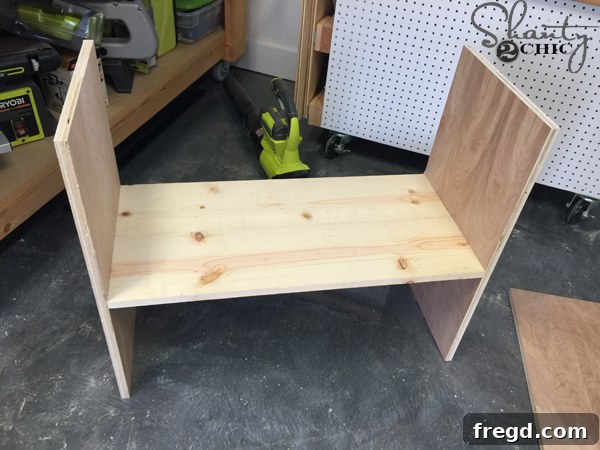
At this stage, your cabinet base should visibly take shape, comprising two sturdy plywood side panels with one of your assembled shelves securely fastened between them. This forms the essential framework for the hidden storage compartment at the bottom of each office tower, providing a solid foundation for the entire unit.
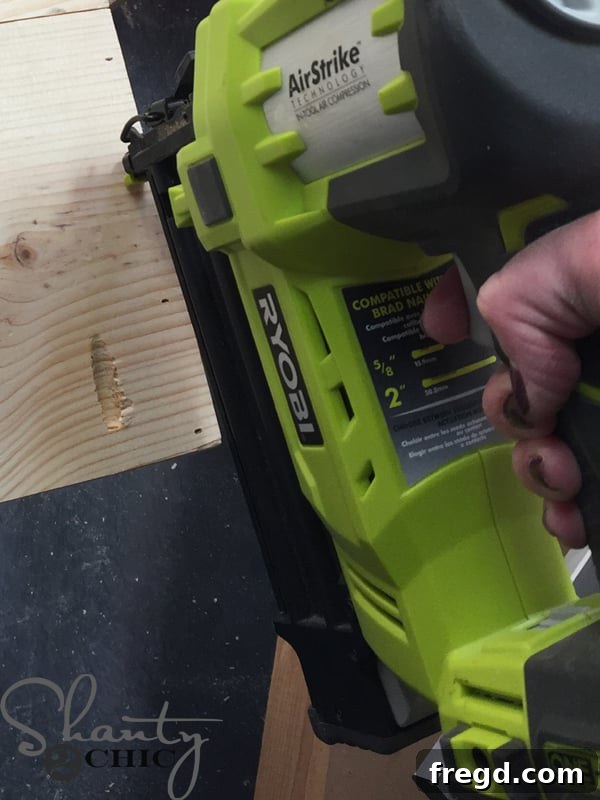
To fully enclose the cabinet base, proceed by attaching the top and bottom pieces. Apply a bead of wood glue along the edges where these pieces will meet the side panels, then secure them with 1 1/4-inch brad nails. For this task, I find my 18-gauge Ryobi Airstrike Nailer incredibly efficient, making quick work of fastening while leaving minimal visible holes that are easy to fill later.
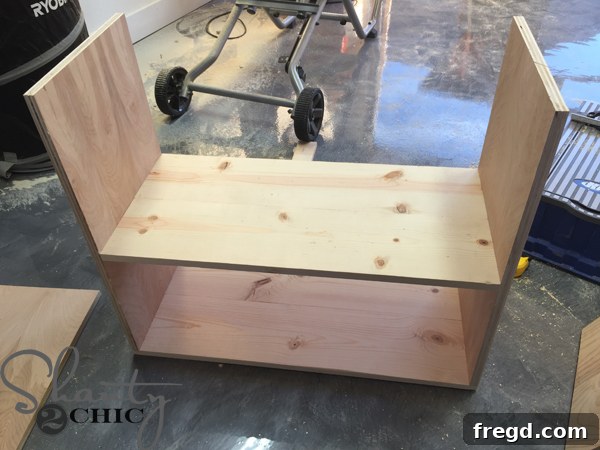
Here’s a clear view of the cabinet base after successfully attaching the bottom piece. This step significantly increases the structural integrity and creates the enclosed storage space that will eventually house a printer or files, keeping your office organized and tidy.
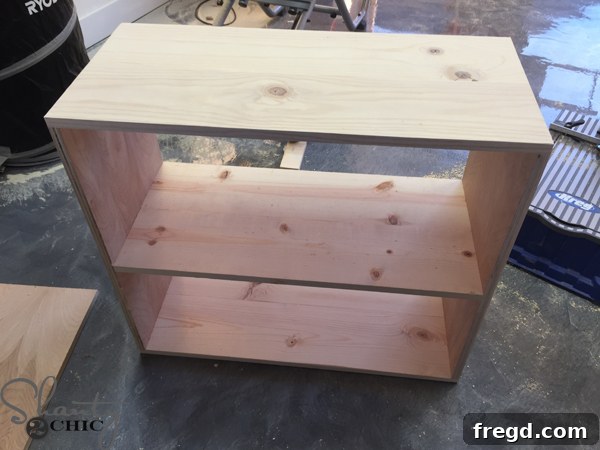
And with the top piece now securely attached, the foundational cabinet base for your DIY office storage tower is complete. This robust box forms the enclosed storage area, ready to be integrated with the upper shelving structure. Now that we have the solid base, it’s time to move on to constructing the distinctive “ladders” that will define the open shelving design of these elegant office towers.
Phase 2: Crafting the Distinctive “Ladders” for Your Open Shelving
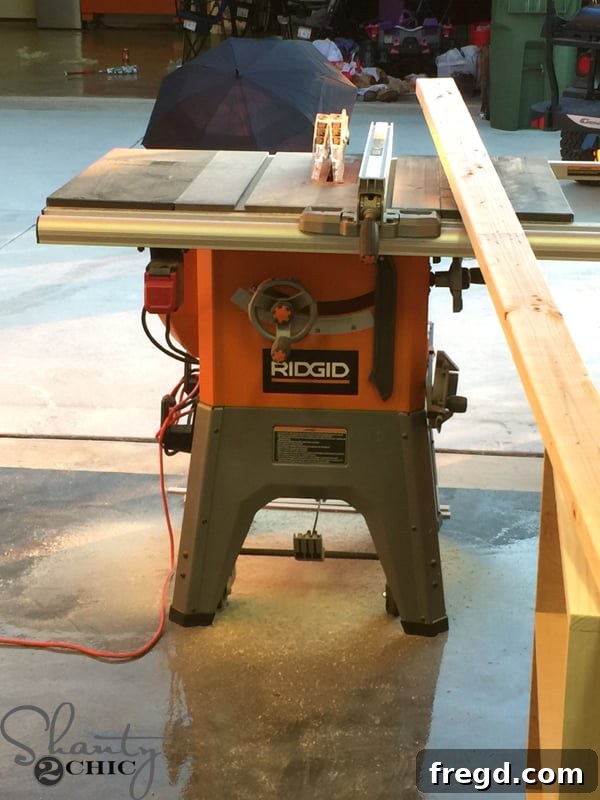
One of my favorite DIY hacks for significant cost savings on lumber is to create my own custom-sized boards. Instead of purchasing expensive select pine 2x2s, which can cost around $8 each at my local hardware store, I bought more affordable 2x4s for just $3 apiece. Using my table saw, I efficiently ripped each 2×4 into two perfect 2x2s. I applied the same cost-saving technique for the 1×2 boards, transforming 1x4s into two 1x2s per board. This simple yet effective strategy saved me approximately $150 in lumber costs for building both office towers! While it does require a table saw, even a basic Ryobi model can be acquired for about $129, making it a justifiable investment that quickly pays for itself if you plan on tackling several woodworking projects. It’s a fantastic way to expand your tool collection while keeping your project budget in check for custom office furniture.
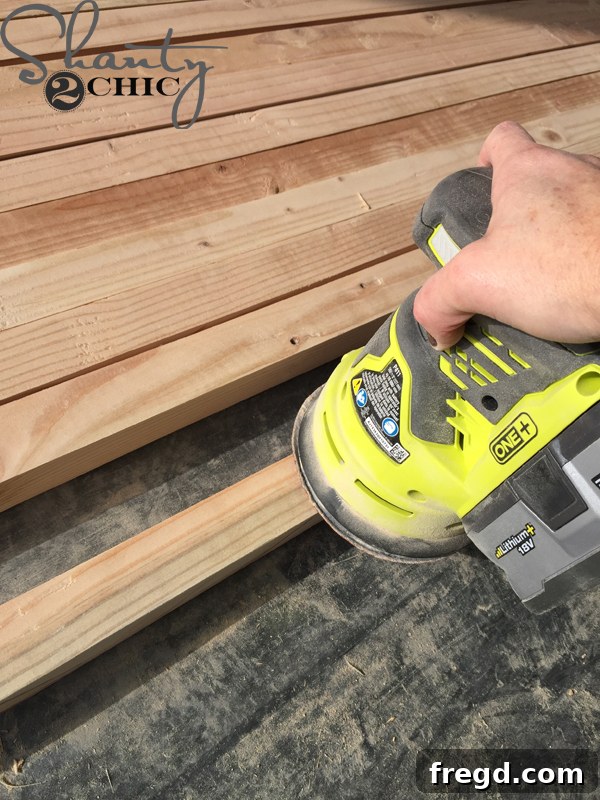
While ripping down larger boards into smaller dimensions definitely adds an extra step to the process, the substantial cost savings make it entirely worthwhile, especially for larger DIY projects like these office storage towers. After cutting, the edges of the newly ripped boards will be a bit rough. To achieve a smooth, professional finish ready for staining or painting, I used my reliable Ryobi 18-volt orbital sander to meticulously smooth out all surfaces. This ensures a polished look and feel for your finished custom office shelving.
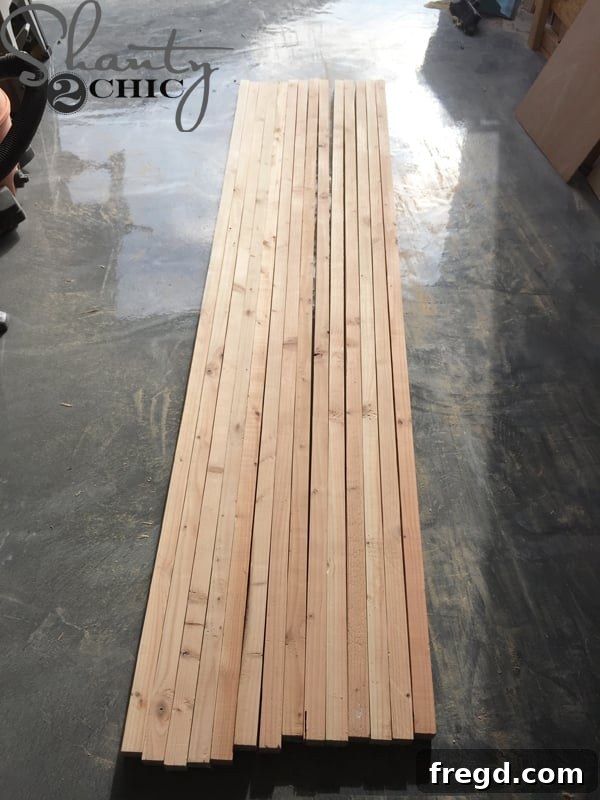
And just like that, after careful ripping and sanding, our custom 2×2 boards are perfectly prepped and ready for assembly. These will form the stylish and structural “ladders” that give the office towers their distinctive open shelving aesthetic, integrating seamlessly into your DIY office desk system.
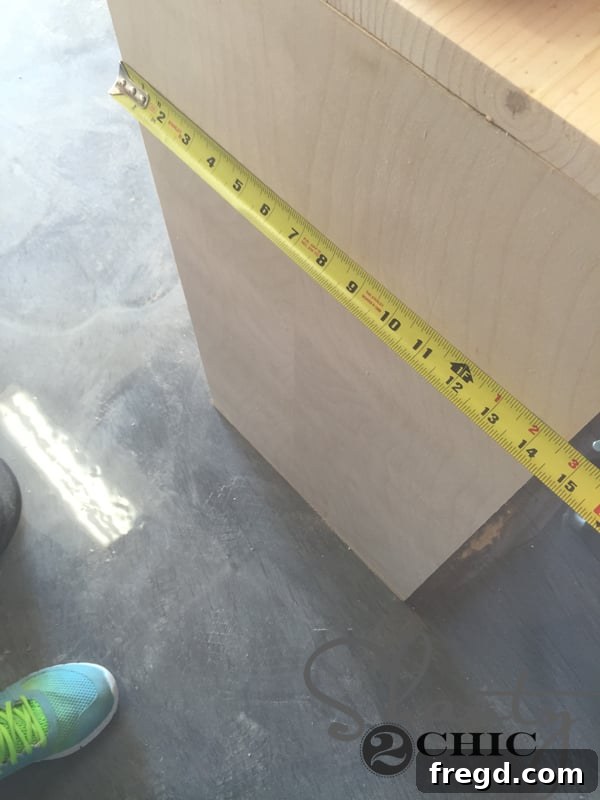
Before proceeding with the assembly of the “ladders,” it is absolutely crucial to take a precise measurement of the width of the cabinet bases you just constructed. This step ensures that the horizontal rails of your ladders are cut to the exact length, guaranteeing a perfect, flush fit between the ladders and the cabinet. Precision here will result in a professional and seamless integration for your custom office storage towers.
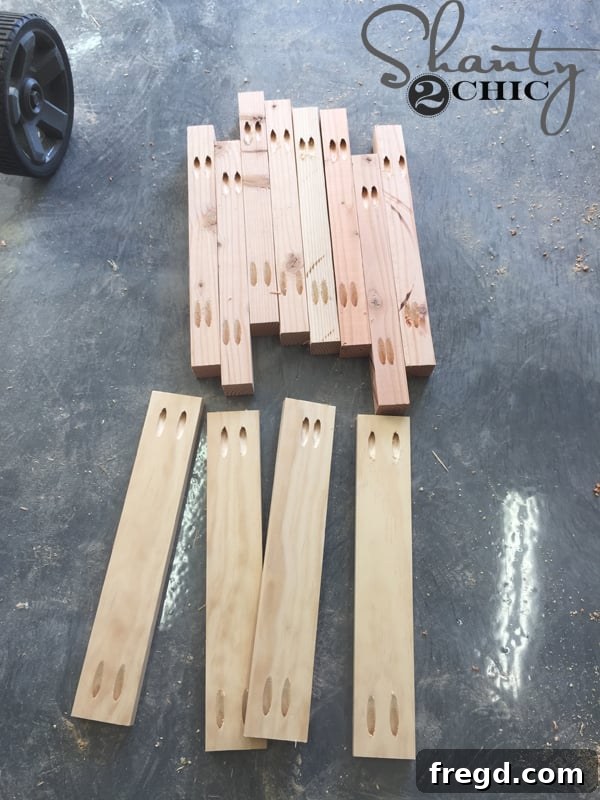
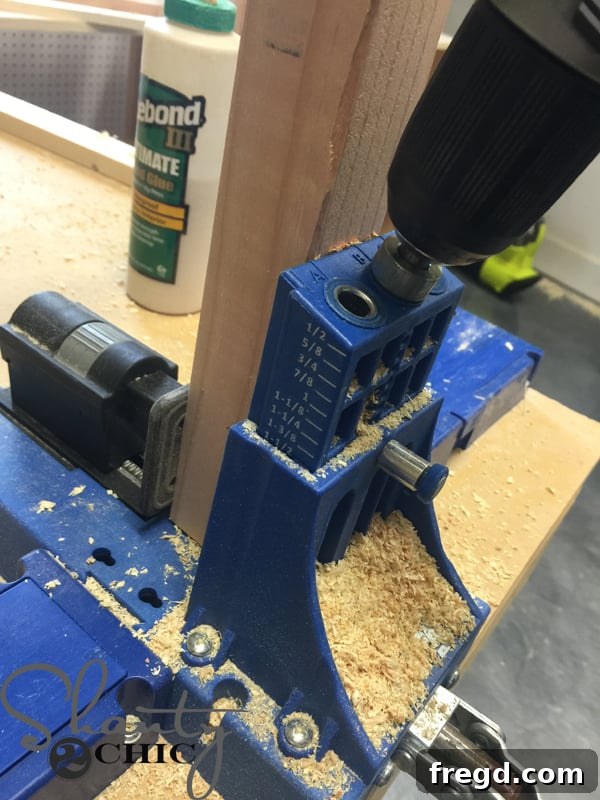
Once you’ve obtained the exact width measurement from your cabinet bases, cut the horizontal rails for the ladders to this precise length. Next, using your Kreg Jig, drill pocket holes into these rails according to the specifications in your free printable plans. These pocket holes will facilitate strong, hidden joints when attaching the rails to the vertical 2x2s, creating sturdy and aesthetically pleasing open shelving for your home office organization.
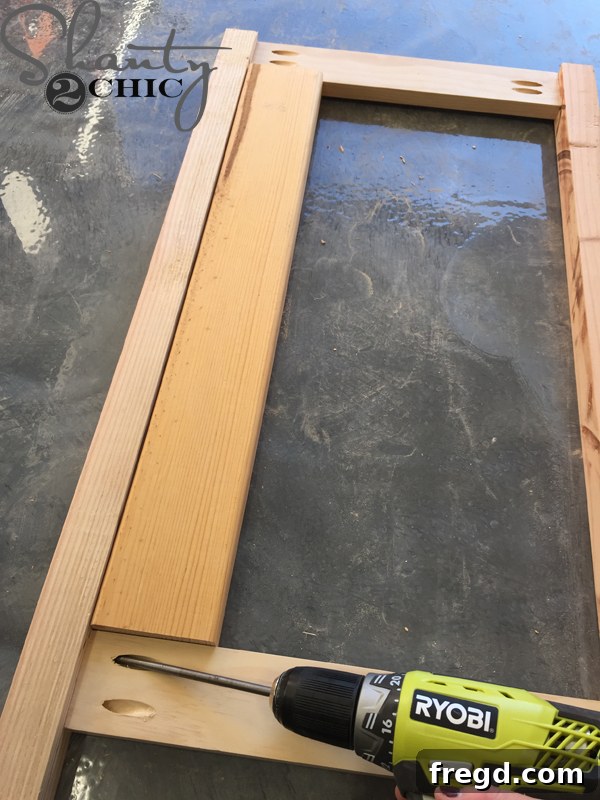
To ensure perfect symmetry and level shelving for both sides of your office towers, I highly recommend using custom-made spacers when assembling the “ladders.” These spacers guarantee that the horizontal rails are consistently spaced on both ladder frames. Once properly aligned with the spacers, attach the 2×2 vertical pieces to the horizontal rails using 1 1/4-inch pocket hole screws and a durable wood glue. This method results in robust, identical ladder frames, critical for the overall stability and appearance of your custom office storage.
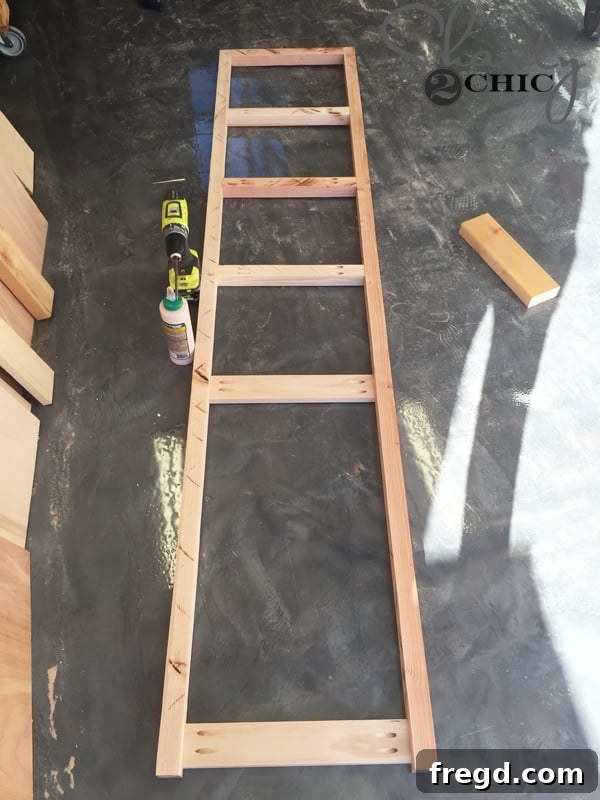
Here it is: one fully assembled “ladder” frame, now complete and ready for integration. This meticulously constructed side piece forms the elegant open shelving structure that will sit atop your cabinet base, contributing significantly to the aesthetic and functional design of your DIY office desk system.
Phase 3: Integrating Ladders with Cabinet Bases
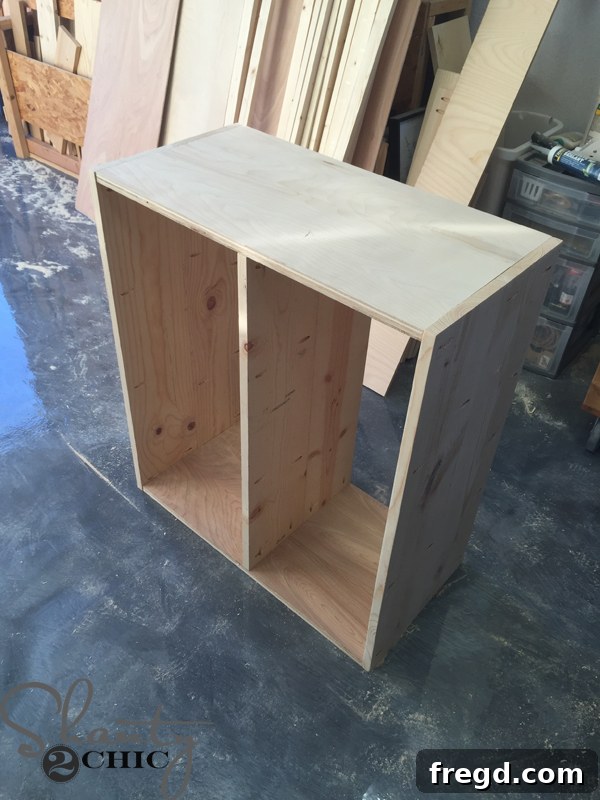
With the “ladders” constructed, the next step in building your custom office storage towers is to attach them to the cabinet bases. To make this process easier and ensure proper alignment, carefully flip the cabinet base onto its side. This position provides a stable and accessible surface for securing the ladder frame, ensuring a smooth transition between the base and the open shelving unit.
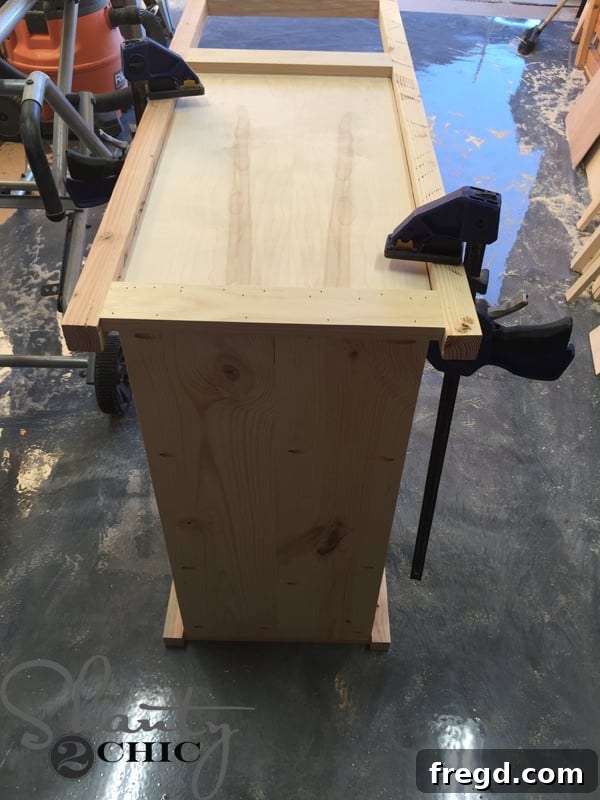
Once the cabinet base is positioned on its side, carefully place one of the completed “ladders” on top of it, ensuring accurate alignment. It’s essential to clamp the ladder firmly in place to prevent any movement during attachment. Refer to your detailed plans for the precise measurements regarding the inset at the bottom, which is crucial for a flush and professional finish. This step marries the hidden storage cabinet with the open shelving structure, bringing your DIY office desk system closer to completion.
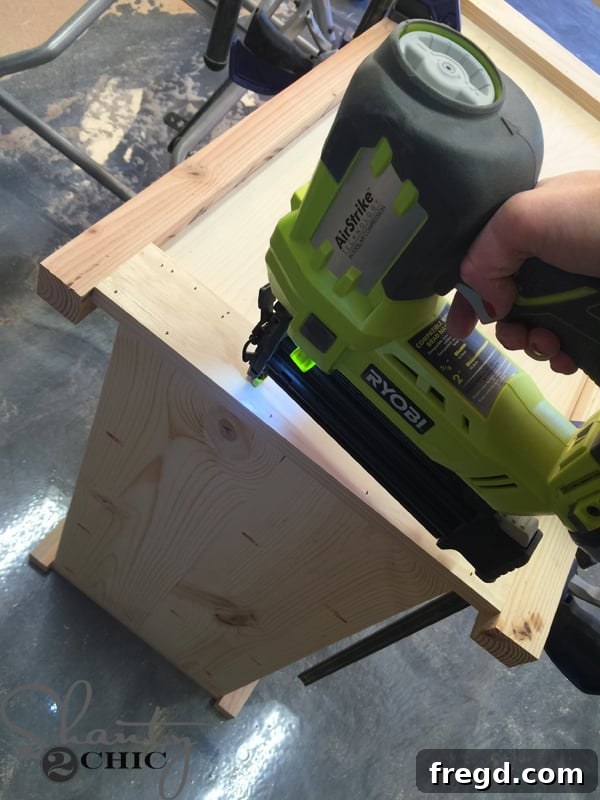
With the ladder securely clamped and perfectly aligned, it’s time to permanently attach it to the cabinet base. Apply a generous amount of wood glue along the contact surfaces for a strong bond, then secure the ladder firmly in place using 1 1/4-inch brad nails. The brad nailer makes this process quick and efficient, minimizing visible fasteners and contributing to the clean aesthetic of your custom office storage towers.
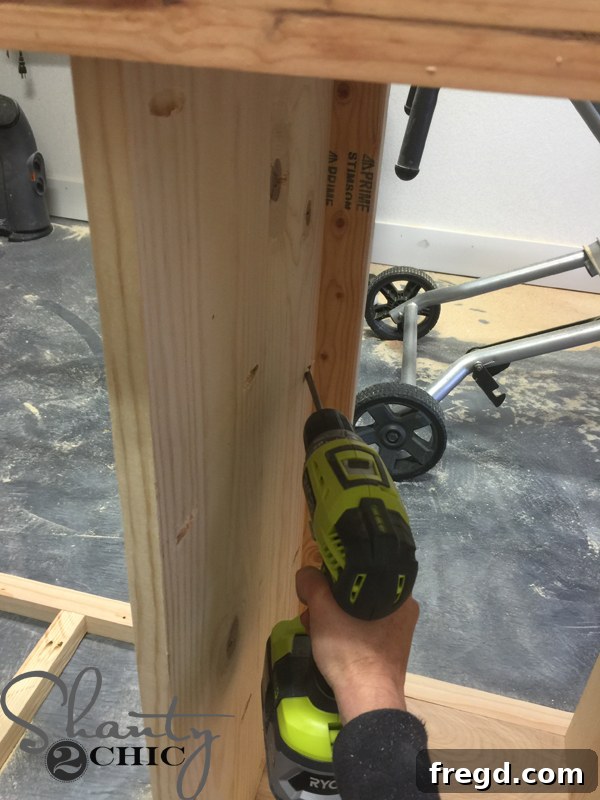
Once both “ladders” are securely attached to the cabinet base, enhancing the structural integrity and defining the silhouette of your office towers, it’s time to add the front trim pieces. Carefully measure and cut the 2×3 trim pieces to precisely fit across the front of each open shelf section. Attach these trim pieces using both wood glue and pocket hole screws for an exceptionally strong and clean connection. The pocket holes will be hidden, maintaining the sleek design of your custom office shelving.
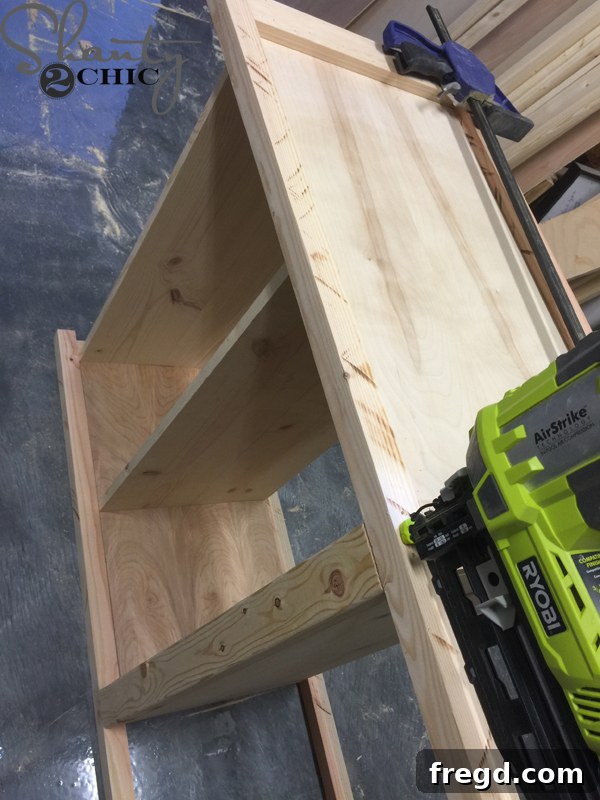
To provide even greater stability and support for the front 2×3 trim pieces, especially considering the weight they might bear on the shelves, add a few extra 2-inch brad nails. Drive these nails from the outside of the 2×2 “ladder” frames directly into the front trim. This additional fastening method reinforces the connection, ensuring your office storage towers are robust and built to last, a key feature for any high-quality DIY office furniture.
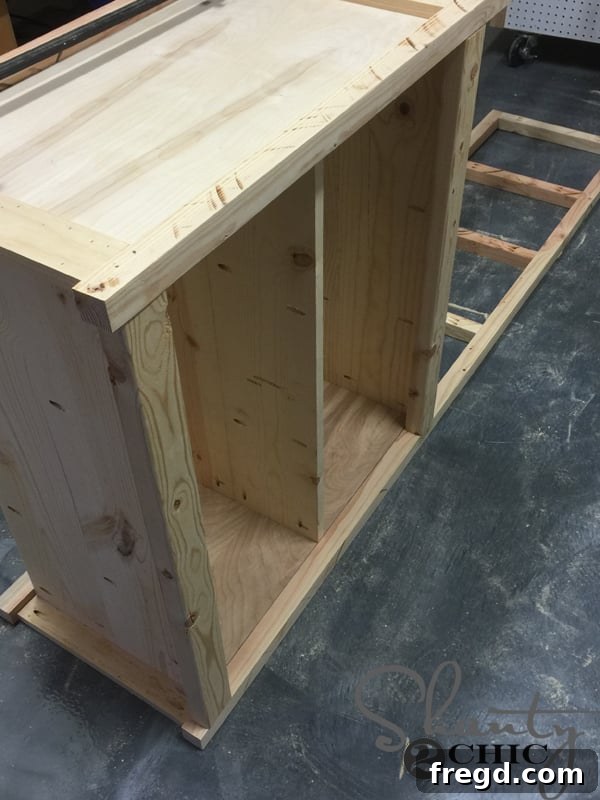
At this stage, your office tower should boast neatly attached trim pieces, providing a refined edge to each open shelf. This significantly enhances the visual appeal and creates a more finished look for your custom office shelving, demonstrating the progress of your DIY office desk system.
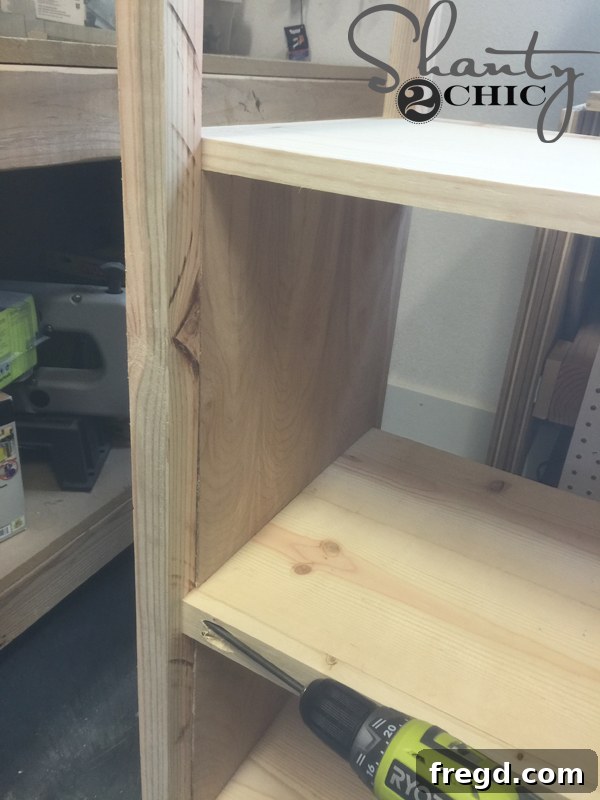
Continuing to build out the structure, the next step involves attaching the back trim pieces. These pieces provide additional rigidity and a clean finish to the rear of your office tower. Secure them firmly with pocket hole screws and wood glue, following the measurements and placement guidelines provided in your detailed plans. This ensures that the back of your custom office storage is as robust and well-finished as the front.
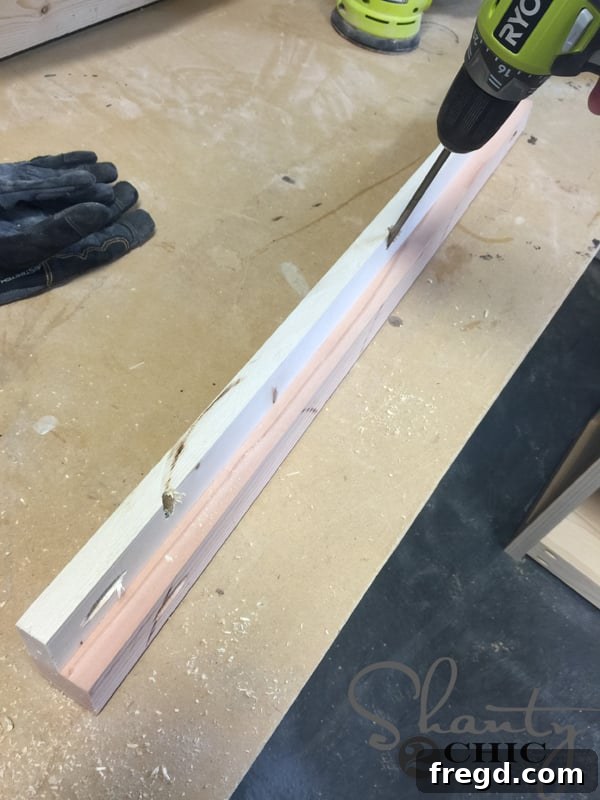
To ensure a solid and professional attachment point for the back plywood panel of the hutch, you’ll need to construct a sturdy brace using 1×2 and 2×3 lumber. This brace creates a flush surface and a secure anchor point, preventing the backing from bowing or detaching over time. This detail is crucial for the long-term durability and finished aesthetic of your DIY office desk system’s storage towers.
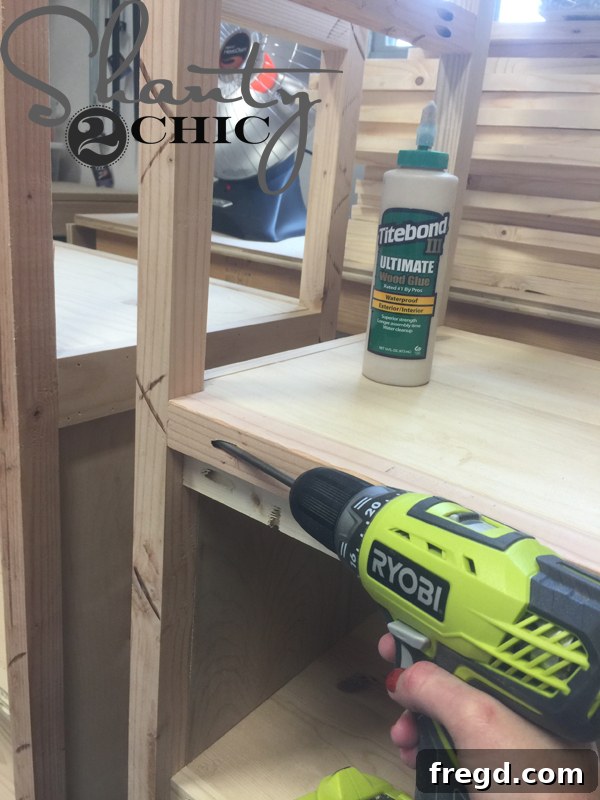
Once your brace is assembled, securely attach it to the back of the cabinet structure. Use a strong wood glue along the contact surfaces and fasten it with 2 1/2-inch pocket hole screws. This creates a robust and reliable frame for the back panel, ensuring the overall stability and finished quality of your custom office storage towers.
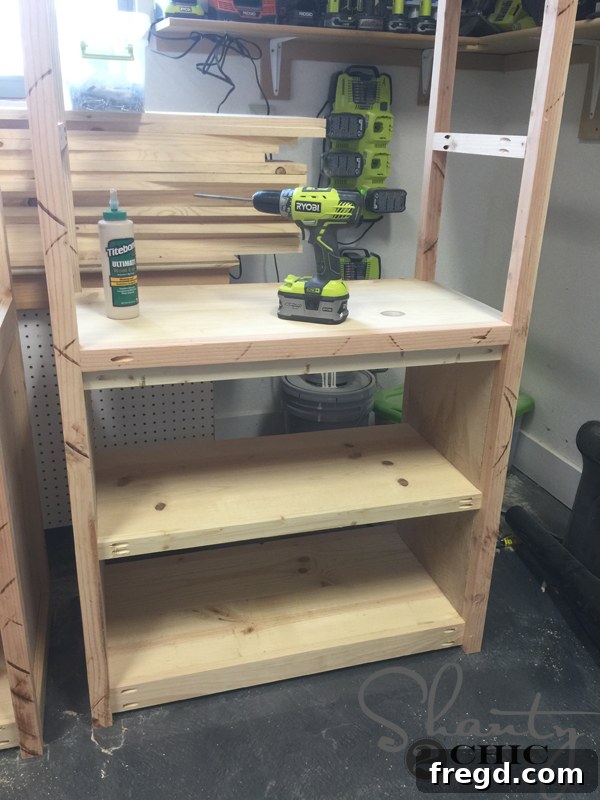
With the brace now firmly attached to the back of the cabinet, the structural framework for your office tower is largely complete. (At this stage, you have the option to attach your back panel with staples if you prefer. However, I typically choose to wait until the very end. This allows for easier and more uniform staining of the shelf pieces and the panel separately before final assembly, ensuring a superior finish for your custom office furniture.)
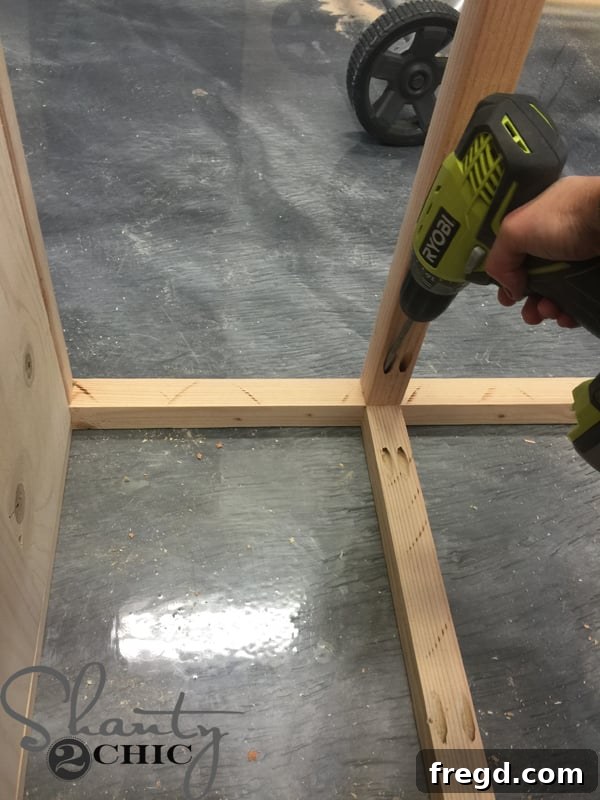
Now, let’s continue to define the open shelving sections by attaching the remaining front horizontal pieces. These rails further strengthen the structure and complete the aesthetic of the “ladders.” Apply wood glue for a strong bond and secure them with 2 1/2-inch pocket hole screws, ensuring that all connections are tight and square. This step is vital for the stability and visual appeal of your DIY office desk system’s towers.
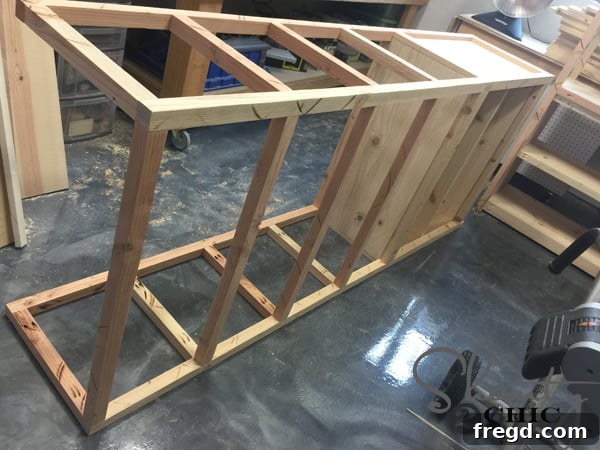
Observe the office tower now, with all the front horizontal pieces meticulously attached. The structure of your open shelving unit is truly taking shape, demonstrating the precision of your custom office furniture project. With the front complete, our attention now shifts to the back pieces, ensuring structural integrity and preparing for the decorative elements.
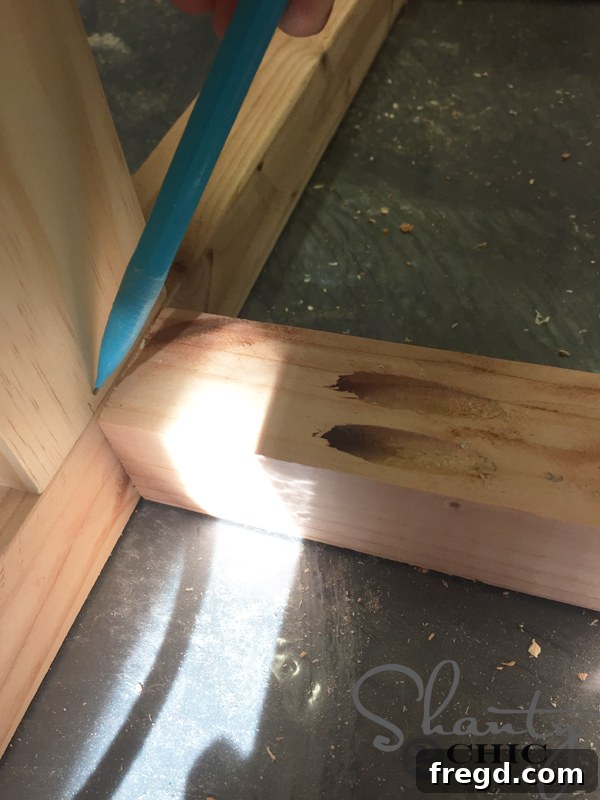
As you begin to attach the back rails for the open shelving sections, it’s crucial to pay close attention to the specific inset designed for the 1×3 piece. This offset is integral to the overall aesthetic and structural integrity, ensuring that all components align correctly for a professional finish on your DIY office storage towers.
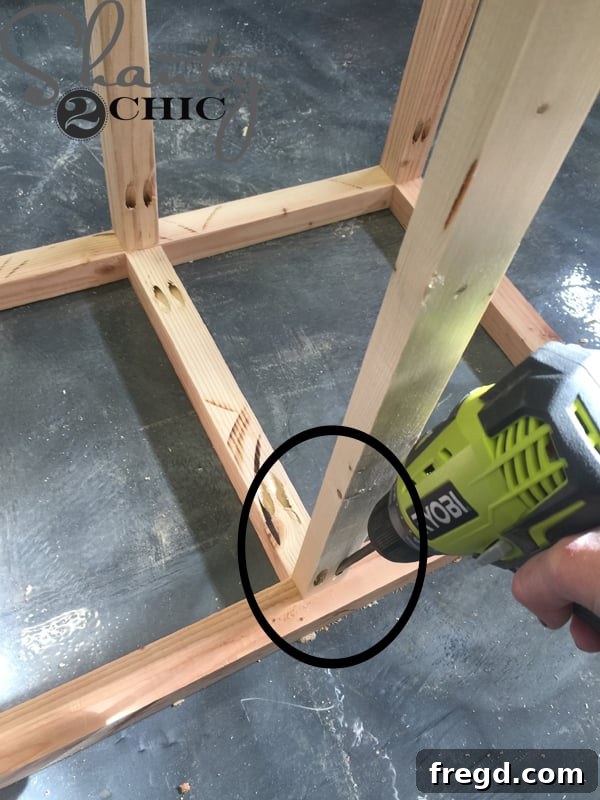
For precise placement and to achieve the intended design, always refer back to your detailed plans for the exact measurements of this inset on the back of the office tower. Accuracy in this step ensures that the final assembly of your custom office shelving will be clean, sturdy, and visually appealing, a hallmark of quality DIY office furniture.
Phase 4: Installing the Shelves for Optimal Office Organization
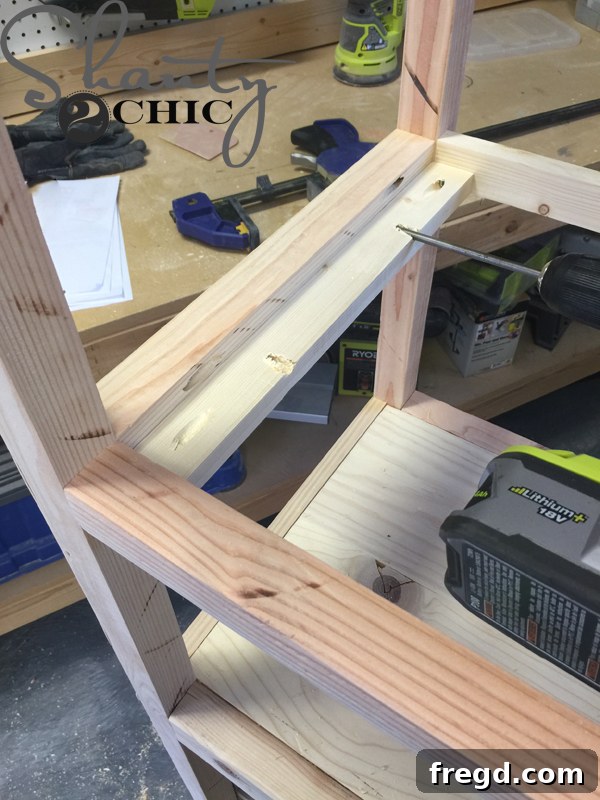
Now we move on to installing the essential shelf cleats. These small but mighty pieces provide crucial support for the adjustable shelves within your office towers. Begin by measuring and cutting the 1×2 pieces to the exact dimensions specified in your plans. Drill 3/4-inch pocket holes into these cleats according to the plan’s diagrams. Then, attach them to the interior of the tower using 1 1/4-inch pocket hole screws and a reliable wood glue. These cleats are engineered to securely hold the pre-built shelves that we assembled at the very beginning of this project, ensuring robust and functional open shelving for your home office organization.
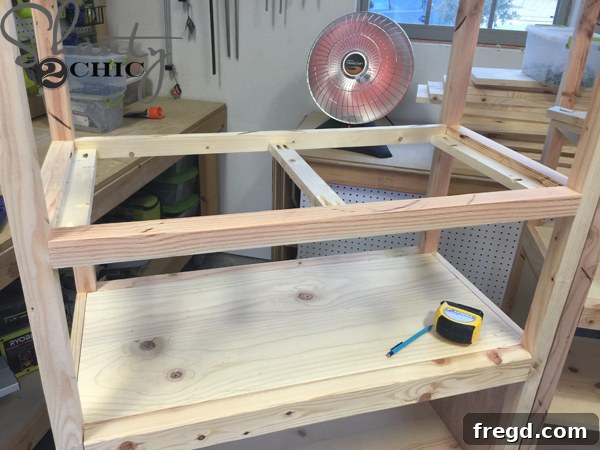
Here’s a clear view of one shelf section with the cleats expertly installed. These carefully placed cleats create a sturdy ledger, ready to support the weight of books, decorative items, or anything else you choose to display on your custom office shelving, contributing to both the beauty and utility of your DIY office desk system.
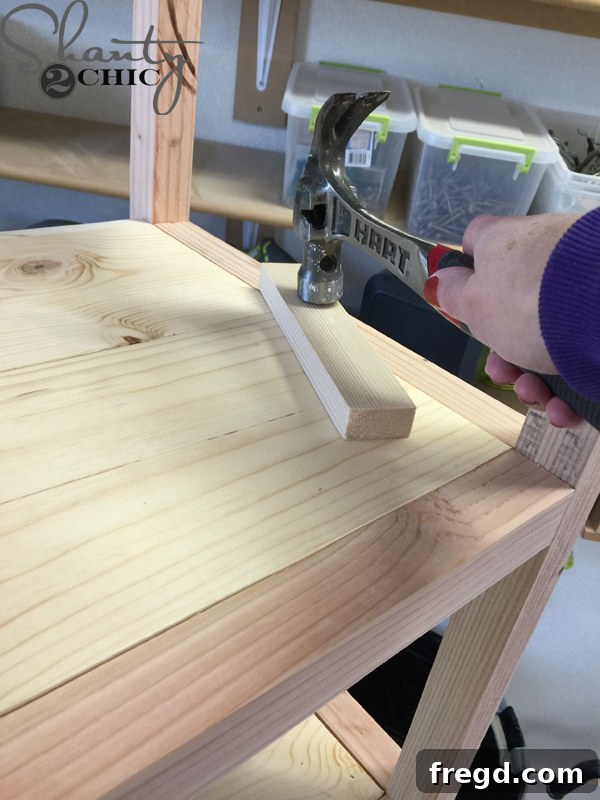
With the cleats securely in place, it’s time to carefully insert the pre-assembled shelf pieces into their designated positions within the tower. These shelves are designed for a snug fit, which is excellent for stability. If you encounter a particularly tight spot, avoid forcing the wood directly, as this can cause damage. Instead, use a rubber mallet for gentle persuasion, or place a scrap piece of wood over the edge of the shelf and tap it with a hammer. This technique evenly distributes the force, protecting your custom office shelving from dings and dents while ensuring a perfect fit.
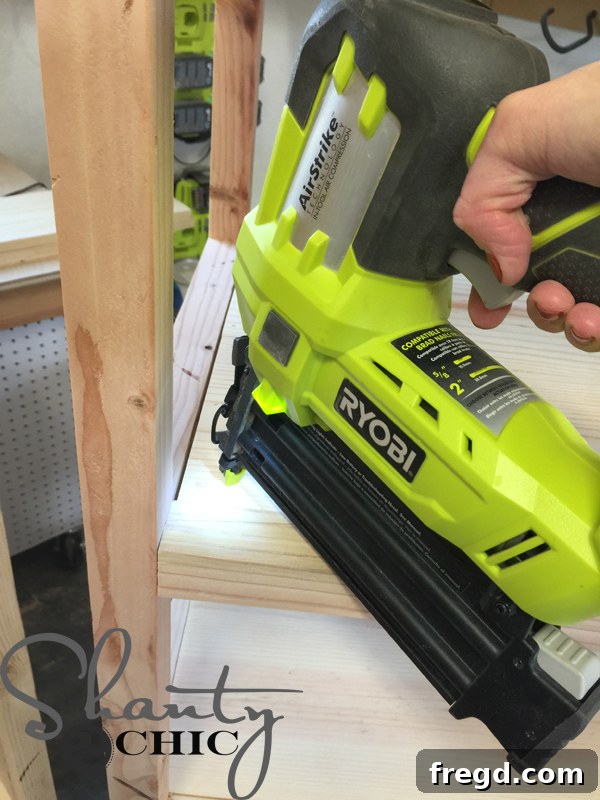
Once each shelf is perfectly seated on its cleats, secure it permanently in place. Apply a small amount of wood glue to the top of the cleats where they meet the underside of the shelf, then fasten the shelf down with 1 1/4-inch brad nails. This combination of glue and nails ensures a solid, long-lasting connection, making your open shelving units robust and reliable for all your home office organization needs.
Phase 5: Adding Decorative “X” Pieces to the Back
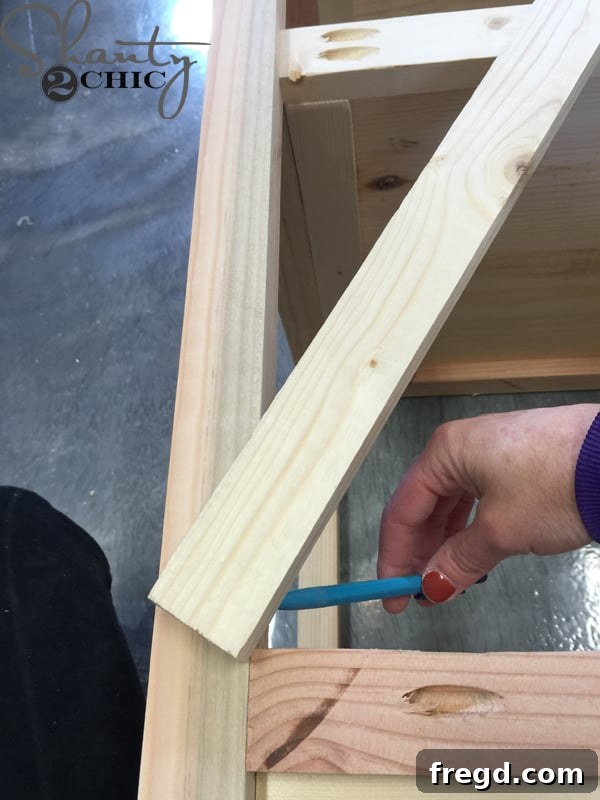
Now for a defining decorative element: the “X” pieces on the back of the open shelving. Start with the first 1×2 piece that will stretch diagonally from corner to corner. Hold it in place and carefully mark a line where the 1×2 meets the existing 2×2 “ladder” frame. This initial mark provides the guide for your first angle cut, ensuring a precise fit for these eye-catching elements of your custom office shelving.
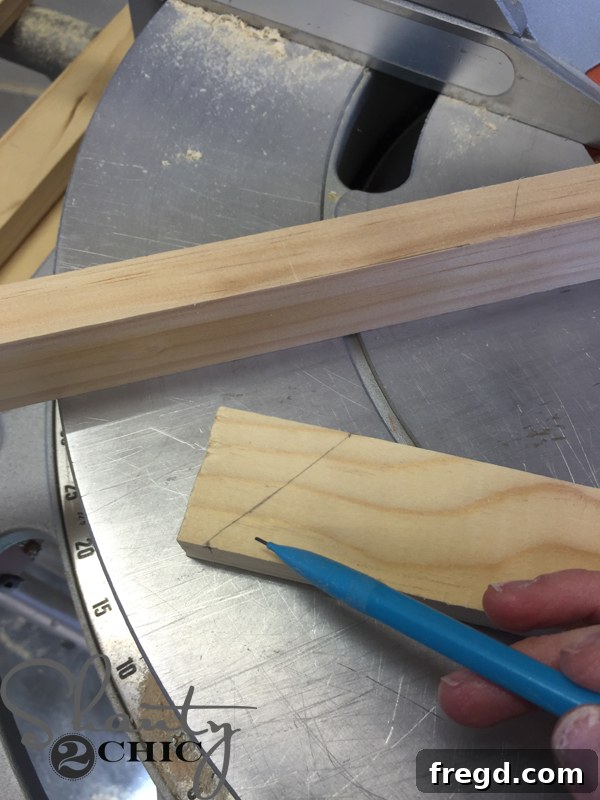
Here’s a fantastic trick to make perfect angle cuts without any guesswork. Once you have your marked line on the 1×2, simply place the board on your miter saw. Then, adjust the miter (bottom part) of your saw until the blade perfectly aligns with the angle you’ve marked on the board. This method takes all the uncertainty out of the equation, guaranteeing a clean, precise cut that will perfectly fit your custom office storage towers, even if you’re tackling angle cuts for the first time.
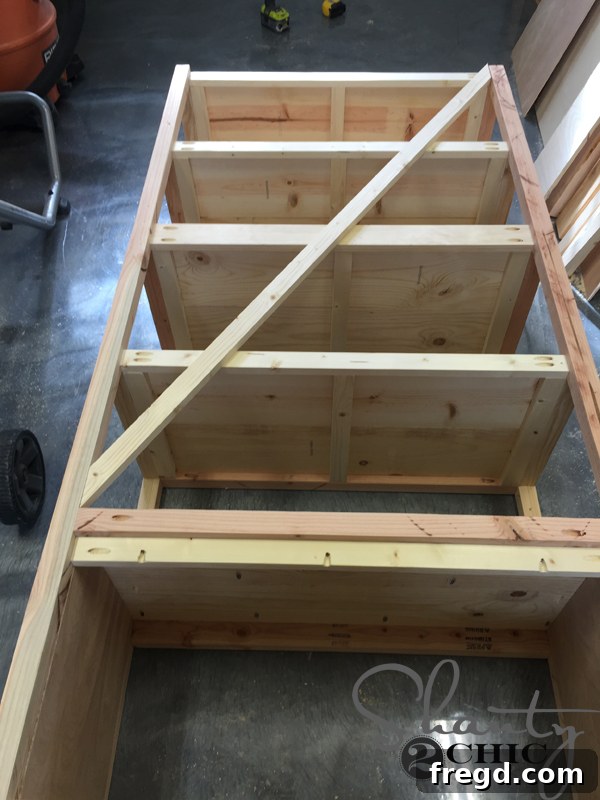
After making your first angle cut, lay the board down in its intended position on the office tower. This allows you to visually confirm the fit and then accurately mark the precise angle for the top corner cut. Dry-fitting each piece is a critical step, allowing for any minor adjustments before permanent attachment, ensuring a clean and professional appearance for the “X” elements on your custom office furniture.
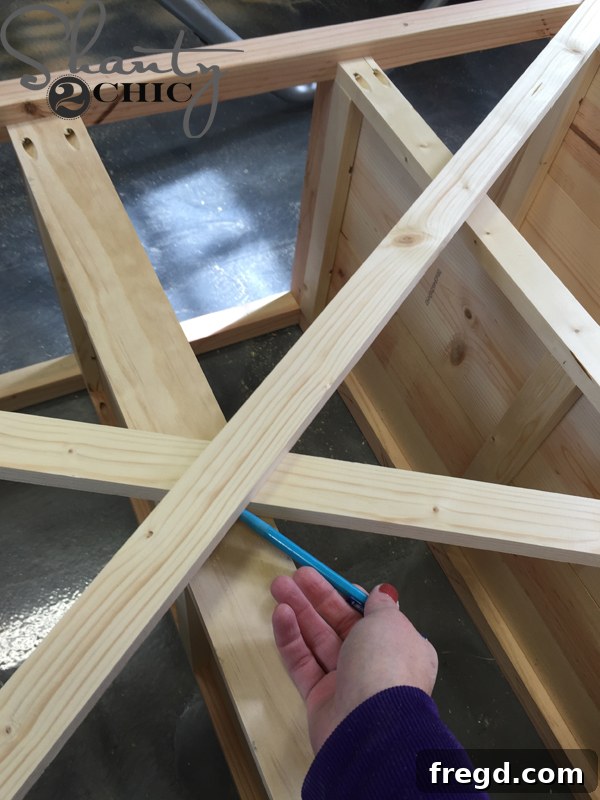
Repeat the precise marking and cutting process for the remaining “X” pieces that complete the decorative pattern on the back of your office towers. Each piece requires careful attention to the angles to ensure a cohesive and well-executed design for your DIY office desk system.
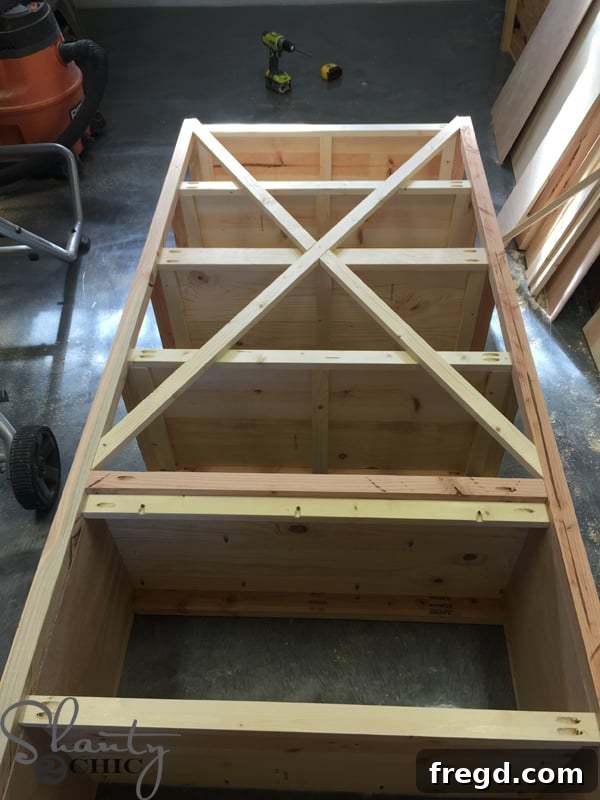
Once all the “X” pieces are cut and dry-fitted, you have an important decision regarding finishing. If you plan to paint these “X” pieces a different color, such as the matte black I chose, do not attach them yet. Instead, clearly label each piece so you know its exact position and set them aside for painting. This approach ensures a cleaner paint job and makes the staining process for the main tower components much easier, resulting in a more polished final look for your custom office storage.
Phase 6: Bottom Trim Details for a Refined Base
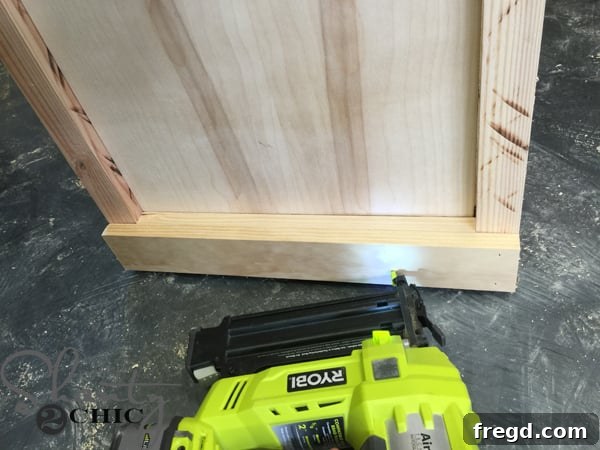
To give the cabinet base a polished and finished look, it’s time to add the bottom trim. Begin by measuring and cutting the 1×3 trim pieces to precisely fit each side of the cabinet. Apply wood glue along the edges for a strong bond, then secure them firmly in place with brad nails. This trim visually grounds the office towers and adds a touch of custom detail to your DIY office furniture.
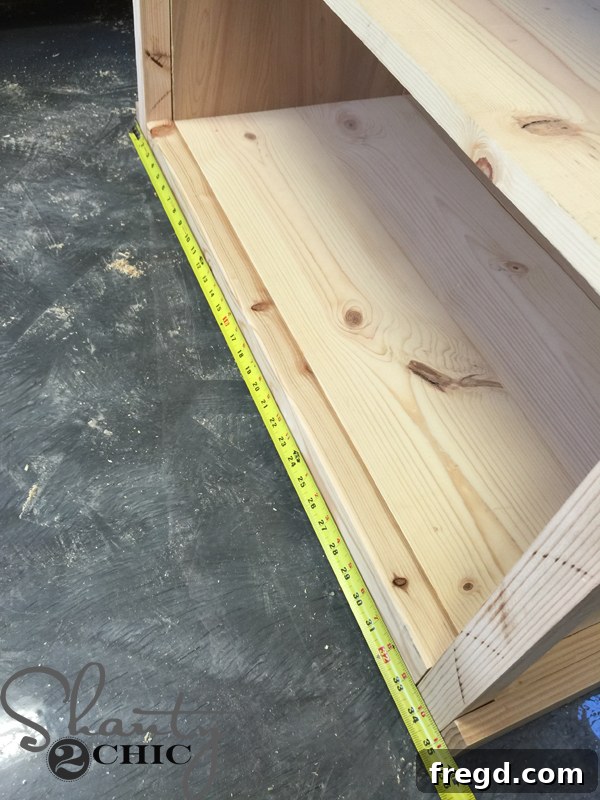
With both side trim pieces securely attached to the cabinet base, the next step is to measure and cut the front piece of trim. Take a precise measurement across the front, ensuring a snug fit between the two side pieces. Accuracy here is key for a seamless and professional appearance, completing the base trim of your custom office storage.
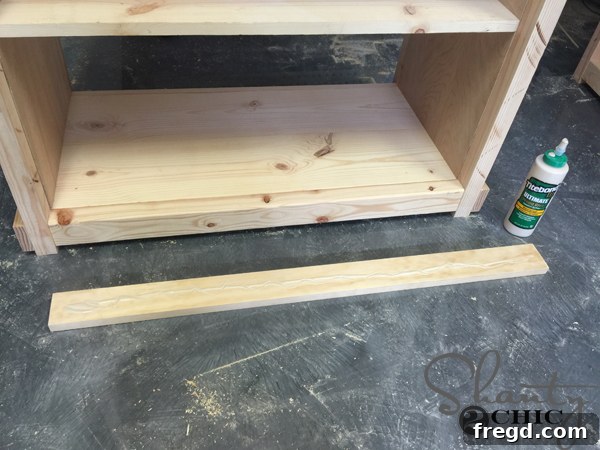
Before attaching the front trim piece, apply a continuous bead of wood glue along the back surface where it will meet the cabinet base. This adhesive provides additional strength to the mechanical fasteners, ensuring a durable and long-lasting connection for the base trim of your DIY office desk system.
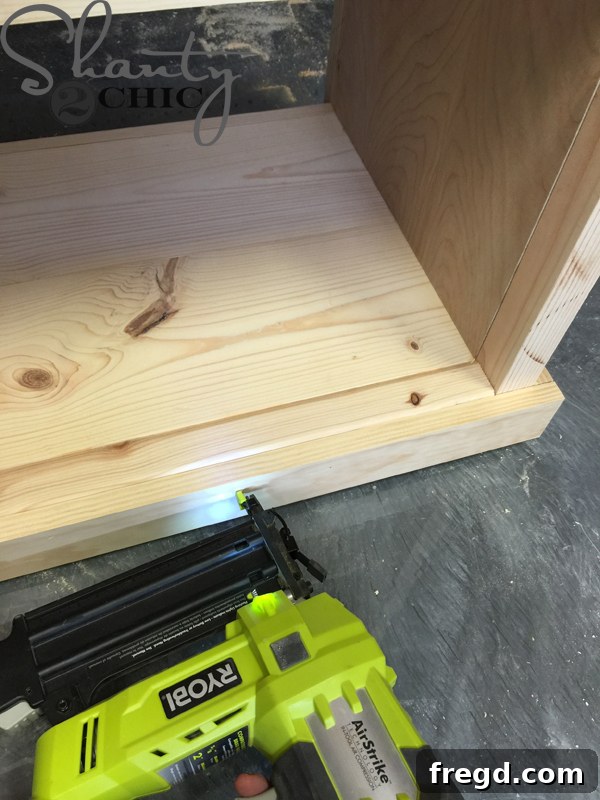
Finally, carefully position the glued front trim piece onto the cabinet base and secure it firmly in place using brad nails. The combination of wood glue and nails creates a robust and aesthetically pleasing finish, completing the base trim and giving your office storage towers a polished, built-in look.
Phase 7: Building and Installing the Doors for Hidden Storage
Now, let’s construct the essential doors that will provide the hidden storage functionality for your office towers, keeping clutter out of sight and maintaining a clean aesthetic for your home office organization.
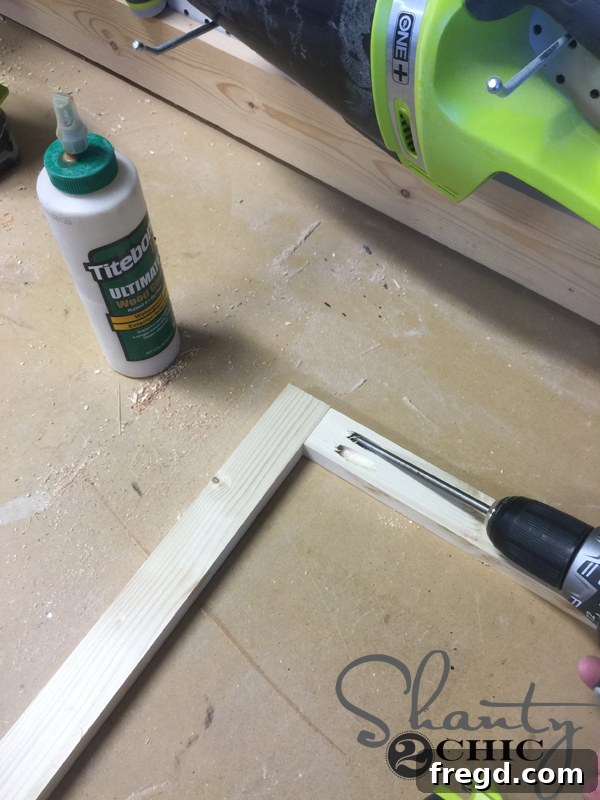
Begin by precisely measuring and cutting all the pieces required to build your door frames according to the plans. Then, drill 3/4-inch pocket holes as indicated in the diagrams, ensuring they are strategically placed for strong, hidden joints. Connect these pieces using 1 1/4-inch pocket hole screws and a light application of wood glue. A crucial tip for stainable projects: use wood glue sparingly! Wood glue does not absorb stain, and any excess that seeps out will create light spots that are incredibly difficult, if not impossible, to completely remove once dry. This meticulous attention to detail is vital for a flawless finish on your custom office furniture.
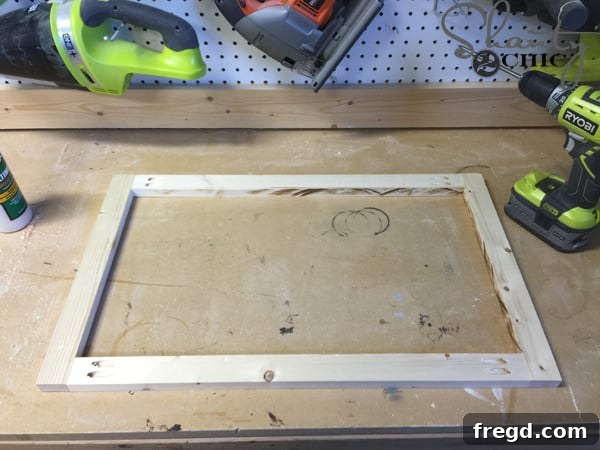
Here you can see one door frame, expertly assembled and perfectly square. The precision in cutting and joinery at this stage ensures that your hidden storage doors will fit flawlessly, contributing to the professional look of your DIY office desk system.
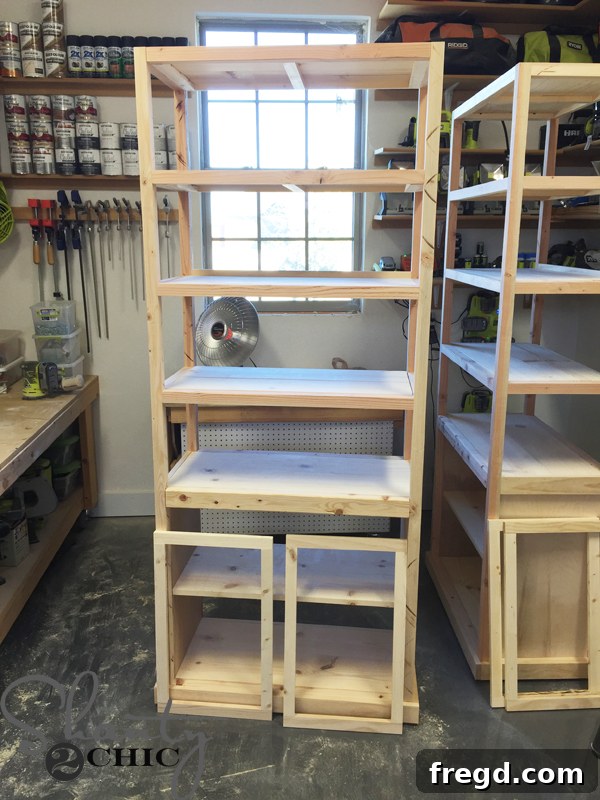
With all the door frames constructed, it’s wise to perform a “dry fit.” Carefully place each frame into its respective opening on the office tower to ensure they fit perfectly before you attach the 1/4-inch plywood backings. Making adjustments at this point, before the backing is permanently secured, is significantly easier and can save you a lot of frustration later on – trust me on this! This step is key to ensuring your custom office furniture doors operate smoothly.
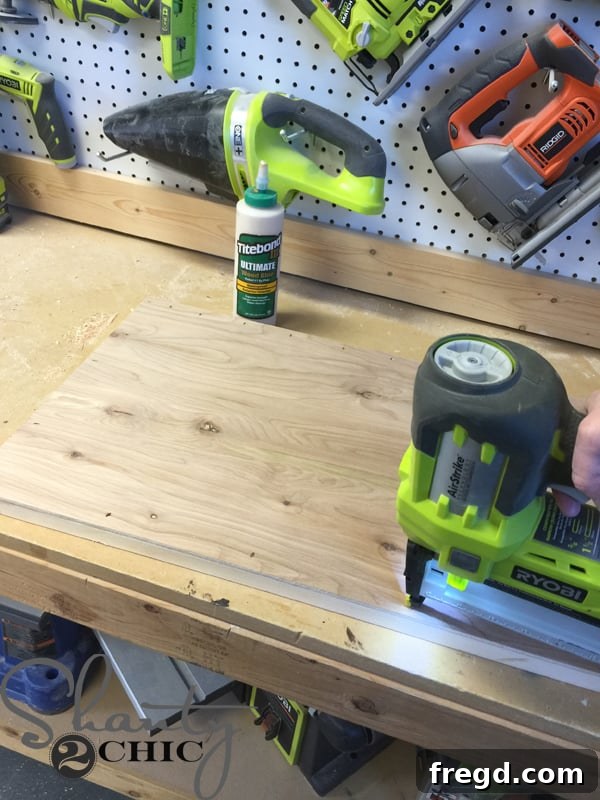
Next, cut the 1/4-inch plywood pieces to perfectly fit the back of each door frame. Apply a thin, even layer of wood glue to the perimeter of the frame where the plywood will sit, then attach the plywood using 3/4-inch staples. My Airstrike Stapler makes quick work of this, but if you don’t have one, brad nails can be used. However, staples are generally superior for securing thin materials like 1/4-inch plywood, providing a stronger and more flush attachment for your custom office storage doors.
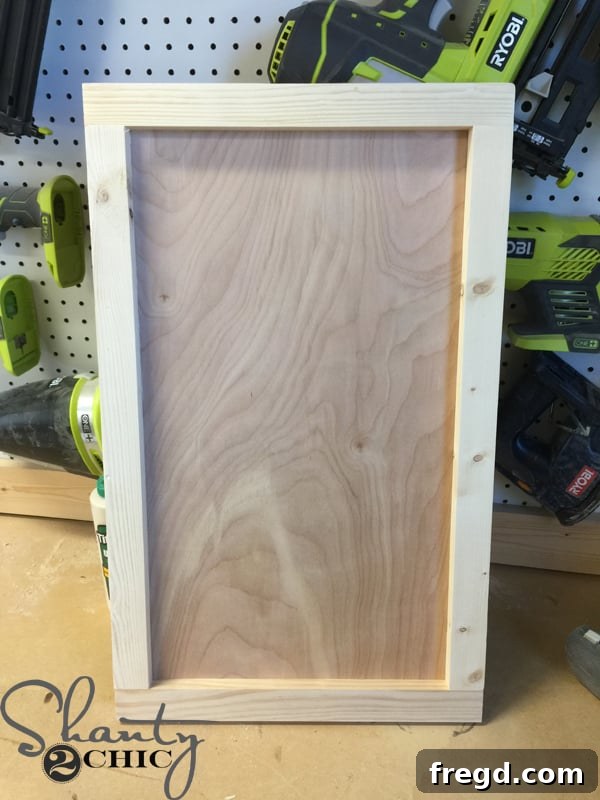
This image illustrates a completed door with its plywood backing securely attached. The door is now a solid unit, ready to be fitted with its decorative “X” pieces, which will add a touch of design flair to the hidden storage compartments of your office towers.
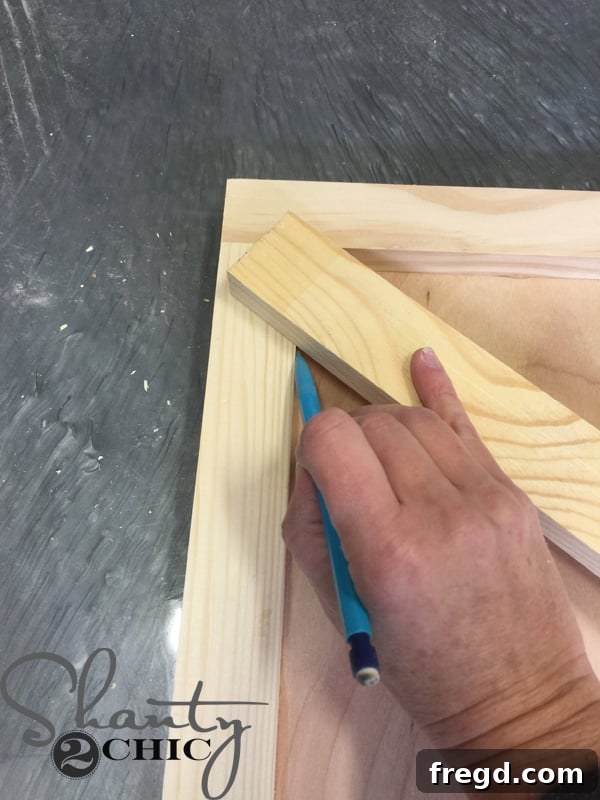
To create the decorative “X” pieces for the doors, you’ll employ the same precise angle-cutting technique used for the back of the towers. Begin by carefully positioning the 1×2 piece and marking the angle for your first cut at the top corner. This method ensures that each piece fits snugly and symmetrically, enhancing the visual appeal of your custom office furniture.
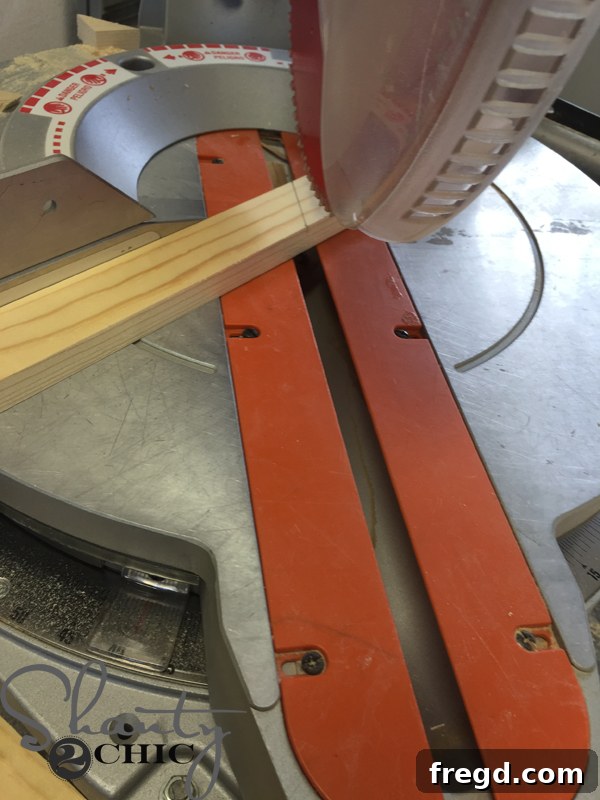
Proceed to make your first angle cut using the miter saw, guided by the mark you just made. Remember to adjust your saw’s miter angle to align perfectly with your drawn line for a precise and clean cut, essential for the intricate design of your DIY office desk system’s doors.
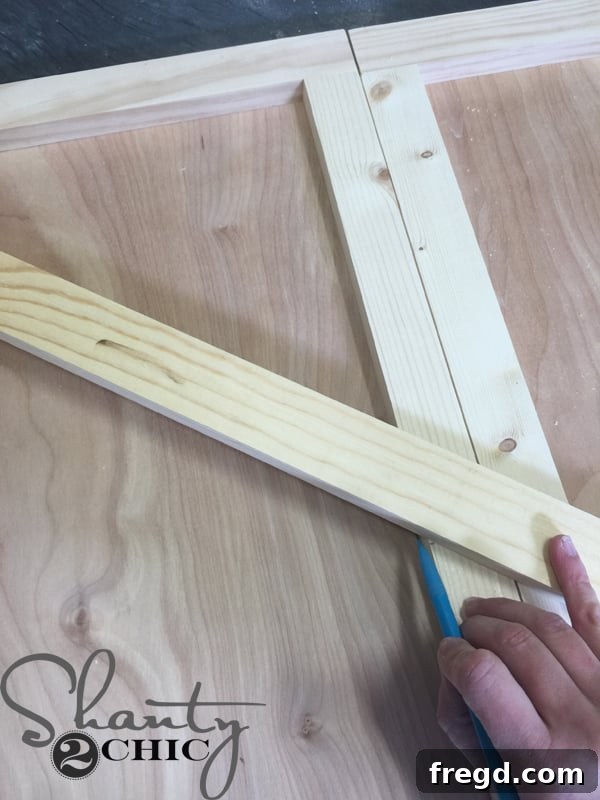
After completing the first cut and dry-fitting the piece, carefully mark the exact location for the second angle cut. This iterative process ensures that each “X” piece perfectly spans the diagonal, creating a symmetrical and professional finish for your custom office storage doors.
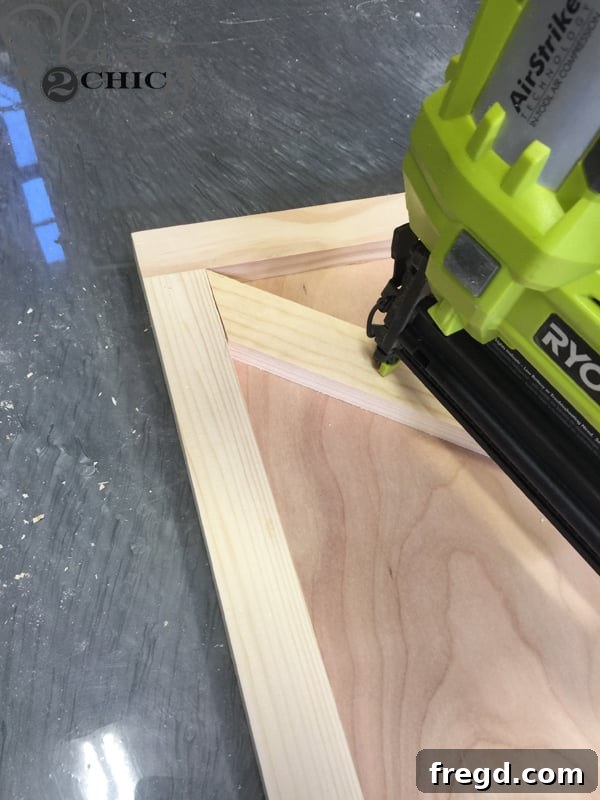
Once all “X” pieces are cut, apply wood glue to their back surfaces and carefully attach them to the door frames using 3/4-inch staples. The staples provide immediate hold while the glue dries, creating a strong and lasting bond for these decorative elements. This completes the construction of your doors, adding a charming detail to the hidden storage of your DIY office desk system.
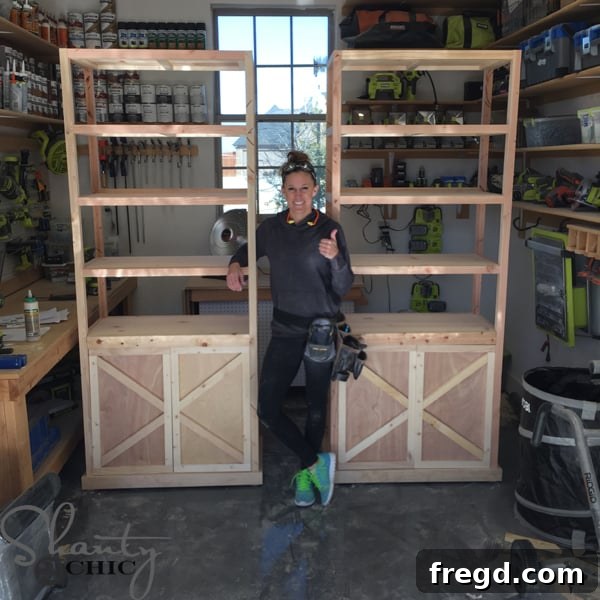
Congratulations! All the major construction phases of your custom office storage towers are now complete. Take a moment to admire your handiwork; you’ve built a truly impressive piece of DIY office furniture. Your towers are officially ready for the transformative stages of staining and finishing, which will bring out the natural beauty of the wood and protect your hard work for years to come.
Phase 8: The Art of Staining, Distressing, and Protecting Your Custom Office Towers
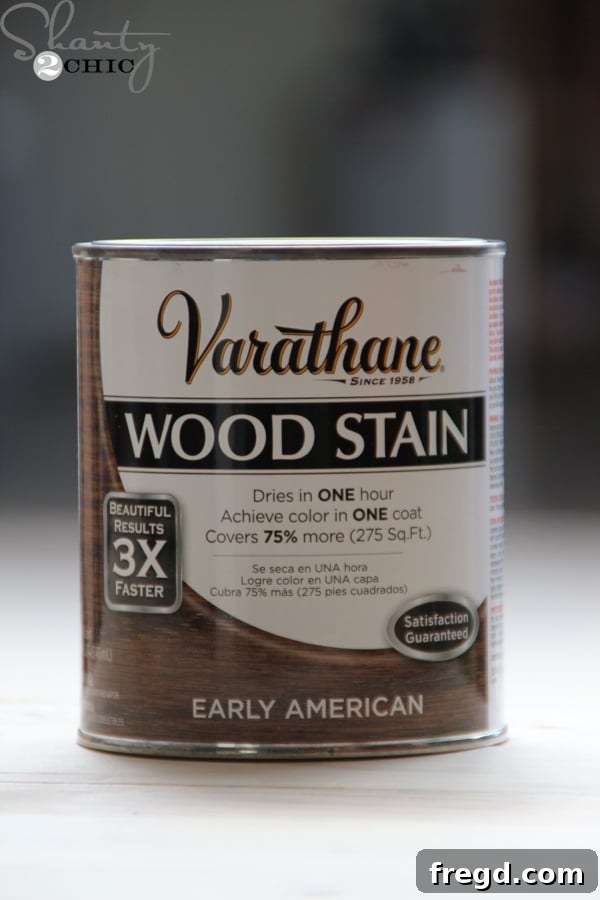
For these magnificent office storage towers, I selected Early American stain by Varathane. This choice was deliberate, as we consistently find Varathane stains to deliver exceptionally rich color and deep penetration, often achieving a stunning finish in just a single coat. Furthermore, its rapid drying time – typically within one hour – significantly accelerates the project timeline, allowing you to move quickly from staining to the next steps of distressing and finishing your custom office furniture. It’s an ideal product for achieving professional results efficiently.
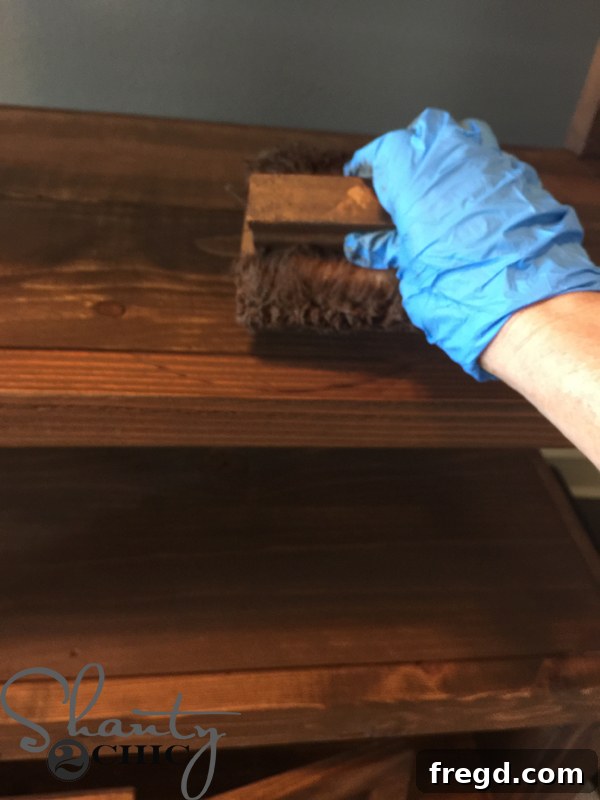
Given the chilly temperatures in my workshop, I brought the office towers indoors for staining to ensure optimal conditions. For large pieces like these, I highly recommend using a lambswool applicator. It allows for quick, even coverage of the stain over the entire piece, making the process remarkably fast and easy. Apply a generous, consistent coat, ensuring all surfaces are thoroughly saturated with the beautiful Early American stain.
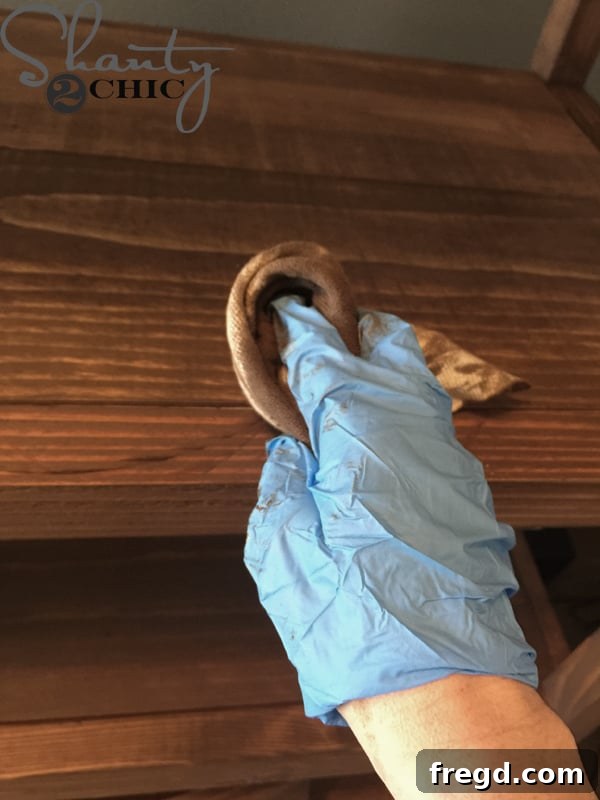
As you apply the stain, allow it to penetrate and set for approximately five minutes. Then, go back over the recently stained area with a clean, lint-free cloth, gently blending the stain to ensure an even and consistent finish. The goal is not to wipe the stain away completely, but rather to smooth out any heavy spots and achieve uniform saturation. I typically work in sections, staining for about five minutes, then blending that section before moving on to the next, ensuring a beautiful, streak-free result for your custom office storage.
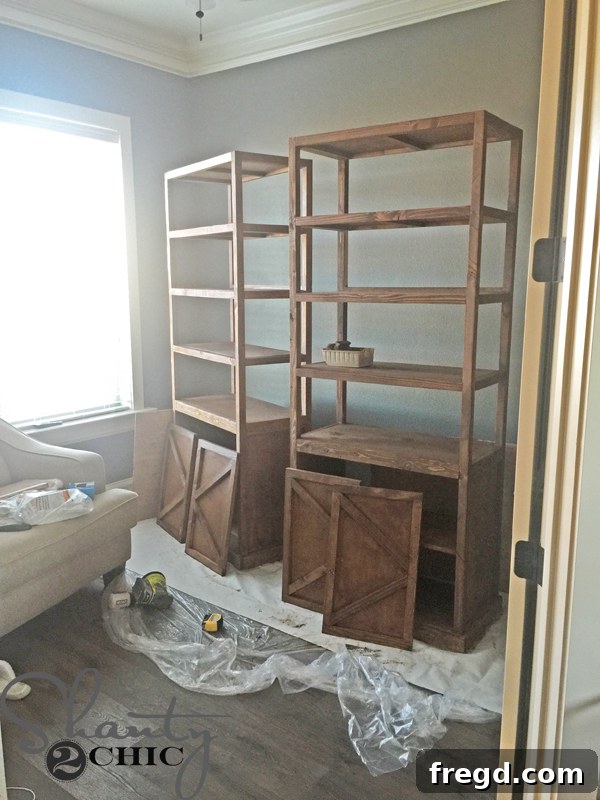
Once you’ve applied and blended the stain over the entire surface, allow it to dry for approximately one hour. Varathane stains are renowned for their fast-drying properties, which means you can quickly move on to the next exciting step in transforming your DIY office furniture: the distressing process, which adds character and a timeworn appeal.
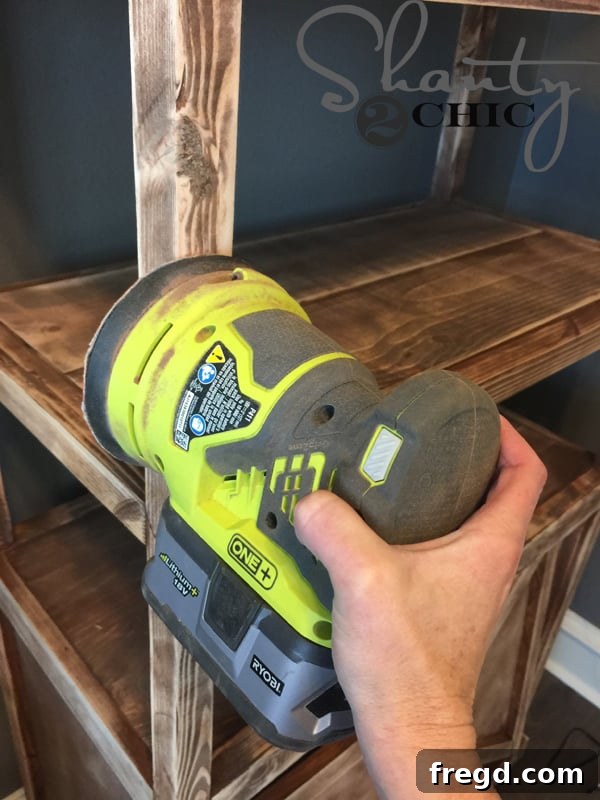
To achieve that coveted worn and vintage aesthetic, I enthusiastically began distressing the entire office tower using my orbital sander. Gently sand along edges, corners, and flat surfaces where natural wear and tear would typically occur. This technique subtly removes some of the stain, allowing the raw wood to peek through, which beautifully enhances the Early American stain and gives your custom office furniture a wonderfully authentic, aged look that is perfect for a farmhouse or rustic home office organization scheme.
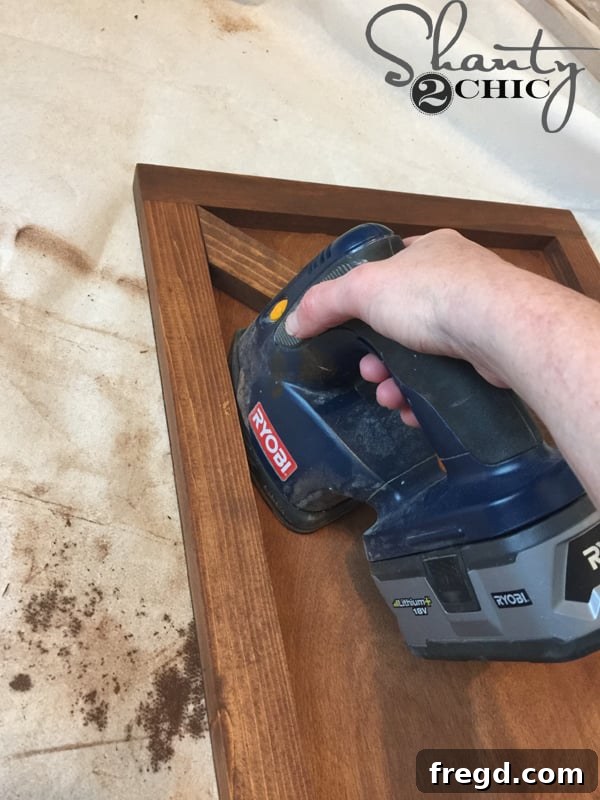
For those intricate corners and hard-to-reach areas where the orbital sander just can’t quite fit, my compact “corner cat” sander proved invaluable. This specialized tool allows for precise distressing in tight spots, ensuring that the worn look is consistent across the entire surface of your office storage towers, contributing to a truly convincing vintage finish.
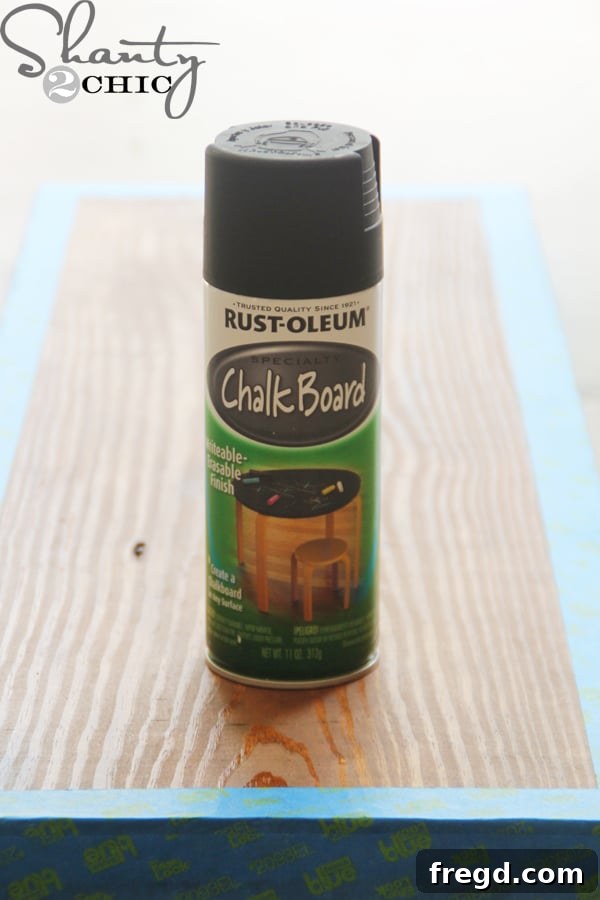
With the main tower stained and distressed, my next step was to prepare the distinctive “X” pieces for the back of the open shelving. I used Rust-Oleum Chalkboard spray paint to give them a modern, matte black finish. This contrasting color adds a striking visual element to the custom office shelving, providing a focal point and a subtle industrial touch to the overall design of the DIY office desk system.
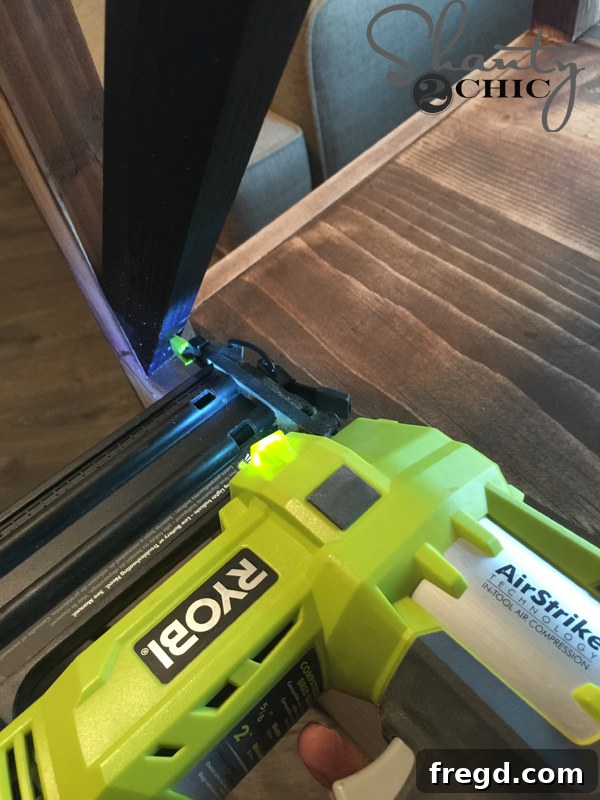
Once the chalkboard paint was completely dry, I carefully attached the “X” pieces to the back of the office towers using my brad nailer. Their dark, matte finish provides a beautiful contrast to the distressed Early American stain of the main structure, adding depth and character to your custom office storage and truly completing the open shelving aesthetic.
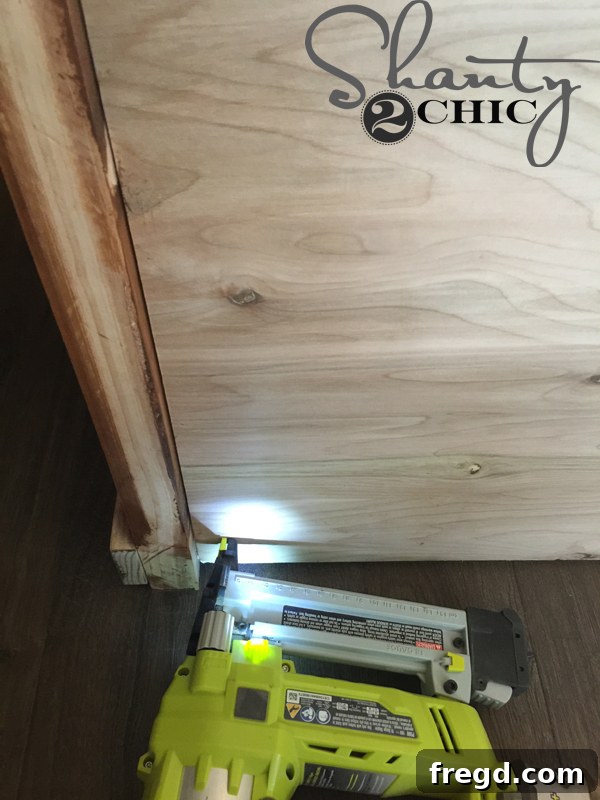
The penultimate step involves attaching the back panel to the cabinet base, fully enclosing the hidden storage area. Secure it firmly with staples or small brad nails, ensuring it’s flush and neatly covers the opening. Finally, meticulously install the doors onto the cabinet using appropriate hinges. This brings the hidden storage compartments to life, providing easy access while keeping your office essentials neatly tucked away, perfecting the functionality of your DIY office desk system.
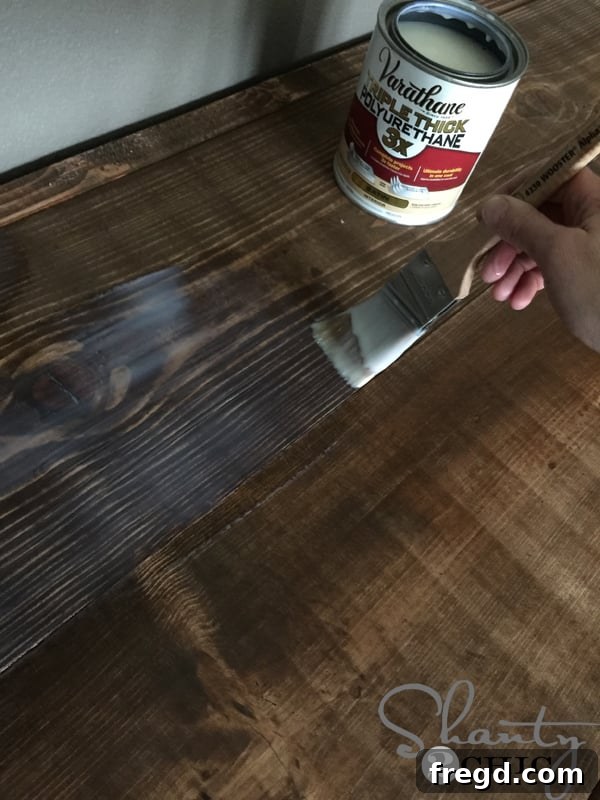
The absolute final and crucial step is applying a protective finish to your newly built office storage towers. First, ensure all surfaces are free of dust from the distressing process by wiping them down with a damp, clean cloth. Once dry, you’re ready for the finish! I cannot recommend Varathane Triple Thick Polyurethane enough. This exceptional product offers the protection of three coats in a single application and dries incredibly fast, streamlining your finishing process. I apply a thick, even coat using a quality bristle brush – don’t be alarmed if it looks like glue during application; it will dry to a crystal-clear, smooth, and incredibly durable finish. For these towers, I opted for a Satin finish, which provides a beautiful, subtle sheen that enhances the wood without being overly glossy, perfectly complementing the distressed Early American stain of your custom office furniture and ensuring it stands the test of time.
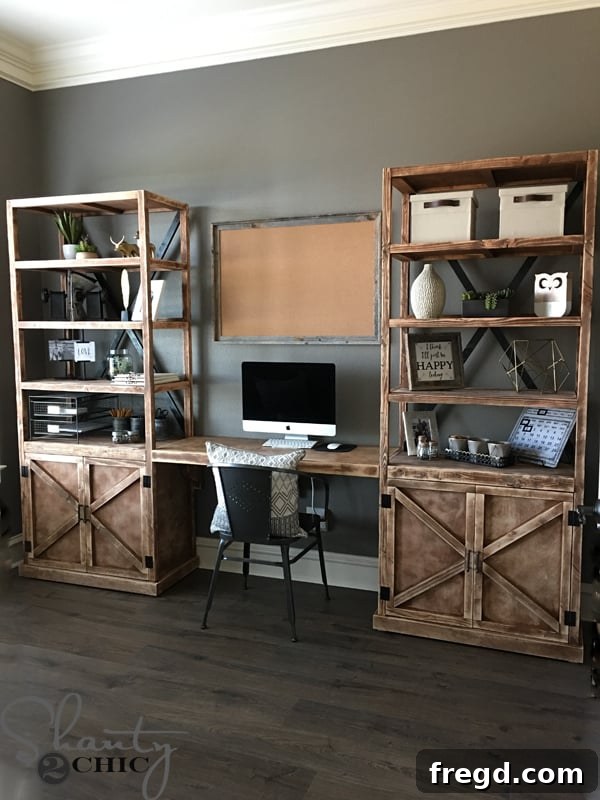
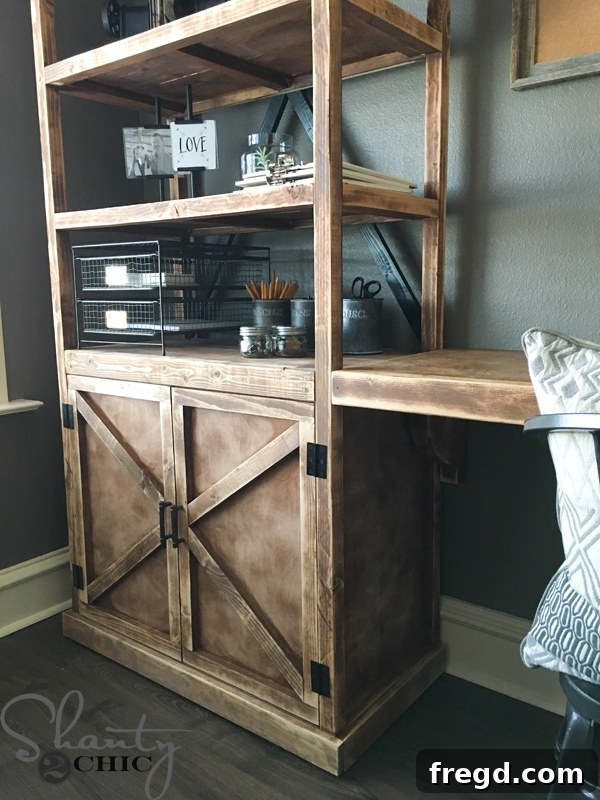
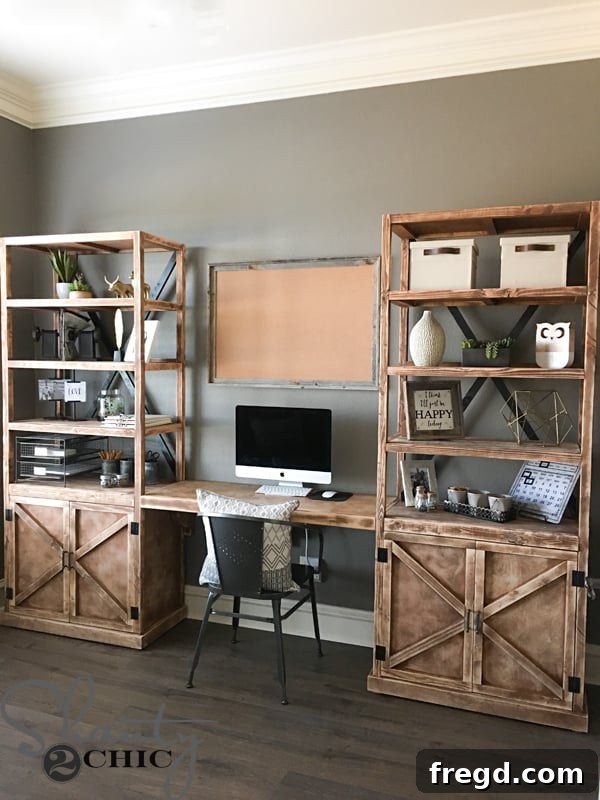
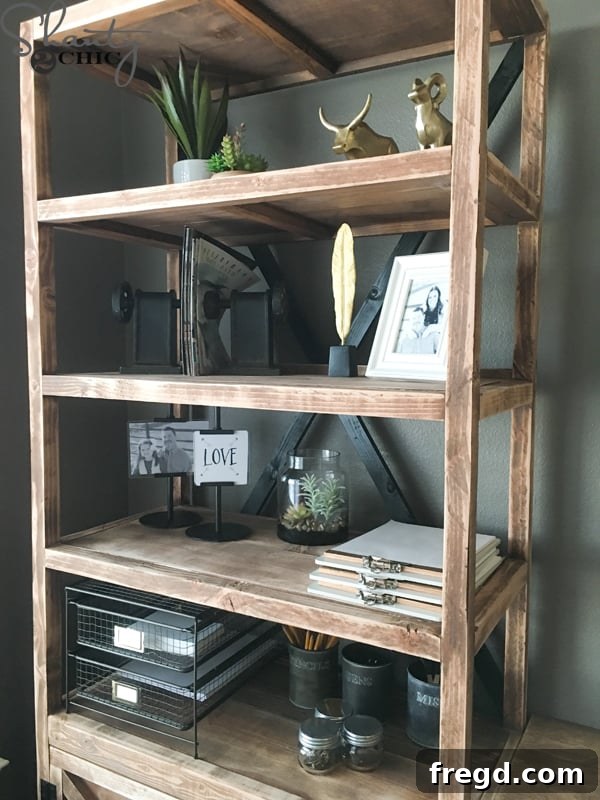
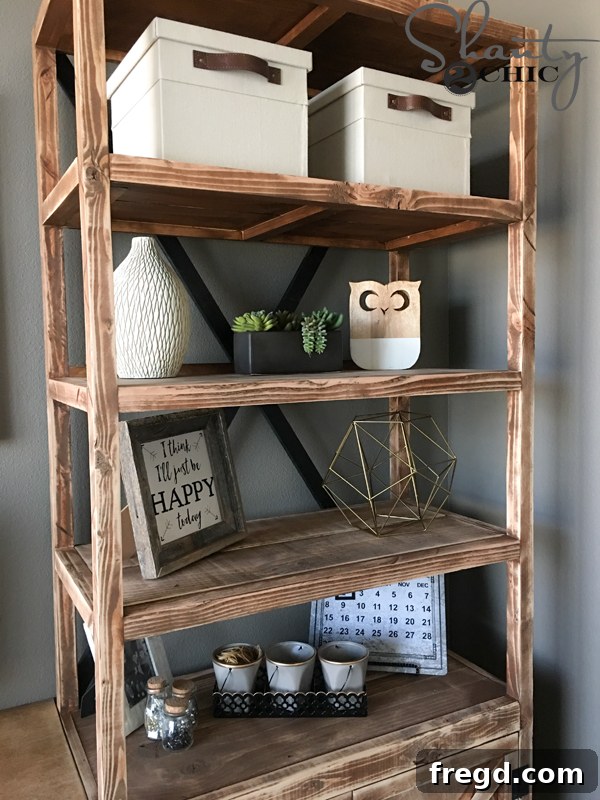
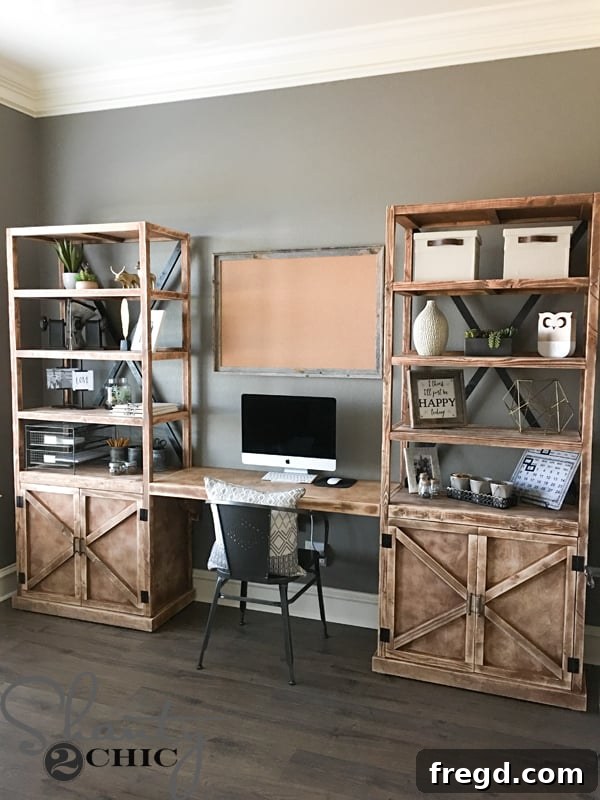
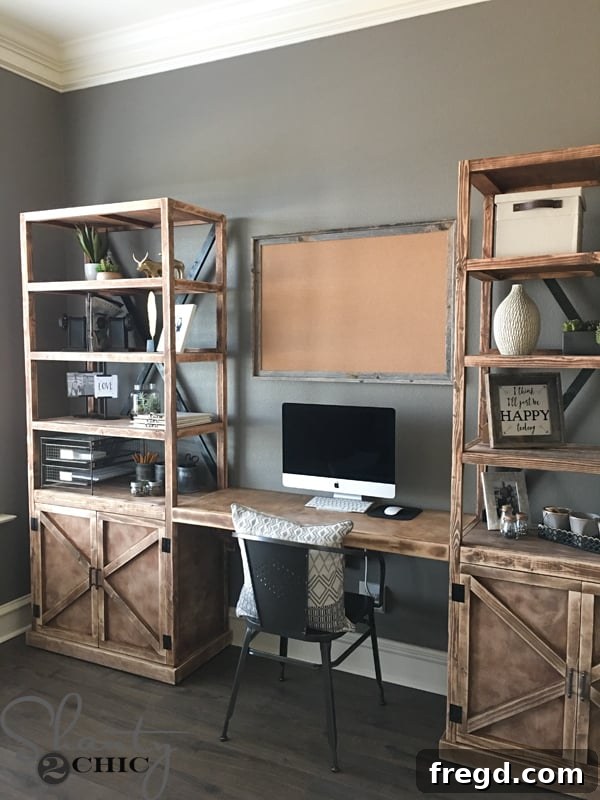
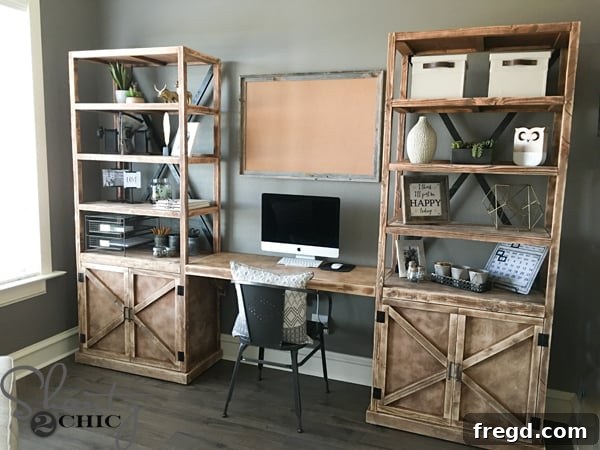
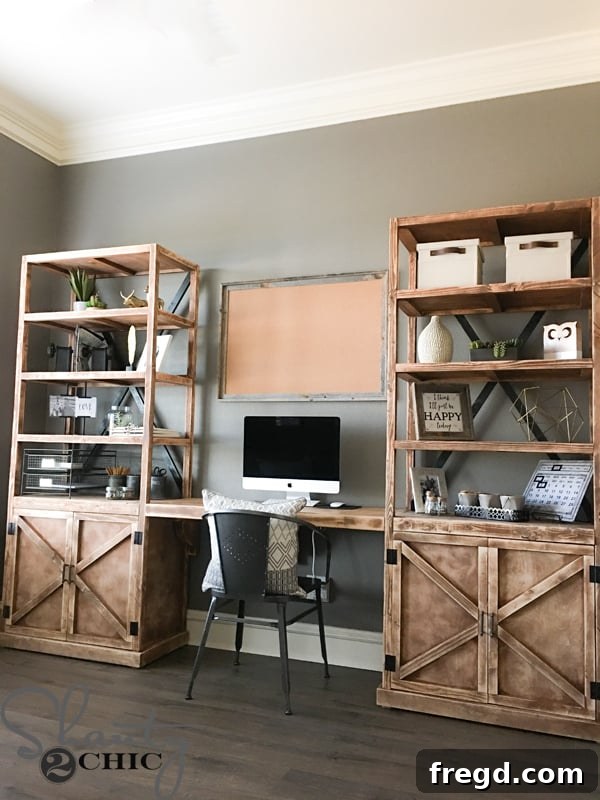
That’s it! Your stunning, custom-built office storage towers are complete, ready to transform your workspace into a beacon of organization and style. The total cost for lumber to construct both of these robust towers came in at approximately $300. This figure highlights the incredible savings achieved by strategically ripping down more affordable 2x4s and 1x4s into the necessary 2x2s and 1x2s. Had I purchased the pre-cut, higher-priced 2x2s and 1x2s directly, the lumber cost would have soared to around $450. This demonstrates how a small investment in a tool like a table saw can yield significant savings on large-scale DIY furniture projects, making custom home office organization more accessible than ever.
Stay tuned! I’ll be back very soon to share the detailed tutorial for building the elegant floating desk that seamlessly connects these two magnificent office towers, completing the entire DIY Office Desk System.
Curious about where I sourced all the beautiful decorative and organizational items styled within these towers? Here’s a quick guide to some of the fun stuff:
Styling Your Custom Office Storage: Sourcing Guide
Left Tower:
- Top shelf: Tall plant – HomeGoods, Succulent – Target, Figurines – Target
- Second shelf: Book Ends – Save On Crafts, Feather Paper Weight – Target, Frame – HomeGoods
- Third Shelf: Frames – HomeGoods, Succulent – Target, Clip boards – Target
- Bottom Shelf: Wire drawers – Target, Pencil and Pen tins – World Market, Glass Jars – Target
Right Tower:
- Top Shelf: Bins – Target
- Second Shelf: Vase – Target, Succulent – Target, Owl – Hobby Lobby
- Third Shelf: Frame – Hobby Lobby, Printable in Frame – HERE, Gold Geometric Ball – Target
- Bottom Shelf: Frame – HomeGoods, Magnetic Calendar – Hobby Lobby, Metal Tray and Grey Buckets – Target
Additional Home Office Decor:
- Cork Board Frame on Wall: Hobby Lobby (assembled by combining a cork board and an empty frame, then stapling them together)
- Chair: Pier 1
- Pillow: Target
Thank you so much for following along on this detailed woodworking journey! I hope this tutorial inspires you to tackle your own DIY office desk system and create a personalized, organized, and beautiful workspace.
Happy Building!