
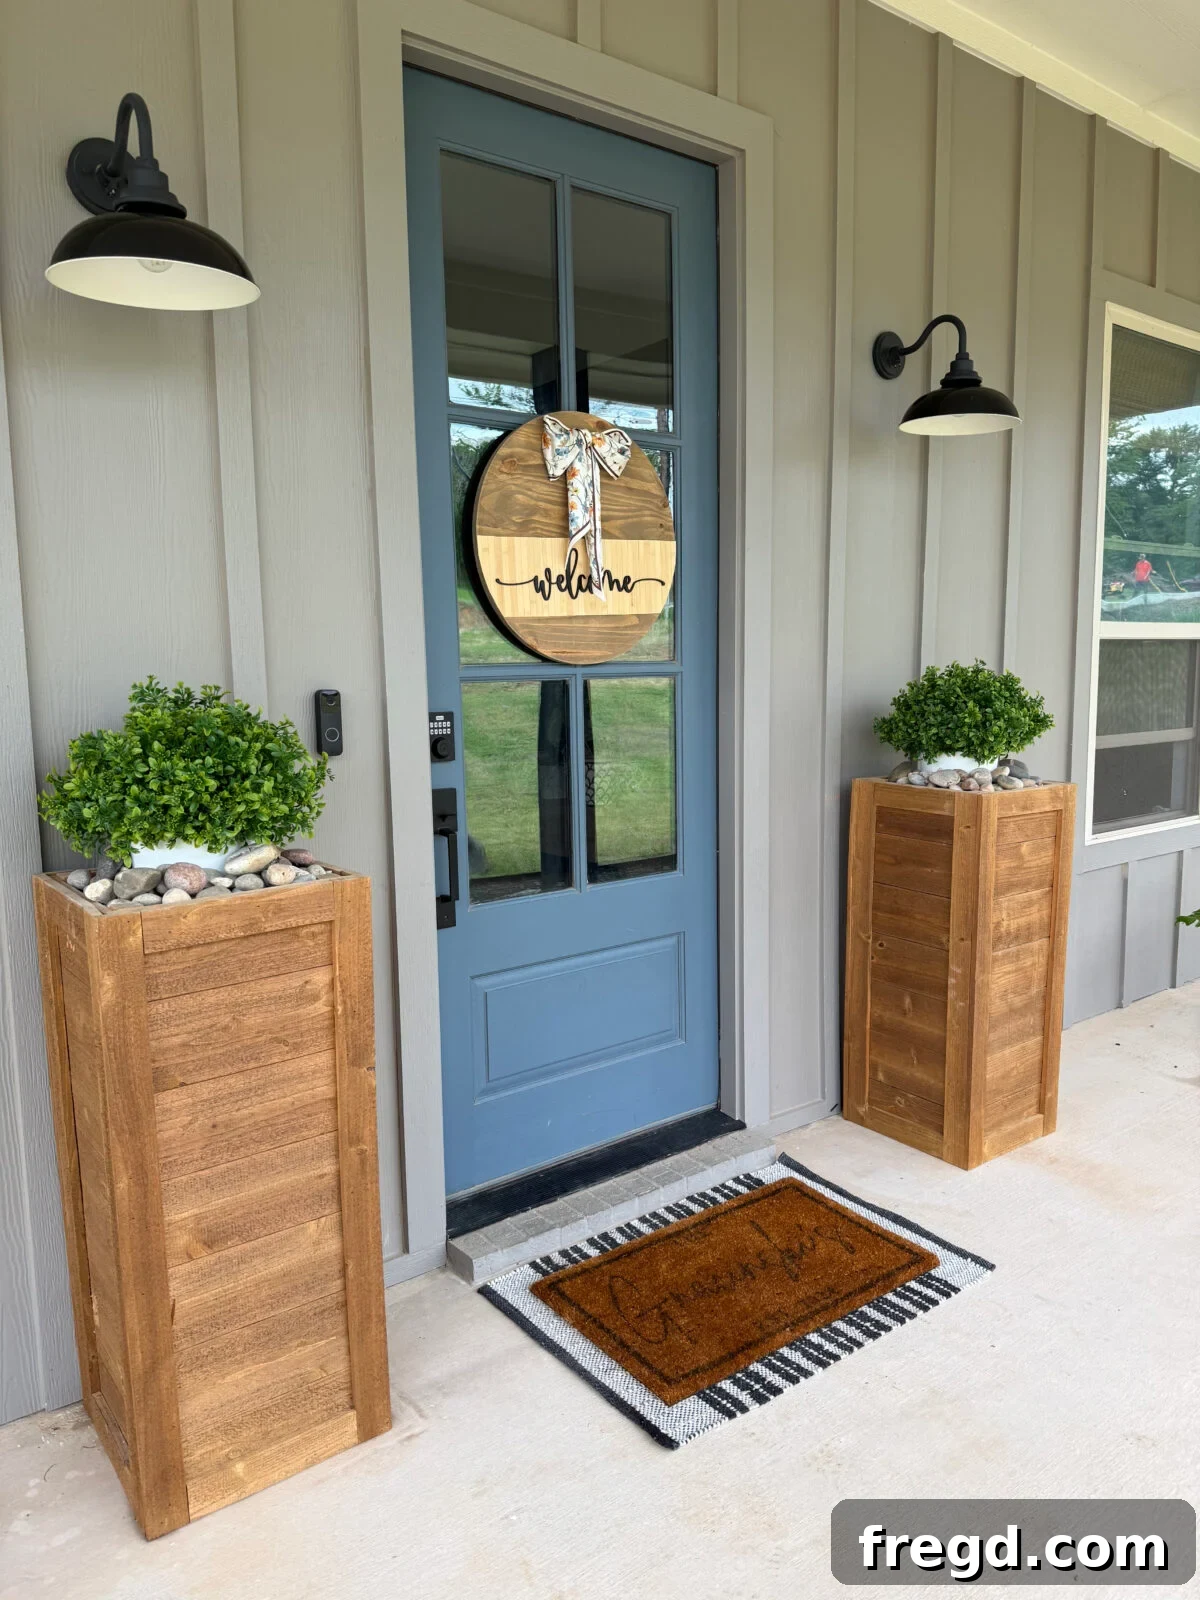
Transform your entryway with a stunning, customizable DIY door hanger that adds a touch of charm to your home. Discover the secret to effortlessly cutting a perfect wood circle every time, eliminating the frustration of uneven edges and imprecise cuts. This comprehensive guide will show you how to leverage the power of a trim router and a specialized circle guide to achieve professional-level results, even if you’re a beginner woodworker. Say goodbye to wobbly lines and guesswork; say hello to clean, precise circles for all your woodworking projects.
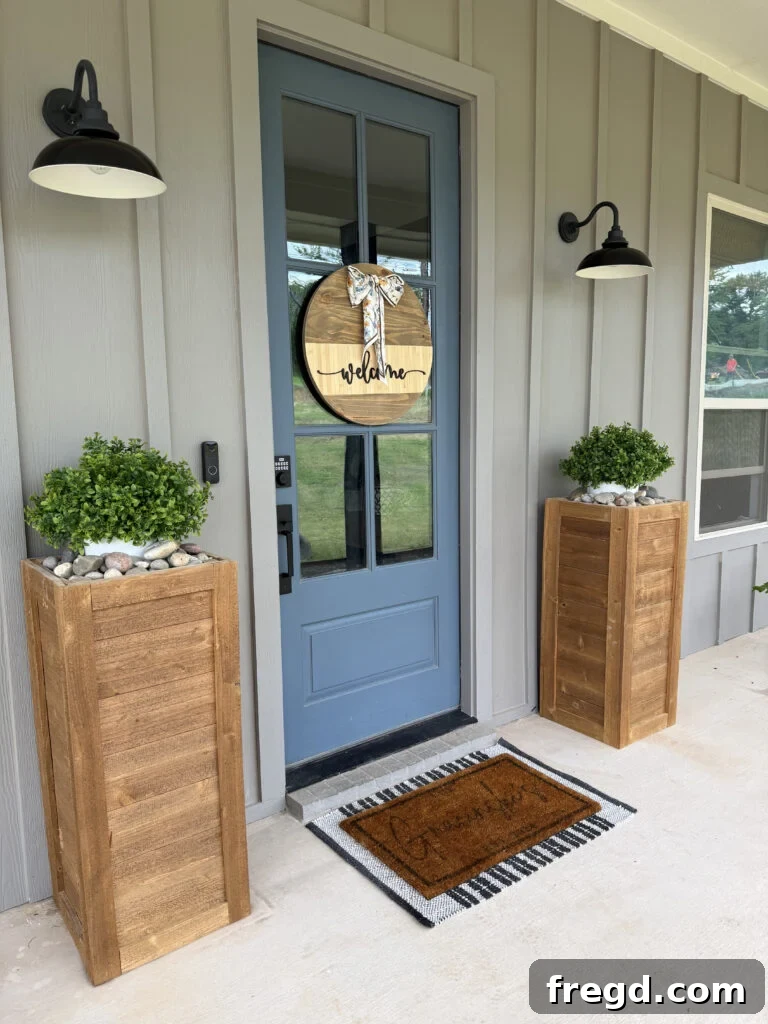
I’ve long envisioned a simple yet elegant door hanger for my front door – one that I could easily update with each passing season. This project brought that vision to life, exceeding my expectations. Its minimalist design, subtle texture, and straightforward customization process make it a true joy to create. The most remarkable aspect? The entire circular base was cut with a trim router and a dedicated circle guide, completely sidestepping the need for complex homemade jigs or the common struggles of trying to follow a line with a jigsaw.
If you’ve ever embarked on a circular cutting project only to be met with less-than-perfect results, this innovative setup will revolutionize your approach. It simplifies the process immensely, making precise circular cuts accessible and far less daunting, even for larger-scale woodworking endeavors.
Watch me create this DIY Door Hanger from start to finish on our Instagram!
Table of Contents
Why Use a Trim Router for Perfect Circles?
Throughout my years of woodworking, I’ve tackled countless round projects, from quaint end tables to grand dining tables. The constant challenge was always crafting the perfect circle. Before discovering this method, I would meticulously construct my own circle jigs, a process that often felt like a project in itself, consuming valuable time before I even made the first cut. These homemade solutions, while functional, lacked the consistent precision and ease of use that every woodworker desires.
The introduction of the Kreg 20V Ionic Drive 1/4″ Trim Router Kit paired with the Kreg Trim Router Circle Guide completely revolutionized my approach to cutting circles. This combination has become an indispensable part of my workshop, making what was once a tedious task an enjoyable and accurate process.
The Kreg trim router itself is a marvel of ergonomic design. Its compact and lightweight nature offers unparalleled control, which is paramount when guiding a router along a delicate curve. The soft-start feature ensures a smooth power-up, preventing sudden jerks that can mar your material. Its variable speed control allows for precise adjustments based on the wood species and router bit, optimizing performance and reducing the risk of burning or tear-out. Furthermore, the smooth depth adjustment mechanism makes it incredibly easy to dial in the exact cutting depth for each pass, eliminating guesswork and ensuring consistent, clean results. Swapping out bits is also quick and straightforward, minimizing downtime and keeping your project moving efficiently.
However, it’s the Kreg Trim Router Circle Guide that truly elevates this system to a league of its own. This guide eliminates the need for complex calculations, makeshift jigs, and repeated measurements. You simply set your desired diameter, insert the pivot pin into your pre-drilled center point on the workpiece, and you’re ready to make a perfect cut. The guide’s intuitive design ensures that the router maintains a consistent radius, delivering flawlessly round edges every single time. This unparalleled accuracy removes all the guesswork from circle cutting, instilling confidence in every cut.
I particularly appreciate the thoughtful placement of the handles on the Kreg router. They provide a steady, comfortable grip throughout the cutting process, allowing for controlled and smooth movements instead of an awkward struggle. The entire setup is remarkably quick, and once you begin, the router glides effortlessly, maintaining a perfectly circular path. This consistency guarantees a perfect circle on every attempt, bringing unparalleled precision to your projects.
The versatility of this system extends far beyond small crafts. While ideal for a simple door hanger, the Kreg Trim Router Circle Guide can cut circles up to an impressive 52 inches in diameter. This expansive range means it’s equally capable of handling larger projects such as full-size coffee tables, dining tables, or even intricate round shelving units. This capability makes ambitious, large-scale round woodworking projects feel significantly more attainable and enjoyable.
Essential Tools and Materials Needed
Before diving into the creative process, gathering all your necessary tools and materials is crucial. This list includes both power tools for precision cuts and finishing, as well as the raw materials that will form your beautiful door hanger.
Tools
- Kreg Trim Router: Essential for precise, guided circular cuts.
- Kreg Trim Router Circle Guide: The key accessory for achieving perfect circles without complex jigs.
- Kreg Random Orbit Sander: For achieving a smooth, professional finish on your wood.
- Kreg 20V Ionic Drive Drill: Needed to create the pivot hole for the circle guide.
- Kreg Project Blocks (optional but highly recommended): Elevate your workpiece for easier sanding and finishing.
- Stapler: For attaching decorative elements like a bow or scarf.
- Scissors: For cutting pole wrap or other decorative materials.
- Router Bit (straight bit, appropriate for wood thickness): For making the actual cut.
- Measuring Tape/Ruler: For initial measurements and center finding.
- Pencil: For marking and tracing.
Materials
- 3/4″ x 24″ x 48″ Project Panel: The primary material for your circular door hanger base.
- “Welcome” lettering or other custom design: Can be pre-cut from craft stores, ordered online, or made with a laser cutter like Glowforge.
- Scrap Pole Wrap: For adding a unique textured element (can be substituted with other materials).
- Wood Glue: For securing the lettering and textured elements.
- Wood Filler: To seamlessly hide the pivot hole after cutting.
- Wood Stain (I used Behr Rustic Brown): To enhance the natural beauty of the wood and achieve your desired aesthetic.
- Spray Paint: For coloring your lettering or other embellishments (e.g., black).
- Decorative Scarf or Ribbon: To create a bow for added flair.
- Sawtooth Hangers: For easy and secure mounting of your door hanger.
Step-by-Step DIY Door Hanger Tutorial
Creating your custom door hanger is a rewarding process, made simple with the right tools. Follow these steps for a beautiful, professional-looking result.
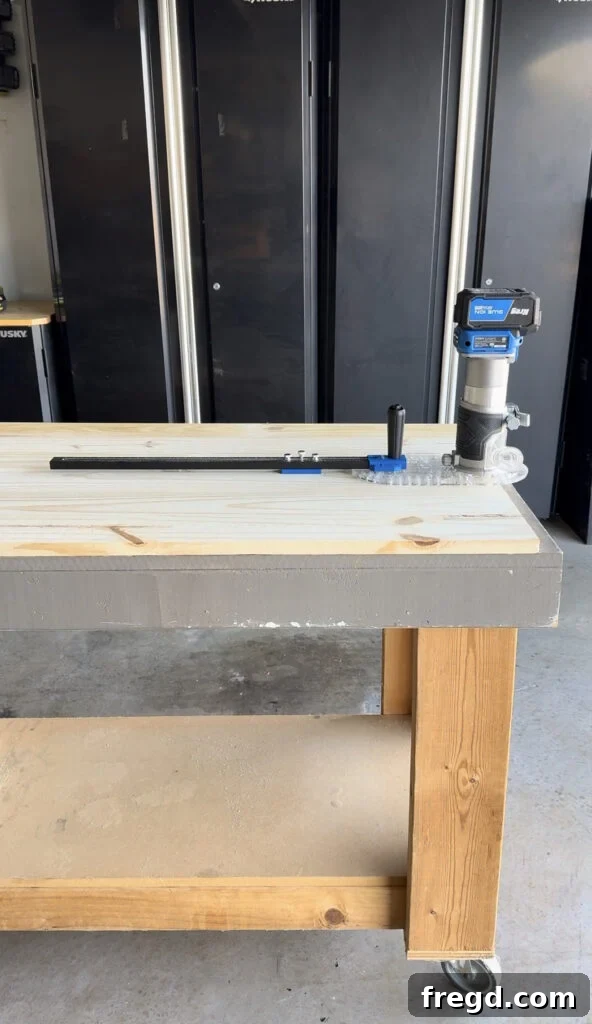
For this project, I relied on my Kreg 20V Ionic Drive 1/4″ Trim Router Kit, perfectly complemented by the Kreg Trim Router Circle Guide. This powerful duo genuinely takes all the guesswork out of cutting flawless circles, making the entire process efficient and enjoyable.
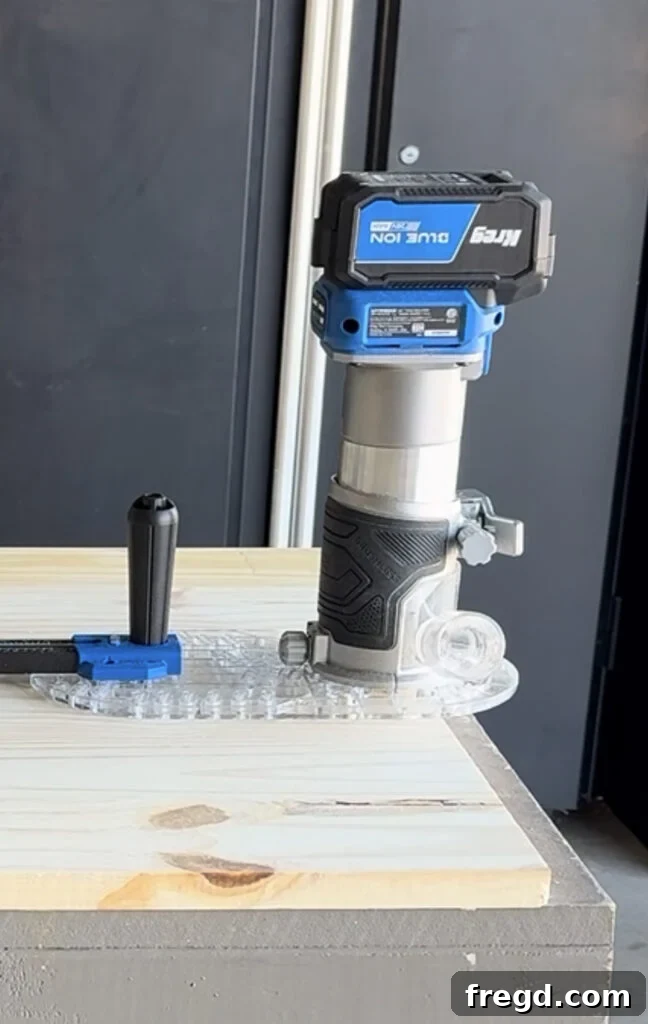
The Kreg trim router’s lightweight design and excellent balance make it exceptionally easy to control, which is a significant advantage when navigating the continuous curve of a circle. Its soft-start mechanism ensures a smooth power-up, preventing any sudden jolts that could misalign your cut. Coupled with variable speed settings, you have the flexibility to adjust the router’s RPM based on the specific material you’re working with, guaranteeing optimal cutting performance and a cleaner finish.
- You can find the Kreg Trim Router HERE.
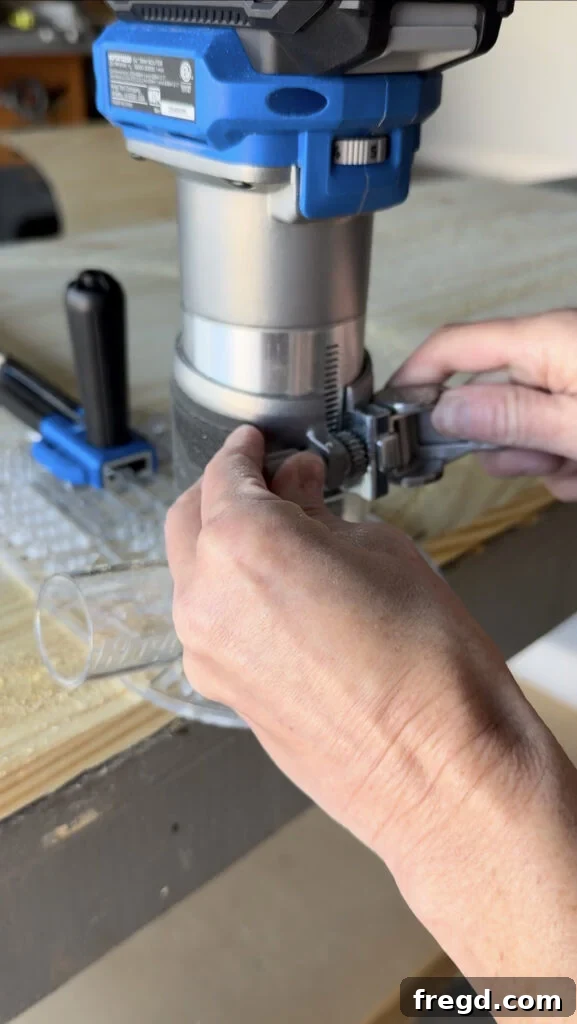
Another feature I particularly appreciate is the precise depth adjustment. Instead of estimating, you can accurately dial in the cutting depth for each pass. This precision is vital because cutting circles in multiple shallow passes, rather than one deep cut, ensures a cleaner edge, prevents strain on the router bit and motor, and significantly reduces the risk of tear-out, especially in thicker materials.
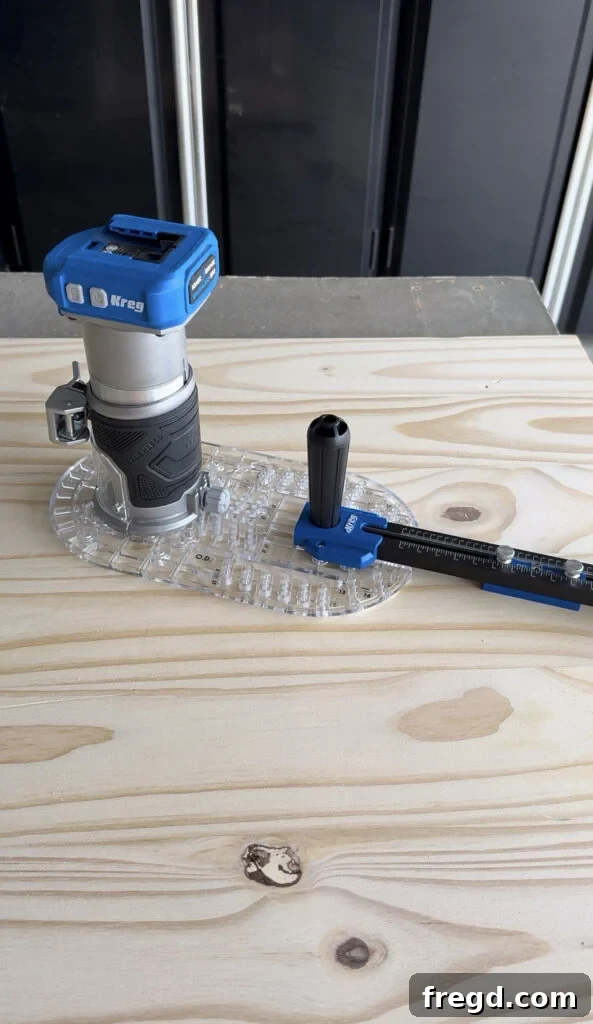
The Kreg Trim Router Circle Guide is what truly simplifies the entire process. It attaches securely to the router, transforming it into a dedicated circle-cutting tool. After setting your desired diameter, you simply drop the pivot pin into your pre-drilled center hole, and the guide ensures that the router maintains a perfectly round path as you cut. Its impressive capability to handle circles from small projects like this door hanger all the way up to 52 inches in diameter makes it an incredibly versatile tool, not just for home decor but for a wide range of furniture and larger woodworking applications.
- You can find the Kreg Circle Guide HERE.
Step 1: Cutting the Perfect 22-Inch Wood Circle
The foundation of your door hanger is a perfectly cut wooden circle. This step, while seemingly the most challenging, is made simple and precise with the Kreg Trim Router and Circle Guide.
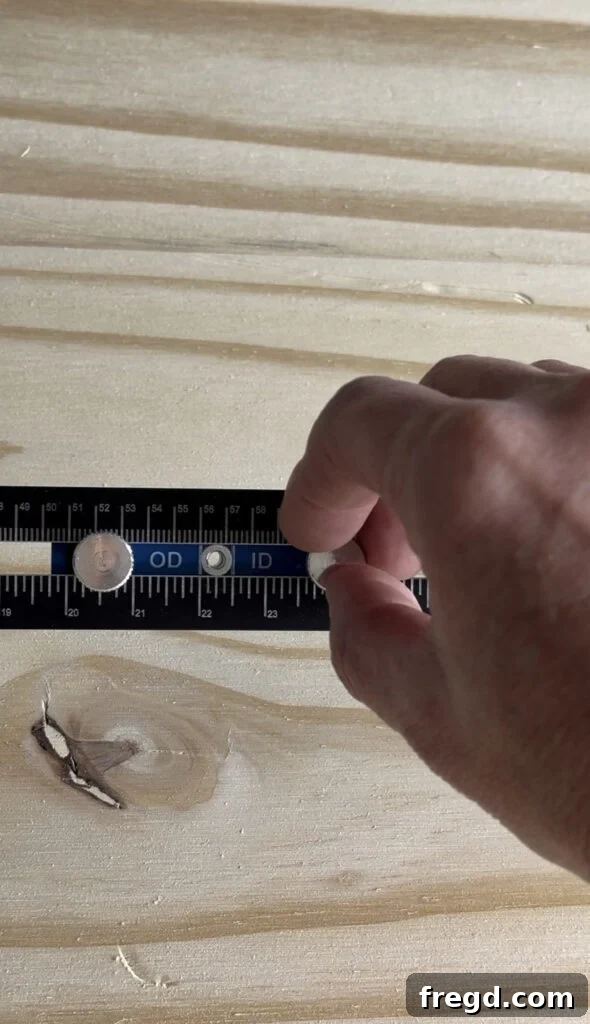
Begin by placing your chosen project panel securely on your work surface. Ensure it is stable and won’t shift during the routing process. Adjust your circle guide to achieve a 22-inch diameter. Once the guide is locked in place, you’re ready to proceed with the cutting.
- You can find the project panel that I used HERE.
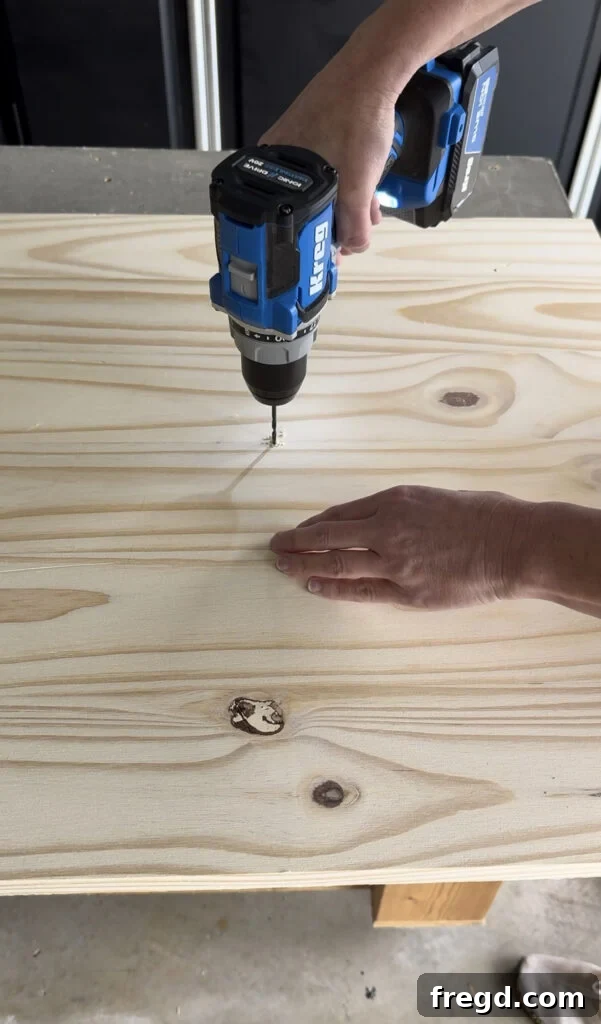
Next, using your Kreg 20V Ionic Drive Drill, carefully drill a small pilot hole directly in the exact center of your board. This tiny hole will serve as the crucial pivot point for the circle guide’s pin, acting as a stable anchor while you execute your circular cut.
- You can find the Kreg 20V Ionic Drive Drill HERE.
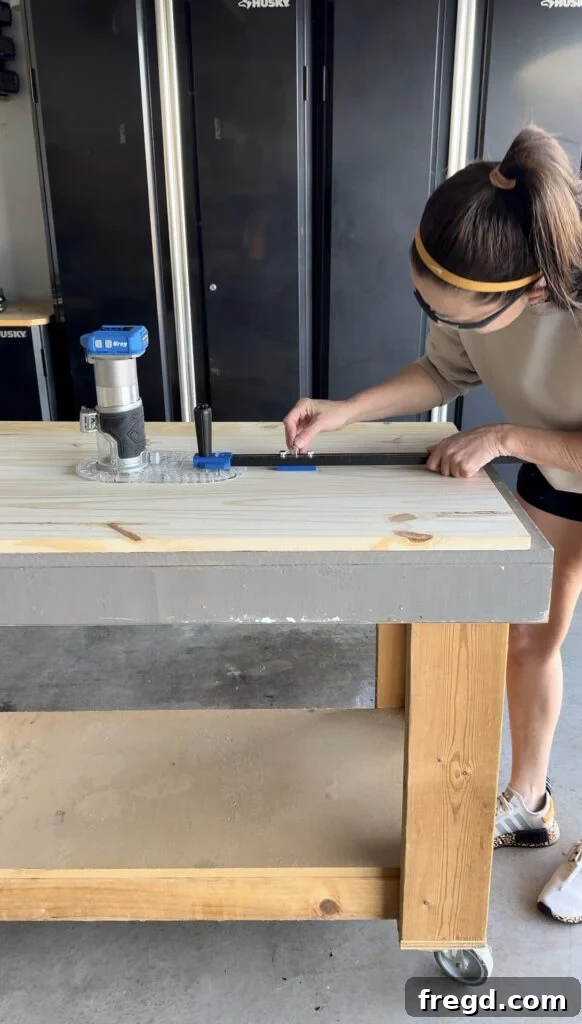
Insert the guide pin firmly into the pivot hole you just drilled. Then, securely attach the guide arm to your trim router, ensuring all connections are tight and stable.
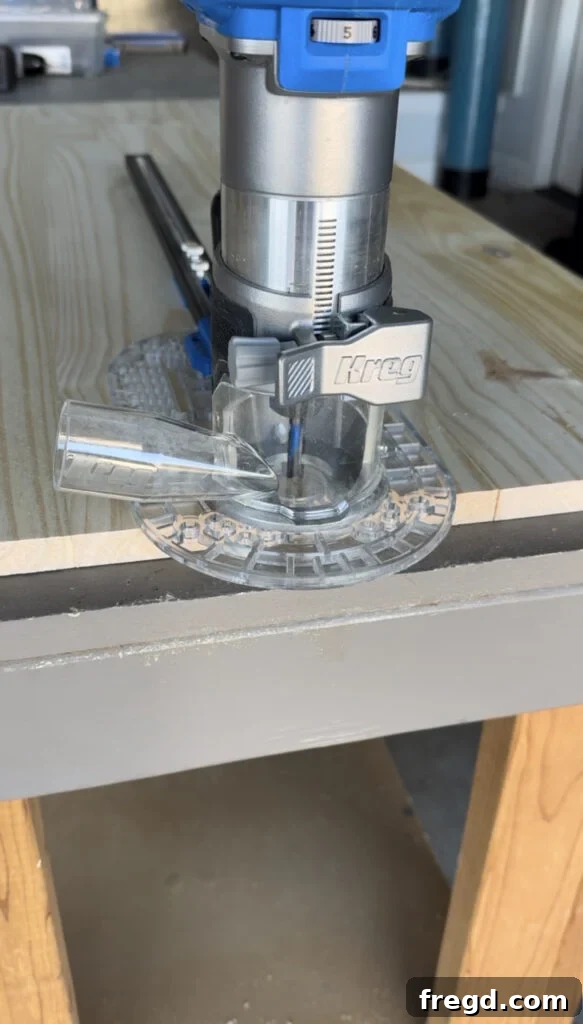
Before initiating any cuts, set your router bit depth to approximately 1/4 inch. A golden rule for cutting circles with a router is to always perform multiple shallow passes instead of attempting one deep cut. This technique provides superior control, significantly reduces the risk of tear-out, and results in a much cleaner, smoother edge, extending the life of your router bit.
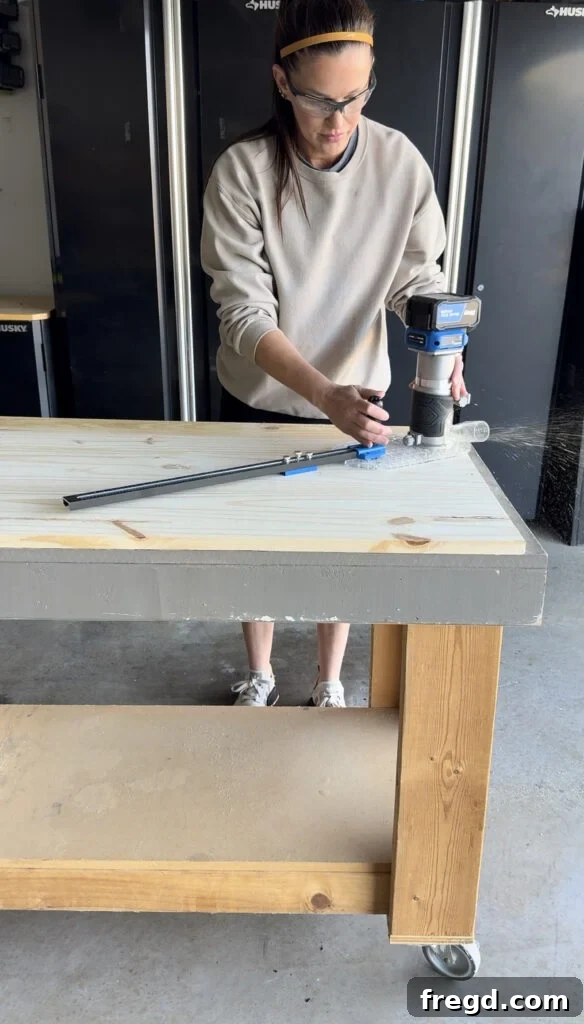
With your first pass depth set, begin to guide the router slowly and steadily around the circular path. The circle guide is designed to do the precise work here, so there’s no need to force the router. Simply maintain a consistent, gentle pace and allow the guide to accurately direct the router along its predetermined circular route.
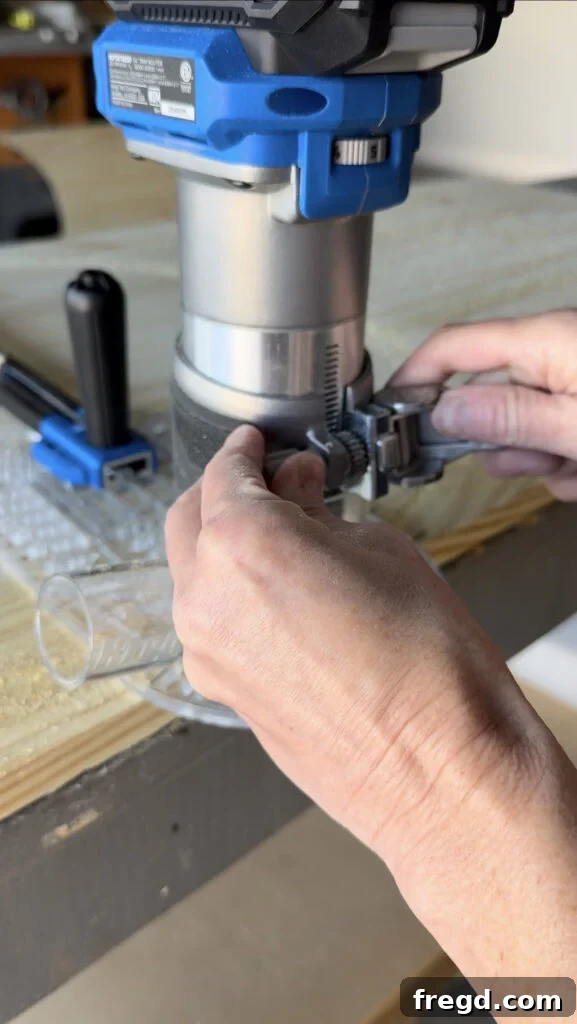
After completing the first pass, carefully lower the router bit another 1/4 inch. Repeat the circular cutting process, guiding the router smoothly. At this stage, you should be approximately halfway through the thickness of your wood panel, ensuring a gradual and controlled cut.
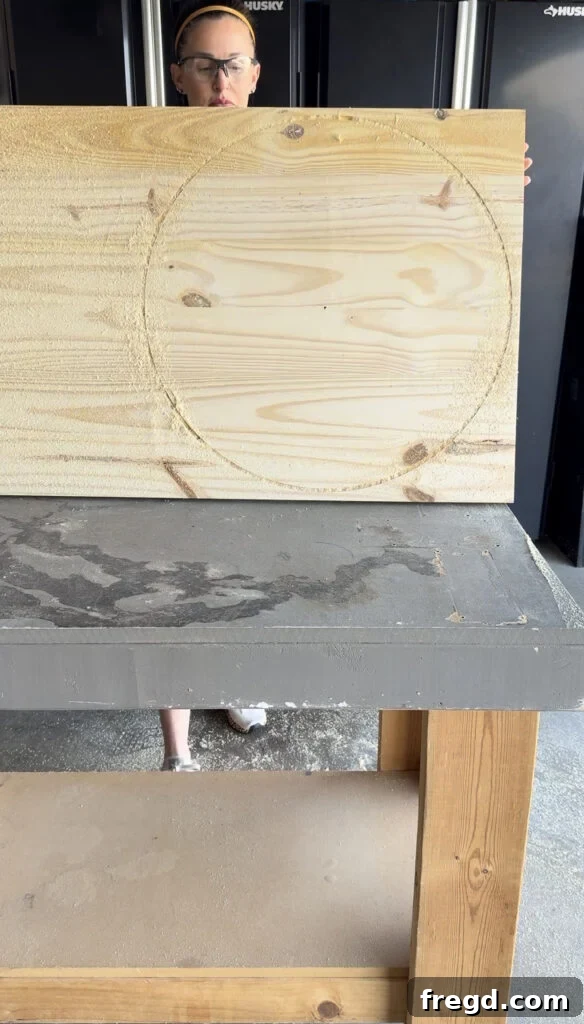
To ensure the cleanest possible finish and prevent tear-out on the underside of your workpiece, flip your board over. Reinsert the guide pin into the same pivot hole on this new side. This method is crucial for achieving a factory-smooth edge on both faces of your circle.
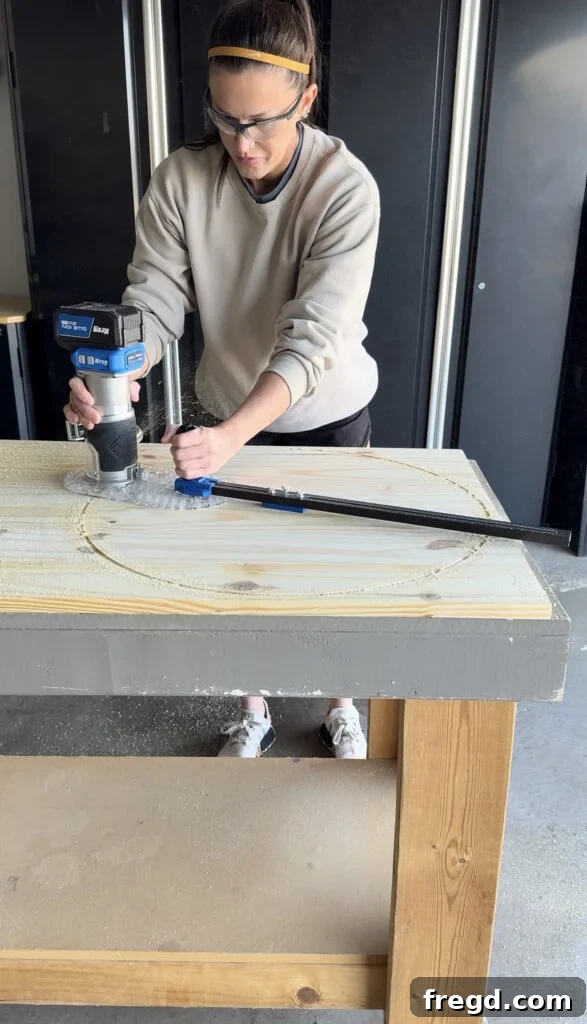
Reattach the guide arm to your router. Continue making passes, lowering the bit 1/4 inch with each rotation, until the circular piece is fully separated from the larger panel.
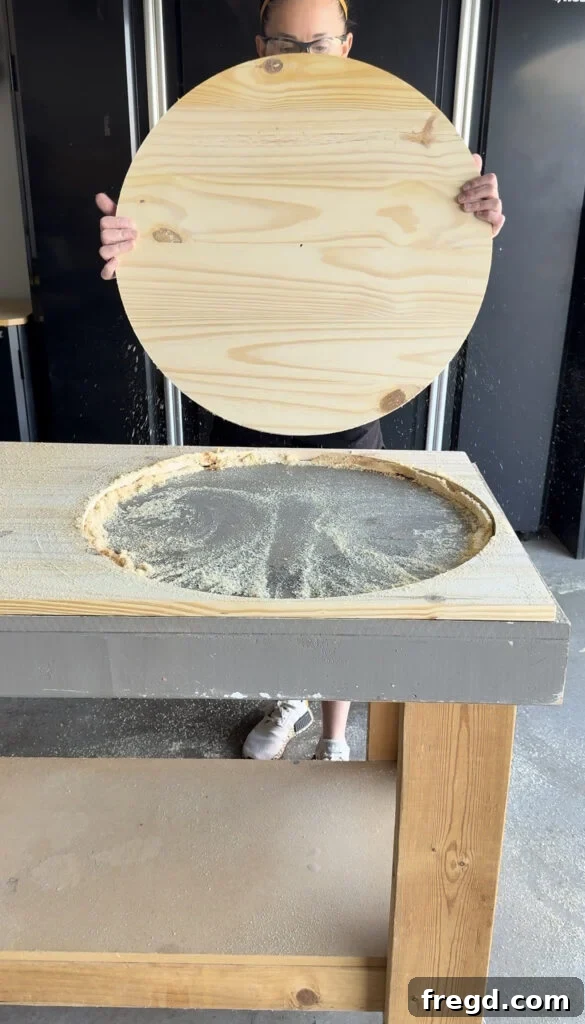
As previously mentioned, flipping the board for the final passes is a key technique that dramatically helps prevent tear-out, ensuring a perfectly clean and crisp edge on both the top and bottom surfaces of your newly cut wood circle.
Step 2: Filling and Sanding for a Flawless Finish
Once your circle is perfectly cut, the next crucial steps involve refining its surface to prepare it for finishing. A smooth surface is key to a professional-looking final product.
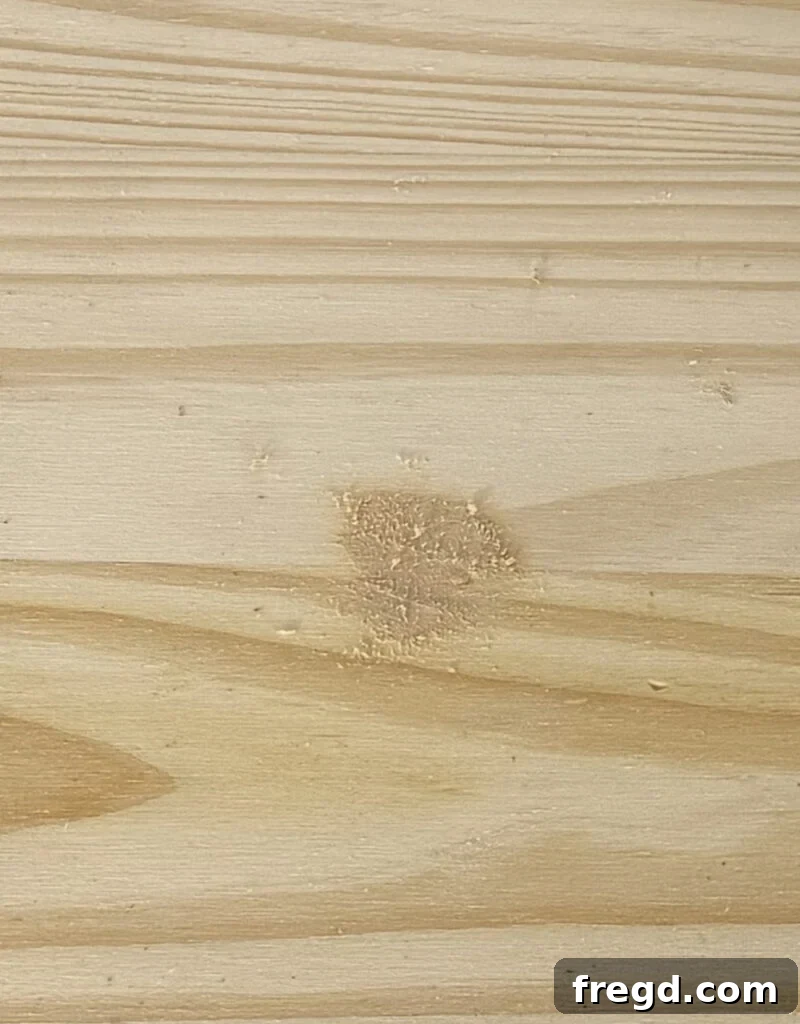
After your circle is cut, apply a small amount of wood filler to the pivot hole in the center. Allow the filler to dry completely according to the manufacturer’s instructions, ensuring it’s flush with the wood surface.
- You can find our favorite wood filler HERE.
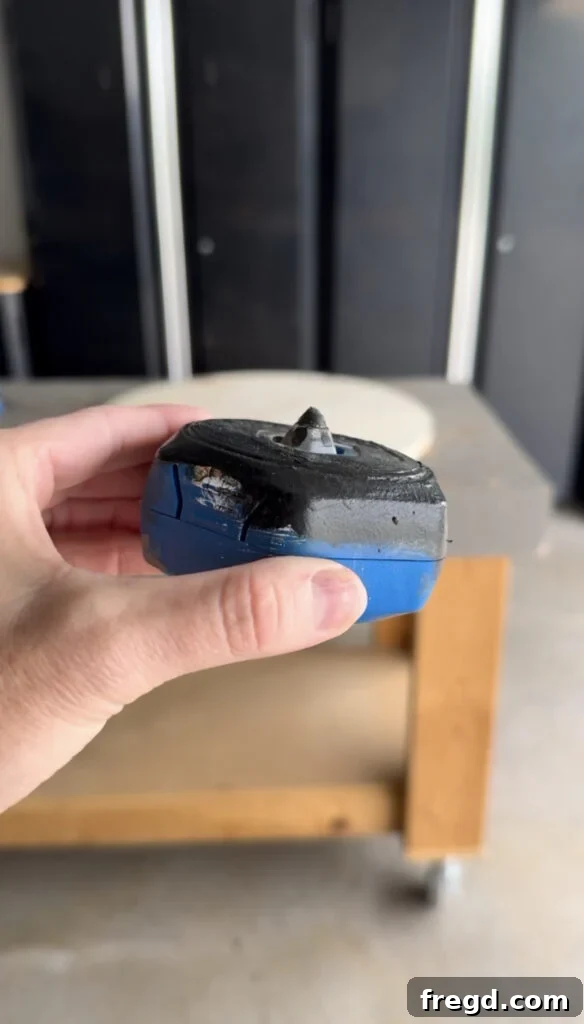
To facilitate thorough sanding, elevate your wooden circle off your work surface using Kreg Project Blocks. These affordable and indispensable accessories lift your workpiece, preventing it from sticking to the surface and allowing for full access to edges without marring. Once elevated, sand the entire piece until it is silky smooth. I absolutely adore my Kreg Project Blocks and find them essential for every finishing stage of my projects!
- You can find the Kreg Project Blocks HERE.
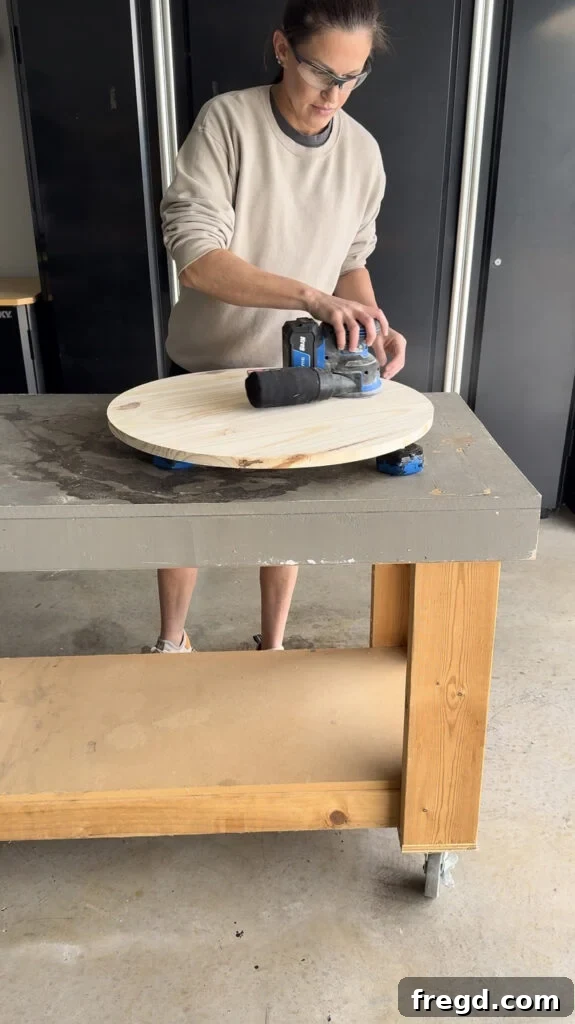
For efficient and effective sanding, I utilized my new Kreg 20V Ionic Drive Random Orbit Sander. Its lightweight design has quickly made it a favorite in my workshop. I started with an 80-grit sanding pad to quickly smooth out any minor imperfections, followed by a 120-grit pad for a finer finish. This two-stage sanding process is critical, as it makes a significant difference in the final appearance and feel of your stained or painted finish. Take your time during this step; the effort will truly pay off.
- You can find the Kreg Random Orbit Sander HERE.
Step 3: Stain the Wood and Paint the Lettering
Adding color and finish to your door hanger brings it to life and allows for personalized expression.
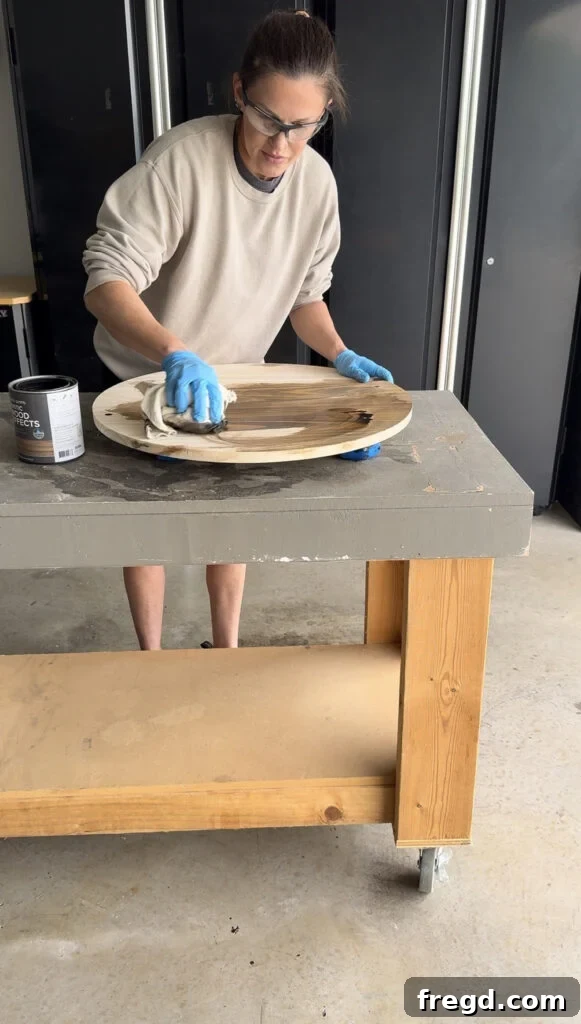
Apply one even coat of your chosen wood stain to the entire wooden circle. For this project, I opted for Behr Rustic Brown Stain, which imparts a warm, natural hue. Ensure the stain is applied uniformly and then allow it to dry completely according to the product’s instructions. Proper drying time is essential before proceeding to the next steps.

- You can find the Behr Rustic Brown Stain that I used HERE.
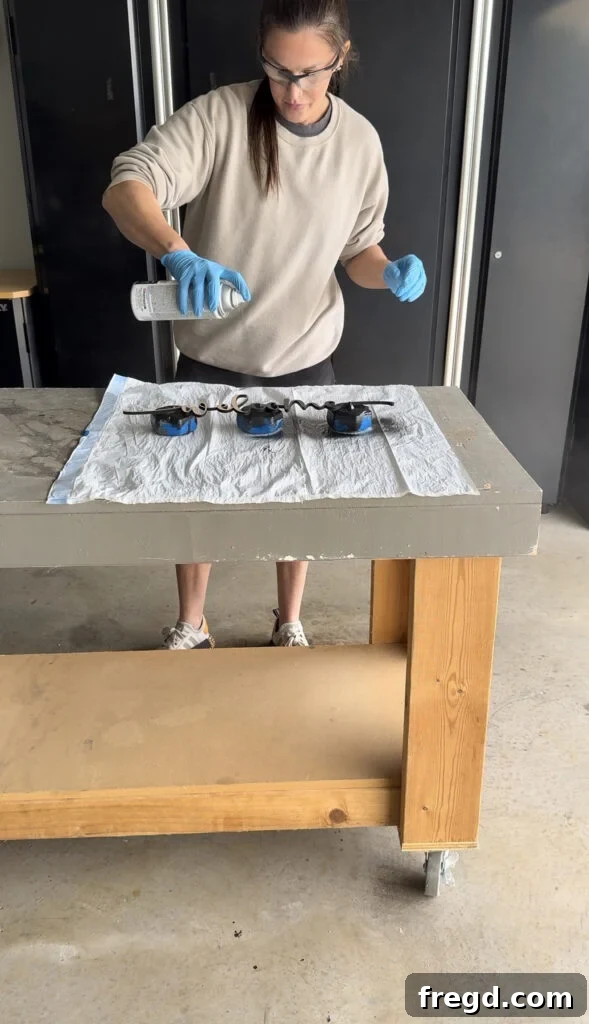
While your stained wood circle is drying, turn your attention to the lettering. I personally cut my “Welcome” sign from 1/8″ MDF using my Glowforge laser cutter. However, you can easily find similar pre-cut lettering at most craft stores or through online retailers like Amazon. Once you have your lettering, spray paint it black using black spray paint. This is where your personal style truly shines; choose a color that complements your home’s aesthetic or the seasonal theme you’re aiming for.
- You can find the black spray paint that I used HERE.
Step 4: Adding Decorative Texture to the Bottom Half
Introducing texture can add depth and visual interest to your door hanger without the need for additional paint or complex designs.
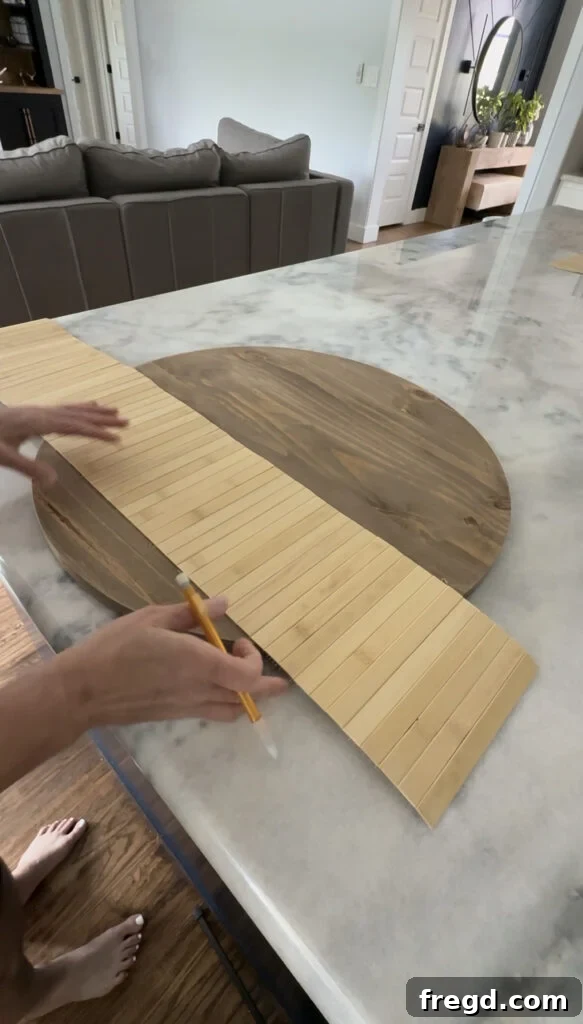
To infuse some subtle texture into the design without adding another layer of paint, I utilized a scrap piece of pole wrap. This material was leftover from our previous Modern Square Coffee Table build, demonstrating the value of repurposing materials.
- You can find the pole wrap that I used HERE.
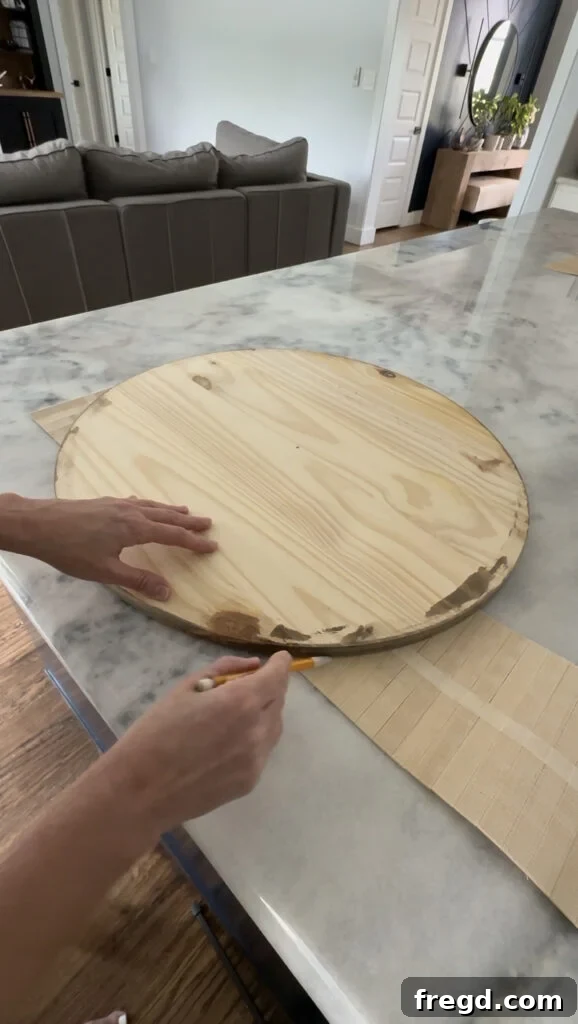
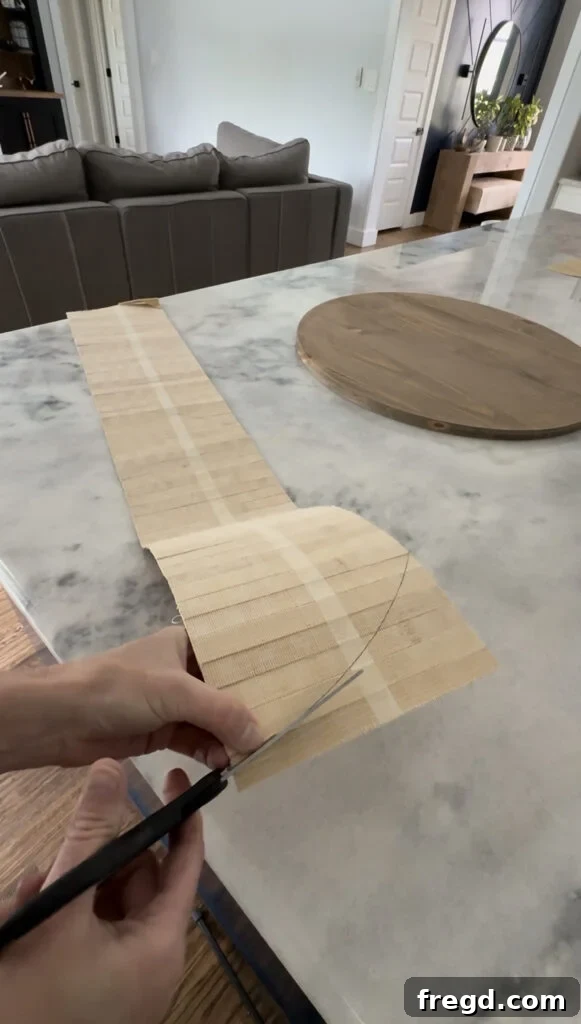
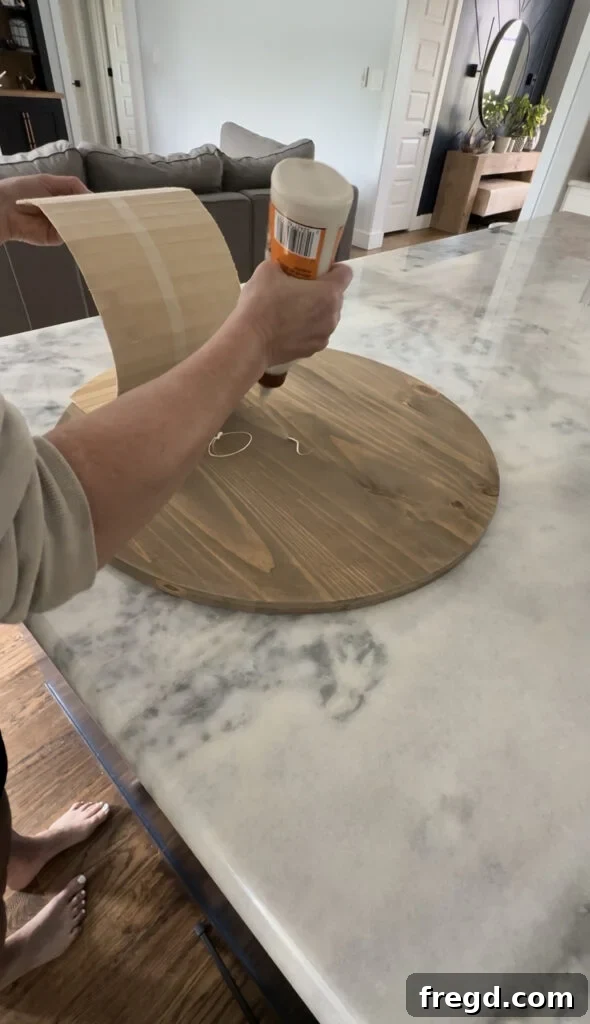
I carefully traced the curved bottom portion of the wood circle onto the pole wrap, then precisely cut it out using scissors. After cutting, I applied a generous amount of wood glue to the back of the pole wrap and securely glued it into its designated place on the door hanger. Press firmly and allow the glue to dry completely.
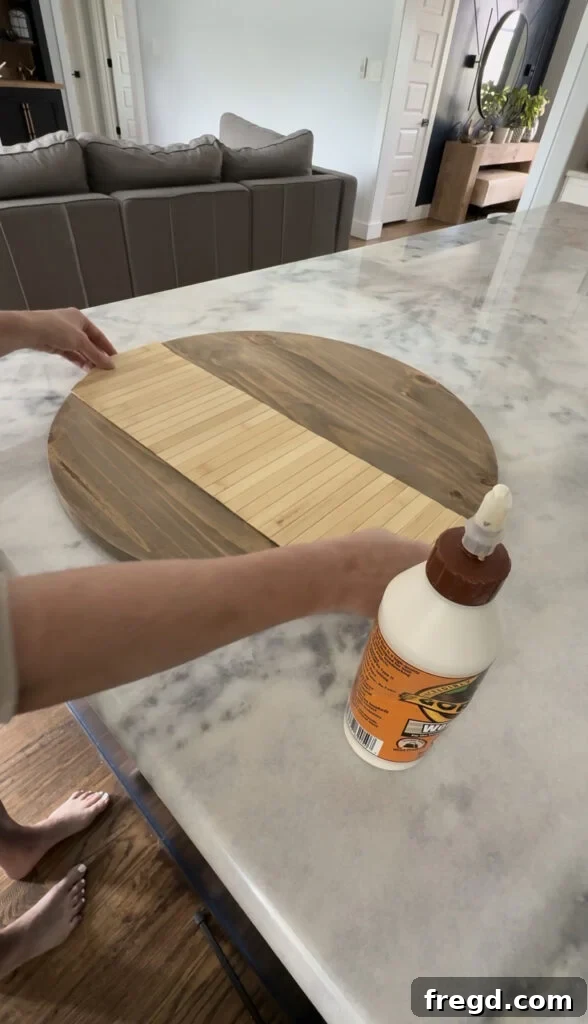
This simple addition of pole wrap provides just enough textural detail to make the door hanger visually appealing without making the design feel cluttered or overly busy.
Step 5: Attaching Your Personalized Design
With all the individual components prepared, it’s time to assemble your door hanger and bring your design to completion.
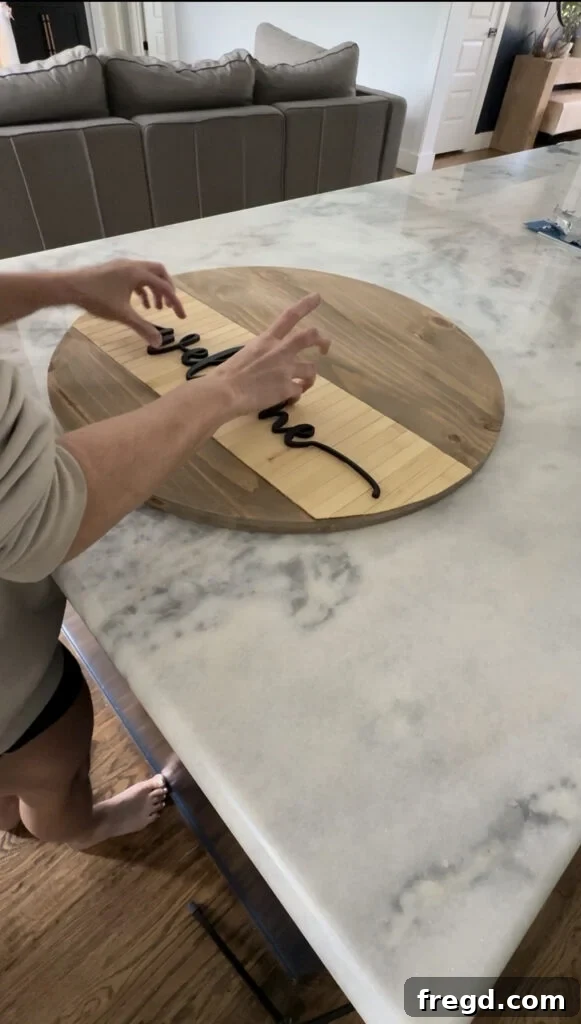
Once both the stain on the wood circle and the paint on your lettering are thoroughly dry, apply wood glue to the back of your painted lettering piece. Carefully position it onto the front of the stained wood circle, ensuring it’s centered and straight. Press down firmly to create a strong bond and allow the glue to cure completely.
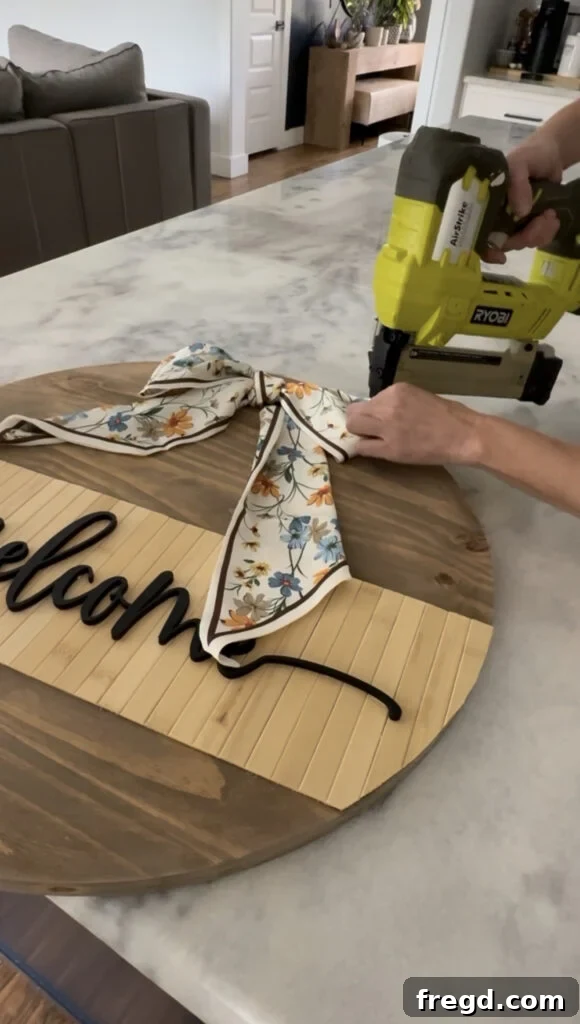
Next, create a simple yet elegant bow using your chosen ribbon or decorative scarf. Position this bow at the top of your door hanger and secure it firmly in place with a stapler. This adds a charming touch and provides a convenient point for hanging.
- You can find the scarf that I used HERE.
Step 6: Adding Hangers and Displaying Your Masterpiece
The final step is to prepare your door hanger for display and showcase your beautiful creation.
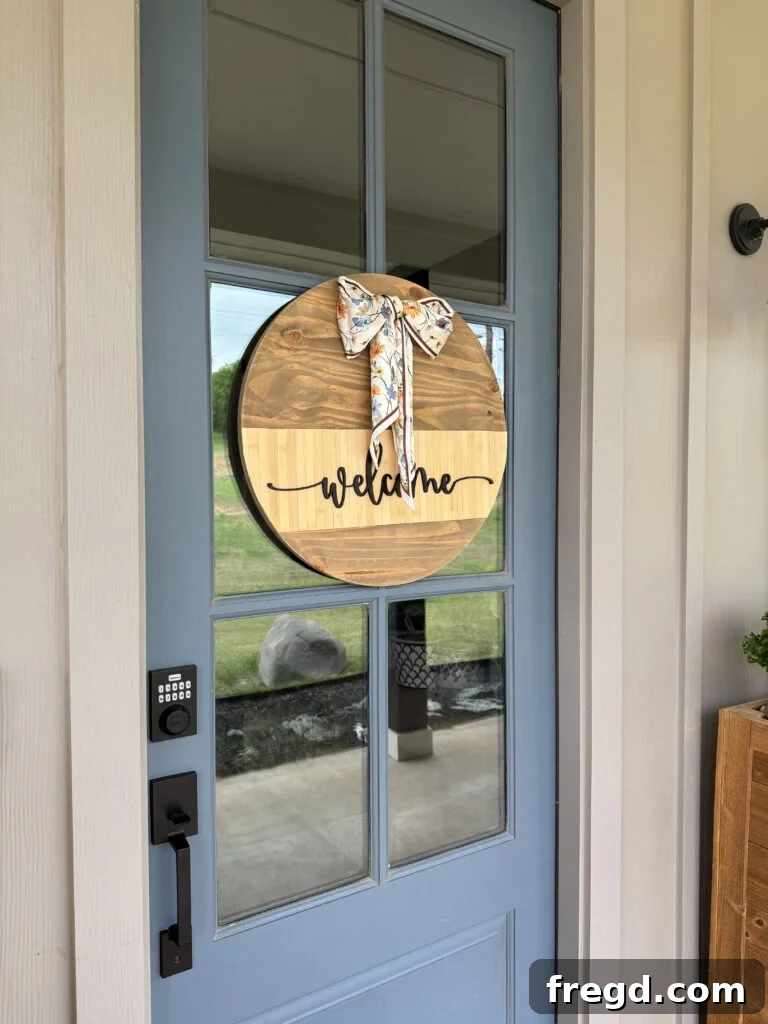
To securely hang your door hanger, attach two sawtooth hangers to the back of the wood circle, ensuring they are evenly spaced for balanced hanging. Position them carefully so the weight is distributed properly.
For hanging it on my glass front door, I utilized reliable suction cup wreath hangers. This offers a convenient and damage-free way to display your new decor without the need for permanent hardware or drilling into your door frame. It also allows for easy removal and seasonal changes.
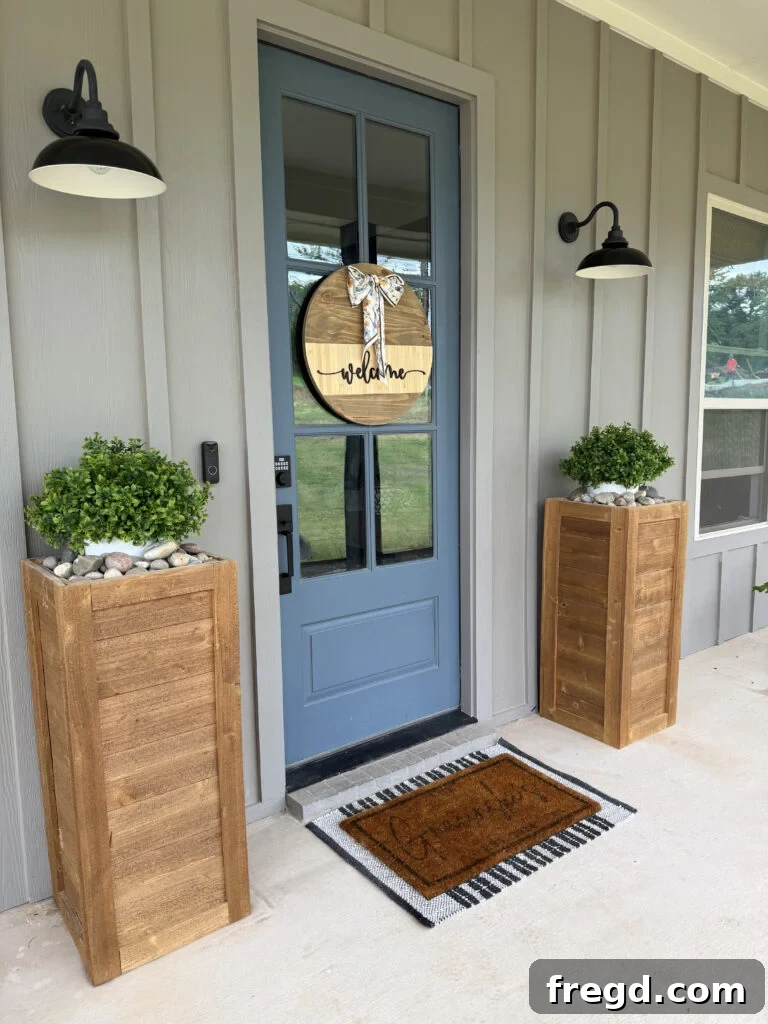
- Consider complementing your door hanger with our free plans for Tall Porch Planters to complete your entryway aesthetic.
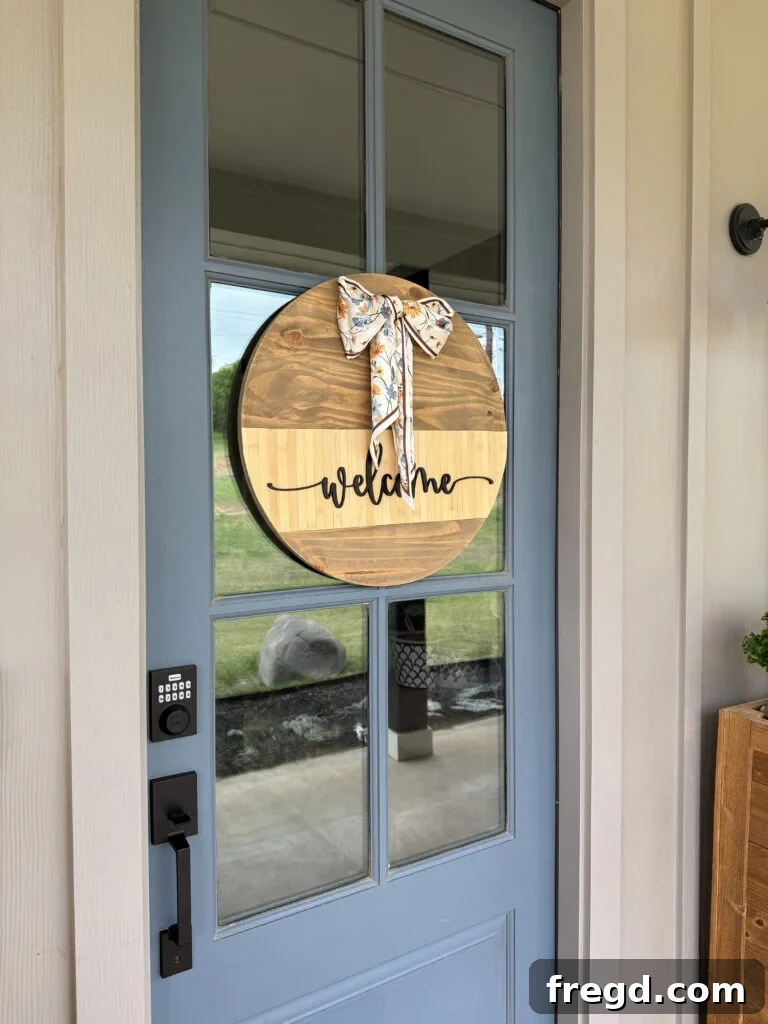
Expert Tips for Router Circle Cutting Success
Achieving consistently perfect circles with a router requires a bit of finesse and adherence to a few key principles. Keep these tips in mind for flawless results every time:
- **Let the Router Do the Work:** Resist the urge to force the router through the wood. The tool is designed to cut efficiently; applying excessive pressure can lead to uneven cuts, bogging down the motor, or even kickback. Maintain a steady, slow, and consistent feed rate.
- **Cut in Multiple Shallow Passes:** This is perhaps the most critical tip. Never attempt to cut through thick material in a single pass. Instead, set your router bit to take off only about 1/8 to 1/4 inch of material per pass. This reduces strain on the bit and router, prevents burning, minimizes tear-out, and results in a much smoother, cleaner edge.
- **Ensure Your Pivot Hole is Centered and Secure:** The accuracy of your circle hinges entirely on the pivot point. Measure carefully to find the exact center of your board. A securely drilled, small pivot hole will ensure the circle guide remains stable throughout the entire cut.
- **Flip Your Board for the Final Pass:** As demonstrated in the tutorial, flipping the workpiece after cutting halfway through and making the final passes from the opposite side is crucial. This technique is highly effective in preventing unsightly tear-out as the router bit exits the material, leaving you with a clean edge on both sides.
- **Use Project Blocks or Adequate Support:** Elevating your workpiece with project blocks or providing sturdy support underneath ensures that the router bit has a clear path and prevents damage to your work surface. It also allows the waste material to fall away freely once the circle is cut.
- **Choose the Right Router Bit:** For cutting circles, a straight bit or a spiral up-cut bit is generally recommended. Ensure the bit is sharp and clean for optimal performance.
- **Manage Dust:** Routing generates a lot of sawdust. Using a router with dust collection capabilities or attaching a shop-vac to your setup will keep your workspace clean and improve visibility of your cut line.
- **Practice on Scrap Wood:** If you’re new to router circle cutting, always do a practice run on a piece of scrap wood of similar thickness to get a feel for the tool and the process.
Creative Ways to Customize Your DIY Door Hanger
One of the most delightful aspects of this DIY door hanger project is its incredible versatility and ease of customization. Once the fundamental wood circle is cut, the creative possibilities are virtually endless, allowing you to tailor your hanger for any season, holiday, or personal preference.
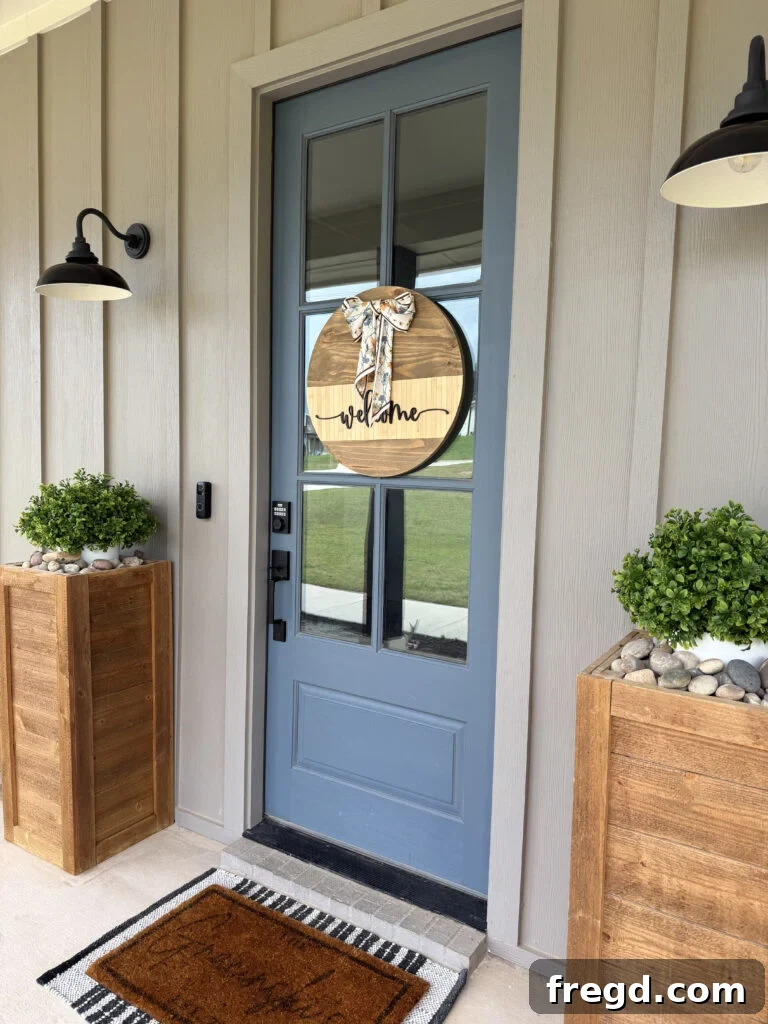
Here are just a few ideas to inspire your personalization:
- **Change the Wording:** Instead of “Welcome,” consider seasonal greetings like “Happy Fall,” “Merry Christmas,” “Spring Has Sprung,” or personalized messages such as “The [Your Last Name] Family” or “Home Sweet Home.” You could also use interchangeable magnetic letters for year-round adaptability.
- **Swap Out the Bow/Scarf:** This is perhaps the easiest way to refresh your door hanger. Use a festive plaid ribbon for winter, bright floral fabric for spring, patriotic colors for summer, or burlap and leaves for autumn.
- **Paint Instead of Stain:** Embrace a completely different aesthetic by painting your wood circle. Choose a classic white, a bold seasonal color (e.g., pumpkin orange for Halloween, pastel blue for Easter), or even a distressed look for a farmhouse vibe.
- **Add Different Textures:** Beyond pole wrap, experiment with other materials for the bottom half or even the entire circle. Consider small mosaic tiles, rope, fabric, artificial greenery, or even wood burning techniques for unique patterns.
- **Incorporate Additional Embellishments:** Attach small faux flowers, berries, miniature ornaments, pinecones, or personalized charms. A small chalkboard section could also allow you to write daily messages.
- **Vary the Finish:** Apply a clear coat sealant for outdoor durability, use a matte finish for a rustic look, or a glossy finish for a more modern appeal.
- **Two-Tone Designs:** Instead of just one stain or paint, create a two-tone effect by taping off a section of the circle before applying a second color.
The beauty of this project lies in its adaptable nature. Once you have that perfectly cut wood circle, the rest is an open canvas for your creativity. Let your imagination guide you!
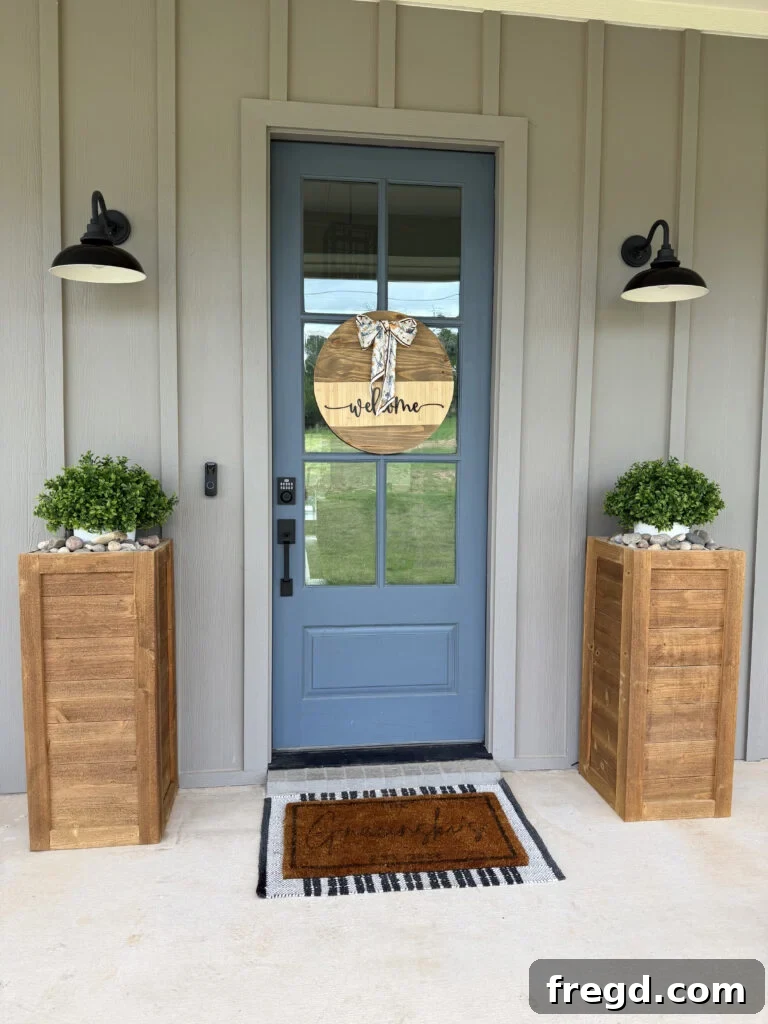
Concluding Thoughts and Future Projects
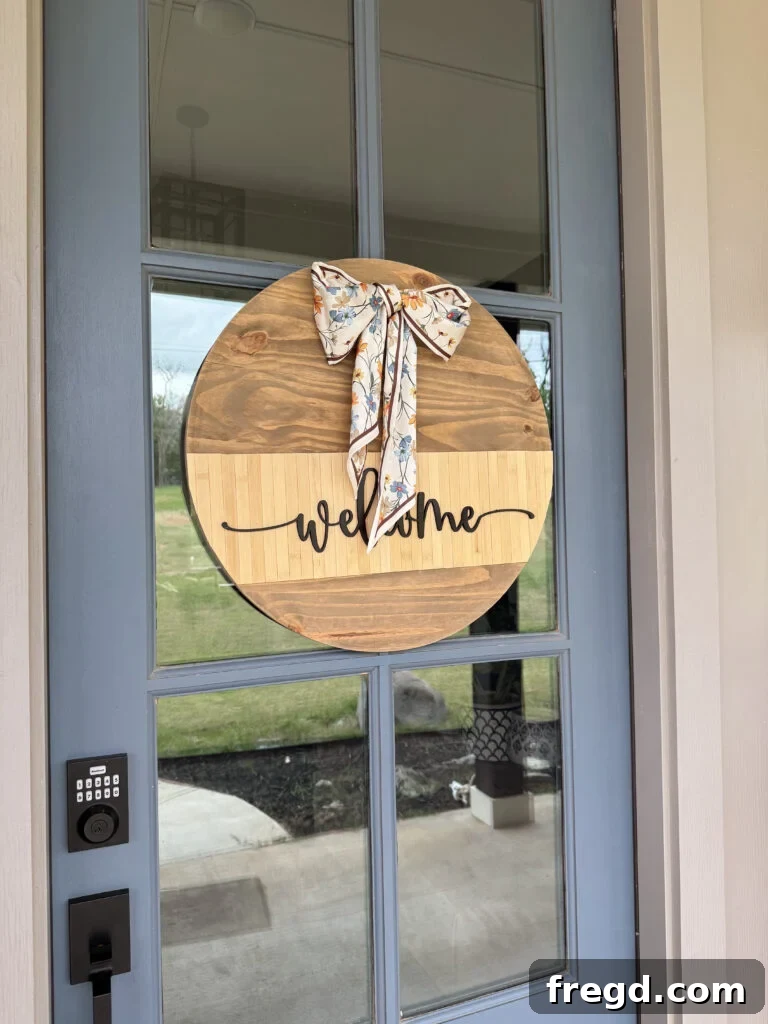
I am absolutely thrilled with how simple and elegantly clean this door hanger turned out. It provides just the right amount of curb appeal without being overwhelming, and the entire assembly process was remarkably straightforward. The key takeaway from this project is the unparalleled efficiency and accuracy offered by using a trim router in conjunction with a specialized circle guide. This combination not only ensures a perfect wood circle every time but also unlocks a world of possibilities for countless other woodworking endeavors.
If you’ve previously shied away from projects involving round elements due to perceived difficulty, this method will undoubtedly change your perspective. It demystifies circle cutting, making it accessible and enjoyable even for those with limited experience. The confidence gained from cutting a perfect circle transforms what could be a frustrating task into a satisfying achievement.
Moreover, this precise cutting method is not limited to small-scale crafts like door hangers. It seamlessly scales up for larger and more ambitious builds. I’ve successfully employed this exact technique for crafting various round coffee tables and even full-sized dining tables. The consistency and ease it brings to these larger projects make them significantly more manageable and fun to undertake.
To spark your imagination and provide further inspiration for incorporating perfect circles into your next build, here are a few of our past round table projects that you can explore for ideas and even find free plans:
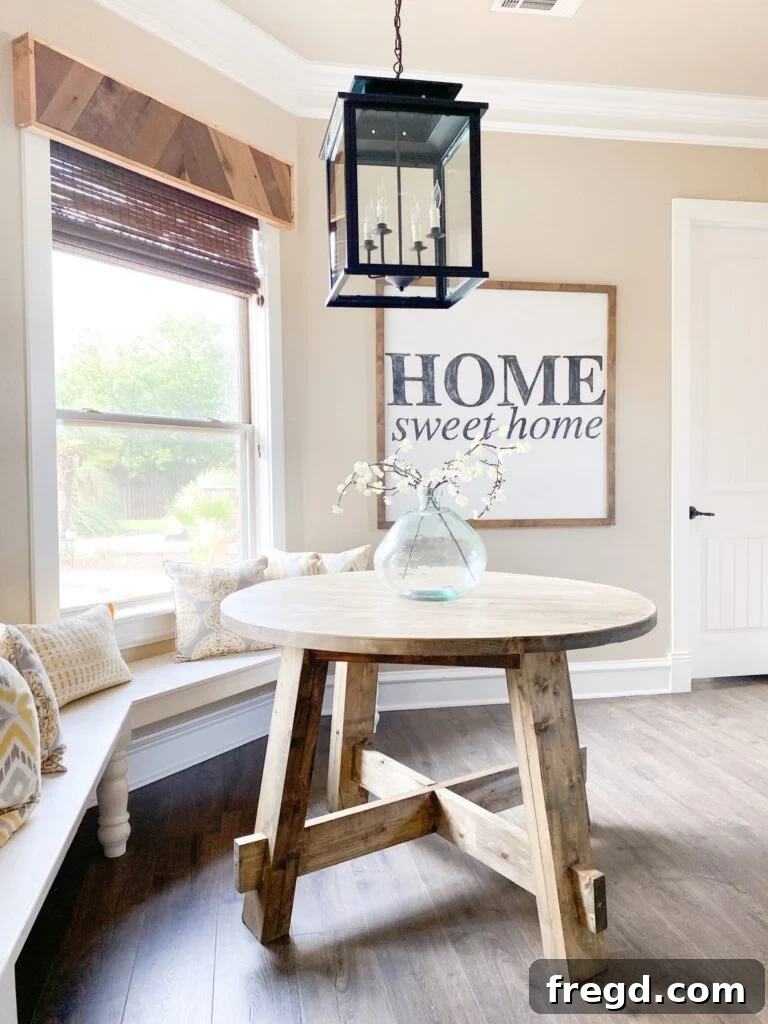
Dining Table with Round Top

Modern Round Coffee Table
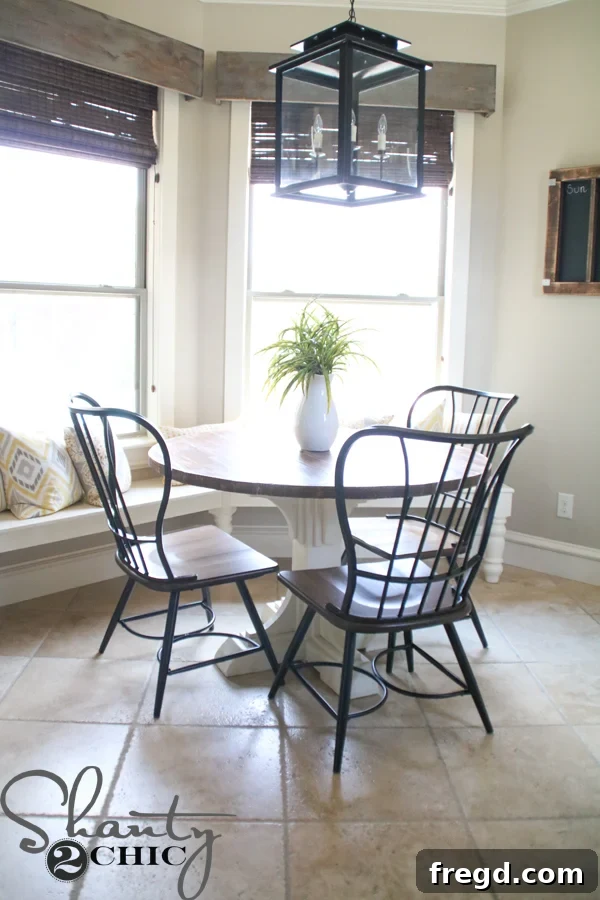
Pedestal Dining Table
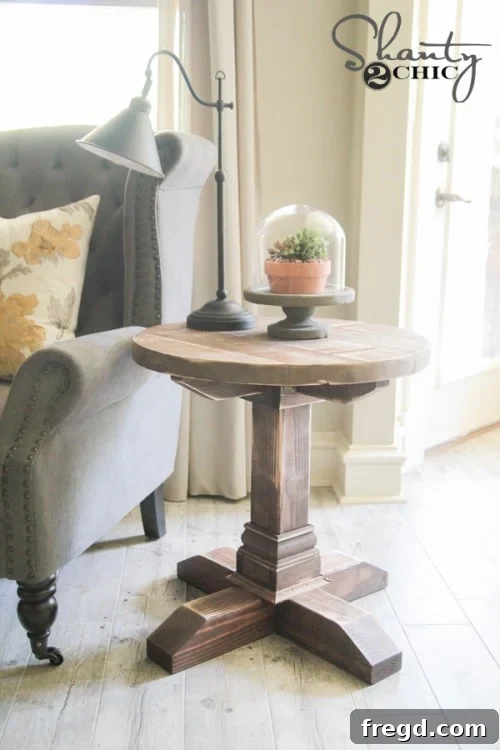
Side Table
Cutting a perfect circle in wood doesn’t have to be a complicated or intimidating task. This powerful combination of a trim router and a dedicated circle guide makes achieving flawless, consistent results simple every single time. Empower yourself with the right tools and techniques, and watch your woodworking projects reach new levels of precision and artistry.
Happy Building!