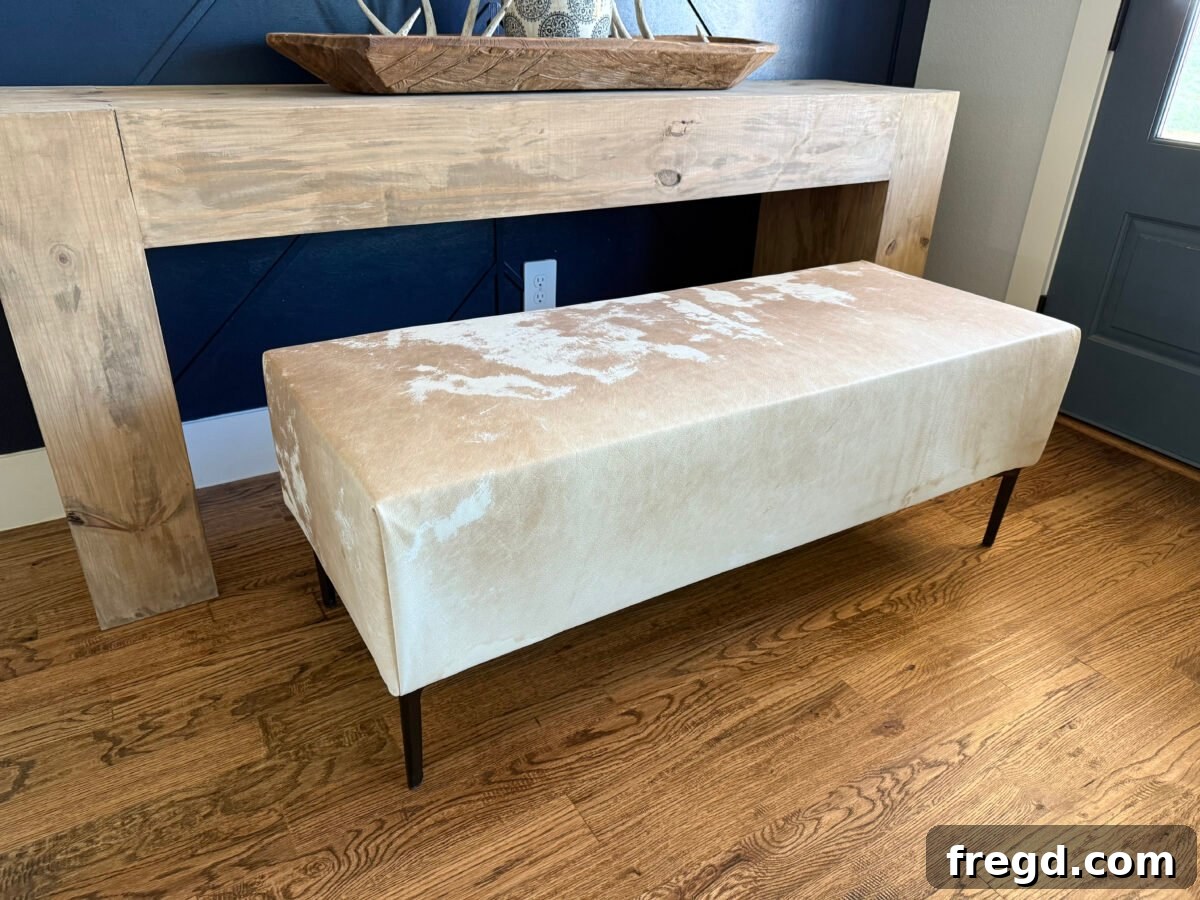
Transform your living space with a touch of modern rustic charm by building your very own DIY cowhide bench. This comprehensive guide provides everything you need, from detailed instructions to free printable plans, making it a perfect project for DIY enthusiasts of all skill levels, even absolute beginners. Using readily available 2×4 lumber, genuine (or faux) cowhide upholstery, and stylish metal legs, you can create a high-end, custom bench that will be the envy of your guests, all for a fraction of the cost of designer alternatives.
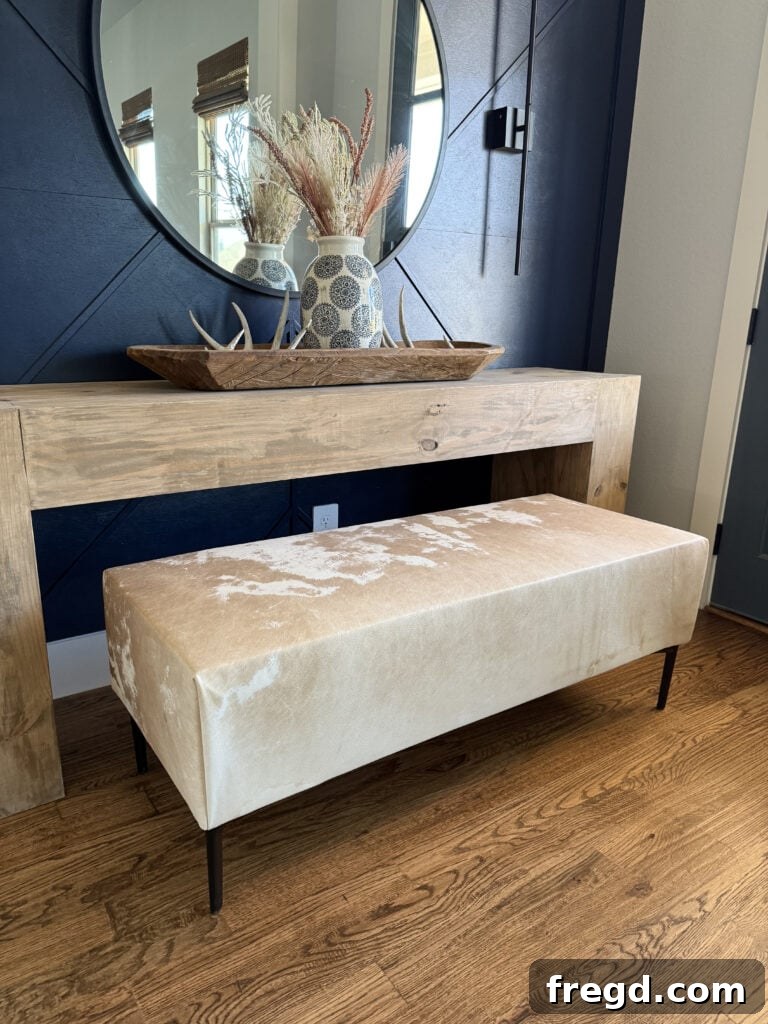
There’s an undeniable thrill in crafting furniture for your home, especially when it results in a stunning piece that perfectly complements your existing decor. A few months ago, I embarked on a project to build a DIY Modern Console Table, and ever since, I’ve been searching for the ideal bench or ottoman to complete the look. My quest led me to a jaw-dropping designer cowhide bench with a price tag nearing $3,000 – an expense I simply couldn’t justify. That’s when the inspiration struck: why not build my own?
The beauty of designing and constructing your own furniture lies in the unparalleled freedom to customize. You dictate the exact dimensions, choose your preferred finish, and select the perfect fabric or upholstery to match your unique style. Not only does this creative process allow for personalization, but it also translates into significant cost savings, delivering that coveted high-end aesthetic without the exorbitant price tag. This particular project exceeded all my expectations, yielding a piece that is as versatile as it is beautiful.
My custom-built cowhide bench has found its perfect home in our entryway, instantly elevating the space with its unique blend of rustic warmth and modern sophistication. However, its adaptability means it would look equally magnificent positioned at the foot of a bed, subtly tucked behind a sofa to offer additional seating, or gracing a bare wall that yearns for character and personality. This isn’t just a bench; it’s a statement piece, a testament to what you can achieve with a little creativity and effort.
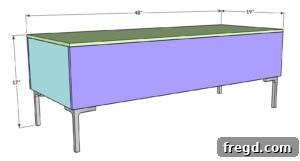
The truly remarkable aspect of this project is its accessibility. This is an easy DIY bench project that anyone, regardless of their prior woodworking experience, can successfully complete. I’ve broken down every step into an easy-to-follow tutorial, complete with a helpful video demonstration. To ensure your success, don’t forget to download the free printable woodworking plans, which provide all the necessary measurements and detailed instructions to guide you through building your very own custom cowhide bench.
How to Build a DIY Cowhide Bench
Embarking on a woodworking project can feel daunting, but with the right guidance and tools, building a stylish piece like this modern rustic bench is incredibly rewarding. This step-by-step tutorial will walk you through the entire process, from constructing the sturdy 2×4 frame to expertly upholstering it with luxurious cowhide, and finally, adding the finishing touches with sleek metal legs. Follow along closely, and you’ll soon have a bespoke piece of furniture to cherish.
Cowhide Bench How-to Video
For those who prefer visual learning, I’ve prepared a detailed video tutorial that complements these written instructions. Watching the steps in action can often clarify any uncertainties and provide valuable insights into techniques like drilling pocket holes, assembling the frame, and achieving a professional upholstery finish. Press play to see each stage of the DIY cowhide bench construction brought to life, ensuring you have the confidence to tackle each task effectively.
What You’ll Need to Build a DIY Cowhide Bench
Before you dive into building your custom bench, gather all the necessary tools and supplies. Having everything ready will streamline your workflow and ensure a smooth, enjoyable building experience. Many of these items are standard for woodworking projects, making this an accessible build for most DIYers.
Tools
- Miter Saw: Essential for precise, straight cuts on your 2×4 lumber. A circular saw or even a hand saw with a miter box can also be used if a miter saw isn’t available, though they may require more care for accuracy.
- Kreg Jig: A pocket-hole jig is crucial for creating strong, hidden joints that give your bench a clean, professional appearance. We recommend the Kreg Jig 720Pro for its ease of use and versatility.
- Drill: Needed for driving pocket-hole screws and pre-drilling pilot holes where necessary. A cordless drill offers maximum flexibility.
- Stapler: An essential tool for attaching the plywood panels, batting, and cowhide upholstery. Whether you use a manual, electric, or cordless stapler, ensure it can drive 1-inch staples effectively.
Supplies
- 1 – 1/2″ x 48″ x 48″ Hardwood Plywood: This will form the solid surfaces of your bench frame, providing a sturdy foundation for upholstery.
- 4 – 2x4x8 Lumber: The backbone of your bench frame, providing structural integrity. Choose straight, knot-free pieces for the best results.
- 2 1/2″ Pocket Hole Screws: Specifically designed for use with your Kreg Jig to create strong, secure joints in 2×4 lumber.
- 1″ Staples: For attaching plywood and upholstery materials. Ensure they are compatible with your chosen stapler.
- 4 – Metal Feet: These provide a modern, sleek finish and elevate the bench off the floor. Select a style that complements your desired aesthetic.
- Batting: Adds cushioning and a smooth, rounded profile to your upholstered bench. It helps the cowhide lay perfectly and enhances comfort.
- Cowhide: The star of the show! You can opt for authentic cowhide for a truly luxurious feel or use high-quality imitation cowhide for a more budget-friendly or animal-friendly option. Consider the pattern and color that best suits your decor.
- Wood Glue: For reinforcing all pocket hole joints, providing extra strength and durability to your bench frame.
Step 1: Build the Side Frame Assemblies
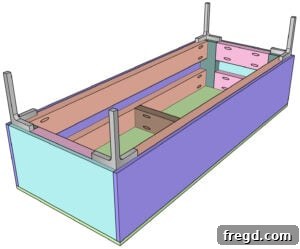
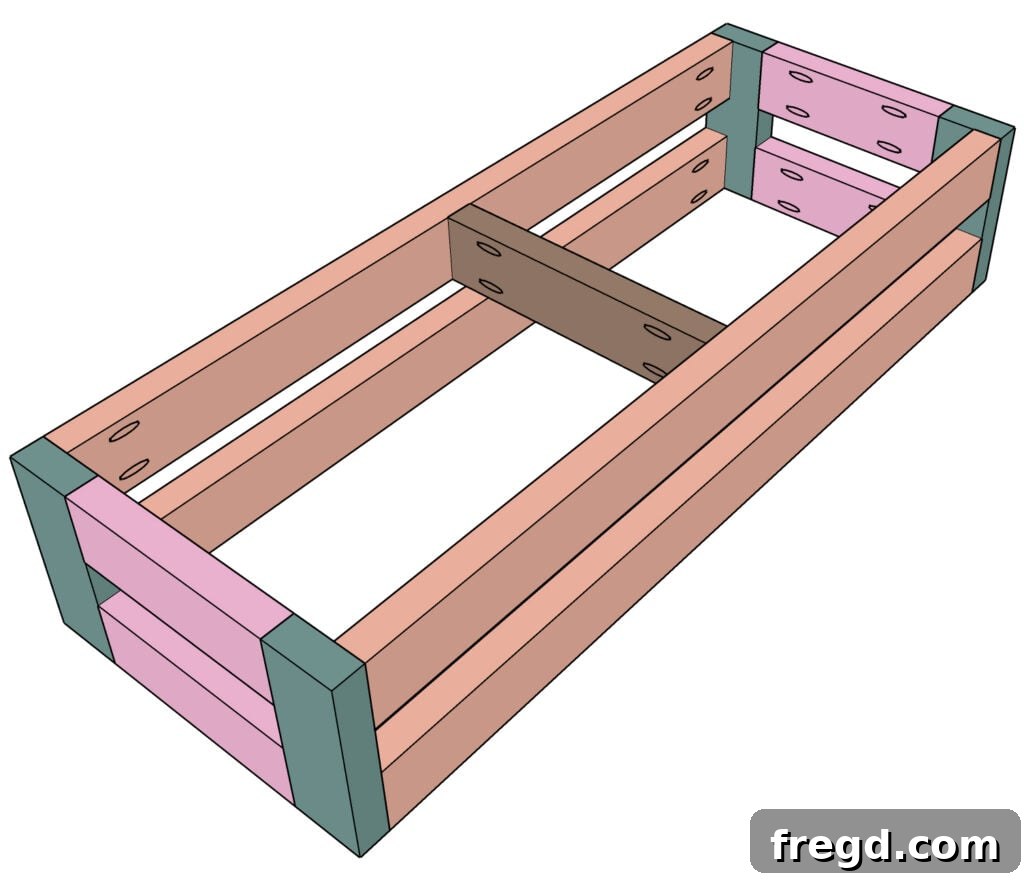
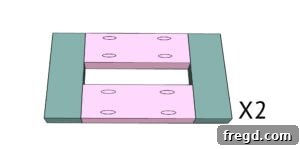
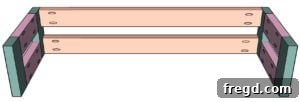
Begin by carefully cutting your 2×4 lumber pieces to the specified sizes for the side frames according to the free plans. Accuracy in this step is key to a square and stable bench. Once cut, set your Kreg Jig 720Pro to the correct depth for 1 ½” pocket holes and drill two holes at each end of the vertical pieces. These pocket holes will allow you to create strong, concealed joints.
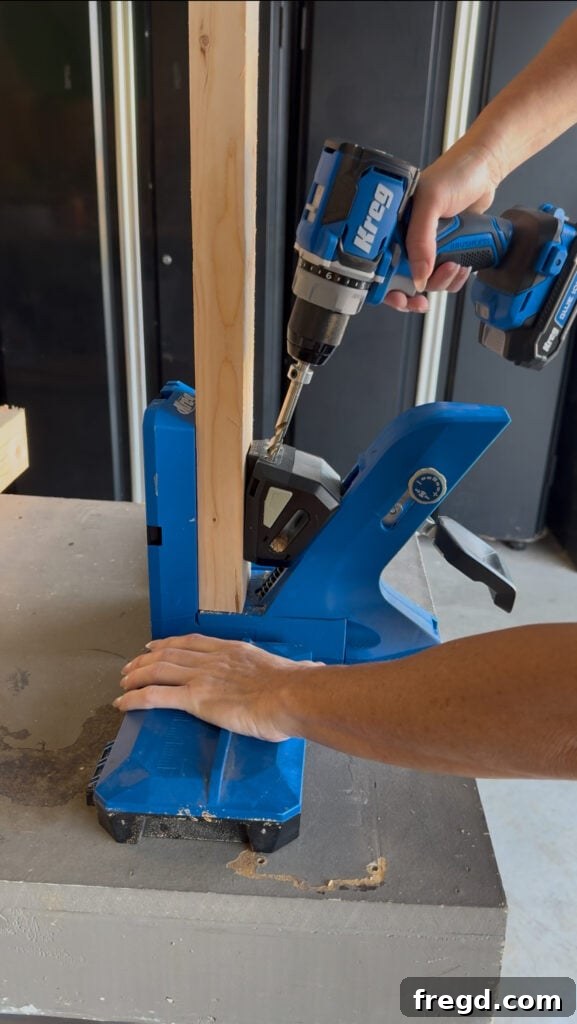
Using a Kreg 20-Volt Ionic Drive Drill, attach the vertical pieces to the horizontal pieces, forming an “H” shape, using 2 ½” pocket hole screws and a generous amount of wood glue. The glue significantly enhances the strength and longevity of the joints. You will need to construct two identical side assemblies to form the ends of your bench.
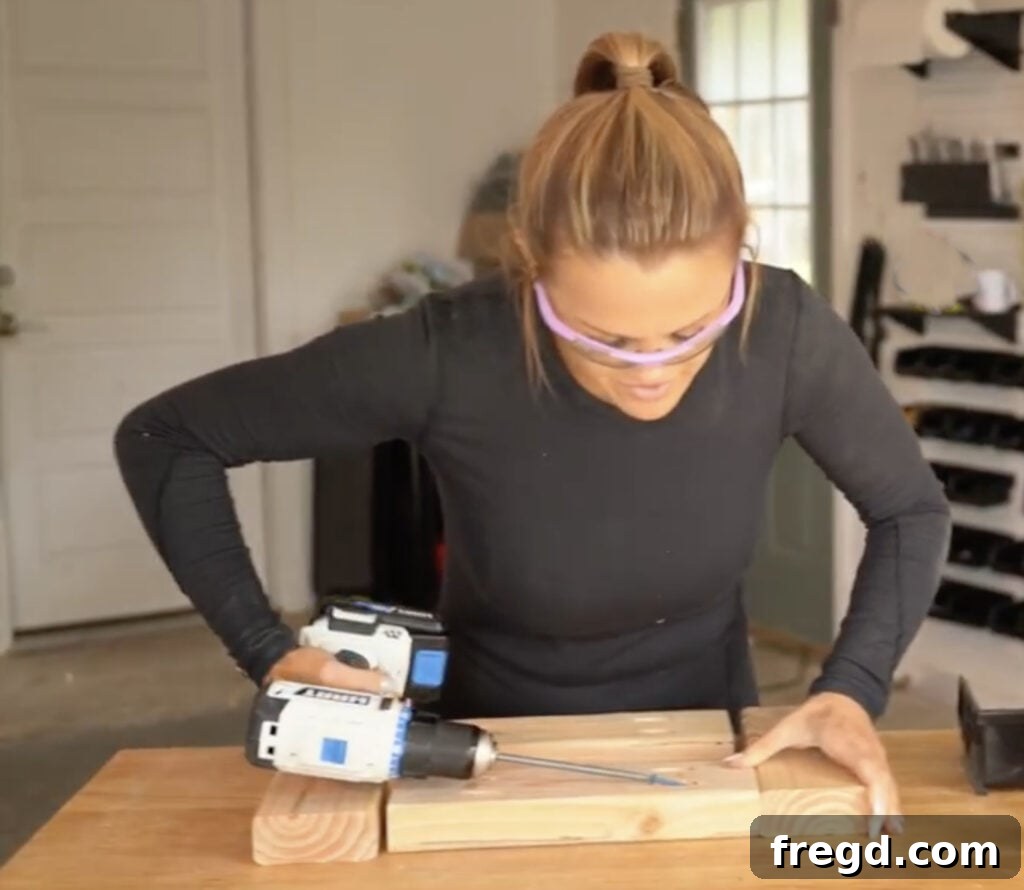
Step 2: Connect the Long Frame Pieces
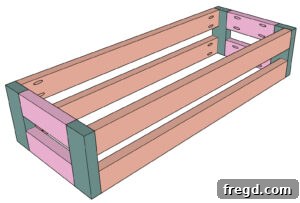
Next, measure and cut the long frame pieces that will connect your two side assemblies. Just like with the side frame components, drill 1 ½” pocket holes on both ends of these long pieces. These will attach to the vertical members of your side frames. Apply wood glue to the mating surfaces, align the pieces, and securely fasten them to the side assemblies using 2 ½” pocket hole screws. Ensure everything is square and flush as you go, clamping if necessary.
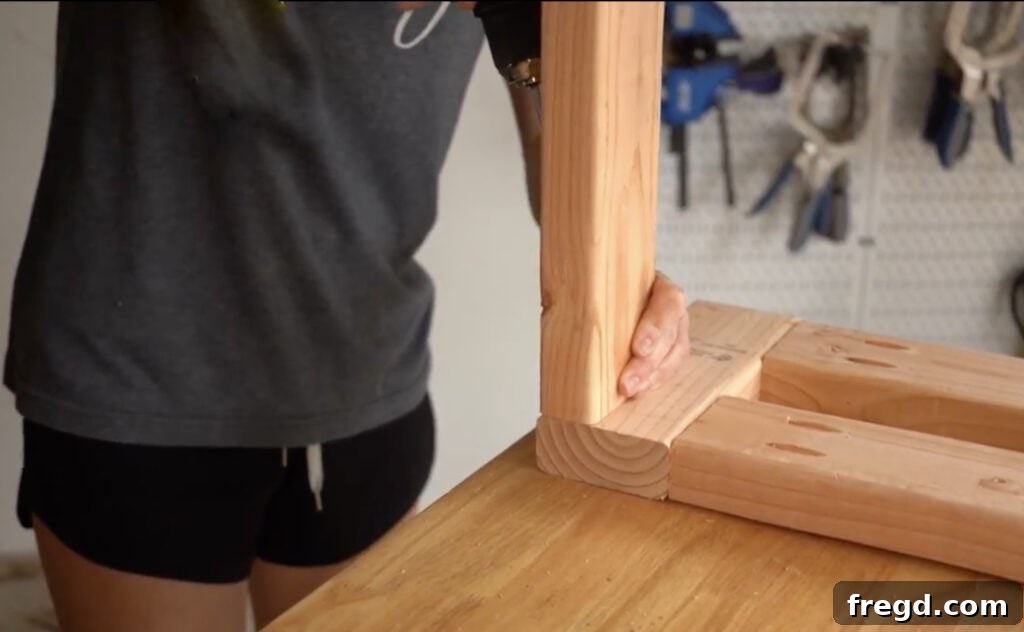
Step 3: Complete the Frame
With one long frame piece attached, repeat the process for the opposite side. Carefully position the second long frame piece, apply wood glue, and secure it with 2 ½” pocket hole screws. This step will bring the entire structure together, forming the complete rectangular frame for your bench. Take a moment to check that the frame is perfectly square and stable before moving on.
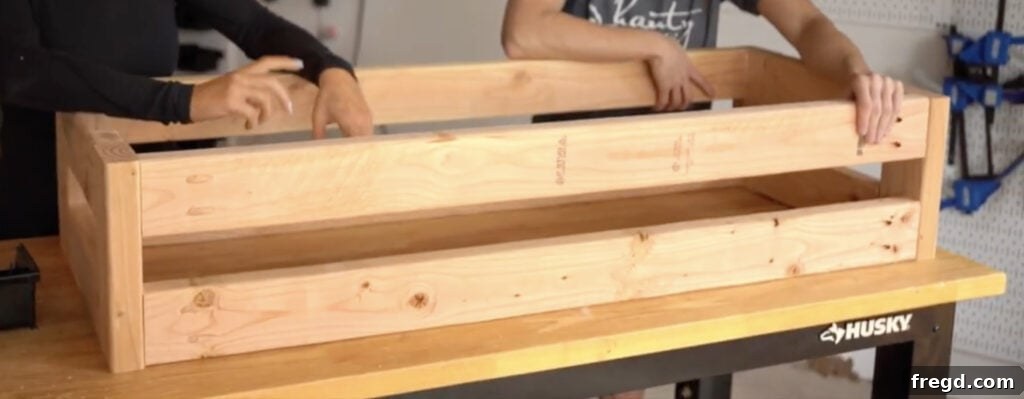
Step 4: Add the Center Support (Optional)
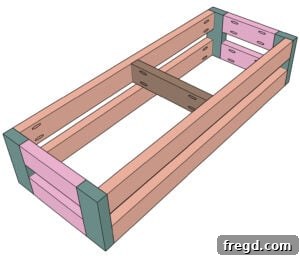
A center support piece offers enhanced strength and stability, particularly important if your bench will be used frequently, needs to support heavier loads, or if it’s a longer design. For purely aesthetic benches, this piece can be optional. If you choose to include it, measure and cut a 2×4 to fit snugly between the top long supports. Drill 1 ½” pocket holes on both ends of this center support. Locate the exact center between the top long supports, apply wood glue, and attach it firmly with 2 ½” pocket hole screws. This addition ensures your bench maintains its integrity and prevents any sagging over time.
Adding the Plywood Panels
Once your 2×4 frame is assembled, the next stage involves cladding it with plywood panels. These panels create a solid, continuous surface that is essential for the upholstery process, providing structure and a clean foundation for the batting and cowhide.
Step 5: Attach the Side Panels
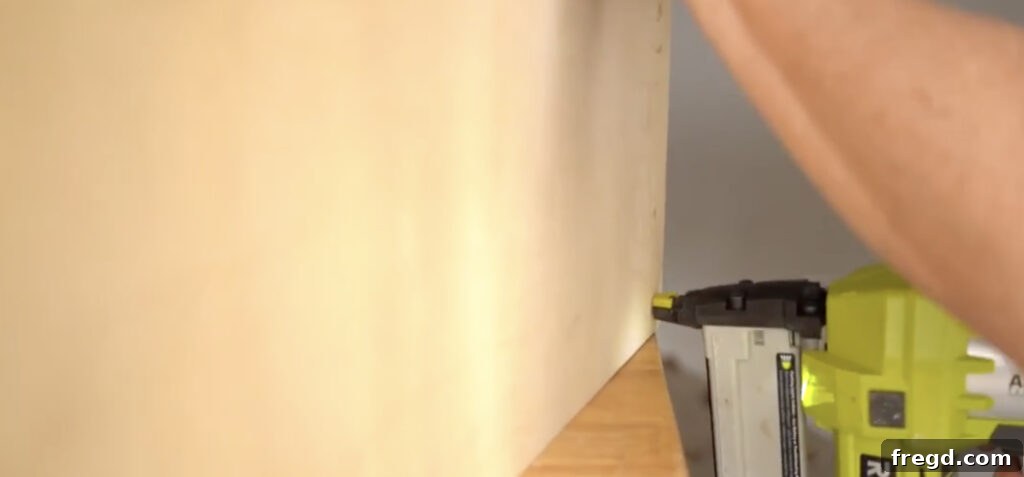
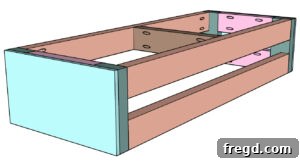
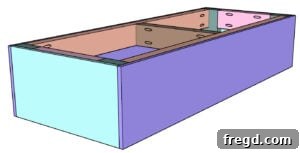
Begin by measuring and cutting your 1/2″ hardwood plywood pieces to precisely fit the ends of your bench frame. These panels should cover the exposed 2×4 side assemblies. Apply a thin, even layer of wood glue to the 2×4 surfaces where the plywood will sit, then carefully position the plywood panels. Using 1″ staples, secure the panels firmly to each end of the bench frame, ensuring they are flush and tight. Work your way around the edges, placing staples every few inches for a secure hold.
Step 6: Add the Front and Back Panels
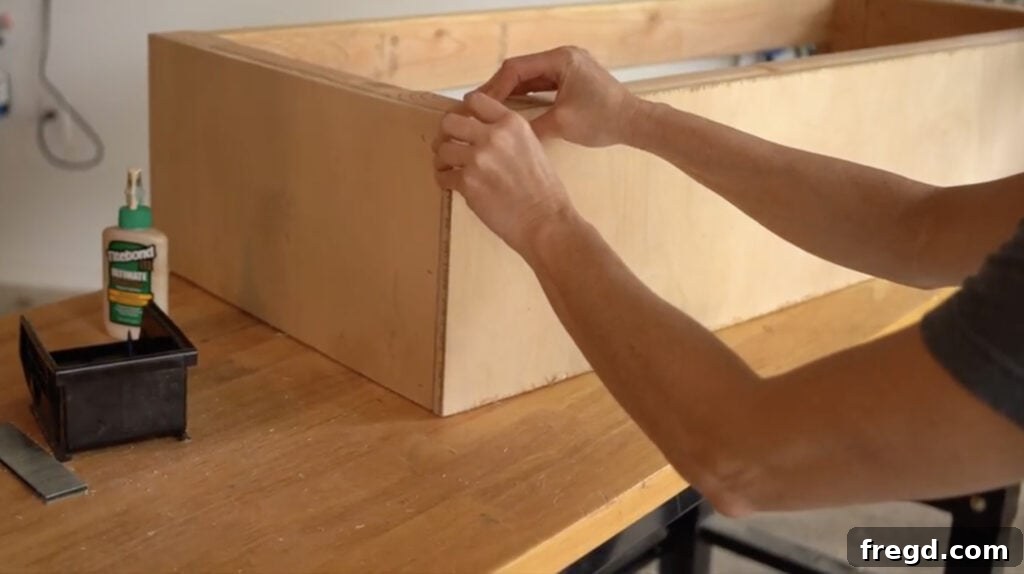
Now, measure and cut the larger plywood pieces for the front and back of your bench. These panels will span the length of the bench, connecting the side panels and further solidifying the structure. Apply wood glue to the 2×4 frame and the edges of the side panels where the front and back panels will meet. Position the plywood carefully and attach them with 1″ staples, ensuring a tight, gap-free fit. The combination of staples and wood glue will create a very robust “box” structure.
Step 7: Install the Top Panel
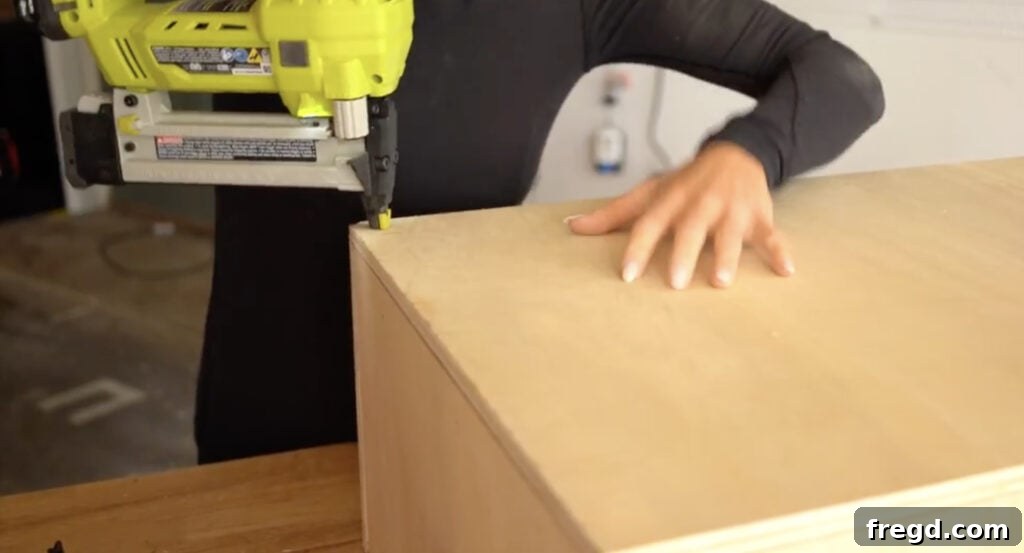
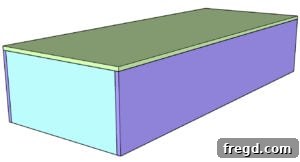
Finally, measure and cut the last plywood piece to fit perfectly over the top of your bench frame. This piece will serve as the primary seating surface. Apply wood glue generously to the top edges of the 2×4 frame and the installed plywood panels. Carefully place the top plywood piece, making sure it aligns perfectly with all edges. Secure it firmly using 1″ staples. This completes the solid structural foundation of your bench, creating a smooth, strong surface ready for the luxurious batting and upholstery layers.
Upholstering the Cowhide Bench
This is where your bench truly begins to take on its unique character and luxurious feel. Upholstering might seem intimidating, but by following these steps carefully, you can achieve a professional-looking finish that perfectly showcases your chosen cowhide.
Step 8: Add Batting
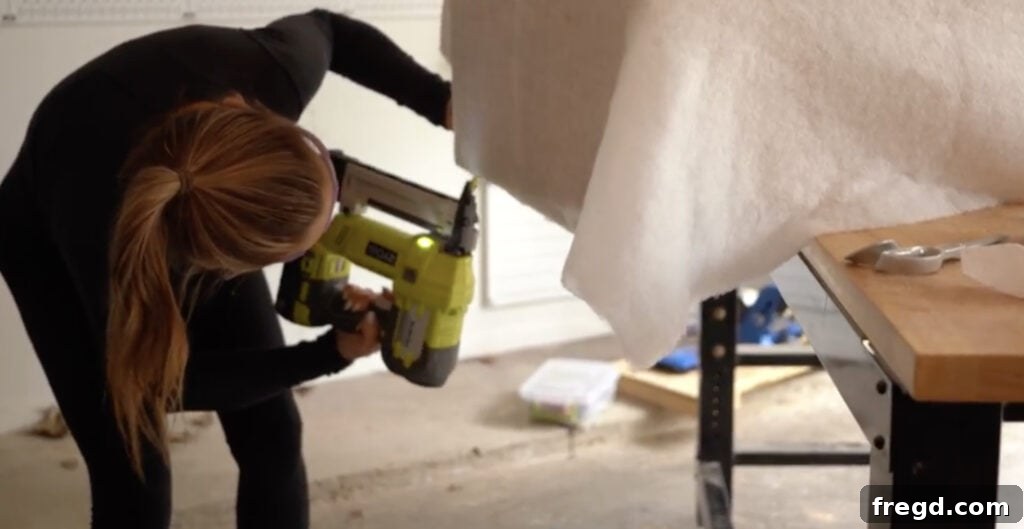
Cut your batting to size, ensuring it’s large enough to cover the top and all four sides of the bench with enough overlap to reach the underside of the plywood frame. Drape the batting evenly over the bench. Starting on one of the longer sides, pull the batting firmly taut, ensuring there are no wrinkles or slack. Staple it to the underside edge of the plywood frame, using 1″ staples. Continue working your way around the bench, pulling the batting taut and securing it every few inches. This firm tension is crucial for creating a smooth, even surface and comfortable padding. Leave the corners for last.
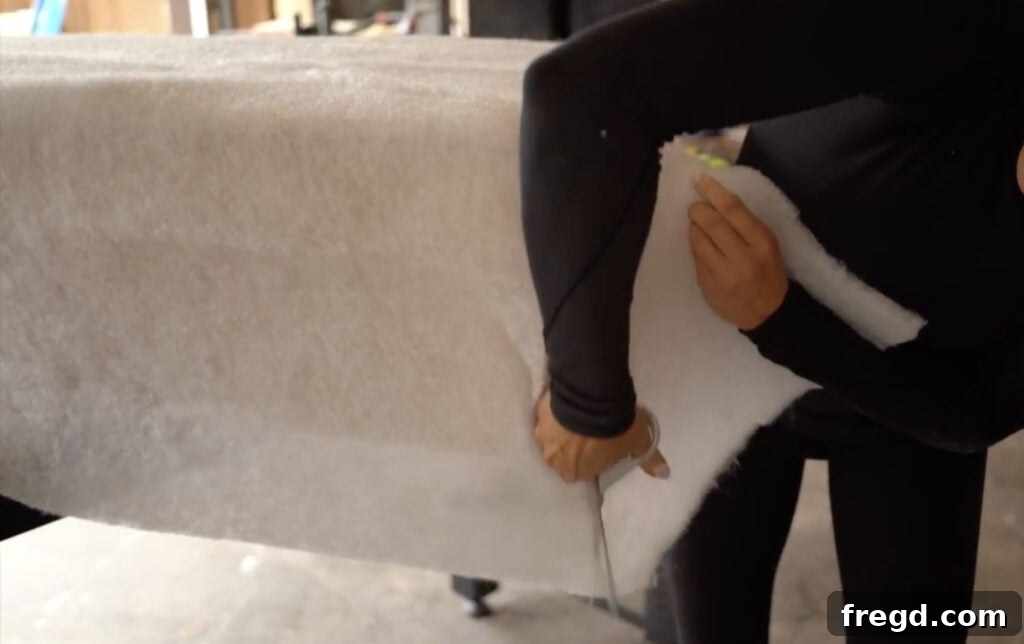
Once the sides are stapled, address the corners. Trim any excess batting down the length of each corner to reduce bulk. Then, neatly fold and tuck the batting at the corners, creating a clean, seamless look. Secure these folds with additional staples to the bench frame, ensuring a tight and smooth transition.
Step 9: Staple on the Cowhide
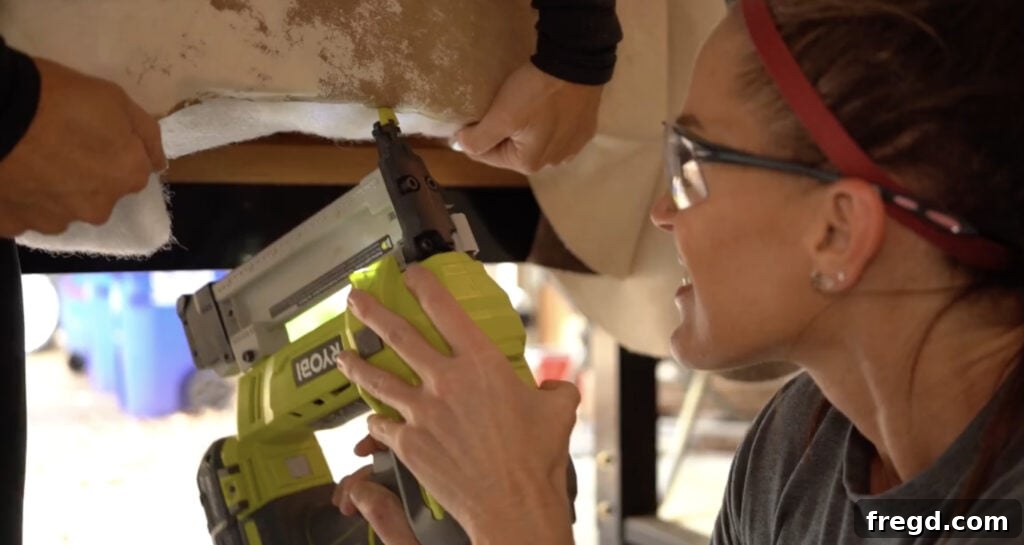
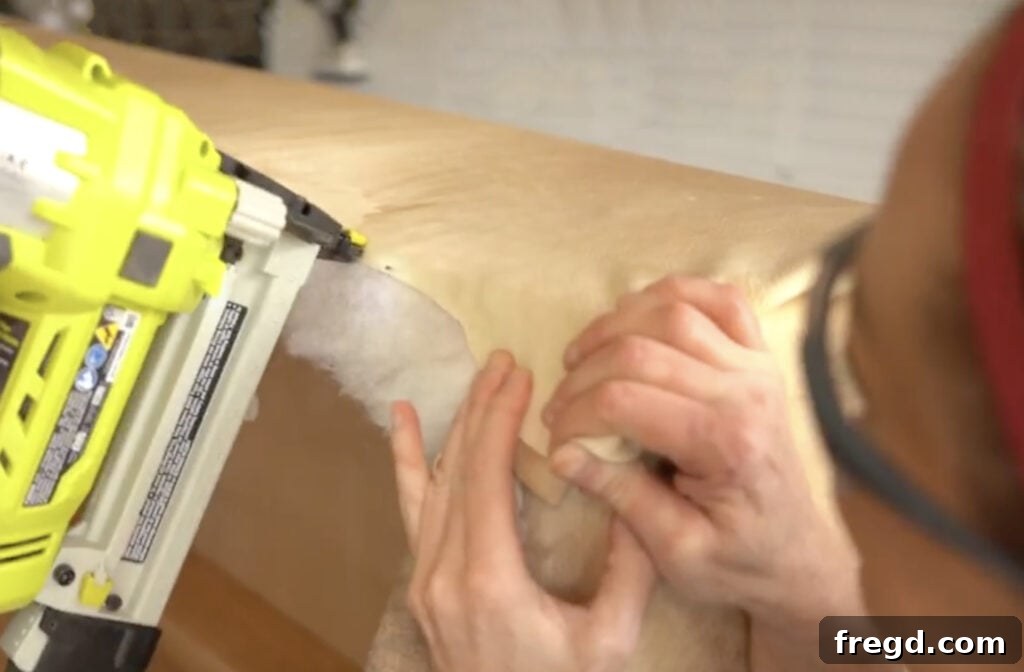
Lay your cowhide evenly over the batting, ensuring the pattern is centered and aligned as desired. Similar to the batting, begin stapling on one of the longer sides. Pull the cowhide taut, making sure there are no wrinkles or slack, and staple it along the underside of the frame, positioning your 1″ staples strategically for a strong hold. Work your way around the entire bench, consistently pulling the material tight before stapling. This meticulous attention to tension will result in a snug, professional, and wrinkle-free finish.
Step 10: Finish the Corners
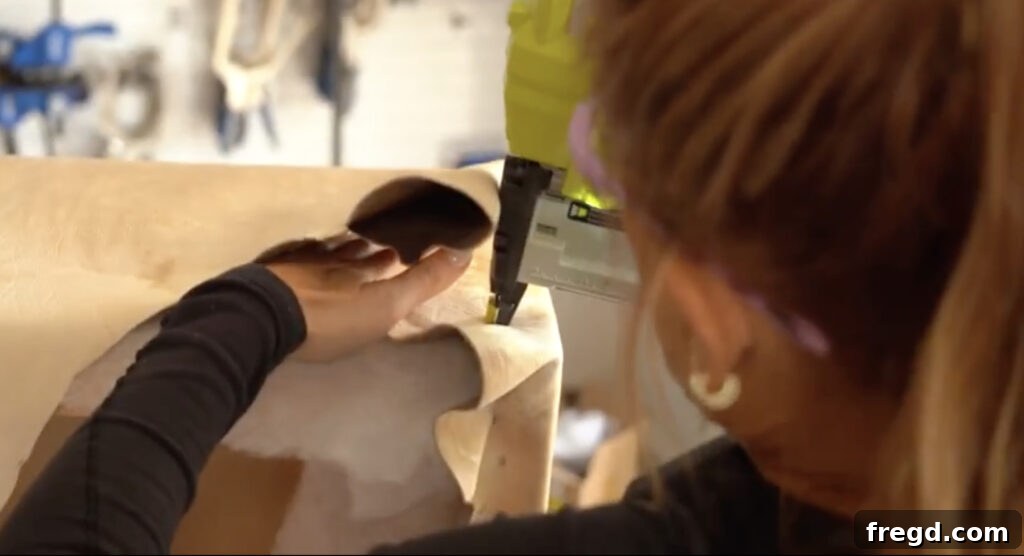
The corners are crucial for a polished look. Treat them as if you’re wrapping a gift, focusing on crisp, neat folds. First, make a clean fold on one side of the corner and staple it down securely to the underside of the bench frame. Then, take the second layer of cowhide at the corner, fold it over the first layer, and pull it taut to neatly cover the initial staples. Secure this final fold with more staples to the underside of the bench, ensuring a smooth, tailored corner that enhances the overall high-end appeal of your cowhide bench.
Attaching the Metal Legs
The final step in constructing your DIY cowhide bench is adding the metal legs. These modern accents not only provide stability but also contribute significantly to the contemporary rustic aesthetic, lifting the bench and giving it a lighter, more elegant presence.
Step 11: Install the Feet
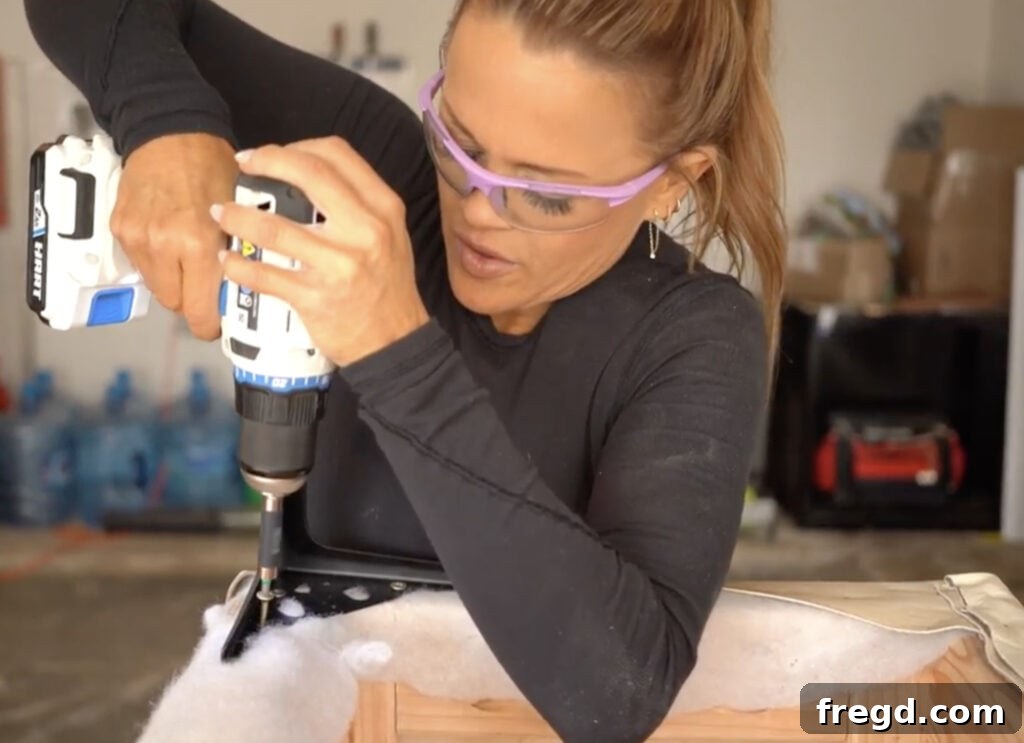
Once your bench is completely upholstered and all the cowhide is securely stapled, carefully flip it over to expose the underside. Position the four metal feet in the desired locations, typically near the corners for maximum stability. Use a drill to attach them securely to the 2×4 frame using the provided screws. Ensure each leg is firmly fastened and level. The specific legs and cowhide fabric I used are linked throughout this post, making it easy for you to source the exact materials for a consistent look. Double-check that all legs are tight before flipping your stunning new bench upright!
The Finished Cowhide Bench
And just like that, your custom DIY cowhide bench is complete! I genuinely couldn’t be more thrilled with how this project turned out. It’s more than just a piece of furniture; it’s a versatile design element that injects the perfect balance of rustic warmth and modern sophistication into our entryway. The satisfaction of knowing I built this beautiful piece myself, especially at a remarkable cost of around $200 – a staggering saving compared to the $3,000 inspiration piece – is truly unparalleled.
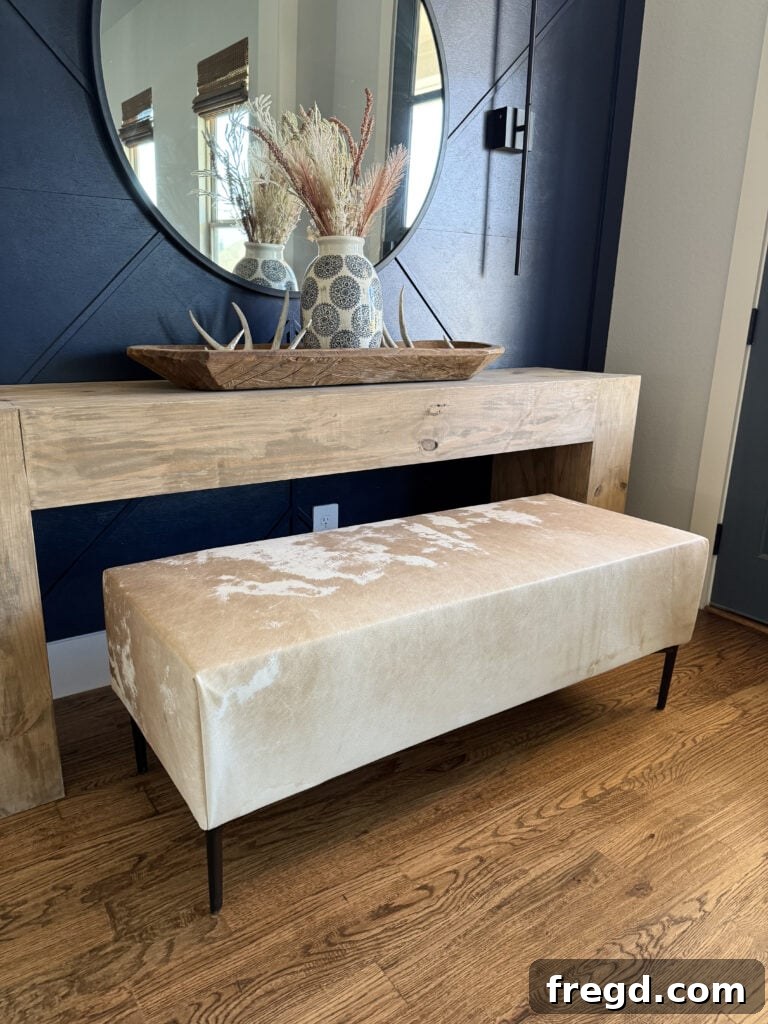
This upholstered bench adds so much character and a unique focal point to my entryway, but its design versatility means it could seamlessly integrate into various other spaces in your home. Imagine it gracing the foot of a bed, providing a cozy spot for putting on shoes or a stylish resting place for decorative pillows. It would also serve as elegant extra seating in a living room, a welcoming touch in a hallway, or even a chic addition to a dining area. Its timeless appeal ensures it will complement a wide range of interior styles, from farmhouse to contemporary.
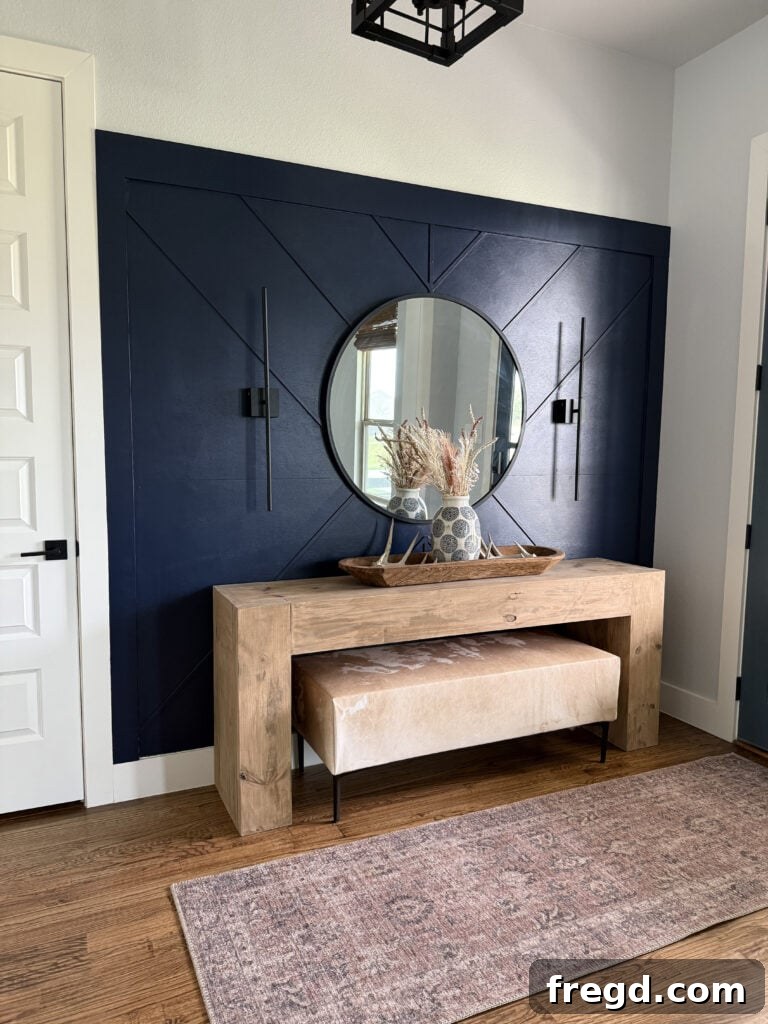
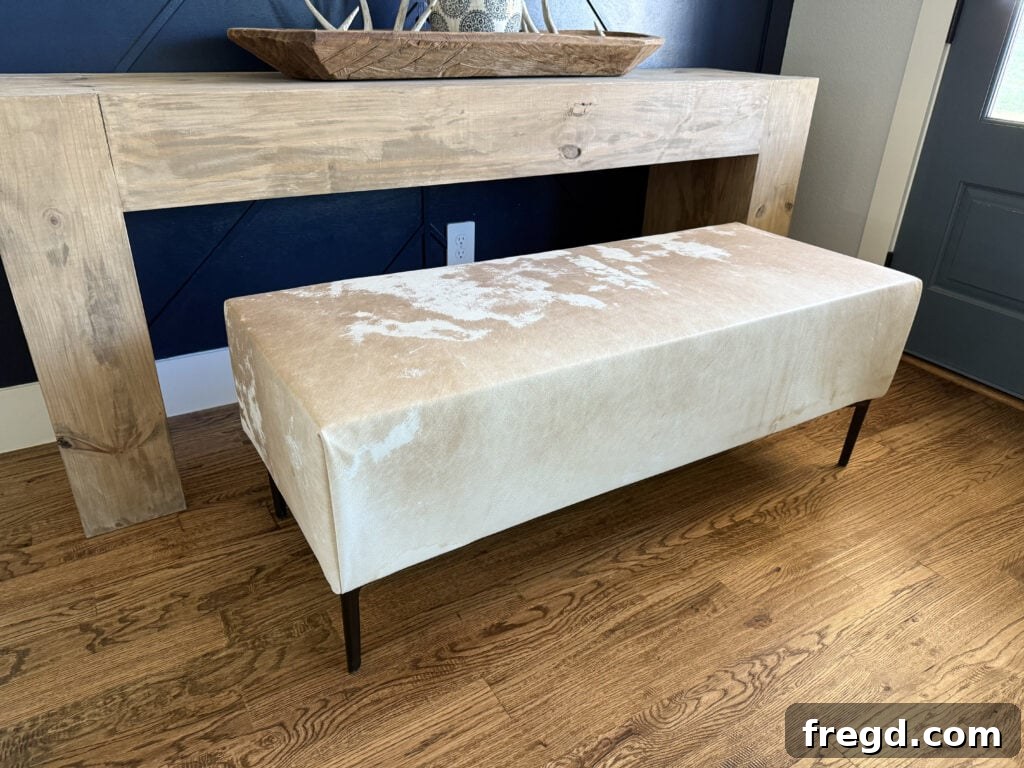
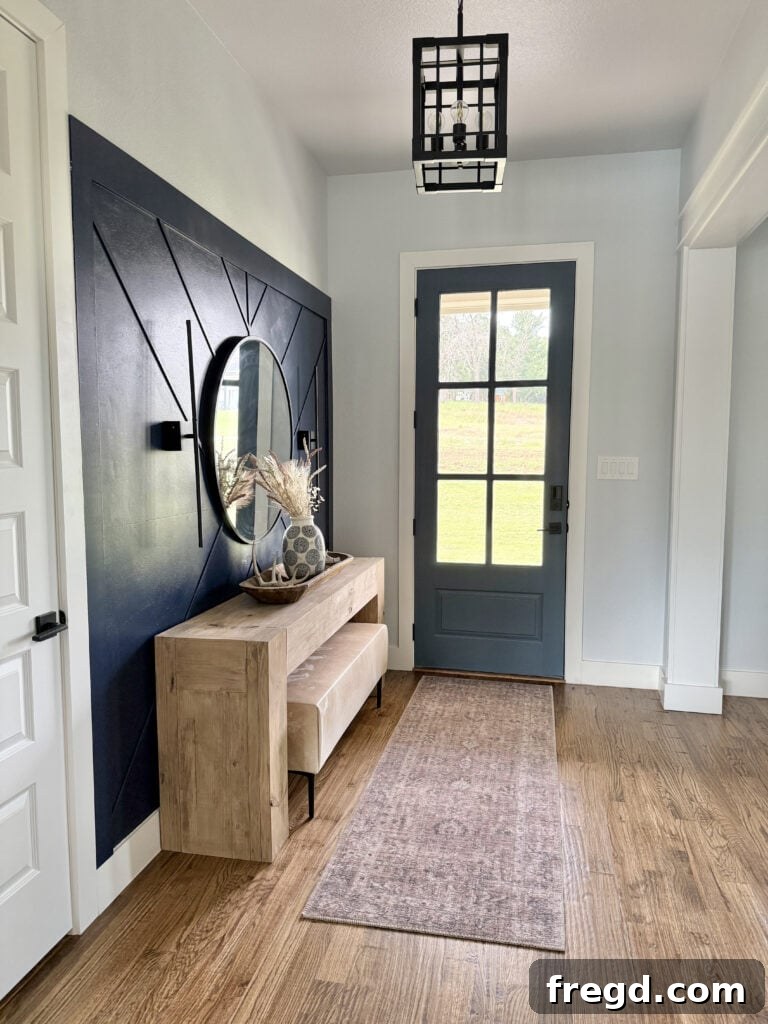
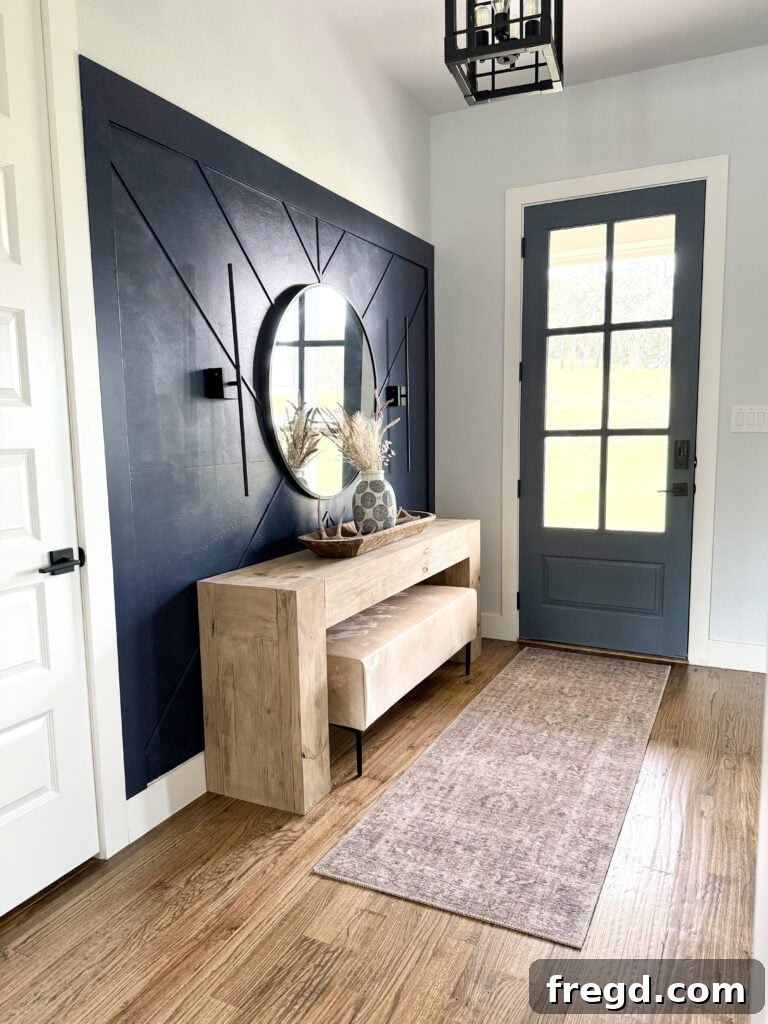
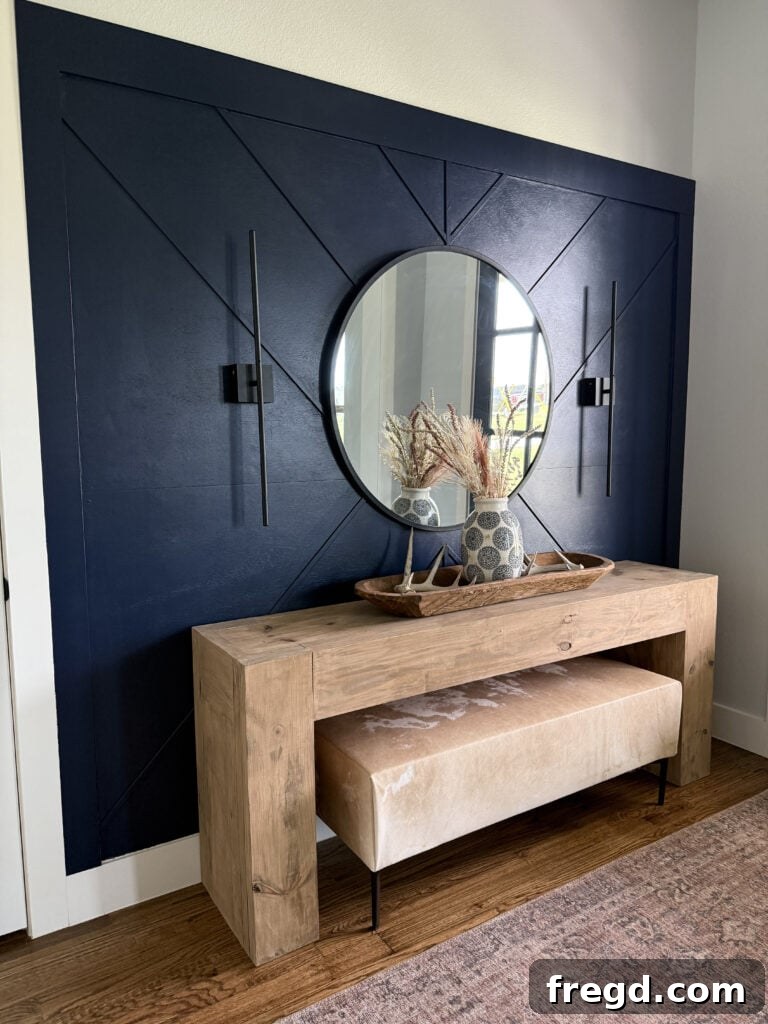
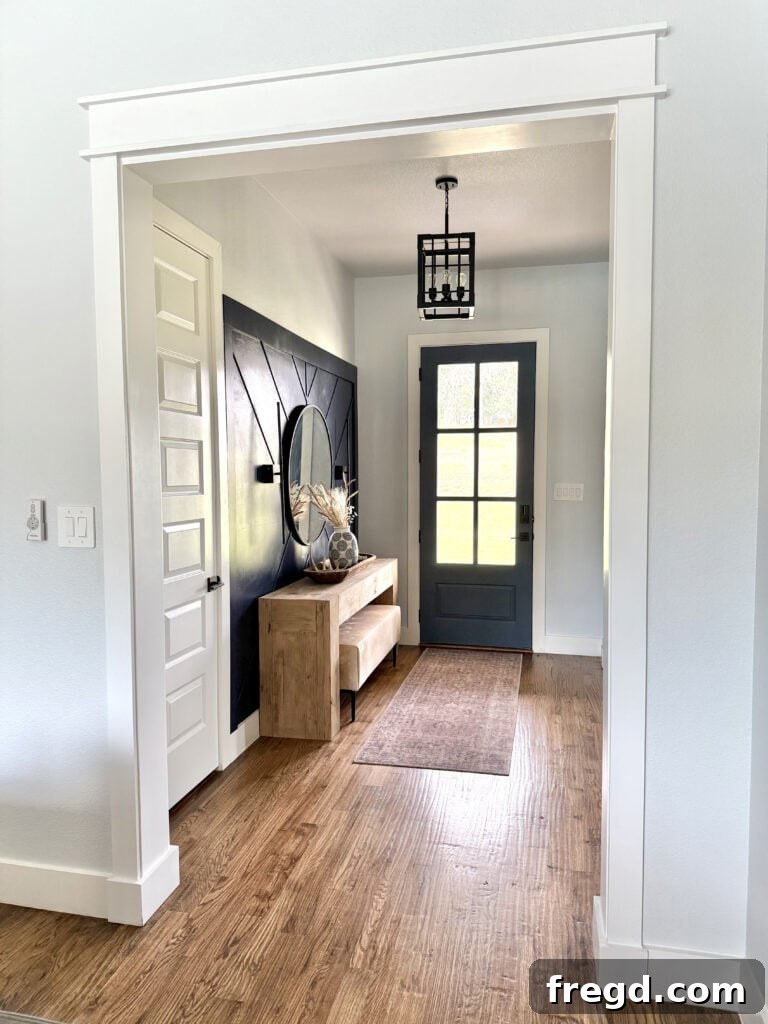
If you’re inspired to recreate or enhance your own entryway with a similar aesthetic, I’ve thoughtfully curated a list of related DIY projects and sourced the exact products used in my entryway styling. These resources are designed to help you easily achieve a cohesive and beautifully designed space that truly reflects your personal style.
Shop My Entryway and Related Tutorials
Ready to complete your entryway or explore more exciting DIY projects? Here are some additional resources and links to the specific products that help define the look of my space. These tutorials and product recommendations are chosen to inspire and guide you in creating a harmonious home.
Related Tutorials With Free Plans
- Modern Wood Console Table: Learn how to build a complementary console table with free plans, perfect for pairing with your new cowhide bench.
- How to Case an Opening: Elevate the architectural details of your home by learning how to properly case an opening.
- Renter-Friendly Accent Wall: Discover a brilliant way to add personality to your walls without permanent changes, ideal for renters.
Entryway Products
- Round Mirror: A stylish mirror is essential for any entryway, offering both functionality and a sense of expanded space.
- Entryway Rug: Define your entryway space and add warmth with a carefully selected rug that complements your decor.
- Light Sconces: Enhance the ambiance and lighting of your entryway with elegant wall sconces that provide a welcoming glow.
Free DIY Cowhide Bench Plans (Printable Version)
Eager to begin your journey to a beautifully crafted home? Your DIY adventure starts here! Download the free printable plans for this DIY cowhide bench, which include a comprehensive shopping list, precise cut list, and step-by-step assembly instructions. These detailed plans are designed to guide you through every stage, ensuring a successful and enjoyable building experience, even if you’re new to woodworking. Get ready to build a stunning piece that will truly transform your space!
DIY Cowhide Bench – Free Plans
Build your own DIY cowhide bench with these free printable plans! This beginner-friendly project utilizes simple 2×4 lumber, rich cowhide upholstery, and contemporary metal legs to create a sophisticated modern rustic aesthetic you’ll absolutely adore. Click here to download the complete free printable plans, including your essential shopping list and detailed cut list!
Tools
- Miter Saw
- Kreg Jig
- Drill
- Stapler (manual or cordless)
Supply List
- 1 – 1/2″ x 48″ x 48″ Hardwood Plywood
- 4 – 2x4x8 Lumber
- 2 1/2″ Pocket Hole Screws
- 1″ Staples
- 4 – Metal Feet
- Cowhide (real or imitation)
- Batting
- Wood Glue
Instructions
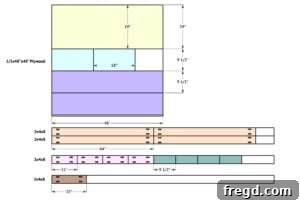
Cut List
-
Refer to the detailed cut list provided in the printable plans for all exact measurements and quantities of your 2×4 lumber and plywood. Ensure all cuts are precise for accurate assembly.

Building the Cowhide Bench Frame
-
Cut the side frame pieces to size. Drill 1 1/2″ pocket holes at the ends of both vertical pieces. Apply wood glue and attach them to the horizontal pieces with 2 1/2″ pocket hole screws to form two strong side assemblies.
-
Cut the long frame pieces to size. Drill 1 1/2″ pocket holes at both ends. Apply wood glue and attach these to the side assemblies using 2 1/2″ pocket hole screws.
-
Repeat the previous step for the other side to complete the full rectangular bench frame. Ensure all joints are tight and the frame is square.
-
Measure and cut the center support piece (optional for added strength). Drill 1 1/2″ pocket holes at both ends. Center it between the top two long supports and attach with 2 1/2″ pocket hole screws and wood glue.
Adding the Plywood Panels
-
Measure and cut the side plywood pieces to fit. Attach them to the ends of the bench frame with 1″ staples and wood glue, working from the side pieces into the 2×4 frames. Repeat for both ends.
-
Measure and cut the front and back plywood pieces. Attach them to the front and back of the bench frame with 1″ staples and wood glue, creating a strong box structure.
-
Cut the top plywood piece to size and attach it to the top of the bench frame using 1″ staples and wood glue, creating a solid surface for upholstery.
Upholstering the Bench
-
Drape batting over the bench, pull it taut, and staple it to the underside of the plywood frame. Trim excess at corners and fold neatly for a smooth, padded surface.
-
Lay your cowhide over the batting. Starting with the sides, pull the hide tight and staple it along the underside of the frame. Continue around the bench for a snug, professional finish.
-
Finish the corners by folding the cowhide neatly, like wrapping a gift. Staple the first fold, then fold the second layer over to cover staples and secure it to the underside of the bench.
Adding the Bench Feet
-
Once the bench is fully covered in fabric, flip it over. Position the metal feet at the corners and attach them securely to the 2×4 frame using screws. Ensure they are stable and level. (Links to feet and fabric are in the main post.)
-
All finished! You’ve successfully built a beautiful, custom cowhide bench. Make sure to share your amazing creations with us on social media using #shanty2chic so we can celebrate your craft!