
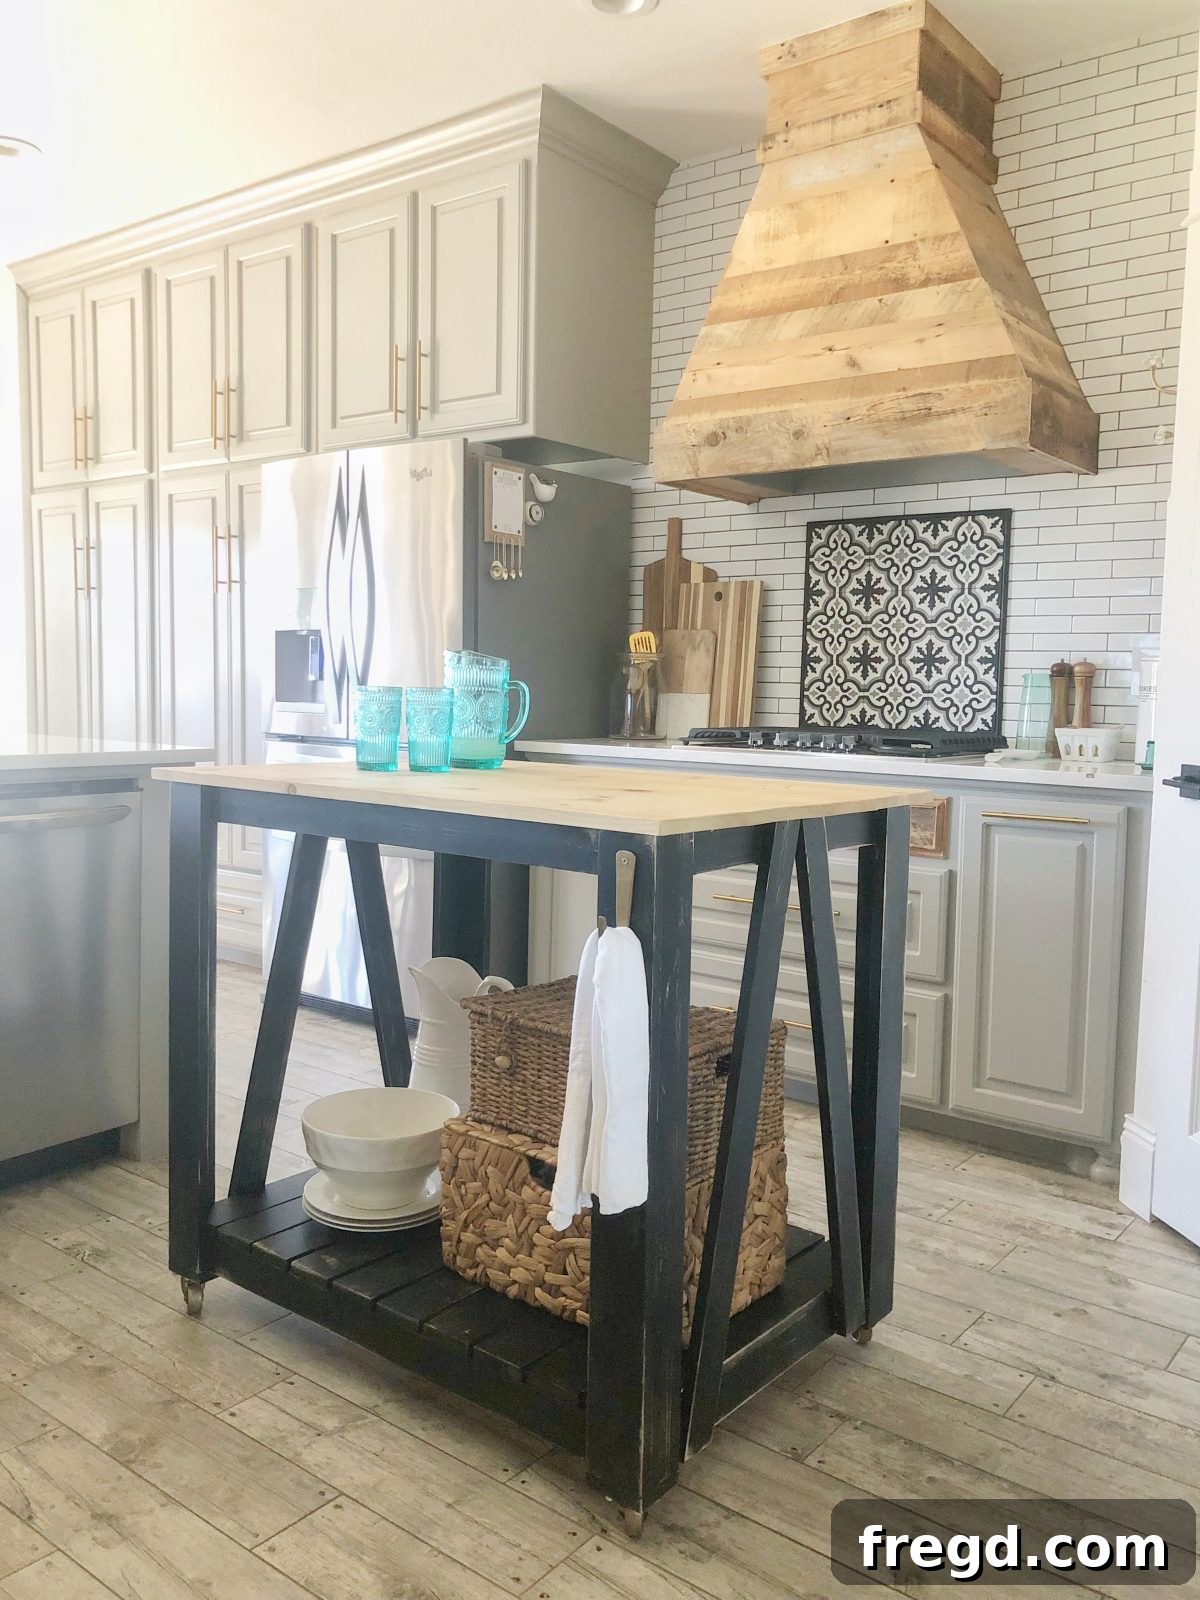
Unlock Your Kitchen’s Potential: Build Your Own Modern Farmhouse Island Cart
Do you dream of a more functional and stylish kitchen, but find yourself limited by space? Many of us face the challenge of a smaller kitchen that simply can’t accommodate a sprawling, built-in island. But what if we told you there’s a charming, practical, and incredibly versatile solution that fits perfectly into almost any layout? Introducing the DIY Modern Farmhouse Kitchen Island Cart – a project designed for functionality, aesthetic appeal, and the satisfaction of building something beautiful with your own hands.
This isn’t just another piece of furniture; it’s a dynamic addition to your home, offering extra prep space, much-needed storage, and a delightful touch of modern farmhouse charm. Whether you’re a seasoned woodworker or a passionate beginner eager to tackle your first major project, this guide, complemented by our detailed plans and video tutorial, will empower you to create a custom piece that transforms your kitchen.
Ready to embark on this rewarding journey? Before we dive into the nitty-gritty details of construction, be sure to watch our comprehensive YouTube video tutorial HERE. It brings the project to life, offering visual guidance that perfectly complements the written instructions and free plans.
We are absolutely thrilled with how this particular kitchen island cart turned out! Its blend of rustic warmth and clean lines truly embodies the modern farmhouse aesthetic, proving that practical pieces can also be incredibly stylish. And the best part? We’re sharing everything you need to recreate it. You can download the free printable plans HERE! These plans are meticulously detailed, providing all the measurements, cut lists, and step-by-step instructions necessary to make your build as smooth and enjoyable as possible.
Why a DIY Modern Farmhouse Kitchen Island Cart?
The appeal of a kitchen island cart lies in its remarkable versatility and the unique style it brings. Unlike stationary islands, a cart offers mobility, allowing you to move it exactly where it’s needed – whether for extra counter space during meal prep, as a portable serving station for entertaining, or simply repositioned to open up floor space. The modern farmhouse style, with its timeless blend of cozy rustic elements and contemporary clean finishes, ensures your cart will seamlessly integrate into a variety of home decors, from traditional to transitional and, of course, classic farmhouse.
Building it yourself not only saves you a considerable amount of money compared to purchasing a pre-made unit, but it also gives you complete control over the materials, finish, and specific features. Imagine customizing the dimensions to perfectly fit your space, choosing a countertop material that complements your existing kitchen, or selecting hardware that reflects your personal taste. This DIY approach results in a truly unique, custom piece of furniture that you’ll cherish for years.
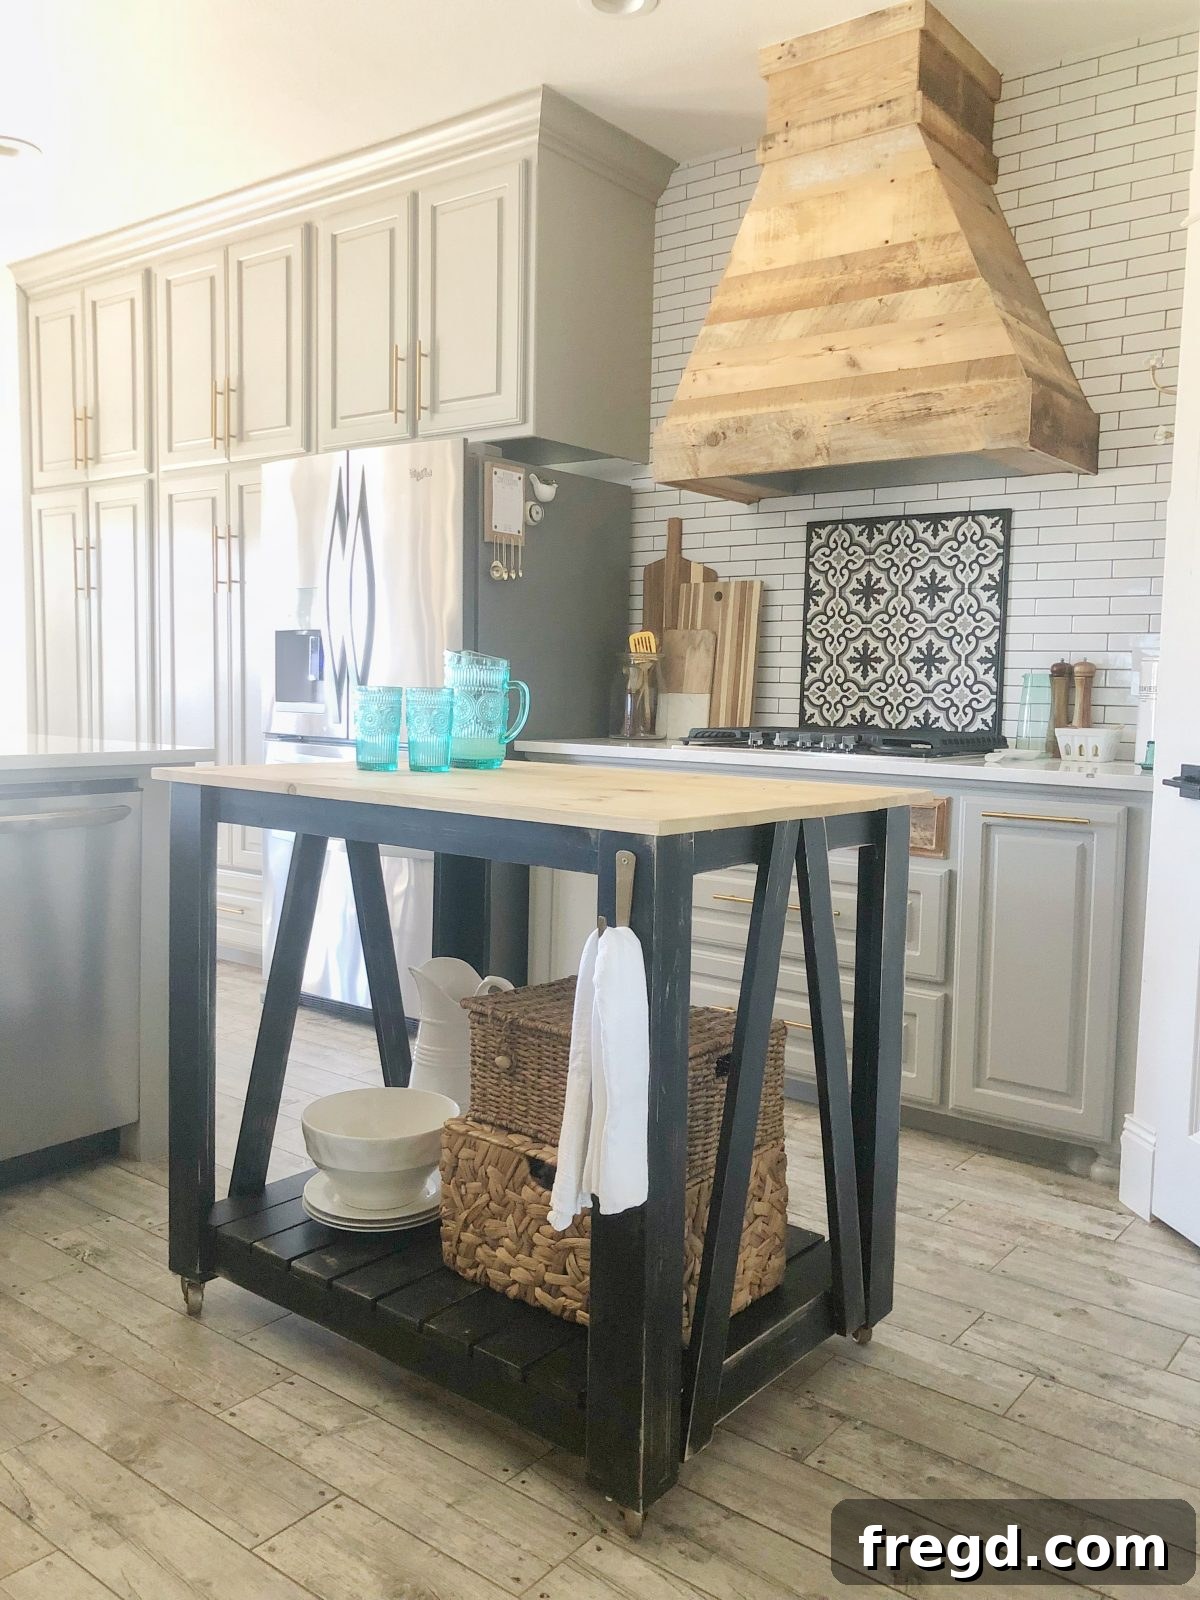
Essential Steps for Building Your Kitchen Island Cart
While our free plans provide the precise blueprint, understanding the general construction process will help you visualize the project from start to finish. This section outlines the key stages involved in bringing your modern farmhouse kitchen island cart to life.
1. Planning and Preparation:
- Review the Plans: Thoroughly read through the free printable plans multiple times. Familiarize yourself with all the cuts, materials, and assembly steps.
- Gather Materials: The plans will detail the specific lumber dimensions (e.g., 2x4s, 1x4s, plywood for shelves). Common choices include pine or fir for a budget-friendly option, or higher-grade hardwoods for increased durability. You’ll also need wood screws, wood glue, sandpaper, paint or stain, and four sturdy casters (preferably locking ones for stability).
- Collect Tools: Essential tools typically include a miter saw or circular saw for accurate cuts, a drill/driver for fastening, a tape measure, a pencil, safety glasses, and hearing protection. A Kreg Jig for pocket hole joinery is highly recommended for clean, strong connections, though alternative joinery methods can also be used if preferred.
2. Cutting and Assembling the Frame:
Precision is key in this stage. Using your saw, carefully cut all your lumber according to the cut list provided in the plans. Double-check each measurement before making the cut. Once your pieces are cut, begin assembling the main frame of the cart. This usually involves creating two side frames first, then connecting them with stretcher pieces to form the base and top frame. Pocket holes, drilled with a Kreg Jig, make for very strong and concealed joints, contributing to the clean aesthetic of the modern farmhouse style.
3. Adding Shelves and Support:
Once the main frame is rigid, you’ll install the shelves. The plans typically incorporate one or more open shelves, providing ample storage for cookbooks, kitchen gadgets, or decorative items. Plywood is often used for shelves, supported by cleats attached to the inside of the cart frame. Ensure these supports are level and securely fastened for a stable surface.
4. Attaching the Countertop:
The countertop is a focal point, both functionally and aesthetically. Options range from butcher block (a classic farmhouse choice) to plywood with an attractive laminate or tile finish. The plans will guide you on how to securely attach your chosen top to the cart frame, usually by screwing up through the top frame supports into the underside of the counter. Ensure proper overhangs as specified in the plans for both aesthetic appeal and practical use.
5. Finishing Touches: Sanding and Painting/Staining:
This stage transforms your raw wood project into a refined piece of furniture. Begin by thoroughly sanding all surfaces. Start with a coarser grit sandpaper (e.g., 80 or 100 grit) to remove any imperfections or rough spots, then progressively move to finer grits (e.g., 150, then 220) for a smooth, ready-to-finish surface. Wipe away all dust before applying your chosen finish.
- For a Painted Finish: Apply a good quality primer, followed by two or more coats of paint. A semi-gloss or satin finish is often preferred in kitchens for durability and ease of cleaning. White, cream, or soft grey paints are popular choices for the modern farmhouse look.
- For a Stained Finish: Apply wood conditioner if using pine to ensure even stain absorption, then apply your chosen stain. Follow with several coats of a protective topcoat, such as polyurethane or a durable clear coat, especially for the countertop surface, to protect against spills and wear.
6. Installing Casters and Hardware:
Finally, attach the casters to the bottom corners of the cart. Make sure they are heavy-duty enough to support the weight of the cart and its contents. Locking casters are highly recommended to prevent the cart from moving when in use. If your design includes towel bars or handles, attach those now as well. These small details significantly enhance both the functionality and the finished look of your cart.
Customization Ideas for Your Modern Farmhouse Cart
The beauty of DIY is the freedom to personalize. Here are a few ideas to make your kitchen island cart truly yours:
- Countertop Options: Beyond butcher block, consider a zinc top for an industrial farmhouse vibe, a concrete overlay for a modern edge, or even a reclaimed wood top for extra character.
- Color and Finish: Experiment with two-tone finishes – perhaps a stained top with a painted base. Or, opt for a distressed look to enhance the rustic feel.
- Added Storage: Integrate small drawers beneath the countertop for utensils, or add hooks to the sides for hanging towels, aprons, or frequently used tools.
- Open vs. Closed Storage: While open shelves are common, you could add cabinet doors to one section for concealed storage.
- Towel Bars and Handles: Choose hardware that complements your kitchen’s existing style – black iron for a more rustic look, brushed nickel for a modern touch.
Styling and Using Your New Kitchen Cart
Once built and customized, your modern farmhouse kitchen island cart will quickly become an indispensable part of your home. Here are some ways to style and utilize it:
- Extra Prep Space: Position it near your main counter to expand your workspace, especially useful for baking or large meal preparations.
- Serving Station: Wheel it into your dining area or living room during gatherings to serve drinks, appetizers, or desserts.
- Coffee or Tea Bar: Dedicate a corner of your cart to your favorite hot beverages, complete with mugs, a coffee maker, and all the fixings.
- Mobile Storage: Use the shelves to store small appliances, extra dishes, fresh produce, or even a collection of cookbooks.
- Decorative Display: Adorn the top with a vase of fresh flowers, a bowl of fruit, or a selection of charming farmhouse decor pieces.
Safety First!
When working on any DIY project, safety should always be your top priority. Always wear appropriate safety gear, including safety glasses and hearing protection. Ensure your workspace is well-lit and free of clutter. Familiarize yourself with all your tools before use, and always follow manufacturer instructions. If you’re unsure about a step, take a moment to re-read the plans, watch the video, or seek advice from an experienced builder.
Care and Maintenance
To ensure your DIY Modern Farmhouse Kitchen Island Cart remains beautiful and functional for years to come, regular care is essential. For painted surfaces, simply wipe down with a damp cloth. For stained or butcher block tops, avoid harsh chemical cleaners, opting instead for mild soap and water. If you have a wooden top, periodic oiling (with food-safe mineral oil if it’s used for food prep) will keep it conditioned and prevent drying or cracking.
Building your own kitchen island cart is more than just a home improvement project; it’s an opportunity to enhance your kitchen’s functionality, inject personalized style, and gain immense satisfaction from your craftsmanship. We hope this expanded guide, coupled with our video tutorial and free plans, gives you all the confidence you need to start building today. Share your finished projects with us – we love seeing your creativity come to life!