
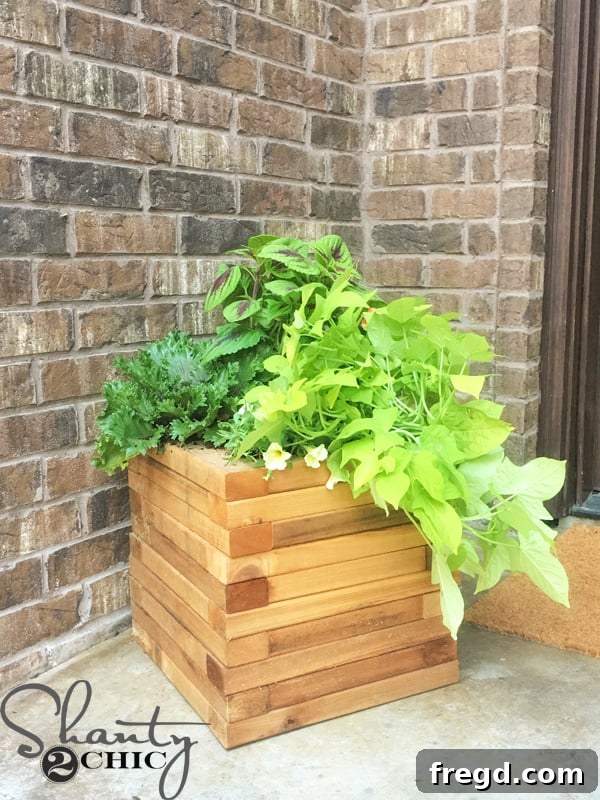
Build Your Own Beautiful Cedar Planter: An Easy DIY Project for Stunning Fall Decor
As the crisp autumn air settles in and leaves begin to change, there’s a special joy in transforming our homes with warm, inviting fall decorations. A beautifully adorned porch not only welcomes guests but also celebrates the seasonal shift. If you’re looking for a project that’s both rewarding and incredibly simple, you’ve come to the right place! We’re thrilled to share our step-by-step guide on how to construct a charming, durable, and surprisingly inexpensive cedar planter. This DIY cedar planter is perfect for adding a touch of rustic elegance to your porch, patio, or garden, providing a stylish home for your favorite fall blooms or greenery.
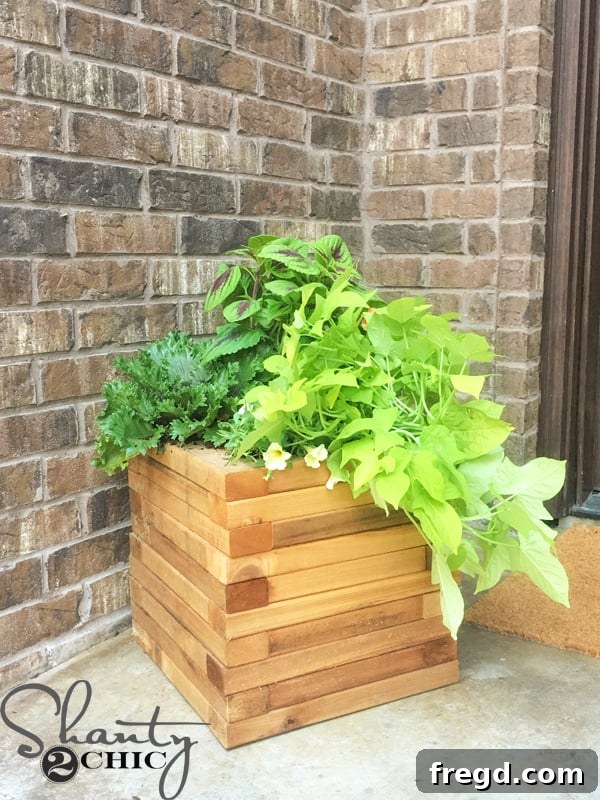
To see this adorable project come to life, you can watch our comprehensive video tutorial by clicking below or right HERE!
For those who prefer a printed guide, don’t forget to grab your FREE PRINTABLE PLANS by clicking HERE!
Now, let’s dive into the detailed tutorial below and start building your very own custom cedar planter!
Why Build a DIY Cedar Planter for Your Home?
There are countless reasons why a DIY cedar planter is an excellent addition to your outdoor living space, especially as you embrace fall decor. Cedar wood is renowned for its natural beauty, boasting a rich color and distinct grain pattern that adds a touch of rustic charm to any setting. Beyond aesthetics, cedar is inherently durable and highly resistant to rot, decay, and insect infestations, making it an ideal choice for outdoor projects exposed to the elements. This natural resilience means your planter will stand the test of time, looking fantastic season after season with minimal maintenance.
Opting for a DIY approach not only allows you to save money compared to purchasing pre-made planters, but it also gives you complete creative control. You can customize the size, finish, and even add unique embellishments to perfectly match your home’s style and your personal taste. The satisfaction of crafting something beautiful and functional with your own hands is truly unparalleled. This project is designed to be straightforward, making it accessible even for beginner woodworkers, proving that you don’t need extensive experience to create something stunning for your home.
Essential Tools and Materials for Your Cedar Planter Project
Before we begin, it’s crucial to gather all your tools and materials. Having everything ready ensures a smooth and efficient building process. Here’s a detailed list of what you’ll need:
Materials You’ll Need:
- 6 Cedar Boards (2x3x8 feet): Cedar is highly recommended for its natural resistance to rot and insects, which is perfect for outdoor planters. These boards will be cut down to form the structure of your planter.
- Wood Glue: Essential for reinforcing the joints and ensuring the longevity and stability of your planter. Choose a high-quality outdoor-rated wood glue.
- 2 1/2″ Pocket Hole Screws: These specialized screws, used with a Kreg Jig, create incredibly strong and discreet joints, crucial for the planter’s structural integrity.
- 2 1/2″ Finish Nails: Used for attaching the layers of your planter, these nails provide additional stability and help secure the unique pattern.
Tools for the Job:
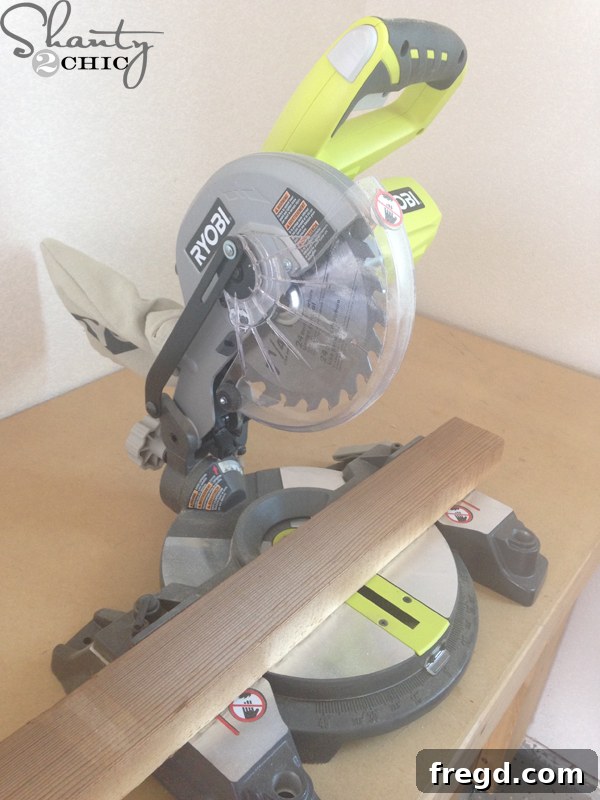
- Miter Saw (e.g., Ryobi 18V Miter Saw): A miter saw is invaluable for making precise and consistent cuts, which are critical for the clean look and proper assembly of your planter. Our Ryobi 18V miter saw offers cordless convenience, allowing you to work anywhere.
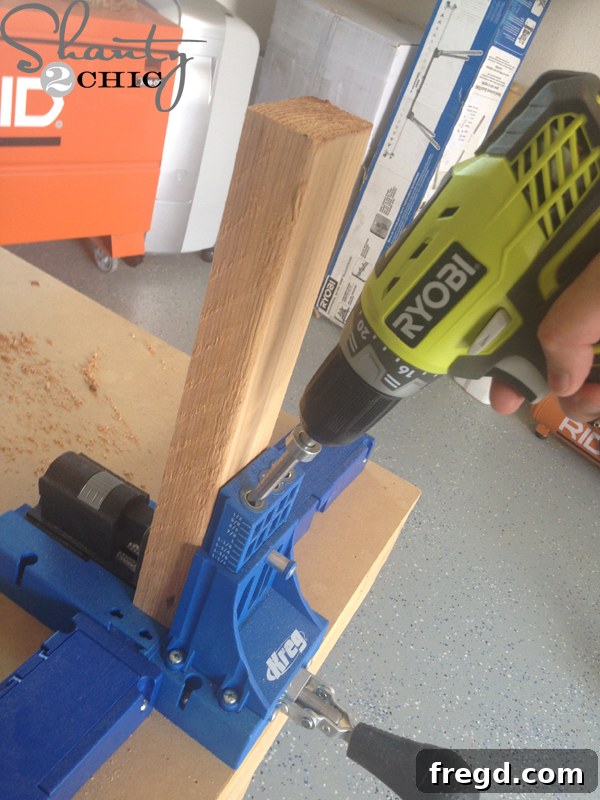
- Kreg Jig: This jig system is a game-changer for woodworking, enabling you to drill perfect pocket holes quickly and accurately. Pocket holes create strong, hidden joints that are superior to traditional screws for many applications. You can find the Kreg Jig we use HERE on Amazon.
- Drill/Driver: You’ll need a drill to create pilot holes for pocket screws and to drive the screws securely into place. An impact driver can also be very helpful for driving screws efficiently.
- Finish Nailer (e.g., Ryobi 16V Airstrike): A finish nailer, like our Ryobi 16V Airstrike, makes quick work of attaching the layers with finish nails. It provides a strong hold without the need for hammering, leaving a clean finish.
- Measuring Tape: For accurate measurements of your cedar boards before cutting.
- Pencil: To mark your cutting lines and pocket hole locations.
- Safety Glasses and Hearing Protection: Always prioritize safety when working with power tools.
Step-by-Step Guide to Building Your Cedar Planter
Follow these detailed instructions to construct your beautiful cedar planter. Precision and patience are key!
Step 1: Precise Cutting of Your Cedar Boards
The first crucial step is to prepare your cedar boards. From your six 2x3x8 cedar boards, you will need to make a series of cuts. Using your miter saw, carefully cut 20 pieces to 15 inches in length and 22 pieces to 10 inches in length. Take your time with these cuts to ensure they are all accurate and square. Precise cuts are fundamental for a planter that assembles cleanly and looks professional. Always measure twice and cut once!
Step 2: Preparing for Strong Joints with Pocket Holes
Once your boards are cut, it’s time to prepare them for assembly using pocket holes, which create incredibly strong and hidden joints. Set up your Kreg Jig according to the instructions for 1 1/2″ material thickness. You will then drill one 1 1/2″ pocket hole into both ends of all your short (10-inch) boards. Ensure the holes are drilled cleanly and consistently. This step is vital for the structural integrity of your planter, as these pocket holes will be used to secure the various sections together.
Step 3: Assembling the Foundation – The Planter Base
Begin by constructing the bottom layer or base of your planter. This particular layer is unique because it includes two additional support pieces in the middle, which will serve as the actual bottom for your plants to rest on. This design ensures that the planter has a sturdy floor. Lay out two of your 15-inch long boards parallel to each other. These will form the main sides of your base. Then, place two of your 10-inch short boards between them to form a rectangle.
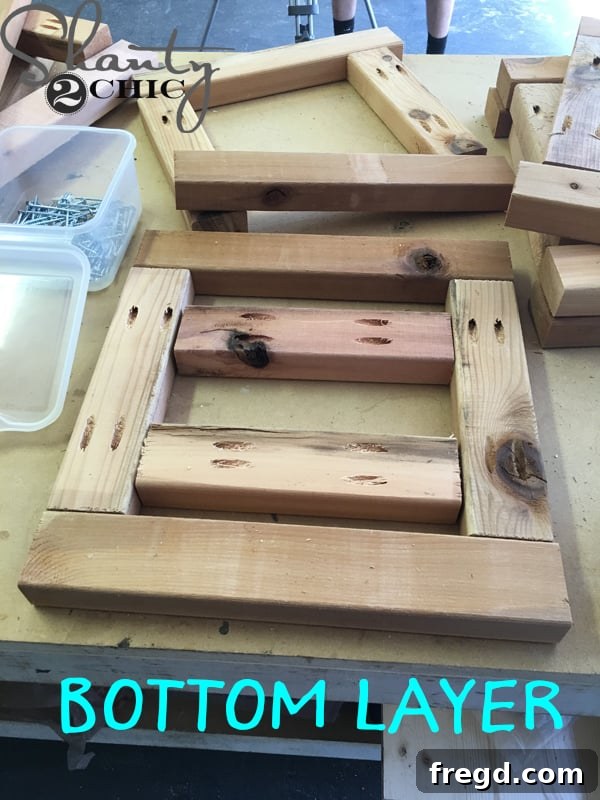
Step 4: Securely Attaching the Base Components
Now, connect the short (10-inch) pieces to the long (15-inch) pieces of your base. Apply a generous bead of wood glue to the ends of the short boards where they meet the long boards. Then, use 2 1/2″ pocket hole screws, driven into the pre-drilled pocket holes, to firmly attach the pieces. Ensure the corners are square and flush. The wood glue provides immediate strength, and the pocket hole screws create a robust, lasting joint, making a solid foundation for your planter.
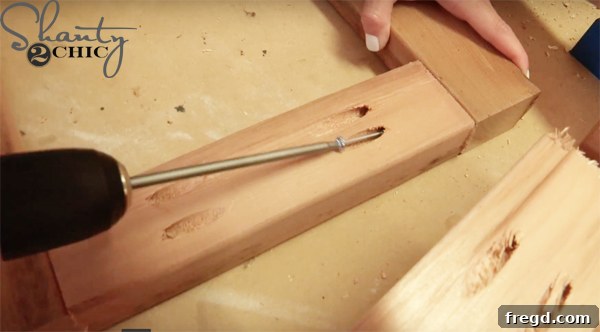
Step 5: Constructing Your Nine Square Layers
Apart from the base, you will need to create nine identical square frames that will form the layers of your planter. For each square, take two 15-inch long boards and two 10-inch short boards. Arrange them to form a perfect square. Apply wood glue to the ends of the short boards and connect them to the long boards using 2 1/2″ pocket hole screws. Repeat this process until you have a total of nine perfectly constructed square frames. These squares are the building blocks for the unique aesthetic of your planter.
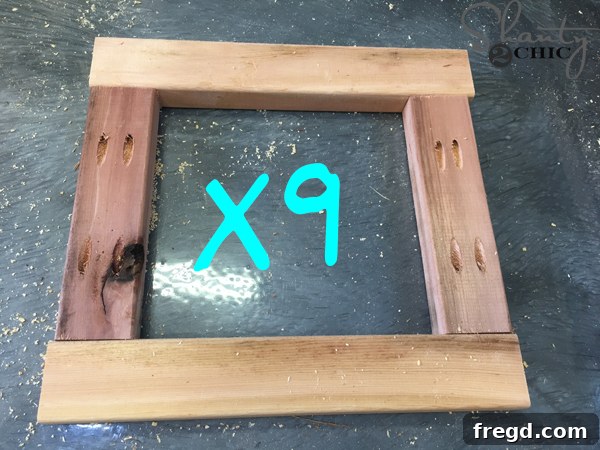
Step 6: Building Up the Planter – First Layer
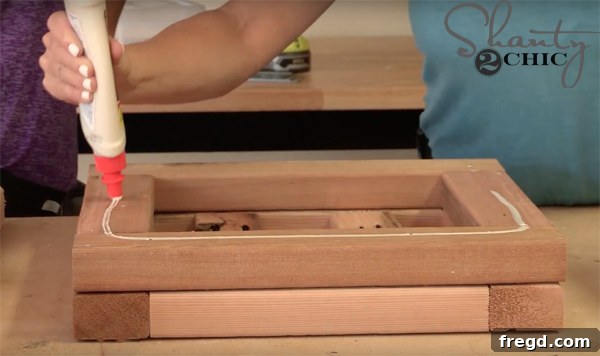
With your base completed and your nine squares ready, it’s time to start stacking. Flip your base over so that the pocket holes are facing downwards, providing a cleaner look on the visible side. Apply a continuous line of wood glue along the top edges of the base. Carefully take one of your assembled square frames and place it directly on top of the glued base. Here’s the trick for the decorative corner pattern: make sure to rotate this first square so that its short boards are now facing forward, creating an offset from the base layer. This rotation is what gives the planter its distinctive and appealing look. Secure this first layer with 2 1/2″ finish nails using your Ryobi 16V Airstrike nailer, driving them through the top square into the base beneath it.
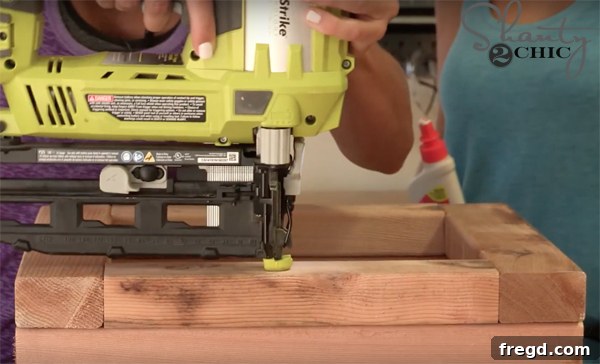
Step 7: Continuing the Pattern – Second Layer and Beyond
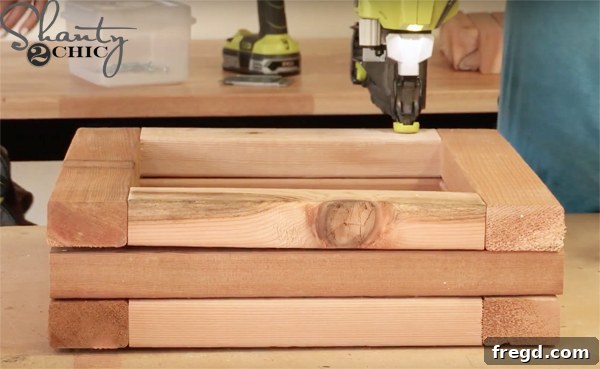
For the subsequent layers, the process is similar but with an alternating rotation. Apply another generous line of wood glue to the top edges of the square you just attached. Then, take the next square frame. This time, rotate it back to the original orientation (long boards facing forward) before placing it on top of the glued surface. This continuous alternating rotation of squares is what creates the captivating pattern along the corners of your planter. Ensure each square is perfectly aligned and flush with the layer below it before securing.
Step 8: Reinforcing Each Layer
Once you’ve carefully positioned the second square with glue, secure it firmly using 2 1/2″ finish nails. Drive nails through the corners and along the sides to ensure maximum stability. The combination of wood glue and finish nails provides an incredibly strong bond, allowing your planter to withstand the weight of soil and plants, as well as various weather conditions. Take care to drive the nails straight to avoid splitting the cedar.
Step 9: Completing the Structure
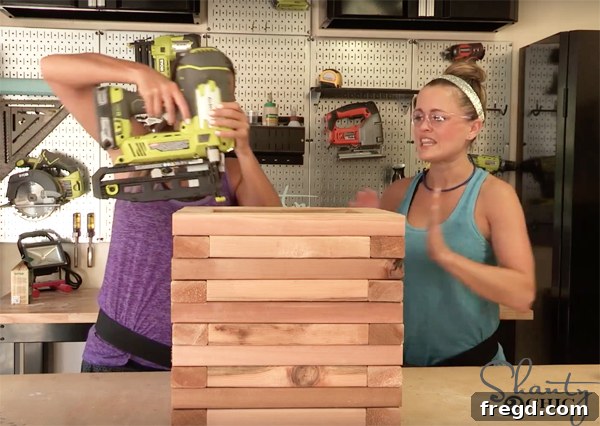
Continue to repeat Steps 7 and 8, alternating the rotation of each square layer and securing with wood glue and finish nails, until all nine square frames have been attached. As you progress, you will notice the distinct and engaging pattern emerging beautifully on the corners of your cedar planter. Step back periodically to admire your work and ensure everything is aligning as intended. Once all layers are attached, your main planter structure is complete!
Personalizing Your Cedar Planter: Finishing Touches & Customization
Congratulations, your cedar planter is built! Now comes the truly fun part: making it uniquely yours. The best aspect of this DIY project is its incredible versatility. We chose to leave ours in its natural, raw cedar state to highlight the wood’s inherent beauty, which will gracefully weather to a silvery-grey patina over time. However, the possibilities for customization are truly endless!
- Stain or Seal: To enhance cedar’s rich tones and provide extra protection against the elements, consider applying an outdoor wood stain or a clear sealant. A stain can deepen the color, while a sealant will preserve its natural hue.
- Paint: For a more vibrant look, paint your planter to match your home’s exterior or add a pop of contrasting color. Fall-themed colors like deep reds, oranges, greens, or even a classic white or black can make a statement.
- Embellish: Add decorative touches such as stenciled designs, your house number, or small metal accents to personalize it further.
- Adjust Dimensions: This design is easily scalable. You could make a taller planter for larger shrubs or a shorter, wider one for a collection of smaller plants. Simply adjust the number and length of your cedar boards accordingly.
- Add Legs or Casters: For elevated style or easier mobility, consider adding short wooden legs or heavy-duty casters to the bottom of the base.
This project can easily be completed in an afternoon, meaning there’s no excuse not to have a charming, customized cedar planter gracing your front porch this fall!
Planting and Caring for Your New Planter
Once your cedar planter is complete and customized, it’s ready for planting. For optimal plant health and to prolong the life of your planter, consider these tips:
- Lining: While cedar is naturally rot-resistant, lining the interior with heavy-duty landscape fabric or a plastic planter liner can provide an extra layer of protection, preventing soil from coming into direct contact with the wood. Remember to puncture holes in the liner for drainage.
- Drainage: Even without a liner, ensure adequate drainage. The small gaps between the base boards and the natural permeability of cedar will allow some drainage. You might consider adding a layer of gravel or broken pottery at the bottom before adding soil.
- Soil: Use a high-quality potting mix suitable for outdoor containers. This will provide your plants with the necessary nutrients and proper drainage.
- Plant Choices: For fall, consider plants like mums, pansies, ornamental cabbages, kale, or small evergreens. Arrange them for varying heights and textures to create an eye-catching display.
- Maintenance: Cedar requires very little maintenance. If left natural, it will weather gracefully. If you choose to stain or paint it, reapplication may be needed every few years, depending on your climate.
Share Your Masterpiece!
We absolutely love seeing your creative projects! If you build your own cedar planter using this guide, please share it on social media. Be sure to use the hashtag #shanty2chic so we can admire your work and share it with our wonderful community!
Don’t Miss Out!
Don’t forget to check out the accompanying how-to video for a visual walkthrough of each step. And while you’re there, make sure to subscribe to our channel so you never miss another fantastic DIY project!
Thanks so much for stopping by and embarking on this exciting DIY journey with us!
Happy building, friends!