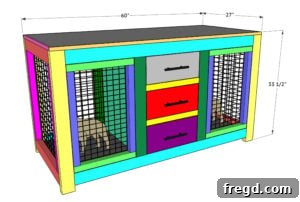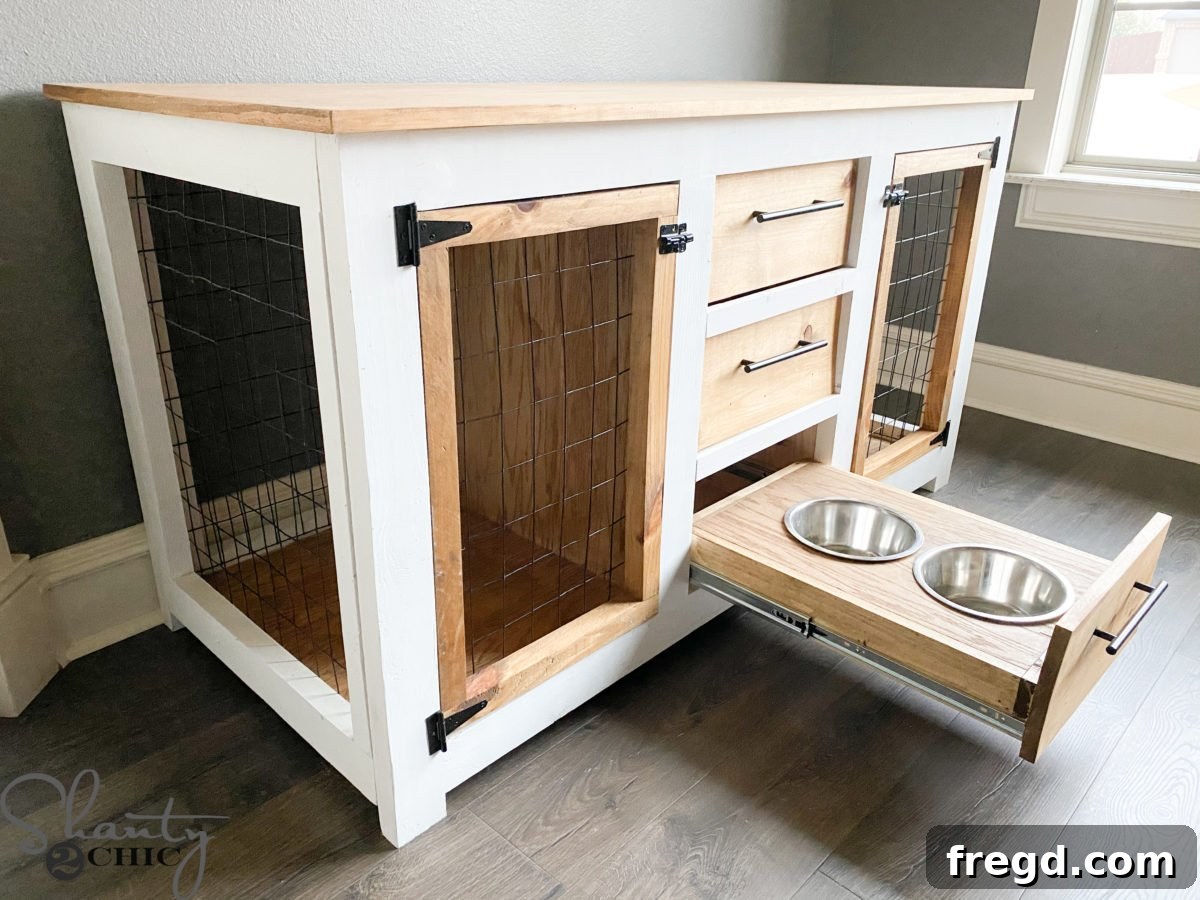
Welcome to an exciting DIY project that combines practical functionality with sophisticated home aesthetics: building your very own custom DIY Dog Crate Console. For too long, pet owners have had to choose between unsightly metal crates that clash with home decor or expensive, purpose-built pet furniture that often lacks the personal touch. This comprehensive guide will walk you through creating a stylish, sturdy, and highly functional piece of furniture that serves as a comfortable haven for your beloved canine companions while seamlessly blending into your living space.
As passionate DIYers and pet lovers ourselves, we understand the desire for solutions that cater to both human and animal needs. After welcoming our newest family member, Lola, a charming Frenchie, we embarked on a mission to design a furniture-style dog kennel that could comfortably accommodate two dogs, offer integrated storage, and even hide unsightly dog bowls. The result is this stunning dog kennel console – a piece that’s not just a crate, but a genuine addition to your home’s decor. If you’re looking for larger accommodations, don’t forget to check out our DIY Large Kennel too!
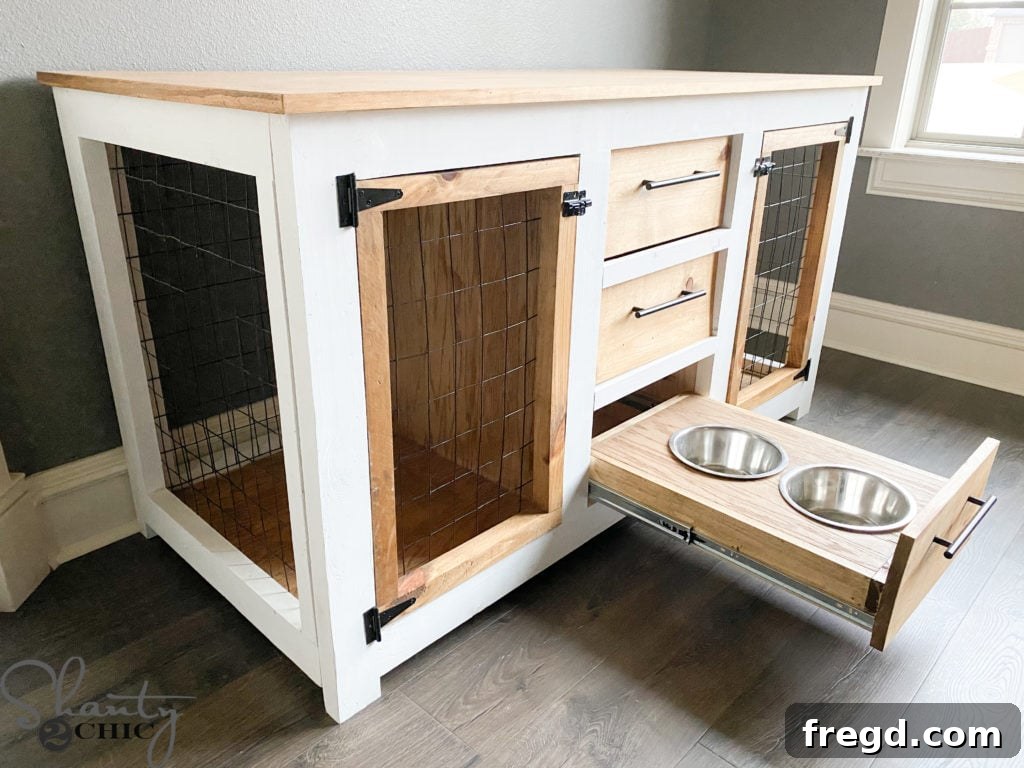
We’ve partnered with Buildsomething.com, a vibrant online community for creators, to share the detailed plans for this project. Buildsomething.com provides an incredible platform where you can discover inspiring projects, share your own designs, and connect with fellow DIY enthusiasts. By sharing our dog crate console plans there, we hope to inspire countless others to build this fantastic piece. Head over to Buildsomething.com to explore not just our design, but thousands of other innovative plans shared by a global community of makers!
This project is designed to be approachable for intermediate DIYers and budget-friendly, proving that you don’t need to spend a fortune to create high-quality, custom furniture for your pets. We’ve streamlined the process with clear, step-by-step instructions that will guide you from raw lumber to a finished, elegant dog crate console. So, gather your tools, roll up your sleeves, and let’s transform your pet’s living situation with this rewarding build!
Click here to jump to the Free Printable Plans and Cut List
Build Your Own DIY Dog Crate Console: A Furniture-Style Pet Kennel
Building this DIY Dog Crate Console offers numerous advantages over purchasing a standard dog kennel. Not only will you save money, but you’ll also gain a custom-built piece that perfectly fits your home’s dimensions and aesthetic. This design is particularly well-suited for households with two dogs, providing individual, secure spaces within a unified furniture piece. The integrated drawers are a game-changer for organization, allowing you to neatly store leashes, toys, treats, and even hide the dog bowls to maintain a tidy feeding area. It’s truly the ultimate solution for combining pet comfort with home decor.
Essential Tools for Your DIY Dog Crate Console
Having the right tools is crucial for any successful woodworking project. Below is a list of the tools you’ll need for this dog kennel console, along with a brief explanation of their purpose. Investing in quality tools will not only make the building process smoother but also ensure precise and professional results.
- Miter Saw: Essential for making precise crosscuts and angle cuts on your lumber, ensuring all your pieces fit together perfectly.
- Drill: You’ll use this extensively for drilling pilot holes, driving screws, and creating pocket holes. A cordless drill offers great flexibility.
- Kreg Jig: This specialized jig is indispensable for creating strong, concealed pocket hole joints, which are fundamental to the sturdy construction of this console.
- 18 Gauge Nailer (Brad Nailer): Perfect for attaching trim pieces and drawer faces with minimal visible fasteners, creating a clean finish.
- 18 Gauge Stapler: Used for quickly and securely attaching the wire mesh to the various frames of the kennel, providing ventilation and security.
- Jig Saw: This versatile saw is ideal for cutting curved lines, especially for creating the circular openings for the dog bowls in the feeding drawer.
- Table Saw: While some cuts can be made with a circular saw and guide, a table saw provides unparalleled accuracy for ripping lumber to specific widths and for making clean, straight cuts on larger panels.
- Nippers: Also known as wire cutters, these are essential for precisely cutting the welded wire mesh to size for the kennel enclosures.
Comprehensive Supply List for Your Custom Dog Kennel Furniture
Careful selection of materials is key to the durability and appearance of your finished dog crate console. We’ve outlined all the necessary lumber, fasteners, and hardware you’ll need. Opt for good quality, straight lumber to ensure an easier build and a more professional end product. Checking each board for warps or knots before purchase will save you headaches later on.
- 8 – 2x4x8 Framing Lumber: These will form the robust structural framework of your console.
- 3 – 2x2x8 Pine or White Wood: Used for specific supports and internal framing components where a lighter profile is desired.
- 1 – 1x4x8 Pine or White Wood: Ideal for drawer faces and other trim pieces that require a finer finish.
- 1 1/4″ Pocket Hole Screws: For joining 3/4″ thick material, providing strong, hidden connections.
- 2 1/2″ Pocket Hole Screws: For joining 1 1/2″ thick material, crucial for the main structural elements.
- 3/4″ Staples: To firmly attach the wire mesh and drawer bottoms.
- 1″ Pin Nails: For securing trim pieces with minimal holes, allowing for a cleaner finish.
- 1 3/4″ Wood Screws: For general wood-to-wood fastening, especially for securing the console’s top.
- 3 ft. Black PVC Coated Welded Wire: Provides ventilation and acts as the kennel enclosure. The PVC coating offers a sleek look and prevents rust.
- 22″ Drawer Slides – 3 sets: High-quality slides ensure smooth and effortless operation for your storage and feeding drawers.
- Hinges – 4: For mounting the two main kennel doors securely.
- Latches – 2: To keep your furry friends safely contained within their individual compartments.
- Dog Bowls – 2: Choose bowls that fit the cutouts you plan to make in the feeding drawer.
- Wood Glue: A vital component for reinforcing all pocket hole and butt joints, ensuring the console’s long-term stability.
Building the Foundation: Dog Kennel Frames
The initial phase of this project involves constructing the individual frames that will form the sides, front, and back of your dog crate console. Precision here is paramount, as it will affect the overall squareness and stability of the entire unit. Always double-check your measurements before making any cuts.
Step 1: Constructing the Side Frames
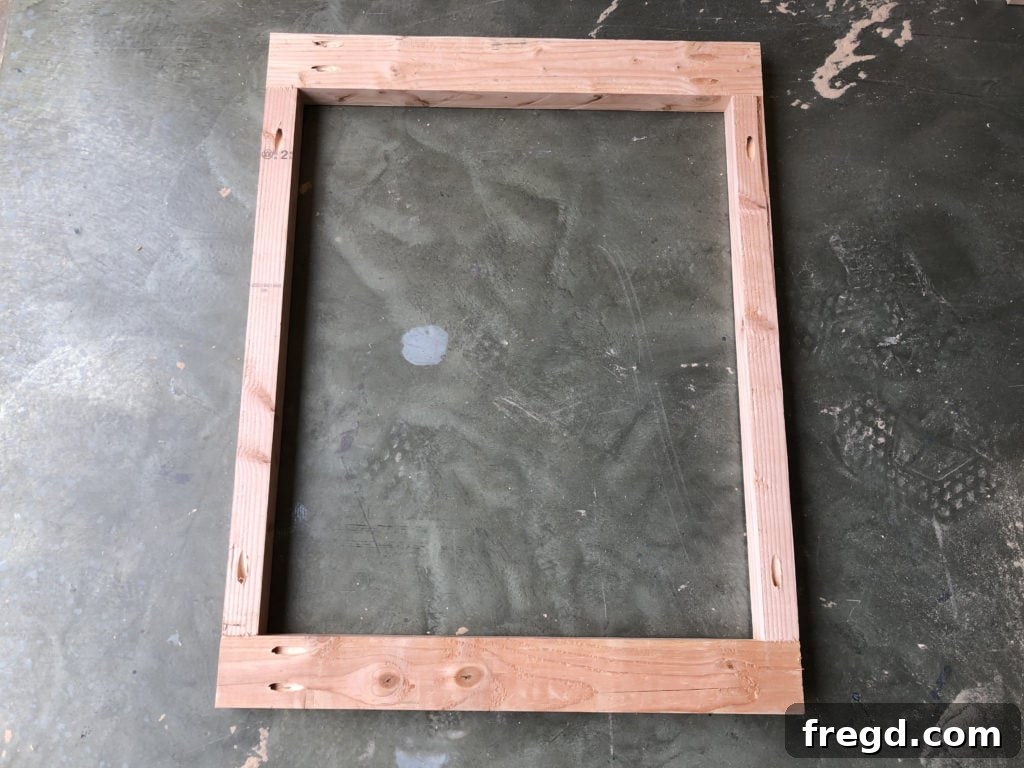
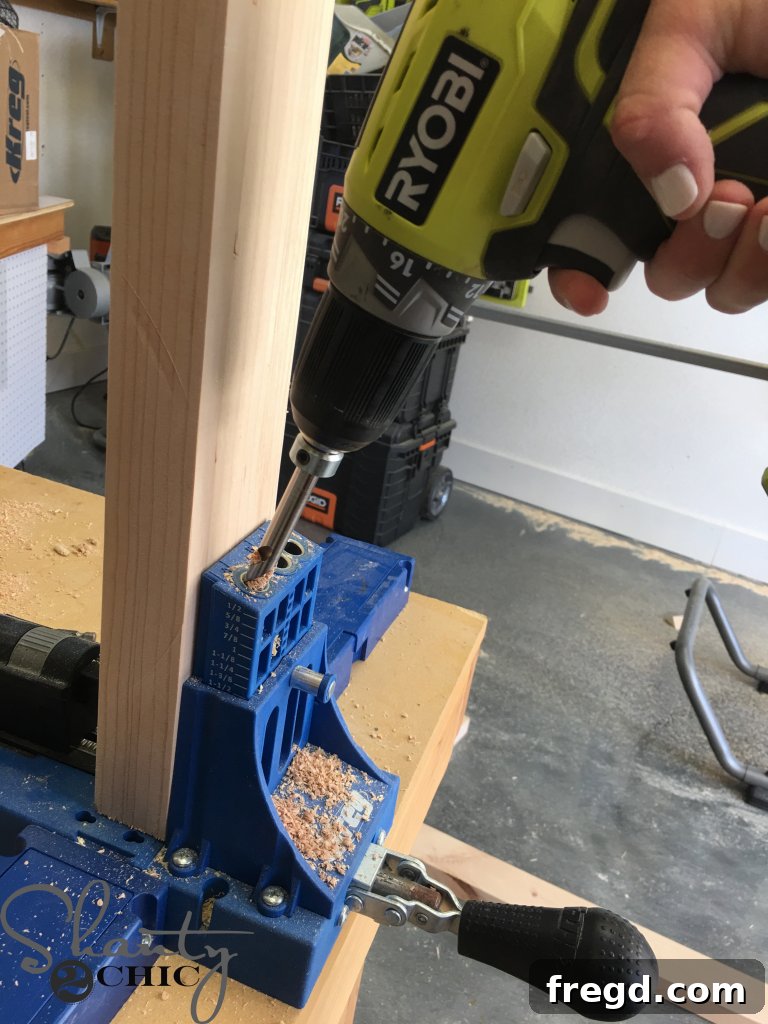
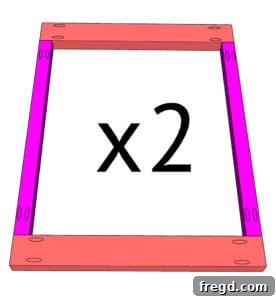
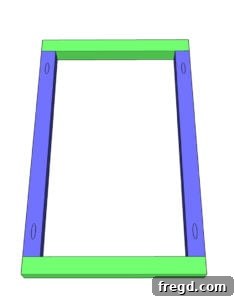
Begin by cutting the side frame pieces to their specified lengths according to your plans. Using your Kreg Jig, drill 1 1/2-inch pocket holes into the two horizontal side boards. Apply wood glue to the joints before attaching these side pieces to the vertical top pieces using 2 1/2-inch pocket hole screws. This method creates strong, hidden joints. Repeat this process to build two identical side frames.
- For optimal results, we highly recommend our favorite Kreg Jig model, which you can find HERE.
Step 2: Adding Ventilation to Side Frames
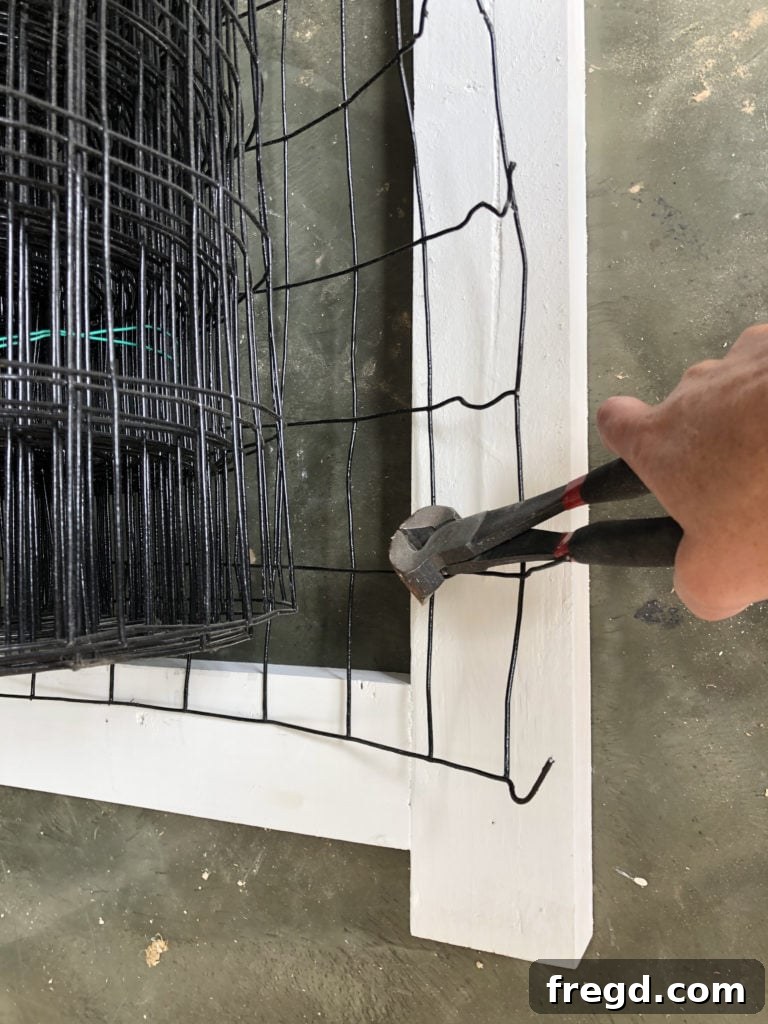
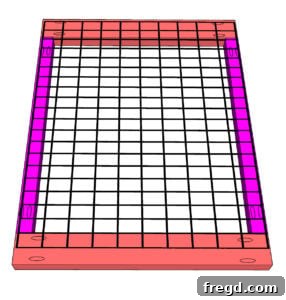
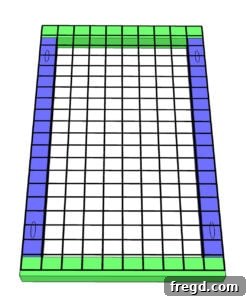
To ensure ample fresh air circulation within the dog kennel, we’ll now integrate the wire mesh. Carefully cut the black PVC-coated welded wire mesh to the exact dimensions required for the back of your side frame assemblies. Utilize nippers for clean, precise cuts. Once cut, attach the mesh securely to the back of the frames using 3/4-inch staples. Ensure the mesh is taut and free of slack.
- The specific type of metal mesh we used for this project can be found HERE.
Step 3: Constructing the Front and Back Frames
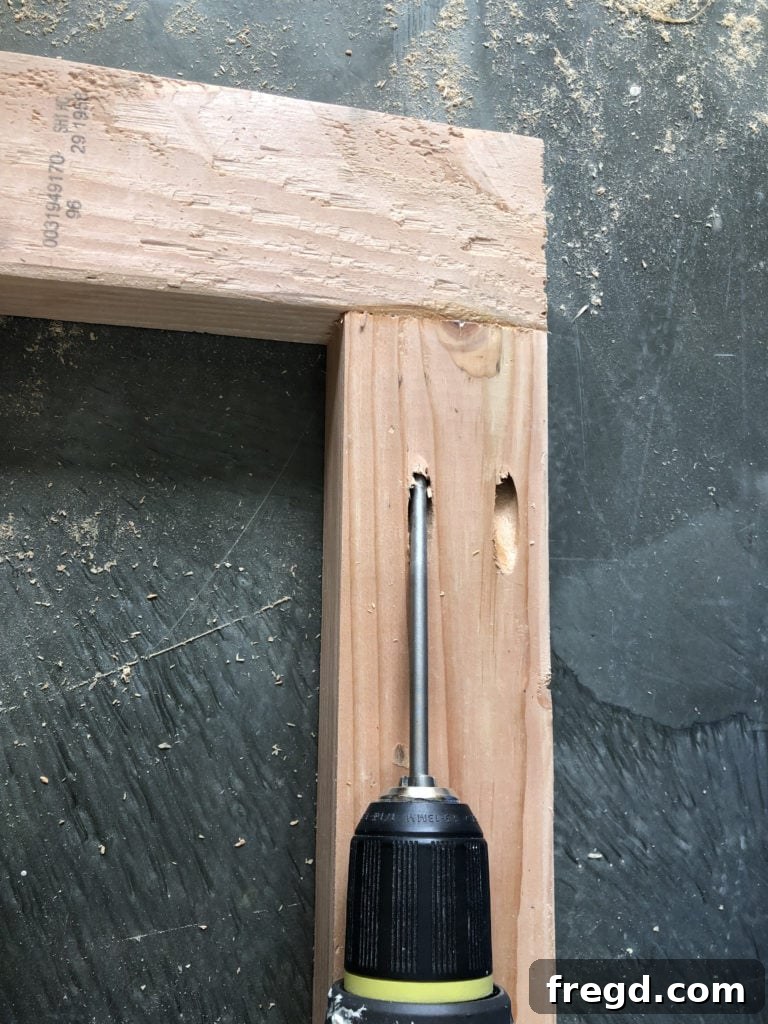
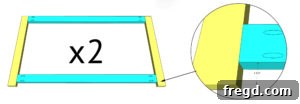
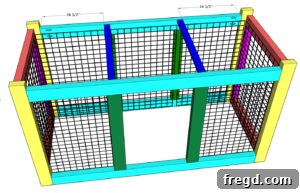
Next, cut the pieces for the front and back frames to size. These frames will define the overall width and depth of your console. Using your pocket hole jig, drill 1 1/2-inch pocket holes into both ends of the top and bottom apron pieces. These apron pieces will connect the legs of your frames. Apply wood glue to the joints and attach the apron pieces to the vertical leg pieces using 2 1/2-inch pocket hole screws. Build two identical frames – one for the front and one for the back of the console.
Step 4: Adding Vertical Dividers for Structure
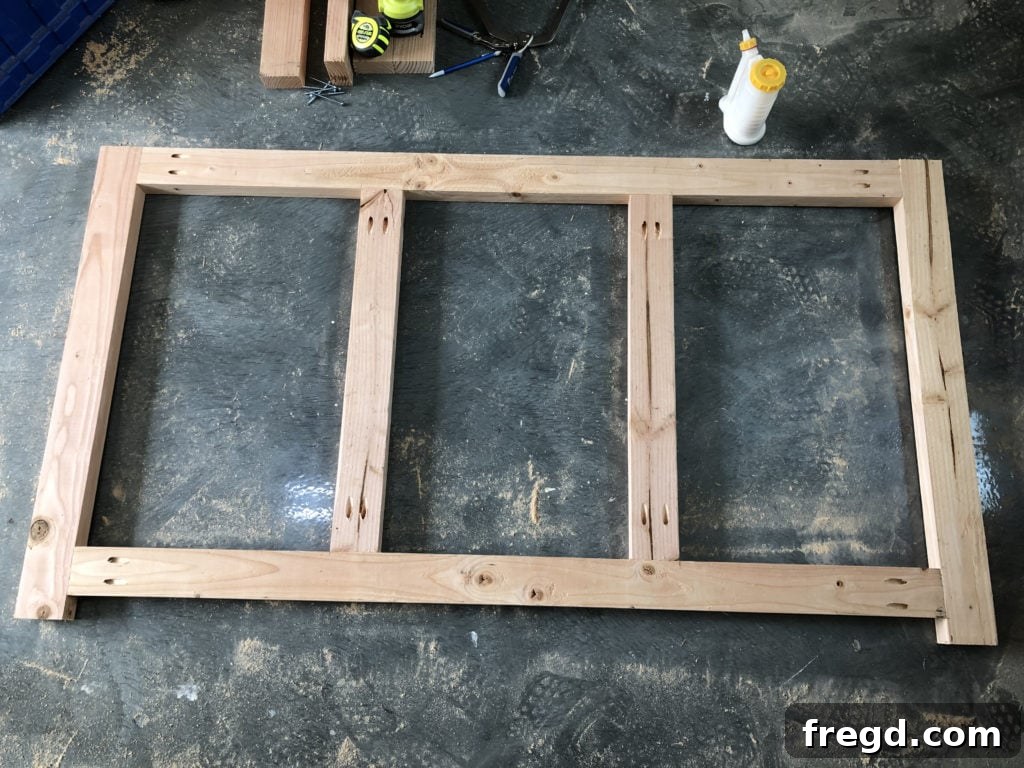
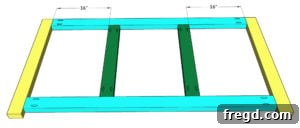
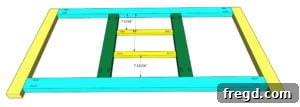
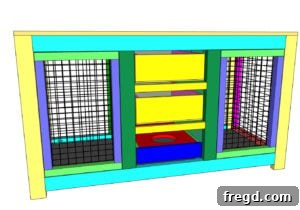
These vertical dividers will create the separate compartments for your dogs and define the central storage area. Cut the vertical divider pieces to their appropriate lengths. Drill 1 1/2-inch pocket holes into both ends of each divider. Apply wood glue and attach these dividers securely to both the top and bottom apron pieces of both the front and back frames using 2 1/2-inch pocket hole screws. Ensure they are evenly spaced and plumb.
Step 5: Incorporating Horizontal Dividers (Front Frame Only)
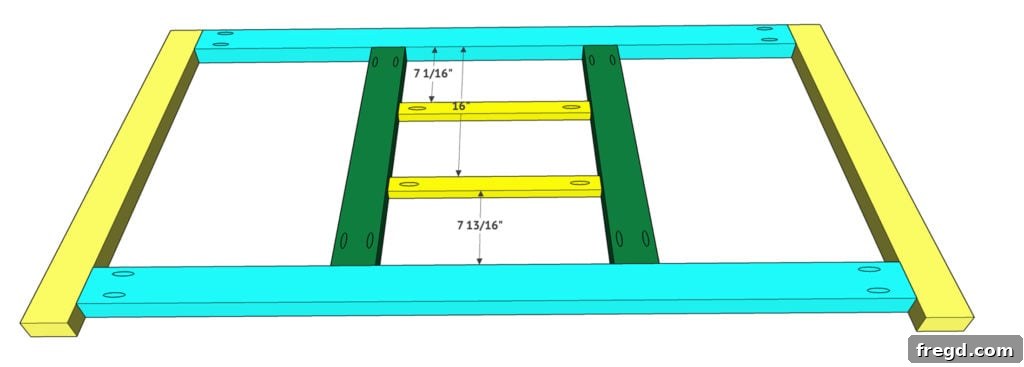
This step is specific to the front frame of your dog kennel console, as these dividers will form the structure for your drawers. Cut the horizontal divider pieces to size. Drill 3/4-inch pocket holes into both ends of these pieces. With wood glue for added strength, attach them to the vertical dividers using 1 1/4-inch pocket hole screws. Pay close attention to the spacing, ensuring enough clearance for your drawers.
Step 6: Securing Mesh to the Back Frame
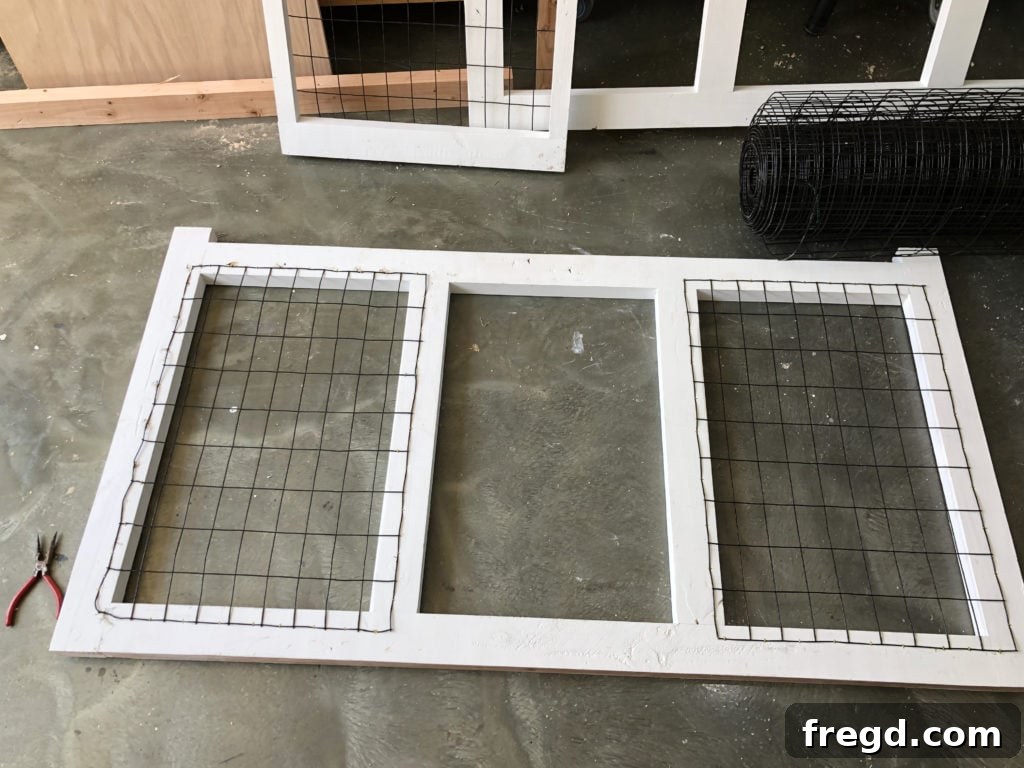
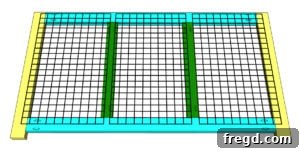
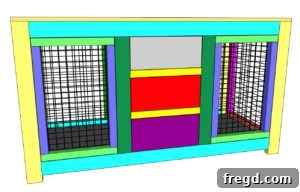
Similar to Step 2, you will now attach the wire mesh to the back frame. Cut the mesh to the dimensions of the back frame opening. Using 3/4-inch staples, securely fasten the mesh to the back frame, ensuring it is taut and provides a safe and well-ventilated enclosure for your pets.
Assembling the Main Cabinet Structure
With all the individual frames built, it’s time to bring them together to form the main cabinet of your dog crate console. This is where the piece truly starts to take shape. Ensure you work on a flat, level surface to maintain squareness throughout the assembly.
Step 1: Connecting Side Assemblies to the Back Frame
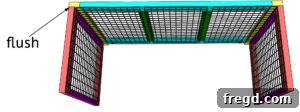
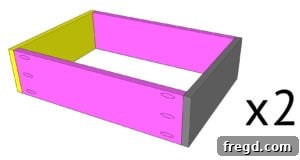
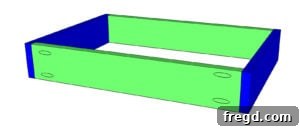
Begin by attaching the two side assemblies you built earlier to the back frame. Apply wood glue generously to the mating surfaces. Using 2 1/2-inch pocket hole screws, securely fasten the side frames to the back frame. It’s often helpful to use clamps to hold the pieces in place while you drive the screws, ensuring a tight and square connection.
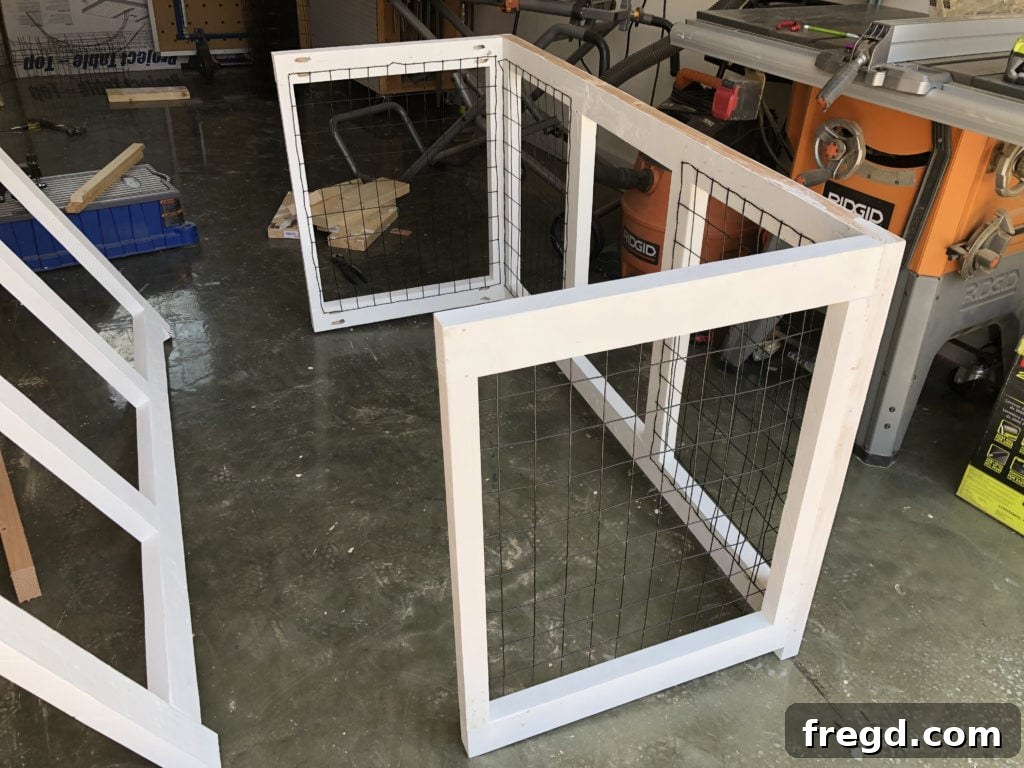
Step 2: Integrating the Front Frame
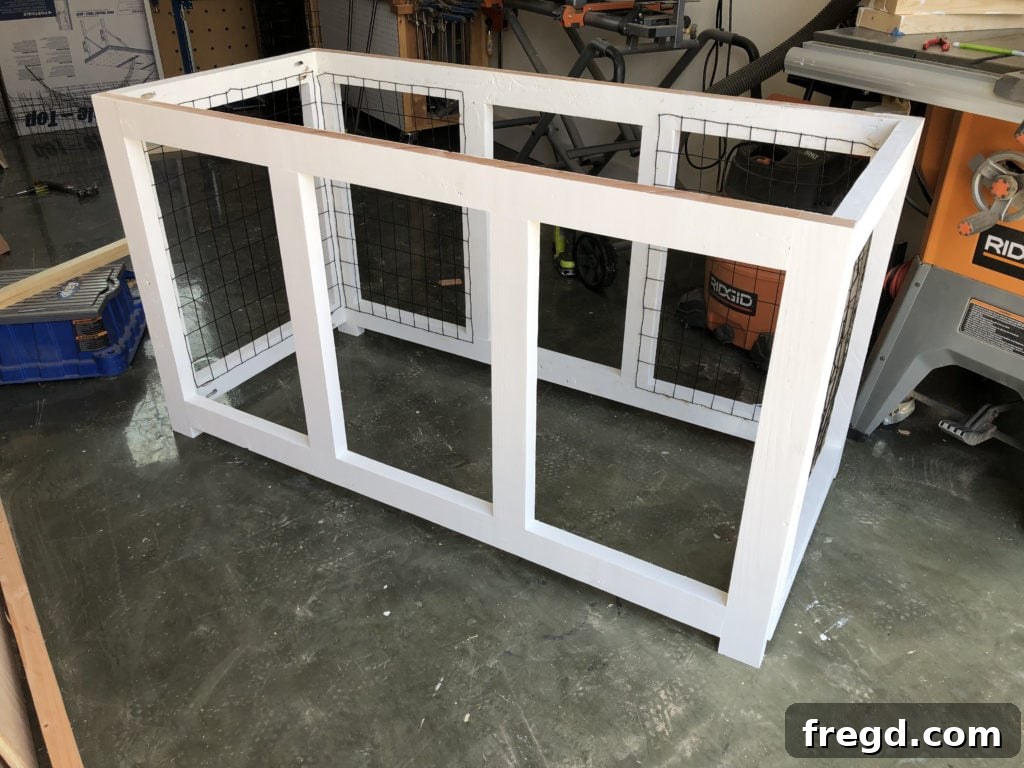
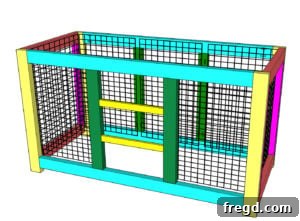
Now, carefully position the front frame in place. Apply wood glue to the connecting edges and attach the front frame to the side frames using 2 1/2-inch pocket hole screws. At this point, you should have a complete, open box structure for your console. Take a moment to check for squareness across all corners.
Step 3: Installing Bottom Supports
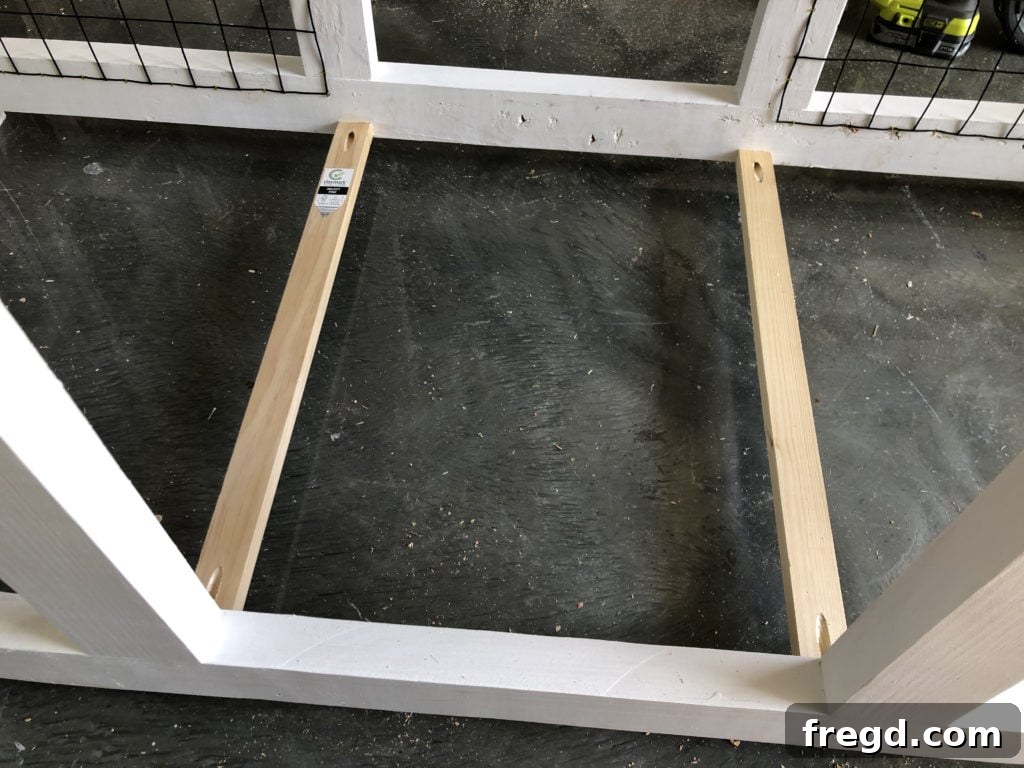
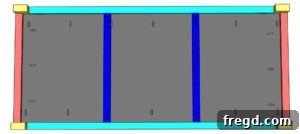
These supports will provide a sturdy base for the kennel’s bottom panel. Cut the bottom support pieces to their required lengths. Drill 3/4-inch pocket holes into both ends of each support. Apply wood glue and attach these supports to the bottom of the front, back, and side apron pieces using 1 1/4-inch pocket hole screws. Ensure they are evenly spaced and level.
Step 4: Securing the Bottom Panel
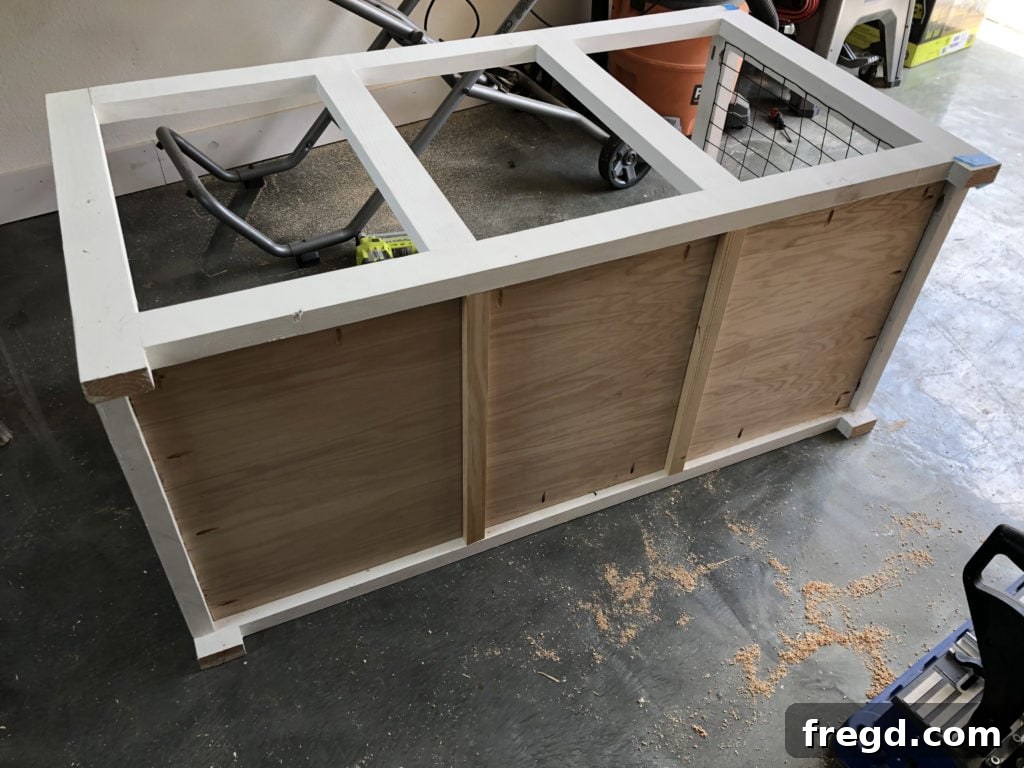
The bottom panel creates the floor of the dog compartments. Cut the bottom panel to its exact size. Drill 3/4-inch pocket holes around all its edges. Carefully slide the panel onto the bottom supports, ensuring it sits flush with the top of the bottom aprons. Apply wood glue to the supports and aprons before attaching the panel with 1 1/4-inch pocket hole screws, securing it to both the bottom and side apron pieces.
Step 5: Adding Top Supports for Strength
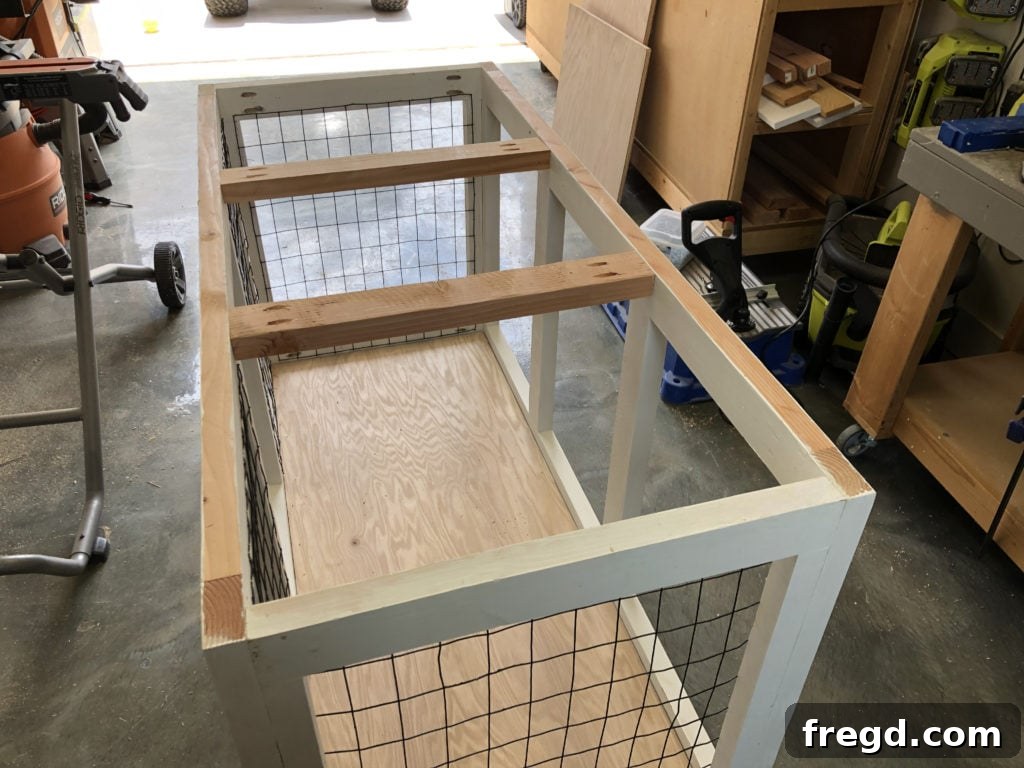
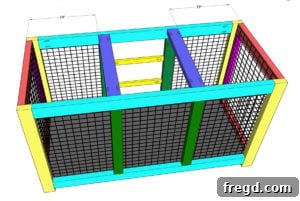
These top supports are crucial for providing a solid foundation for the console’s top surface. Cut the top support pieces to size. Drill 1 1/2-inch pocket holes into both ends. Apply wood glue and attach them to the top aprons using 2 1/2-inch pocket hole screws. These supports will also contribute to the overall rigidity of the cabinet.
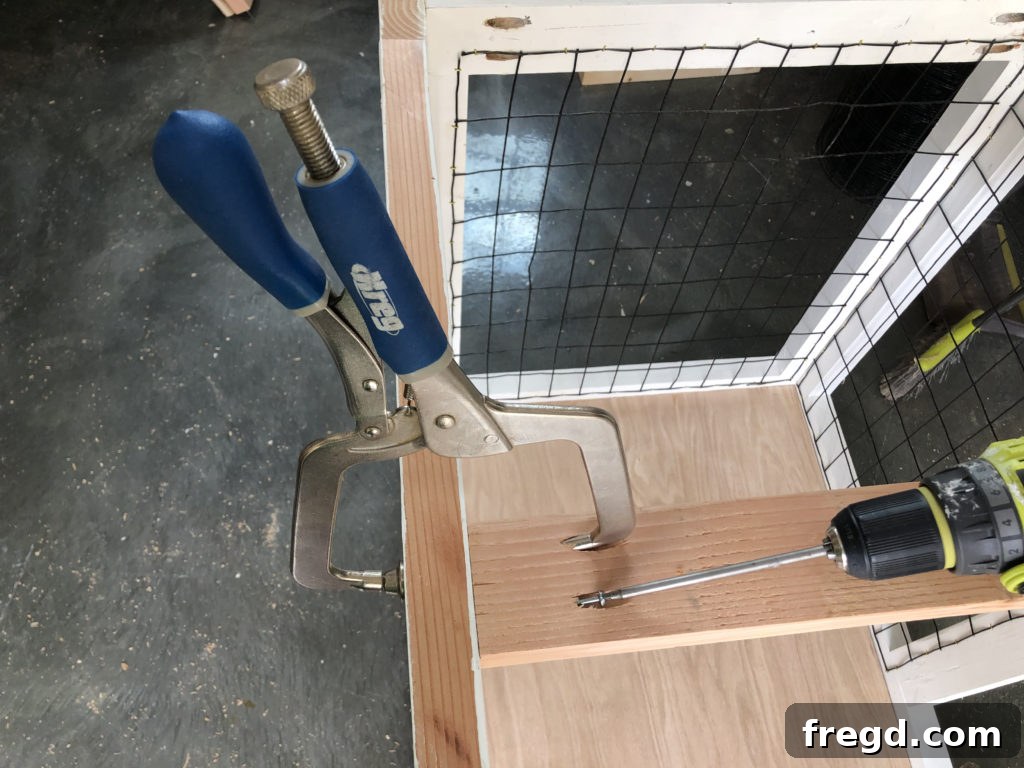
Pro Tip: When assembling, tools like the Kreg Right Angle Clamps can be incredibly helpful. They act as an extra set of hands, holding pieces perfectly perpendicular while you fasten them, ensuring square and secure joints. You can find our favorite Kreg Right Angle Clamp HERE.
- Ensure precise angles with our recommended Kreg Right Angle Clamp, available HERE.
Step 6: Installing Center Dividers for Compartments
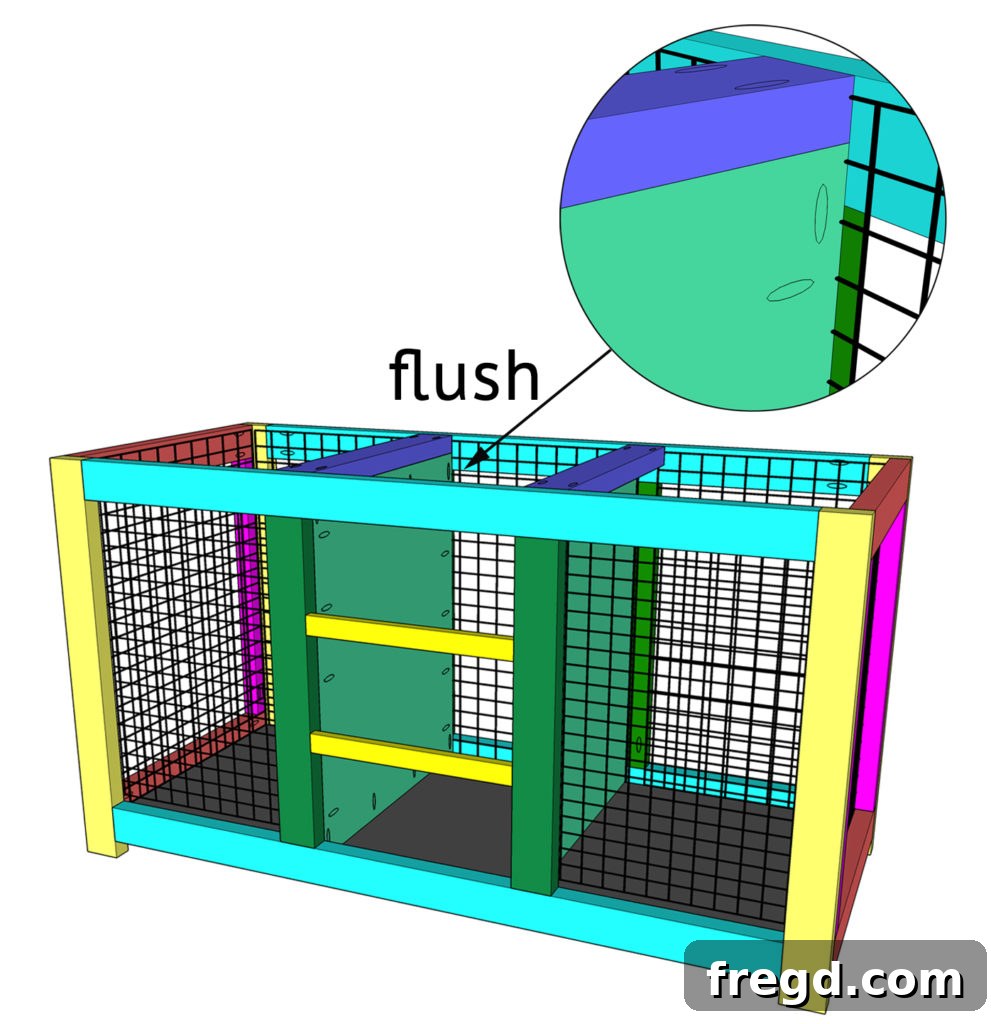
The center dividers define the individual kennel spaces and the central storage area. Cut these dividers to size. Drill 3/4-inch pocket holes around all edges that will connect to other pieces. Apply wood glue and attach them to the vertical dividers using 2 1/2-inch pocket hole screws. These dividers should create two equally sized dog compartments and a central section for drawers.
Crafting the Kennel Doors
The doors are a critical element for both the function and aesthetic of your dog crate console. They need to be robust enough to contain your pets while also blending seamlessly with the furniture design.
Step 1: Assembling the Door Frames
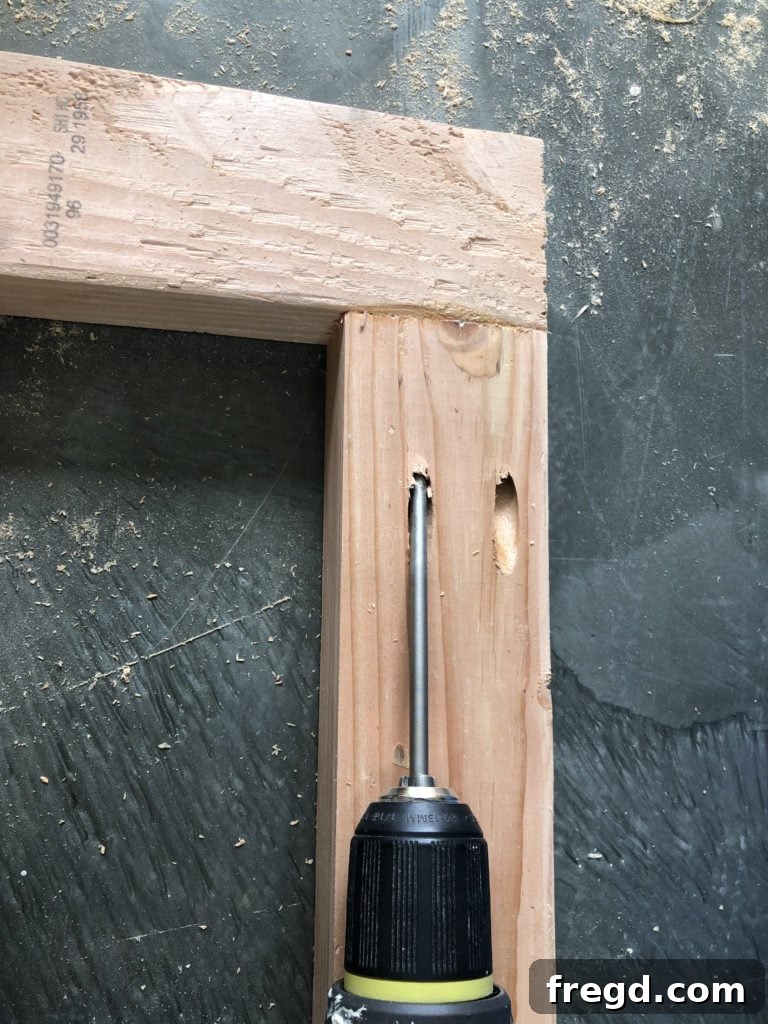
Cut all the door frame pieces to the dimensions specified in your plans, ensuring they fit snugly into the kennel openings. Drill 1 1/2-inch pocket holes into the ends of the side boards. Apply wood glue to the joints and attach the side pieces to the top and bottom pieces using 2 1/2-inch pocket hole screws. Build two sturdy door frames.
Step 2: Integrating Mesh into the Doors
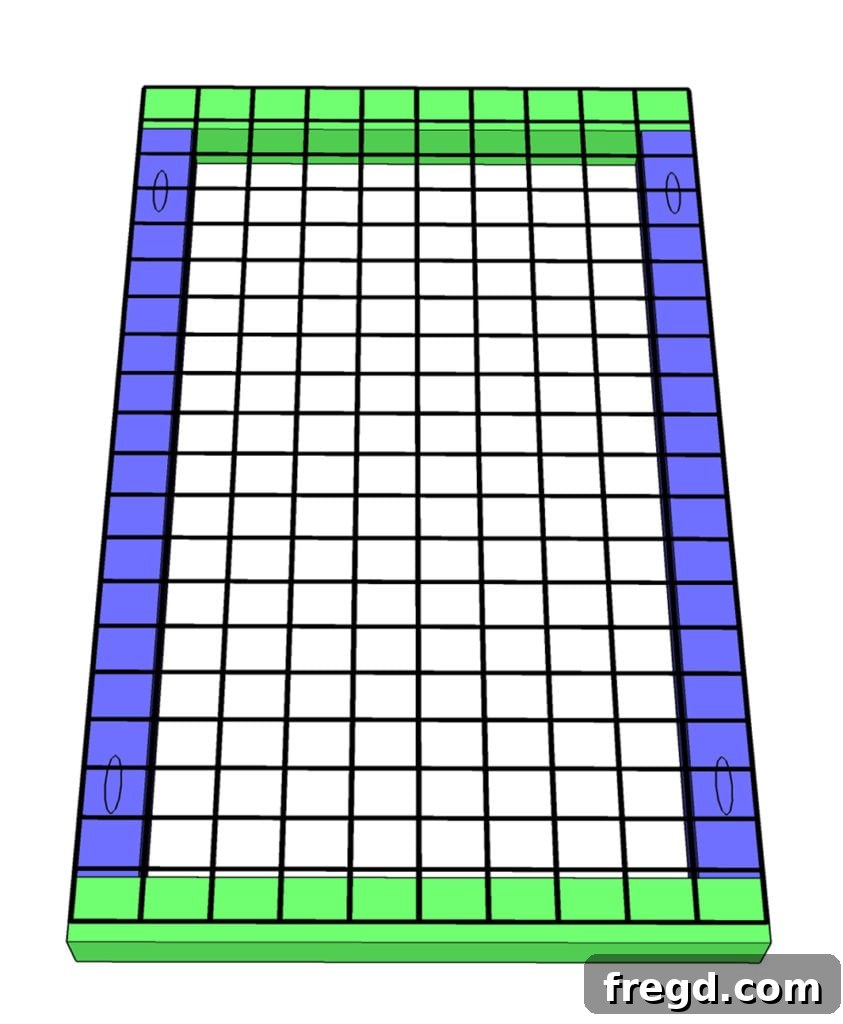
Measure and cut the wire mesh to fit the back of each door frame. Using 3/4-inch staples, securely attach the mesh to the back of the door frames. This provides necessary ventilation while allowing your dogs to see out and you to see in. Ensure the mesh is taut and neatly trimmed.
Constructing the Functional Drawers
This dog crate console isn’t just a kennel; it’s also a storage solution. The drawers will provide ample space for pet supplies and a clever, hidden spot for food and water bowls.
Step 1: Assembling Top and Middle Drawers
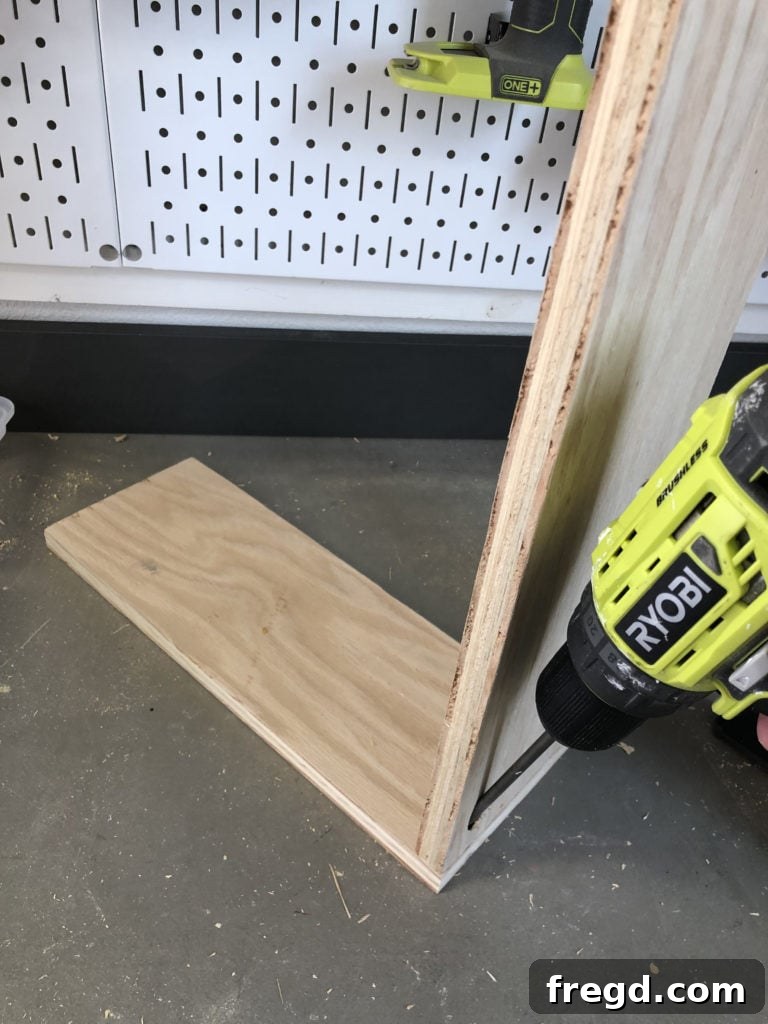
Cut the pieces for the top and middle drawers to size. Drill 3/4-inch pocket holes into the ends of the longer drawer pieces. Apply wood glue and attach the long pieces to the shorter pieces using 1 1/4-inch pocket hole screws. Ensure each drawer box is square. You will build two such drawers for the top and middle sections.
Step 2: Attaching Drawer Bottoms
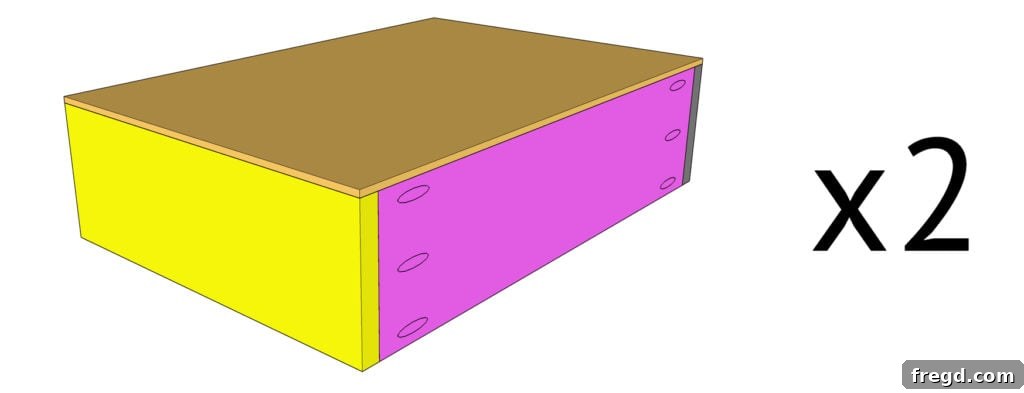
Cut the drawer bottom panels to size, ensuring they fit snugly into the assembled drawer frames. Apply wood glue around the bottom edges of the drawer frames and attach the bottom panels using 3/4-inch staples. This creates a solid base for your stored items.
Step 3: Building the Unique Bowl Drawer Frame
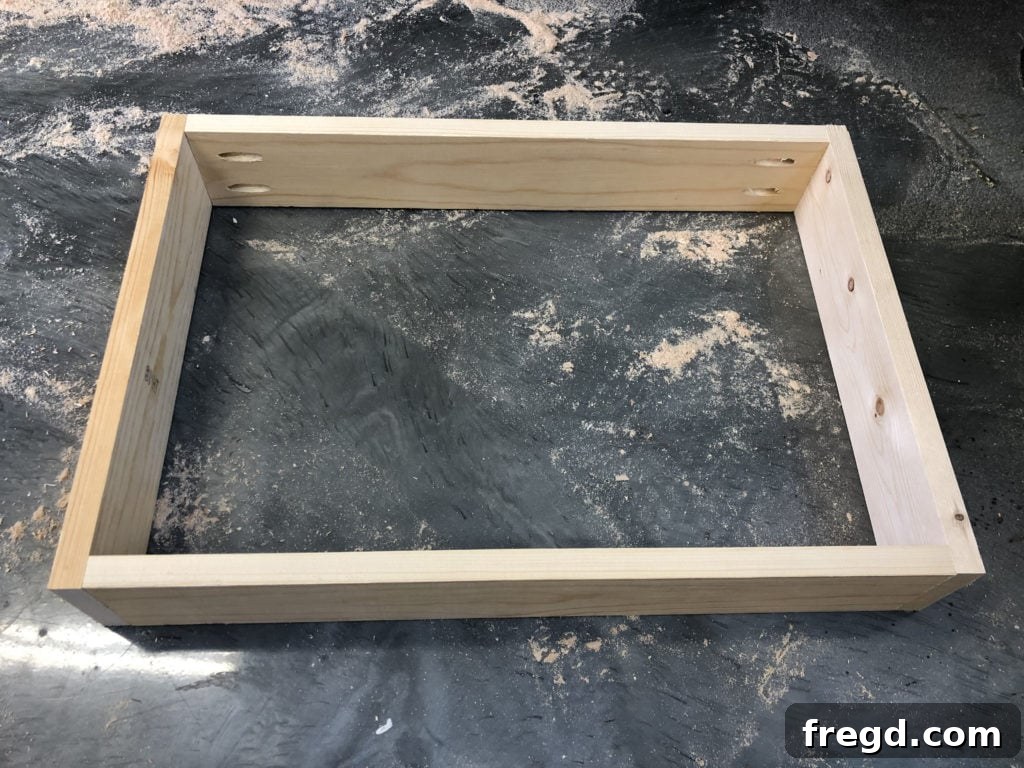
This special drawer will house your dog’s food and water bowls. Cut the bowl drawer pieces to size. Drill 3/4-inch pocket holes into both ends of the longer pieces. Apply wood glue and attach them to the shorter pieces with 1 1/4-inch pocket hole screws. This frame should be built to comfortably accommodate your chosen dog bowls.
Step 4: Crafting the Bowl Cutouts
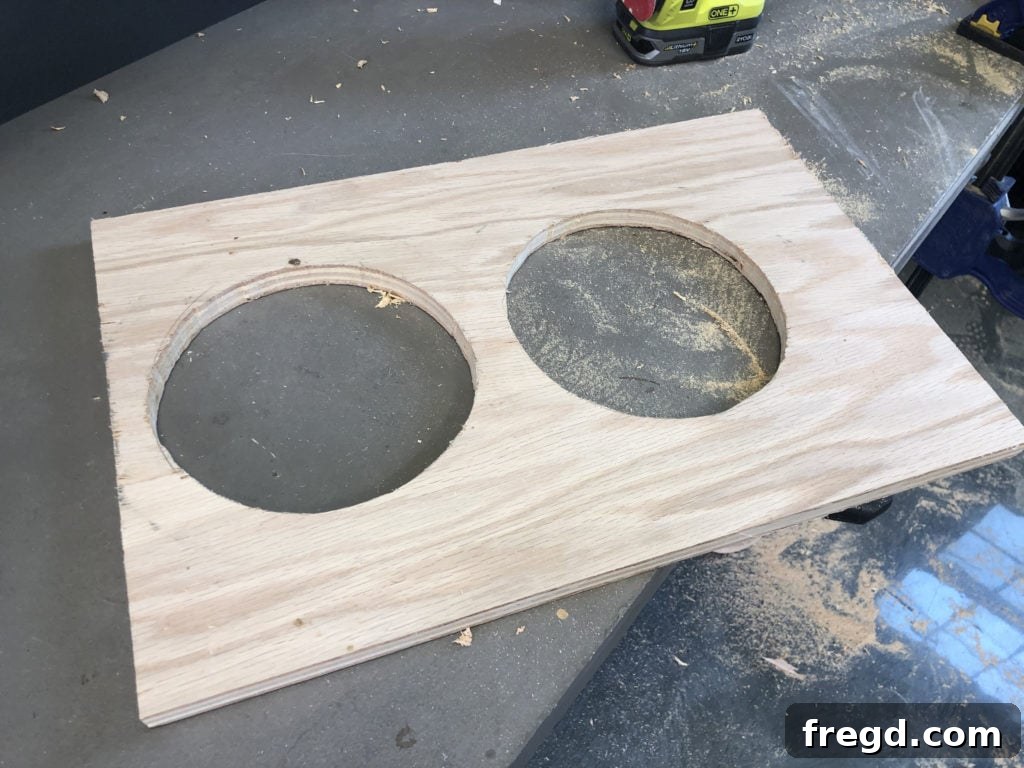
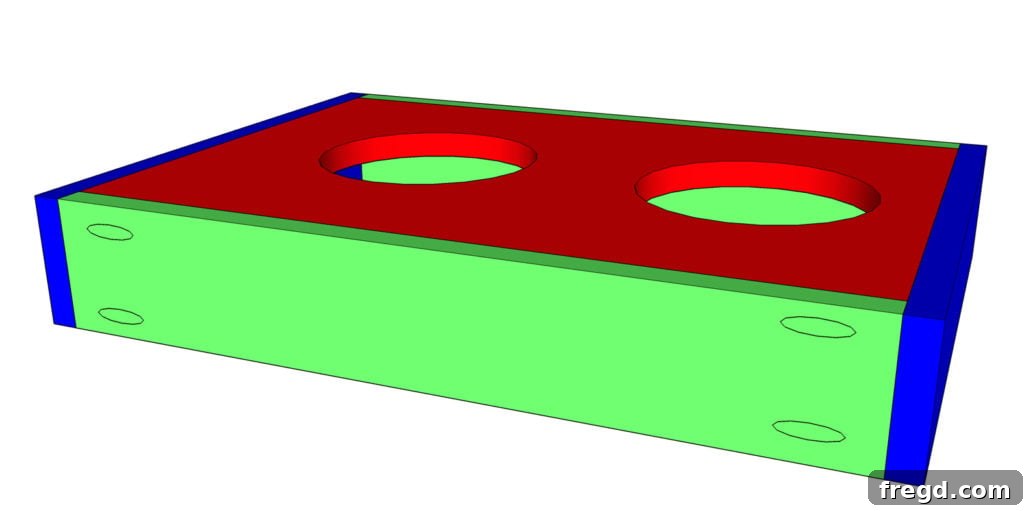
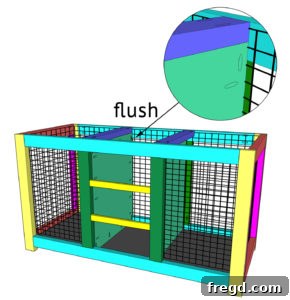
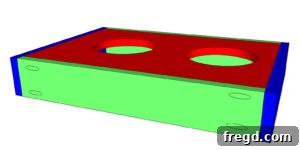
Measure and cut the top piece of the dog bowl drawer to size. Carefully mark the locations for your dog bowls on this piece. Using a jigsaw, precisely cut out the circles for the bowls, ensuring they fit snugly but can still be easily removed for cleaning. Attach this top piece inside the drawer frame using 1 1/4-inch brad nails and wood glue. The top should be flush with the top of the drawer frame, creating a neat, integrated feeding station.
Seamlessly Installing the Drawers
Proper drawer installation ensures smooth operation and a professional look for your dog crate console. Take your time with this step, as precise alignment is key.
Step 1: Mounting Drawer Slides
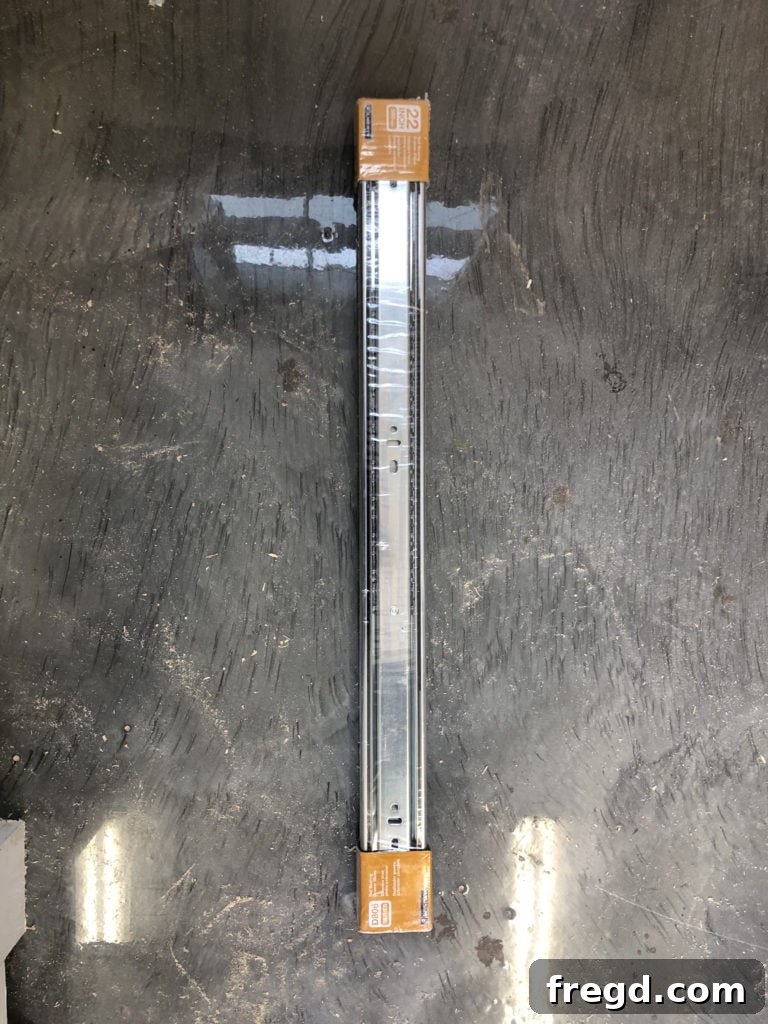
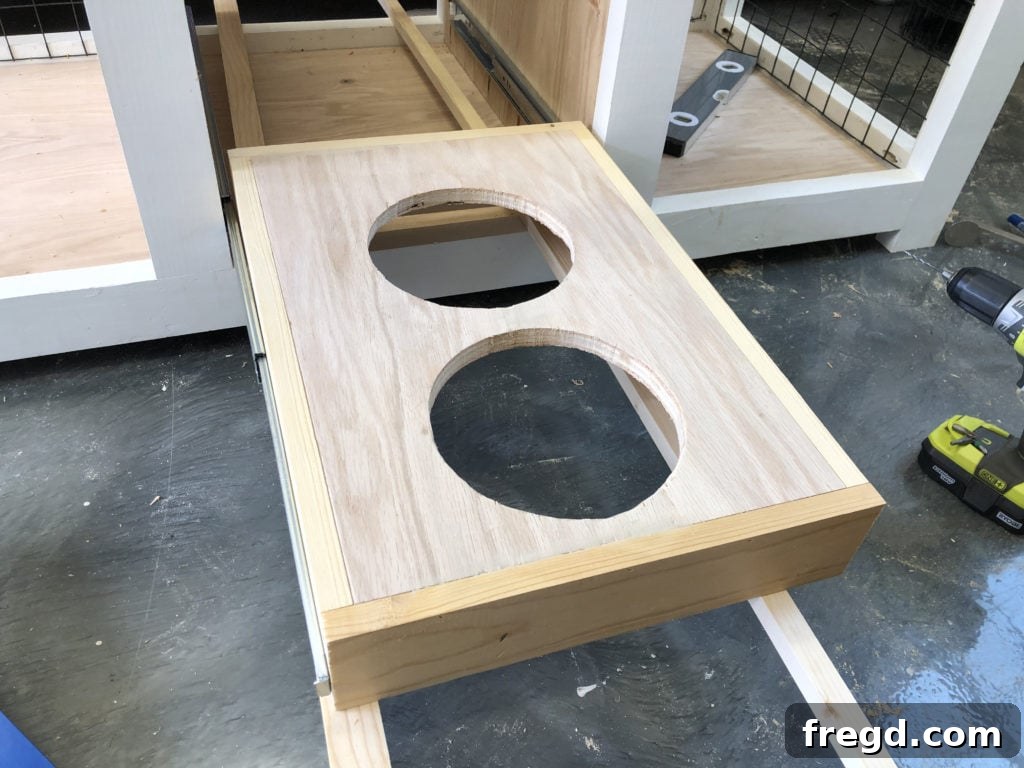
Install the drawer slides inside the cabinet, ensuring they are level and parallel for each drawer opening. For the bottom drawer (the dog bowl drawer), use two scrap 1x boards as temporary spacers to elevate the drawer off the bottom of the cabinet. This ensures proper clearance and alignment with its corresponding opening. Follow the manufacturer’s instructions for your specific drawer slides for optimal performance.
- You can find the high-quality 22-inch drawer slides we used for this project HERE.
Step 2: Attaching Drawer Faces
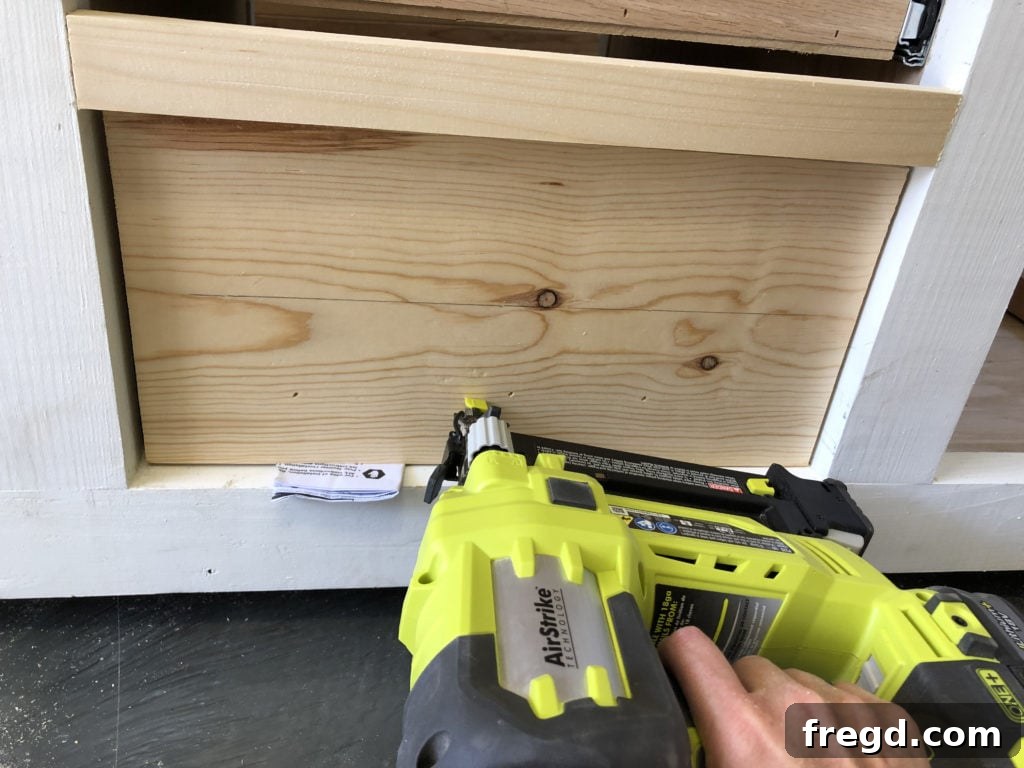
Cut the drawer face pieces to size, ensuring they overlap the drawer openings evenly. For temporary positioning, use your 18 gauge brad nailer to pop a few nails from the front of the drawer face into the drawer box. This holds the face in place while you permanently secure it. Then, from the inside of the drawer, attach the drawer face to the front of the drawer box with 1 1/4-inch wood screws. This method creates a clean exterior without visible screw holes.
Finishing Touches: Building the Console Top
The top of your dog crate console is where much of its furniture appeal comes from. A well-crafted top will elevate the entire piece and provide a functional surface for decorations or everyday items.
Step 1: Cutting the Plywood Top
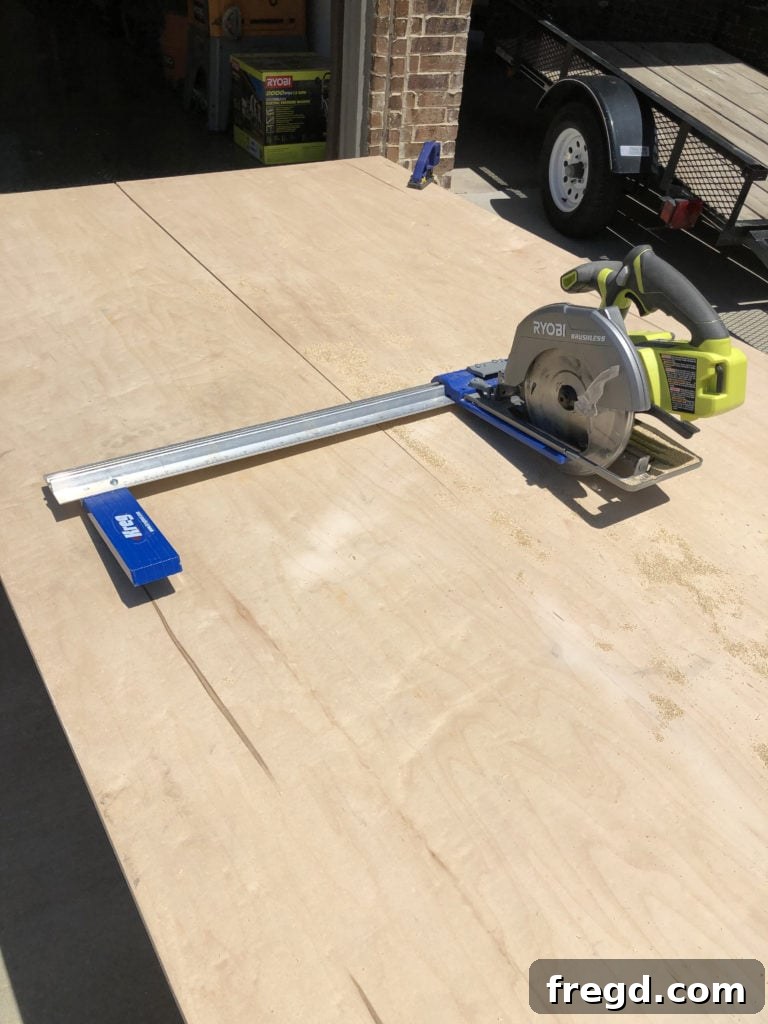
Begin by accurately cutting your plywood top panel to the required dimensions. If you don’t have a table saw, a Kreg Rip Cut attachment for your circular saw is an excellent, affordable alternative. It’s perfectly designed for making straight, precise cuts on large plywood sheets, ensuring your console top is perfectly square.
- Achieve professional-grade cuts on plywood with the Kreg Rip Cut, available HERE.
Step 2: Attaching Side Trim Pieces
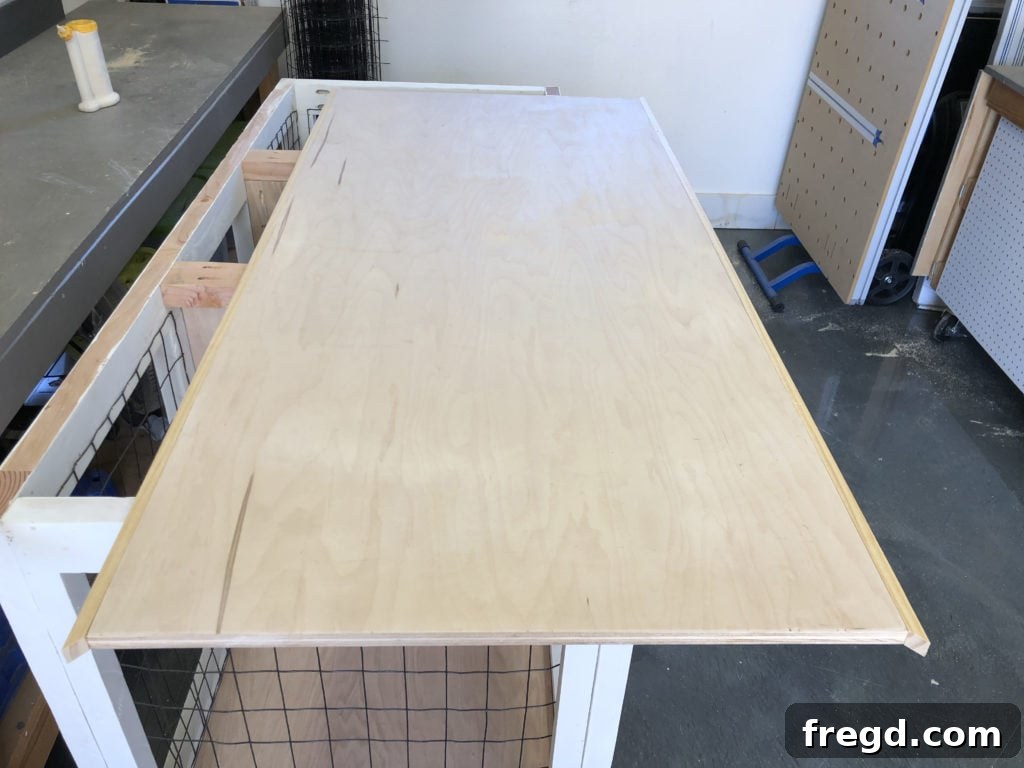
After cutting the main top panel, measure and cut the side trim pieces to size. These pieces will create a finished edge for the console top. Apply wood glue along the edges of the plywood top and attach the side trim pieces using 1-inch pin nails. The pin nails provide a strong hold with almost invisible fasteners.
Step 3: Completing the Top Trim
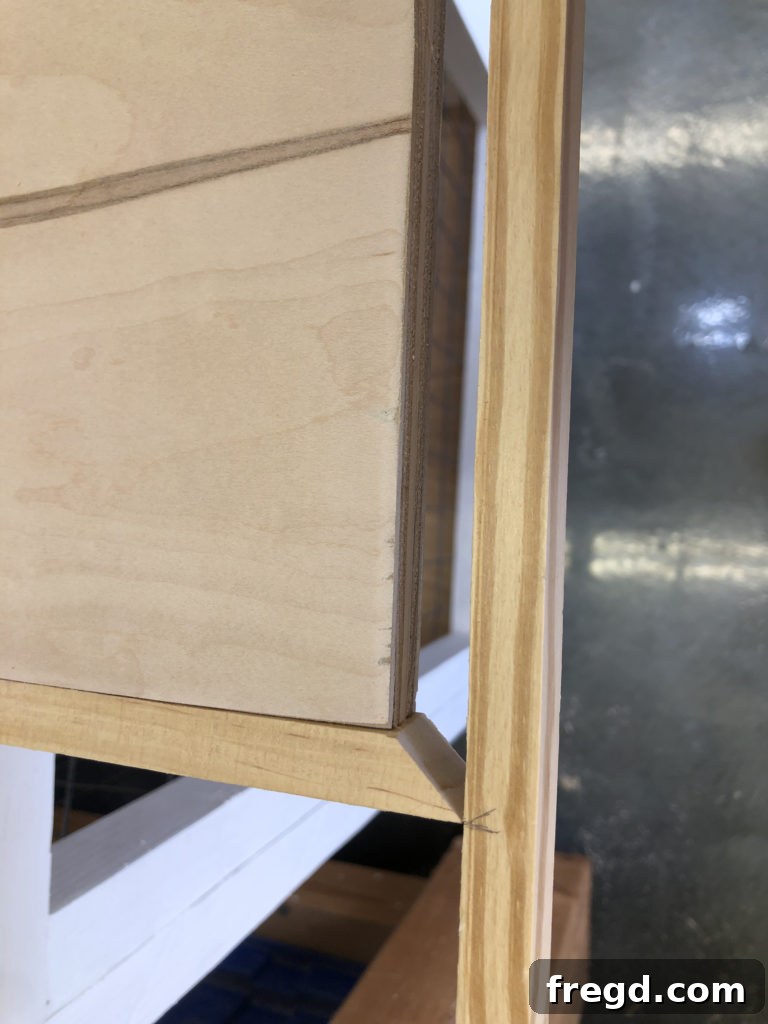
Now, measure and cut the front and back trim pieces to size, ensuring they fit flush with the previously installed side trim. Apply wood glue and attach these pieces to the top panel using 1-inch pin nails. This completes the solid, finished look of your console top.
Step 4: Securing the Top to the Console
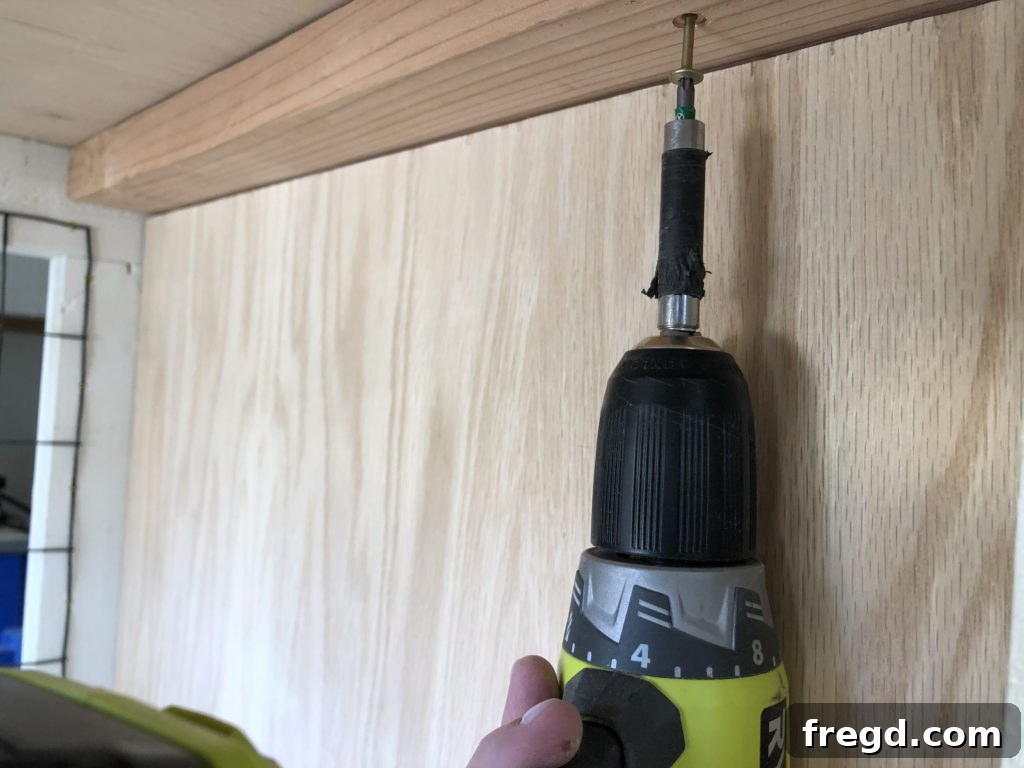
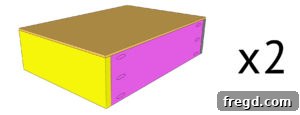
With the console top fully assembled, it’s time to attach it to the main cabinet. Position the top carefully, ensuring it’s centered and flush. From the underside of the top supports (from “Assembling the Cabinet – Step 5”), drive 1 3/4-inch wood screws up into the plywood top. This method creates a strong, hidden attachment, leaving the top surface smooth and unblemished.
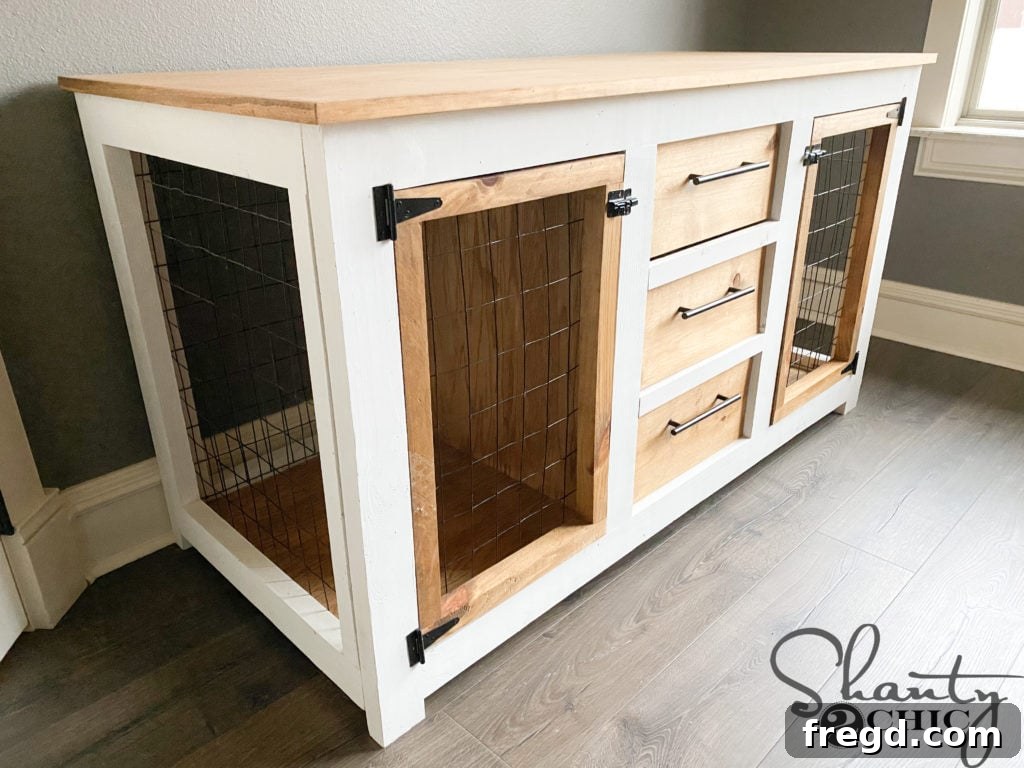
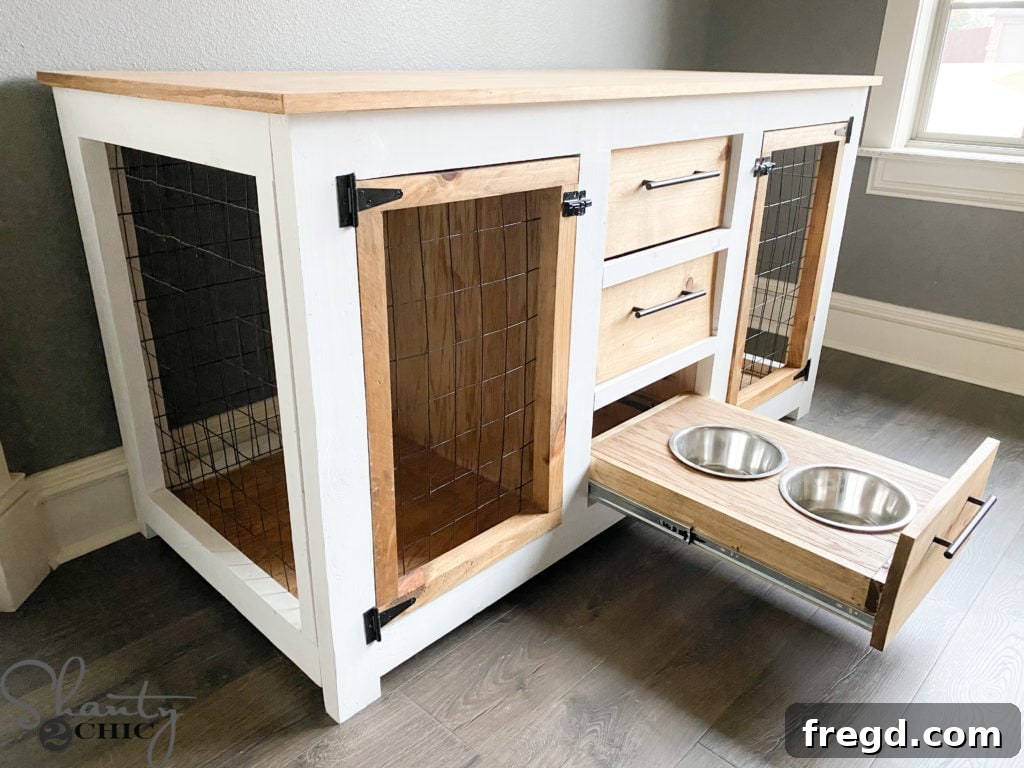
Congratulations! Your DIY Dog Crate Console is now structurally complete. The next exciting step is to add your personal flair with a beautiful stain or paint finish, install the hinges and latches on the doors, and place the dog bowls into their designated drawer. This versatile console is perfectly designed to provide a comfortable and secure shelter for medium-sized dogs, offering them their own special space within your home.
Choose a wood stain that complements your existing furniture for a cohesive look, or opt for a bold paint color to make a statement. Don’t forget to apply a durable protective finish to guard against wear and tear, especially around the feeding area. Select hardware (hinges, latches, drawer pulls) that matches your home’s style to complete the custom furniture feel. The transformation from raw lumber to a stunning piece of pet furniture is truly rewarding!
We absolutely love seeing your completed projects! Make sure to share your incredible builds with us on social media. Use the hashtag #shanty2chic so we can admire and share your finished dog kennel consoles with our community. Happy Building!
DIY Dog Crate Console: Free Plans
Click HERE for the Detailed Supply and Cut List
Click HERE for the Free Step-by-Step Plans
Tools Needed
-
Miter Saw
-
Drill
-
Kreg Jig
-
Jig Saw
-
Table Saw
-
Nippers
Key Supplies
- 8 2x4x8 Framing Lumber
- 3 2x2x8 Pine or White Wood
- 1 1x4x8 Pine or White Wood
- Pocket Hole Screws (1 1/4″ & 2 1/2″)
- 3/4″ Staples
- 1″ Pin Nails
- 1 3/4″ Wood Screws
- 3 ft. Black PVC Coated Welded Wire
- 3 sets 22″ Drawer Slides
- 4 Hinges
- 2 Latches
- 2 Dog Bowls
- Wood Glue
Brief Instructions (See full post for detailed steps)
-
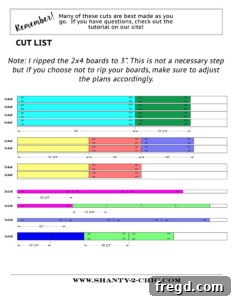
Cut List 1

-
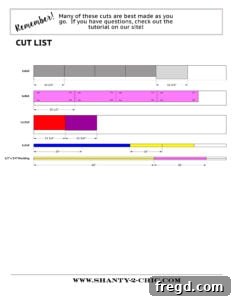
Cut List 2
-
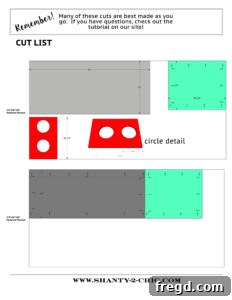
Cut List 3
-
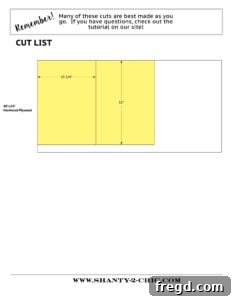
Cut List 4
-
Build two side frames: cut pieces, drill 1 1/2″ pocket holes in side boards, attach to top pieces with 2 1/2″ screws and wood glue.
-
Cut mesh to size; attach to the back of side assemblies with 3/4″ staples.
-
Build two front/back frames: cut pieces, drill 1 1/2″ pocket holes in ends of top/bottom aprons, attach to legs with 2 1/2″ screws and wood glue.
-
Cut vertical dividers, drill 1 1/2″ pocket holes in both ends, attach to top/bottom aprons with 2 1/2″ screws and wood glue for both frames.
-
*Front frame only* Cut horizontal dividers, drill 3/4″ pocket holes in both ends, attach to vertical dividers with 1 1/4″ screws and wood glue.
-
Cut mesh to size; attach to the back frame with 3/4″ staples.
-
Attach side assemblies to the back frame with 2 1/2″ pocket hole screws and wood glue.
-
Attach the front frame to the side frames with 2 1/2″ pocket hole screws and wood glue.
-
Cut bottom supports, drill 3/4″ pocket holes in both ends, attach to bottom front/back aprons with 1 1/4″ screws and wood glue.
-
Cut bottom panel, drill 3/4″ pocket holes around edges, attach to bottom supports and side aprons with 1 1/4″ screws and wood glue (flush with apron tops).
-
Cut top support pieces, drill 1 1/2″ pocket holes in both ends, attach to top aprons with 2 1/2″ screws and wood glue.
-
Cut center dividers, drill 3/4″ pocket holes around edges, attach to vertical dividers with 2 1/2″ screws and wood glue.
-
Cut door pieces, drill 1 1/2″ pocket holes into side boards, attach to top/bottom pieces with 2 1/2″ screws and wood glue.
-
Cut mesh, attach to the back of door frames with 3/4″ staples.
-
Build two top/middle drawers: cut pieces, drill 3/4″ pocket holes in ends of long pieces, attach long to short pieces with 1 1/4″ screws and wood glue.
-
Cut drawer bottoms, attach to bottom of drawer frame with 3/4″ staples and wood glue.
-
Cut bowl drawer pieces, drill 3/4″ pocket holes in ends of long pieces, attach to short pieces with 1 1/4″ screws and wood glue.
-
Cut dog bowl top piece, use jigsaw for circles, attach inside frame with 1 1/4″ brad nails and wood glue (flush with frame top).
-
Install drawers with drawer slides. Use scrap 1x boards as spacers for the bottom drawer.
-
Cut drawer face pieces, attach to front of drawers with 1 1/4″ wood screws from inside, using brad nails for temporary hold.
-
Cut top panel. Measure and cut side trim pieces, attach with wood glue and 1″ pin nails.
-
Measure and cut front/back trim pieces, attach to top panel with 1″ pin nails and wood glue. Secure top to console with 1 3/4″ wood screws from top supports.
-
Add finish, hardware, and dog bowls. Share your build using #shanty2chic! Happy Building!